Cryostat is a container-native JVM application that provides a secure API for profiling and monitoring containers with JDK Flight Recorder. In the newest release, Cryostat 2.2, three new and updated views for archived JDK flight recordings managed by Cryostat have been added to the web client, along with new recording filters and enhanced features for recording metadata and custom labels.
All Targets archived recordings view
Upon navigating to the Cryostat console tab titled Archives, the first view we see is the All Targets view (Figure 1). From this view, users can see all of their archived recordings from each target JVM as well as any re-uploaded archived recordings in one convenient location.

When we first come upon the view, we can see a card that includes three tabs, one titled All Targets, the second titled All Archives, and the last titled Uploads. By default, the All Targets view will be selected. A checkbox on this view includes the option to Hide targets with zero recordings. By unchecking the box, we can see all targets Cryostat has discovered, with or without any associated archived recordings.
Let's try archiving a recording in one of the targets to see the view in action.
Navigate to the Recordings tab on the Cryostat console and select any target JVM from the dropdown. If any JMX authorization issues or SSL errors occur, learn to resolve these by reading the guides on the upstream Cryostat website. Click Create to create a custom flight recording. For now, we can ignore any other new features and simply create a simple recording with these values:
- Name: Cryostat_Demo
- Archive on Stop: Unchecked
- Duration: 30 Seconds
- Template: Profiling
Create the recording by clicking the blue Create button. Then archive the created recording by pressing the checkbox next to it and then pressing the Archive button. Navigating to the Archived Recordings tab of the target, we should see the newly archived recording.
Then, going back to the Archives view on the Console tab, we should see the target that we saved the recording from, as well as an updated archived recording count of 1 (Figure 2).
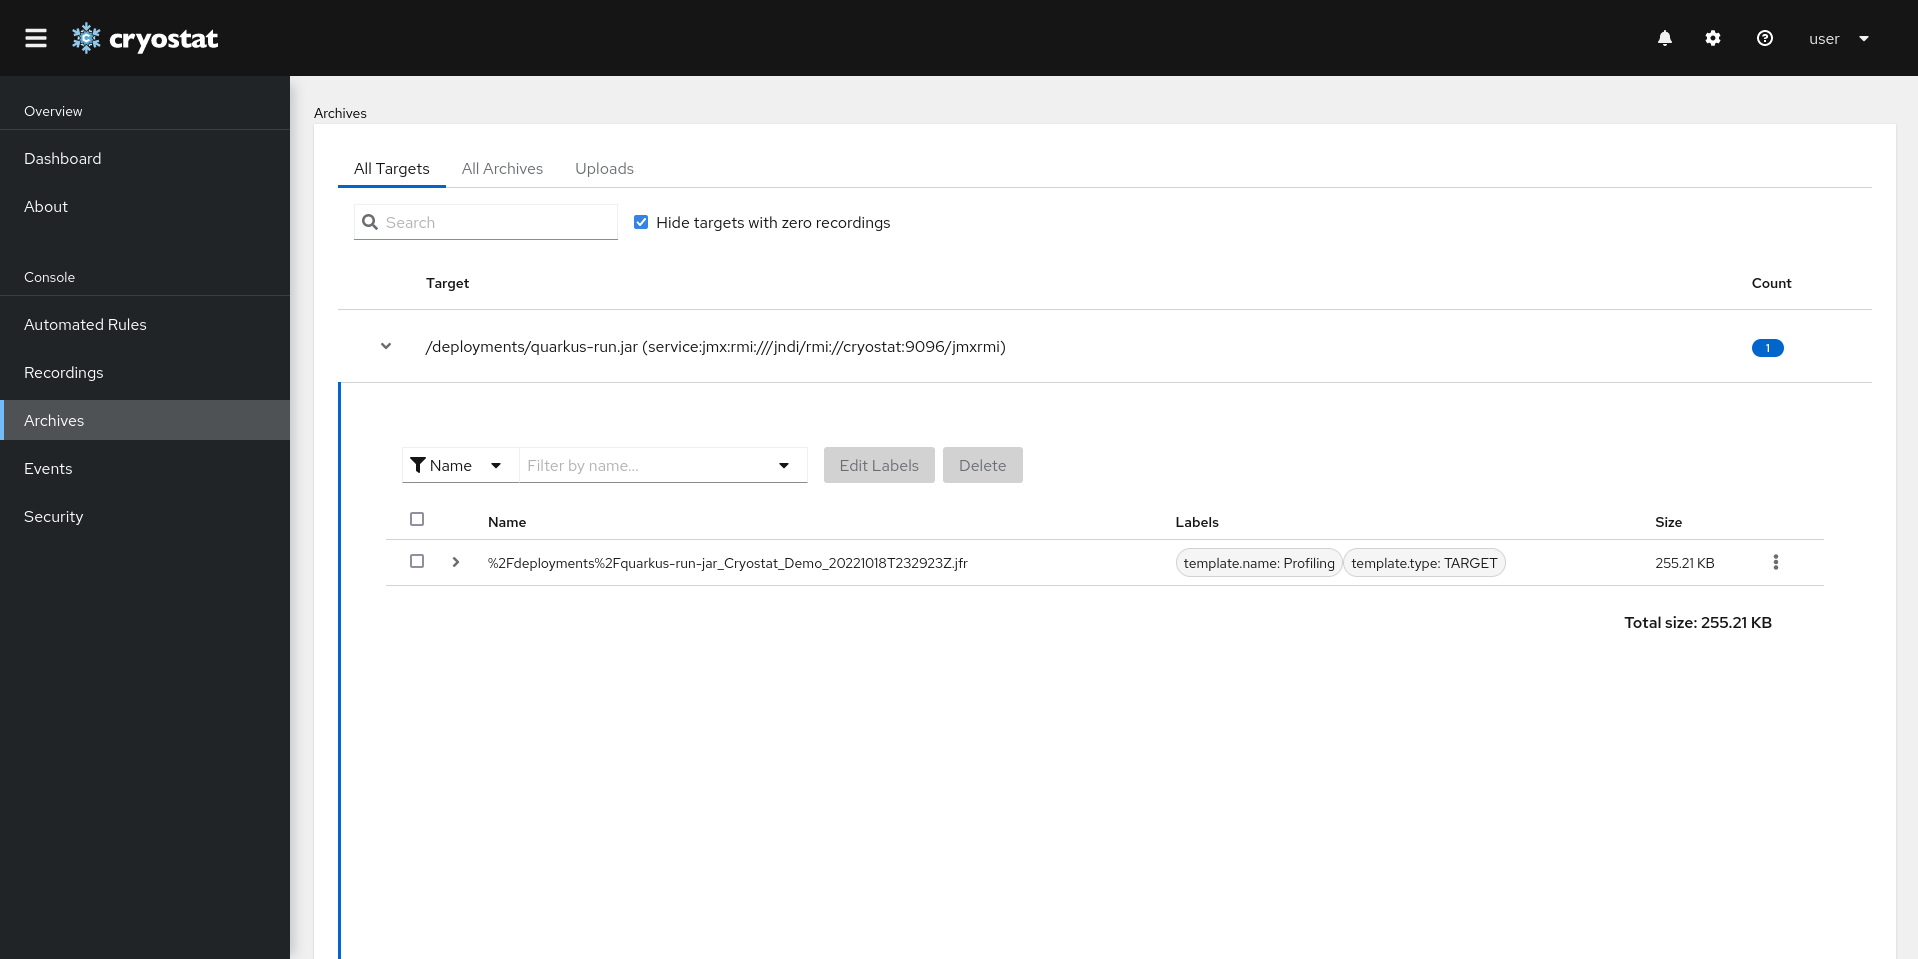
Clicking on the dropdown menu next to the target, we can see our newly archived recording along with labels and any actions Cryostat can perform on recordings, such as deleting or downloading it, viewing the associated report, or viewing the recording in Grafana.
New All Archives archived recordings view
Now, quickly navigate to the second tab of the Archives section, titled All Archives. After what you did in the previous section, you should now see a single row in a table under the Directory header with a directory name (Figure 3).
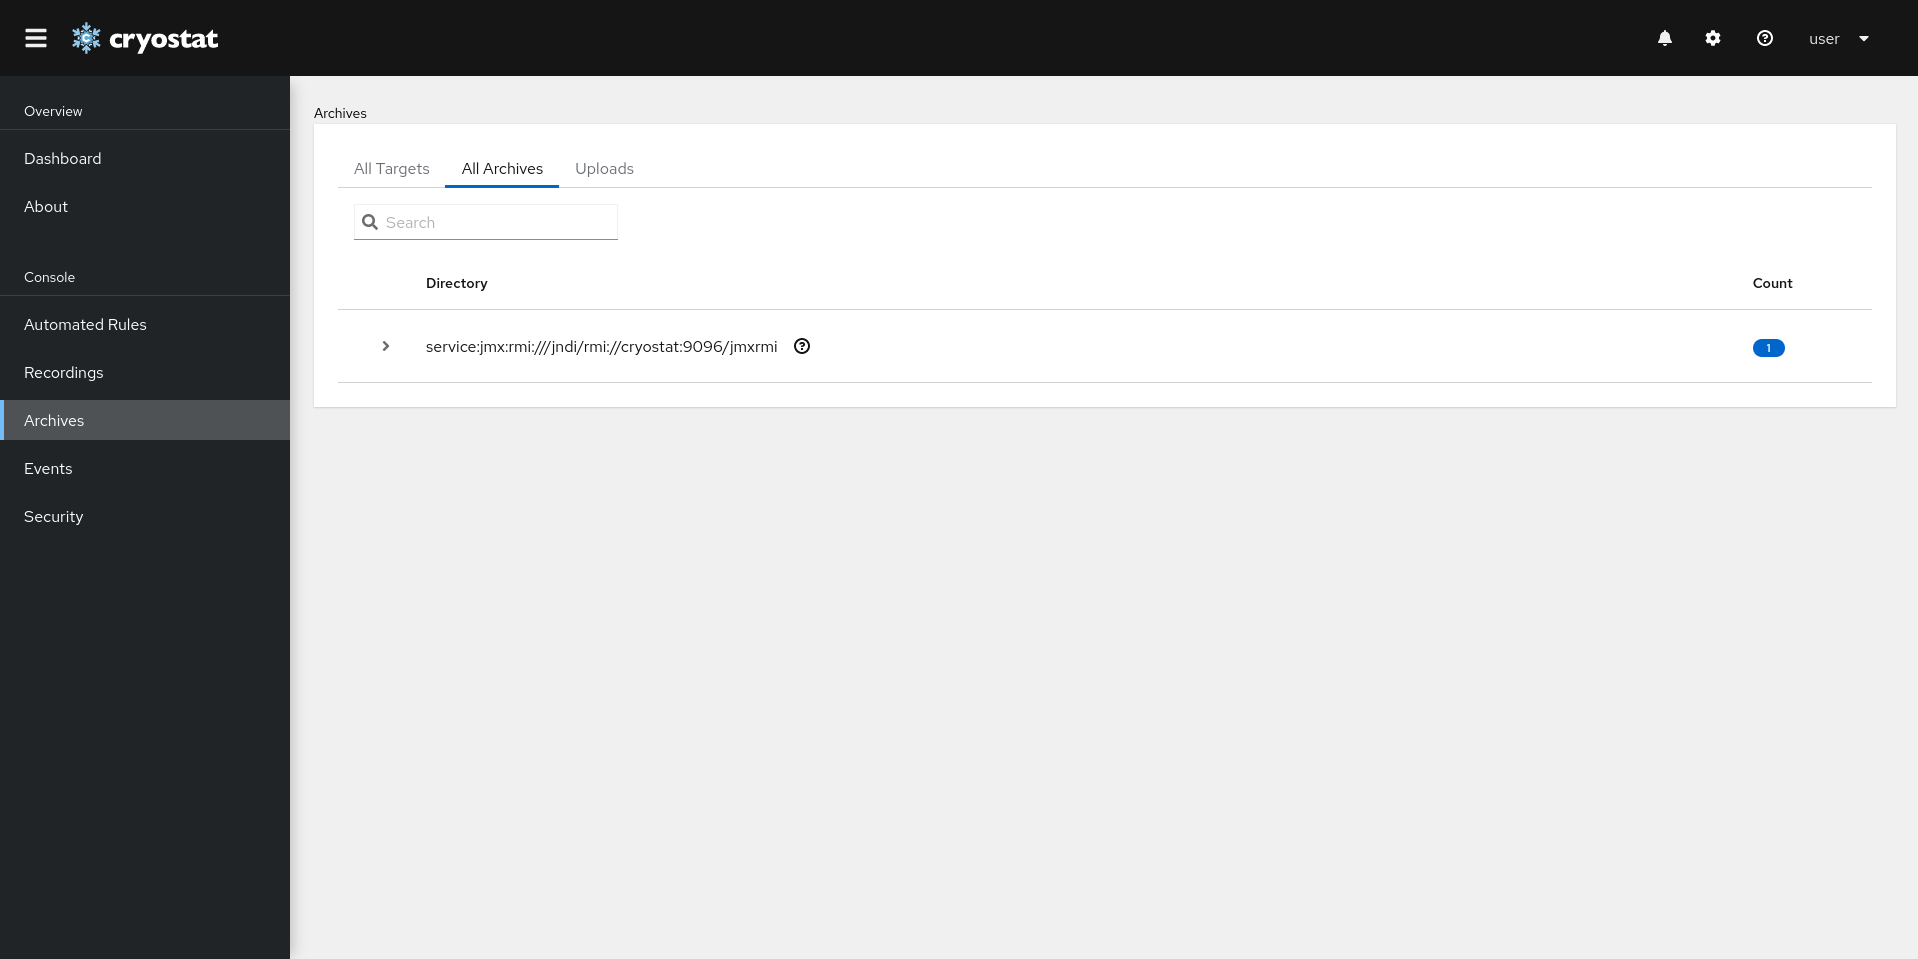
The All Archives archived recordings view is a place to view any archived recordings that have been saved to Cryostat's storage. Any archived recording saved from a target JVM through Cryostat or re-uploaded to Cryostat will appear here, under its corresponding directory.
You can perform any actions on recordings within these directories as you could normally, such as viewing a recording in Grafana, viewing an automated analysis report, or editing labels (more on that later in the article).
If any target JVMs restart or exit when Cryostat is running, you may be unable to find previously saved archived recordings from that source target through the Recordings tab. However, you will always be able to find them here in the All Archives view under the directory table named with the same service URL as the specified target.
Note that if you are upgrading from version 2.1.0 of Cryostat to 2.2.0, any previously saved archived recordings may only appear here in the All Archives view, under a directory named lost.
Uploads view
The final view that has been updated as part of Cryostat 2.2 is the Uploads view. Users may now re-upload and access their JFR recordings through the Uploads tab as part of the Archives view.
Navigating to the Uploads tab on the All Archives view, we can see the Uploads view where we are able to re-upload and interact with any re-uploaded archived JFR recording files by clicking the + icon (Figure 4).

From here, we see many of the same actions as before on other views.
For more information on how to re-upload JFR recordings to Cryostat 2.2, see the official Red Hat guide.
Recording filters
Another new feature in Cryostat 2.2 is the ability to selectively filter recordings in recording tables. To see this in action, navigate to the Recordings tab, and select a target from the Target Select dropdown menu.
You can see that there is a new dropdown menu and search filter on the toolbar. Clicking the dropdown menu will bring a list of filter categories you can use to better selectively find your recording. You may apply multiple filters across multiple categories.
Let's try using the filtering system here in the Active Recordings table. As before, create a new recording with these configurations:
- Name: Cryostat_Demo_2
- Archive on Stop: Unchecked
- Duration: 30 Seconds
- Template: Profiling
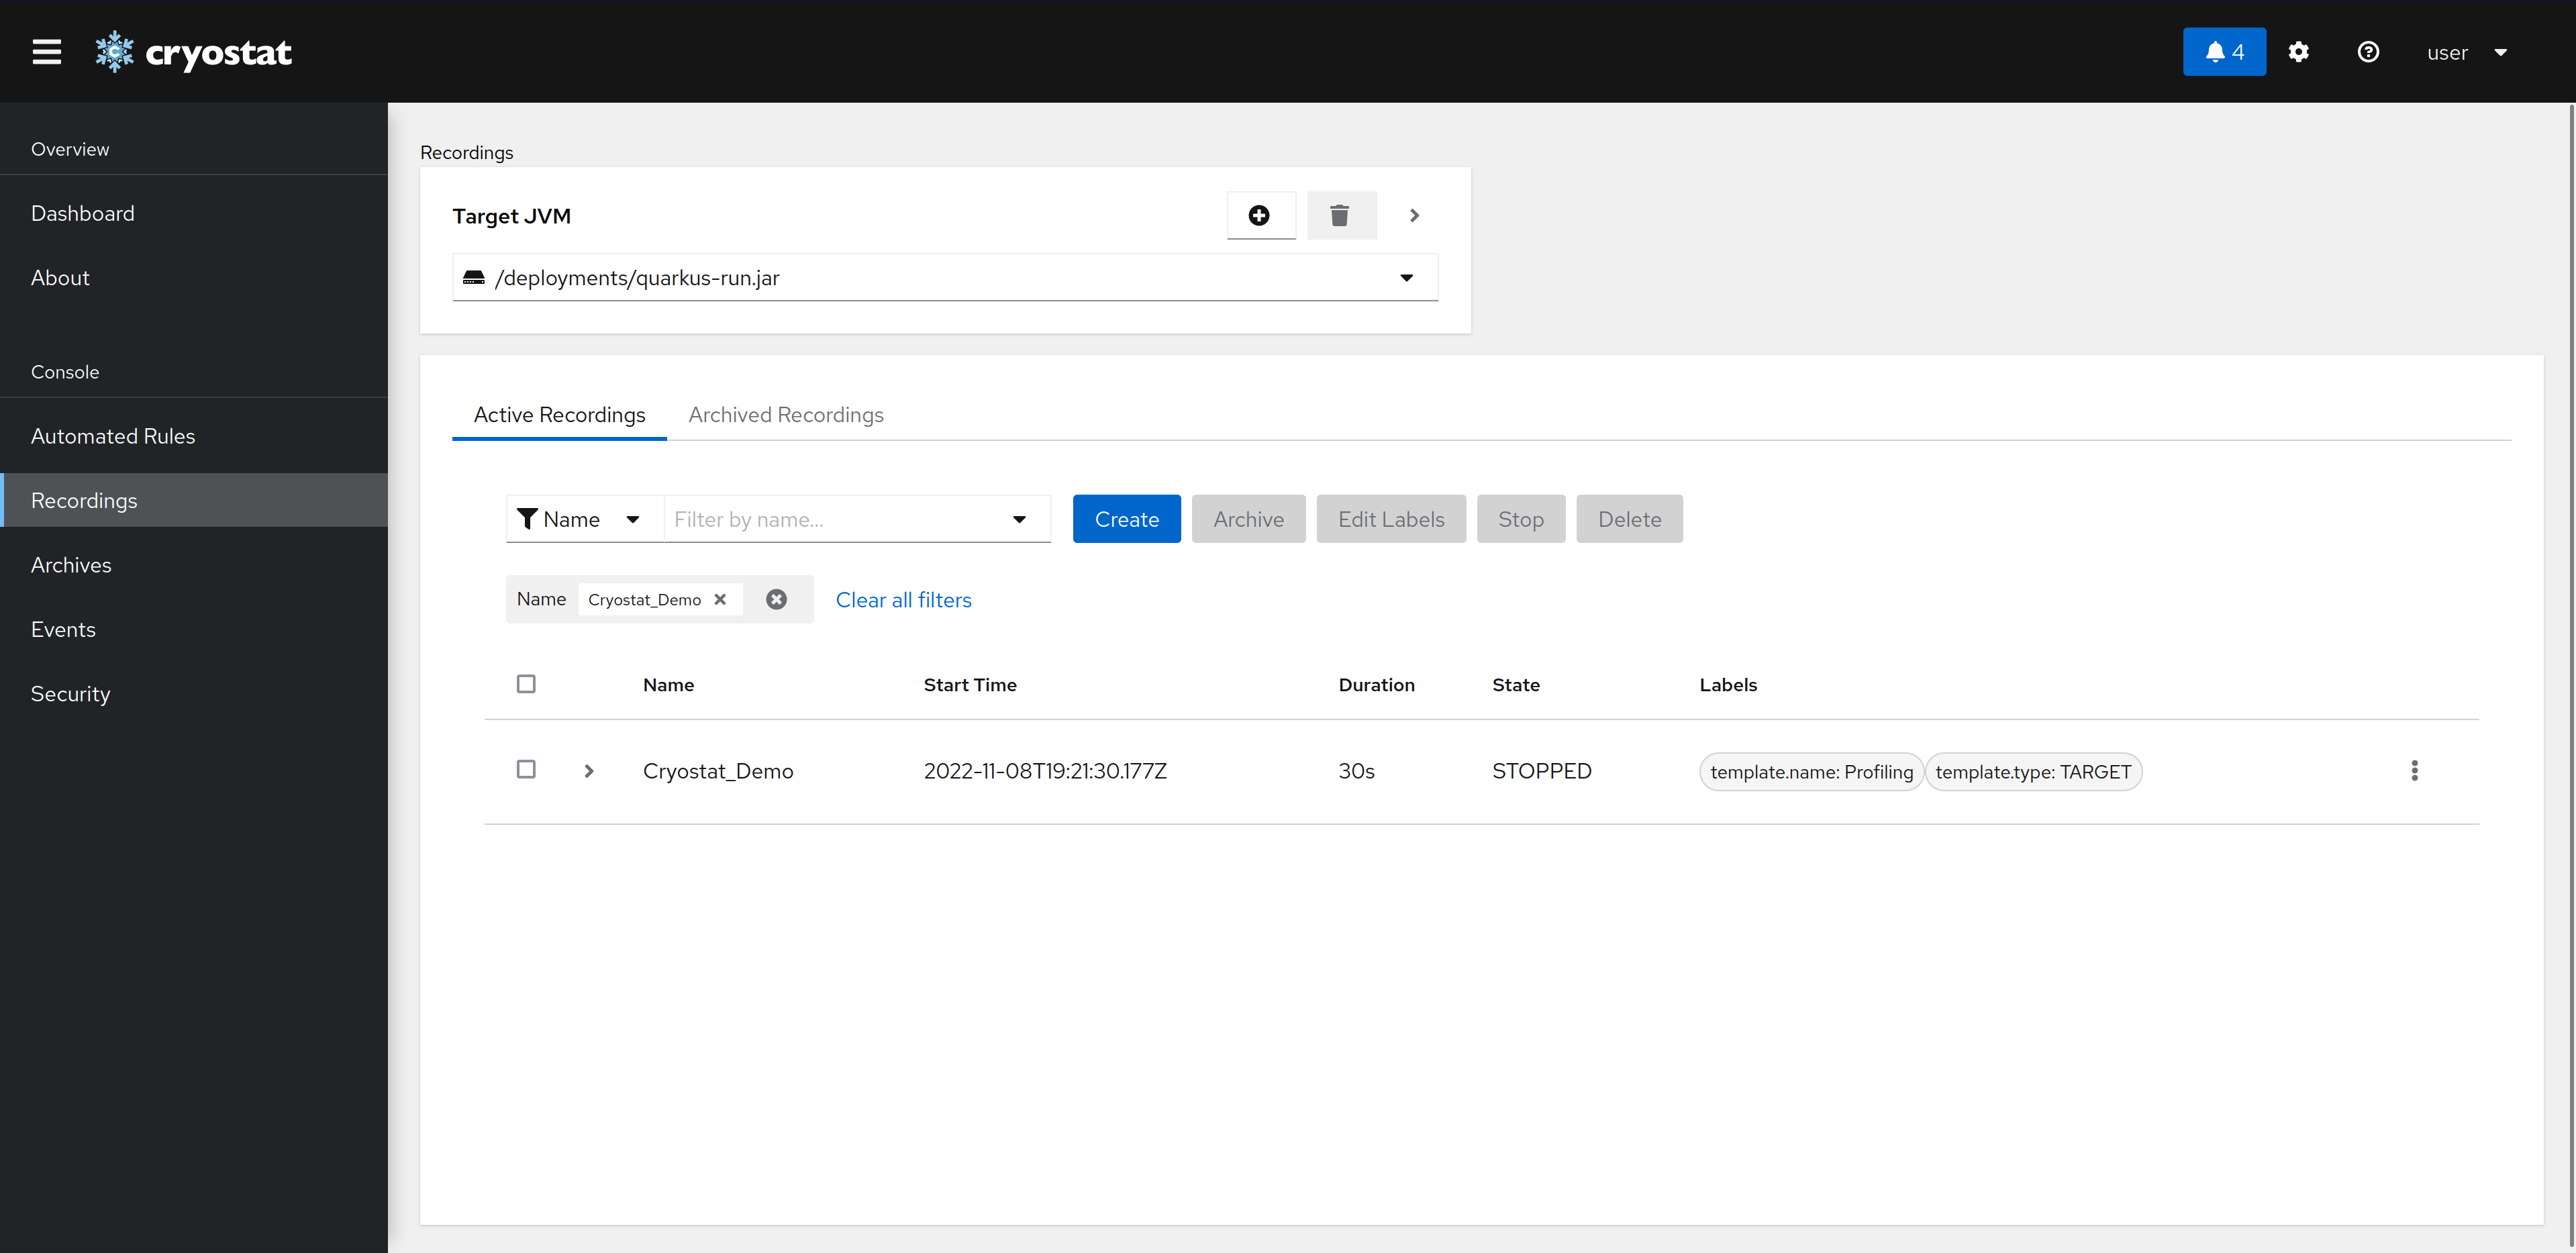
On the Active Recordings tab, the first option in our filtering toolbar is the ability to filter selectively on the recording Name. This is the default option.
Clicking the search bar will bring up a dropdown with the current list of names of recordings within the table. If there are many recordings within the table, you can also type within the bar to narrow down the search.
Click Cryostat_Demo to filter selectively on the recording. Notice how an element shows up with the list of current filters currently selected (Figure 5). You can remove individual filters from the filter group (Name, in this case), remove entire filter groups, and clear all filters.
Clicking any label of a recording under the Labels column in the recordings table will also use the new filtering system to filter the view to only show recordings that are attached with that label.
Before moving on, let's remove all filters by using any of the filter clearing methods listed earlier.
Enhanced labels
The final Cryostat 2.2 feature we'll showcase in this article is the enhanced labels, which have been improved for better usability. The biggest change to labels is the ability to bulk edit a batch of labels that may be common to multiple recordings at once.
Let's see one final example. Stay within the Active Recordings tab. Select both recordings created earlier and click the Edit Labels button on the toolbar (Figure 6).
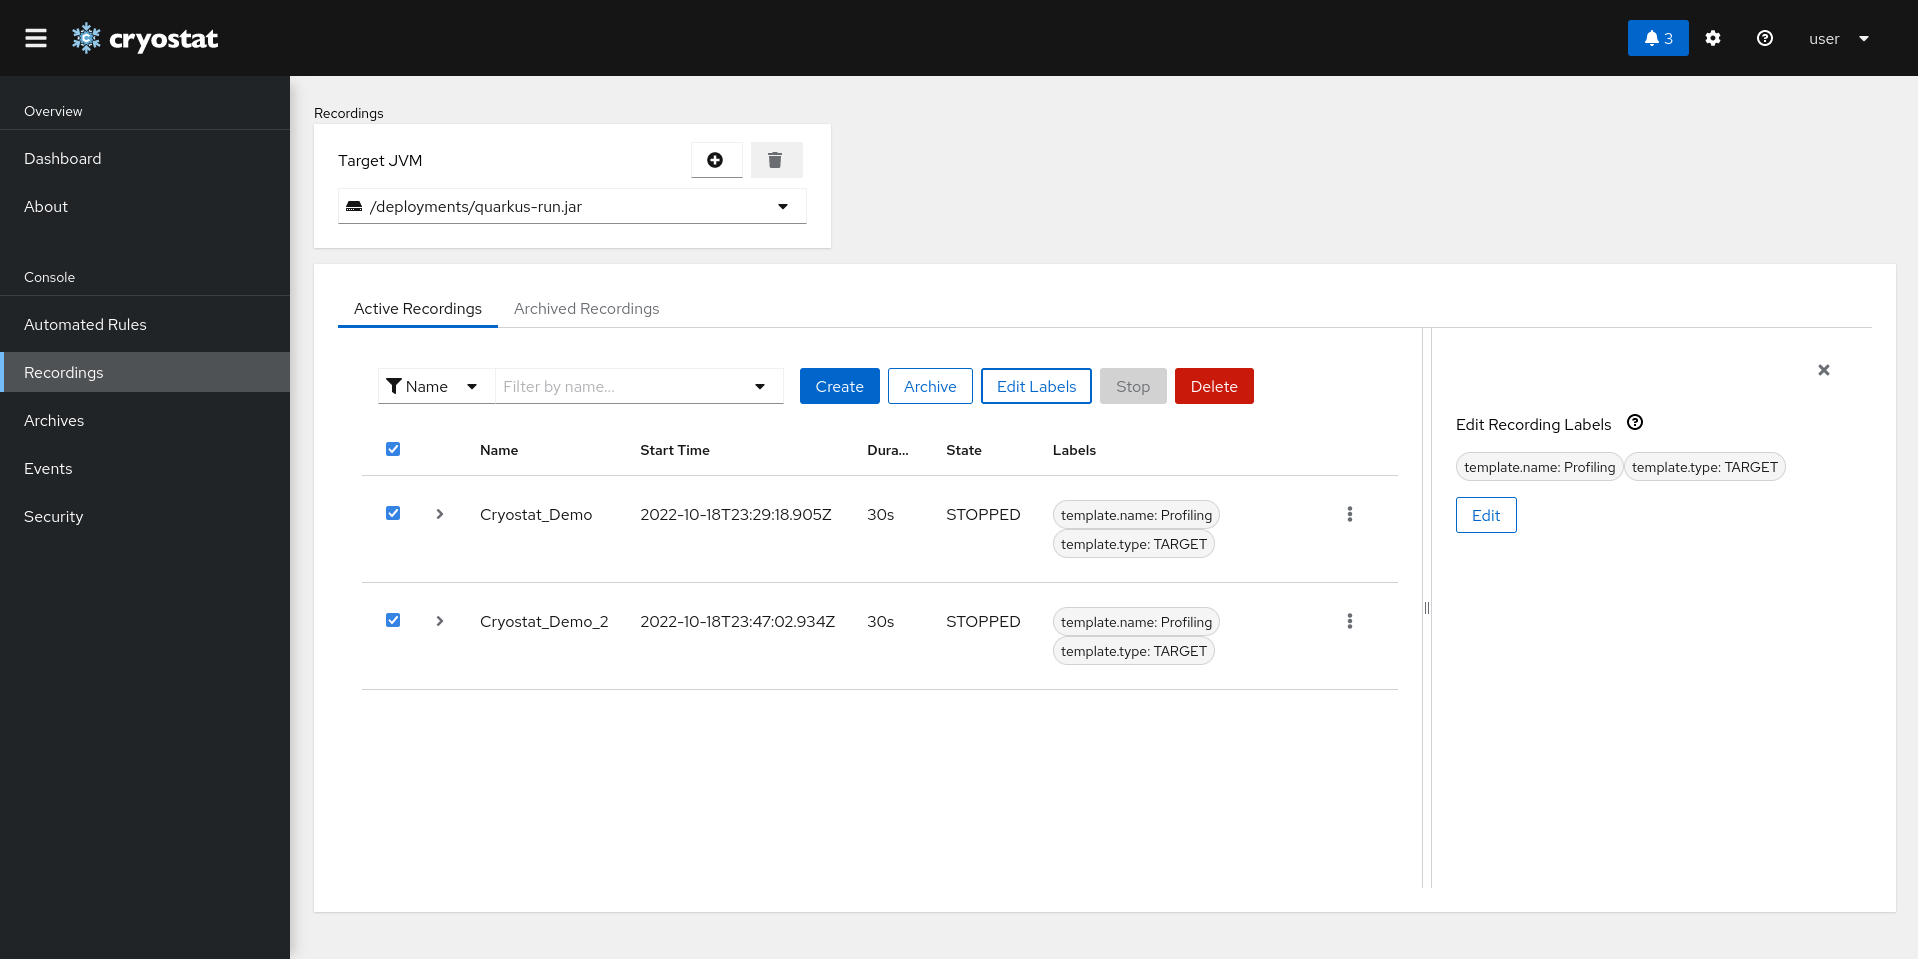
A drawer will appear from the right where you can bulk edit common recording labels between all selected archived recordings. Let's remove a common label and add a new label to both recordings.
Press Edit and remove the template.name label by pressing the x button next to the label. Then press the Add Label button to create a new label key-value pair. Finally, save the changes.
You have now successfully Bulk-edited labels from several recordings at once.
Conclusion
This tutorial walks through the new Archives view and explains the new features for enhanced recording metadata labels and recording filters. To learn how to operate on recordings using these labels, see this previous article on Managing JFR across instances with Cryostat and GraphQL. For more information about Cryostat, visit cryostat.io. For questions, comments and feedback, feel free to connect with us on GitHub or join our mailing list.
Last updated: February 11, 2024