This is the second part of a three-part series explaining how to bind easily to databases and other backing services from Node.js applications running in Kubernetes. The first article in the series, Connect to services on Kubernetes easily with kube-service-bindings, introduced the tools we use for this simplified integration: kube-service-bindings and the Service Binding Operator (SBO).
In this article and the next, we'll set up a cluster with access to a MongoDB database. For our Kubernetes cluster, we use the Developer Sandbox for Red Hat OpenShift, a free service for developers to experiment and learn about open source tools.
The articles use a MongoDB example hosted in GitHub to show you kube-service-bindings in action. This example will illustrate the process of deploying a Node.js and MongoDB application in OpenShift. The final step is to establish a connection between the processes with the Service Binding Operator and kube-service-bindings.
Setting up an OpenShift cluster on the Red Hat Sandbox
You are going to deploy your Node.js application in an OpenShift cluster. A quick and easy way that requires no local setup in your computer is to use Developer Sandbox for Red Hat OpenShift, a service hosted on the cloud and provided at no cost by Red Hat. After a few clicks to create a Red Hat account, you'll have an OpenShift cluster up and running, ready to use.
To create your cluster:
- Visit the getting started page for the Developer Sandbox for Red Hat OpenShift.
- Click Launch your Developer Sandbox for Red Hat OpenShift.
- Register to create your Red Hat account.
- After completing your registration, you will be redirected to the initial page. Click Launch your Developer Sandbox for Red Hat OpenShift.
- Log in with the Red Hat account you created.
- Fill in the form with your personal information and click Submit.
- Confirm your mobile phone number via text. (Don't forget to click the Send Code button after filling in your phone number.)
- Click Start using your sandbox and your sandbox will start immediately.
More information about the Developer Sandbox's resources and pre-installed software are available at the getting started page.
Setting up a MongoDB database on MongoDB Atlas
Now that your OpenShift cluster is up and running, you can create a database that your Node.js application will use to store its data. Luckily for us, the Developer Sandbox has Red Hat OpenShift Database Access built in. This lets you use an external service for hosting a database, outside of the OpenShift sandbox. Using an external database has several benefits:
- Data is accessible no matter what the state is of the OpenShift cluster.
- Other services outside of the OpenShift cluster are able to reach your database.
- You can use an existing MongoDB database hosted on MongoDB Atlas.
If you don't already have an account on MongoDB Atlas, register for one. There are several different levels of access, including a free one that is useful for learning projects like the one this article. After you register and sign in, select an organization, create a new project, and create a database as follows:
- On the upper left corner, next to the gear icon, expand the dropdown menu and choose View All Organizations (Figure 1).
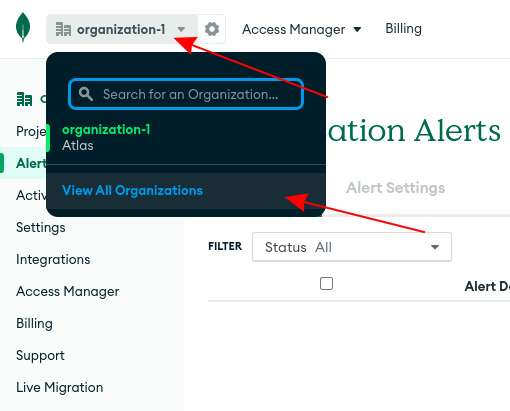
Figure 1: MongoDB Atlas provides a dropdown menu where you can view all organizations in your MongoDB Atlas account. - Click the Organizations button in the left sidebar and then click the organization in which you would like to create your database (Figure 2).
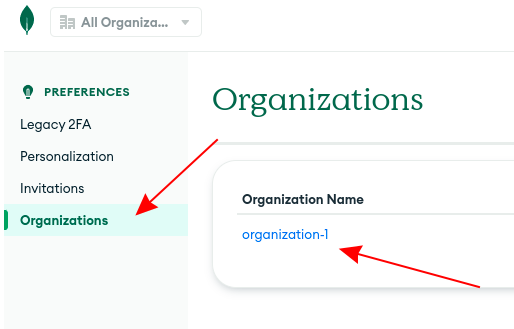
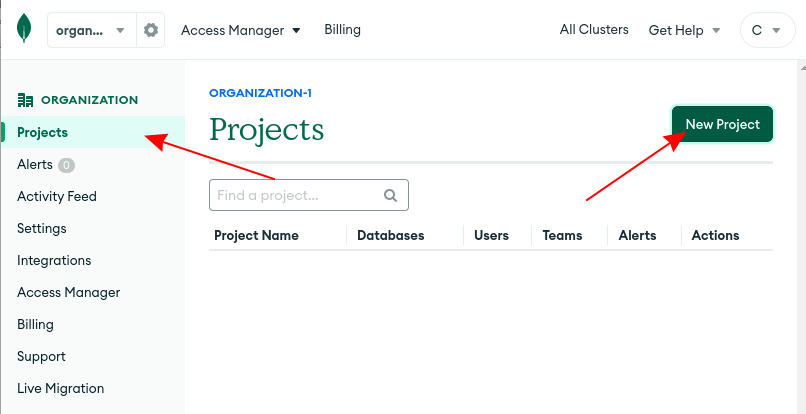
Figure 2: On the dashboard of MongoDB Atlas, you can see all organizations in your MongoDB Atlas account. - Create a project by clicking Projects→New Project on the left sidebar (Figure 3).
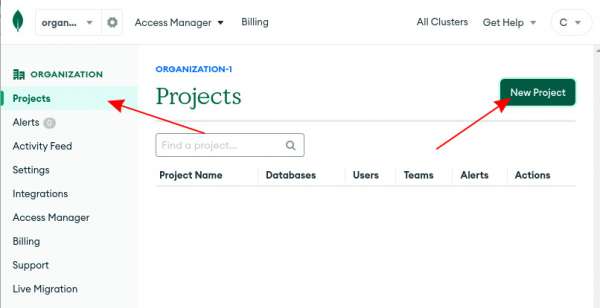
Figure 3: Under the Projects menu item, in the selected organization in MongoDB Atlas, you can see all available projects and create a new one. - Type a name for your project, the select Next→ Create Project.
- Create a MongoDB database inside this project by clicking the Build Database button. On the next page, click the Create button on FREE plan→create cluster. Leave the values at their defaults.
- On the left sidebar, create a user for the MongoDB database by clicking Database Access→Add new Database user→Choose a username and password→Create user.
- At the bottom of the page, in the section Add a connection IP Address, set the field IP Address to the value 0.0.0.0/0, which will allow access from any IP address (Figure 4).
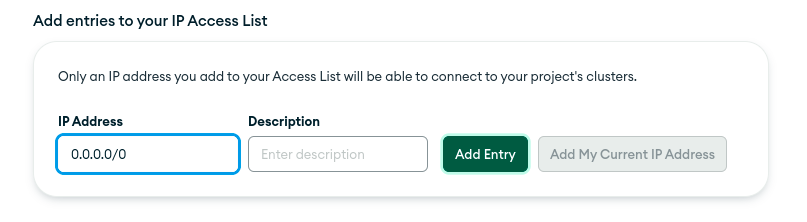
Figure 4: In the section "Add entries to your IP Access List", you are able to add an IP address from which you would like to access your cluster.


OpenShift Operators
Once you have the OpenShift cluster and MongoDB database up and running, take a look at the Operators you'll use to integrate these processes. Your OpenShift cluster in the sandbox comes with several pre-installed Operators. To see currently installed Operators in the OpenShift cluster, switch to the Administrator perspective and expand Operators→Installed operators in the left sidebar. You should be able to see the list of all the installed Operators (Figure 4).
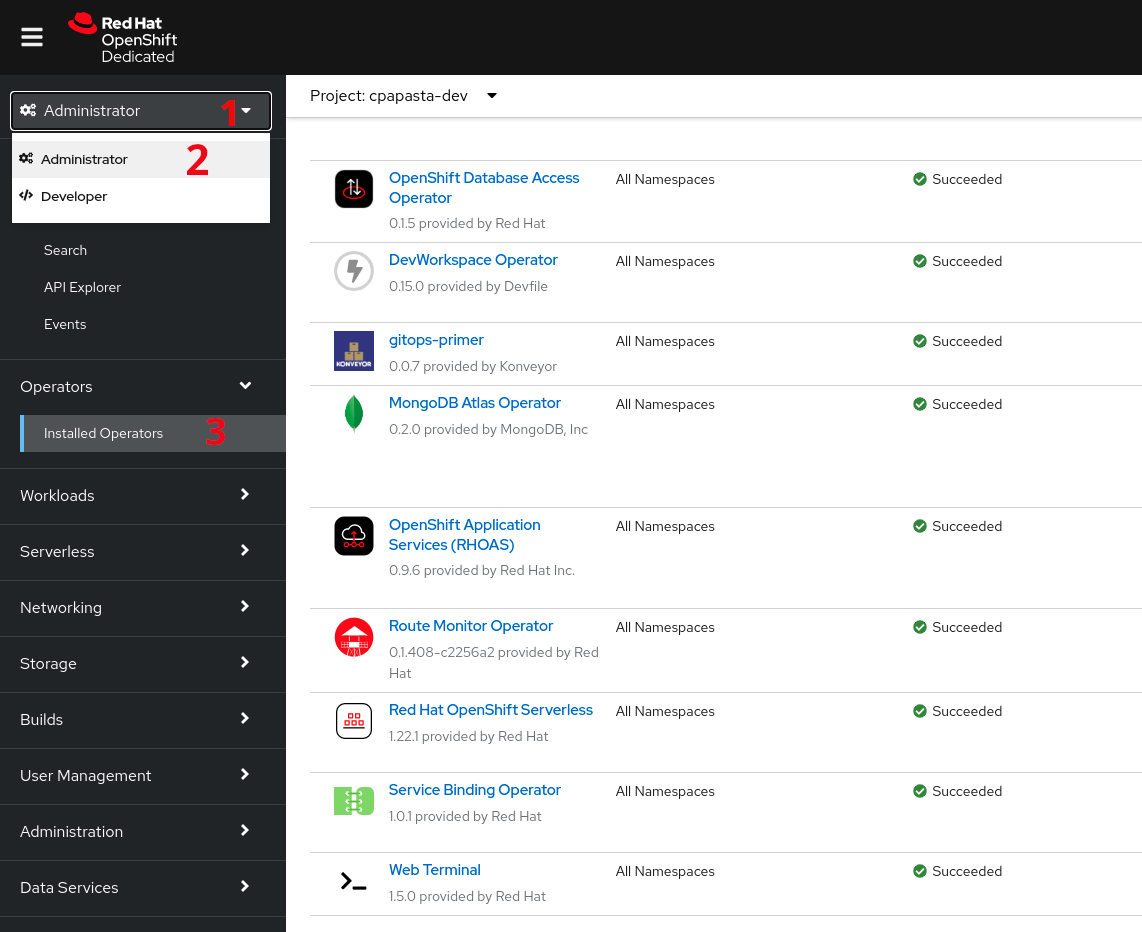
For our needs, we are interested in the following Operators:
- Red Hat OpenShift Database Access Operator: This integrates a database instance into an OpenShift cluster. The Operator gives your application in OpenShift access to a database hosted on an external service, such as MongoDB Atlas.
- Service Binding Operator: As we discussed in the first article in this series, this follows the Service Binding specification to project the credentials of a backing service (here, your MongoDB instance) under a directory of a workload (here, your Node.js application).
Set up access between OpenShift and a MongoDB database with the OpenShift Database Access Operator
In this section, you'll give the OpenShift Database Access Operator access to the MongoDB Atlas organization in which you created a database, so that the Operator can configure, manage, and connect to the database instance you created previously.
- Choose a project you would like to work on by selecting, from the sidebar on the top left, Developer→Topology→Project. In the dropdown, select your project (Figure 5).
- Switch to the Administrator perspective on the top of the left sidebar.
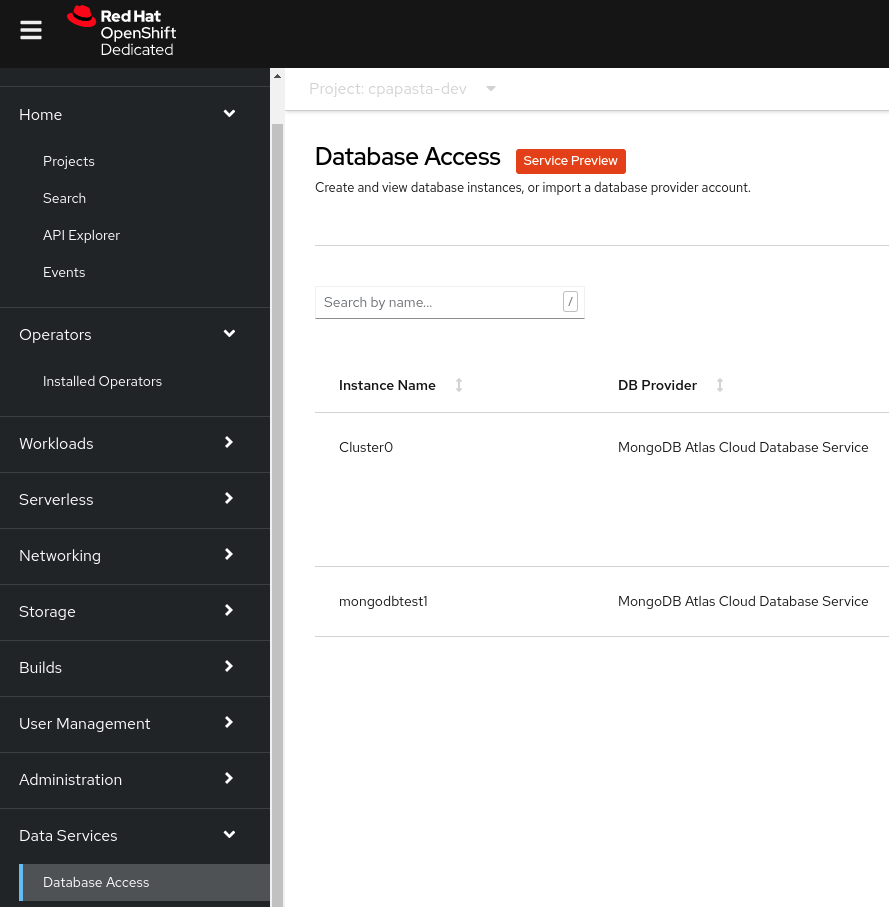
- Expand the Data Services navigation menu at the bottom of the left sidebar and click Database Access.
- At the upper right, choose Configuration→Import Database Provider Account (Figure 6).
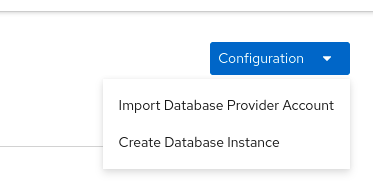
Figure 6: Under the Configuration menu, you can import a database provider such as MongoDB Atlas. - On the form, select MongoDB Atlas Cloud Database on the Database provider drop-down menu. Then fill in the rest of the fields and click Import.

At this point, by visiting Data Service→Database Access in the left sidebar, you should be able to see all database instances available to you in MongoDB Atlas (Figure 7).
Elements of a binding between a Node.js application and a database
This article has set up key building blocks of our application. In the next and final article of this series, we will connect the Node.js application and MongoDB database using kube-service-bindings and the Service Binding Operator.
Last updated: September 19, 2023