This is the third and final article in a three-part series introducing kube-service-bindings for Node.js developers on Kubernetes. Together with the Service Binding Operator (SBO), kube-service-bindings makes it easier to share credentials for services with your applications.
The first article of this series offered background on the tools we're using, and the second set up some basic elements such as hosting on the Developer Sandbox for Red Hat OpenShift and a MongoDB database. Now we're going to use all these tools to create a binding between our Node.js application and the database.
Deploy MongoDB as a cloud-hosted database
The previous article set up access between MongoDB Atlas and your OpenShift cluster. If you went through those steps successfully, you are ready to deploy a cloud-hosted MongoDB database in the cluster as follows:
- In the OpenShift console, visit the Topology view by selecting Developer→Topology from the left sidebar.
- Select the project where you would like to deploy the cloud database by selecting, from the top of the left sidebar, Developer→Topology→Project. From the dropdown menu, select your project.
- In the left sidebar menu, click +Add→Cloud-Hosted Database→MongoDB Atlas Cloud Database Service→Add to Topology. Select your database instance and click Add to topology→Continue.
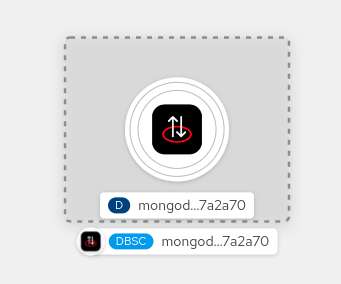
- Upon successful connection, you are taken to the Topology view, where the cloud-hosted database is deployed and visible (Figure 1).
Deploy the Node.js application in OpenShift
There are several ways to deploy a Node.js application in OpenShift: Through the oc OpenShift command-line interface (CLI), the odo CLI, the OpenShift console, etc. This article covers two options: The OpenShift console and Nodeshift, an NPM package.
Deploy through the OpenShift console
From the Developer perspective, select +Add→Import from Git.
In the Git Repo url field, set the repository URL to https://github.com/nodeshift-blog-examples/kube-service-bindings-examples. This is a kube-service-bindings examples repository maintained by our team; it contains the Node.js application you are deploying in this article.
Expand Show advanced Git options. On the Context dir field, set the value to src/mongodb, which is the path of the subdirectory where your Node.js application is located.
On Builder Image, select Node.js and click Create.
Deploy through Nodeshift
Open a terminal and clone the git repository:
$ git clone https://github.com/nodeshift-blog-examples/kube-service-bindings-examples.git
$ cd ./kube-service-bindings-examples/src/mongodb
Install Nodeshift globally:
$ npm install -g nodeshift
To find the login credentials required by the next command you'll use, visit your OpenShift console. In the upper right corner, click your username. A dropdown will appear. Click Copy login command (Figure 2), which transfers you to another page. Then click Display Token to display the username, password, and server credentials to log in with Nodeshift.

Using these credentials, you can now log in to your OpenShift cluster with Nodeshift:
$ nodeshift login --username=developer --password=password --server=https://api.server
Deploy the Node.js application with Nodeshift through the following command, replacing the namespace name with your specific project name:
$ nodeshift --namespace.name=<selected-project>
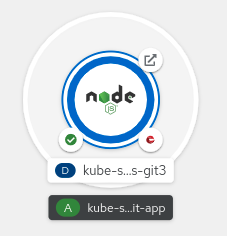
Your application should be deployed and visible in the Topology view, as shown in Figure 3.
Establish a connection between the Node.js application and the MongoDB database
The final step in this series is to establish a connection between your Node.js application and the MongoDB database, which we'll accomplish in this section.
Service Binding Operator
At this point, two instances should show up in your Topology view: the Node.js application and the connection to your MongoDB instance in Atlas (Figure 4).

To establish a connection between these instances, you will use the Service Binding Operator to share the credentials and kube-service-bindings to parse those credentials (binding data).
You can create a Service Binding in two different ways:
- Drag a line in the Topology view between the two backing services (the Node.js application and MongoDB).
- Apply a YAML file specifying the service binding.
We will go with the first option, which in our case is faster and easier.
Hover the mouse over the Node.js application in the Topology view. An arrow should appear. Drag the arrow from the Node.js application to the circle around the MongoDB instance. A tooltip should be visible that says Create service binding. Release the mouse button and a pop-up box will let you specify the name of the service binding. Click Create binding. The container of the Node.js application will restart immediately (Figure 5).
Check the environment of Node.js application by clicking the Node.js application container in the Topology view. In the right sidebar, click Resources→View Logs (Pods Section) and visit the Environment tab. The SERVICE_BINDING_ROOT environment variable should be set, as shown in Figure 6.
kube-service-bindings
The final step is to read the binding data under the directory indicated by the SERVICE_BINDING_ROOT variable and pass the data to the MongoDB client to establish a connection to the MongoDB database. Your Node.js application already has kube-service-bindings as a dependency. So calling the getBinding() function, as shown in the following JavaScript code snippet, does all the hard work of parsing, cleaning, and transforming the binding data into a consumable format for the MongoDB client:
const { MongoClient } = require("mongodb");

const serviceBindings = require("kube-service-bindings");

const { url, connectionOptions } = serviceBindings.getBinding("MONGODB", "mongodb");

const mongoClient = new MongoClient(url, connectionOptions);
That's it. By visiting the URL of the Node.js application (click the arrow-box icon on the node), you can perform simple CRUD operations through the UI on the database.
Easier integration with services on Kubernetes
Over the past year, our team has been active in developing kube-service-bindings, making it easier for developers with little or no experience in managing containerized applications to securely share credentials among backing services.
Complementing the work on kube-service-bindings development, our team provides examples for most of the clients supported by kube-service-bindings, instructions on utilizing kube-service-bindings, and a description of how to deploy a variety of backing services through Nodeshift in Kubernetes and OpenShift environments.
This series of articles has shown which clients are supported and how both a service binding and kube-service-bindings work. We guided you through the whole cycle of deploying a Node.js application backing service using the SBO and kube-service-bindings, sharing and parsing credentials for a connection between a Node.js application and a MongoDB database. kube-service-bindings read, parsed, and transformed binding data projected by the Service Binding Operator, returning data in a form directly consumable by the MongoDB client.
To help you use kube-service-bindings in other types of deployments, we have provided additional Node.js examples. We hope you found this article interesting and now have a better understanding of kube-service-bindings and service bindings in general.
If you want to learn more about what Red Hat is up to on the Node.js front, check out our Node.js page.
Last updated: October 31, 2023