MicroShift, a small footprint Kubernetes/Red Hat OpenShift Container Platform implementation, can be configured with NVIDIA Container Runtime and provide containerized jobs with access to your system's GPUs in order to use the CUDA API. The NVIDIA-GPU Operator can be used in the cluster to enforce the GPU as a requestable resource, just like memory and CPU. In this article, we will demonstrate this by running a few sample CUDA programs that are provided by NVIDIA within a MicroShift implementation.
By the end of this article, you will know how to configure MicroShift with your NVIDIA drivers using the all-in-one image, and will have deployed several CUDA programs provided as containers.
The power of GPUs
In the past decade, we have seen the importance of GPUs in accelerating many of the most crucial workloads in the modern era. With applications ranging all the way from computer vision that's used in autonomous vehicles and facial recognition, to data science models being applied in order to develop a vaccine against COVID-19, it is clear that the future of our world largely relies on being able to run accelerated workloads. To achieve parallel computing at this level of scale efficiently, it becomes imperative to containerize your application and run it on a container orchestration platform such as the OpenShift Container Platform.
The problem with this approach is that OpenShift has a minimum requirement of 16GiB so that the platform can run itself, with more memory needed to run additional applications on top of that. To address this issue, MicroShift was created to serve as a small form-factor version of OpenShift in order to provide the user with many of its benefits while maintaining a low impact on the system's resources.
This blog was written within a Red Hat Enterprise Linux 8 environment with a single g3s.xlarge EC2 node, and an additional 100GiB EBS volume to provide the storage space needed for OverlayFS; however, you should be able to achieve the same results with a GPU on any RHEL system (or some other system, if you want to get hacky).
Set up GPU enablement with MicroShift
In order to set up a GPU workload on MicroShift, we will follow this guide for setting up on RHEL 8 with Amazon EC2.
We'll first want to login to the root user account by running the following command:
sudo bash
Then you'll need to verify that your system registers your NVIDIA GPU. You can do this with lspci:
lspci -nnv |grep -i nvidia
If everything works, you should see output like this:
00:1e.0 VGA compatible controller [0300]: NVIDIA Corporation GM204GL [Tesla M60] [10de:13f2] (rev a1)
(prog-if 00 [VGA controller])
        Subsystem: NVIDIA Corporation Device [10de: 113a]
        Kernel driver in use: nvidia
        Kernel modules: nvidia_drm, nvidia
Next, you'll want to install the NVIDIA drivers onto your system. First, you'll want to disable Nouveau graphics drivers from the system modules:
echo 'blacklist nouveau' >> /etc/modprobe.d/blacklist.conf
Then you'll want to install the latest drivers:
# add the CUDA dnf repo for RHEL8
dnf config-manager --add-repo=https://developer.download.nvidia.com/compute/cuda/repos/rhel8/x86_64/cuda-rhel8.repo && \
# install the drivers
dnf module install nvidia-driver:latest -y
Now that the drivers are installed, we'll have to enable them. The best way to do this cleanly is to reboot the system:
reboot
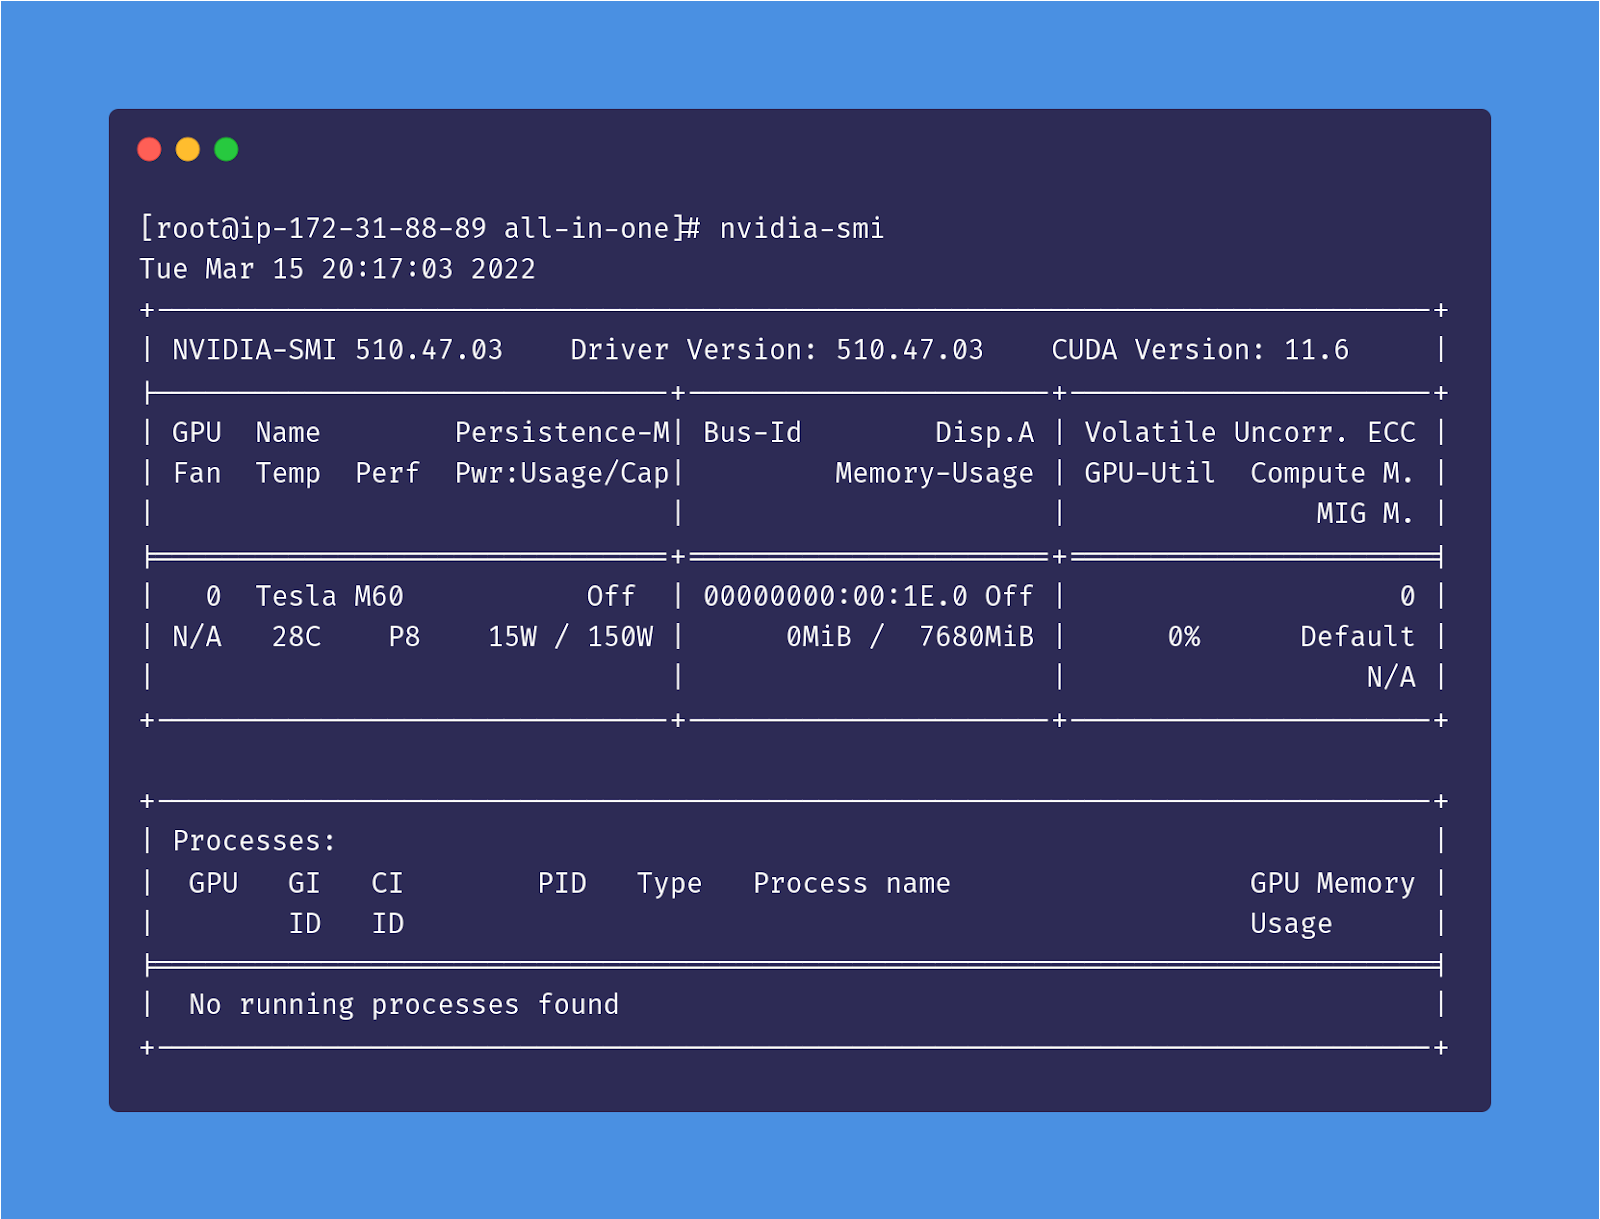
Once the system has restarted, we can check that NVIDIA is capable of monitoring our GPU devices by getting the status from the NVIDIA System Management Interface (NVIDIA-SMI):
nvidia-smi
Which should produce an output like this:
Install Podman
With our NVIDIA drivers installed, we can proceed to install Podman and configure it with NVIDIA's container toolkit. We'll also install crun, since we'll be using it as the OCI runtime.
dnf install -y crun podman
To enable crun as our runtime, we'll edit containers.conf so that runtime = "runc" is commented out and crun is enabled:
# copy over the containers file
cp /usr/share/containers/containers.conf /etc/containers/containers.conf

# enable crun
sed -i 's/^#runtime = "crun"/runtime = "crun"/;' /etc/containers/containers.conf

# disable runc
sed -i 's/^runtime = "runc"/#runtime = "runc"/;' /etc/containers/containers.conf
Then we need to verify that grep "runtime" /etc/containers/containers.conf yields the following result:
runtime = "crun"
#runtime = "runc"
Next, we'll need to install nvidia-docker:
# add the NVIDIA-docker repository to our dnf repos
curl -s -L https://nvidia.github.io/nvidia-docker/rhel8.3/nvidia-docker.repo | tee /etc/yum.repos.d/nvidia-docker.repo
dnf update
# use the experimental channels to enable support for cgroupsv2
dnf config-manager --enable libnvidia-container-experimental
dnf config-manager --enable nvidia-container-runtime-experimental
dnf install nvidia-container-toolkit -y
Once nvidia-docker is installed, we'll need to add the nvidia-container SELinux policy to our machine:
curl -LO https://raw.githubusercontent.com/NVIDIA/dgx-selinux/master/bin/RHEL7/nvidia-container.pp
semodule -i nvidia-container.pp
nvidia-container-cli -k list | restorecon -v -f -
Our NVIDIA drivers should now be configured to work with our container runtimes. We can verify that everything works by running the nvidia-smi command from a CUDA image with Podman:
podman run --privileged -ti docker.io/nvidia/cuda:11.0-base nvidia-smi
The output should look something like this:
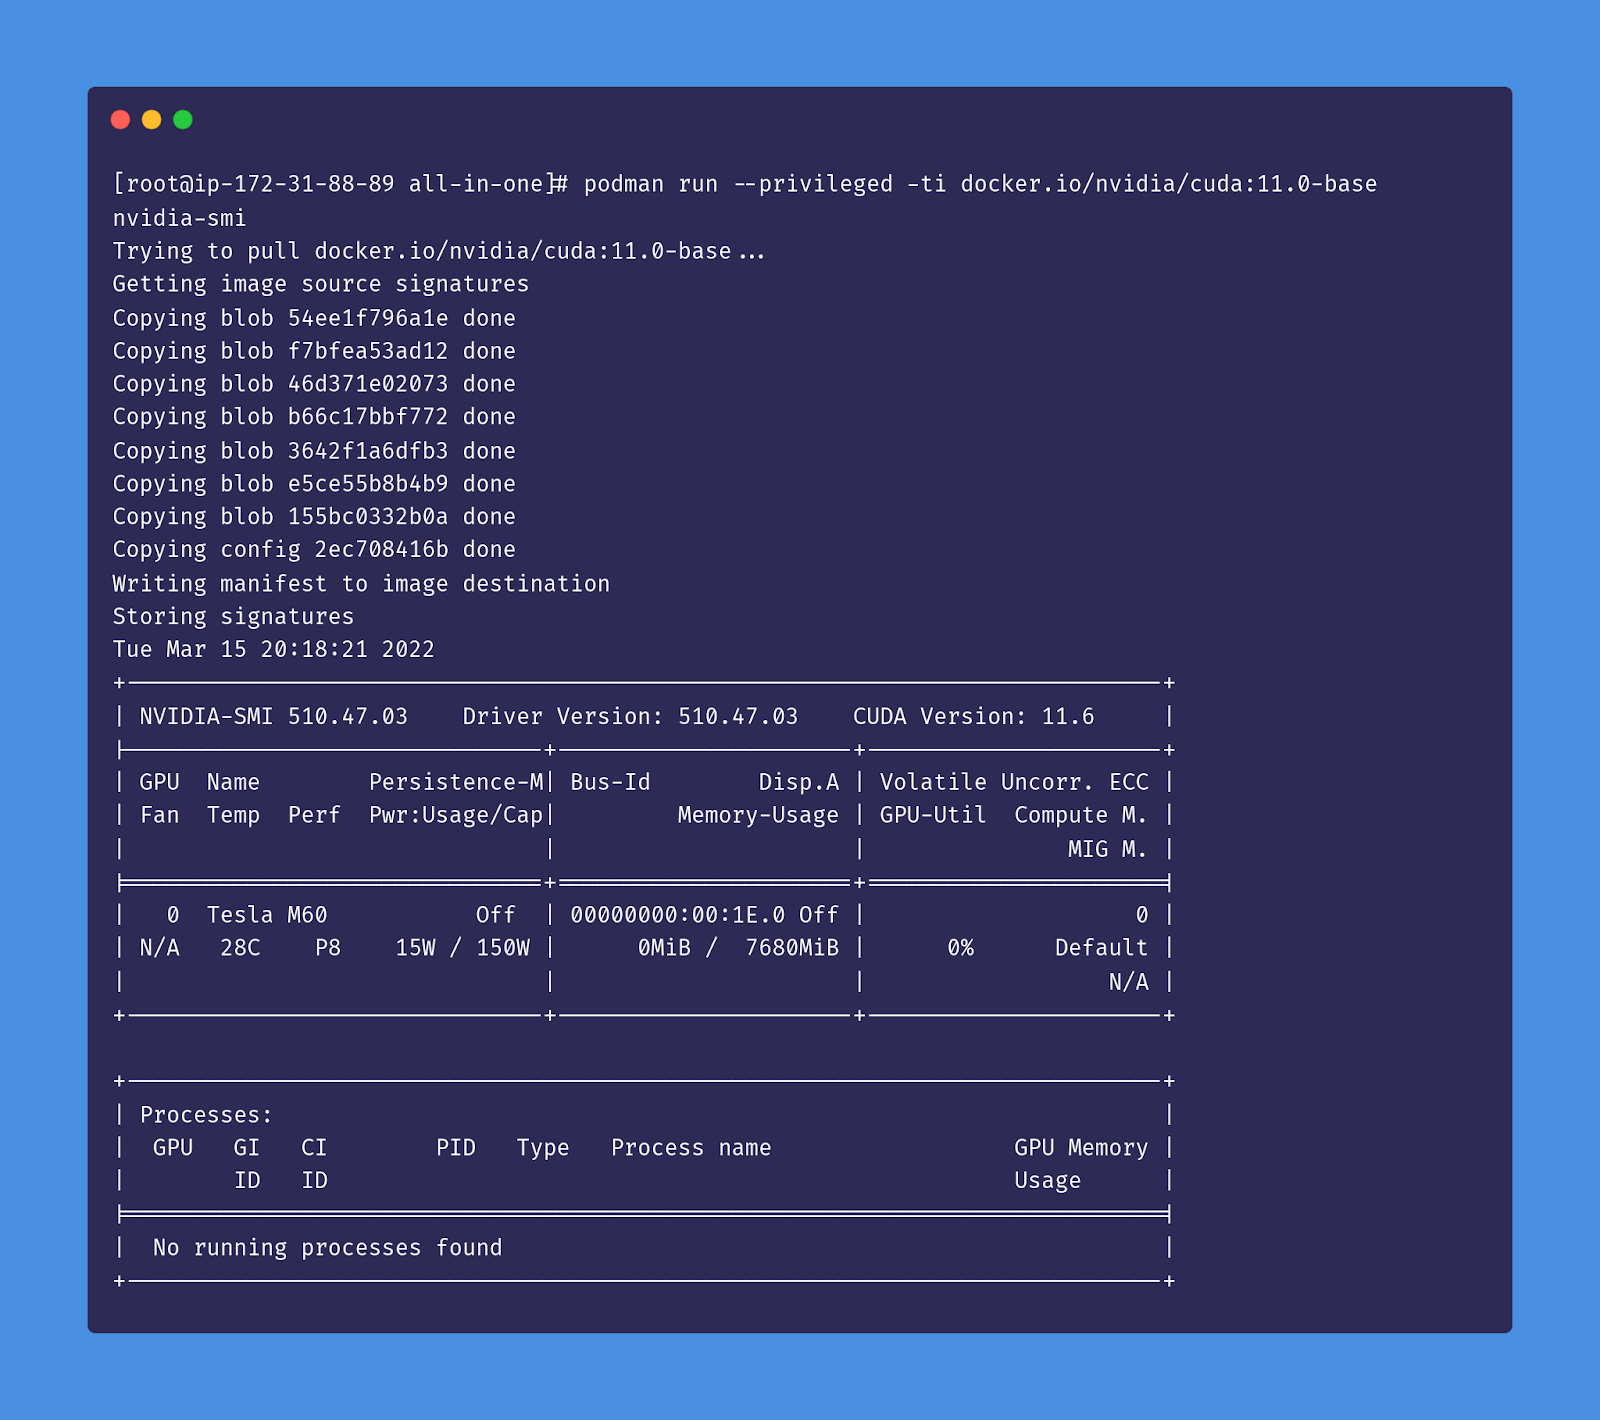
Note: We'll need to run these containers with the --privileged flag due to the security constraints from NVML.
Run MicroShift
Next, we'll run MicroShift. We'll provide flags to mount the container's /lib/modules directory into our host system's /lib/modules directory, as well as a main place for storage that will be mounted into MicroShift's /var/lib directory. For this example, we are using the 100GiB EBS volume that we mounted at /mnt/containers, but this could also be a volume or another directory of your choice.
podman run -d --rm --name ushift --privileged -v /lib/modules:/lib/modules -v /mnt/containers:/var/lib --hostname microshift-p 6443:6443 -e KUBECONFIG="/var/lib/microshift/resources/kubeadmin/kubeconfig" quay.io/microshift/microshift:aio-cuda-11.4.2-base-ubi8
Once our container has launched, we can simply shell in:
podman exec -ti microshift bash
Within the container, we'll need to install OpenSSL so that we can download the Helm binary, as well as ncurses so we can clear our terminal.
dnf install -y ncurses openssl
Configure the GPU as a cluster resource
In order to provide better control of our resources, NVIDIA provides a GPU Operator that specifies the GPU as a resource type of nvidia.com/gpu, which allows us to provide limits on how many GPUs a running container should be consuming at any given time.
We'll need to install Helm, and since we like to live on the edge, we're just going to curl it into bash:
curl https://raw.githubusercontent.com/helm/helm/main/scripts/get-helm-3 | bash
Now we can install the NVIDIA GPU Operator through Helm:
# Add the NVIDIA k8s-device-plugin chart repository
helm repo add nvdp https://nvidia.github.io/k8s-device-plugin
helm repo update

# Install the NVIDIA Operator
helm install --generate-name nvdp/nvidia-device-plugin
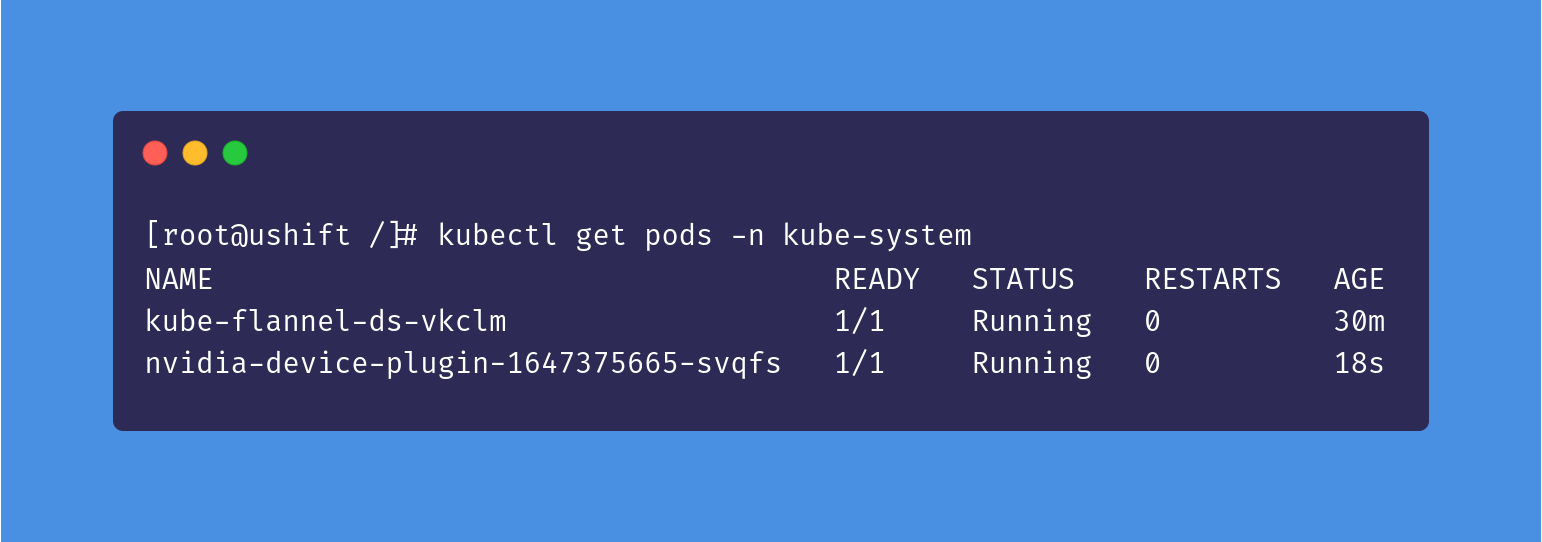
We can verify that the nvidia-device-plugin is running by viewing the pods in the kube-system namespace:
kubectl get pods -n kube-system
If successful, the nvidia-device-plugin pod should look like this:
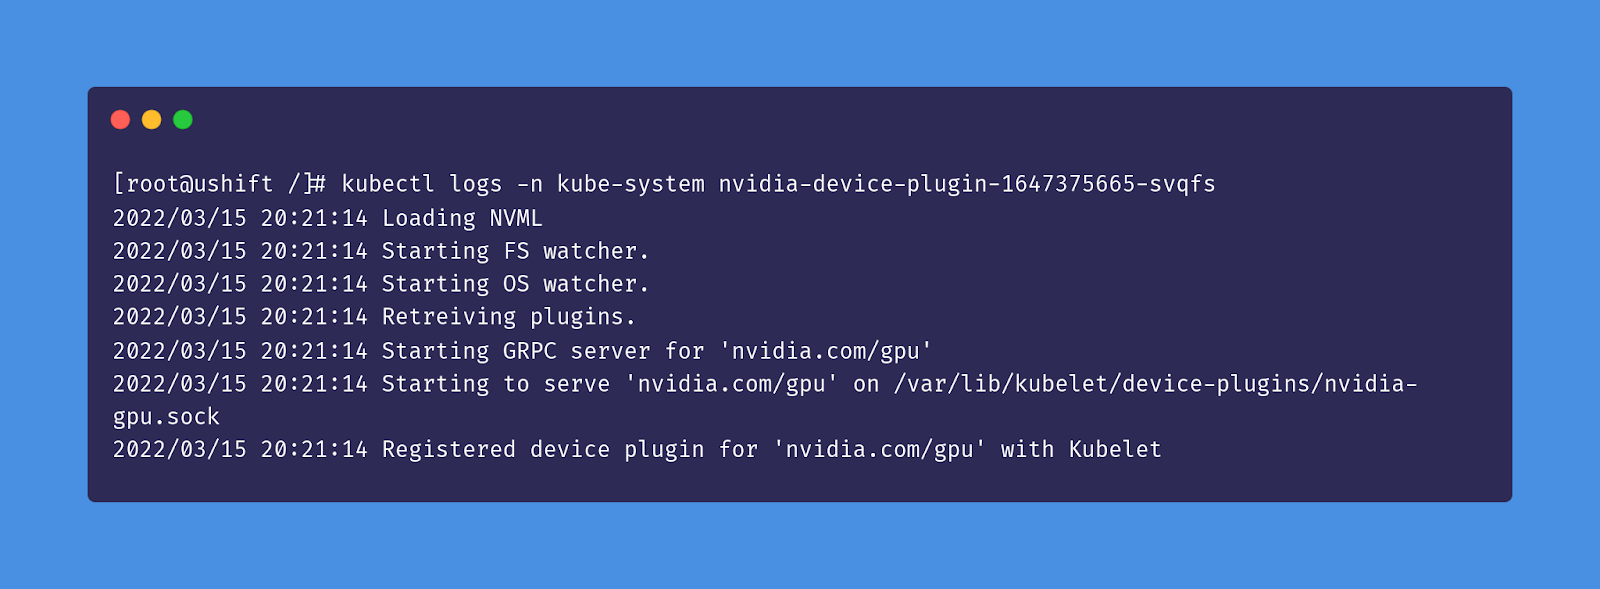
Next, we need to check the logs to ensure that the device plugin has been registered with kubectl logs -n kube-system nvidia-device-plugin-<generated_suffix>:
If we run kubectl describe nodes and check the allocated resources section, there should be a listing as nvidia.com/gpu:

Run CUDA programs with MicroShift
Now that we've confirmed that MicroShift is running, we can try running a CUDA sample from one of the containers that NVIDIA makes available to us.
For our purposes, we'll be running the vectoradd sample by setting up a job that pulls the cuda-sample image tagged vectoradd-cuda11.2.1 and sets a resource limit of one NVIDIA GPU per container. Create a file named cuda-vectoradd.yaml with the following contents:
# Sample Job that runs the CUDA vectoradd example
apiVersion: batch/v1
kind: Job
metadata:
 name: nvidia-vectoradd
spec:
 ttlSecondsAfterFinished: 100
 template:
   spec:
     containers:
     - name: nvidia-cuda-vectoradd
       image: "nvcr.io/nvidia/k8s/cuda-sample:vectoradd-cuda11.2.1"
       resources:
         limits:
           nvidia.com/gpu: 1
     restartPolicy: Never
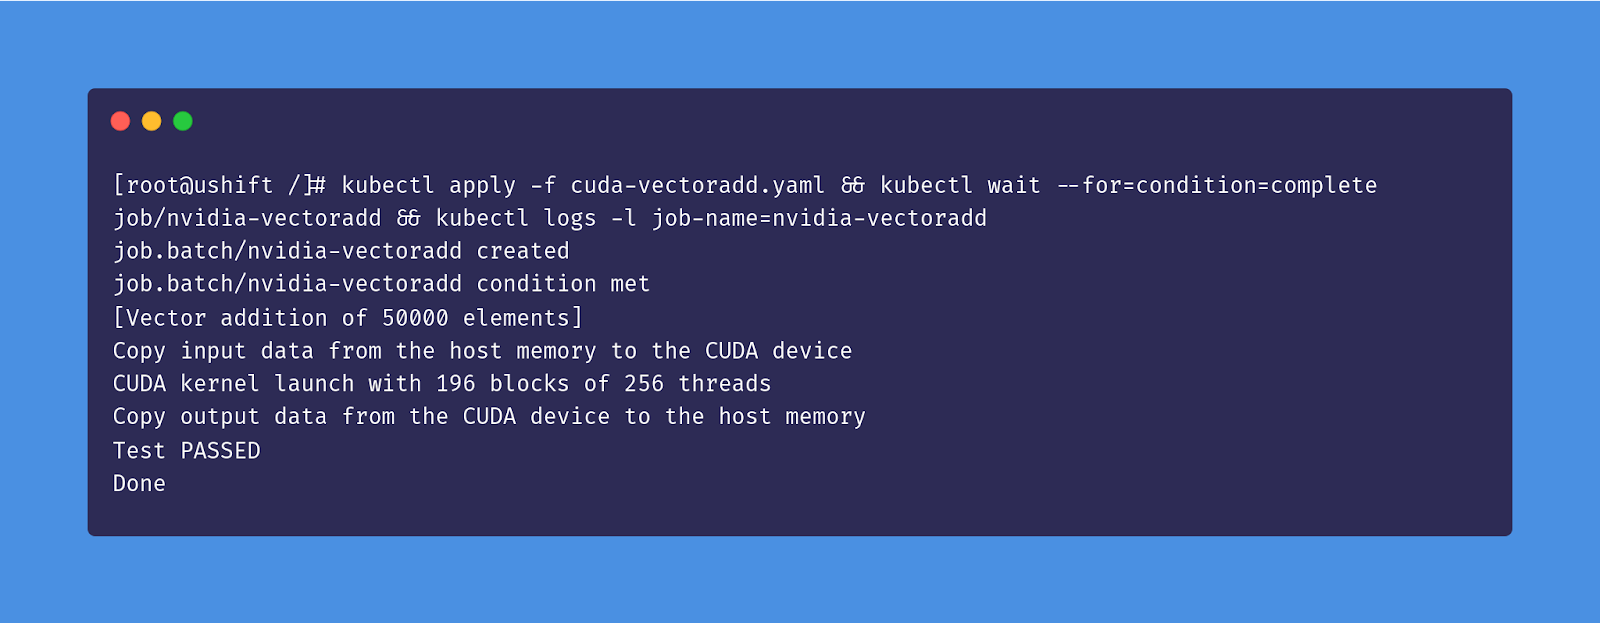
We'll launch the job and view the result after completion:
kubectl apply -f cuda-vectoradd.yaml && kubectl wait --for=condition=complete job/nvidia-vectoradd && kubectl logs -l job-name=nvidia-vectoradd
Your output should look something like this:
A few final notes
Before we conclude, there are a couple of points we need to cover about potential bumps you might encounter during this process.
Set up an EBS volume for EC2
For EC2, you may have to configure an additional EBS volume so that MicroShift has enough storage space for your workloads. We can check to see that the volume is attached by running lsblk. You should see an output like this:
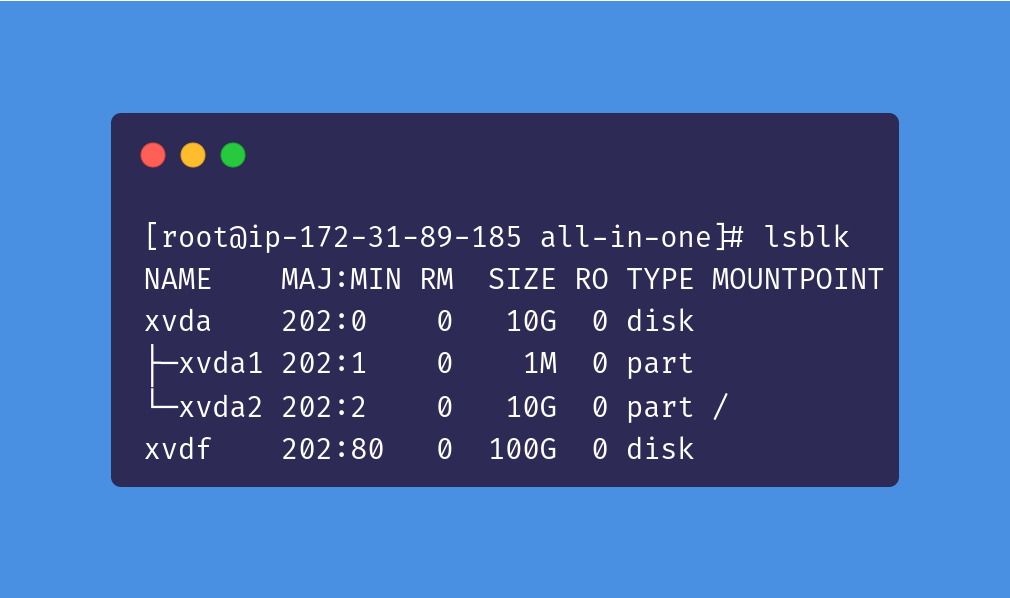
If this is your first time mounting the EBS volume, you will need to create a filesystem:
mount /dev/xvdf /mnt
mkdir /mnt/containers
Resolve DNF errors
While writing this article, I ran into an issue where dnf would give me the following error:
Unable to read consumer identity

This system is not registered to Red Hat Subscription Management. You can use subscription-manager to register.
If you find yourself running into this problem, there are a few potential solutions. First, you should run the following command to get around the subscription service:
sed -i 's/enabled=1/enabled=0/g' /etc/yum/pluginconf.d/subscription-manager.conf
sed -i 's/enabled=1/enabled=0/g' /etc/yum/pluginconf.d/product-id.conf
If that doesn't work, then you should try to delete the file /etc/yum.repos.d/root_dnf.repo:
rm /etc/yum.repos.d/root_dnf.repo
This FAQ has more info on this problem.
Conclusion
In this article, you have learned how MicroShift can be configured in RHEL 8 with NVIDIA's container toolkits in order to make GPUs available as a resource to containerized applications that rely on NVIDIA GPU acceleration. This was demonstrated by running a MicroShift container, which we used to run the CUDA vector addition sample. If you're interested, there's a video companion to this tutorial that you can follow along.
If you ever want to deploy GPU-accelerated applications with MicroShift, you now know the procedure you would need to follow:
- Ensure the NVIDIA drivers are installed
- Configure Podman to use
crunas the default OCI runtime - Install
nvidia-docker - Install the experimental version of
nvidia-container-toolkitfor cgroupsv2 support - Add the
nvidia-containerSELinux policies - Run the MicroShift all-in-one image
- Install the NVIDIA GPU Operator using Helm
If you've reached the end of this article and are still hungry for more MicroShift-related content, feel free to check out the MicroShift project homepage. For more MicroShift-related demos, check out the project's GitHub repository.
Last updated: November 17, 2023