This article discusses and demonstrates how you can implement duty rostering with Red Hat Business Optimizer. Business Optimizer, a component in Red Hat Decision Manager, is an AI (artificial intelligence) constraint solver that optimizes planning and scheduling problems with Decision Manager.
The duty rostering use case requires us to assign shifts to employees based on their respective duty—for example, cleaning, drying, delivery, and so on. The following hard constraint conditions must be met:
- Employees are only assigned one shift each day.
- Any shifts that require a specific employee duty are assigned to an employee who can perform that particular duty.
- Once an employee schedules a shift off, the shift is reassigned to another employee.
- No employee is assigned to a shift that begins less than 10 hours after their previous shift ends.
Additionally, there is a soft constraint that all employees should be assigned to the same number of shifts.
Planning the employee roster domain model
Before starting with the duty rostering implementation, let's first plan the resources we need to draw out a domain model, which is shown in Figure 1.
The required resource classes here are Employee, Duty, Timeslot, Shift, and DayOfRequest. These classes are problem facts that do not change during the planning.
The planning result class is ShiftAssignment. It holds information about an employee and their assigned shift representing a one-to-one relationship. This relationship is referred to as the planning entity that changes during solving. For example, the shift can be assigned to another employee. Employee is the planning variable that changes during planning.
The class that holds everything needed for planning is called the DutyRoster class. This is the planning solution that contains the dataset for the solver to solve. The DutyRoster class contains a list of employees that comprise the planning range. This is the set of possible planning values for a planning variable.

DutyRoster domain model.Just to share my thought process, here are the steps I took to create this data model:
- List out all the resources required to come out with the rostering.
- Identify the relationship between the resources. Normalize it by eliminating redundancy and inconsistent dependency.
- Create the class to hold information (such as shift, timeslot, or employee) about the rostering and what information within this class will change during the solving process. For this use case, it is the employee, as it will change depending on the rules defined.
- Create the class to hold all the information (e.g.,
DutyRoster). - Review the data model structure to see if it matches with the attributes required for rules (in this case, soft constraints and hard constraints). Repeat the process until everything is in place.
Use case implementation with Red Hat Decision Manager
We will develop our use case using Red Hat Decision Manager 7.7. After installation, log in to Decision Central and perform the following steps:
- Create a new project.
- Create data objects for
Employee,Duty,Timeslot,Shift,DayOfRequestas the problem facts, as you see in Figure 2.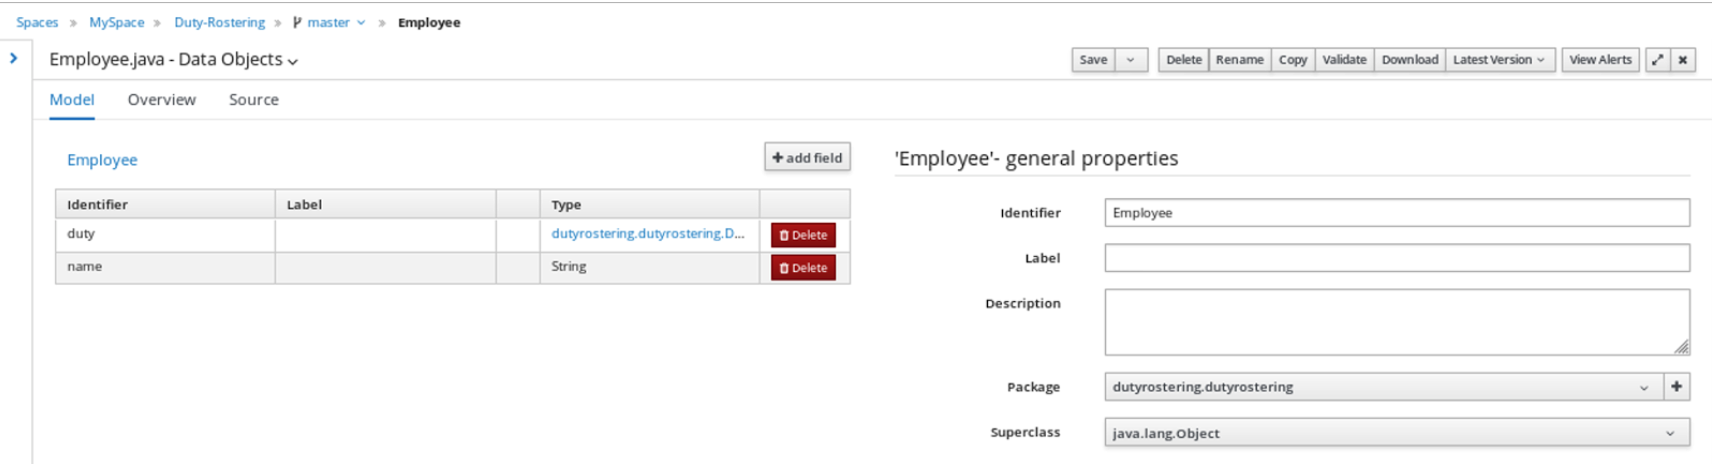
Figure 2: Using Decision Central to create a new project and data objects as the problem facts. - Create the data object for
ShiftAssignmentas the planning entity, as shown in Figure 3.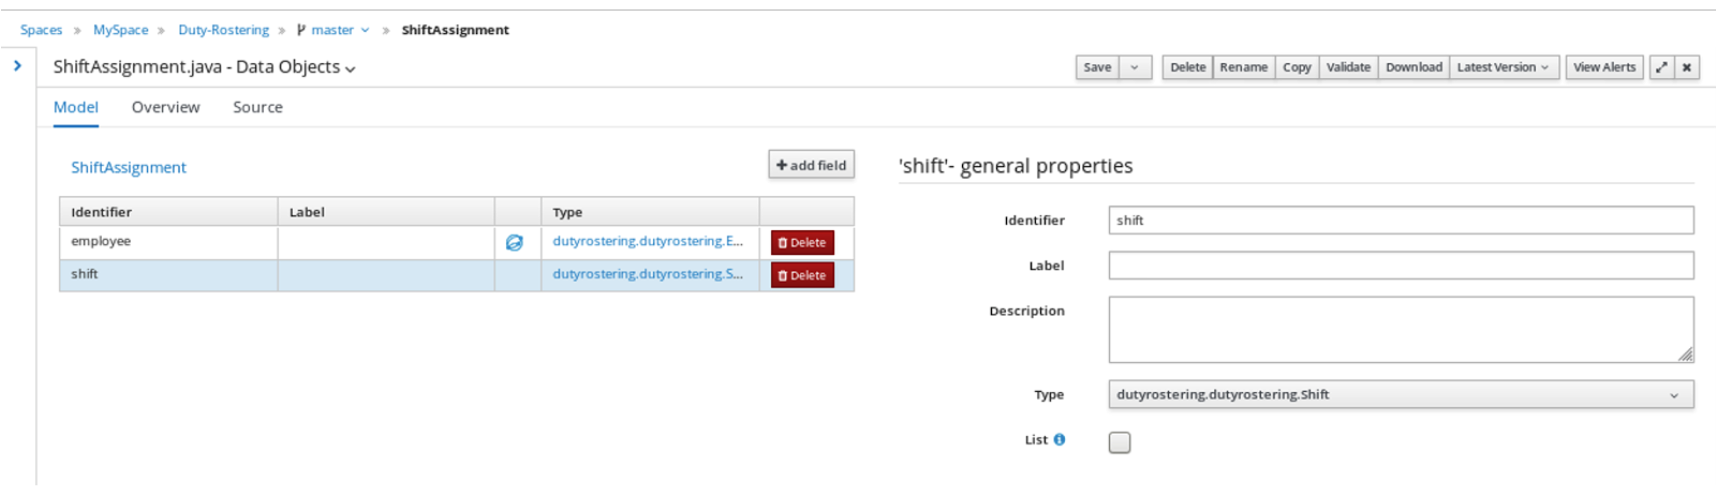
Figure 3: Create the data object for ShiftAssignmentas the planning entity. - Create the data object for
DutyRosteras the planning solution, as shown in Figure 4. Click theemployeeListattribute's corresponding “blue planet" icon, select the Planning Value Range Provider checkbox, and assign the Identifier asemployeeRange.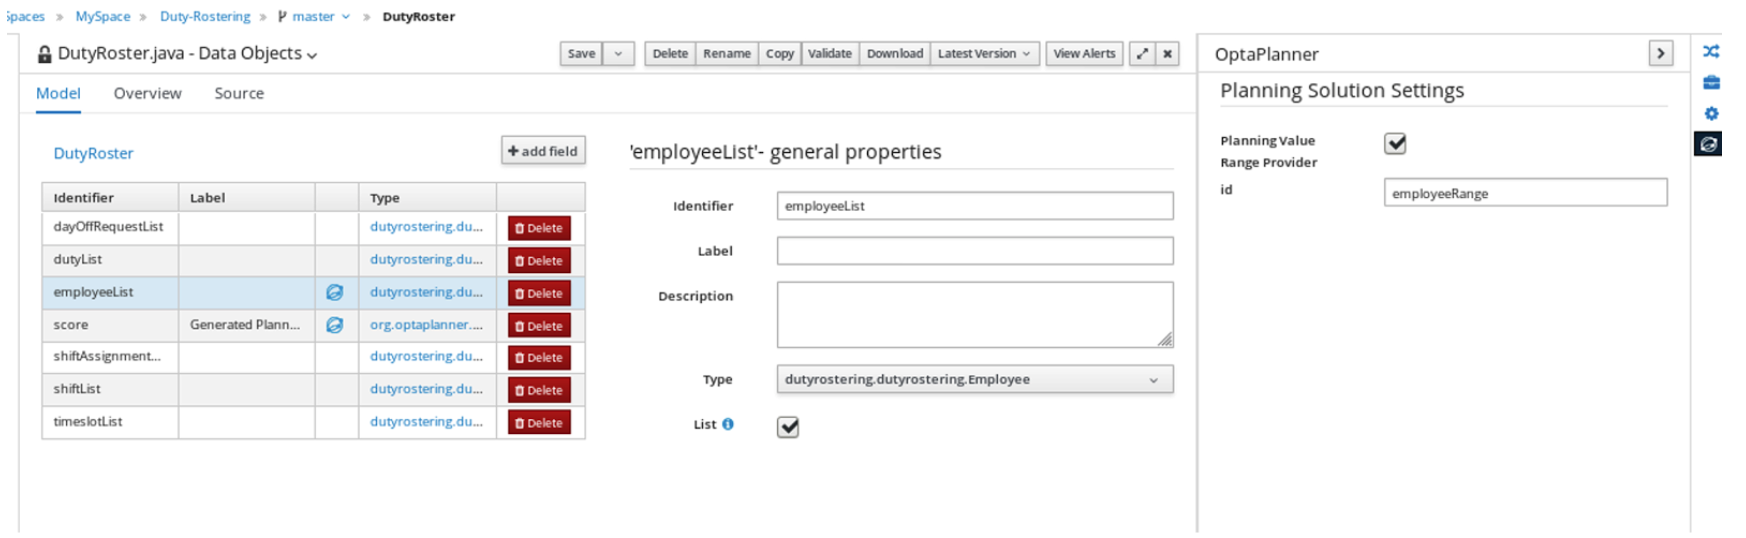
Figure 4: Create the data object DutyRosteras the planning solution. - Reopen
shiftAssignment. Click theemployeeattribute's corresponding blue planet icon, select the Planning variable checkbox, and assignemployeeRangeas the Value Range Id. See Figure 5.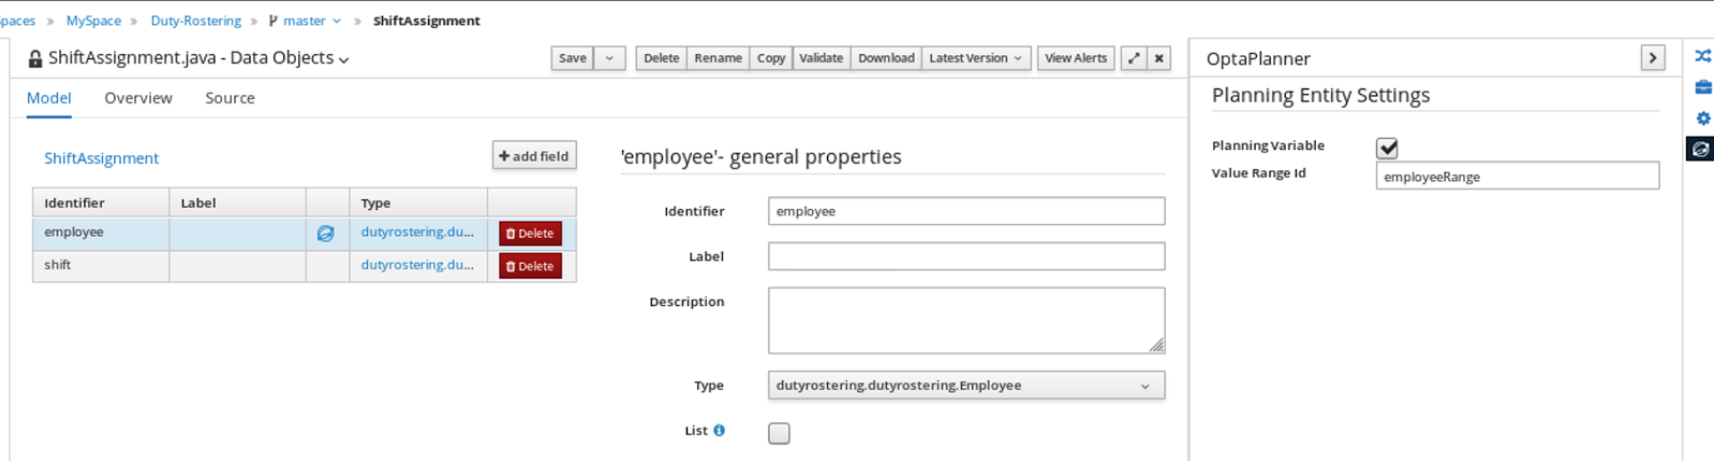
Figure 5: Select the planning values (planning variables) and the value range ID. - Define the third constraint: If the employee requested a shift off, they will not be assigned to the shift. Assigning a negative value to a hard score means that it must not be broken. See Figure 6.

Figure 6: Create and assign DayOffRequestsas hard constraints. - Define the fifth constraint (Figure 7): All employees are assigned the same number of shifts. Ideally, this soft constraint should not be broken.
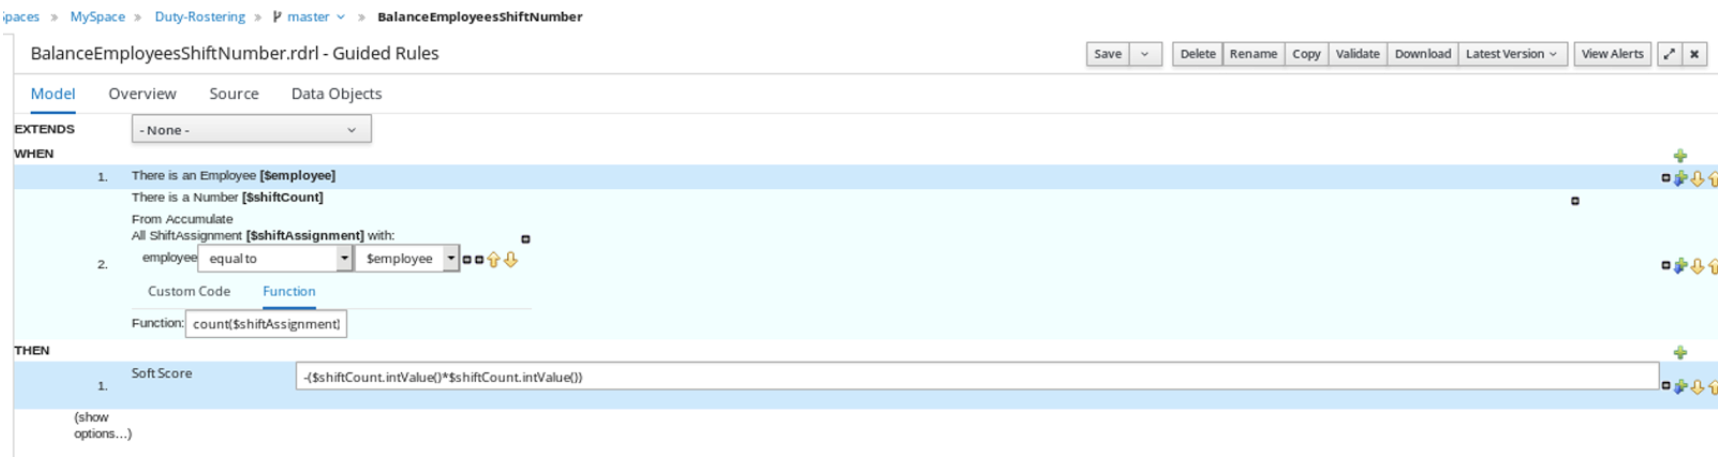
Figure 7: Create and balance the employee shift number as soft constraints. - Add the Solver configuration on the Score Director Factory page shown in Figure 8. This configuration uses the default algorithm, construction heuristic, and late acceptance.
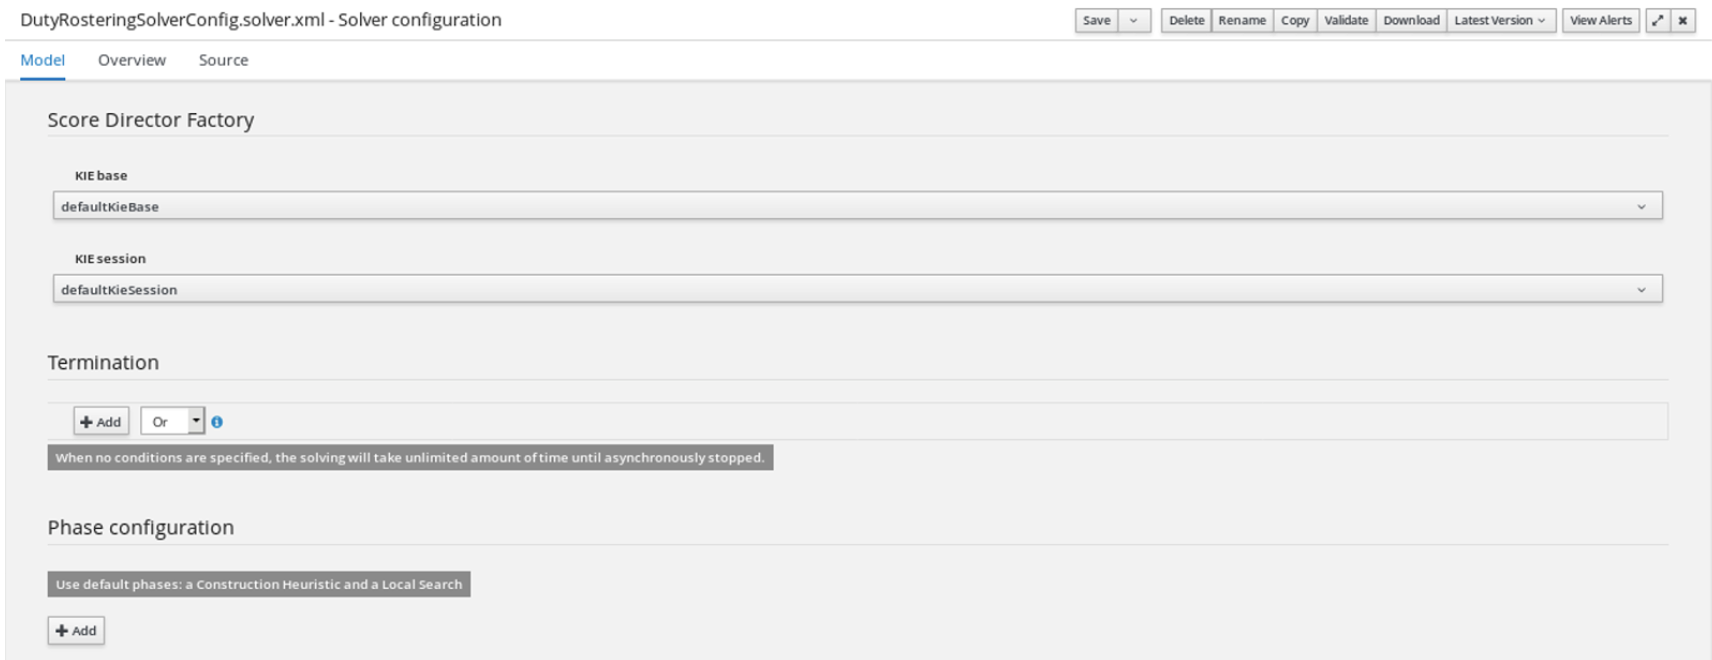
Figure 8: Add the Duty Roster Solver configuration on the Score Director Factory page. - Click Build. Make sure the build is successful.
- When the build is successful, click Deploy. Make sure the deployment is successful.
- Get the URL of the rule on the Kie Server.
-
Navigate to the execution servers. Get the URL as
<Copied URL>(see Figure 9).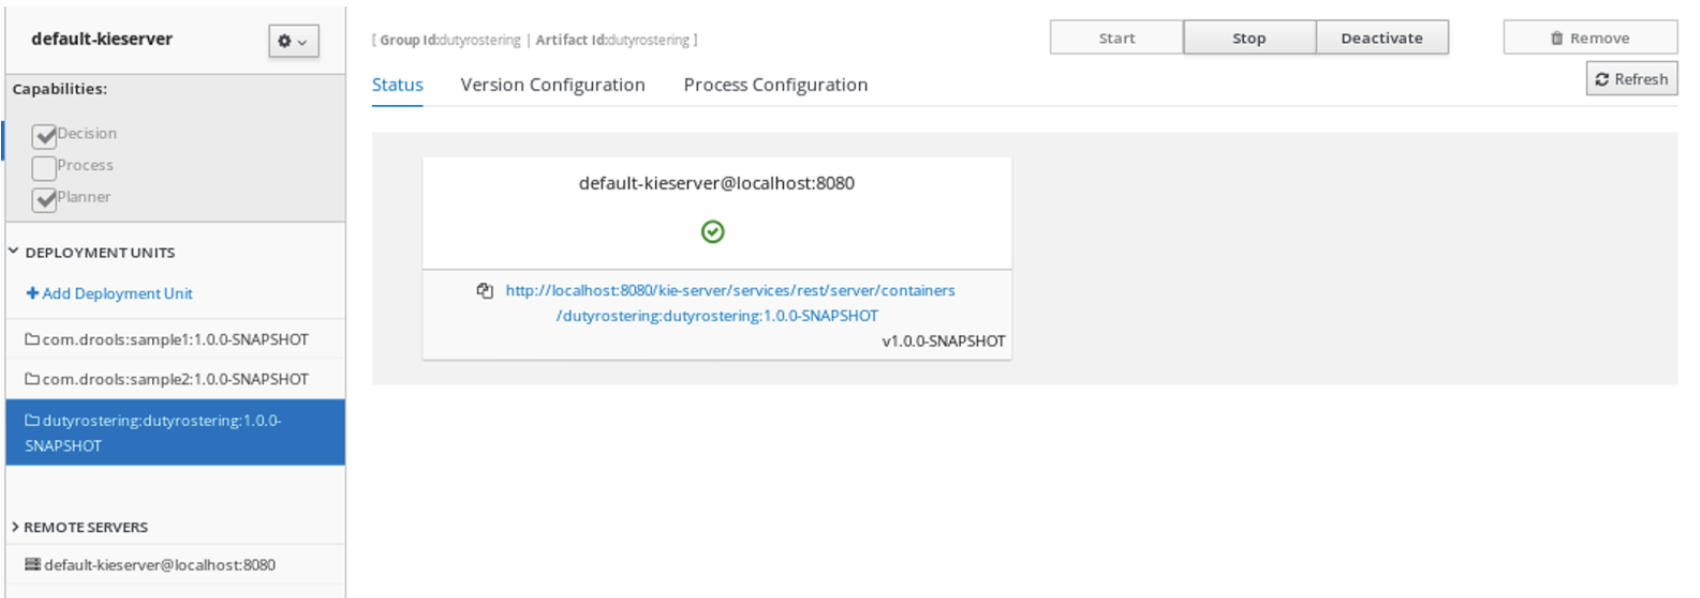
Figure 9: Get the URL from the Kie Server. - Open Postman. Open a tab with the URL as <Copied URL>/solvers/<Solver name> and use the PUT method to specify and publish the body, as shown in Figure 10.
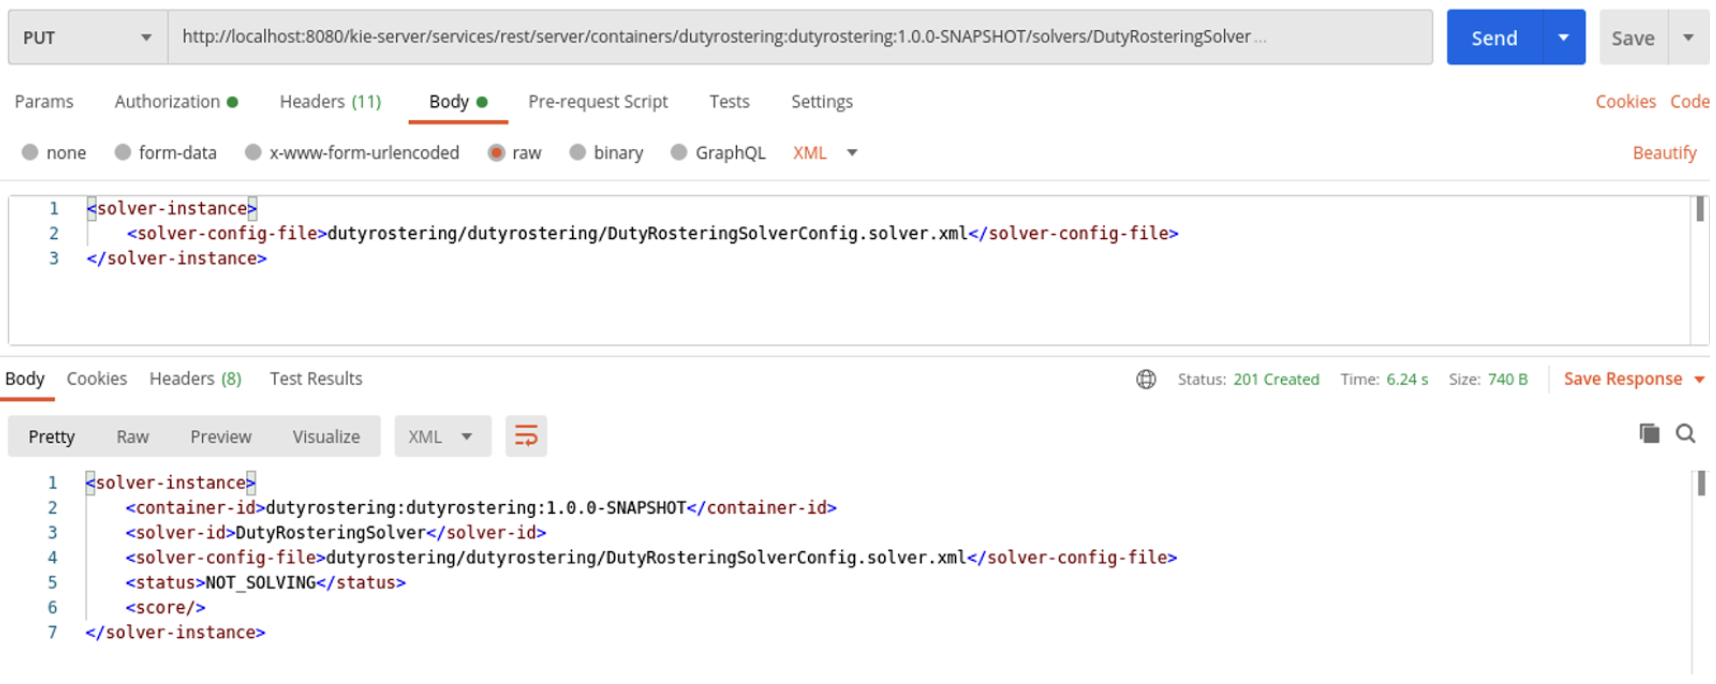
Figure 10: Open the URL and use the PUT method to specify and publish the body. - Open another tab with the URL as
<Copied URL>/solvers/<Solver name>/state/solvingand use the POST method. This posts theDutyRosterclass in XML format—that is, the content of the planning solution (see Figure 11).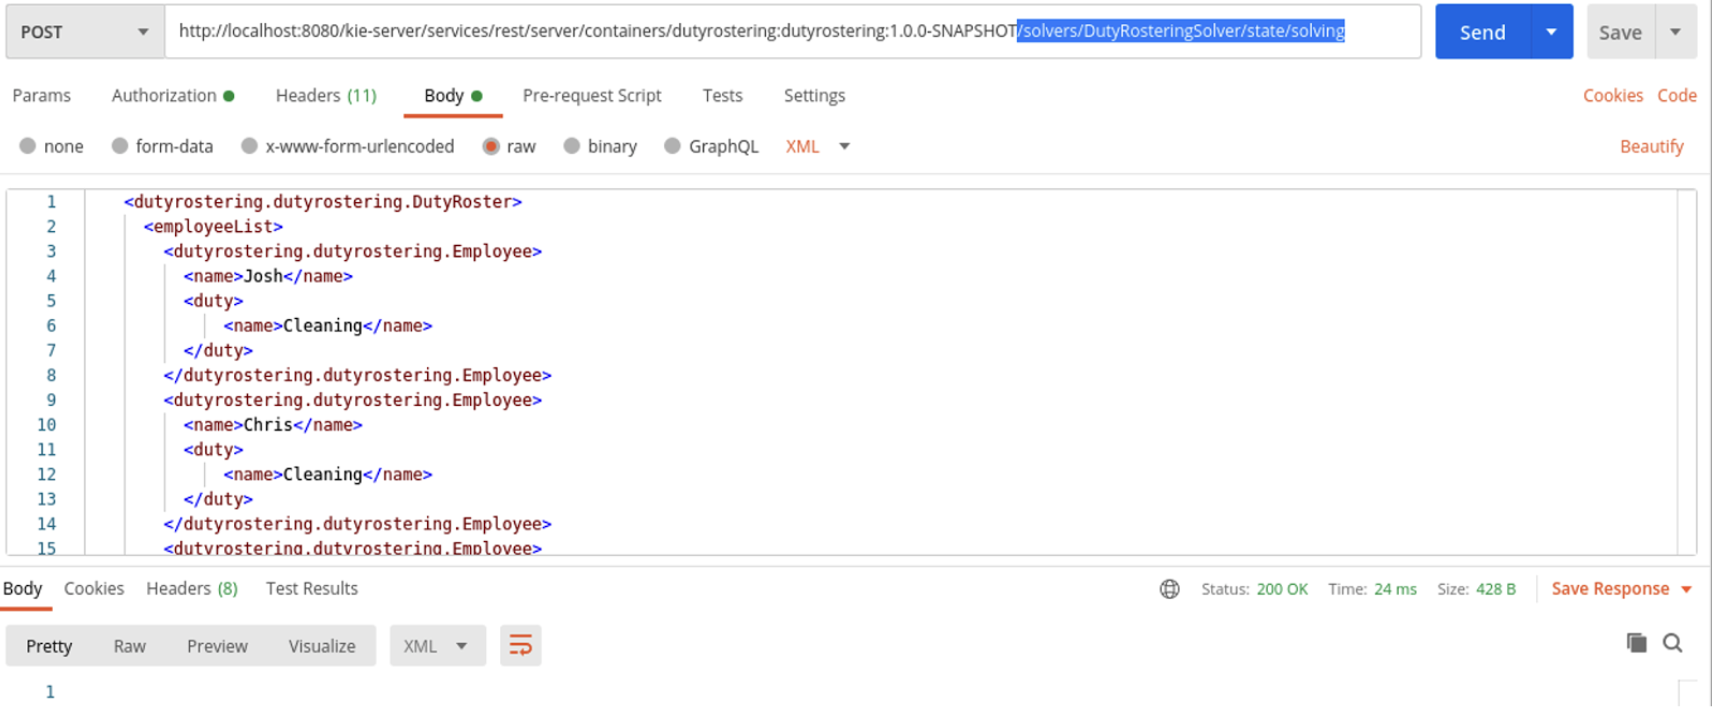
Figure 11: Open the URL and use the POST method to post the content of the planning solution. - Open another tab with the URL as
<Copied URL>/solvers/<solver name>/bestsolutionand use the GET method, as shown in Figure 12. This returns the result from the planning engine.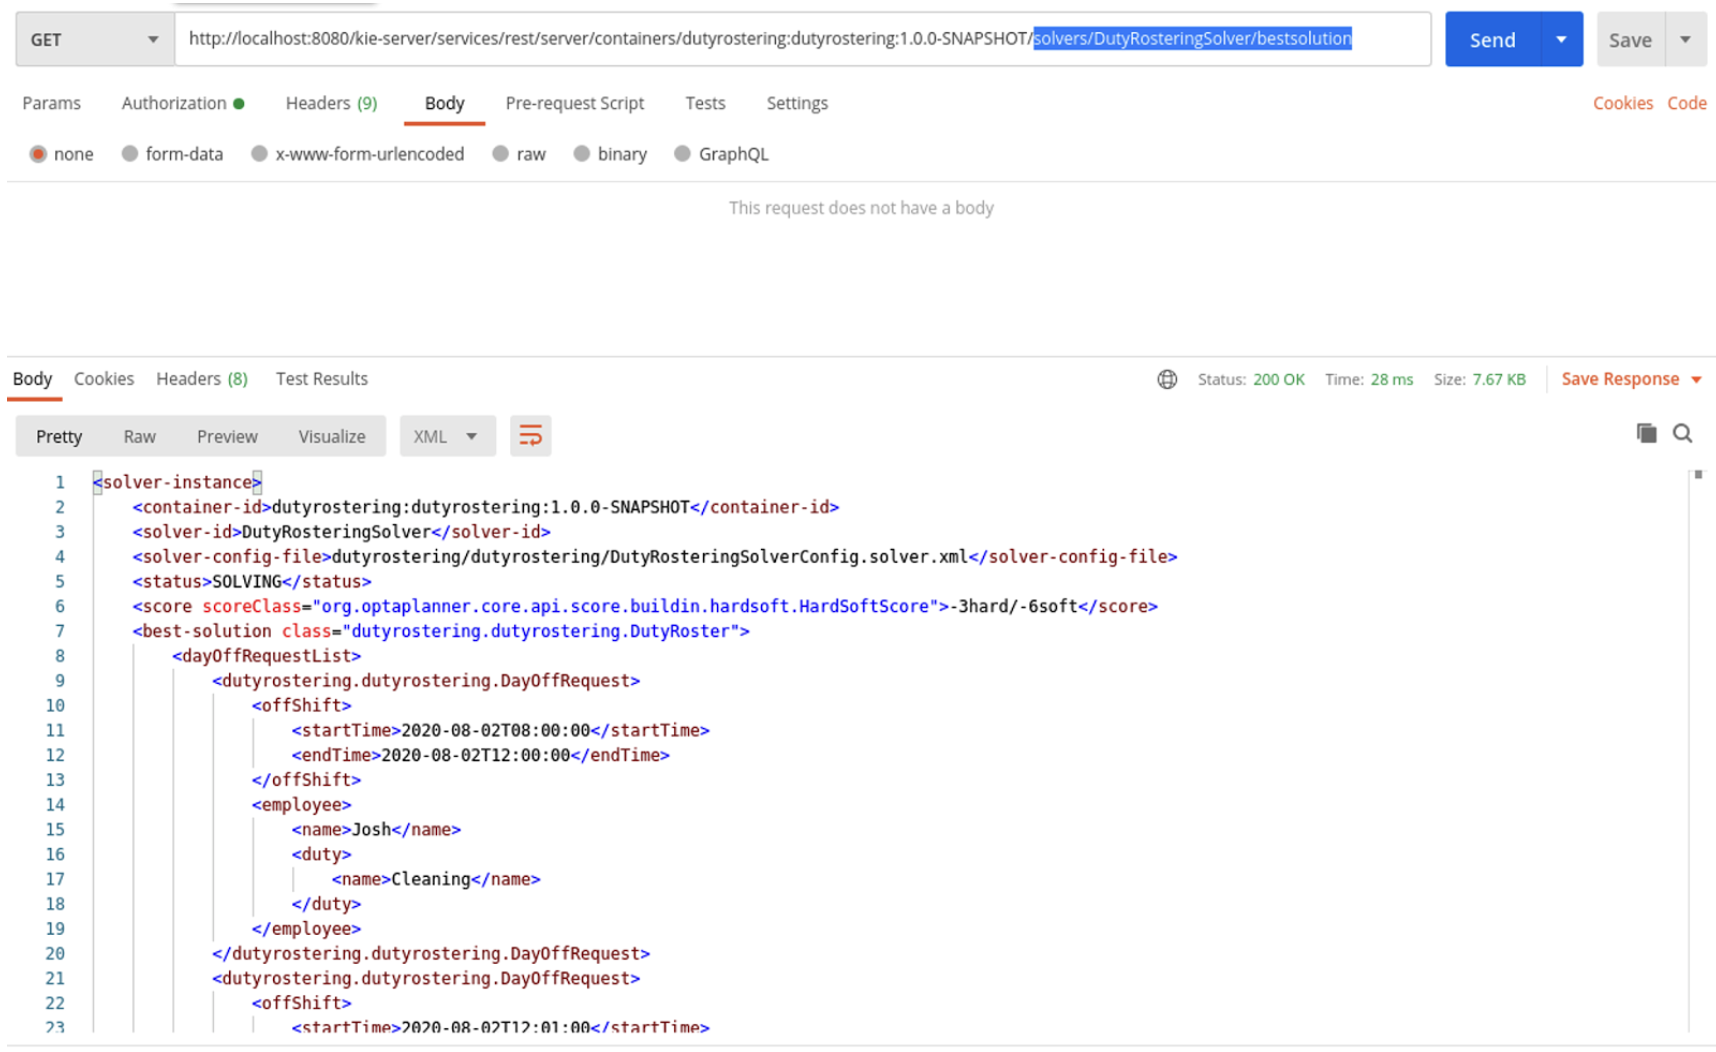
Figure 12: Open the URL and use the GET method to return the result from the planning engine.


Conclusion
See the Duty Roster project on GitHub for the completed project and sample input files.
Last updated: January 22, 2024