Page
Step-by-step guide to MTC installation and configuration
Explore cluster migration with this step-by-step guide. We demystify the details of installing and configuring MTC, from setting up MTC in the control and remote clusters to integrating the replication repository.
In order to get the full benefit from taking this lesson, you need:
- A good understanding of the OpenShift Container Platform and its components, particularly ROSA.
- Proficiency in using the OpenShift command-line interface (CLI) for executing commands and managing clusters.
- Knowledge of AWS cloud infrastructure and concepts.
In this lesson, you will learn:
- The importance of using consistent versions of MTC on both the source and destination clusters for successful migration.
- How to prepare prerequisite resources, such as ROSA HCP and ROSA classic clusters, as well as an AWS S3 bucket.
- Step-by-step instructions for installing MTC on the control (host) cluster.
- The process of installing MTC on remote clusters, gathering essential information, and configuring them within the control cluster.
- The process of configuring a replication repository within the control cluster.
MTC installation
For the migration to succeed, both the source cluster and the destination cluster must use the same version of MTC.
- MTC 1.7 supports migrations from OpenShift Container Platform 3.11 to 4.8.
- MTC 1.8 only supports migrations from OpenShift Container Platform 4.9 and later.
If you are planning to follow our migration exercise, please prepare the following resources as prerequisites in the same Availability Zone (AZ) in AWS.
- ROSA HCP cluster
- ROSA classic cluster
- AWS S3 bucket Ready your Access Key and Secret Access Key required to access the S3 bucket
- Latest OpenShift CLI (Using older versions may not work properly)
In this example, we have the following resources (shown in Figure 1) already created in the same AZ in AWS:
- Host (Control) cluster: A single AZ ROSA HCP cluster with OpenShift version 4.15.0 and 2 worker nodes.
- Remote cluster: We need, at minimum, a source cluster and a target cluster. Our source cluster is a multizone ROSA classic cluster with OpenShift version 4.14.13 and 3 worker nodes. We will use our control cluster as the target cluster.
- Replication repository: An AWS S3 bucket.
OpenShift CLI: Version 4.15
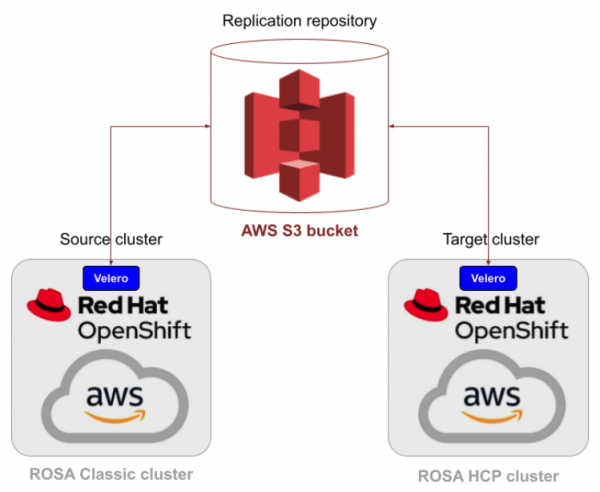
Figure 1: AWS resource required for migration.

Install MTC on the Host (Control) cluster
Our control cluster is a single AZ ROSA HCP cluster with OpenShift version 4.15.0 and 2 worker nodes.
To install MTC on the control cluster, log in as
cluster-admin. In the ROSA web console, click Operators → OperatorHub. Use the Filter by keyword field to find the Migration Toolkit for Containers Operator (Figure 2).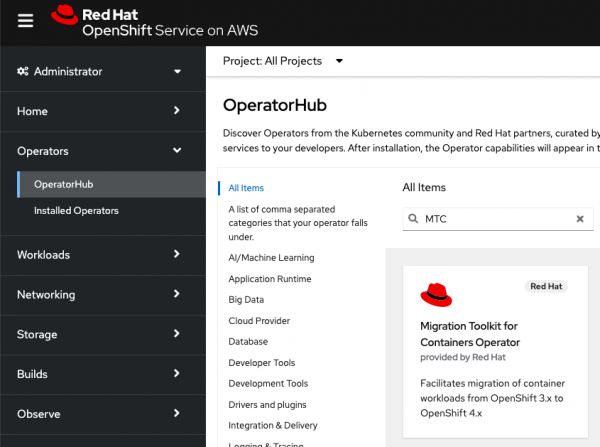
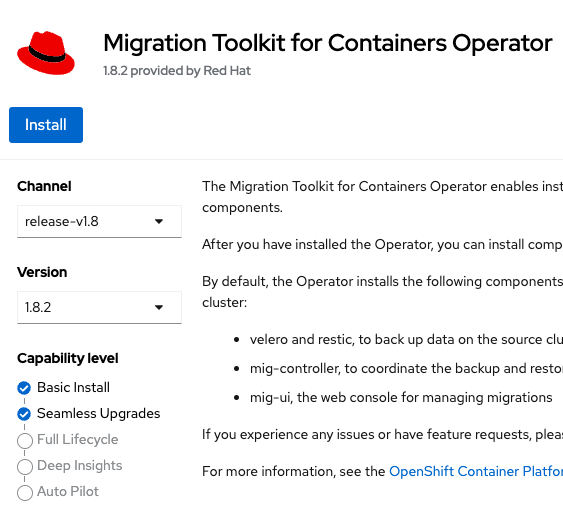
Figure 2: Migration Toolkit for Containers (MTC) Operator in the OperatorHub. Select the Migration Toolkit for Containers Operator. We will install Version 1.8.2 in the release-v1.8 channel (Figure 3).

Figure 3: MTC Version 1.8.2 with default settings. Click Install. In the next screen, keep the default settings and click Install. Make sure the installation is completed (Figure 4).

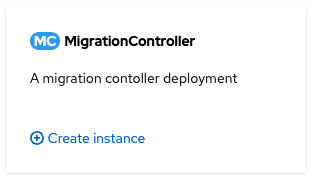
Figure 4: Confirmation of successful installation of MTC. After you have installed the operator, you can install the necessary components by creating a MigrationController Custom Resource (CR). Click View Operator in the above dialog box or on the Installed Operators page, select the Migration Toolkit for Containers operator. Under Provided APIs, locate the MigrationController tile (Figure 5), and click Create Instance.

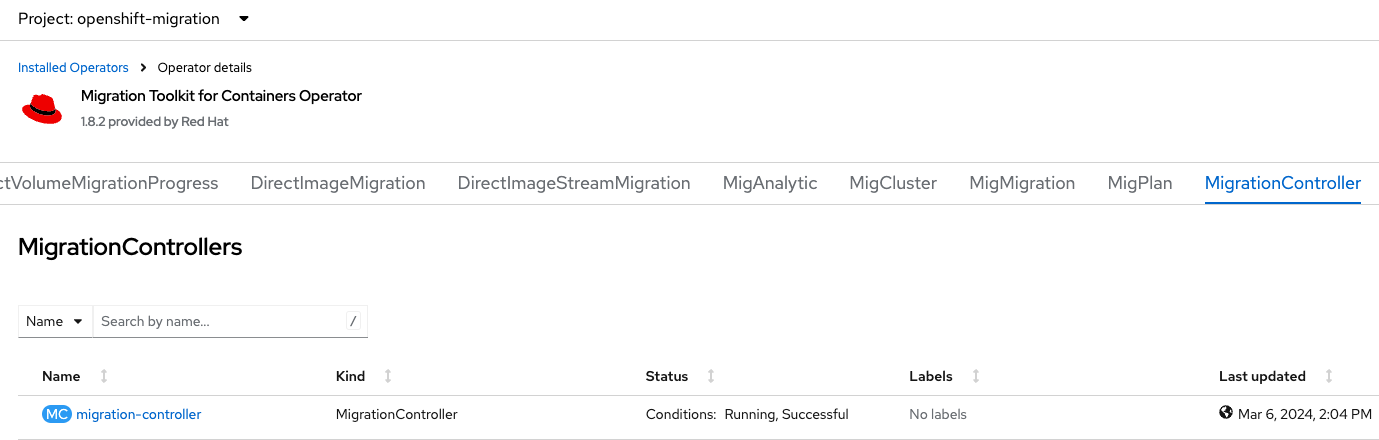
Figure 5: MigrationController appearing as MTC API. On the next screen click Create. You can see MigrationController settings by selecting the MigrationController tab in the Migration Toolkit for Containers Operator page (Figure 6) then selecting the instance created.

Figure 6: MigrationController tab selected in MTC Operator page. The operator installs the necessary components on the cluster in the
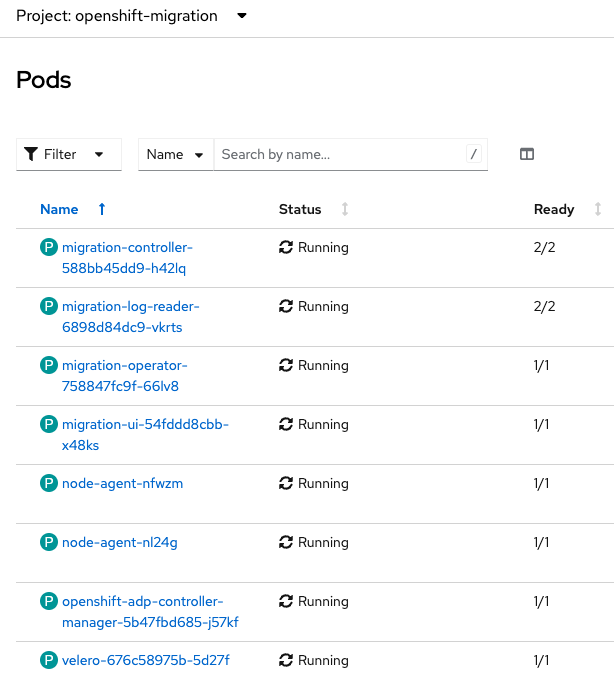
openshift-migrationproject. In the console, select Workloads → Pods to verify that the MTC pods are running in theopenshift-migrationproject (Figure 7).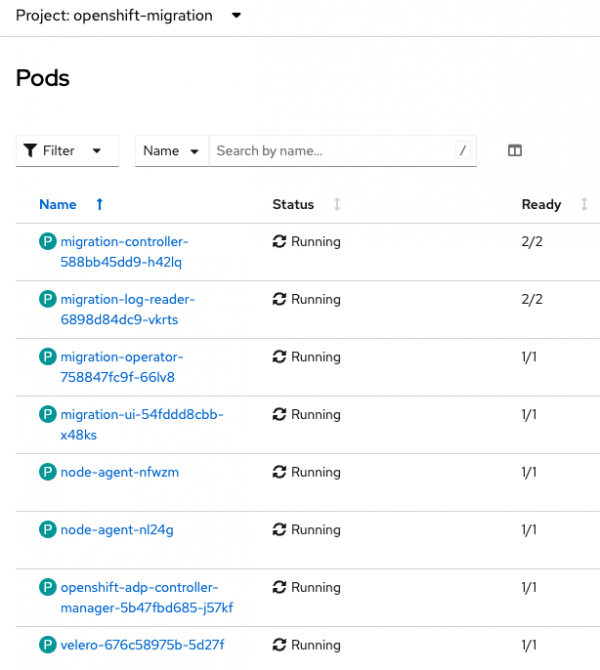
Figure 7: MTC pods running in the openshift-migration project. Note that each worker node has a node-agent pod.


Access MTC console in the control cluster
Since we will use this as our control cluster, we will do all necessary configurations and operations in this cluster.
In the console, select Networking → Routes under the
openshift-migrationproject.Make sure that you can access the MTC console by clicking Location, the URL, on the migration route in the
openshift-migrationproject (Figure 8).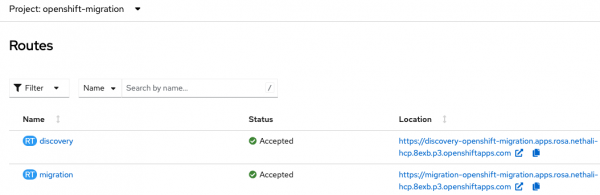
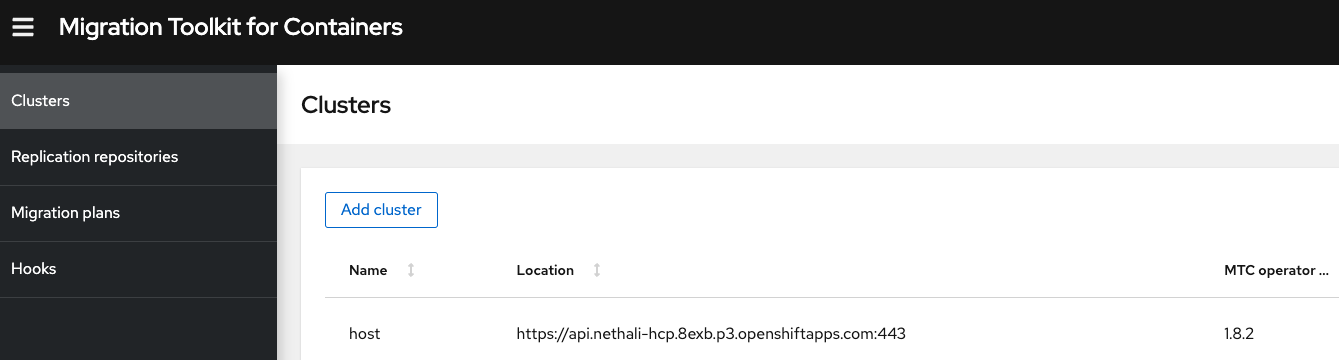
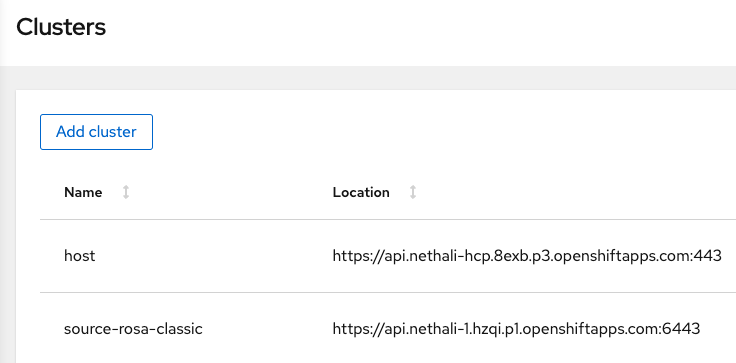
Figure 8: MTC migration route in the openshift-migration project. In the MTC console, note that our cluster is already visible as
hostunder Clusters (Figure 9). This cluster cannot be edited or removed. Although this is our Host (Control) cluster, we can even use it either as a source or a target cluster. In our example, we will use this as our target cluster.
Figure 9: Clusters in MTC console.

Install MTC on remote clusters
Since we will use the Host (Control) cluster as our target cluster, now we need a source cluster. We will use a multizone ROSA Classic cluster with OpenShift version 4.14.13 and 3 worker nodes as our source cluster.
Install the same MTC version in the source cluster following the same process as above. After the installation, check if the Operator installs the necessary components on the cluster in the openshift-migration project by verifying that the MTC pods.
Info alert: All the components necessary for the control cluster are installed even in the remote clusters. But we practically don’t use control cluster capabilities available in remote clusters.
Gather remote cluster Information
Now we have to let our control cluster know about remote clusters. Since our target cluster is already available in the control cluster as host, let’s add the source cluster with its information. We have to collect the following necessary remote cluster information:
- URL of the cluster's API server
- Service account token
- URL of the cluster internal image registry (optional)
Log into your ROSA classic cluster as the administrator using the URL of the cluster's API server:
oc login <cluster API url> --username <username> --password <password>Note that you have a service account called migration-controller in the openshift-migration namespace:
oc get serviceaccounts -n openshift-migrationExample output:
NAME				    SECRETS	AGE
...
migration-controller	1		6h43m
...
Let’s request a token to authenticate the service account migration-controller in the openshift-migration namespace:
oc create token migration-controller --duration=8760h -n openshift-migrationNote: Make note of the very long service account token you have generated. Save it somewhere and we will provide it to the Control cluster so that it can access this cluster.
For the direct image migration, the internal registry has to be exposed so that it can be accessed externally. In ROSA, the internal registry is exposed by default. You can check it as:
oc get config.imageregistry -n openshift-image-registry -o yaml | grep defaultRouteThe output should be:
defaultRoute: trueThe router to the internal registry is in the openshift-image-registry project. You may find the route URL as below:
oc get route -n openshift-image-registryExample output:
NAME               HOST/PORT
default-route      default-route-openshift-image-registry.apps.ne...openshiftapps.com
Now we have the necessary remote cluster information:
- URL of the cluster's API server
- Service account token
- URL of the cluster internal image registry (optional)
Configure remote clusters in a control cluster
Now let’s add the remote clusters in the controller (host) cluster. Since the target cluster is already there we need to add only the source cluster.
Go to the MTC Console of the Control Cluster. Note that our cluster is already visible as
hostunder Clusters. To add our source cluster, click Add cluster (Figure 10).
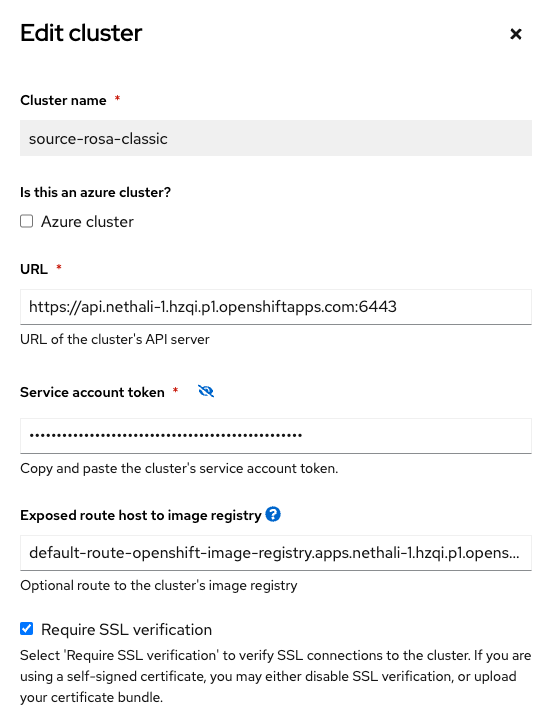
Figure 10: Add cluster in MTC console. On the next screen, provide all necessary source cluster information collected previously (Figure 11).

Figure 11: Add source cluster information in MTC console. Click Add Cluster. If the provided information is right, the cluster will be added successfully (Figure 12) and the status will be connected.

Figure 12: All clusters added successfully in MTC console.

Configure replication repository in a control cluster
The replication repository is an object storage accessible by all clusters and used for copying images, volumes, and Kubernetes objects during indirect migration or for Kubernetes objects during direct volume migration or direct image migration. So, the replication repository is always used during the migration process.
We will use AWS S3 storage as our replication repository. Our S3 bucket is private and we have the access key and the secret access key to access the S3 bucket. MTC transfers data from the source (ROSA classic) cluster to this repository then from the repository to the target (ROSA HCP) cluster. In this specific example, all of our clusters and the S3 bucket are in the same region.
Now let’s add the replication repository in the controller (host) cluster.
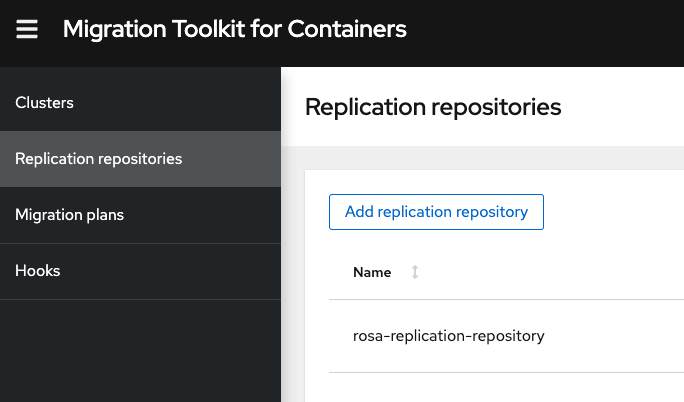
Go to the MTC Console of the control cluster. Select Replication repositories and then click the Add replication repository button (Figure 13).
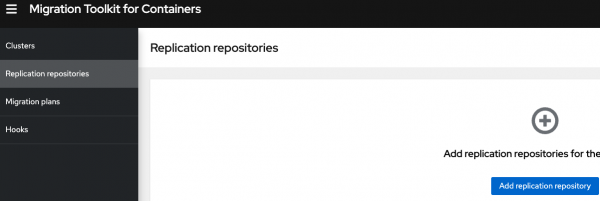
Figure 13: Add replication repository in MTC console. Fill in the necessary information in the next screen (Figure 14). Note that we already have the S3 bucket name as
rosa-mtc-bucket, the access key, and the secret access key.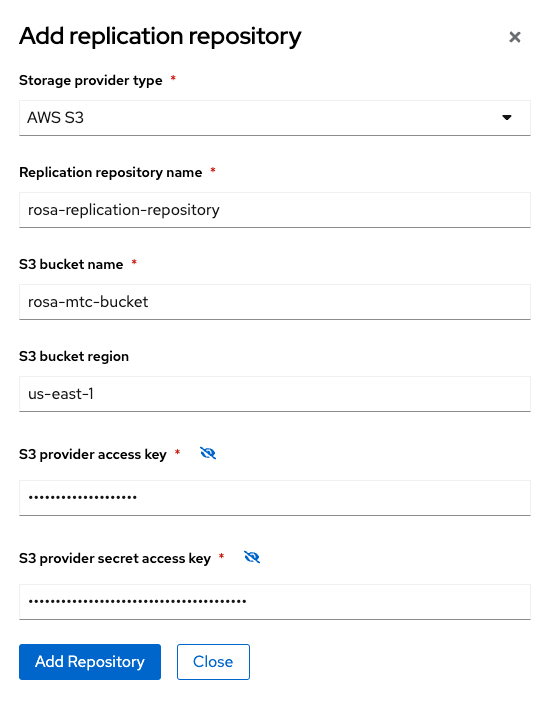
Figure 14: Add replication repository information in MTC console. Fill in the mandatory fields and click Add replication repository. Once all configurations are validated, your new replication repository will be added as below (Figure 15).
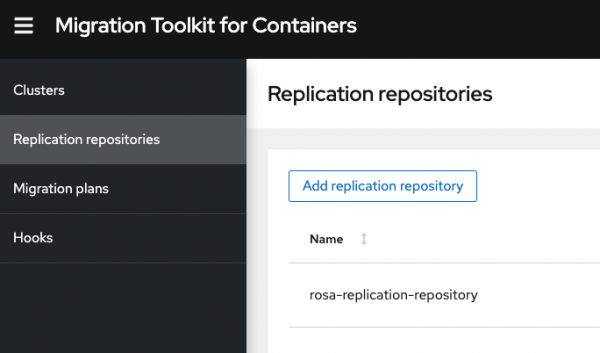
Figure 15: All replication repositories added successfully in MTC console.