Page
Automate operations with Tilt and the Developer Sandbox

The first step in our path is to install Tilt and access the Developer Sandbox.
In order to get the full benefit of this lesson, you will need:
- A local development environment
- A Developer Sandbox account
- A container image registry
In this lesson, you will:
- Install Tilt
- Access the Developer Sandbox
Overview
When it comes to software development, understanding the development lifecycle is crucial. The development lifecycle is the process software goes through from its initial conception and development to its deployment and maintenance. The first phase is known as the inner loop, and the second (when the application is deployed) is the outer loop. Tilt is a tool that automates the inner-loop operations thereby improving the developer experience. Figure 1 illustrates both phases.

The inner loop phase
Let’s focus on the inner loop. If the application is simple enough, it’s easy to develop, test, or even deploy it locally (for example, using Quarkus dev mode). A developer would want to test the application manually or make a change to the code and see this change reflected automatically to the running instance. But nowadays, these applications are containerized and deployed to Kubernetes. So what works locally might not work when containerized (i.e., permissions, configuration, directory layout).
Moreover, sometimes it’s impossible to deploy the application locally because of the complexity of the dependencies (i.e., databases, other services, third-party services). So you might want to use a personal Kubernetes cluster to test the application.
At this point, to test the application in a cluster, the developer must compile and package the application, containerize (either with a Dockerfile or using a tool like Jib) and push it to the registry, then apply the Kubernetes manifests to deploy the application to the Kubernetes cluster.
Consider the following example:
mvn clean package
docker build -t quay.io/lordofthejars/hello:latest .
docker push quay.io/lordofthejars/hello:latest
kubectl apply -f kubernetes.yaml
The same process should be executed for any change developed in the code to be tested in a cluster. Although the process is straightforward, the developer needs to repeatedly execute every time a change needs to be tested.
Tilt automates inner loop operations
Tilt simplifies this process by automation. For every change detected on a specific directory, Tilt will execute commands to compile, containerize, push, and deploy the application. To install Tilt, I recommend following an alternative method described in this installation guide because there is no local Kubernetes cluster used.
To validate the correct installation of Tilt, run the following command in a terminal window:
tilt versionAnd the output should show you the installed version of Tilt, such as this:
v0.32.1, built 2023-04-14Example: Kubernetes cluster and Quarkus application. We will use a remote Kubernetes cluster and a Quarkus Java application for this example. Tilt also works with a local Kubernetes cluster, such as KinD. You only need to adapt the configuration parameters of Tilt.
How to register for the Developer Sandbox
The Developer Sandbox is a free Kubernetes cloud environment in a shared, multi-tenant OpenShift cluster preconfigured with developer tools. The Developer Sandbox is active for 30 days and renewable once it expires.
IMPORTANT : If you already have a Kubernetes cluster installed locally or have remote access, you can skip this step.
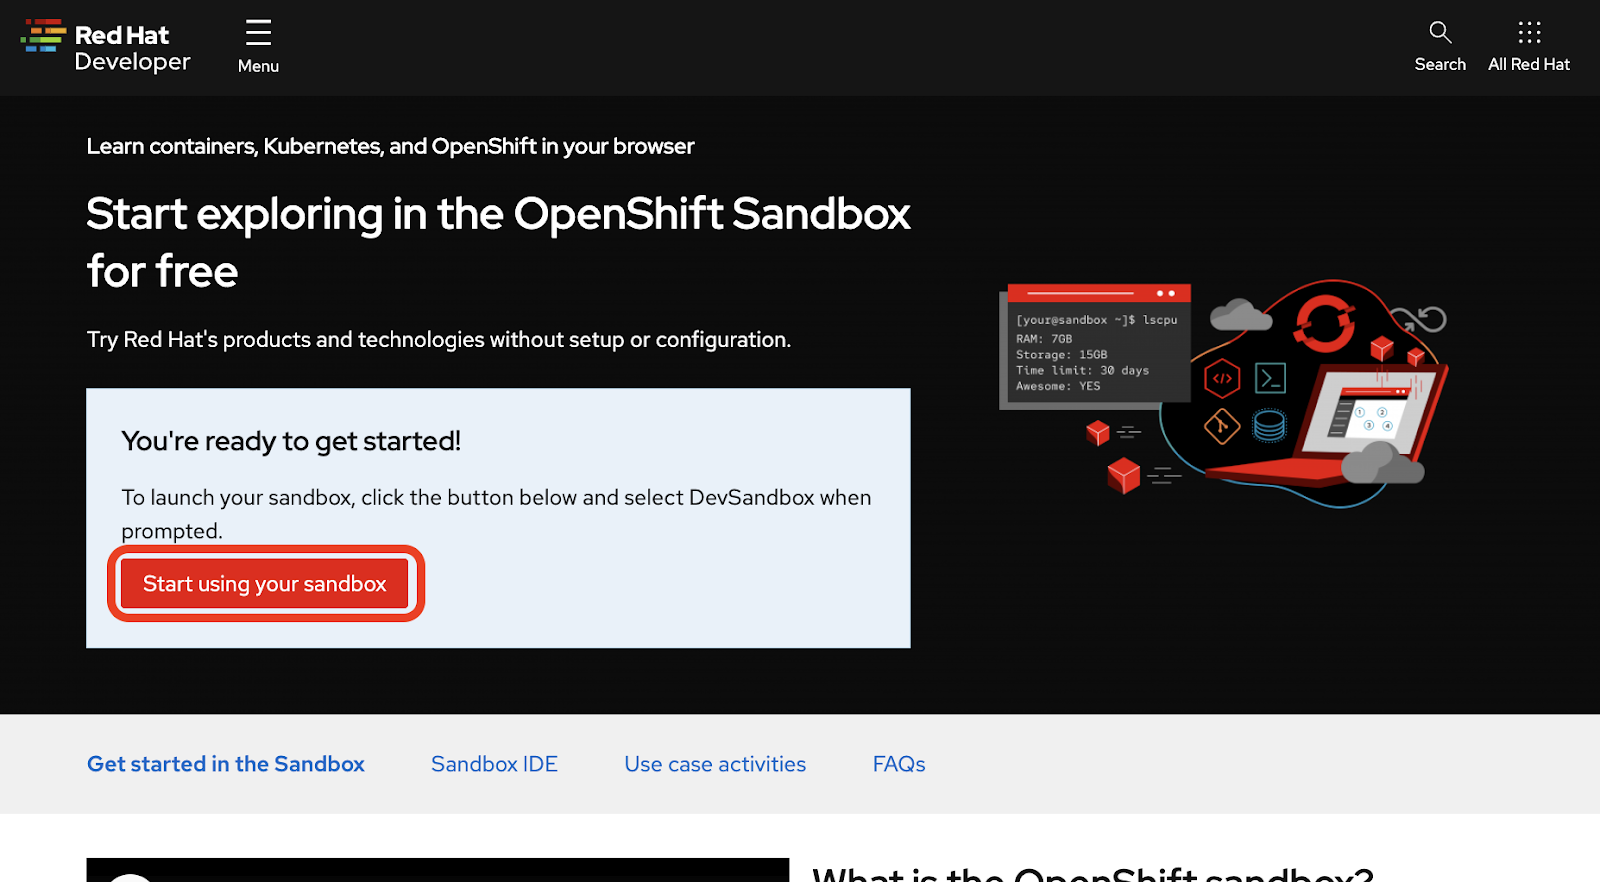
To register for the Developer Sandbox, click the red button, Start your sandbox for free, as shown in Figure 2.

Log in with your existing Red Hat account or create a new one. Follow the instructions on the screen. Then you will be redirected to the Developer Sandbox page again, but this time, you should see the Start using your sandbox button (Figure 3).
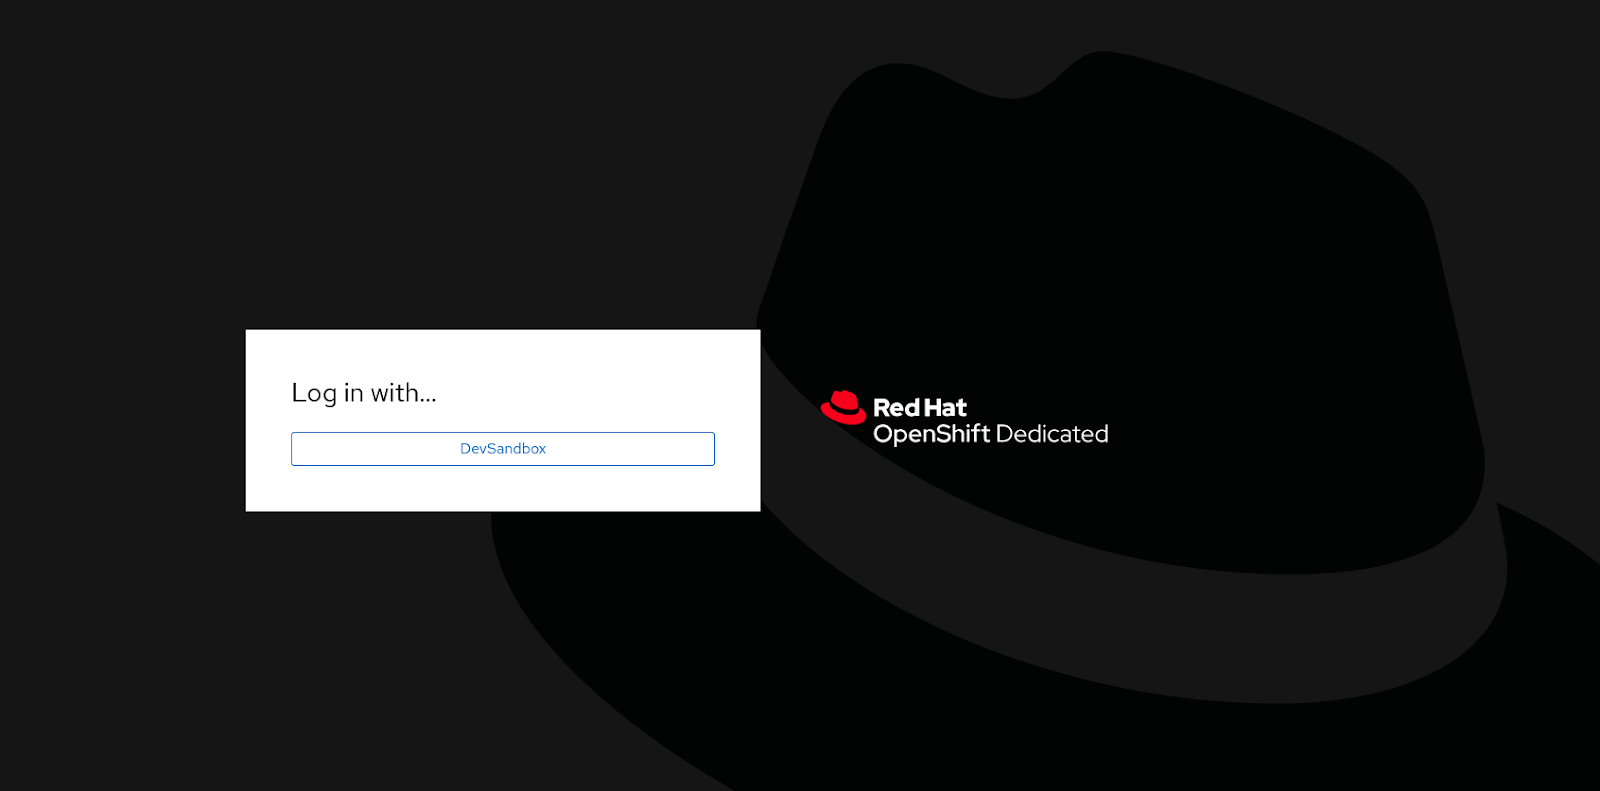
On the OpenShift login screen, click the DevSandbox button (Figure 4).
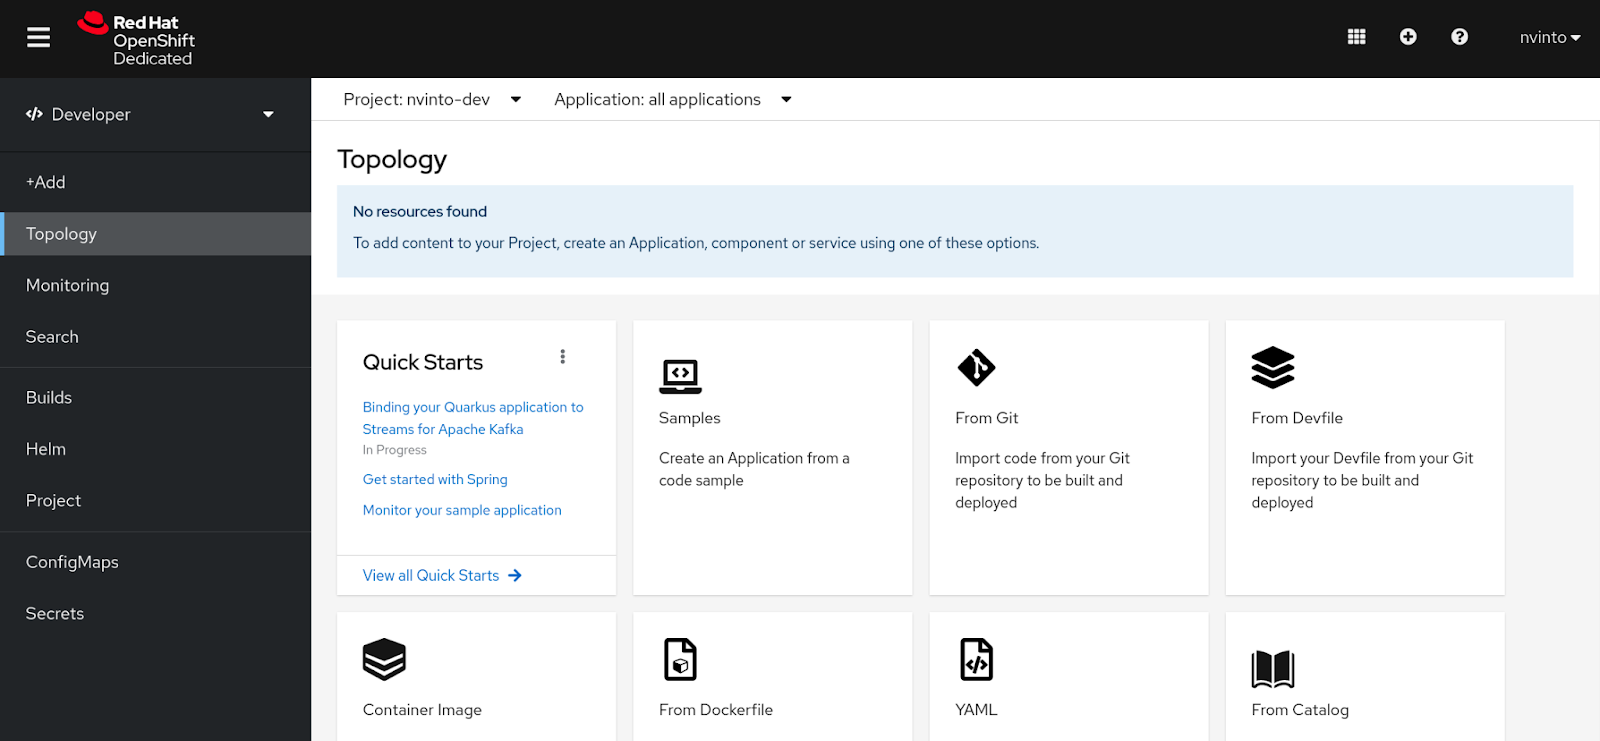
This opens your new OpenShift cluster console (Figure 5).
Now you can log into the cluster from your computer. The first step is to download the oc tool to execute the login command and configure the Kubernetes context locally.
Click the question mark icon in the top-right corner, and select the Command line tools option from the menu (Figure 6).
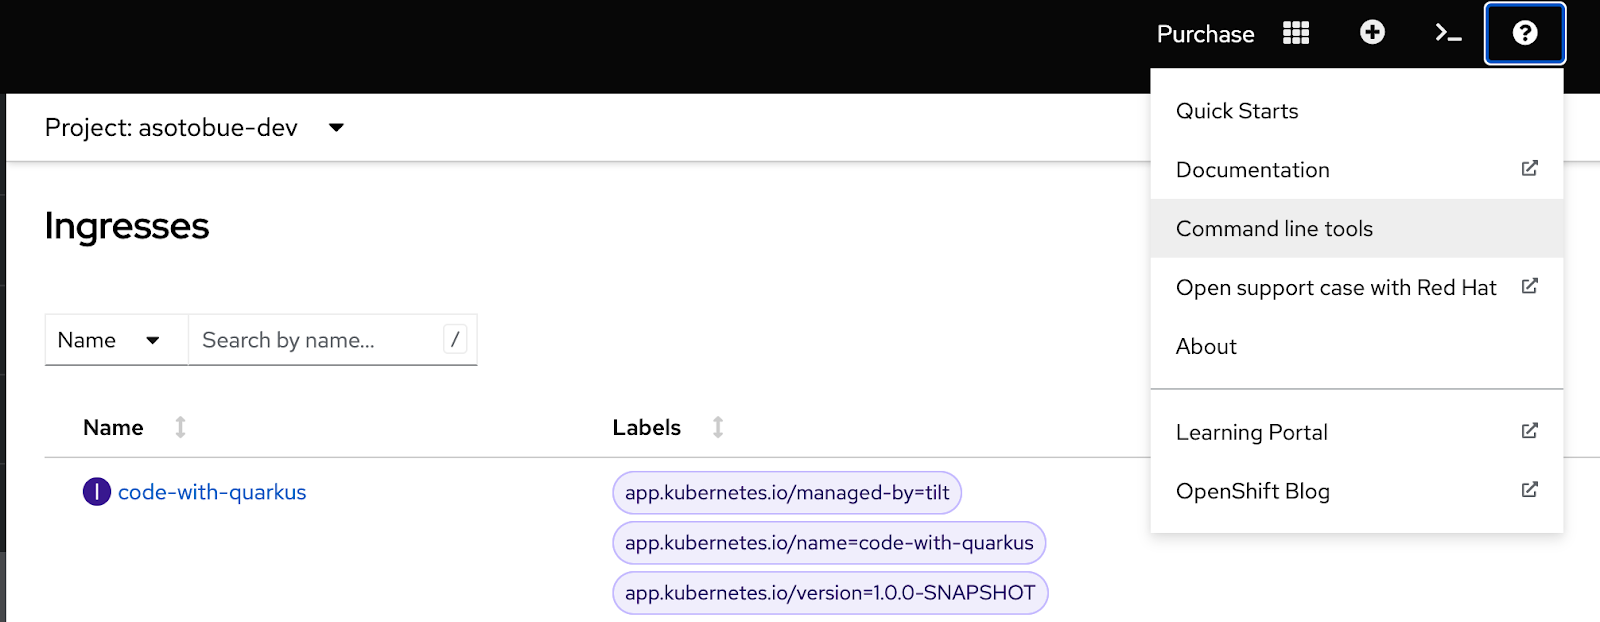
Then select the oc version, depending on your platform. Download, copy, and add it to your PATH variable.
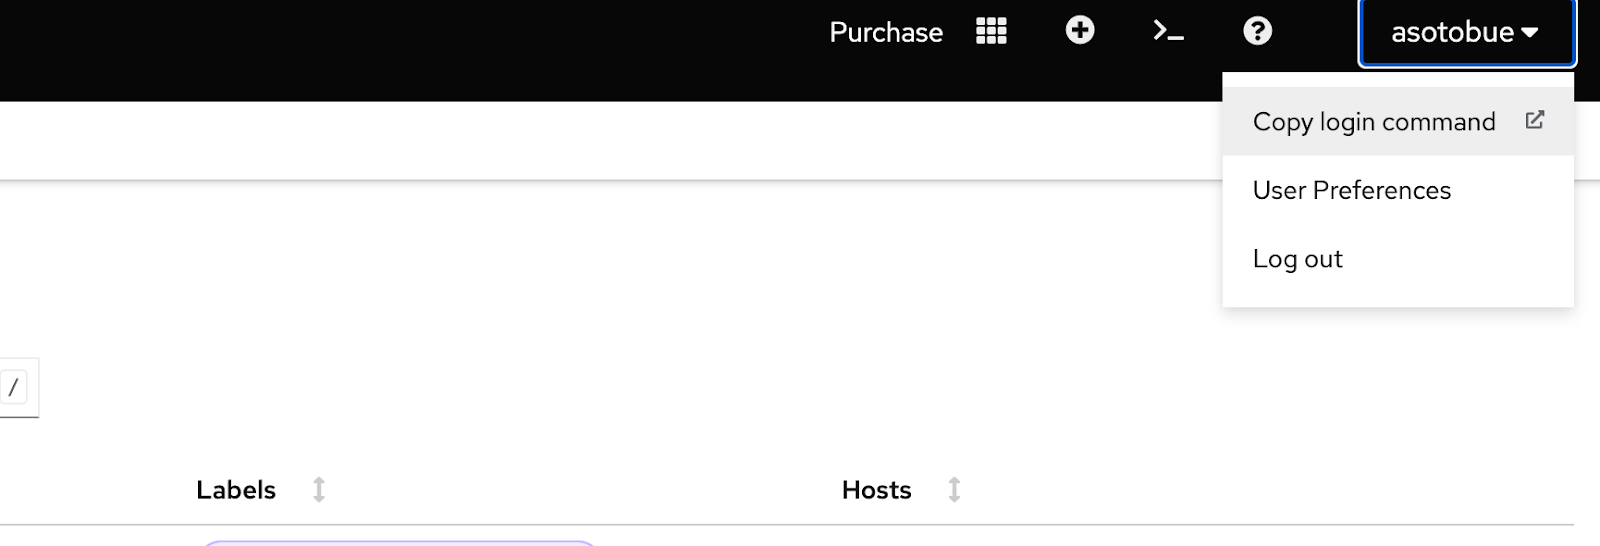
The final step: Log into the cluster by clicking on your username in the Developer Sandbox screen and select the Copy login command option (Figure 7).
A new window will open. Log in again and click on the Display Token link to show the oc command to use.
oc login --token=sha256~n3GHmBJfSAwbW55555558iyoDuPBp8KJINGTuWQnLar --server=https://api.sandbox-m2.ll9k.p1.openshiftapps.com:6443Execute this command in a terminal window. After this step, you can use the kubectl command as usual and execute the commands in the remote Developer Sandbox cluster. However, we want to use Tilt, so there will be no manual kubectl commands.
Congratulations. You've created your Tilt application and accessed the Developer Sandbox. Are you ready to use Quarkus in Lesson 2?
