Page
Build your application from a container image
In the first lesson, you set up your Developer Sandbox environment and built an application from source code. Now it's time to do the same thing with a container image.
In order to get full benefit from taking this lesson, you need to:
- An OpenShift cluster from the Developer Sandbox.
In this lesson, you will:
- Set up your Developer Sandbox.
- Set up a cluster.
- Build the application from a container image.
Build the application from a container image
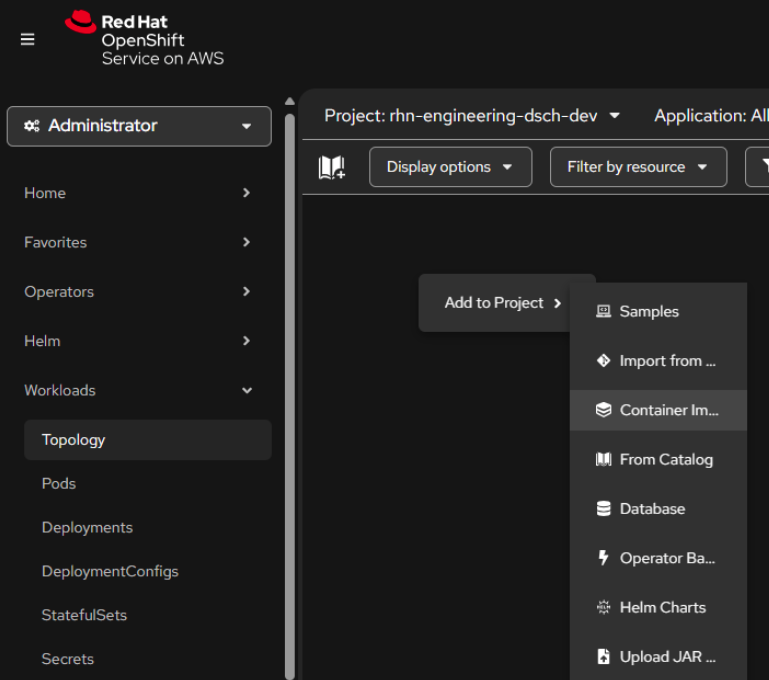
Begin by navigating to the Topology page. Right-click on the page and select the Container image option from the Add to Project menu (Figure 1).
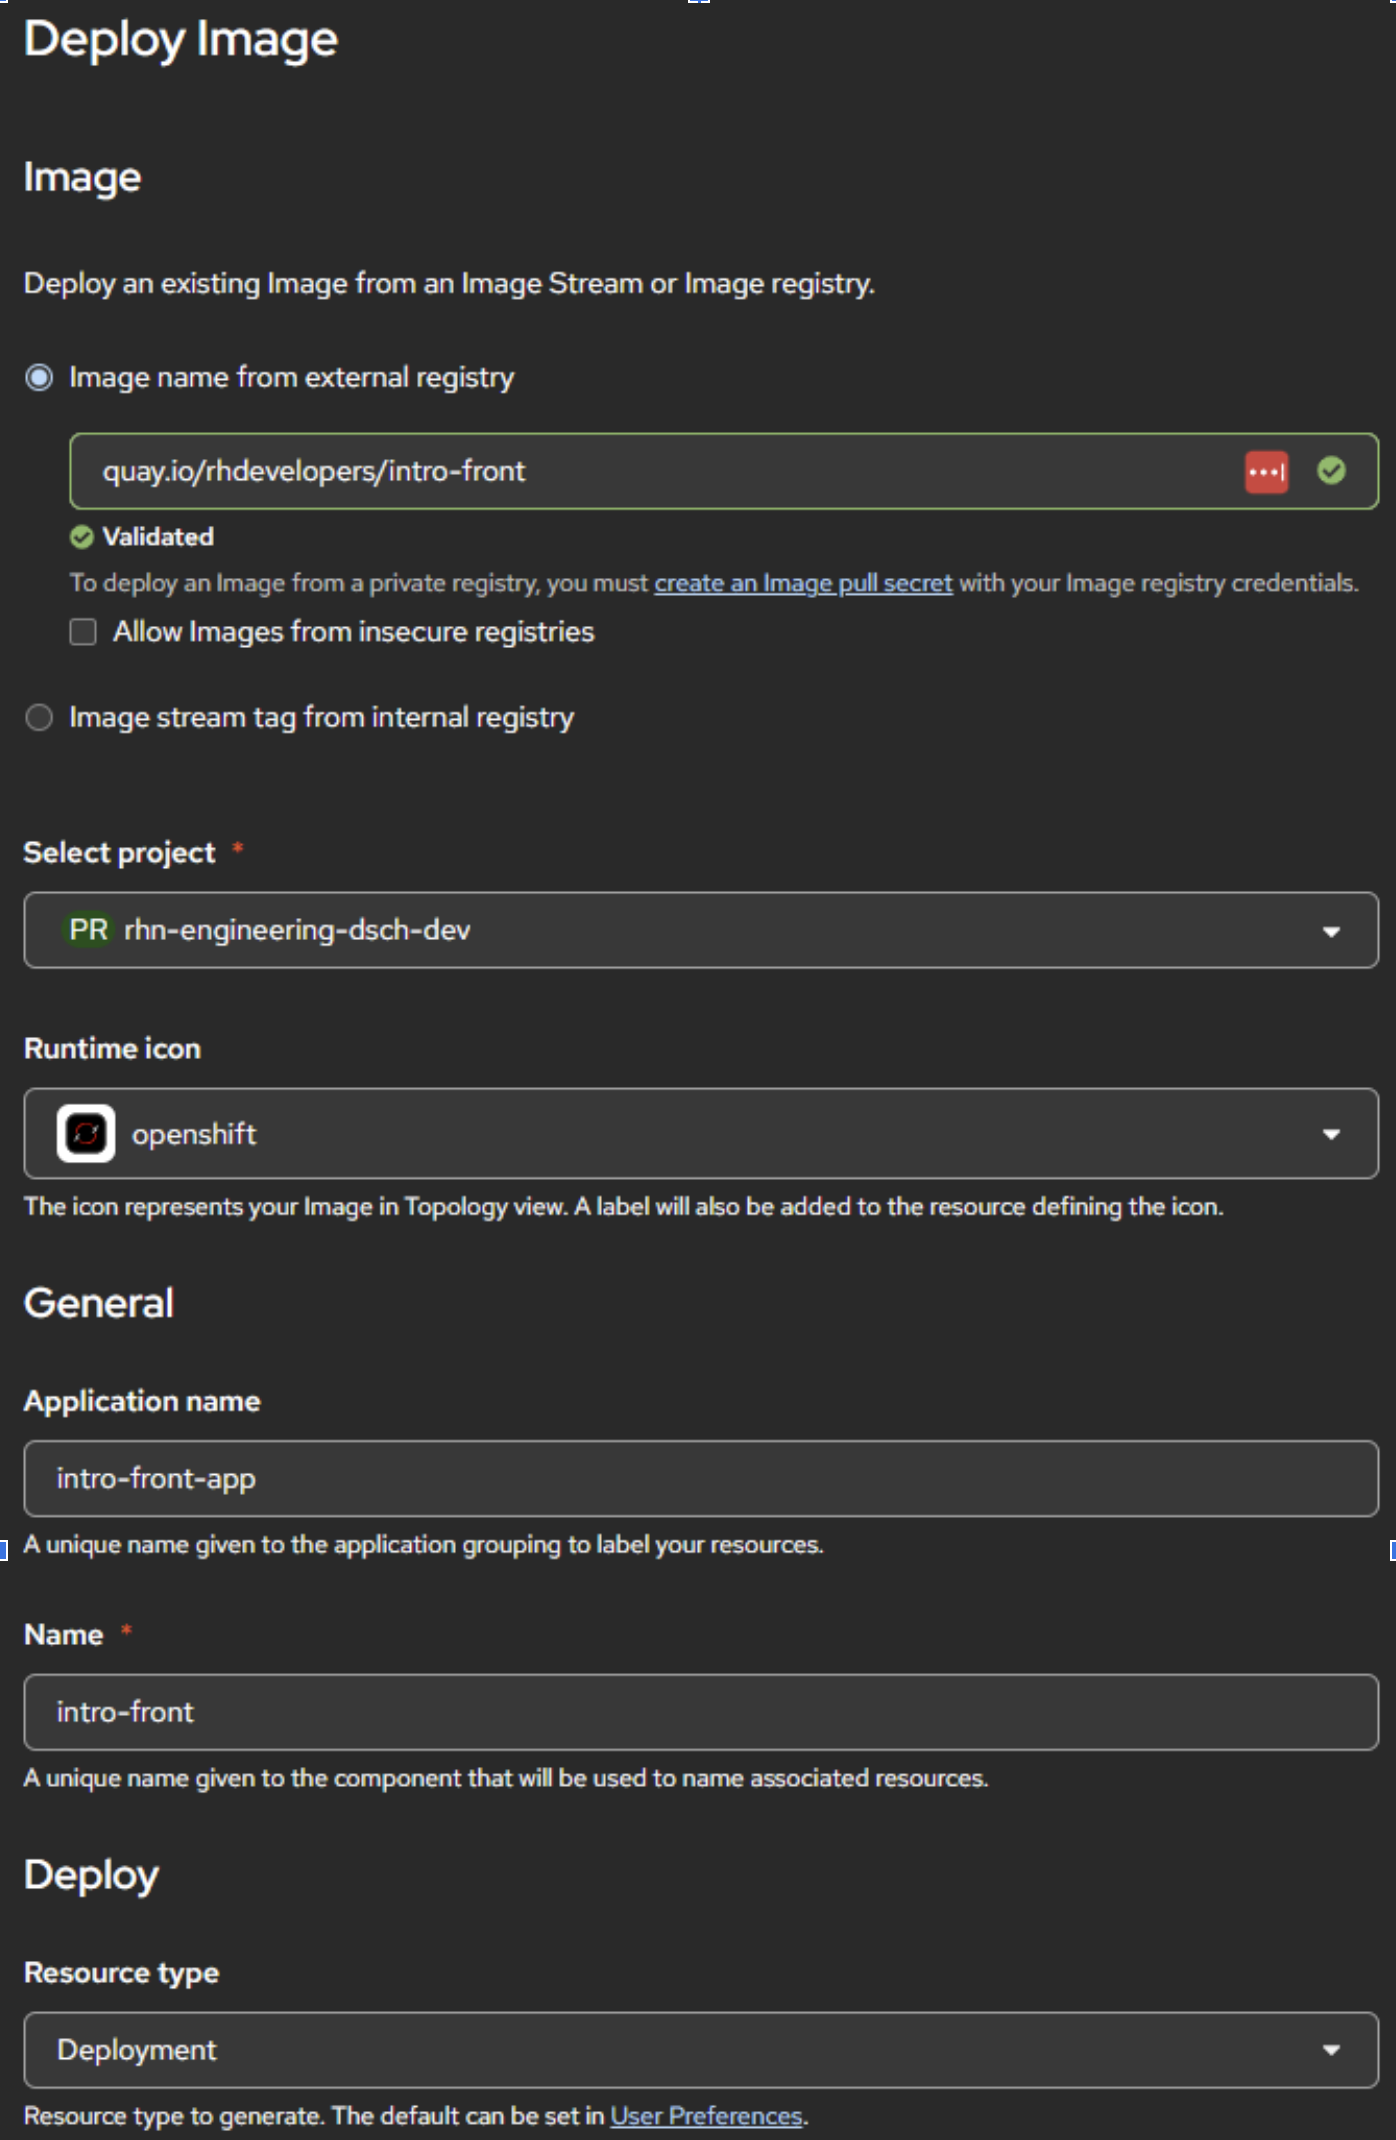
You will be prompted to supply the fully qualified image name. Use this image name: quay.io/rhdevelopers/intro-front.
Then scroll down, select the Deployment Resource type, and click Create (Figure 2).
This is the option I use 100% of the time. I like to build and test my images on my PC, then push them to my image registry (quay.io/donschenck). Once I host an image in a registry, it's very simple to get it into OpenShift.Is there more?
Yes. Play around. Try things. Break things. Learn more about the Developer Sandbox. Learn more about OpenShift. There is a wealth of knowledge for you to learn within the Red Hat Developer program.
