Page
Install and deploy Red Hat Trusted Artifact Signer
Discover how to deploy Red Hat Trusted Artifact Signer (TAS), an on-premise implementation of the Sigstore project. During this process, you will configure TAS with Google as the OIDC identity provider, enabling you to utilize the keyless signing feature to sign and verify container images.
In this lesson, you will
- Install Trusted Artifact Signer (TAS) on Red Hat OpenShift
- Deploy the Trusted Artifact Signer service.
- Download the Cosign binary.
Create an OAuth client ID
The following instructions will show how you can use your Google account as your OIDC identity provider.
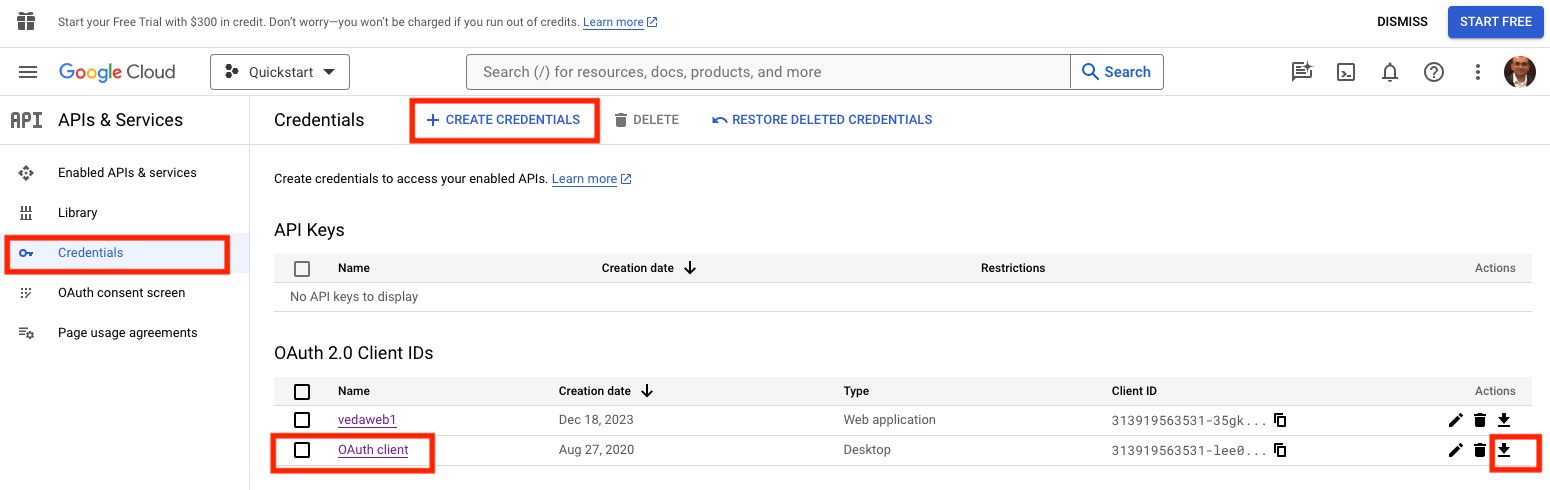
Create a Google OAuth client ID from Google Cloud Console with the following settings, as shown in Figure 1::
- Set the application type to Web Application.
- Authorized redirect URLs must include: http://localhost/auth/callback.
- Make a note of your Client ID.
Save the Client secret into a file by clicking the down arrow under Actions; we’ll call it:
my-google-secret. This secret file will be used later when signing the artifact using cosign.
Figure 1: Create Google cloud credentials.
Install the Trusted Artifact Signer Operator
Follow these steps to install the TAS Operator.
- Log into the OpenShift web console with a user that has the cluster-admin role.
- From the Administrator perspective, expand the Operators navigation menu and click OperatorHub.
In the search field, type
trusted, and click the Red Hat Trusted Artifact Signer tile, as shown in Figure 2.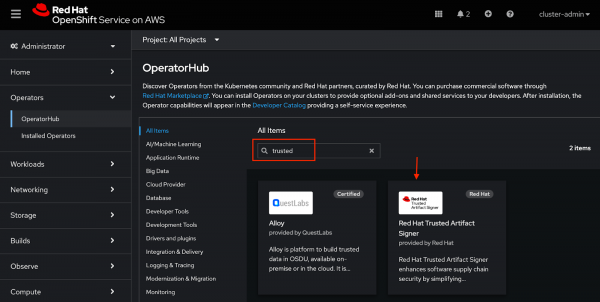
Figure 2: Red Hat OpenShift OperatorHub. - Click the Install button to show the operator details.
- Accept the default values, click Install on the Install Operator page, and wait for the installation to finish.

Select the project to deploy the TAS service
Once the installation finishes, you need to select a project to deploy the Trusted Artifact Signer service.
Expand Home from the navigation menu, and click Projects.
Select the trusted-artifact-signer project which is automatically created when you install the operator.
Deploy a TAS service
You have created a new project to deploy your new service. Here's how to deploy it:
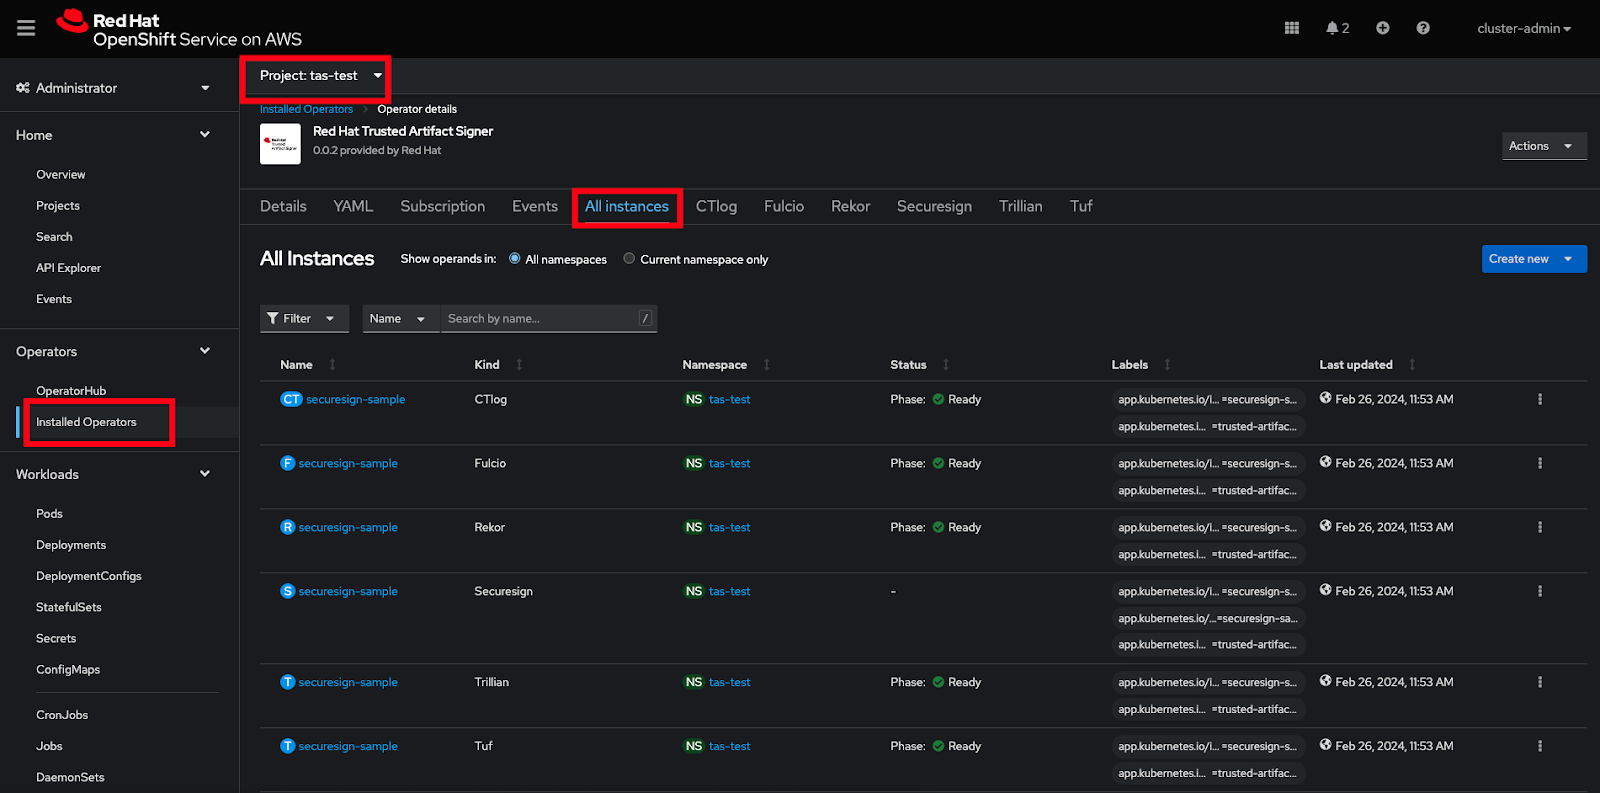
- Expand Operators from the navigation menu, click Installed Operators. See Figure 3.
- Select your new project name from the project drop-down box.
- Click Red Hat Trusted Artifact Signer.
- Click the Securesign tab, and then click Create Securesign.
- On the Create Securesign page, select YAML view.
Under the spec.fulcio.config.OIDCIssuers section, replace the OIDCIssuers code with the following configuration which specifies Google OIDC provider URL:
Info alert: Please replace ClientID with your specific identifier.
config: OIDCIssuers: - ClientID: 313xxx-xxx.apps.googleusercontent.com Issuer: 'https://accounts.google.com' IssuerURL: 'https://accounts.google.com' Type: email- Click Create.
Click the All instances tab to watch the deployment status until the CTlog, Fulcio, Rekor, Trillian, and TUF instances are ready (Figure 3).

Figure 3: Installed operator status.
Download the cosign binary from the OpenShift cluster to your laptop
Download the Cosign binary using these steps:
Log into the OpenShift web console. From the home page, click the ? icon, then Command line tools, go to the cosign download section, and click the link for your platform (Figure 4).
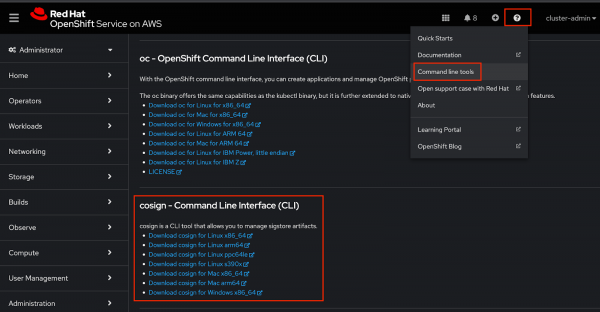
Figure 4: Download cosign Open a terminal on your laptop, decompress the binary .gz file, and set the execute bit:
gunzip cosign-amd64.gz
chmod +x cosign-amd64
Move and rename the binary to a location within your $PATH environment:
sudo mv cosign-amd64 /usr/local/bin/cosign

Congratulations. You've created an OAuth client ID. Now it's time to download the cosign binary using Red Hat OpenShift.