Developers deploying Red Hat AMQ on Red Hat OpenShift often wonder how to connect external clients to AMQ Broker using the Transport Layer Security (TLS) protocol, which is an improved successor to the Secure Sockets Layer (SSL) protocol.
In this article, you will learn how to do just that. The steps are as follows:
- Generate TLS credentials.
- Install the AMQ Broker Operator.
- Deploy an AMQ Broker instance.
- Define an Advanced Message Queuing Protocol (AMQP) acceptor that uses TLS.
- Create an Anycast address.
- Connect an external AMQP client and send and receive messages.
Prerequisites
To follow the examples in this article, you will need:
- Red Hat OpenShift Container Platform (OCP) 4.3 or higher.
- Cluster admin access for the OCP installation.
- Familiarity with
oc, the OpenShift command-line interface (CLI).
Let's get started.
Part 1: Generating credentials for TLS connections
In this section, we configure a one-way TLS connection and create and store our TLS credentials.
One-way TLS
One-way TLS is the most common way to verify the authenticity of the server that you are accessing and form a secure channel to it. In this authentication mechanism, the content being verified is the authenticity of the server itself. The client is never verified.
Storing TLS credentials
When deploying AMQ broker(s) to OpenShift, any defined connectors that are secured via TLS must store the TLS credentials. You can use any of the following secret mechanisms to store the credentials:
- A
broker.ks, which must be a Base64-encoded keystore. - A
client.ts, which must be a Base64-encoded truststore. - A
keyStorePassword, which must be specified in raw text. - A
trustStorePasswordspecified, which must be specified in raw text.
For TLS connections, AMQ requires a broker keystore, a client keystore, and a client truststore that includes the broker keystore. In the next section, we will create a broker keystore, export the broker certificate, create a client truststore, import the broker certificate into the client truststore, and then create a broker truststore.
Step 1: Create the broker keystore
Note that I'm using the Java Keytool to generate the necessary certificates and stores for this example. First, generate a self-signed certificate for the broker keystore. When asked for a password, use password:
$ keytool -genkey -alias broker -keyalg RSA -keystore broker.ks
Next, export the certificate so that it can be shared with clients:
$ keytool -export -alias broker -keystore broker.ks -file broker_cert
Create a client truststore that imports the broker certificate:
$ keytool -import -alias broker -keystore client.ts -file broker_cert
Generate a self-signed certificate for the broker trust store:
$ keytool -genkey -alias broker -keyalg RSA -keystore broker.ts
Note: When you import the broker_cert make sure that you specify yes to the dialog: Trust this certificate? [no]: yes. The default setting is no.
Step 2: Create the secret name
In this example, we create the secret after generating the certificates and stores. By default, the secret name has the following format:
<CustomResourceName>-<AcceptorName>-secret
Following this format, I have named this secret ex-aao-amqp-secret. You can use whatever naming format you like. We will provide this secret name in the custom resource for ActiveMQ Artemis, which we'll use to deploy the broker shortly.
Part 2: Configuring OpenShift
Next, we log into our OpenShift cluster as a system admin, create a project named amq-broker-ssl, and create a secret for the project (in my case, ex-aao-amqp-secret). Note that I'm using OpenShift 4.4 for this example.
Step 1: Create the project and secret
Log into OpenShift by entering the command:
$ oc login <CLUSTER_API_URL>
Create a new project:
$ oc new-project amq-broker-ssl
Create the secret:
$ oc create secret generic ex-aao-amqp-secret \
--from-file=broker.ks \
--from-literal=keyStorePassword=password \
--from-file=client.ts=broker.ts \
--from-literal=trustStorePassword=password
Note: In the snippet--from-file=client.ts=broker.ts, we provide the broker.ts, which is correct. However, we're aliasing it in the secret as client.ts. The alias is the value that the broker image looks for in the secret.
Step 2: Open the project in OpenShift
Next, log in to the OpenShift console and click on Projects. As shown in Figure 1, you'll see the project that we've just created.
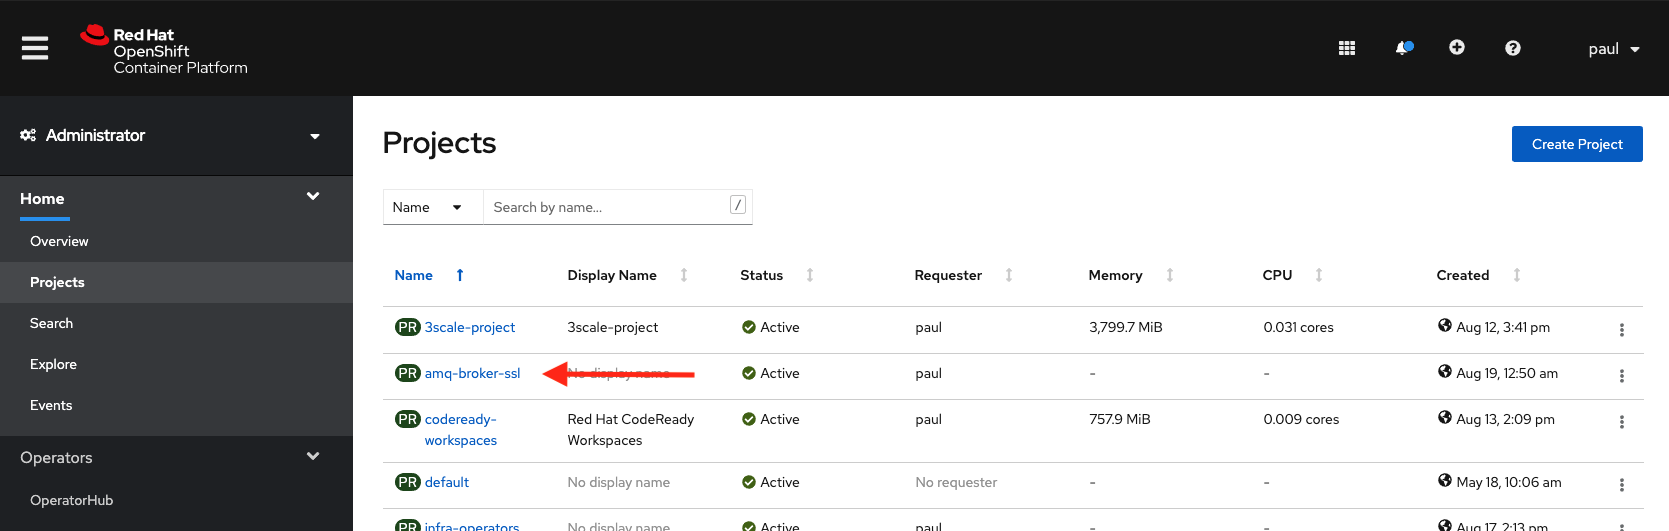
Figure 2 shows the project details.
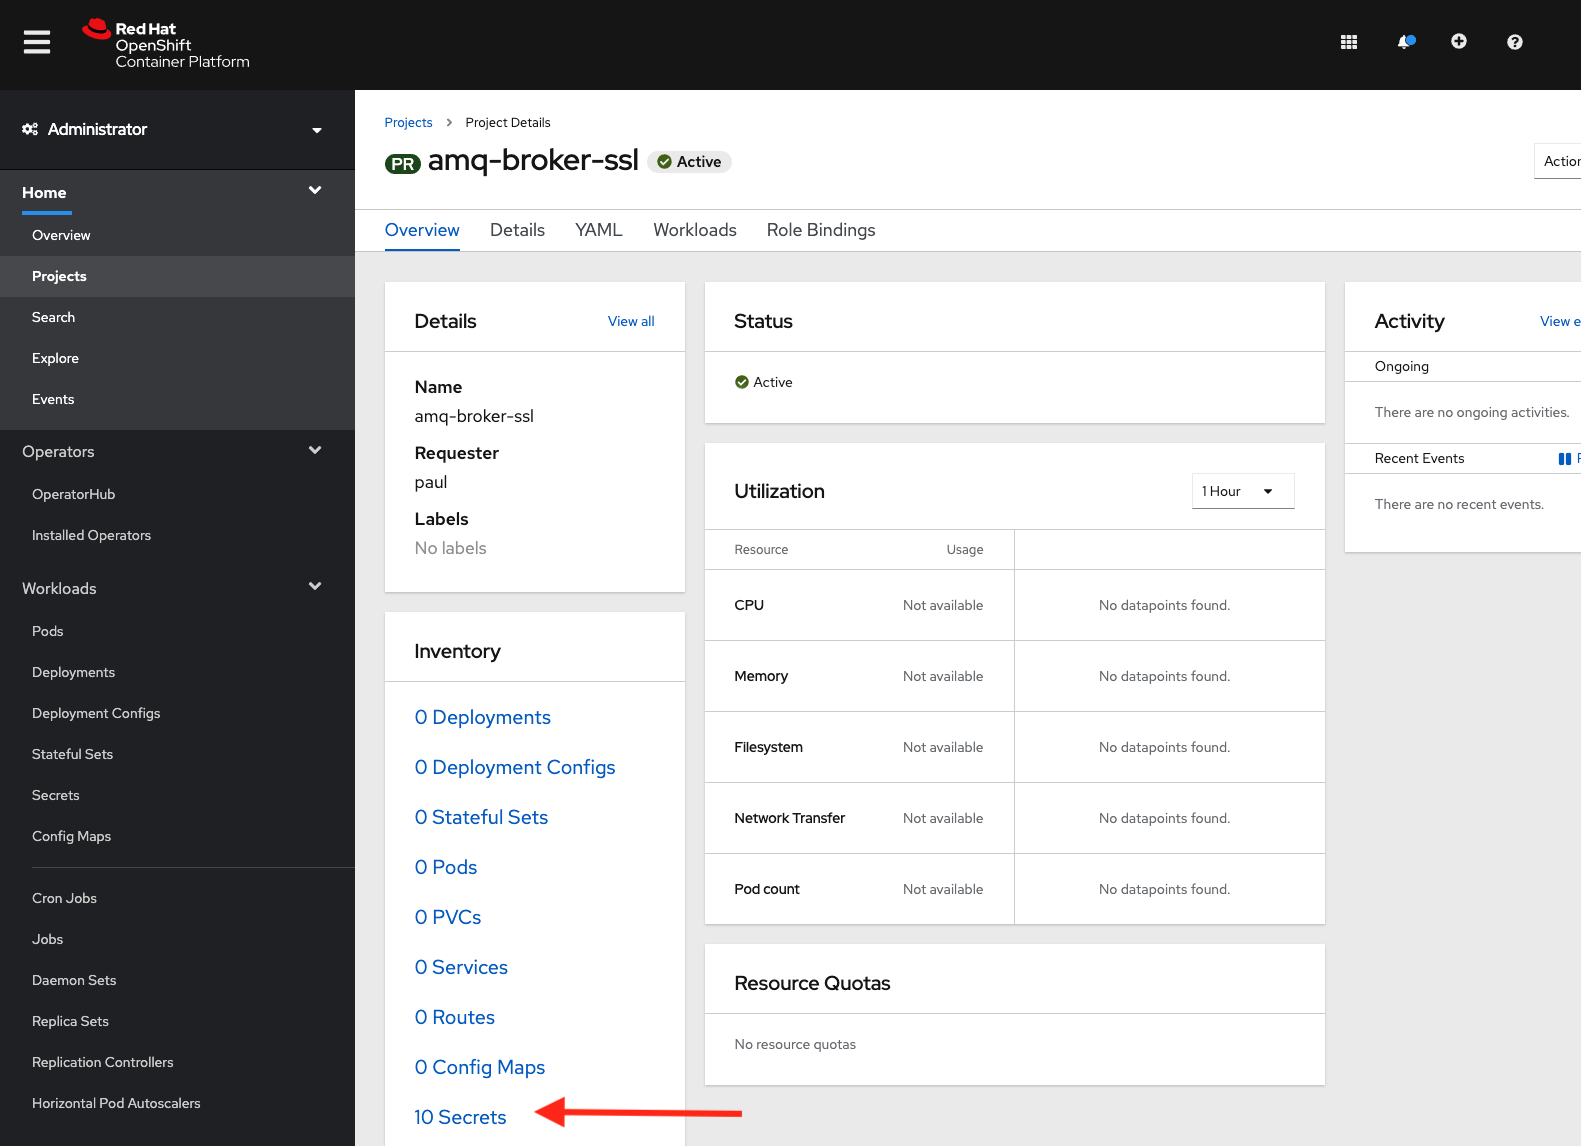
Click Secrets in the Inventory panel shown in Figure 2. Find the ex-aao-amqp-secret, which appears in the list of secrets shown in Figure 3.

If you drill into ex-aao-amqp-secret, as shown in Figure 4, you'll see broker.ks, client.ts, and their respective passwords, which we supplied when we created the secret.

We’ve created our TLS credentials and stored them in a namespace secret. Next, let's install AMQ Broker.
Part 3: Installing AMQ
In this section, we install the AMQ Broker Operator from the OperatorHub into our OpenShift cluster. To install the Operator, you must have cluster-admin privileges for the OpenShift cluster.
Before we install AMQ Broker, let's first look at what it is. Below is a brief overview, if you would like to learn more about AMQ Broker and other AMQ offerings, go to Red Hat AMQ 7
AMQ Broker is a high-performance messaging implementation based on ActiveMQ Artemis. It uses an asynchronous journal for fast message persistence and supports multiple languages, protocols, and platforms.
Red Hat AMQ Broker 7.7 (the latest version as of this article) is available as a containerized image that is provided for use with OpenShift Container Platform (OCP) 3.11 and later.
AMQ Broker on OCP provides similar functionality to Red Hat AMQ Broker, but some aspects of the functionality need to be configured specifically for use with OpenShift Container Platform.
Install the AMQ Broker Operator
Log in to the web console as a cluster admin. On the left-side navigation bar, expand Operators and click on OperatorHub. In the search field, type AMQ, and select the Red Hat Integration – AMQ Broker tile, as shown in Figure 5.

On the installation screen, click the Install button, as shown in Figure 6.

Be sure to select a specific namespace on the cluster and keep the defaults for the Update channel and Approval strategy. Select amq-broker-ssl under Installed Namespace*, as shown in Figure 7.

Wait a few minutes for the Operator to install. Once it has successfully installed, you should see the status change to Succeeded, as shown in Figure 8.

Part 4: Deploying the AMQ Broker
Next, we will deploy a broker with a defined AMQP connector secured with TLS.
Step 1: Create the AMQ Broker instance
While on the Installed Operators page, click the Red Hat Integration - AMQ Broker link to see the Operator details shown in Figure 9.

In the Operator details, you'll see tiles for each of the Operator APIs. Click on the Create Instance link inside the AMQ Broker tile, as shown in Figure 10.

Step 2: Create the ActiveMQ Artemis instance
Now, copy and paste the ActiveMQArtemis custom resource below into the Create ActiveMQArtemis YAML editor. Notice the acceptors stanza in the YAML file, where we define the AMQP acceptor:
apiVersion: broker.amq.io/v2alpha2
kind: ActiveMQArtemis
metadata:
 name: ex-aao
spec:
 deploymentPlan:
   size: 1
   image: registry.redhat.io/amq7/amq-broker:7.6
   requireLogin: false
 adminUser: admin
 adminPassword: admin
 console:
   expose: true
 acceptors:
 - name: amqp
   protocols: amqp
   port: 5672
   sslEnabled: true
   sslSecret: ex-aao-amqp-secret
   verifyHost: false
   expose: true
Also, note that I set sslEnabled: true. When you set sslEnabled: true for an acceptor, you'll need to specify the named secret that contains the keys broker.ks, client.ts, keyStorePassword, and trustStorePassword. The broker image will look for these in the named secret. If they're not present, OpenShift will fail to schedule the broker pod until it finds them.
As shown in Figure 11, I specified the name of the secret as sslSecret: ex-aao-amqp-secret.

When you are done editing the file, click Create. You'll see an instance of the broker that we just created. Click on the ex-aao link to see the AMQ Broker Overview that is shown in Figure 12.

As shown in Figure 13, the pod status indicates that one pod is ready.

Step 3: Create the AMQ Broker address
Next, we'll define our address test.foo, from which our client applications will send and receive messages. Click on Installed Operators under Operators in the left-hand navigation panel and drill into the Red Hat Integration - AMQ Broker. Then, click the Create Instance link in the AMQ Broker Address tile, as shown in Figure 14.

Copy and paste the following YAML for the ActiveMQArtemisAddress custom resource into the YAML editor:
apiVersion: broker.amq.io/v2alpha1
kind: ActiveMQArtemisAddress
metadata:
  name: ex-aao-address-test-foo
spec:
  addressName: test.foo
  queueName: test.foo
  routingType: anycast
Click Create when you are done, as shown in Figure 15.

We've created an address named test.foo on the running broker pod which will create a point-to-point message queue. Next, we'll test the ability to send and receive messages.
Part 5: Sending and receiving messages
For this part of the example, I am using the out-of-the-box ActiveMQ Artemis CLI client to send and receive messages. The CLI client comes bundled in the Apache ActiveMQ Artemis distribution. Once you've downloaded the distribution and unzipped or un-tarred it to a directory, you'll find the artemis executable in the bin directory. From there, you can run the commands in the following steps.
Step 1: Produce messages
Send 10 messages to test.foo using the following command (change the URL and location of the truststore if yours is different from the one in my example). If you recall, in the ActiveMQArtemis custom resource where we defined our protocol as amqp, we set expose: true, which created a service and route. The URL I'm using is derived from the location specified in the ex-aao-amqp-0-svc-rte route, replacing the https with amqps and adding port 443:
$ ./bin/artemis producer --url 'amqps://ex-aao-amqp-0-svc-rte-amq-broker-ssl.apps.ocp42.lab.example:443?jms.username=admin&jms.password=admin&transport.trustStoreLocation=/opt/playground/amq76-ocp-deploy/client.ts&transport.trustStorePassword=password&transport.verifyHost=false'  --threads 1 --protocol amqp --message-count 10 --destination 'queue://test.foo'

Producer ActiveMQQueue[test.foo], thread=0 Produced: 10 messages
Producer ActiveMQQueue[test.foo], thread=0 Elapsed time in second : 0 s
Producer ActiveMQQueue[test.foo], thread=0 Elapsed time in milli second : 192 milli seconds
Note: You'll need to change the URL and location of client.ts. If you used a different password, change that too.
Step 2: View the messages in the AMQ Broker console
If you recall, when we created the broker using the ActiveMQArtemis custom resource, we set the following attribute to expose the broker console:
console:
   expose: true
The broker pod in our deployment has a service that provides access to the console. This service has a corresponding route, ex-aao-wconsj-0-svc-rte. To get the URL to access the broker console, Click on Routes under Networking over on the left navigation pane. You'll see two routes. Click the link that corresponds to this route as shown in Figure 16

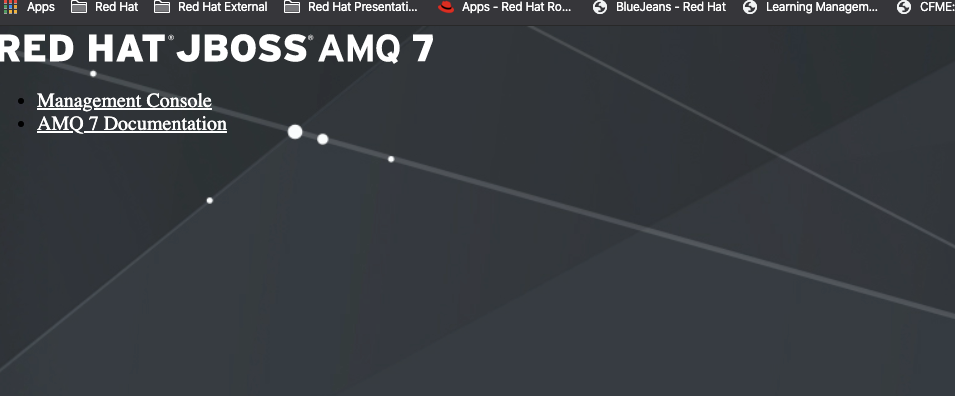
Clicking the link opens a page that renders another link to the Management Console. Click the link, which is shown in Figure 17.
Once you are in the Management Console, log in using admin as your username and password, as shown in Figure 18.

From the Management Console, click on Artemis in the upper-left corner, then click Queues in the top navigation bar. Notice the test.foo address and queue that we created earlier, using the ActiveMQArtemisAddress custom resource. As shown in Figure 19, the message count should be 10.

Step 3: Consume the messages
Use the following command to consume the 10 messages (change the URL and location of the truststore as needed):
$ ./bin/artemis consumer --url 'amqps://ex-aao-amqp-0-svc-rte-amq-broker-ssl.apps.ocp42.lab.example:443?jms.username=admin&jms.password=admin&transport.trustStoreLocation=/opt/playground/amq76-ocp-deploy/client.ts&transport.trustStorePassword=password&transport.verifyHost=false'  --threads 1 --protocol amqp --message-count 10 --destination 'queue://test.foo'

Consumer:: filter = null
Consumer ActiveMQQueue[test.foo], thread=0 wait until 10 messages are consumed
Consumer ActiveMQQueue[test.foo], thread=0 Consumed: 10 messages
Consumer ActiveMQQueue[test.foo], thread=0 Elapsed time in second : 0 s
Consumer ActiveMQQueue[test.foo], thread=0 Elapsed time in milli second : 42 milli seconds
Consumer ActiveMQQueue[test.foo], thread=0 Consumed: 10 messages
Consumer ActiveMQQueue[test.foo], thread=0 Consumer thread finished
Note: You'll need to change the URL and location of client.ts. If you used a different password, change that too. Back in the broker management console, make sure that you are looking at the list of queues and click the Reset button. The message count should be zero.
Summary
In this article, we walked through how to:
- Configure One-Way TLS with AMQ Broker
- Install AMQ Broker Operator on OpenShift
- Create a broker instance and TLS secured AMQL acceptor and define an Anycast address
- Use the Apache Artemis CLI as a client to establish a secure connection to the broker and produce and consume messages
That's all. Hopefully, this article has been helpful.
Last updated: November 14, 2023