My colleague and I recently had to stand up a Red Hat OpenShift 4 cluster for a customer to determine how difficult it would be for them to port their application. Although they could have achieved a similar outcome with CodeReady Containers, their local development machines did not have enough resources (8GB RAM minimum, which is one problem of developing on tablets).
To reduce the overhead of adding and removing users from the project during the trial, we decided to skip over the simple HTPasswd provider and use the OAuth provider backed by Auth0. We also wanted to publish our guide to make it easier for others to adopt a similar deployment.
This article outlines how to configure Red Hat OpenShift 4.x to use Auth0 as an OAuth2 provider. It assumes you already have a running OpenShift cluster and an Auth0 account.
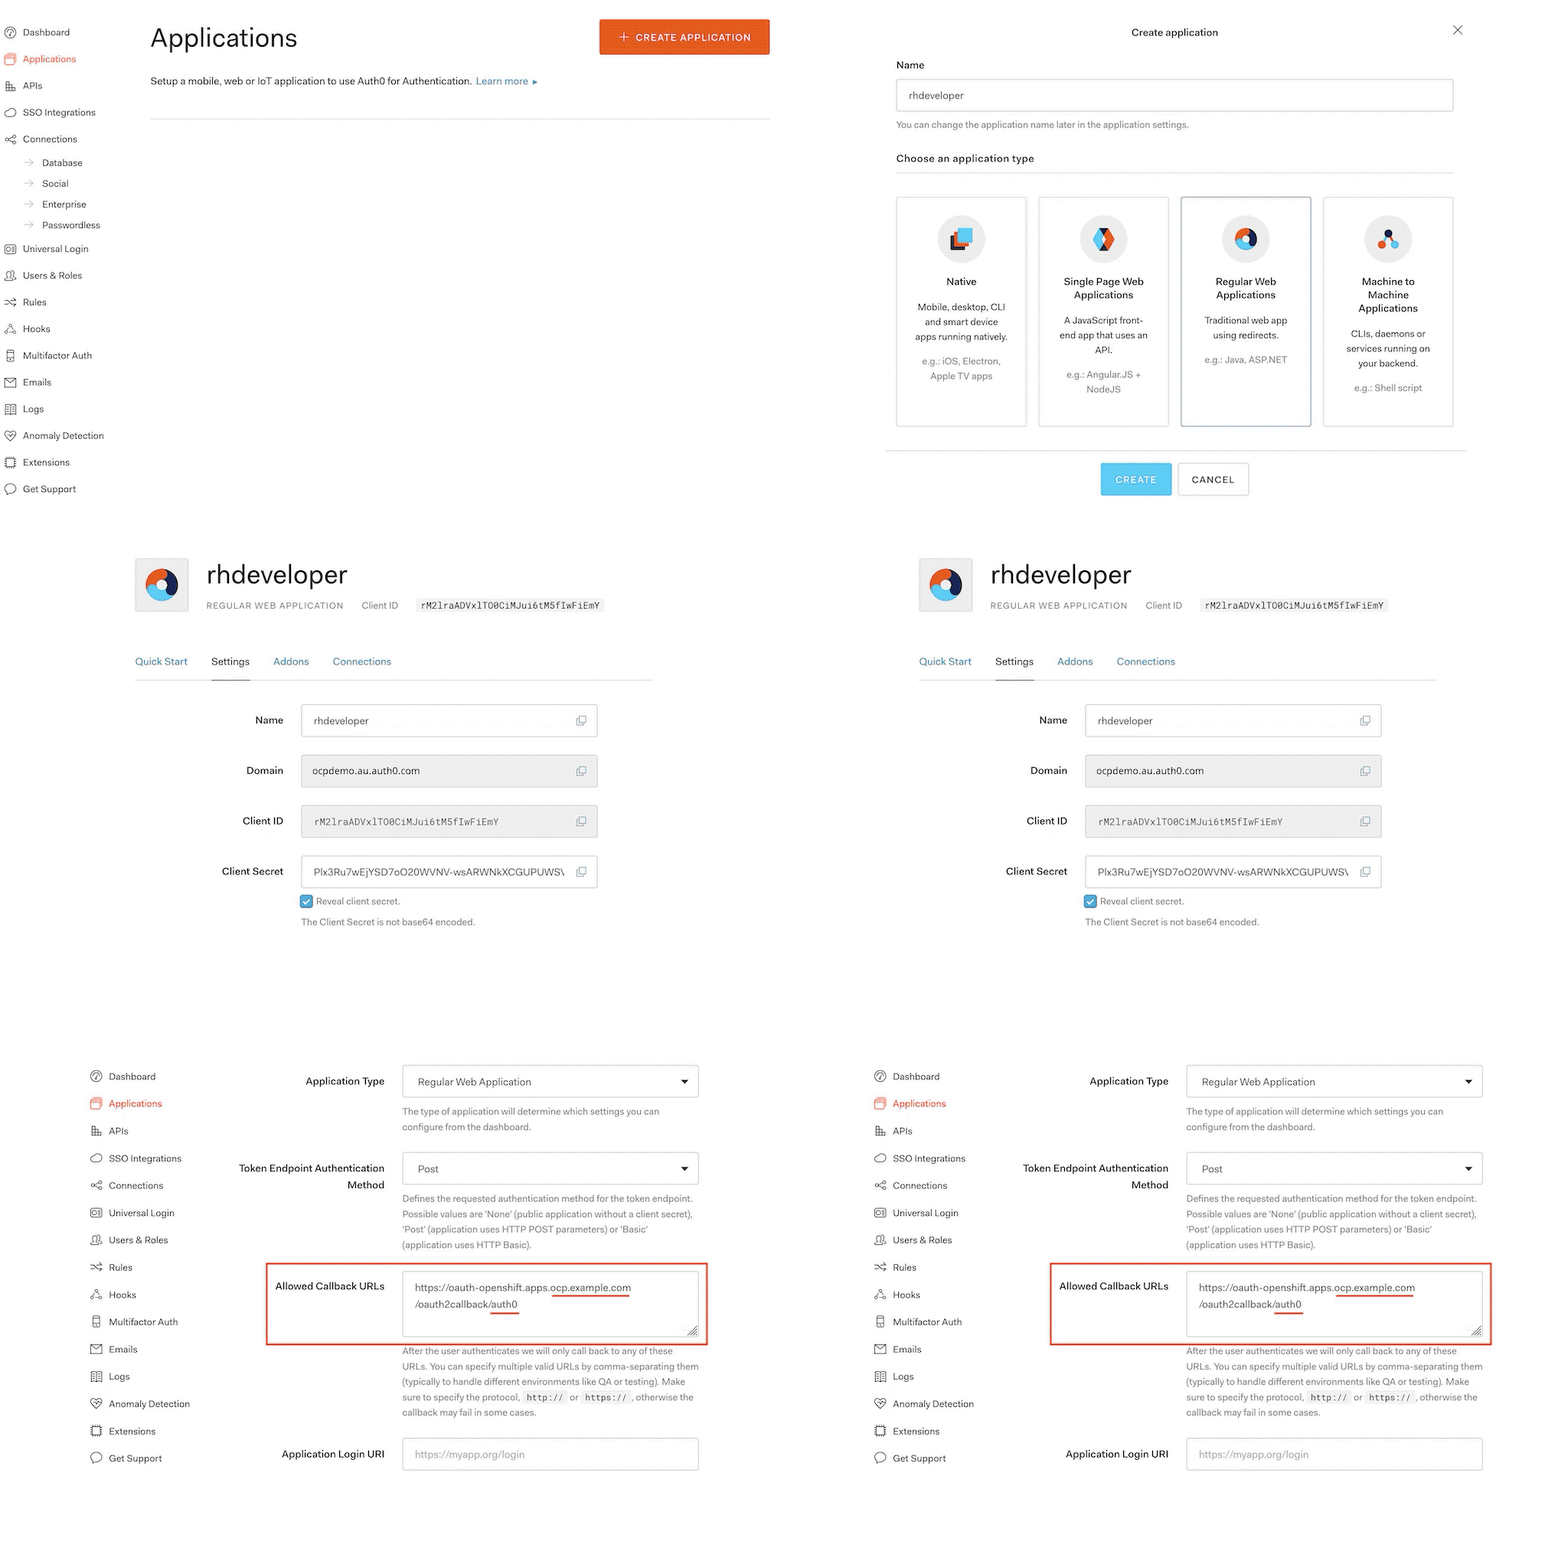
Auth0 steps
- Log in to the Auth0 management console.
- Select Applications from the side menu.
- Select Create application and choose Regular Web Applications.
- Click settings:
- Record the client secret.
- Record the client id.
- Record the domain.
- Set the callback URL of your OpenShift Cluster. The name at the end is named you provide the identity provider in OpenShift, then click submit. For example: https://oauth-openshift.apps.ocp.example.com/oath2callback/auth0
Example

OpenShift steps
Now you can configure Red Hat OpenShift:
- Log in to OpenShift with the kubeadmin account.
- Select Administration > Cluster Settings.
- Select Global Configuration > Oauth.
- Scroll down to Identity Providers and select Add > OpenID Connect
- Complete the form as follows. If you change the name make sure you update the callback within Auth0:
- name: auth0
- Client ID: <your client id>
- Client Secret: <your client seceret>
- Issuer URL: <your domain for auth0 - e.g. https://ocpdemo.au.auth0.com>
- Preferred Username: email
- Name: nickname
- Email: email
- Extra Scopes: email, profile, nickname
- Click Add
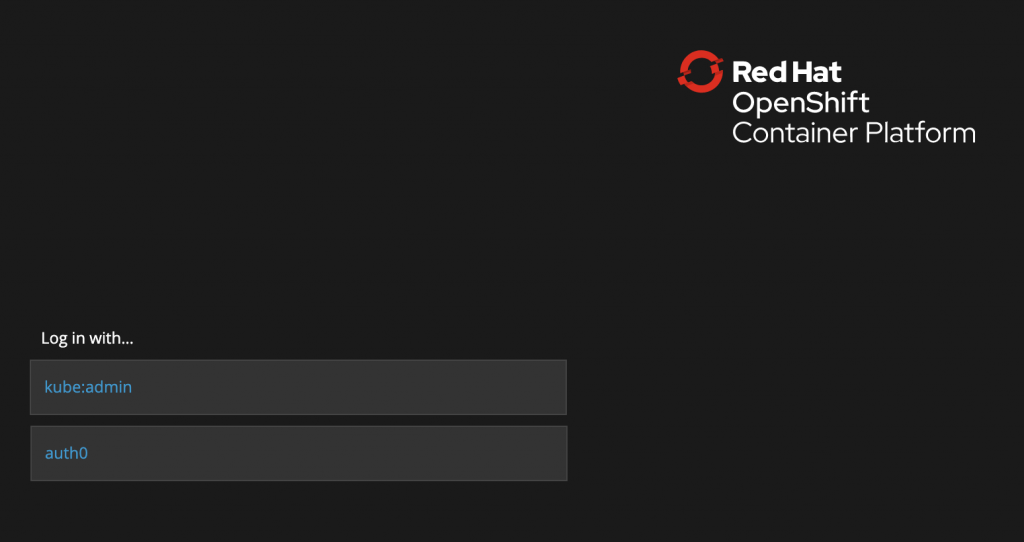
Now when you browse to the OpenShift login page, you will see Auth0 as a login provider.

Thank you to James Ryles for helping with this configuration.
Last updated: July 1, 2020