In this article, we show how to set up Red Hat AMQ 7.4 on Red Hat OpenShift. Also, we show how to connect the external Message Queuing Telemetry Transport (MQTT) secure client to the AMQ 7.4 platform. MQTT is a Java-based client that uses the Eclipse Paho library and can publish and consume messages from Red Hat AMQ 7.4 Broker on OpenShift using secure transport. These commands and code have been verified with OpenShift 3.11.
Follow the steps below to perform this activity.
Step 1: Create a secret and a service account
In a new OpenShift project, create a secret and a service account with the view role:
[cpandey@cpandey AMQ74_CERTIFICATE]$ oc new-project amq-demo
[cpandey@cpandey AMQ74_CERTIFICATE]$ echo '{"kind": "ServiceAccount", "apiVersion": "v1", "metadata": {"name": "amq-service-account"}}' | oc create -f -
[cpandey@cpandey AMQ74_CERTIFICATE]$ oc policy add-role-to-user view system:serviceaccount:amq-demo:amq-service-account
[cpandey@cpandey AMQ74_CERTIFICATE]$ keytool -genkey -alias broker -keyalg RSA -keystore broker.ks
[cpandey@cpandey AMQ74_CERTIFICATE]$ keytool -export -alias broker -keystore broker.ks -file broker_cert
[cpandey@cpandey AMQ74_CERTIFICATE]$ keytool -genkey -alias client -keyalg RSA -keystore client.ks
[cpandey@cpandey AMQ74_CERTIFICATE]$ keytool -import -alias broker -keystore client.ts -file broker_cert
[cpandey@cpandey AMQ74_CERTIFICATE]$ oc create secret generic amq-app-secret --from-file=broker.ks
[cpandey@cpandey AMQ74_CERTIFICATE]$ oc secrets add sa/amq-service-account secret/amq-app-secret
Note: All of these steps are mentioned in the official Red Hat Documentation, with details.
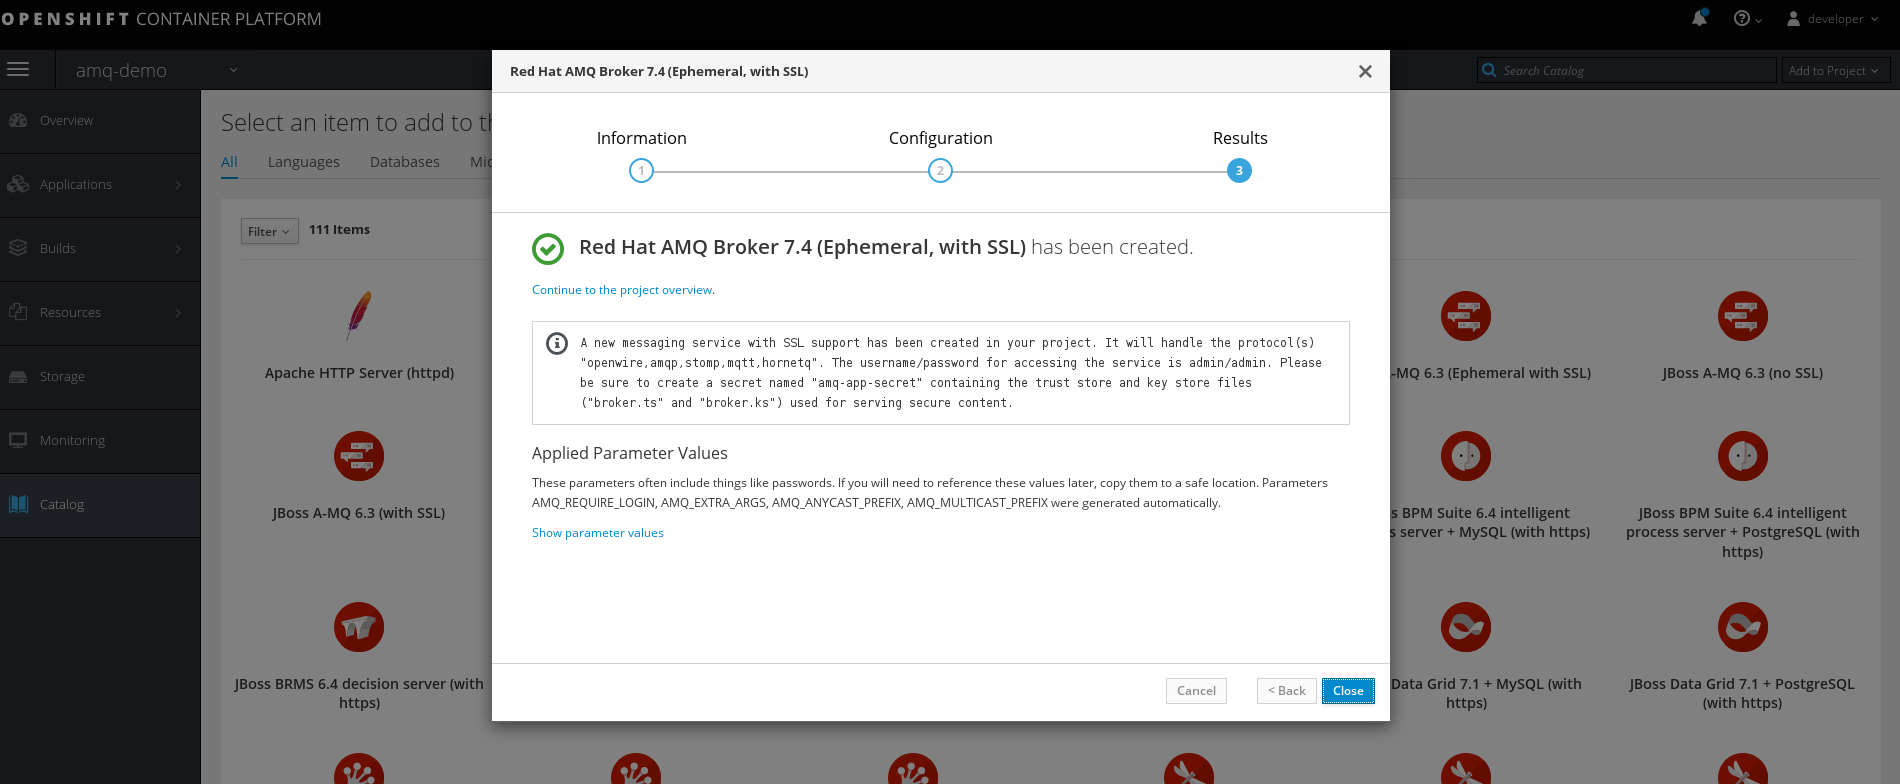
Step 2: Deploy Red Hat AMQ 7.4 Broker
Deploy Red Hat AMQ 7.4 broker using the OpenShift web console:
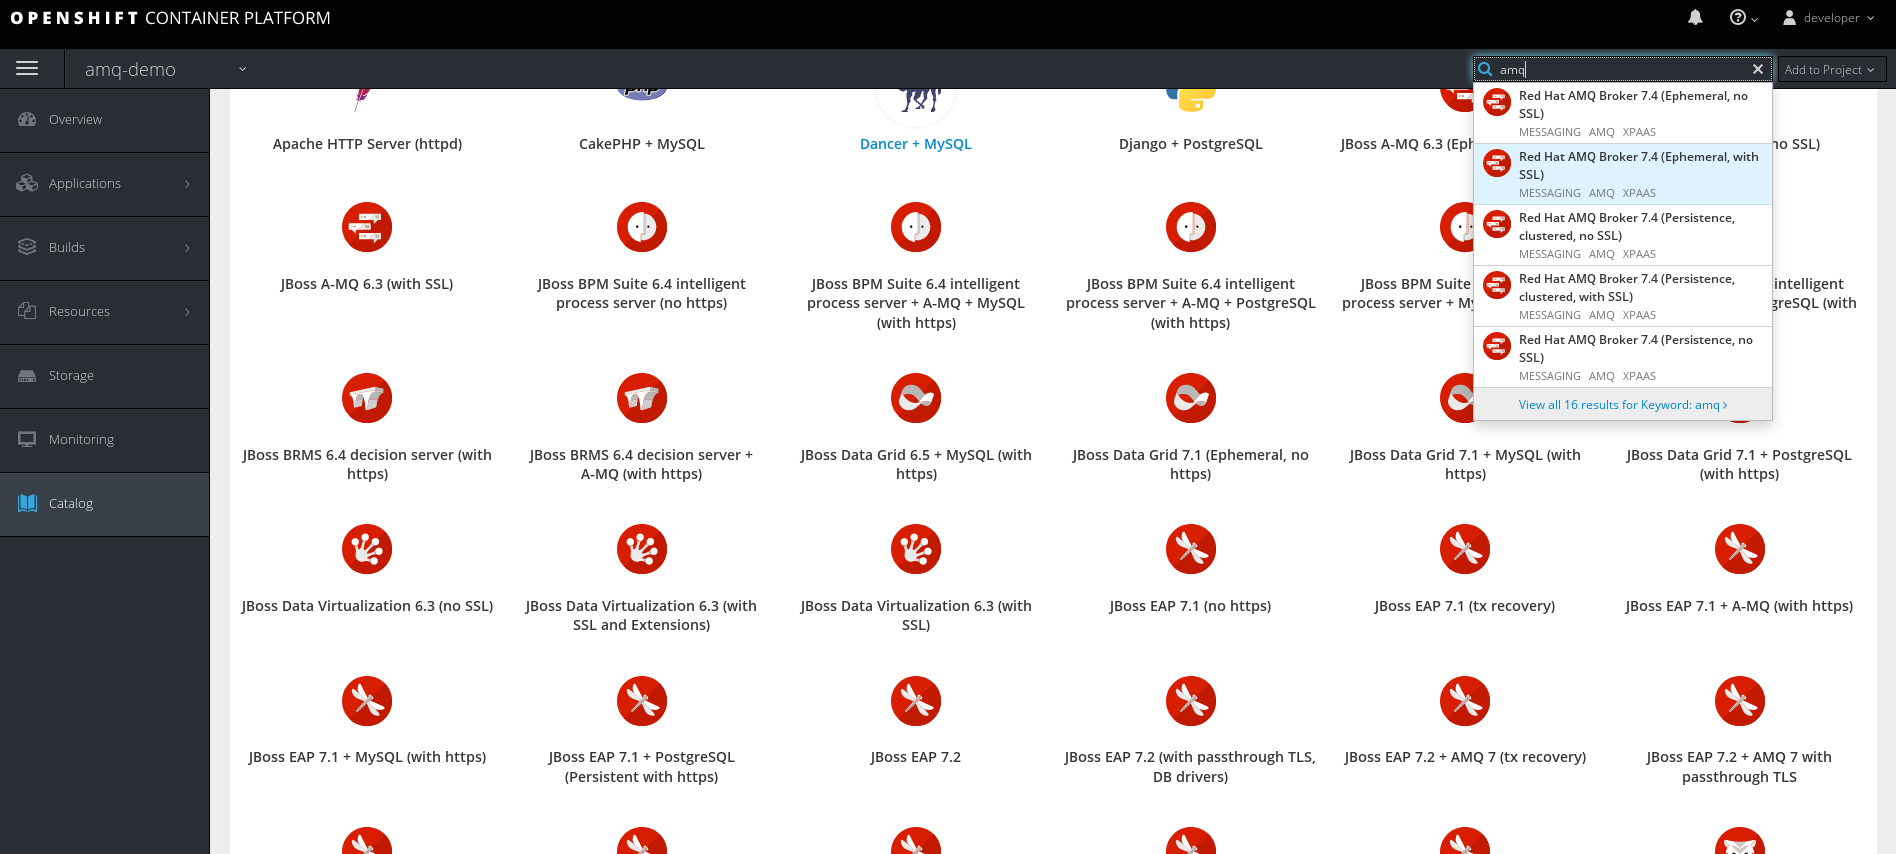
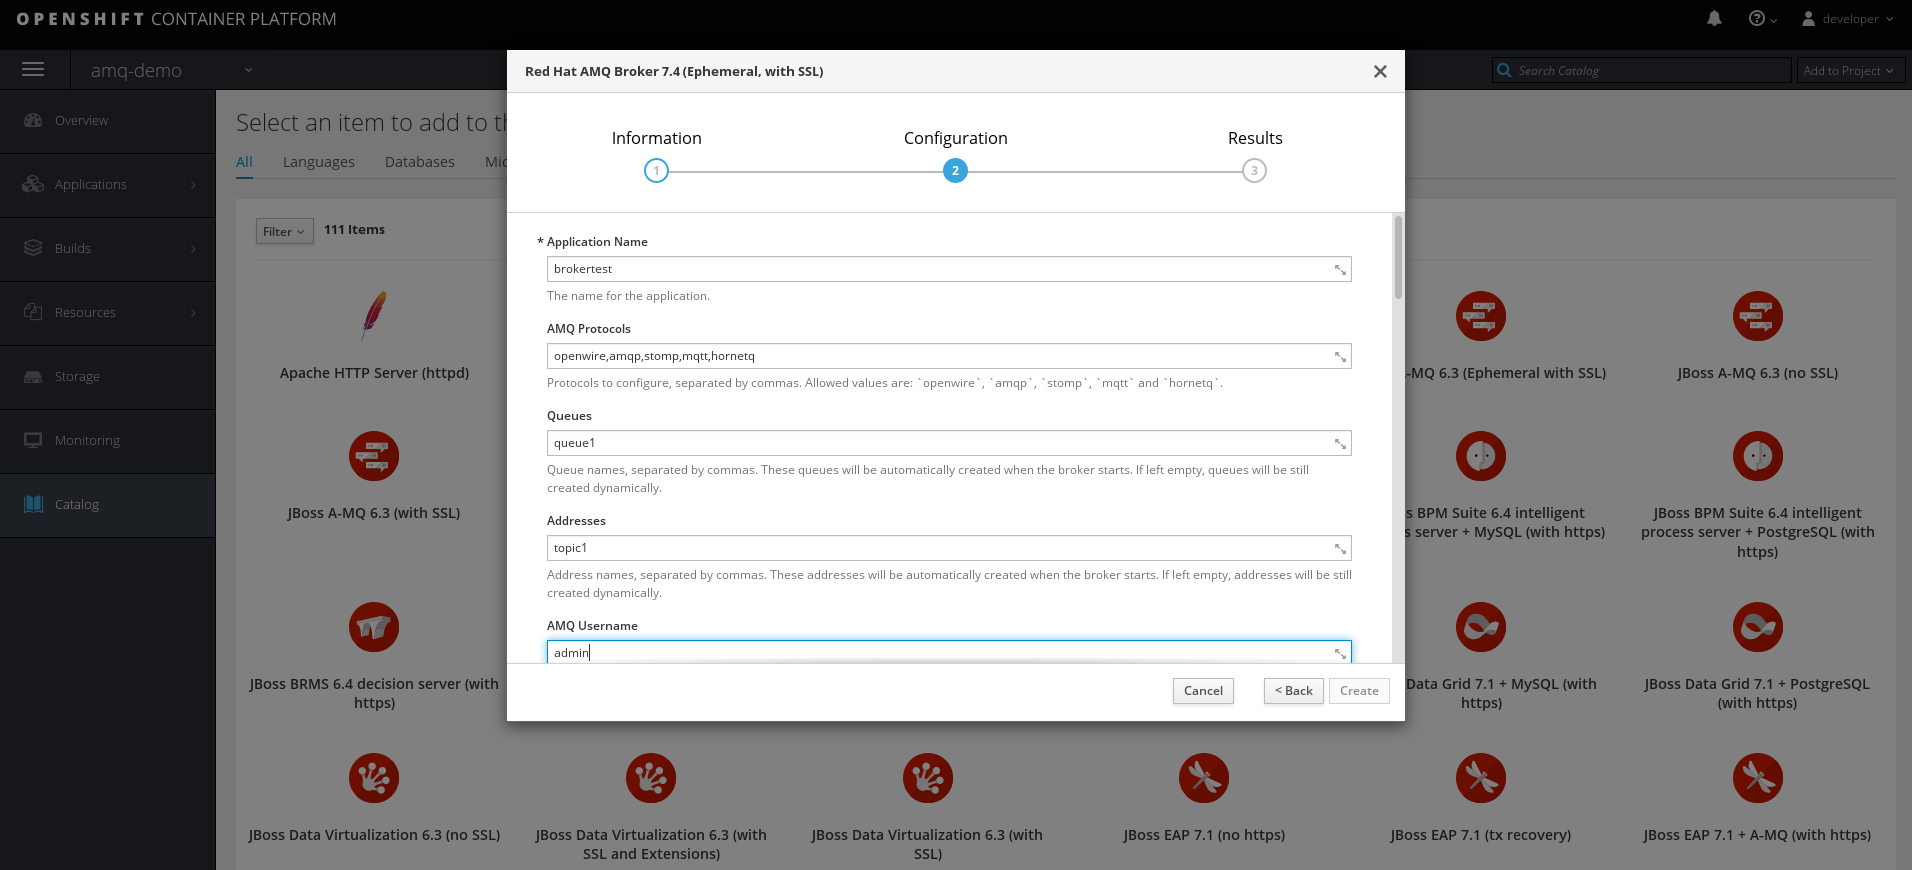
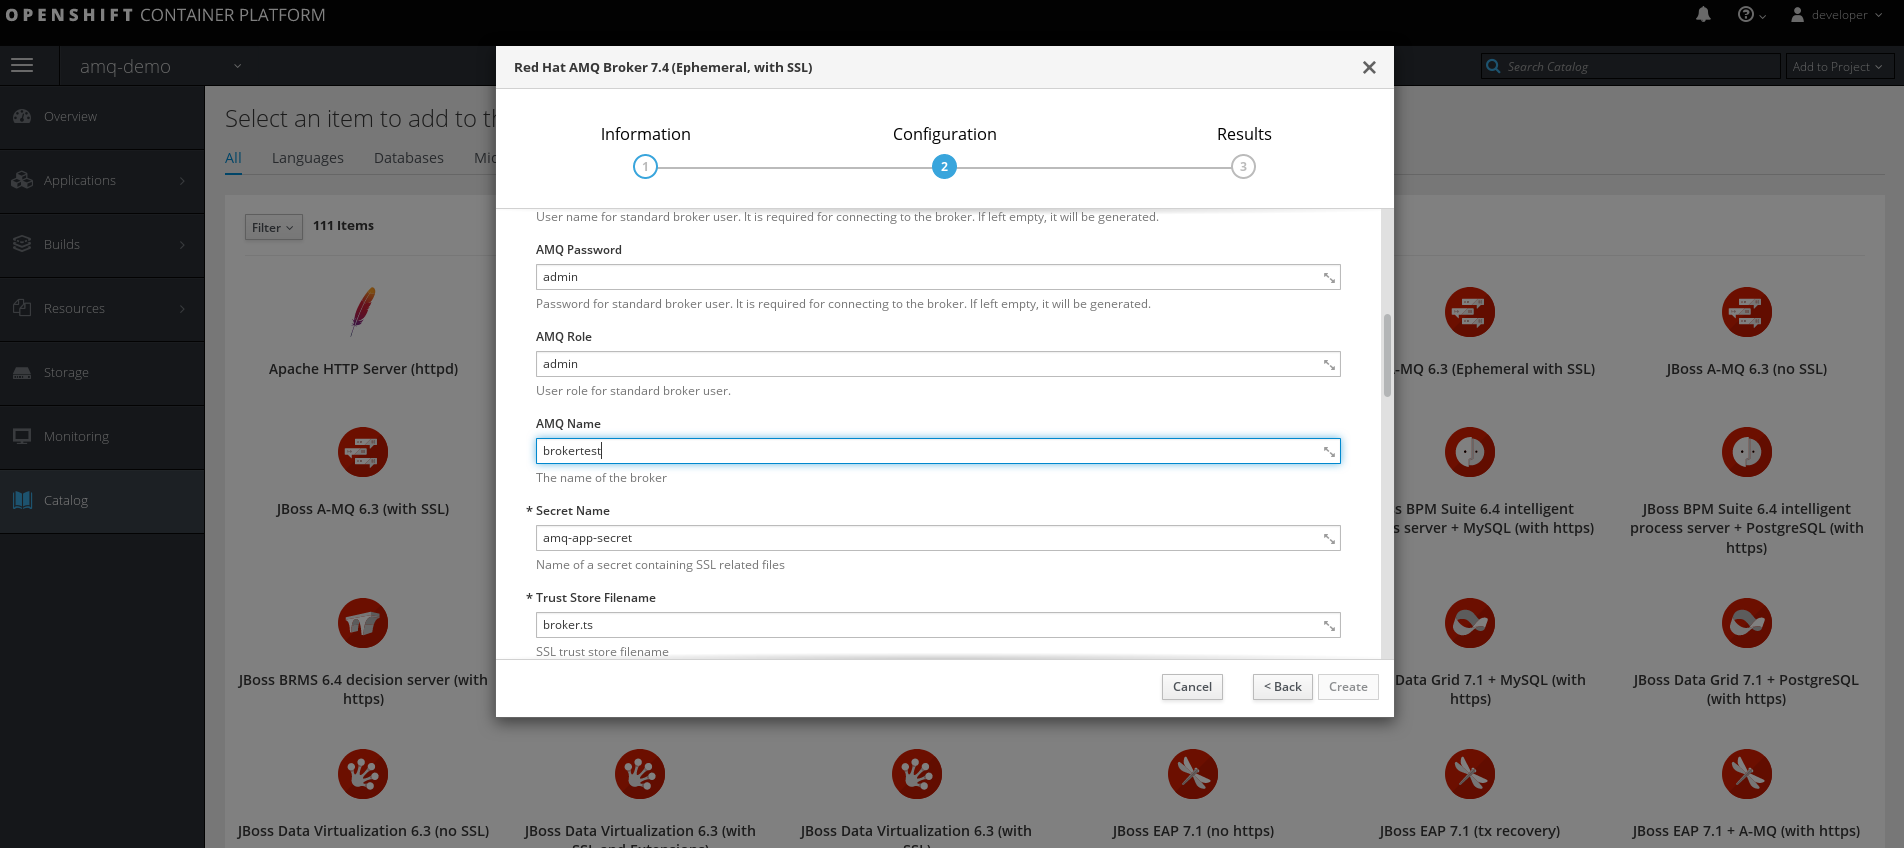
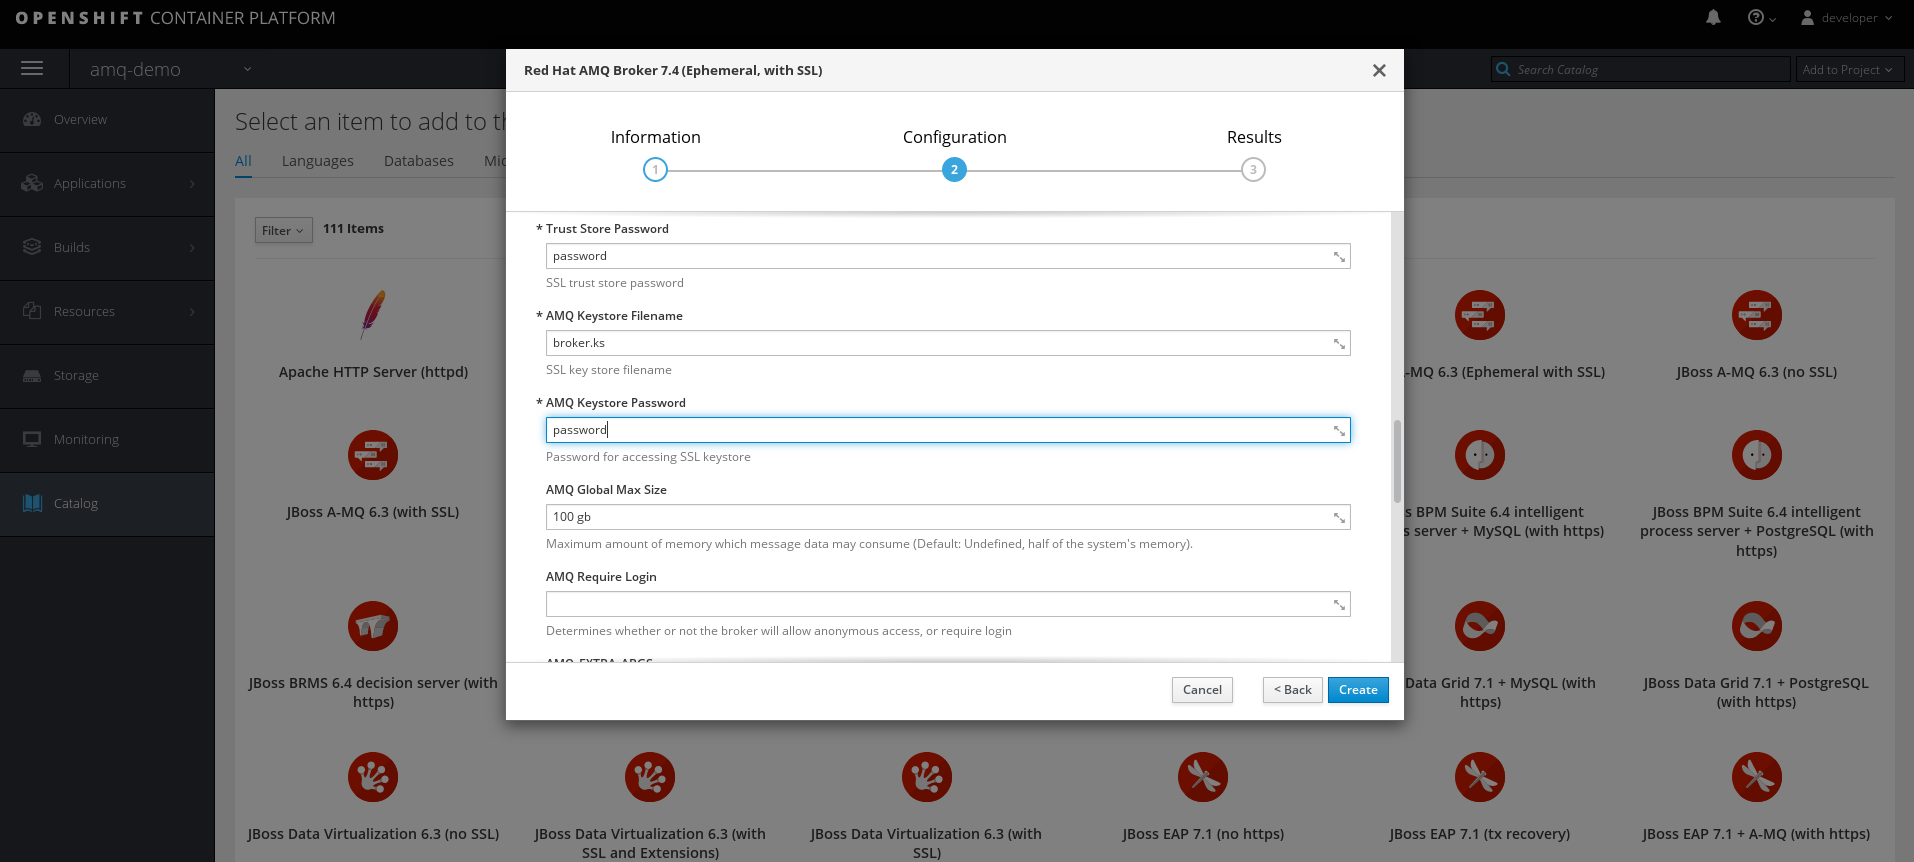
- Broker setup is easy with the OpenShift GUI. In the amq-demo project, browse the catalog and search for the template Red Hat A-MQ 7.4 (Ephemeral with SSL). The following six figures describe the information that you need to fill in for Broker setup. Once the configuration is complete, click the Create button:

- Run the following commands to check for services and pods. After a successful setup, you should have these available:
[cpandey@cpandey AMQ74_CERTIFICATE]$ oc get service|grep ssl
brokertest-amq-amqp-ssl ClusterIP 172.30.4.207 5671/TCP 2m
brokertest-amq-mqtt-ssl ClusterIP 172.30.145.232 8883/TCP 2m
brokertest-amq-stomp-ssl ClusterIP 172.30.20.224 61612/TCP 2m
brokertest-amq-tcp-ssl ClusterIP 172.30.160.172 61617/TCP 2m
[cpandey@cpandey AMQ74_CERTIFICATE]$

[cpandey@cpandey AMQ74_CERTIFICATE]$ oc get pod
NAME READY STATUS RESTARTS AGE
brokertest-amq-1-z2xjq 1/1 Running 0 3m
[cpandey@cpandey AMQ74_CERTIFICATE]$
- Now, create a route in the current project (amq-demo) for the MQTT service brokertest-amq-mqtt-ssl so that external clients can access Red Hat AMQ 7.4 in OpenShift. Set this route's termination type to passthrough so that the encrypted traffic goes to Red Hat AMQ 7.4 broker and TLS termination is not done at the route, specifically:
[cpandey@cpandey AMQ74_CERTIFICATE]$ oc create route passthrough --service brokertest-amq-mqtt-ssl route.route.openshift.io/brokertest-amq-mqtt-ssl created
- Now, if we check routes available in the current project (amq-demo):
[cpandey@cpandey AMQ74_CERTIFICATE]$ oc get route
NAME HOST/PORT PATH SERVICES PORT TERMINATION WILDCARD
brokertest-amq-mqtt-ssl brokertest-amq-mqtt-ssl-amq-demo.192.168.42.111.nip.io brokertest-amq-mqtt-ssl passthrough None
console console-amq-demo.192.168.42.111.nip.io brokertest-amq-jolokia passthrough None
[cpandey@cpandey AMQ74_CERTIFICATE]$
Step 3: Set up the Java MQTT client
Now, set up the Java MQTT client external to your OpenShift environment. Once the route is configured, we just have to provide that URL in our client. Check out my personal GitHub code for examples:
- For the MQTT publisher client, check out MqttPublishSample.java.
- For the MQTT subscriber client, check out MqttSubscribeSample.java .
- To execute these clients, use ThreadFactory.java.
Note that we are using the client truststore client.ts, which we generated in Step 1.
Step 4: Monitor topic statistics
Now that you're set up, you can monitor your topic statistics:
[cpandey@cpandey AMQ74_CERTIFICATE]$ oc get pods
NAME READY STATUS RESTARTS AGE
brokertest-amq-1-z2xjq 1/1 Running 0 14m
[cpandey@cpandey AMQ74_CERTIFICATE]$ oc rsh brokertest-amq-1-z2xjq
sh-4.2$ cd /opt/amq/bin
sh-4.2$ ./artemis queue stat
OpenJDK 64-Bit Server VM warning: If the number of processors is expected to increase from one, then you should configure the number of parallel GC threads appropriately using -XX:ParallelGCThreads=N
|NAME |ADDRESS |CONSUMER_COUNT |MESSAGE_COUNT |MESSAGES_ADDED |DELIVERING_COUNT |MESSAGES_ACKED |
|DLQ |DLQ |0 |0 |0 |0 |0 |
|ExpiryQueue |ExpiryQueue |0 |0 |0 |0 |0 |
|activemq.management.b75e216e-902d-4393-8961-4a45dc54e4b6|activemq.management.b75e216e-902d-4393-8961-4a45dc54e4b6|1 |0 |0 |0 |0 |
|paho3709101254858.MQTT_paho|MQTT_paho |0 |0 |9 |0 |9 |
|queue1 |queue1 |0 |0 |0 |0 |0 |
sh-4.2$
Wrapping up
That's it. I hope this article helps you to quickly set up Red Hat AMQ 7.4 on OpenShift, plus the external secure client using the MQTT protocol. You can also check out this developer blog for setting up Red Hat AMQ 6.3 on OpenShift with the Camel-based Openwire Client using SSL.
Last updated: January 22, 2024