
In the first part of this series we explored the Istio project and how Red Hat is committed to and actively involved in the project and working to integrate it into Kubernetes and OpenShift to bring the benefits of a service mesh to our customers and the wider communities involved. If you want to play with Istio, check out the service mesh tutorials on learn.openshift.com. If you want to install it, follow the Istio Kubernetes quickstart instructions and install it on OpenShift 3.7 or later. Also don't miss Don Schenck's series of blogs on Istio technology in general to learn more about it and what Red Hat is doing in this space.
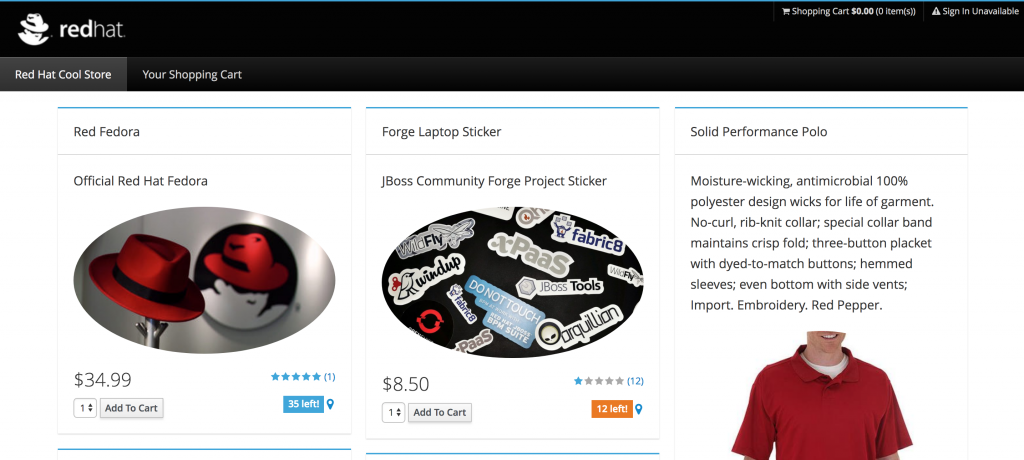
In this post, we will deploy the existing Coolstore microservices demo as a service mesh and start to demonstrate the tangible value you can get out of the system without any major rewrite or rearchitecture of the existing app. We'll also improve our project along the way to adhere to Istio (and general microservice) best practices. In the real world, your applications and developers often make bad assumptions or fail to implement best practices, so with this information you can learn something about your own projects. For Coolstore, many of these workarounds will eventually find their way into the source code of the demo.
Getting Started
Let's assume you already have OpenShift 3.7+ installed (I am using OpenShift Origin 3.9.0.alpha3 because at press time, OpenShift Container Platform 3.9 has not yet been released). Let's further assume you've installed Istio 0.6.0 or later, including the Prometheus, Servicegraph, Jaeger, and Grafana plug-ins (see the shell script installer in the More Reading section below for instructions on how to install istio and its plug-ins). Verify Istio is installed and running in the istio-system namespace:
% oc get pods -n istio-system
NAME                                READY     STATUS    RESTARTS   AGE
grafana-89f97d9c-2wtxx              1/1       Running   0          7m
istio-ca-59f6dcb7d9-bs9hx           1/1       Running   0          7m
istio-ingress-779649ff5b-jw4hg      1/1       Running   0          7m
istio-mixer-7f4fd7dff-pct4j         3/3       Running   0          7m
istio-pilot-5f5f76ddc8-pvq4d        2/2       Running   0          7m
jaeger-deployment-559c8b9b8-klspv   1/1       Running   0          7m
prometheus-cf8456855-svpmb          1/1       Running   0          7m
servicegraph-59ff5dbbff-7zrfp       1/1       Running   0          7m
Let's get started. Clone the Coolstore repo and then play along:
% git clone https://github.com/jbossdemocentral/coolstore-microservice
And make sure you are logged in as a cluster administrator, or you have cluster-admin privileges, since it'll require you to make some policy and permission changes later on. (As mentioned in part 1, this will be fine-tuned in future Istio releases to not require so much privilege and permission.) You can do this by logging in as a cluster administrator, or if you have sudoer privileges, you can add --as=system:admin to all the oc commands below.
Manual Injection of Sidecars
In part 1, I showed that with sidecar auto-injection, your app's pods are automatically festooned with Envoy proxies without ever having to change the application's deployments. However, there are issues with it that currently prevent us from using it. For now, we'll do manual injection. Manually injecting has the obvious drawback that you have to do the injection, but it has a big benefit as well: you need to do it only once (per release of Istio), and once it's done you can check in the results to your source code management system—infrastructure as code and all that.
Let's first set a few environment variables in our Linux shell so we can reference them later on. (Just copy and paste all of these commands into your Linux terminal. If you're on Windows, there is hope for you.)
# Version of Istio we are using
ISTIO_VERSION=0.6.0

# The name of the OpenShift project into which you installed Istio. It should
# be istio-system as that's what the Istio nstaller creates for you
ISTIO_PROJECT=istio-system

# Name of project to house our coolstore service mesh
COOLSTORE_PROJECT=coolstore-mesh

# Location of istio binaries that you downloaded and installed from istio.io
ISTIO_HOME=${HOME}/istio-${ISTIO_VERSION}

# Location of Coolstore microservice demo repo
COOLSTORE_HOME=${HOME}/coolstore-microservice
The Coolstore Microservice demo uses a lot of JBoss middleware, so let's install the necessary image stream definitions into the openshift namespace:
oc create -n openshift -f https://raw.githubusercontent.com/jboss-fuse/application-templates/master/fis-image-streams.json
oc create -n openshift -f https://raw.githubusercontent.com/jboss-openshift/application-templates/master/eap/eap70-image-stream.json
oc create -n openshift -f https://raw.githubusercontent.com/jboss-openshift/application-templates/master/webserver/jws31-tomcat8-image-stream.json
oc create -n openshift -f https://raw.githubusercontent.com/jboss-openshift/application-templates/master/openjdk/openjdk18-image-stream.json
oc create -n openshift -f https://raw.githubusercontent.com/jboss-openshift/application-templates/master/decisionserver/decisionserver64-image-stream.json
Next, create a project to house the mesh and give the default serviceaccount within the project the necessary permissions for Istio to do its thing:
oc new-project $COOLSTORE_PROJECT
oc adm policy add-scc-to-user privileged -z default
oc adm policy add-scc-to-user anyuid -z default
Now comes the big bang. The coolstore microservice demo comes with a giant OpenShift template that will create the microservices and associated databases in your new project. It will fire off a number of builds that should eventually succeed, but like many real-world projects, ours does not adhere fully to best practices for container-based microservices, so we'll need to work around these issues. We will use oc process to convert the template into a list of Kubernetes objects, and then pass them through the Istio manual injection CLI, which will do the same thing as auto-injection, but do it outside of OpenShift itself. Finally, after passing through the manual injector (istioctl kube-inject), the results are sent to OpenShift via oc apply. You could instead capture the output and save it to your source code management system, but for demo purposes we'll just send it directly to OpenShift. Right after deploying Coolstore, we'll stop the deployments using oc rollout cancel to give us a chance to do some hacking before things are up and running:
oc process -f ${COOLSTORE_HOME}/openshift/coolstore-template.yaml | \
 ${ISTIO_HOME}/bin/istioctl kube-inject -f - | \
 oc apply -f -

for i in $(oc get dc -o name) ; do
  oc rollout cancel $i
  oc rollout pause $i
done
At this point, your builds should be progressing (and CPU contributing to the heat death of the universe):
% oc get builds
NAME             TYPE      FROM          STATUS    STARTED          DURATION
cart-1           Source    Git@f63f51d   Running   37 seconds ago
catalog-1        Source    Git@f63f51d   Running   38 seconds ago
coolstore-gw-1   Source    Git@f63f51d   Running   38 seconds ago
inventory-1      Source    Git@f63f51d   Running   38 seconds ago
pricing-1        Source    Git@f63f51d   Running   37 seconds ago
rating-1         Source    Git@f63f51d   Running   37 seconds ago
review-1         Source    Git@f63f51d   Running   37 seconds ago
web-ui-1         Source    Git@f63f51d   Running   38 seconds ago
You can keep running oc get builds until the STATUS column shows Complete, but you don't have to wait for it in order to continue below.
While the builds are progressing (and deployments are cancelled), one of the first best practices this application does NOT follow is naming the service and container ports used. Istio currently requires that for services to participate in the service mesh, their exposed TCP ports must be named, and they must be named starting with http or https. Istio can only intelligently route and trace SNI or equivalent protocols such as HTTP and HTTPS that have parseable headers indicating the destination host, so by explicitly naming the service and container ports, you are confirming with Istio your service's intention to participate. It just so happens that all the Coolstore services bind to port 8080, so let's hack the demo and brute-force name all the service ports http for simplicity:
for i in $(oc get svc -o name) ; do
  PATCH=$(mktemp)
  cat <<EOF > $PATCH
spec:
  ports:
  - name: http
    port: 8080
    protocol: TCP
    targetPort: http
EOF
  oc patch $i -p "$(cat $PATCH)"
  rm -f $PATCH
done
With the above code, all our services' ports are now named (with the exception of database service ports, which you'll see in the output are skipped). We need to do the same for our containers, and we also need to add some sleep time (see part 1 or consult your doctor for an explanation of the need for sleep). Istio's intelligent routing can also operate on service versions, so you can do things like canary deployments or dark launches of different versions of a service. So we'll add a version specifier of v1 for all services (later, we'll do fun things with this). So here's the magic hack to do all of that to our DeploymentConfigs:
for i in $(oc get dc -o name) ; do
 oc label $i version=v1
 DCNAME=$(echo $i | cut -d'/' -f 2)
 PATCH=$(mktemp)
 cat <<EOF > $PATCH
spec:
  strategy:
    customParams:
      command:
      - /bin/sh
      - '-c'
      - 'sleep 5; echo slept for 5; /usr/bin/openshift-deploy'
  template:
    metadata:
      labels:
        version: v1
    spec:
      containers:
      - name: $DCNAME
        ports:
        - containerPort: 8080
          name: http
          protocol: TCP
EOF
   oc patch $i -p "$(cat $PATCH)"
   rm -f $PATCH
done
Next, since this demo is often used on low-powered laptops, by default, we disable (scale to 0 pods) some services. But because we're in big bang mode, let's turn those services back on:
for i in rating rating-mongodb review review-postgresql pricing ; do
  oc scale --replicas=1 dc $i
done
We're almost there. The next issue is with JBoss EAP. Out of the box, when the containerized JBoss EAP image starts up, it binds its Undertow listeners to a private IP address (the output of hostname -i). Due to the networking magic of Istio, it expects containers to bind to its public IP address or 0.0.0.0 (that is, all interfaces, and it's not documented anywhere that I could find). Unfortunately for us, the bind address for JBoss EAP is fixed to always bind to a private IP address on an interface that Istio does not control or proxy, so we have to resort to another hack to work around this. This hack modifies the JBoss EAP S2I builder image, creating a derived builder image (using the container image format that shall not be named) that we then use to rebuild our JBoss EAP–based inventory microservice so that it binds to 0.0.0.0:
cat <<EOF | oc new-build --name inventory-builder -D -
  FROM registry.access.redhat.com/jboss-eap-7/eap70-openshift:1.6
  RUN sed -i 's/JBOSS_HA_ARGS="-b \${IP_ADDR}/JBOSS_HA_ARGS="-b 0.0.0.0/' /opt/eap/bin/launch/ha.sh
EOF
Wait for it to complete:
for i in {1..200}; do oc logs -f bc/inventory-builder && break || sleep 1; done
And then rebuild the inventory service using S2I:
oc new-build --name inventory-hack --to='inventory:latest' ${COOLSTORE_PROJECT}/inventory-builder~${COOLSTORE_HOME} --context-dir=inventory-service
And wait for it to complete:
for i in {1..200}; do oc logs -f bc/inventory-hack && break || sleep 1; done
One final hack to go. We are using JBoss Fuse to implement our Coolstore gateway (which fronts all of our microservices and provides aggregated data back to the UI at runtime). Unfortunately, some features of Camel (most notably the ones we are using to implement our AggregationStrategy) strip HTTP headers when making downstream calls to other services. This will interfere with proper tracing, causing the downstream calls to appear as individual traces with a single span rather than as a single trace containing aggregated spans representing the downstream calls. Proper tracing comes relatively free with the Istio+Prometheus+Jaeger combination so popular these days, and there's a lot of value that can be extracted when tracing works, so let's hack around this limitation by modifying the source code to the Coolstore gateway to preserve the headers.
This hack assumes you have Maven 3.3.9+ installed, because it will do an in-place edit of the source using sed, then do a local rebuild of the hacked source code with Maven, and finally kick off an OpenShift S2I binary rebuild of the service on your local machine:
sed -i.bak 's/return original;/original.getOut().setHeaders(original.getIn().getHeaders()); return original;/g' \
 $COOLSTORE_HOME/coolstore-gw/src/main/java/com/redhat/coolstore/api_gateway/ProductGateway.java

mvn -f $COOLSTORE_HOME/coolstore-gw clean package -DskipTests -Dfabric8.skip -e -B

oc new-build --name coolstore-gw-hack --to='coolstore-gw:latest' --image fis-java-openshift:2.0 --strategy source --binary

oc start-build coolstore-gw-hack --from-file=${COOLSTORE_HOME}/coolstore-gw/target/coolstore-gw.jar --follow
One other best practice that Coolstore fails to follow is to declare all of the exposed ports in containers that you wish to access. Istio's proxy will proxy traffic only to named and declared ports, so if your containers are listening on undeclared or unnamed ports, you won't be able to access them, even from within the running container, because Istio transparently intercepts all traffic and passes traffic only on named ports. So in this case, our Coolstore gateway has failed to declare port 8081 (the port on which its health probes are exposed), so the health checks will fail. So for now, let's disable the Coolstore gateway health check (which in itself is a bad practice, and should be eventually fixed in Coolstore itself):
oc set probe dc/coolstore-gw --readiness --liveness --remove
The Final Step
Wow; that's a lot of hacking. With our newly minted and Istio-ified project, it's time to redeploy everything. We'll use oc rollout to do this for all of our deployments:
for i in $(oc get dc -o name) ; do
  oc rollout resume $i
  oc rollout latest $i
done
Wait for the redeployments to complete:
for i in $(oc get dc -o name) ; do
  oc rollout status -w $i
done
If the above command reports timeouts, just rerun the for loop until all deployments report success.
Ordinarily at this point, once all the deployments complete, you could access the UI of Coolstore directly, but we will use the built-in Istio Ingress component so that we can fully control routing of the incoming requests and generate respectable distributed traces from the start of the requests:
cat <<EOF | oc create -f -
apiVersion: extensions/v1beta1
kind: Ingress
metadata:
  name: coolstore-ingress
  annotations:
    kubernetes.io/ingress.class: "istio"
spec:
  backend:
    serviceName: web-ui
    servicePort: http
  rules:
  - http:
      paths:
      - path: /api/*
        backend:
          serviceName: coolstore-gw
          servicePort: http
EOF
This will set up Istio Ingress to route requests for /api/* to our Coolstore gateway, and all other requests will just go to the web UI front end. You will access the application through the Ingress route installed in the istio-system project (you did run oc expose svc/istio-ingress -n istio-system, right?)
After everything is rebuilt and all the deployments are successfully rolled out, you should be able to access the Coolstore UI through the Istio Ingress service URL in your browser, which you can generate with this command:
echo "CoolStore URL: http://$(oc get route istio-ingress -n ${ISTIO_PROJECT} --template='{{ .spec.host }}')"
You can also access the web consoles of various services such as Prometheus and Grafana. Run these commands and then copy/paste the URLs into your browser to verify that everything is working:
echo "Primary web frontend URL: http://$(oc get route istio-ingress -n ${ISTIO_PROJECT} --template='{{ .spec.host }}')"
echo "D3 force layout service graph: http://$(oc get route servicegraph -n ${ISTIO_PROJECT} --template='{{ .spec.host }}')/force/forcegraph.html?time_horizon=5m&filter_empty=true"
echo "Example Prometheus query: http://$(oc get route prometheus -n ${ISTIO_PROJECT} --template='{{ .spec.host }}')/graph?g0.range_input=30m&g0.expr=istio_request_count&g0.tab=0"
echo "Grafana Istio Dashboard: http://$(oc get route grafana -n ${ISTIO_PROJECT} --template='{{ .spec.host }}')/d/1/istio-dashboard?refresh=5s&orgId=1"
echo "Jaeger Tracing Console: http://$(oc get route jaeger-query -n ${ISTIO_PROJECT} --template='{{ .spec.host }}')"
We will explore these in the next post, but feel free to play around, access the page, generate some load, and inspect the results.
For added fun and value, access the Web front-end URL a few times in your browser, and then check out the D3 Force Layout endpoint above. It should look something like this:
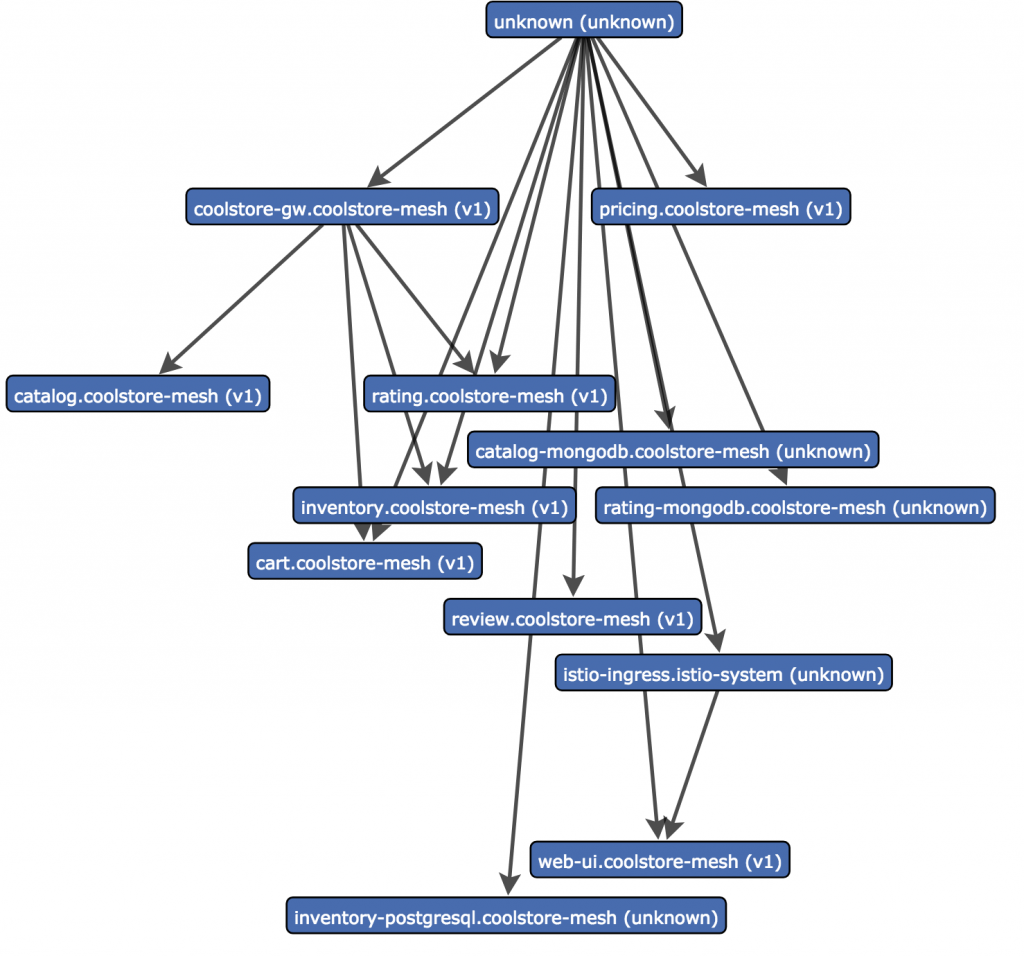
The diagram is pretty confusing, because some of the non-HTTP/S accesses (for example, to databases) aren't properly linked to the services calling them because Istio cannot interpret these calls. But you can, for example, see that the coolstore-gw makes several downstream calls to other services (inventory, catalog, rating, cart) and these will also show up as proper traces and spans in Jaeger.
Summary and Observations
This is a quick way to see a visualization of the service dependencies and confirm that the gateway is indeed accessing the underlying microservices. Some observations:
- You should name all of your container and service ports. You may have noticed in the hacks above we brute-force named all services on port 8080 as
http, but non-HTTP services (most notably PostgreSQL and MongoDB, both of which use non-HTTP protocols) were skipped/ignored. These services cannot participate in the service mesh because Istio currently cannot route these services. - Containerized JBoss EAP has a limitation that we worked around.
- JBoss Fuse has an unfortuate side effect for HTTP headers that we worked around.
- Manual injection is most likely better than auto-injection in production because you can capture it in infrastructure source code.
Auto-injection is great for demos (once this issue is resolved). - There is HUGE value in Istio+OpenShift for existing apps, whether they use microservices or not.
In the next part of this series, we'll explore additional value you can get out of Istio+OpenShift for existing applications, and we'll even detect and fix a few issues in our distributed microservice application using the power of Istio service mesh and Red Hat technology. Stay tuned!
