Recently, there has been a lot of buzz about two seemingly different products: Red Hat OpenShift and Microsoft Visual Studio Code (VSCode). Thanks to the help of Red Hat, the Java language is now supported inside of VSCode development environment. As Java is a first class citizen in Red Hat OpenShift, we will see how it is possible to debug your Java code running inside containers on OpenShift (thanks to Red Hat Container Development Kit) from within the VSCode IDE running on your desktop.
Prerequisites
In order to execute this sample, the following components should be installed:
- Java Development Kit: Java8 or Java9 JDK must be installed on your machine. You can download either from here.
- Microsoft Visual Studio Code: downloads are available here.
- The easiest way to install Red Hat Container Development Kit (CDK) is to use the Red Hat Development Suite installer.
Configure Microsoft VSCode
We need to configure Microsoft VSCode so that it supports editing and debugging Java projects.
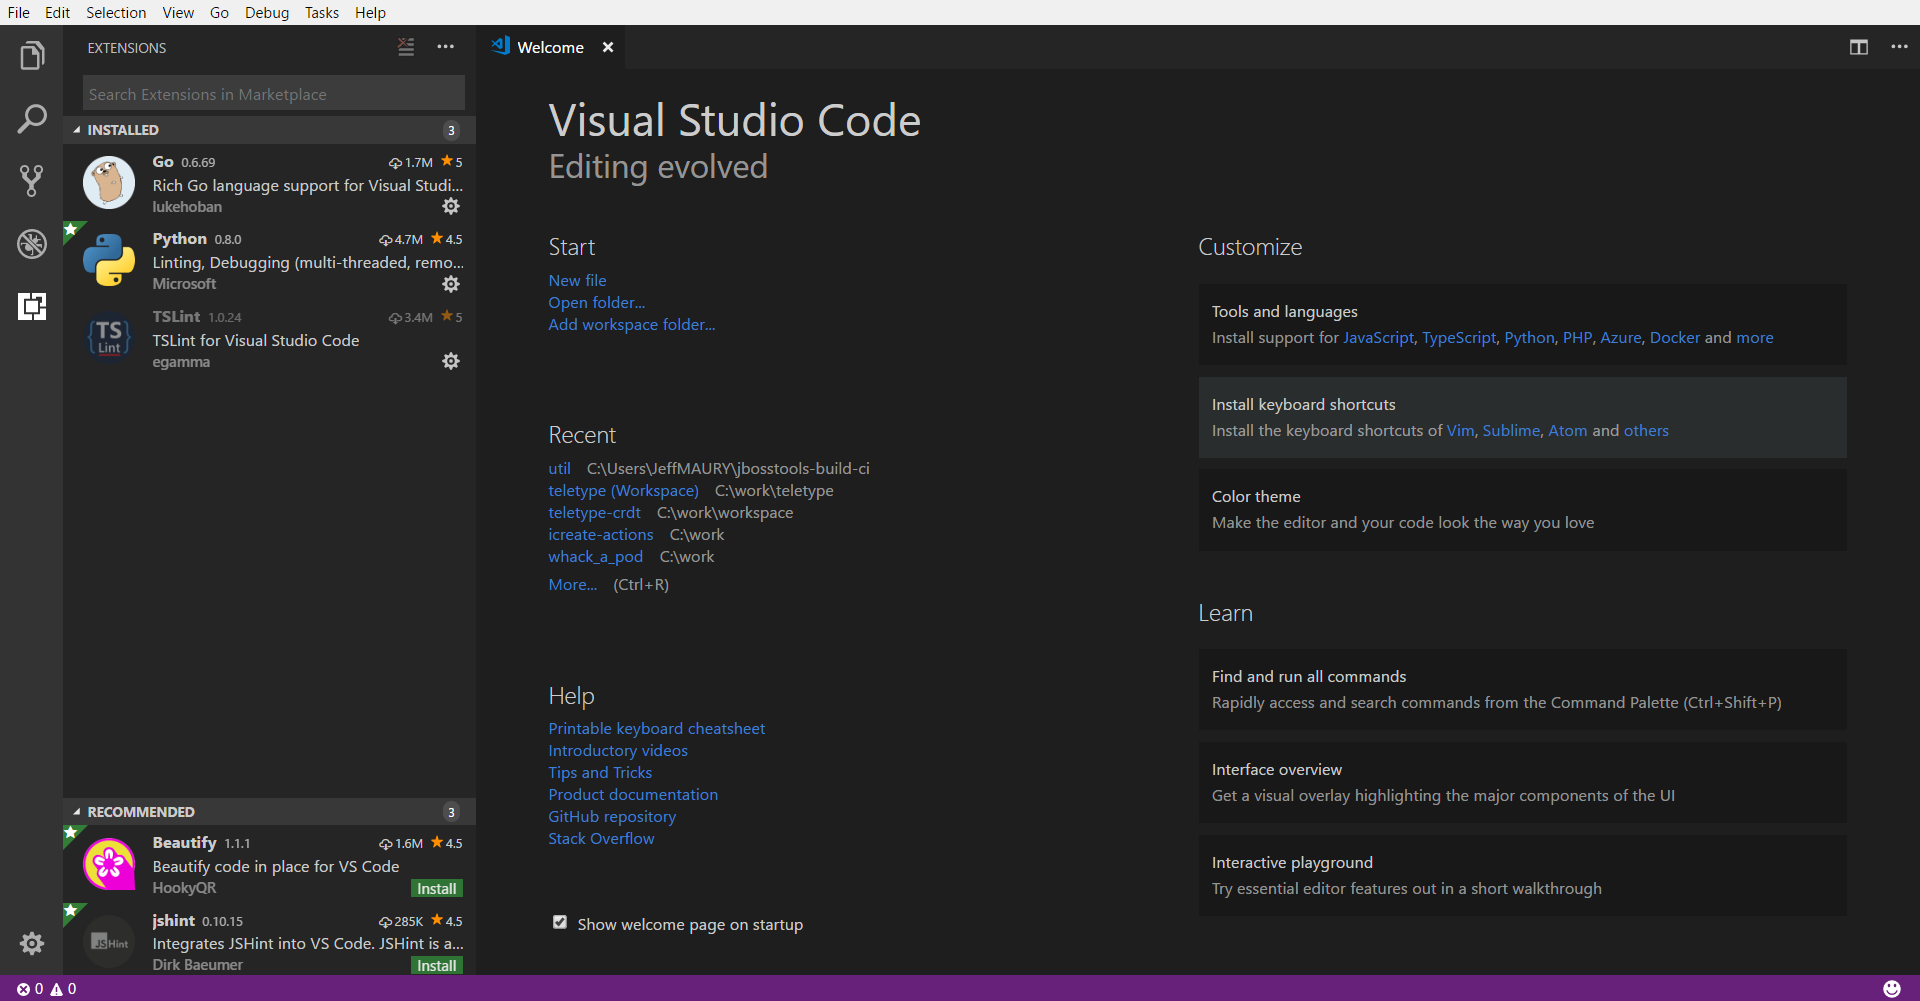
You can launch Microsoft VSCode and click on the Extensions icon in the left panel: ![]()
The following screen should appear:
Enter 'java' in the Extensions search bar. The list of available extensions is updated:
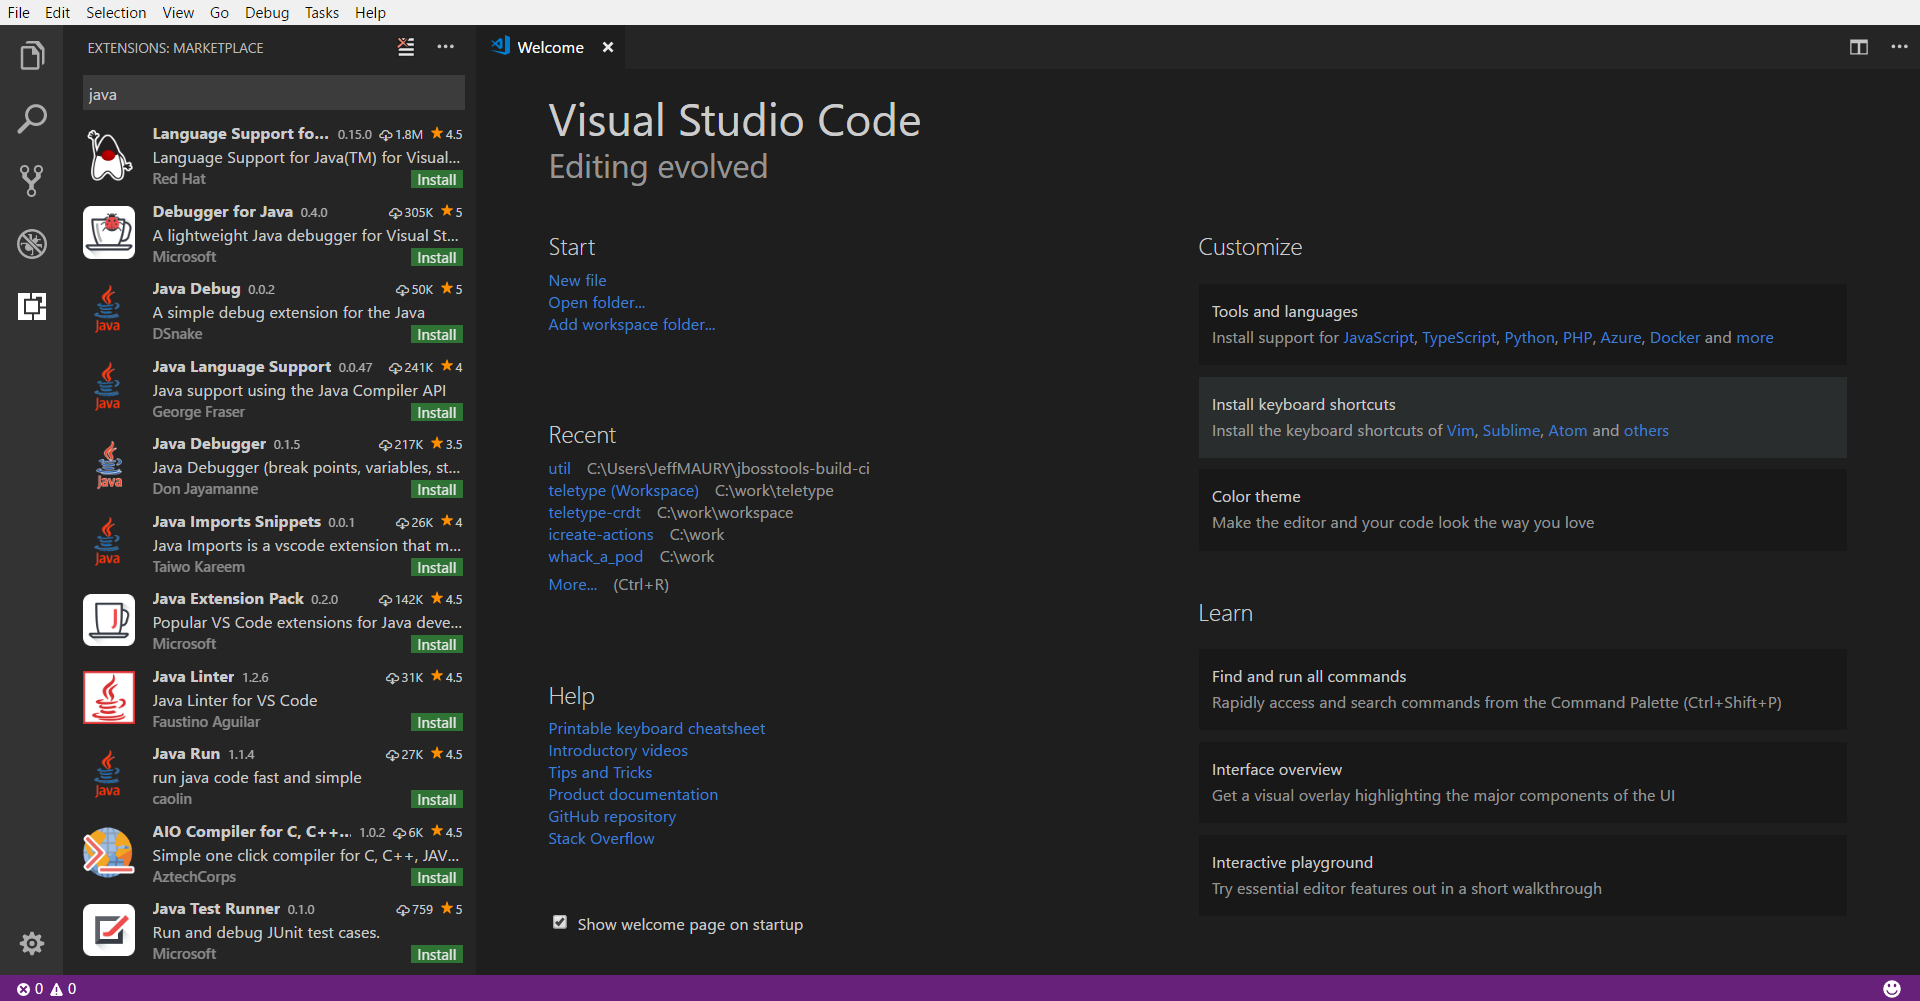
As we need debugging support, on the Debugger for Java, click the install button. You don't need to install the Language Support for Java™ by Red Hat as it will automatically be installed as a dependency.
The installation may take a long time to complete. When finished, after you cleared the Extensions search bar, you should see the following screen:
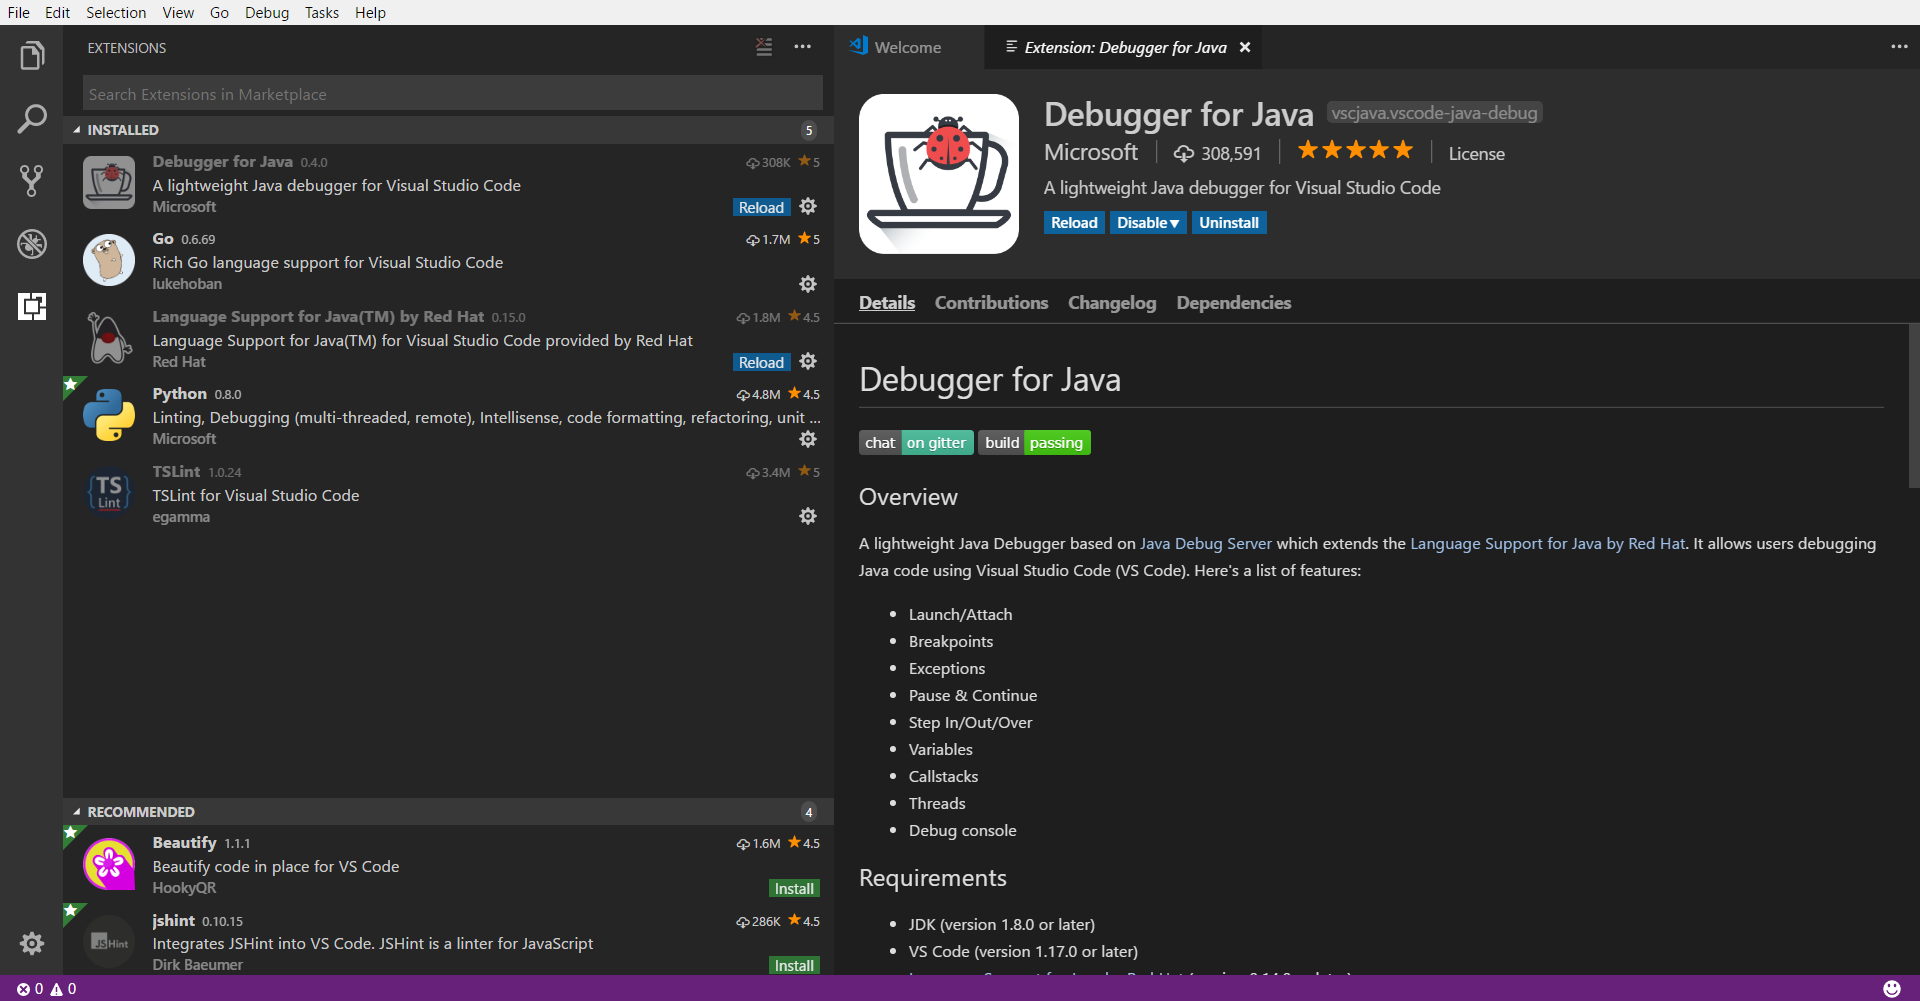
If you can see the Reload button, then click it to reload Microsoft VSCode.
The user interface will be reloaded and should be updated as seen below:
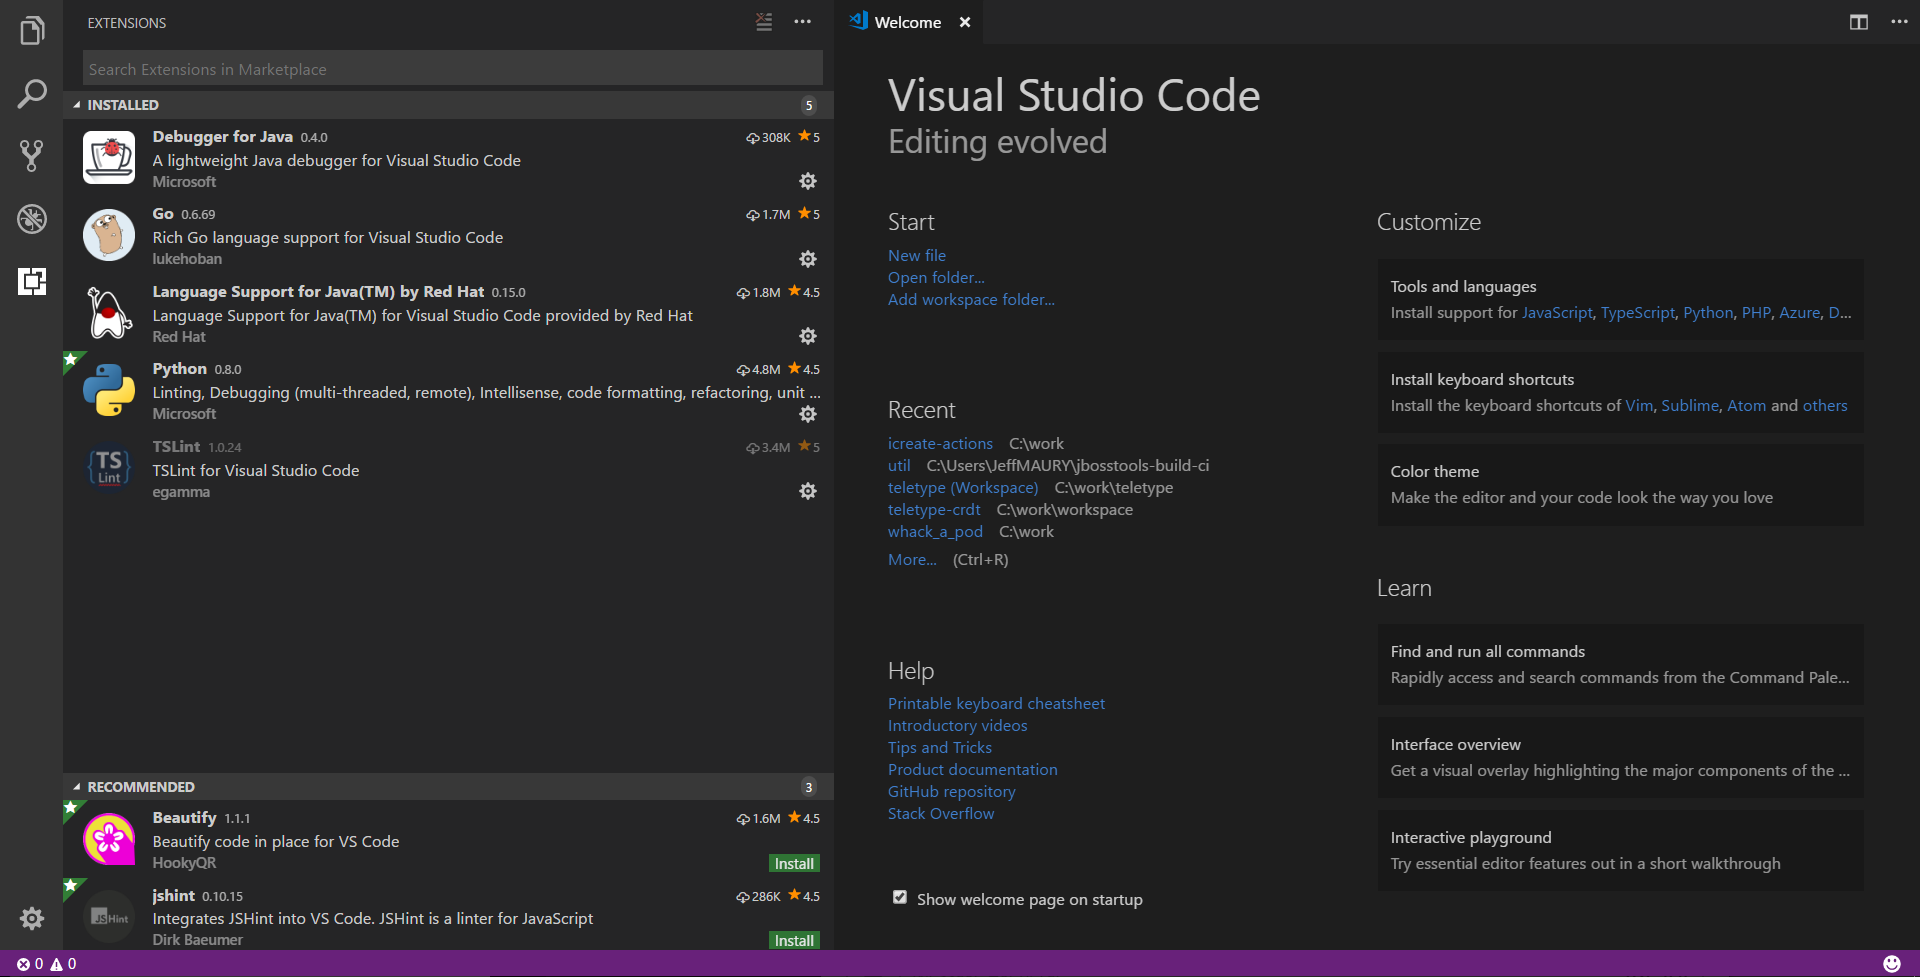
We're now ready to handle Java projects from Microsoft VSCode!
Deploy the OpenShift application
All the following operations will be performed from the Microsoft VSCode integrated terminal. In order to access it, go to the menu View -> Integrated Terminal.
Start Red Hat CDK
After you downloaded Red Hat CDK, you must make sure it is started before we can play with it. Go to the folder where you downloaded the minishift binary, and enter the following command:
minishift status
If the response states Running, then skip the following step.
The Red Hat CDK is not started, so you must start it. Enter the following command:
minishift start
It may take a long time (the VM may need to be created) and if you don't observe any error messages, the Red Hat CDK has started.
Make sure oc is on the PATH
Run the following command:
minishift oc-env
Follow the given instructions to make sure the oc binary is in the system PATH so we can now use it.
Create an OpenShift project for our deployment
Issue the following command:
oc new-project eap
If everything goes ok, you should see the following message:
Now using project "eap" on server "https://192.168.99.xxx:8443".
You can add applications to this project with the 'new-app' command. For example, try:
oc new-app centos/ruby-22-centos7~https://github.com/openshift/ruby-ex.git
to build a new example application in Ruby.
Deploy the application
Issue the following command:
oc new-app --image-stream=jboss-eap70-openshift https://github.com/jboss-developer/jboss-eap-quickstarts.git#7.0.0.GA --context-dir=kitchensink --env DEBUG=true
A bunch of OpenShift resources will be created, and if everything goes ok, you should see the following message:
--> Success
Images will be pulled and a new build will be spawned, this may take a while so be patient.
Expose the service
In order to access the application through a web browser, we must expose the just deployed service through an OpenShift route.
Run the following command:
oc expose service jboss-eap-quickstarts
In order to get the URL used to access the application, run the following command:
oc get routes
You should see something similar to this:
NAME                  HOST/PORT                                       PATH SERVICES              PORT     TERMINATION WILDCARD
jboss-eap-quickstarts jboss-eap-quickstarts-eap.192.168.99.100.nip.io      jboss-eap-quickstarts 8080-tcp             None
We now need to increase the timeout for this route as it may expire when we step into the code while debugging. Run the following command:
oc patch route/jboss-eap-quickstarts -p "{\"metadata\":{\"annotations\":{\"haproxy.router.openshift.io/timeout\":\"1h\"}}}"
Import the source code for the application
We will now first import the application source code to one of your local workstation folders and then load the application source code into Microsoft VSCode.
Open the Command Palette (View -> Command Palette or Ctrl+Shift+P) and then enter git. You should see the list of commands for Git:
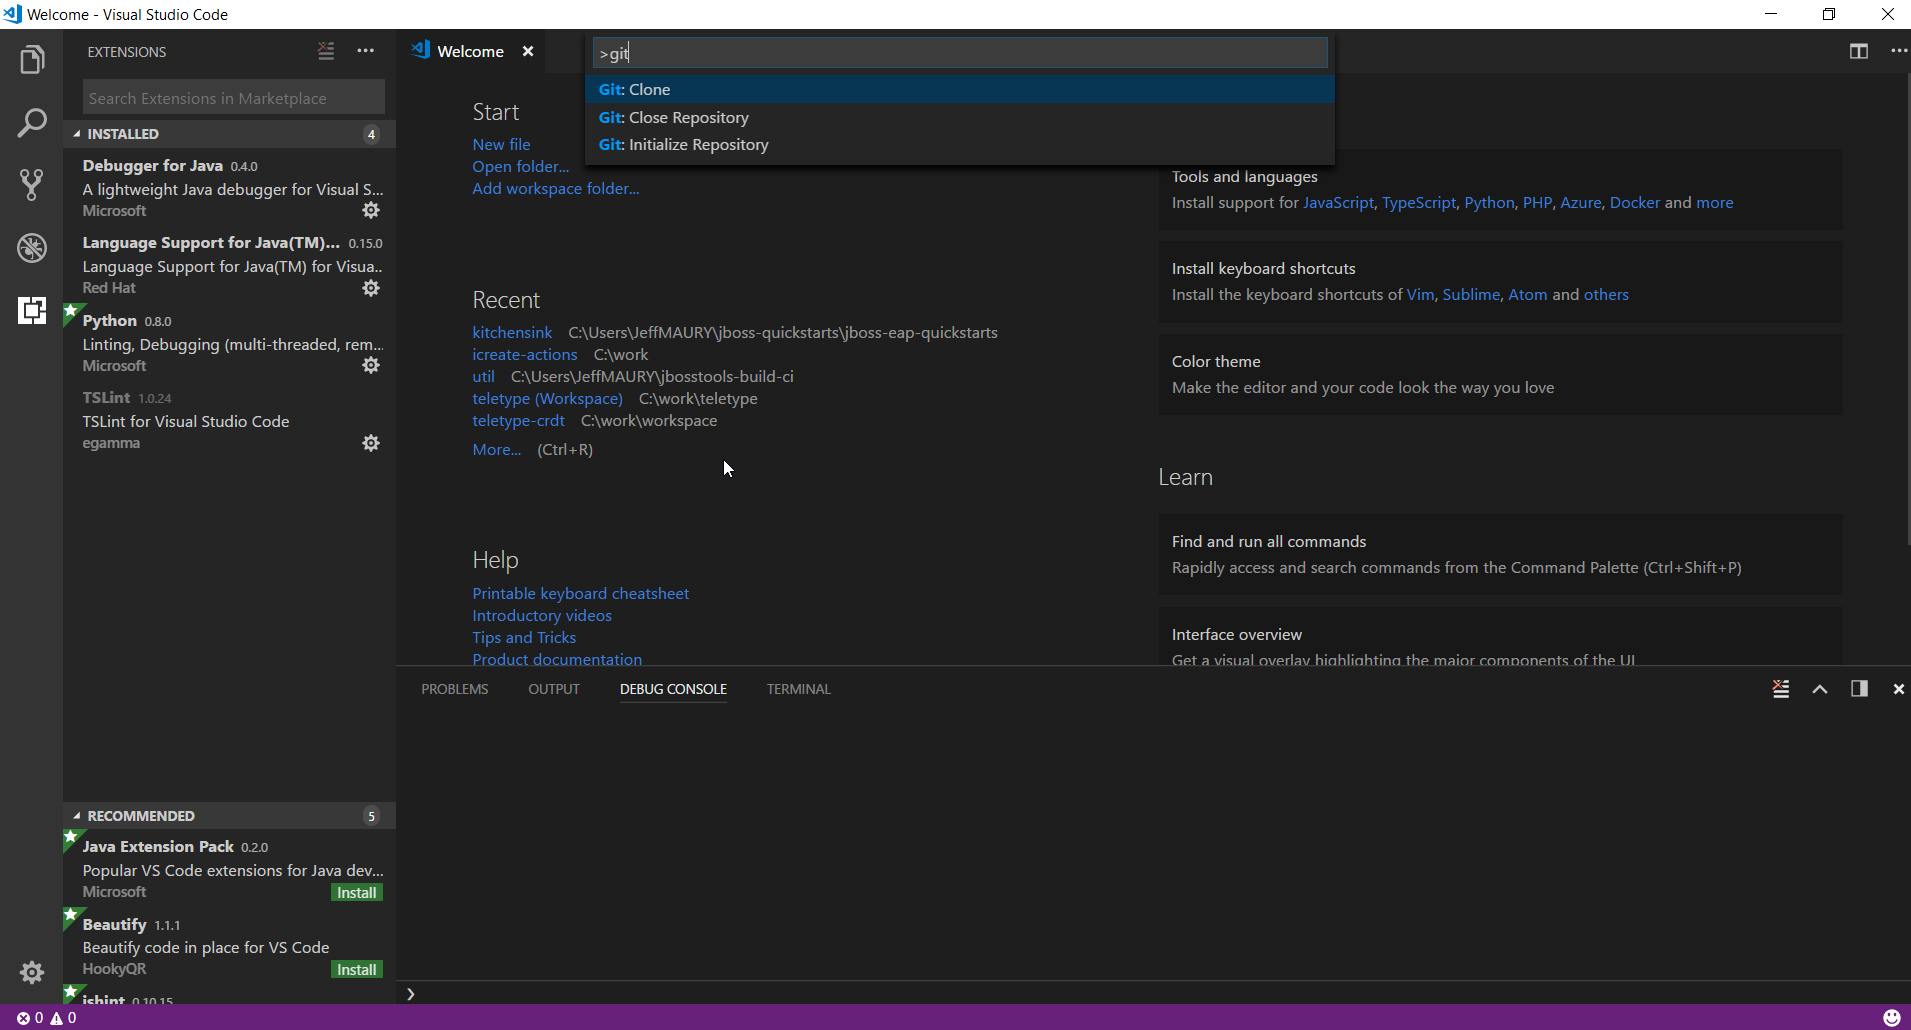
Select the Git: Clone command and press Enter.
The Git repository URL will be required:
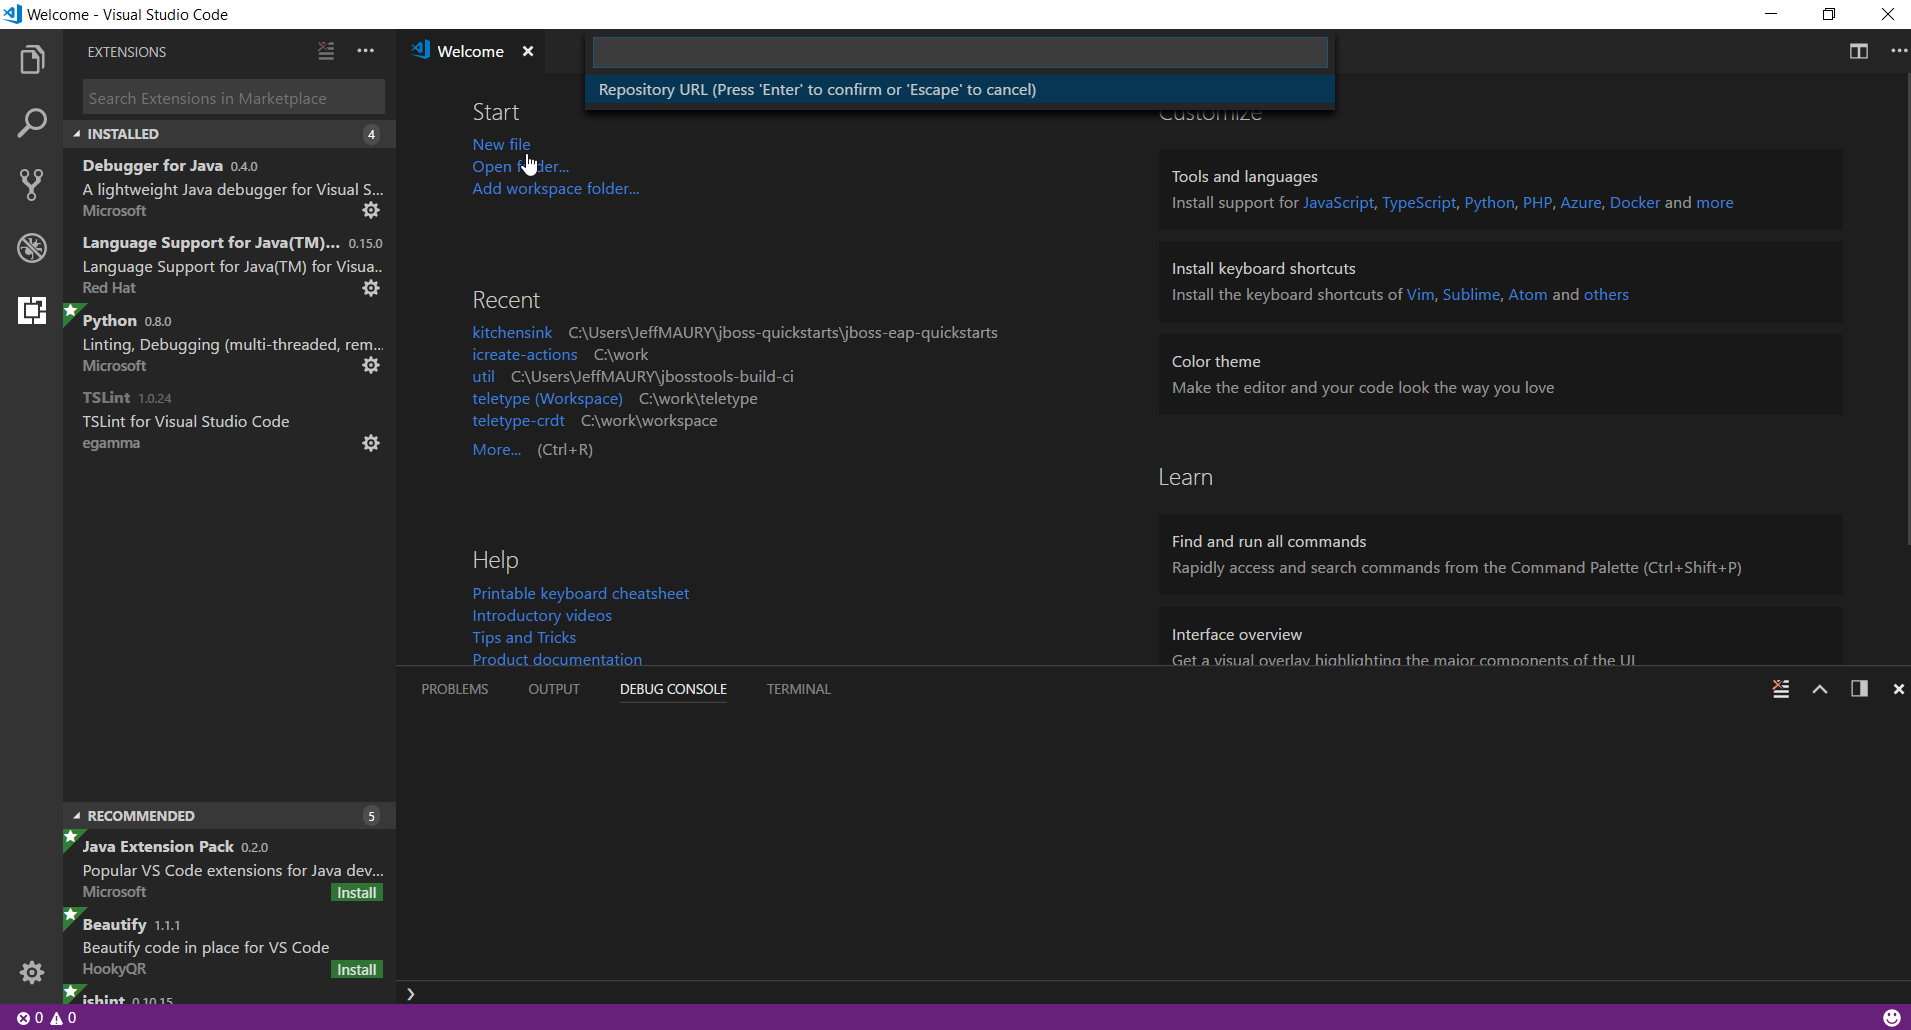
Enter https://github.com/jboss-developer/jboss-eap-quickstarts.git in the text box and press Enter.

You must provide a folder where the Git repository will be cloned. You can specify your HOME folder as an intermediate folder and will be created by the git clone command.
The git clone command will be launched, this may take a while as this repository contains many applications.

When the clone command is finished, you will be asked to open the cloned repository:

Select the 'Close' button. We don't open the cloned repository because it contains too many applications and folders that would cause Microsoft VSCode take too much time to load.
Instead, we will load a subfolder called 'kitchensink'.
Select the Open Folder command (File -> Open Folder....) and select the kitchensink subfolder where you cloned the Git repository (do not double-click this folder but only keep it selected):
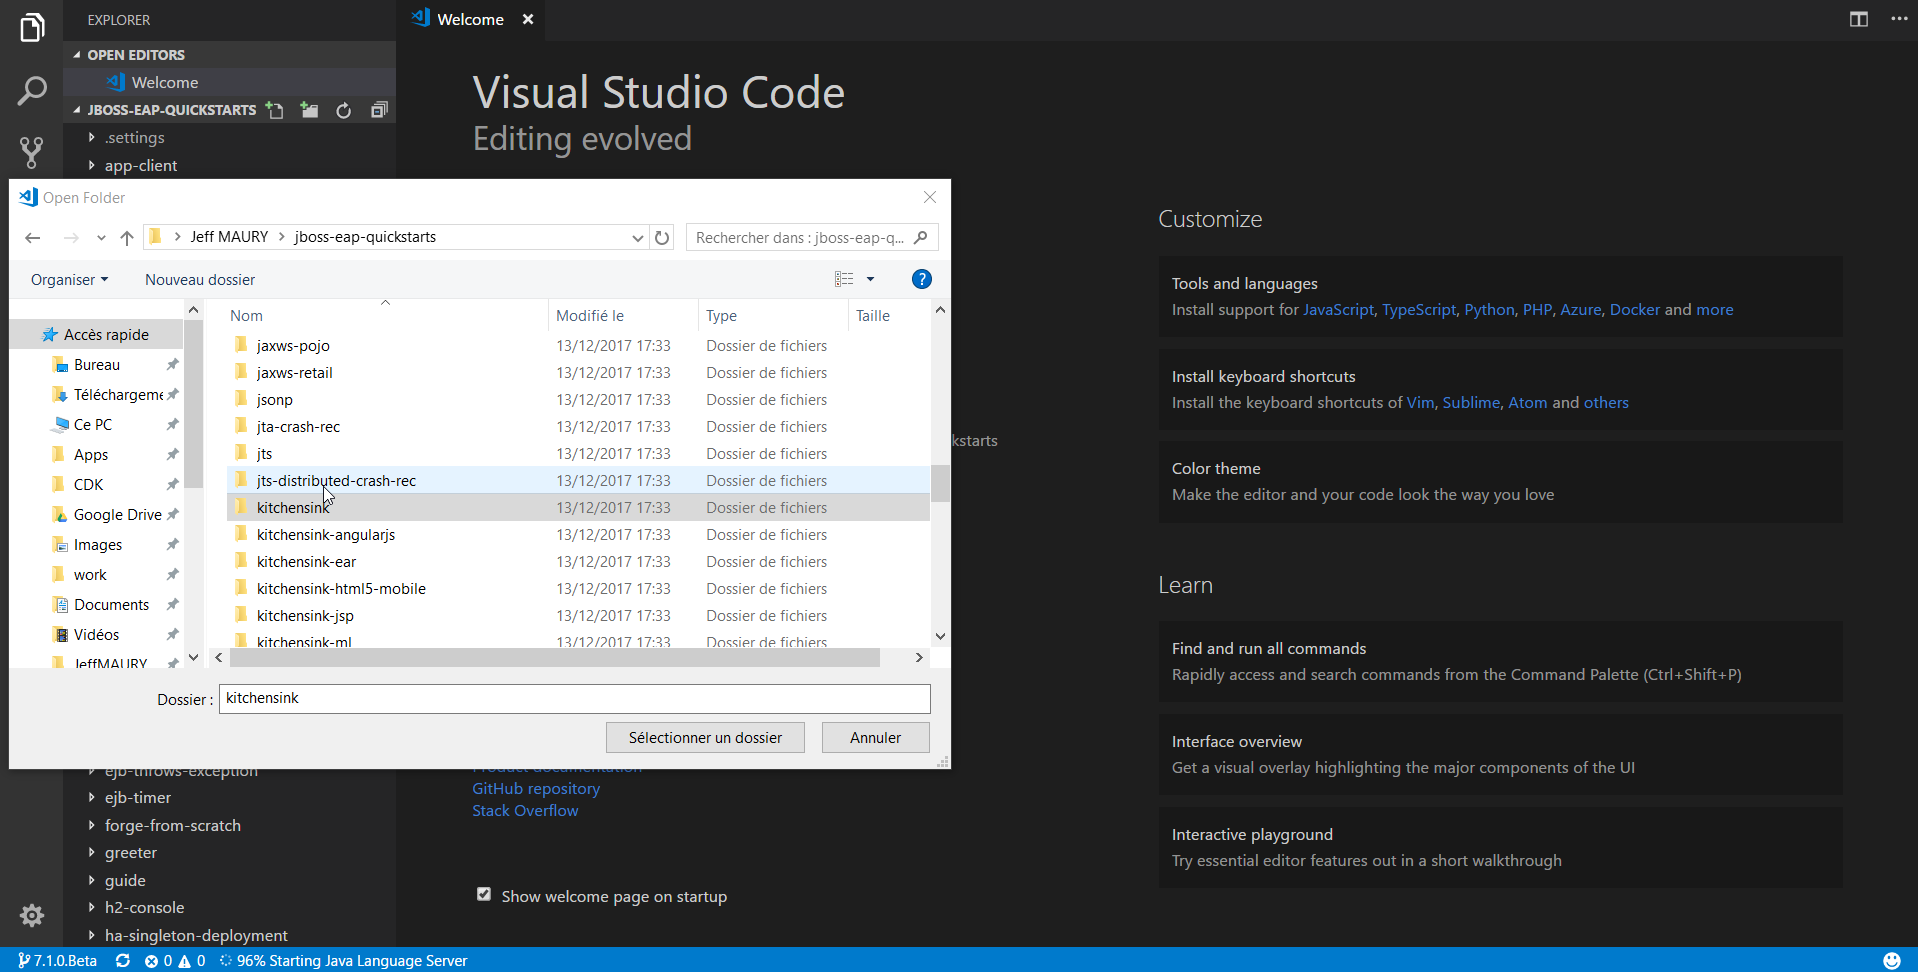
Then press the Select button to load the selected folder into Microsoft VSCode:
By default, the master branch has been checked out. But when we created the deployment, we use the 7.0.0.GA branch.
Open the Command Palette (View -> Command Palette or Ctrl+Shift+P) and then enter git. Select the Git:Checkout to... command and enter 7 in the text field. You should see all branches that contain the letter 7, starting with 7.0.0.GA:
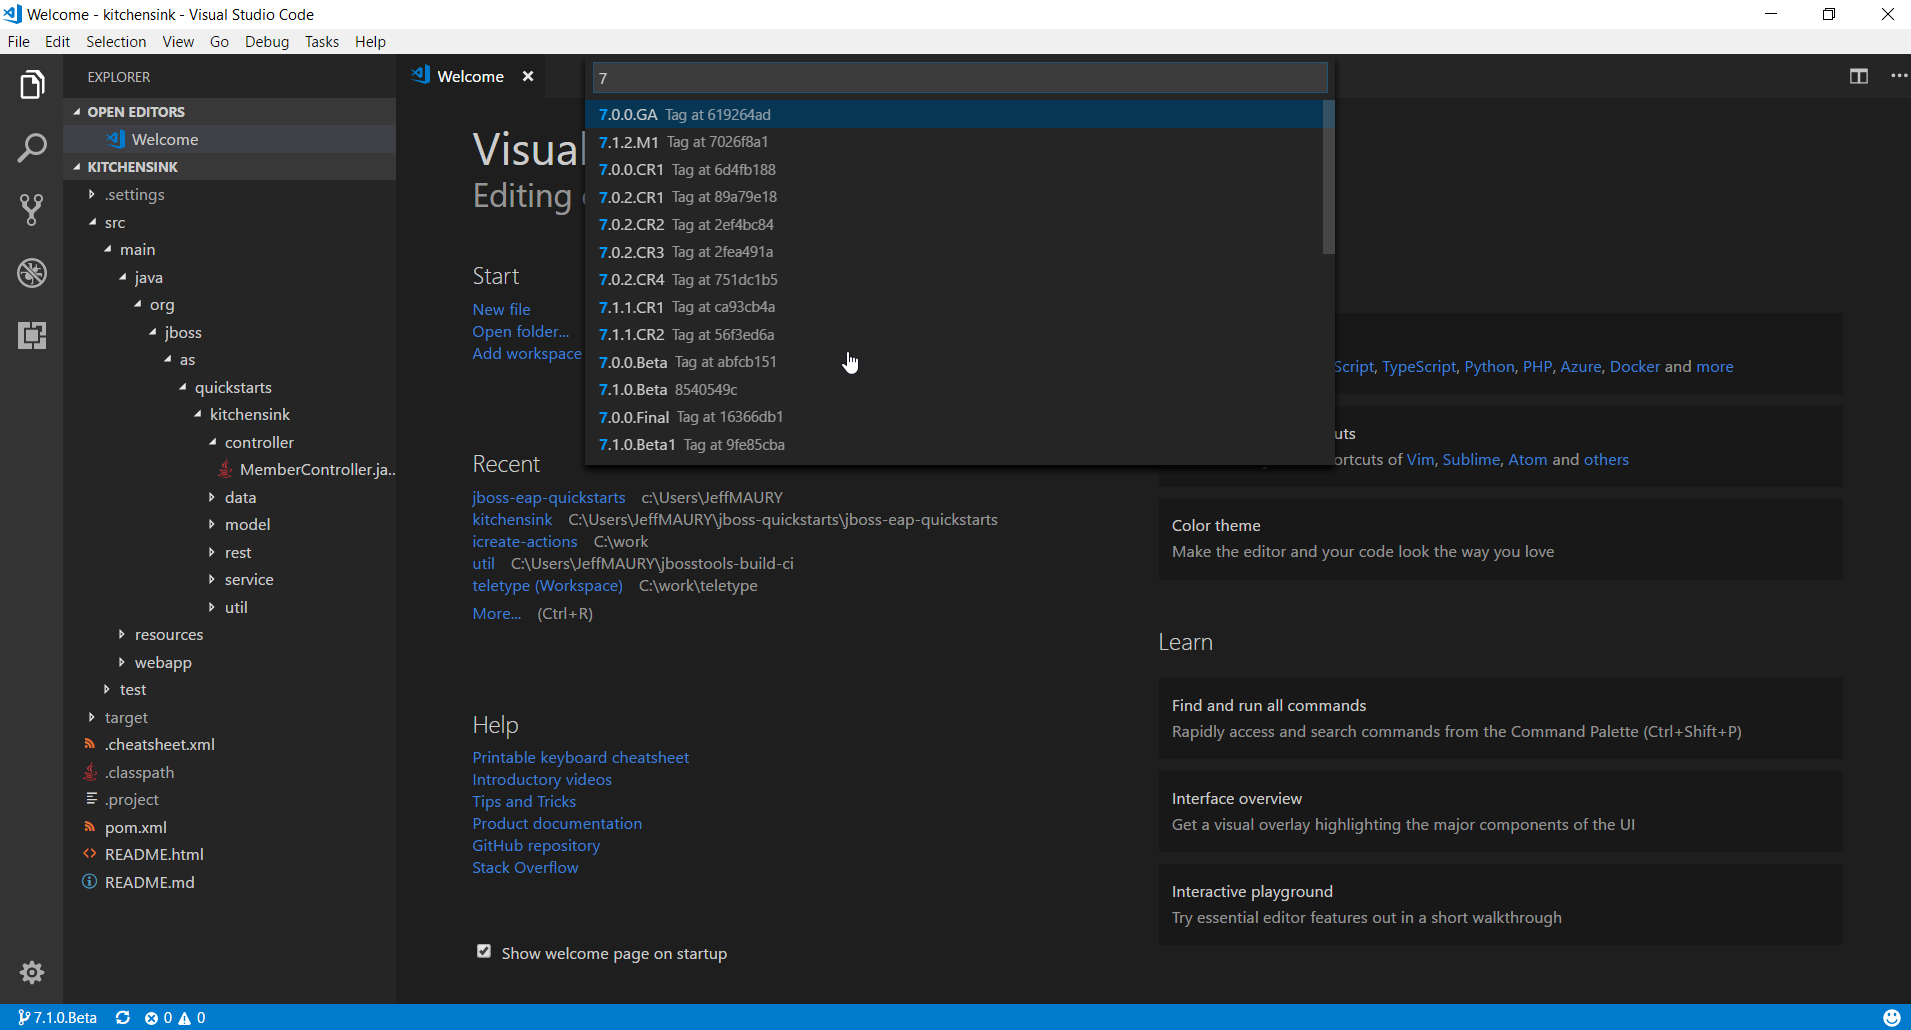
Select the 7.0.0.GA branch and press Enter.
You will see text warning you about a modified build file:
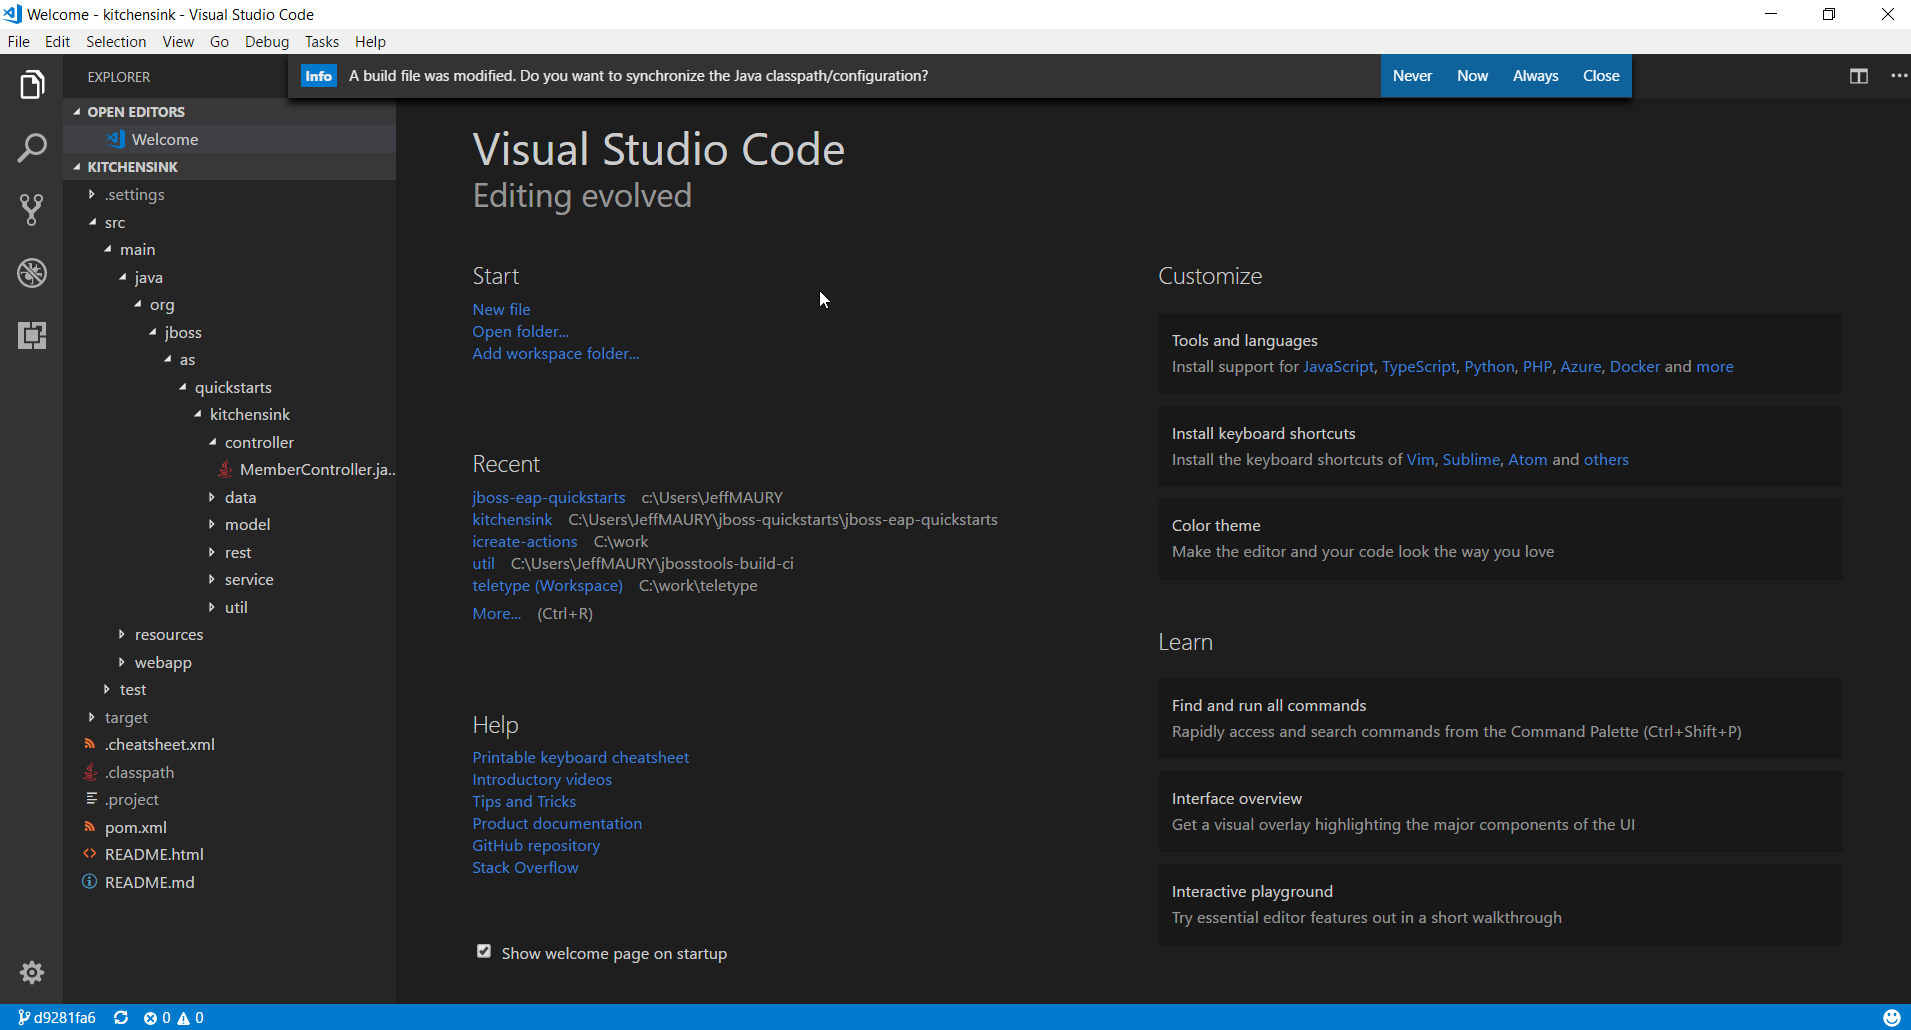
In order to synchronize the changes, press the Now or Always button.
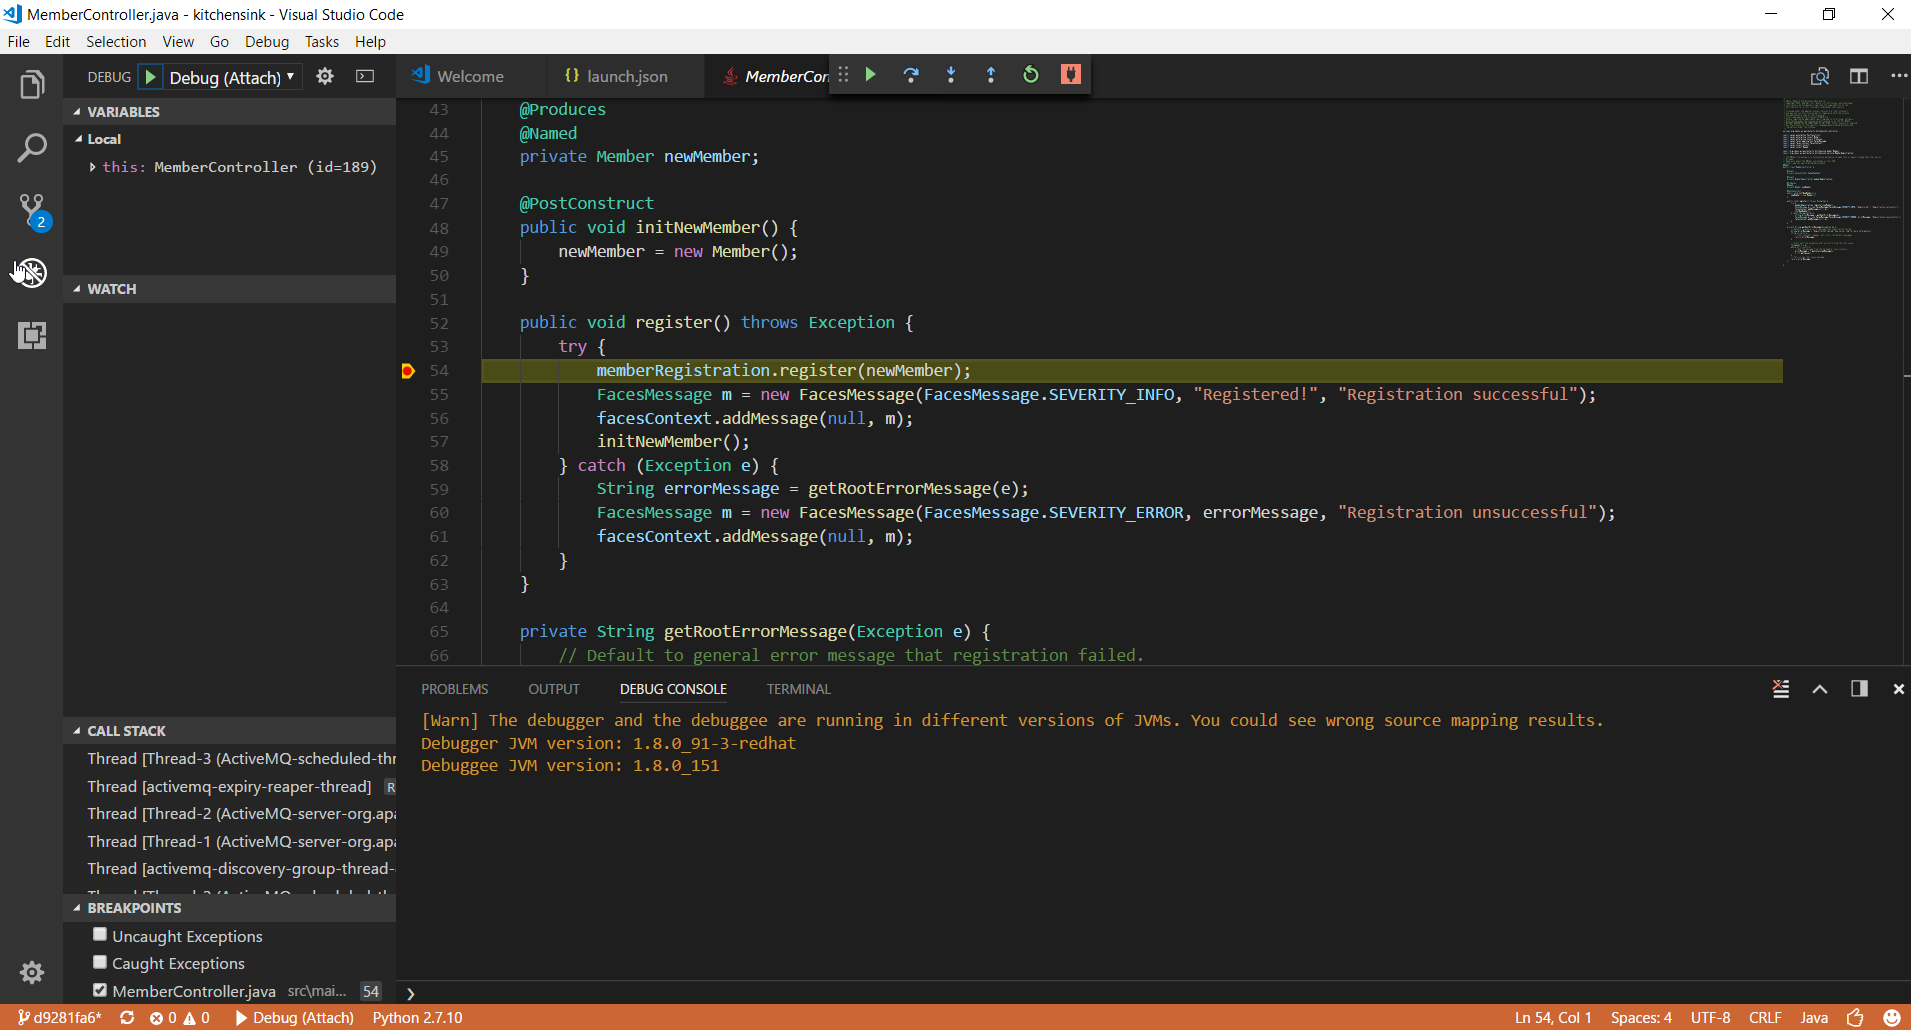
Set a breakpoint in the application code
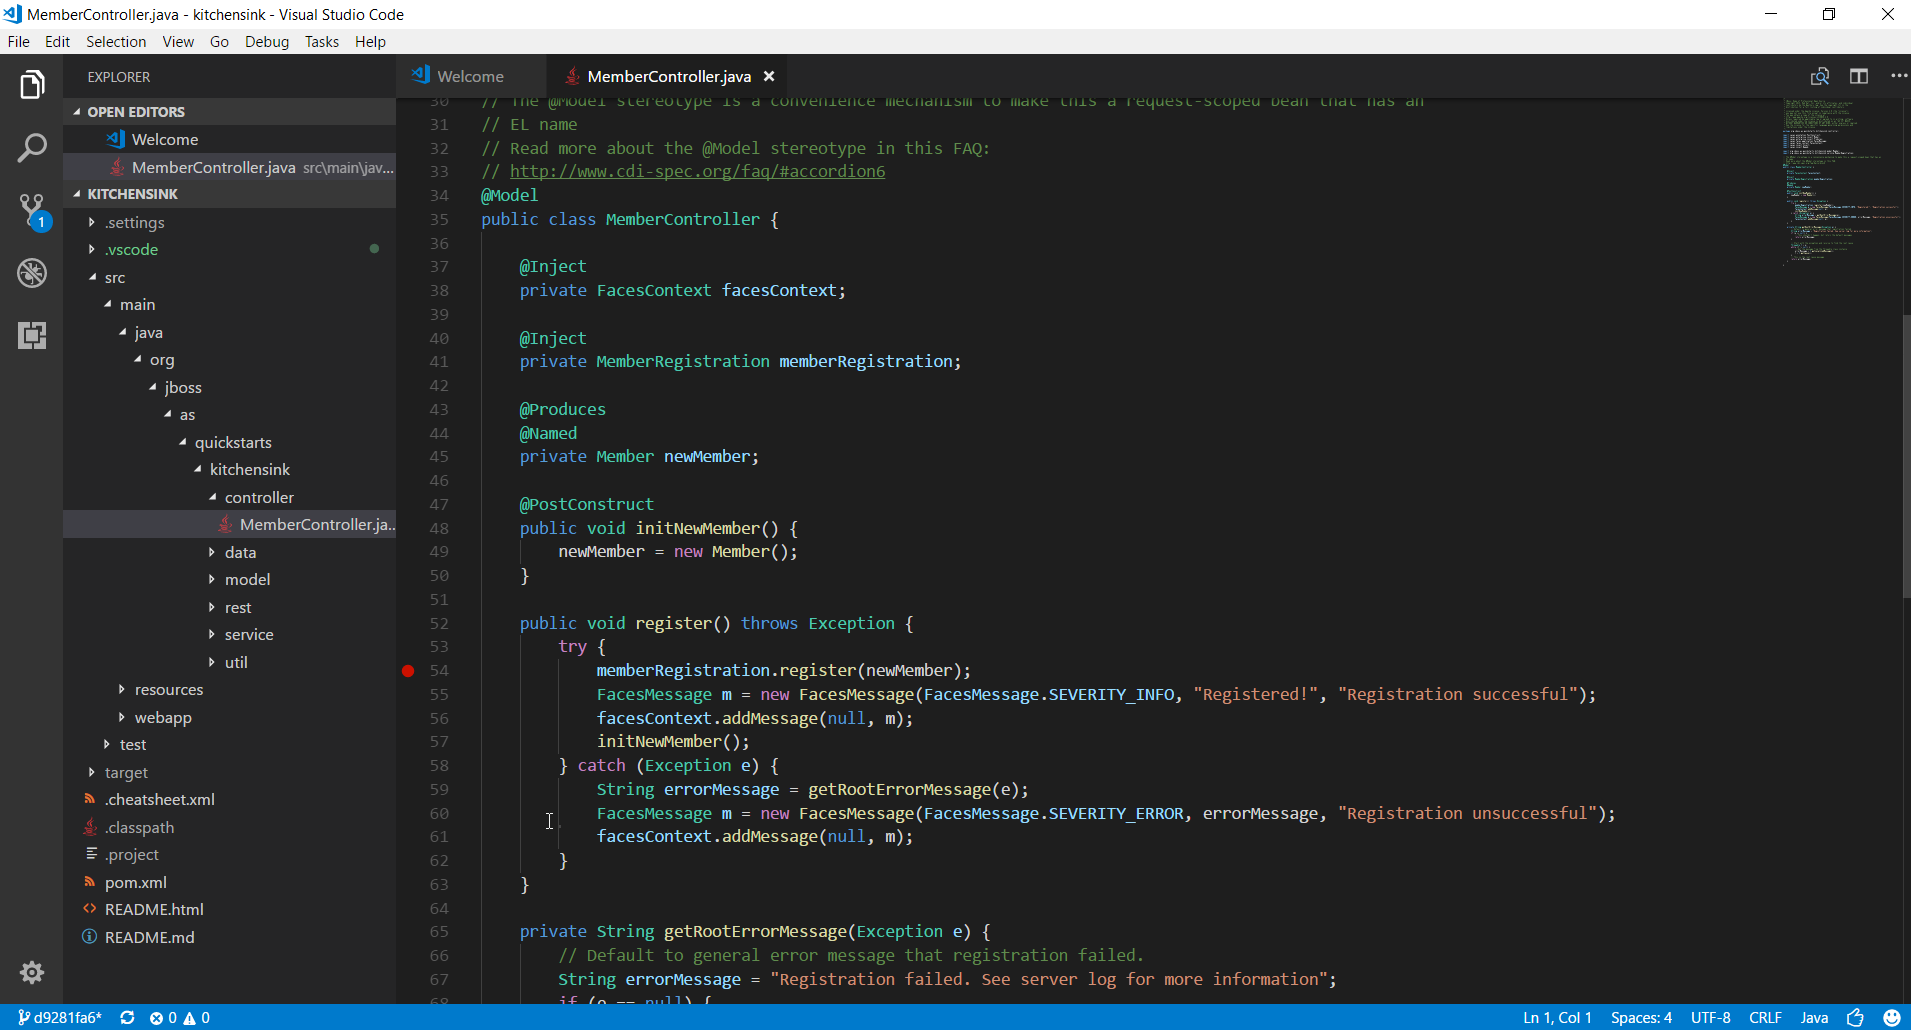
In the kitchensink project, open the src/main/java/org/jboss/as/quickstarts/controller/MemberController.java file:

You can see that syntax highlighting is active on this source file so the Java extensions we just installed previously are active.
Scroll down to the register() method:
Click in the ruler that is left to the line numbers, on line 54 to put a breakpoint at the first instruction of the register() method:
We're now ready to debug our program in Microsoft VSCode.
Enable debugging on the OpenShift side
In order to be able to remotely debug a Java program, Microsoft VSCode must be able to communicate with the Java(TM) virtual machine through a TCP port. This cannot be achieved through OpenShift as it's only for HTTP(S) traffic which Java debug protocol is not based on. On the pod side, the Java debugger is listening on port 8787. So, we will use an OpenShift/Kubernetes feature that allows you to proxy a local workstation TCP port to a remote pod TCP port, in our case the 8787 port.
In order to get the pod name, run the following command:
oc get pods --show-all=false
This would give a pod name like jboss-eap-quickstarts-n-suffix where n is a number and suffix is a unique string. Remember this name as the pod name.
Then run the following command:
oc port-forward pod_name 8888:8787
You should see the following output:
Forwarding from 127.0.0.1:8888 -> 8787
Forwarding from [::1]:8888 -> 8787
We're now ready to debug our OpenShift deployment just as it was a local Java program. Let's do it.
Launch a Java debugging session
First, start a debugging session (Debug -> Start Debugging or F5), you will have the list of debugging types supported that will be displayed:
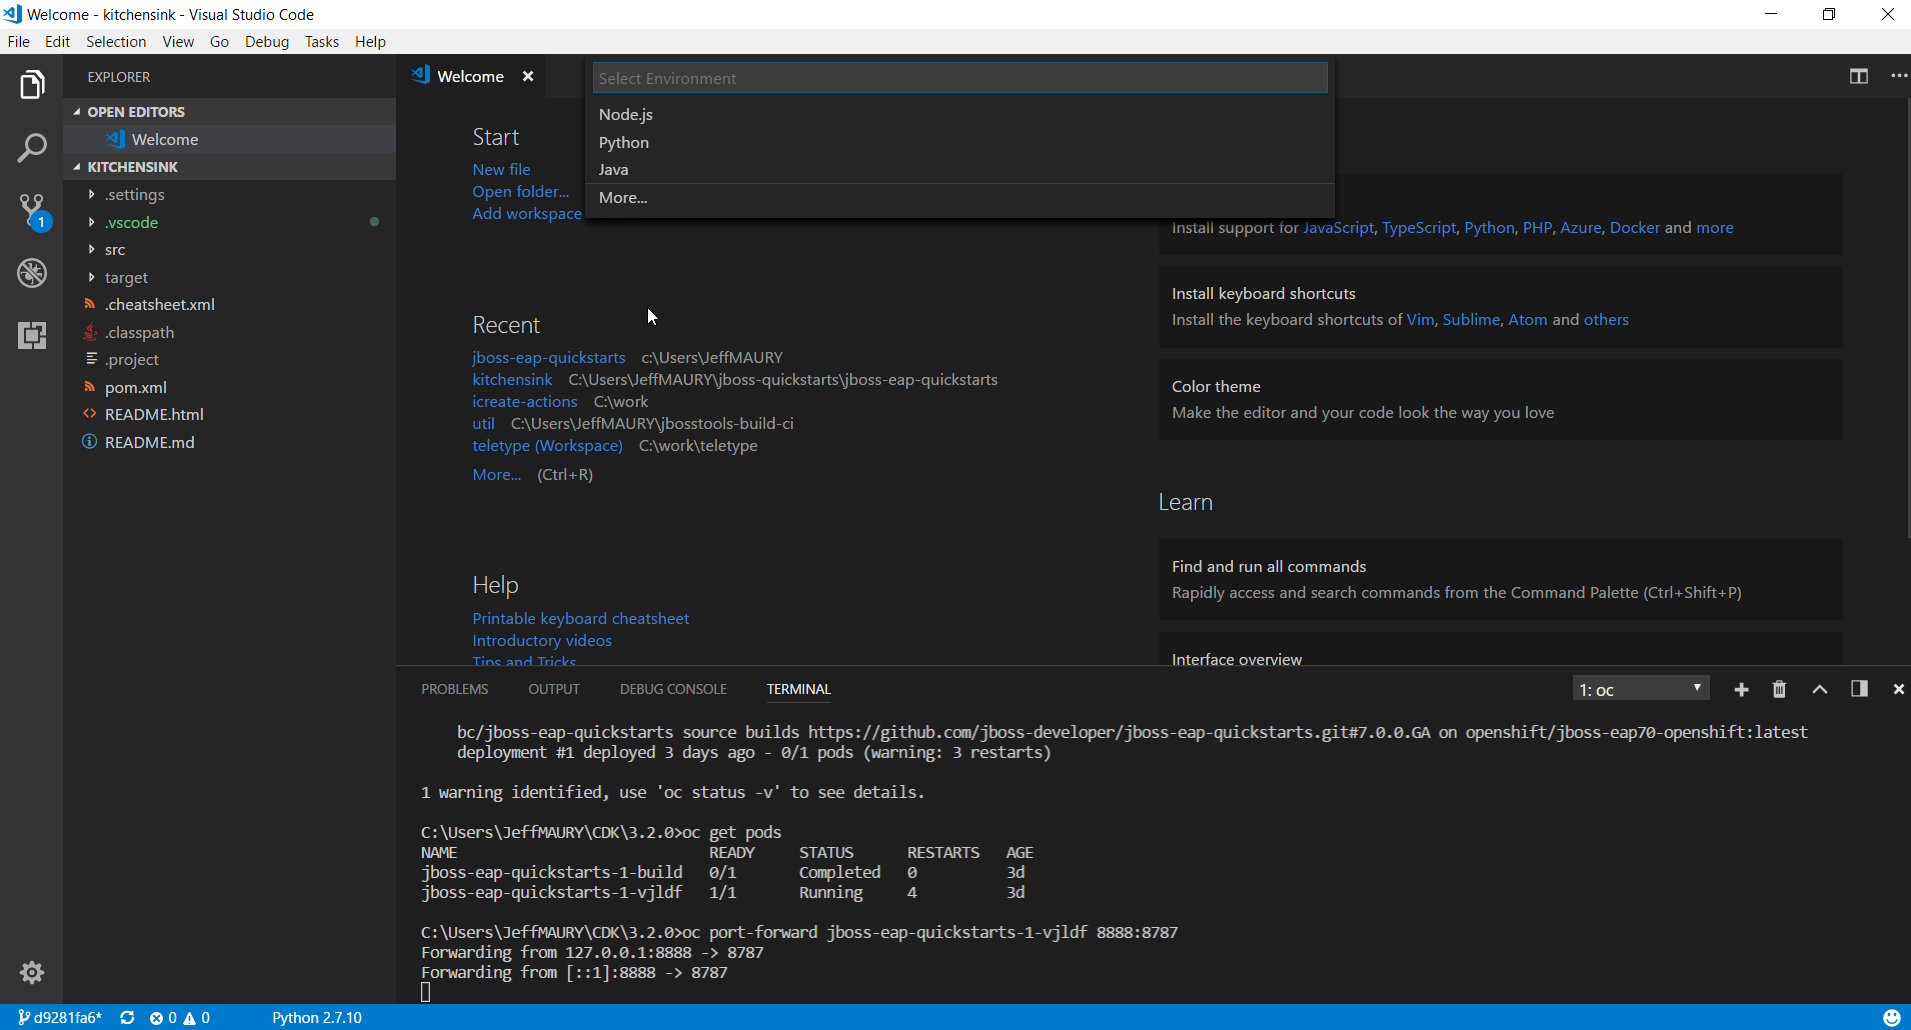
Select 'Java', a new file called launch.json will be created in your project and displayed in an editor:
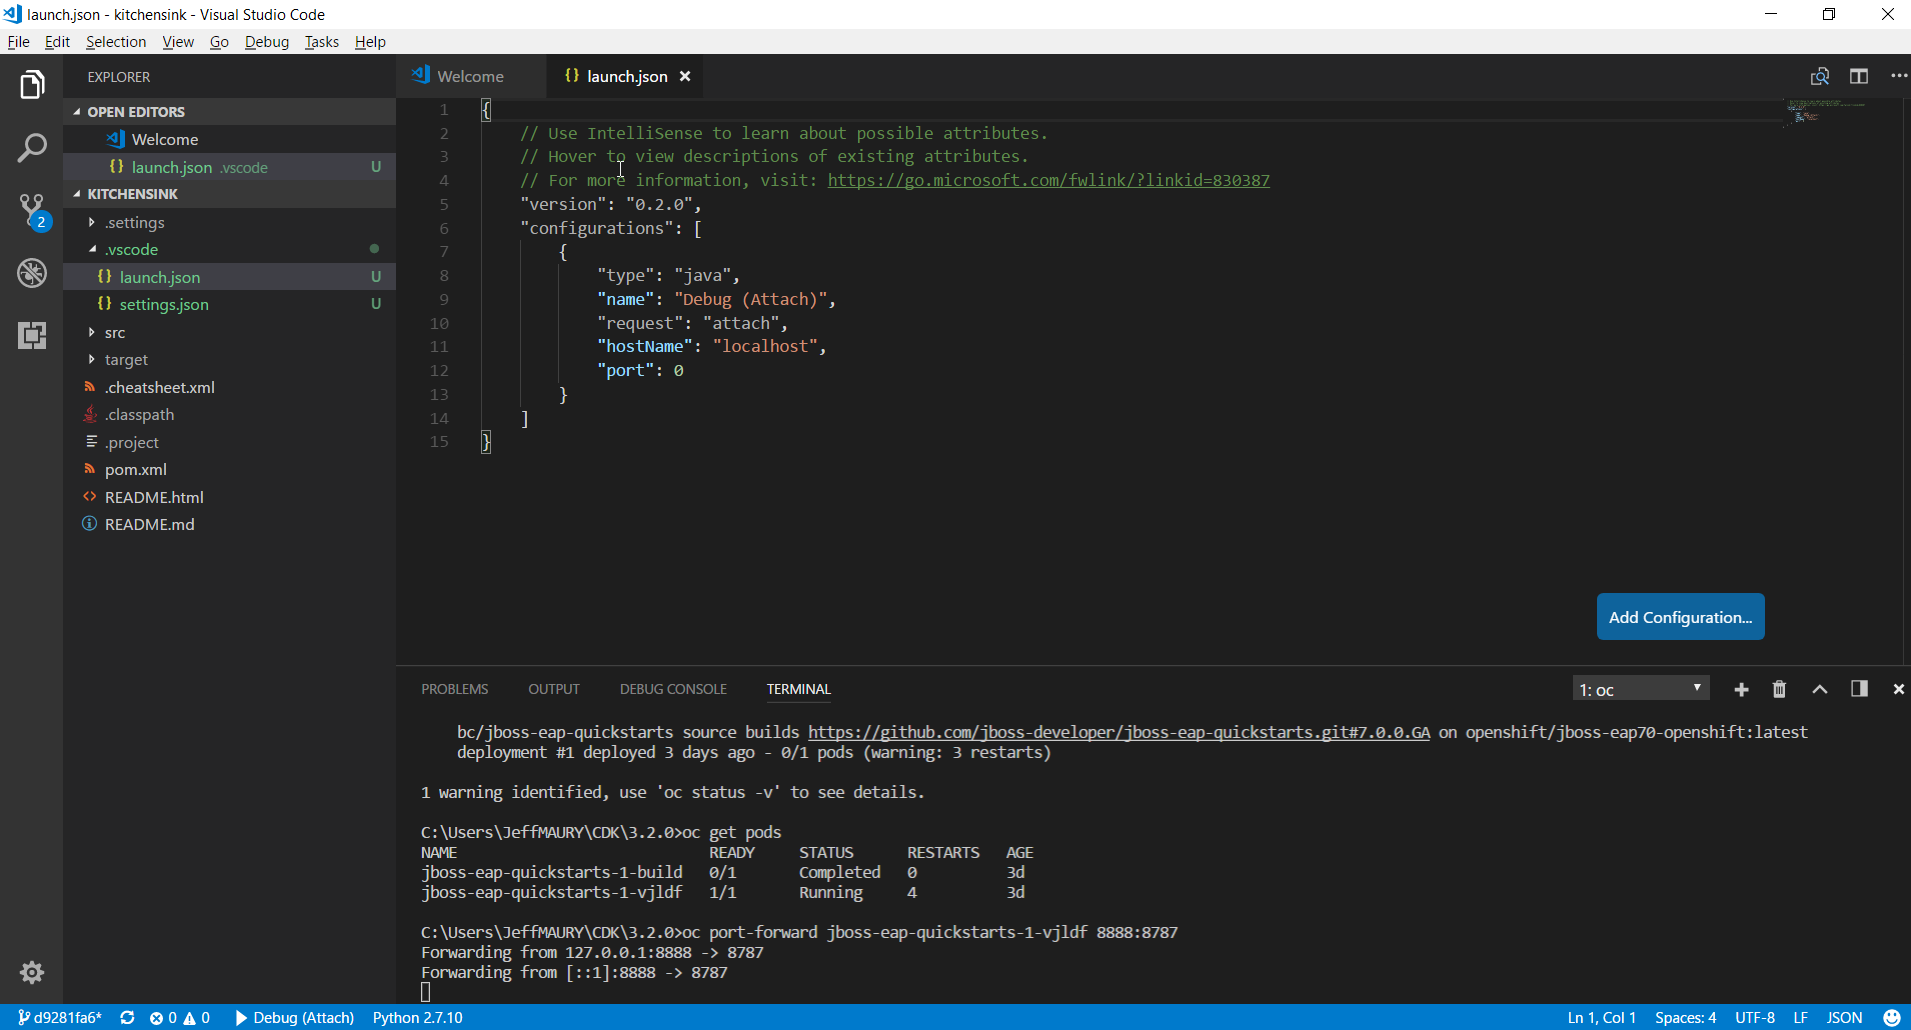
Edit this file and change the line:
"port": 0
to
"port": 8888
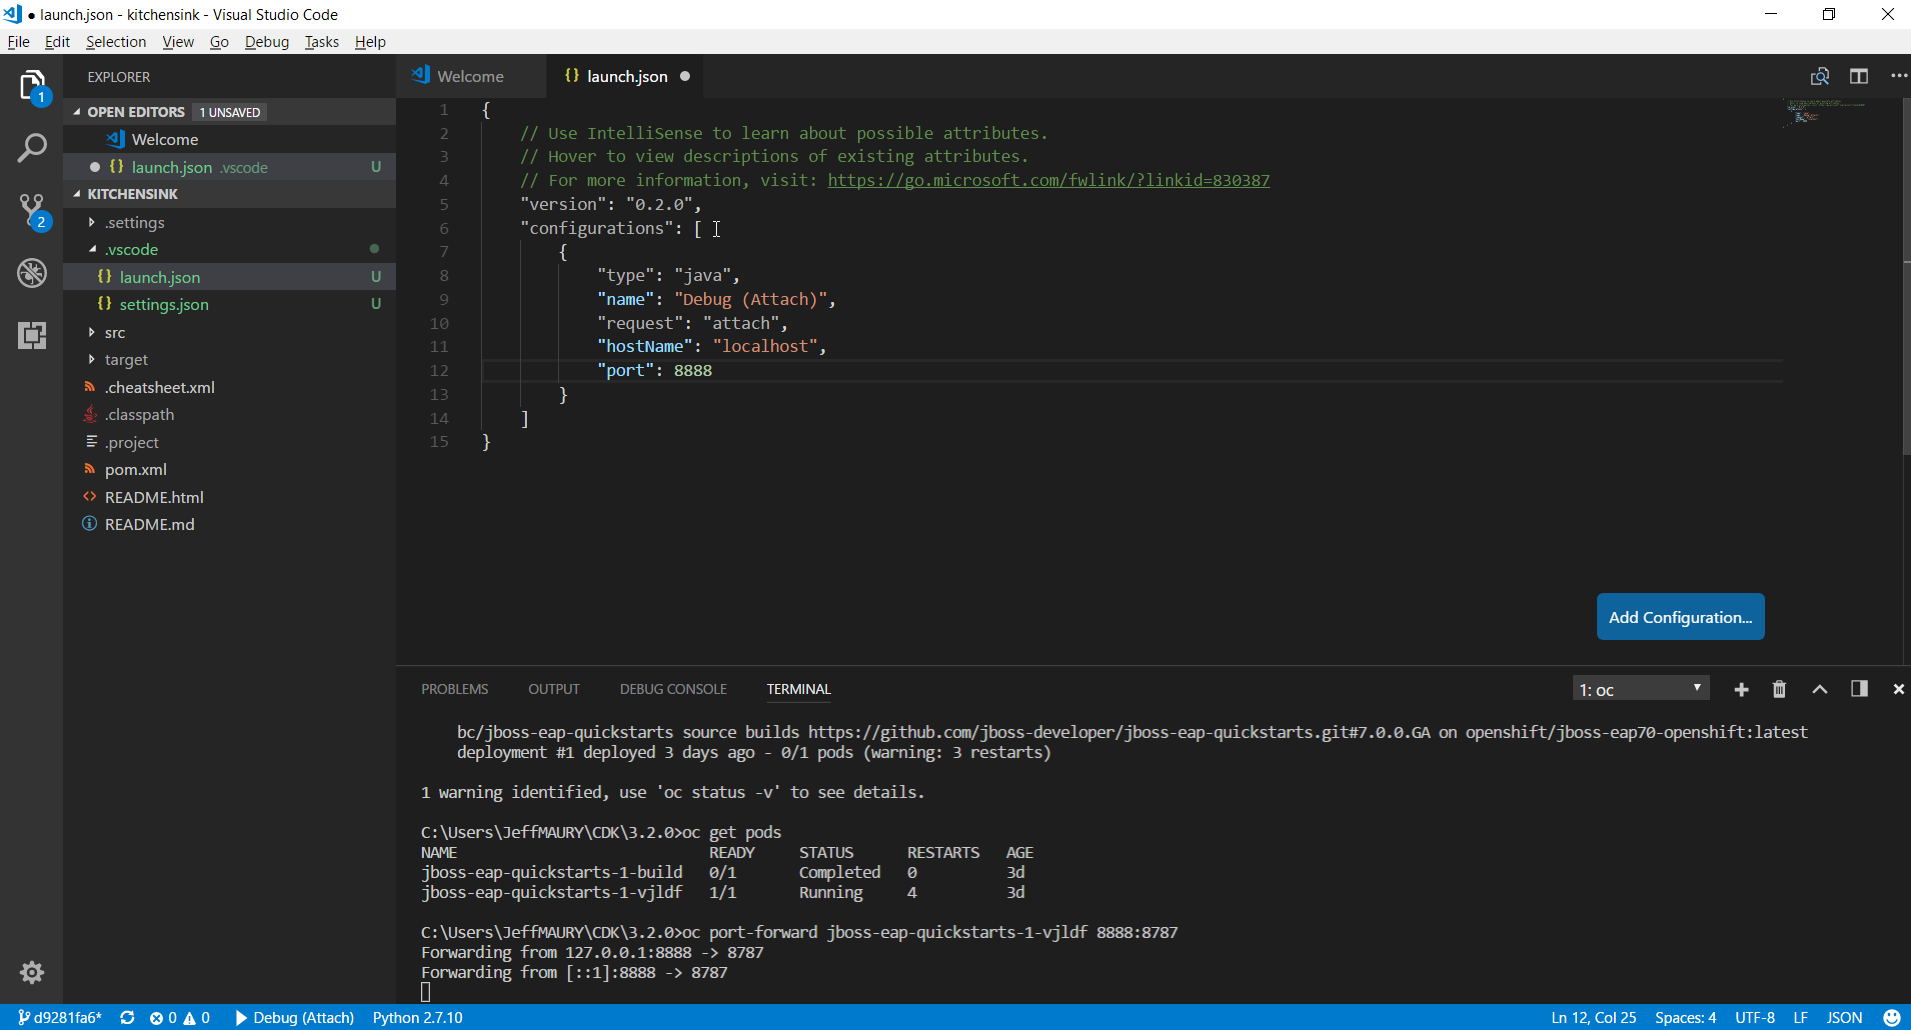
Then save the file (File -> Save or Ctrl+S).
Repeat the start debug session command (Debug -> Start Debugging or F5), a new Debug Console will be displayed:
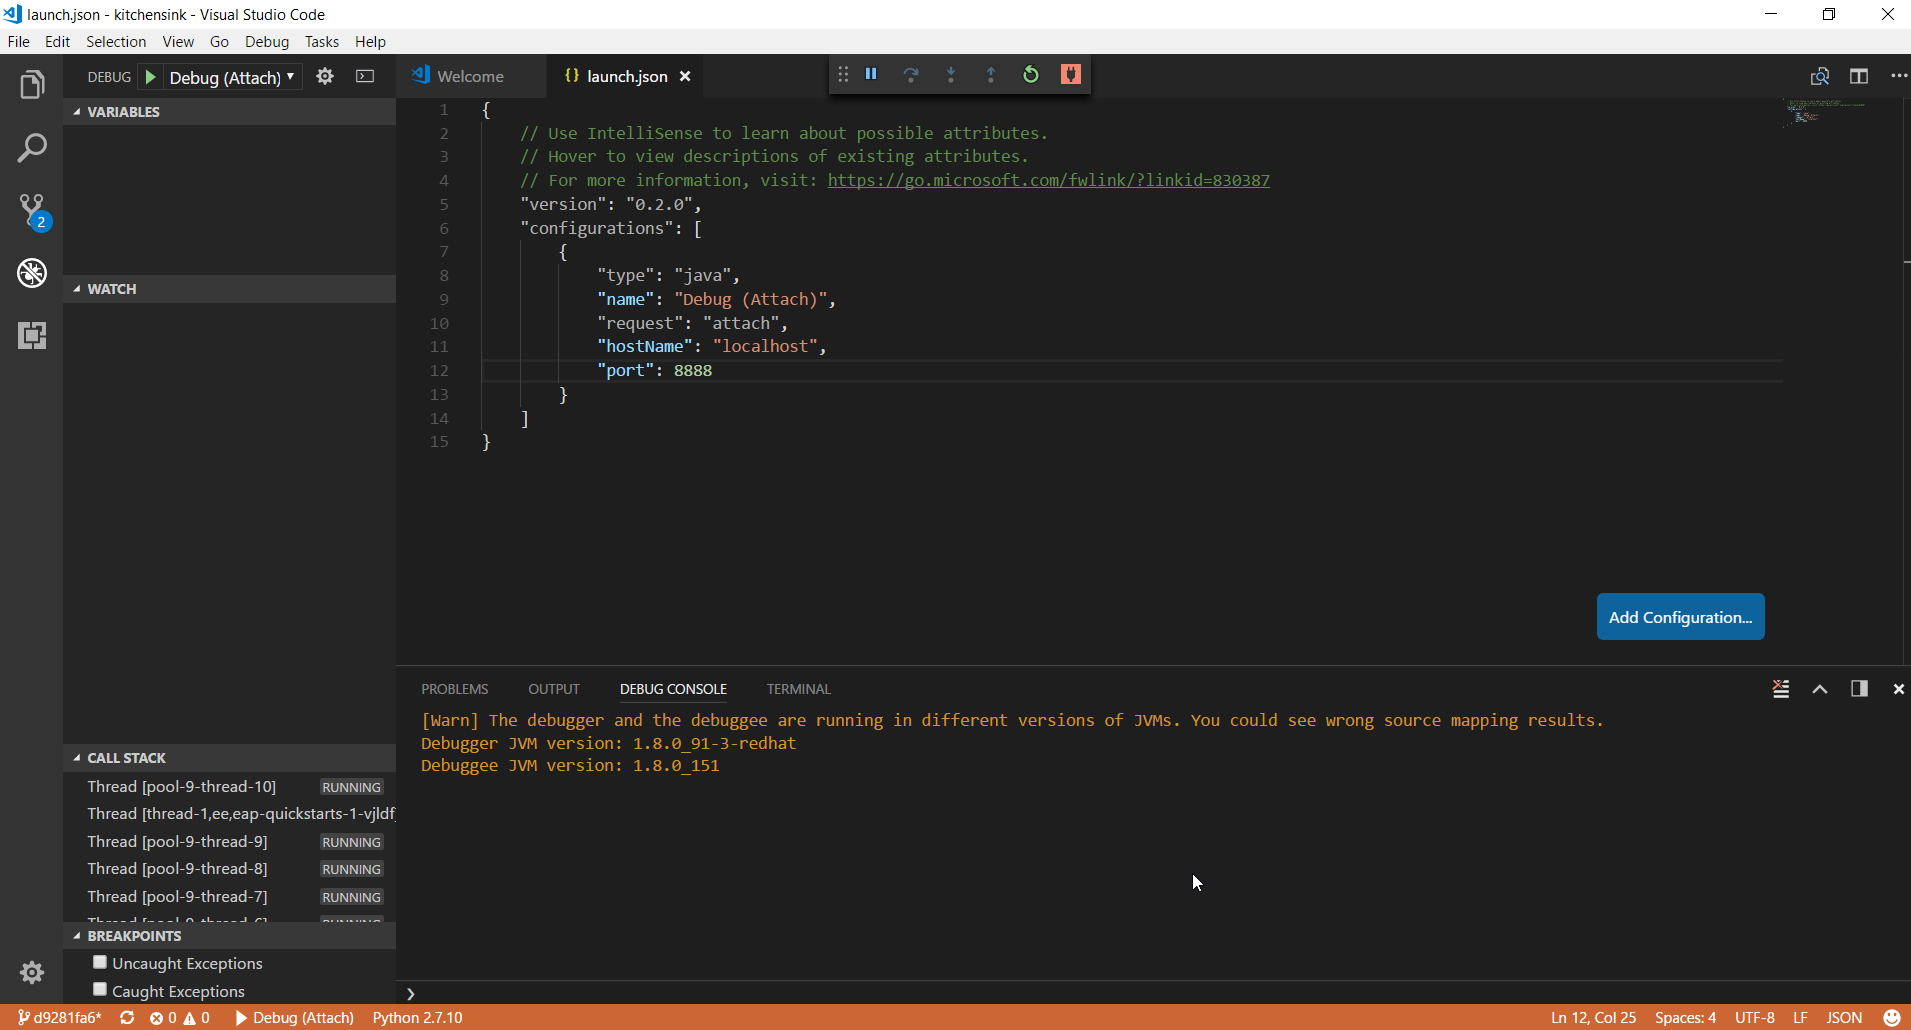
Microsoft VSCode is now debugging our OpenShift deployment, waiting for the breakpoint to be hit.
Access the application
With a web browser, access the following URL: http://jboss-eap-quickstarts-eap.192.168.99.100.nip.io. Please note that the IP address here is the IP of the Red Hat CDK virtual machine and may be different in your configuration. If you want to know yours, run the following command:
minishift ip
You should see the following content in your browser:
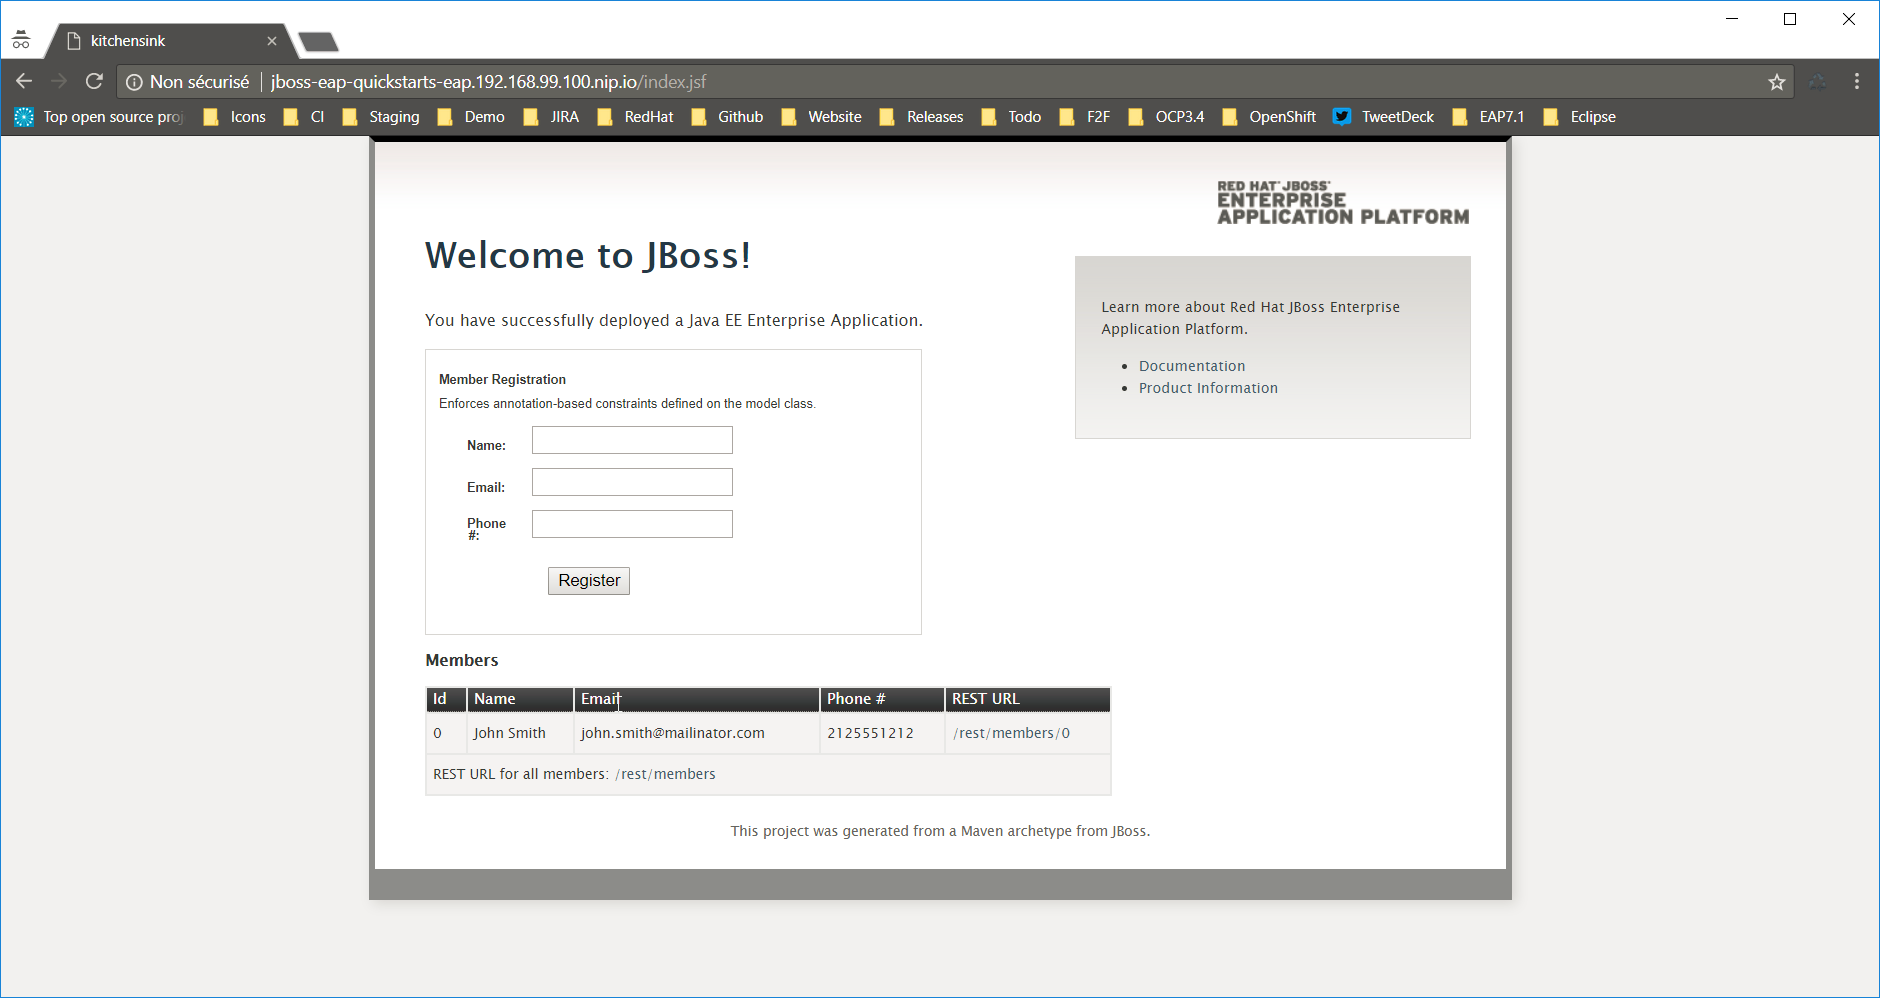
In the Name field, enter Test
In the Email field, enter test@redhat.com
In the Phone field, enter 0123456789
Then click the Register button. You should see the Microsoft VSCode icon in the system taskbar blinking, click it to activate Microsoft VSCode user interface.

Select the Debug icon (![]() ) on the left to switch to the debug view:
) on the left to switch to the debug view:
In the Variables window, expand this member:
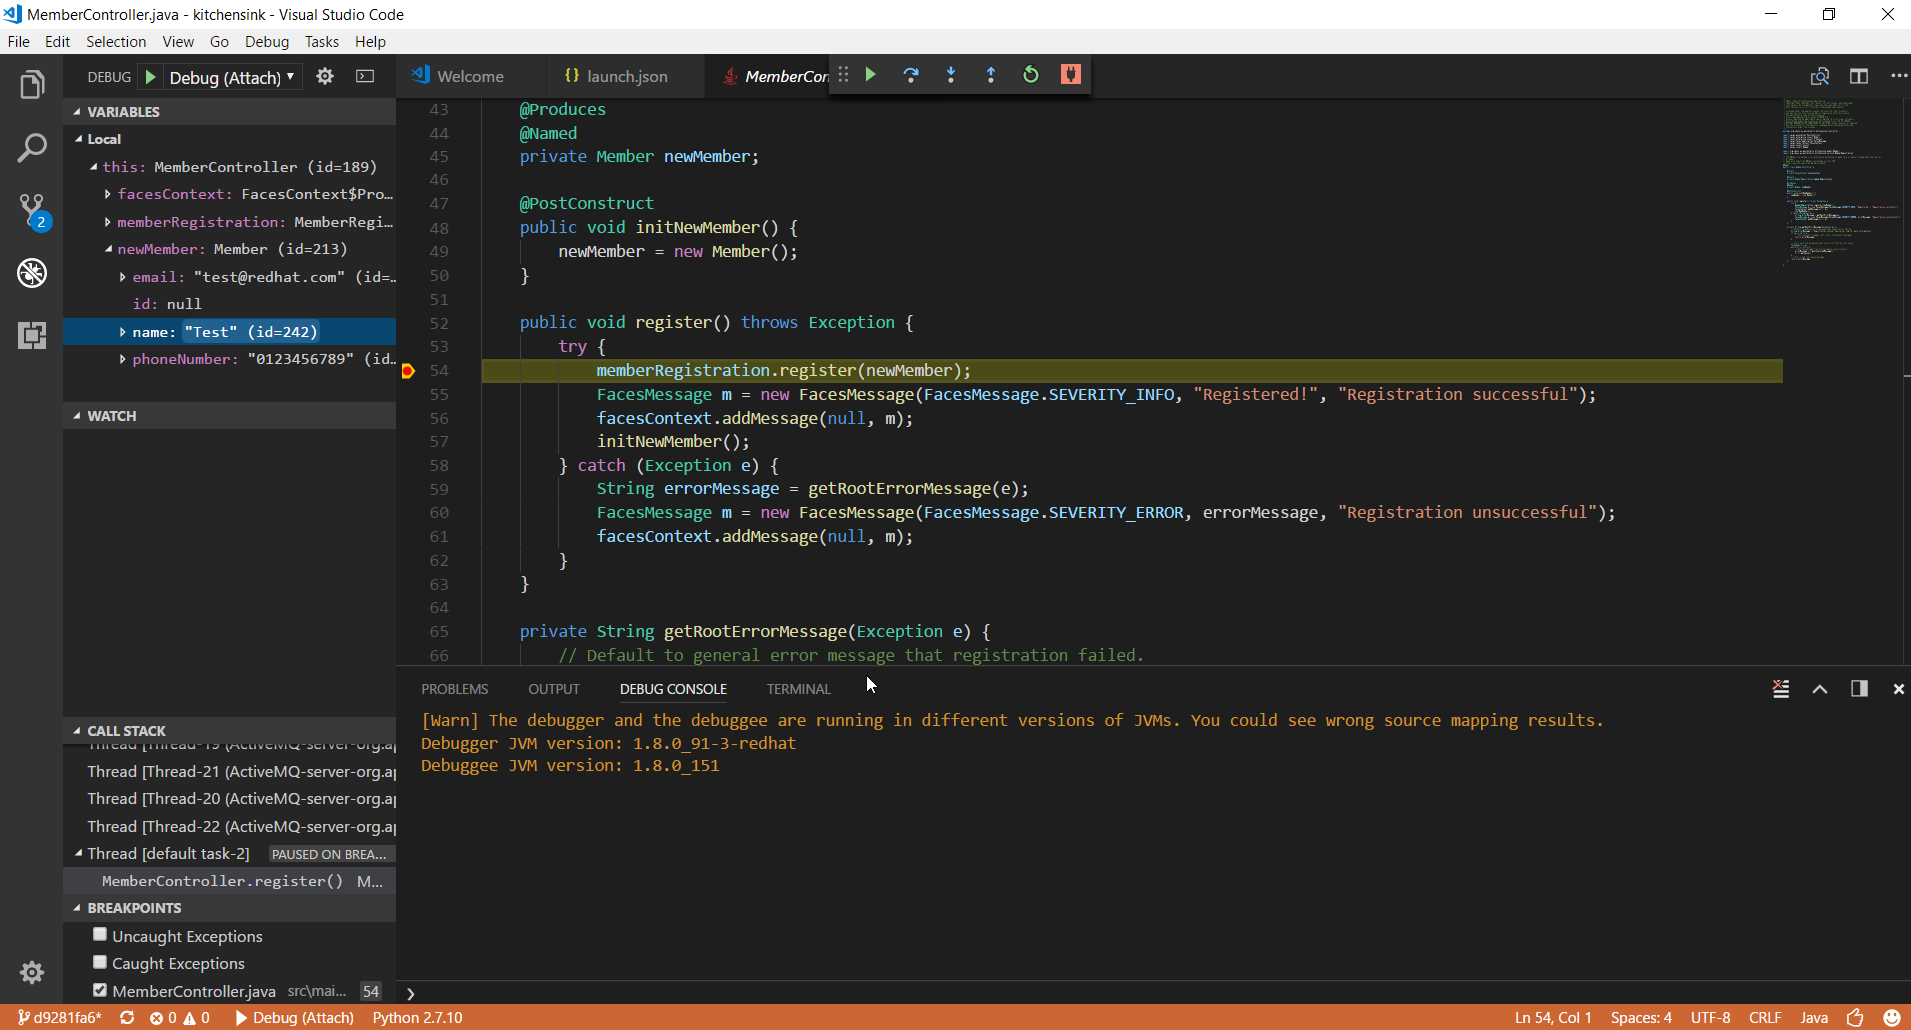
You can see the values we've set on the application user interface and we can now step in the code of the application.
In my next post, we will see how we can do the same with an online OpenShift deployment using OpenShift Online Starter!
Join the Red Hat Developer Program (it’s free) and get access to related cheat sheets, books, and product downloads.
Last updated: November 2, 2023