Welcome to part 4 of Red Hat JBoss Data Virtualization (JDV) running on OpenShift.
JDV is a lean, virtual data integration solution that unlocks trapped data and delivers it as easily consumable, unified, and actionable information. JDV makes data spread across physically diverse systems such as multiple databases, XML files, and Hadoop systems appear as a set of tables in a local database.
When deployed on OpenShift, JDV enables:
- Service enabling your data.
- Bringing data from outside to inside the PaaS.
- Breaking up monolithic data sources virtually for a microservices architecture.
Together with the JDV for OpenShift image, we have made available several OpenShift templates that allow you to test and bootstrap JDV.
Introduction
In part 1, part 2, and part 3 we described how to get started with JDV running on OpenShift, service enable your data using OData, and how to perform data federation from internal datasources with PostgreSQL and MySQL. We are now adding an external datasource (Oracle database) bringing data from outside to inside the PaaS.
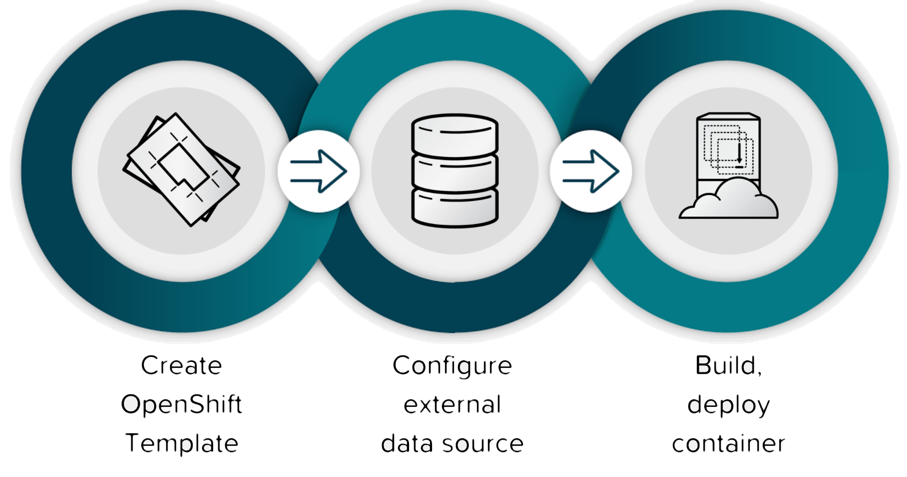
The tasks needed to achieve bringing data from outside to inside the PaaS are depicted in the image below.
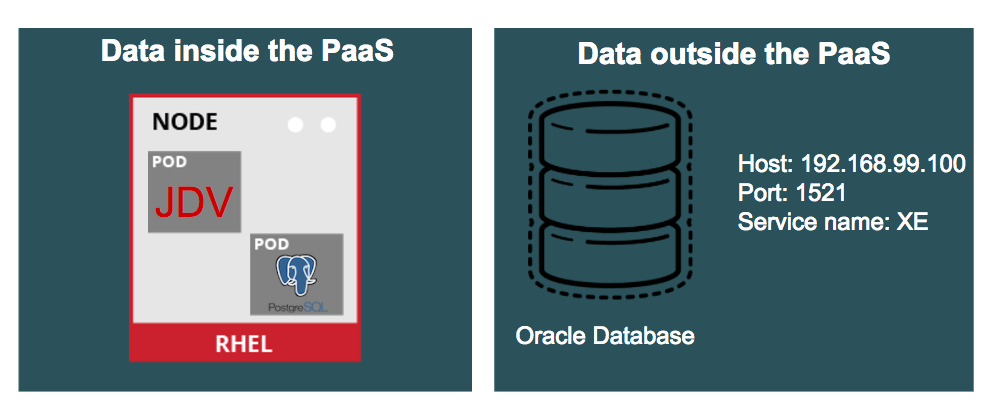
Environment
In this example, we are using an Oracle XE database running inside a VirtualBox environment. The environment is depicted in the following diagram.
Create OpenShift template
The OpenShift template (datavirt63-ext-mysql-psql-s2i.json) we were using in part 2 contains the JDV environment with internal data sources only (MySQL and PostgreSQL). To configure an external Oracle database we’re going to remove the MySQL configuration and use a new OpenShift template (datavirt63-ext-oracle-psql-s2i.json) based on the previous template but now includes configuration of an external Oracle database environment and add it to our OpenShift environment as described below.
$ vagrant ssh
[vagrant@rhel-cdk ~]$ oc login -u admin -p admin
Login successful.

You have access to the following projects and can switch between them with 'oc project <projectname>':

 * default (current)
 * openshift
 * openshift-infra
[vagrant@rhel-cdk ~]$ oc project openshift
Now using project "openshift" on server "https://127.0.0.1:8443".
[vagrant@rhel-cdk ~]$ oc create -f https://raw.githubusercontent.com/cvanball/jdv-ose-demo/master/extensions/is.json
[vagrant@rhel-cdk ~]$ oc create -n openshift -f https://raw.githubusercontent.com/cvanball/jdv-ose-demos/master/templates/datavirt63-ext-oracle-psql-s2i.json
Configure external data source
Files for runtime artifacts are passed to the JDV for OpenShift image using the OpenShift secrets mechanism. This includes the environment files for the datasources and resource adapters, as well as any additional data files. These files need to be present locally so we are able to create OpenShift secrets for them.
There are two types of datasources:
- Internal datasources supported by Red Hat JBoss Middleware for OpenShift. These are PostgreSQL, MySQL, and MongoDB. Internal datasources do not require additional environment files to be configured.
- External datasources that do are not supported by default by OpenShift. The configuration of external datasources is provided by environment files added to OpenShift Secrets.
Since we are now using an external datasource using an Oracle Database, we have to configure the external datasources in the datasources.properties file, configure the install.properties for the Oracle driver and the JBoss module for Oracle.
- Configure install.sh to include the modules for the external data source.
#!/bin/bash set -x source /usr/local/s2i/install-common.sh injected_dir=$1 chmod -R ugo+rX ${injected_dir}/modules install_modules ${injected_dir}/modules configure_drivers ${injected_dir}/install.properties #configure_translators ${injected_dir}/install.properties - Configure install.properties to install Oracle driver as shown below.
#DRIVERS
DRIVERS=ORACLE_DRIVER

ORACLE_DRIVER_DRIVER_NAME=oracle
ORACLE_DRIVER_DRIVER_MODULE=com.oracle
ORACLE_DRIVER_DRIVER_CLASS=oracle.jdbc.OracleDriver
ORACLE_DRIVER_XA_DATASOURCE_CLASS=oracle.jdbc.xa.client.OracleXADataSource


#TRANSLATORS
- Create a JBoss module.
A JBoss module is a logical grouping of classes used for class loading and dependency management. JBoss modules are defined in the EAP_HOME/modules/ directory of the application server. Each JBoss module exists as a subdirectory, for example, EAP_HOME/modules/com/oracle/. Each module directory then contains a slot subdirectory, which defaults to main and contains the module.xml (see below) configuration file and any required JAR files, in this case, ojdbc6.jar.<?xml version="1.0" encoding="UTF-8"?> <module xmlns="urn:jboss:module:1.3" name="com.oracle"> <resources> <resource-root path="ojdbc6.jar"/> </resources> <dependencies> <module name="javax.api"/> <module name="javax.resource.api"/> <module name="javax.transaction.api"/> </dependencies> </module>
- Download JDBC driver for the external data source. In this case, we need to download the Oracle JDBC driver here. and place the ojdbc6.jar in <DIR>/jdv-ose-demos/bringing-data-to-the-paas/oracle-postgresql-driver-image/modules/system/layers/openshift/com/oracle/main
- Configure data source configuration in datasources.properties to include the external data source as shown below.
#Configure datasources

#DATASOURCES
DATASOURCES=EUCUSTOMERS,USCUSTOMERS

USCUSTOMERS_JNDI=java:jboss/datasources/USCustomersDS
USCUSTOMERS_DRIVER=postgresql
USCUSTOMERS_NONXA=true
USCUSTOMERS_USERNAME=jdv
USCUSTOMERS_PASSWORD=redhat1!
USCUSTOMERS_DATABASE=uscustomers
USCUSTOMERS_PROTOCOL=jdbc:postgresql
USCUSTOMERS_MIN_POOL_SIZE=5
USCUSTOMERS_MAX_POOL_SIZE=10
USCUSTOMERS_JTA=true
USCUSTOMERS_VALIDATE=true

EUCUSTOMERS_JNDI=java:jboss/datasources/EUCustomersDS
EUCUSTOMERS_DRIVER=oracle
EUCUSTOMERS_NONXA=false
EUCUSTOMERS_USERNAME=jdv
EUCUSTOMERS_PASSWORD=redhat1!
EUCUSTOMERS_DATABASE=XE
EUCUSTOMERS_PROTOCOL=jdbc:oracle:thin
EUCUSTOMERS_SERVICE_HOST=192.168.99.100
EUCUSTOMERS_SERVICE_PORT=1521
EUCUSTOMERS_XA_CONNECTION_PROPERTY_URL=jdbc:oracle:thin:@192.168.99.100:1521:XE
EUCUSTOMERS_MIN_POOL_SIZE=5
EUCUSTOMERS_MAX_POOL_SIZE=10
EUCUSTOMERS_JTA=true
EUCUSTOMERS_VALIDATE=true
EUCUSTOMERS_CONNECTION_CHECKER=org.jboss.resource.adapter.jdbc.vendor.OracleValidConnectionChecker
EUCUSTOMERS_EXCEPTION_SORTER=org.jboss.jca.adapters.jdbc.extensions.oracle.OracleExceptionSorter
Note: All the steps above are automated with the exception of
- download the ojdbc6.jar and put it into <DIR>/jdv-ose-demos/bringing-data-to-the-paas/oracle-postgresql-driver-image/modules/system/layers/openshift/com/oracle/main
- create an Oracle user called jdv with password redhat1! and run the eucustomers-oracle.sql to create the required tables and data
- change the Oracle data source settings applicable to your Oracle environment
$ oc login -u openshift-dev -p devel
$ oc new-project jdv-bring-data-into-the-paas-demo
$ oc create -f https://raw.githubusercontent.com/cvanball/jdv-ose-demos/master/bringing-data-to-the-paas/oracle-postgresql-driver-image/datavirt-app-secret.yaml
$ oadm policy add-role-to-user view system:serviceaccount:jdv-bring-data-into-the-paas-demo:datavirt-service-account
$ curl https://raw.githubusercontent.com/cvanball/jdv-ose-demos/master/bringing-data-to-the-paas/oracle-postgresql-driver-image/datasources.properties -o datasources.properties
$ oc secrets new datavirt-app-config datasources.properties
Build and deploy container
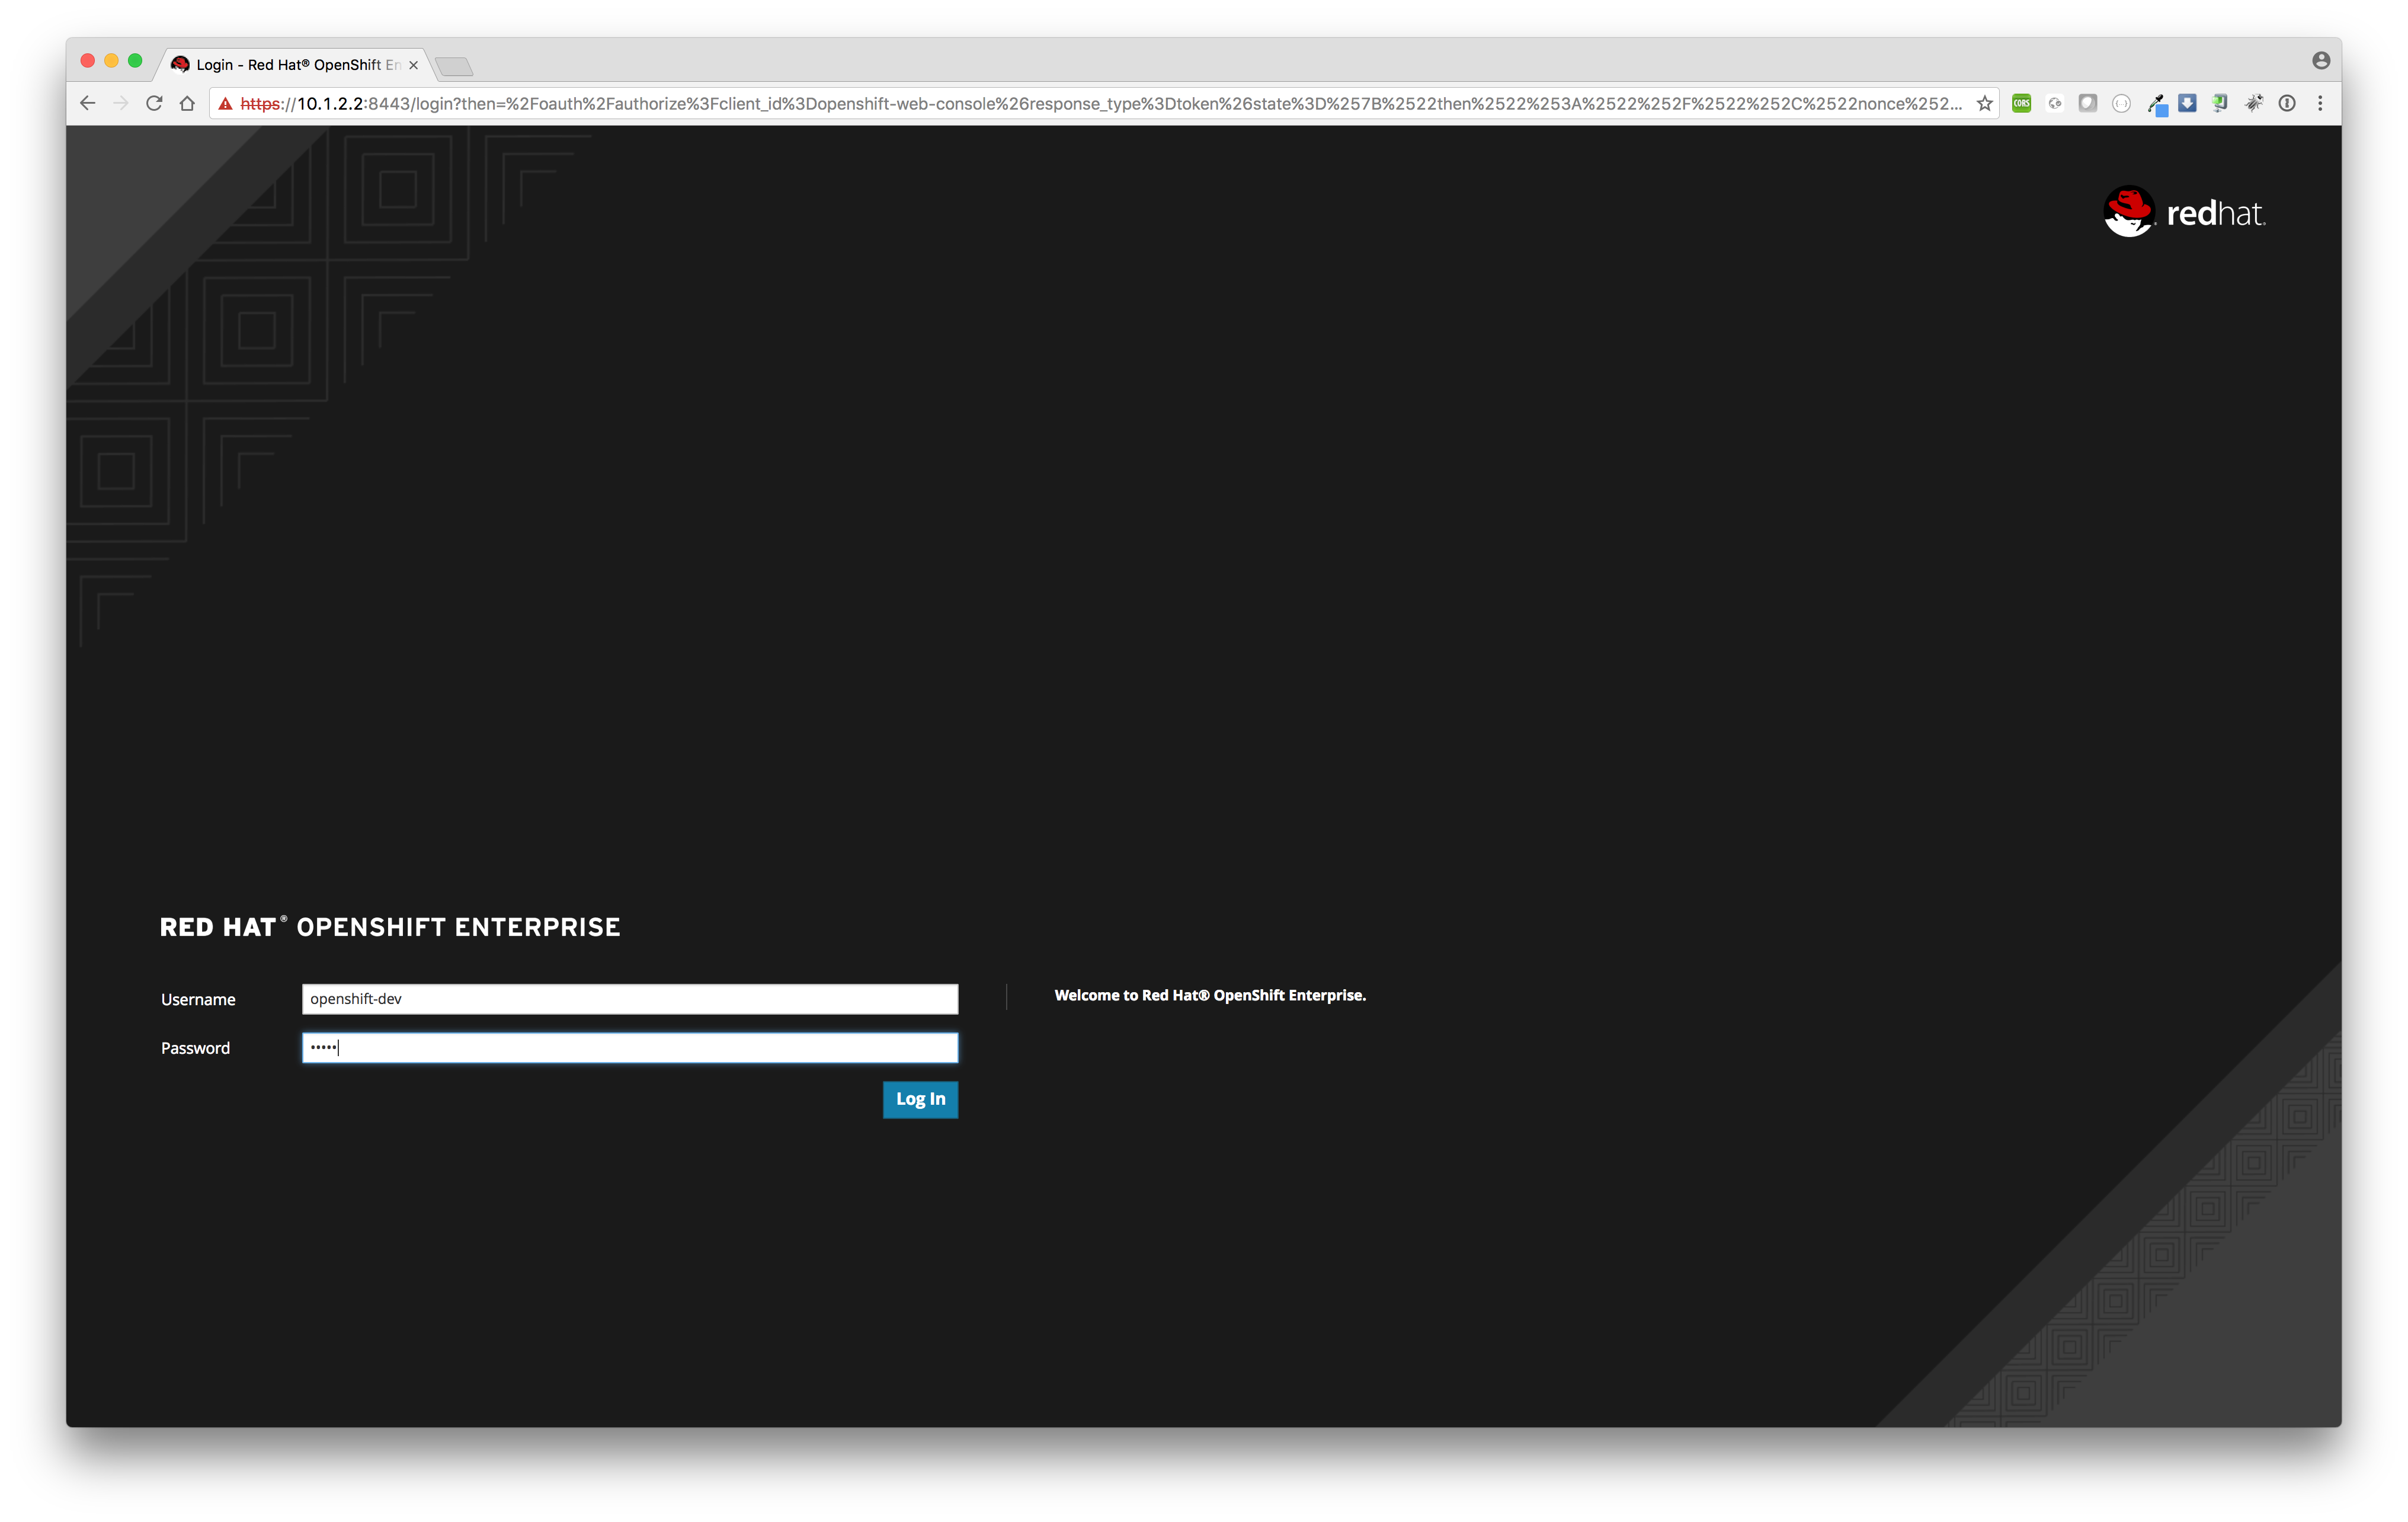
Log into the OpenShift web console with username “openshift-dev” and password “devel”.
Now we need to attach the new OpenShift template to our project.
You should see project jdv-bring-data-into-the-paas-demo in the project list.
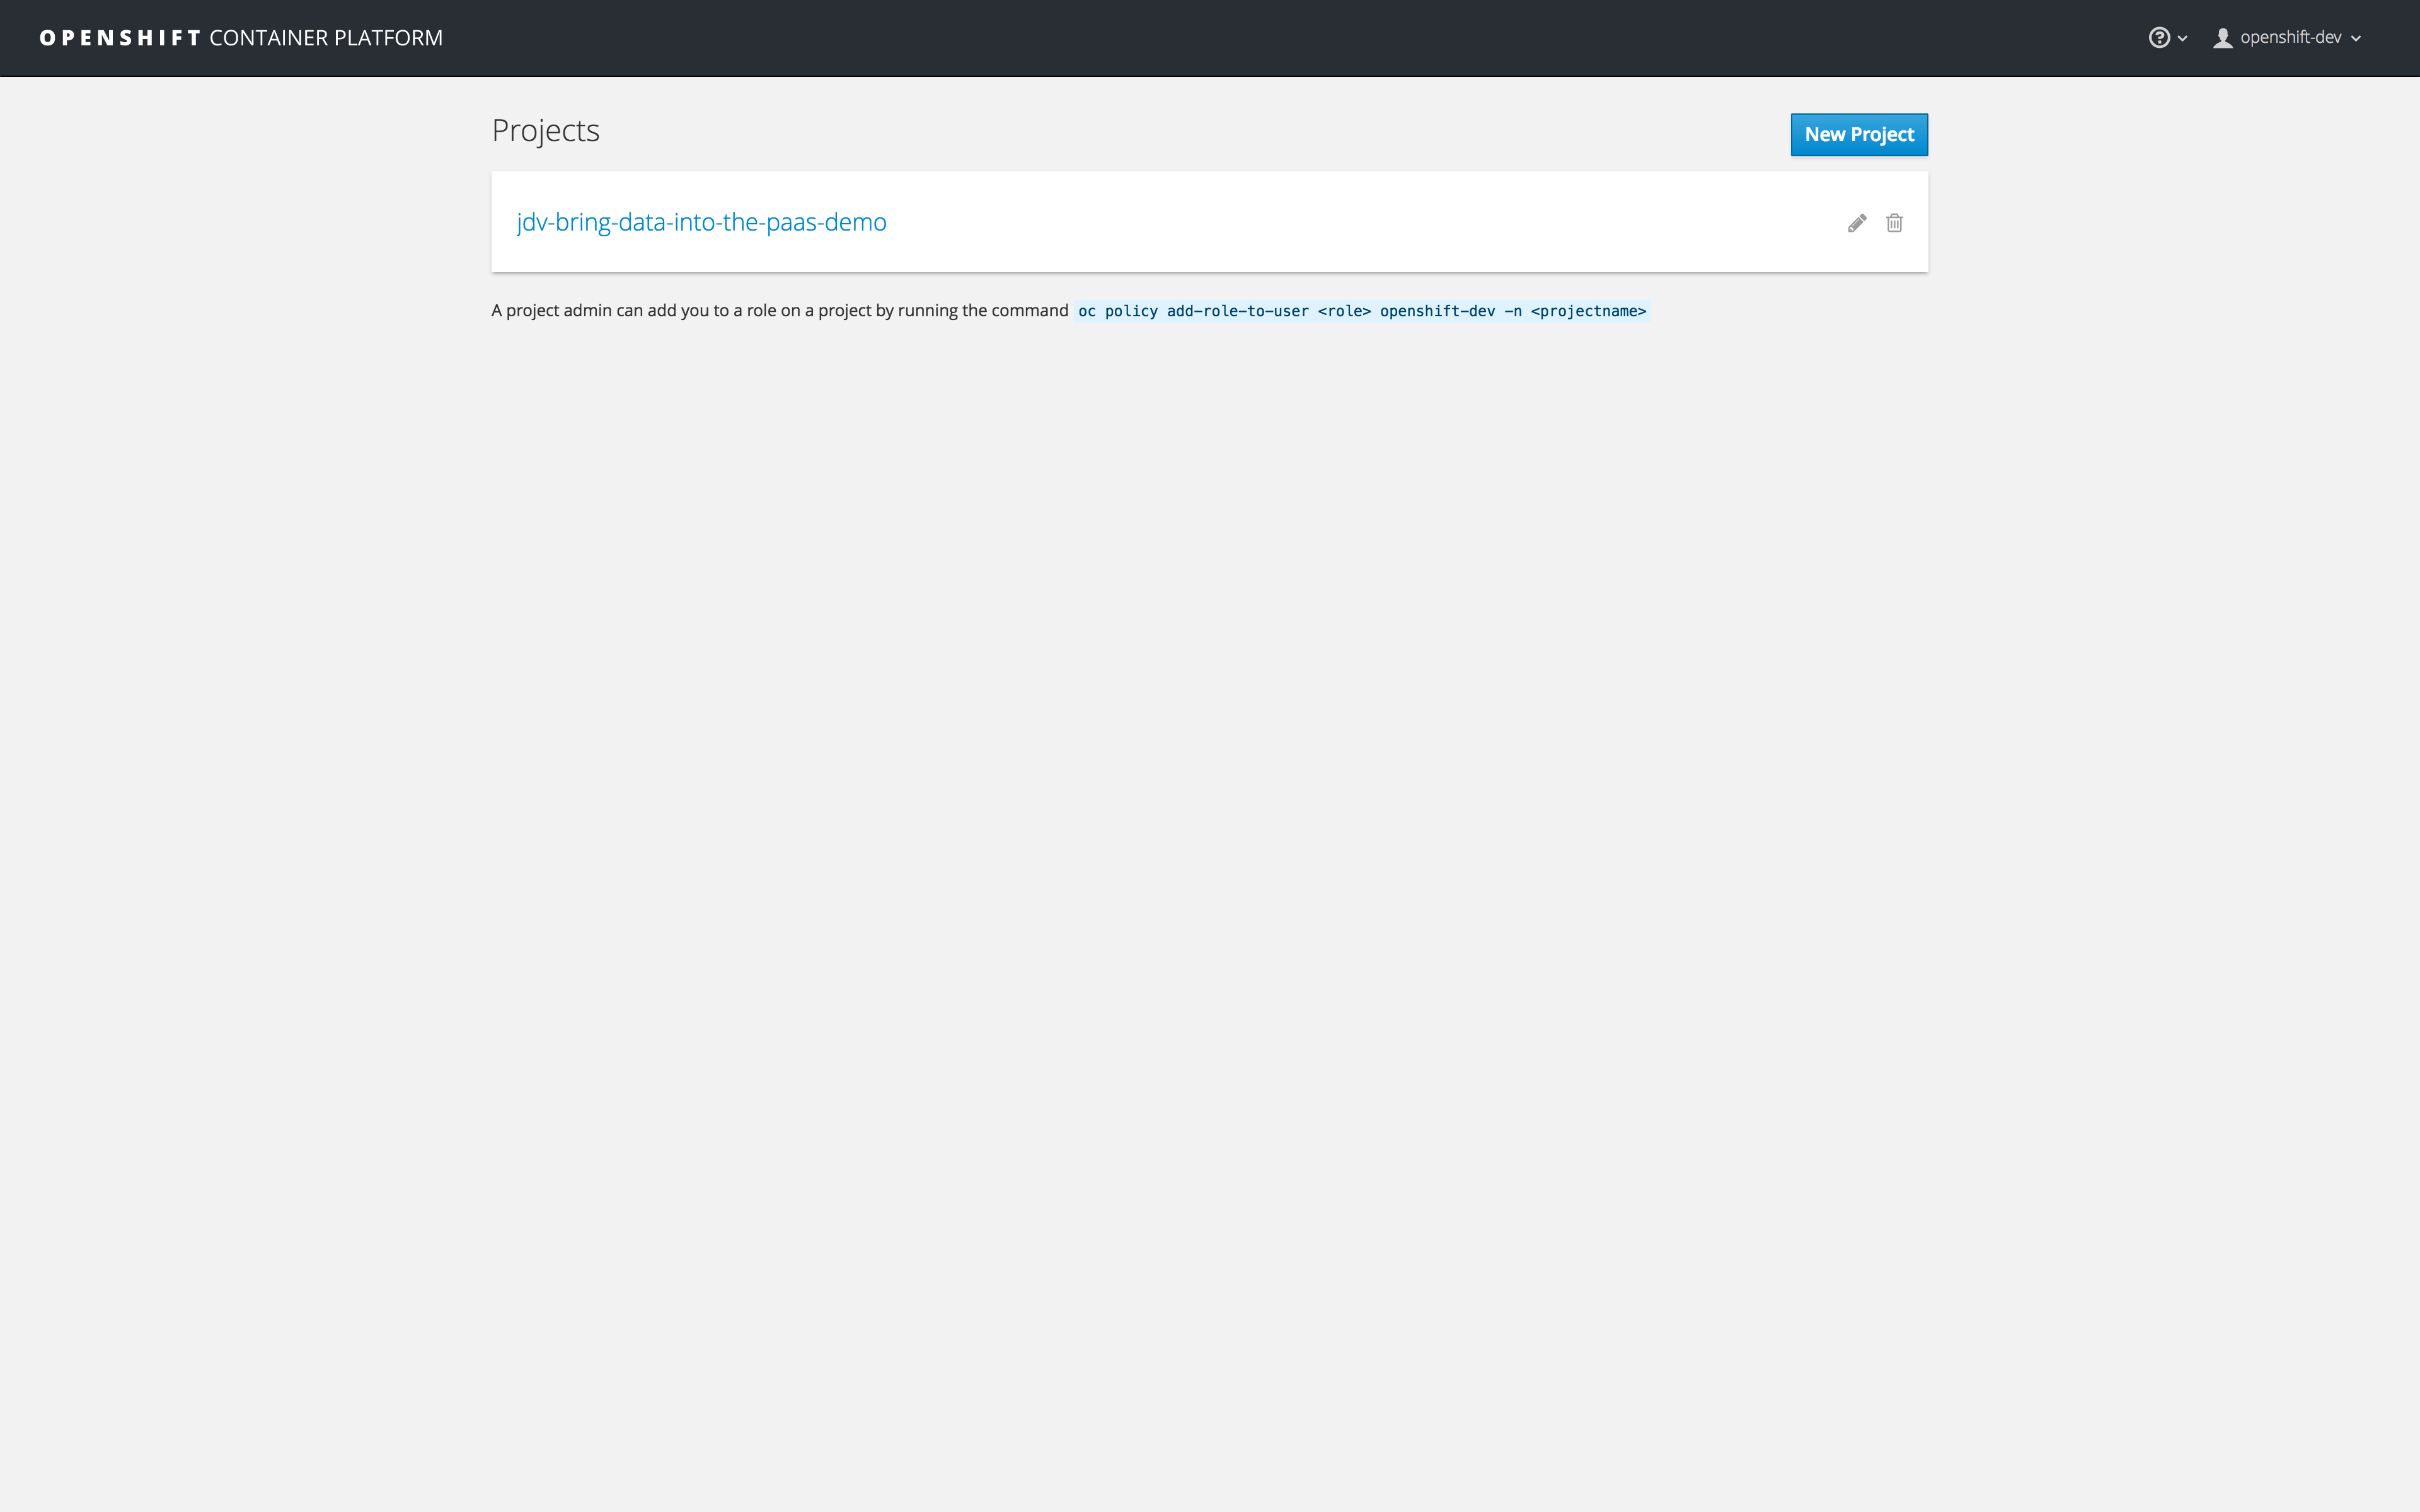
Click on project jdv-bring-data-into-the-paas-demo.
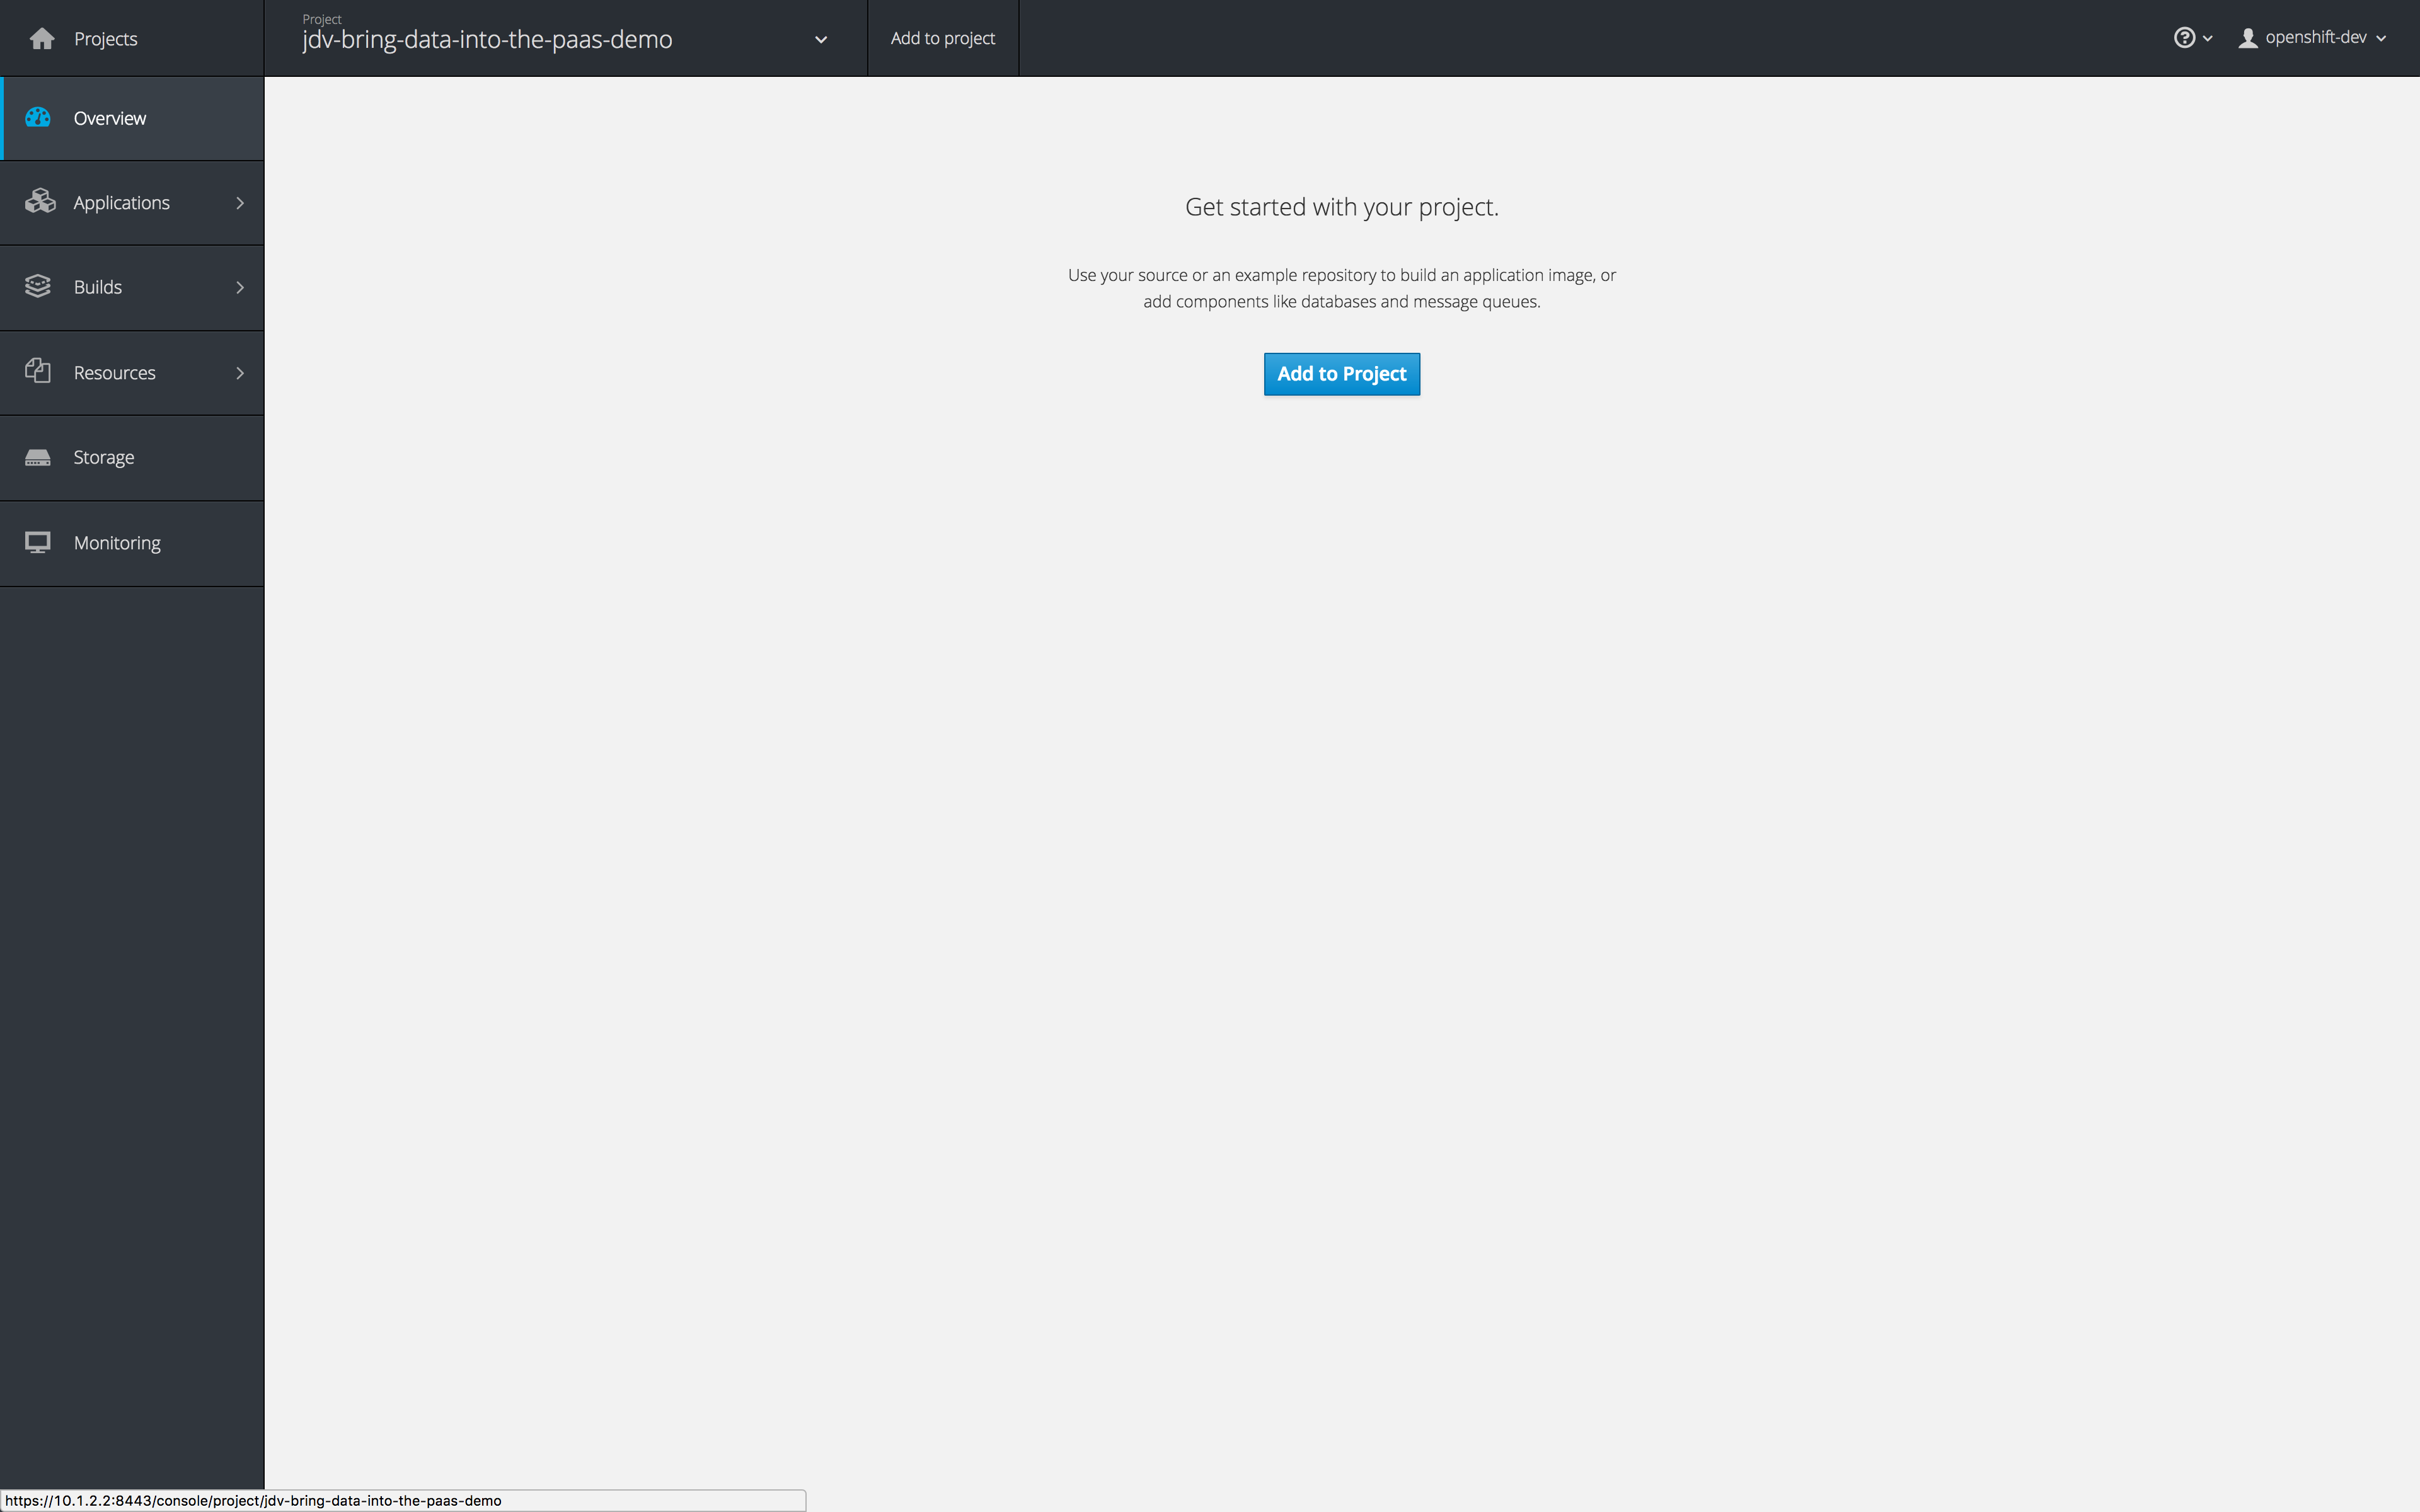
Click the Add to project button and search for template oracle.
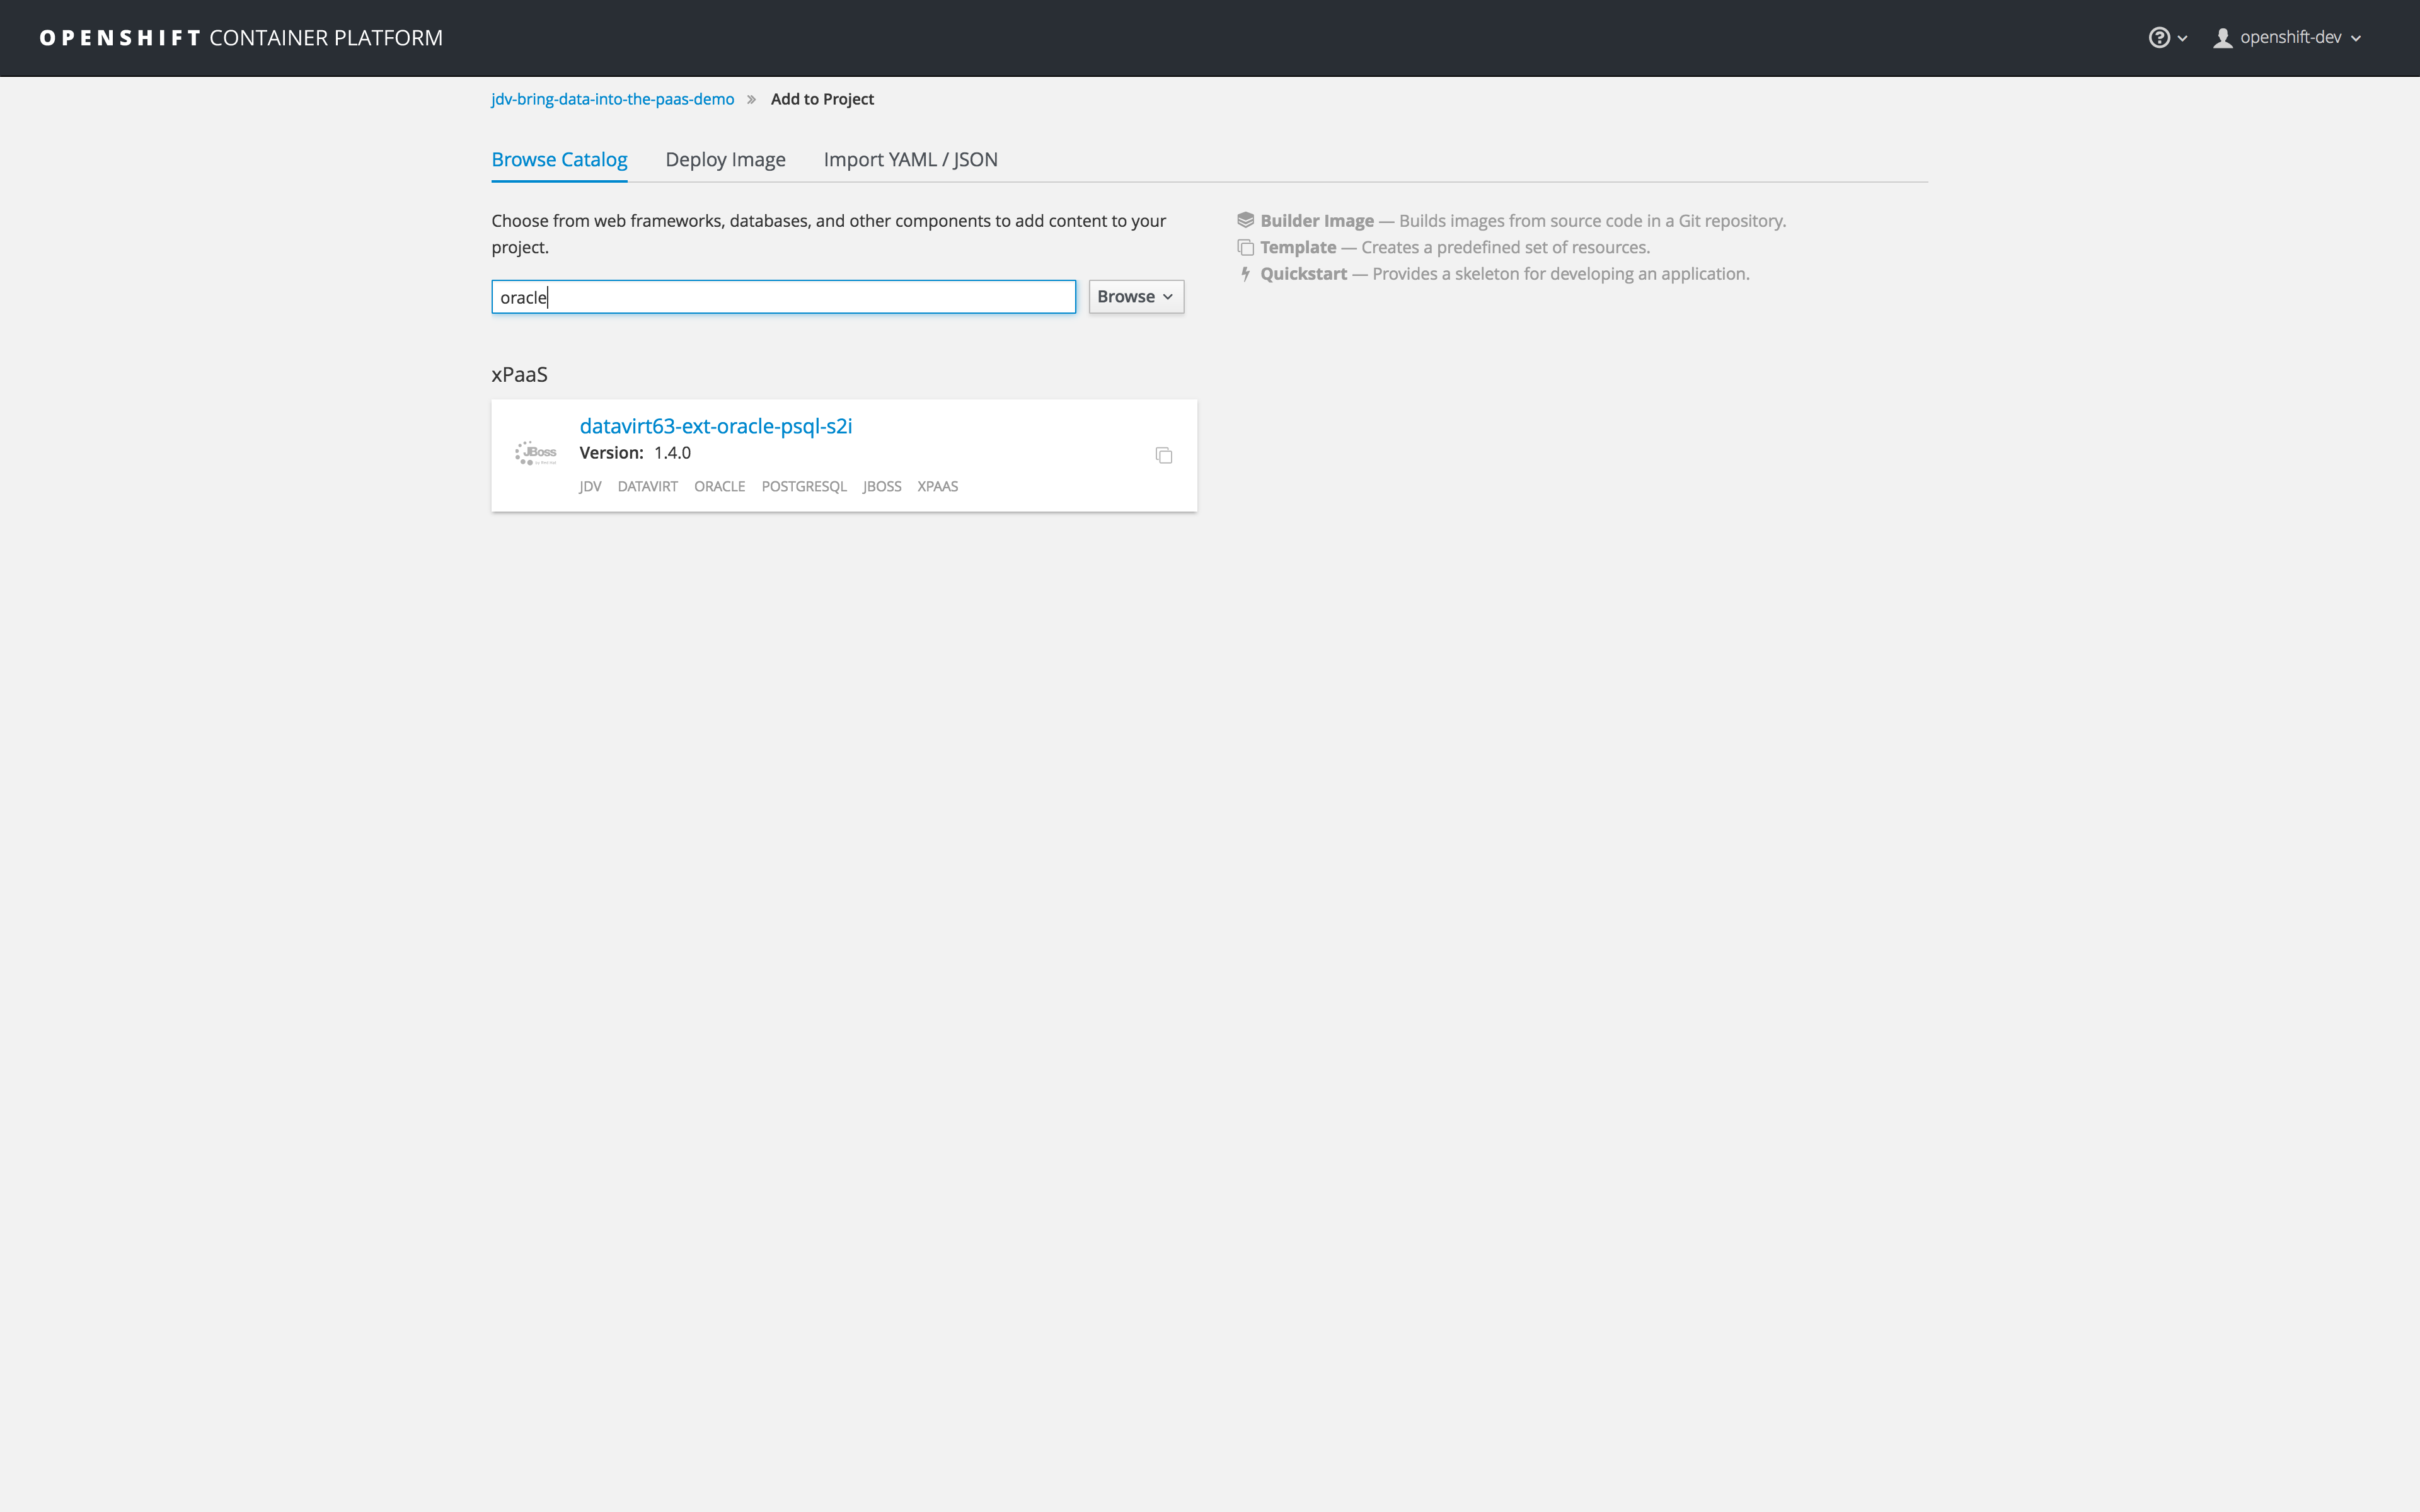
Now you should get a template in category xPaas in the search results, select the
datavirt63-ext-oracle-psql-s2i template.
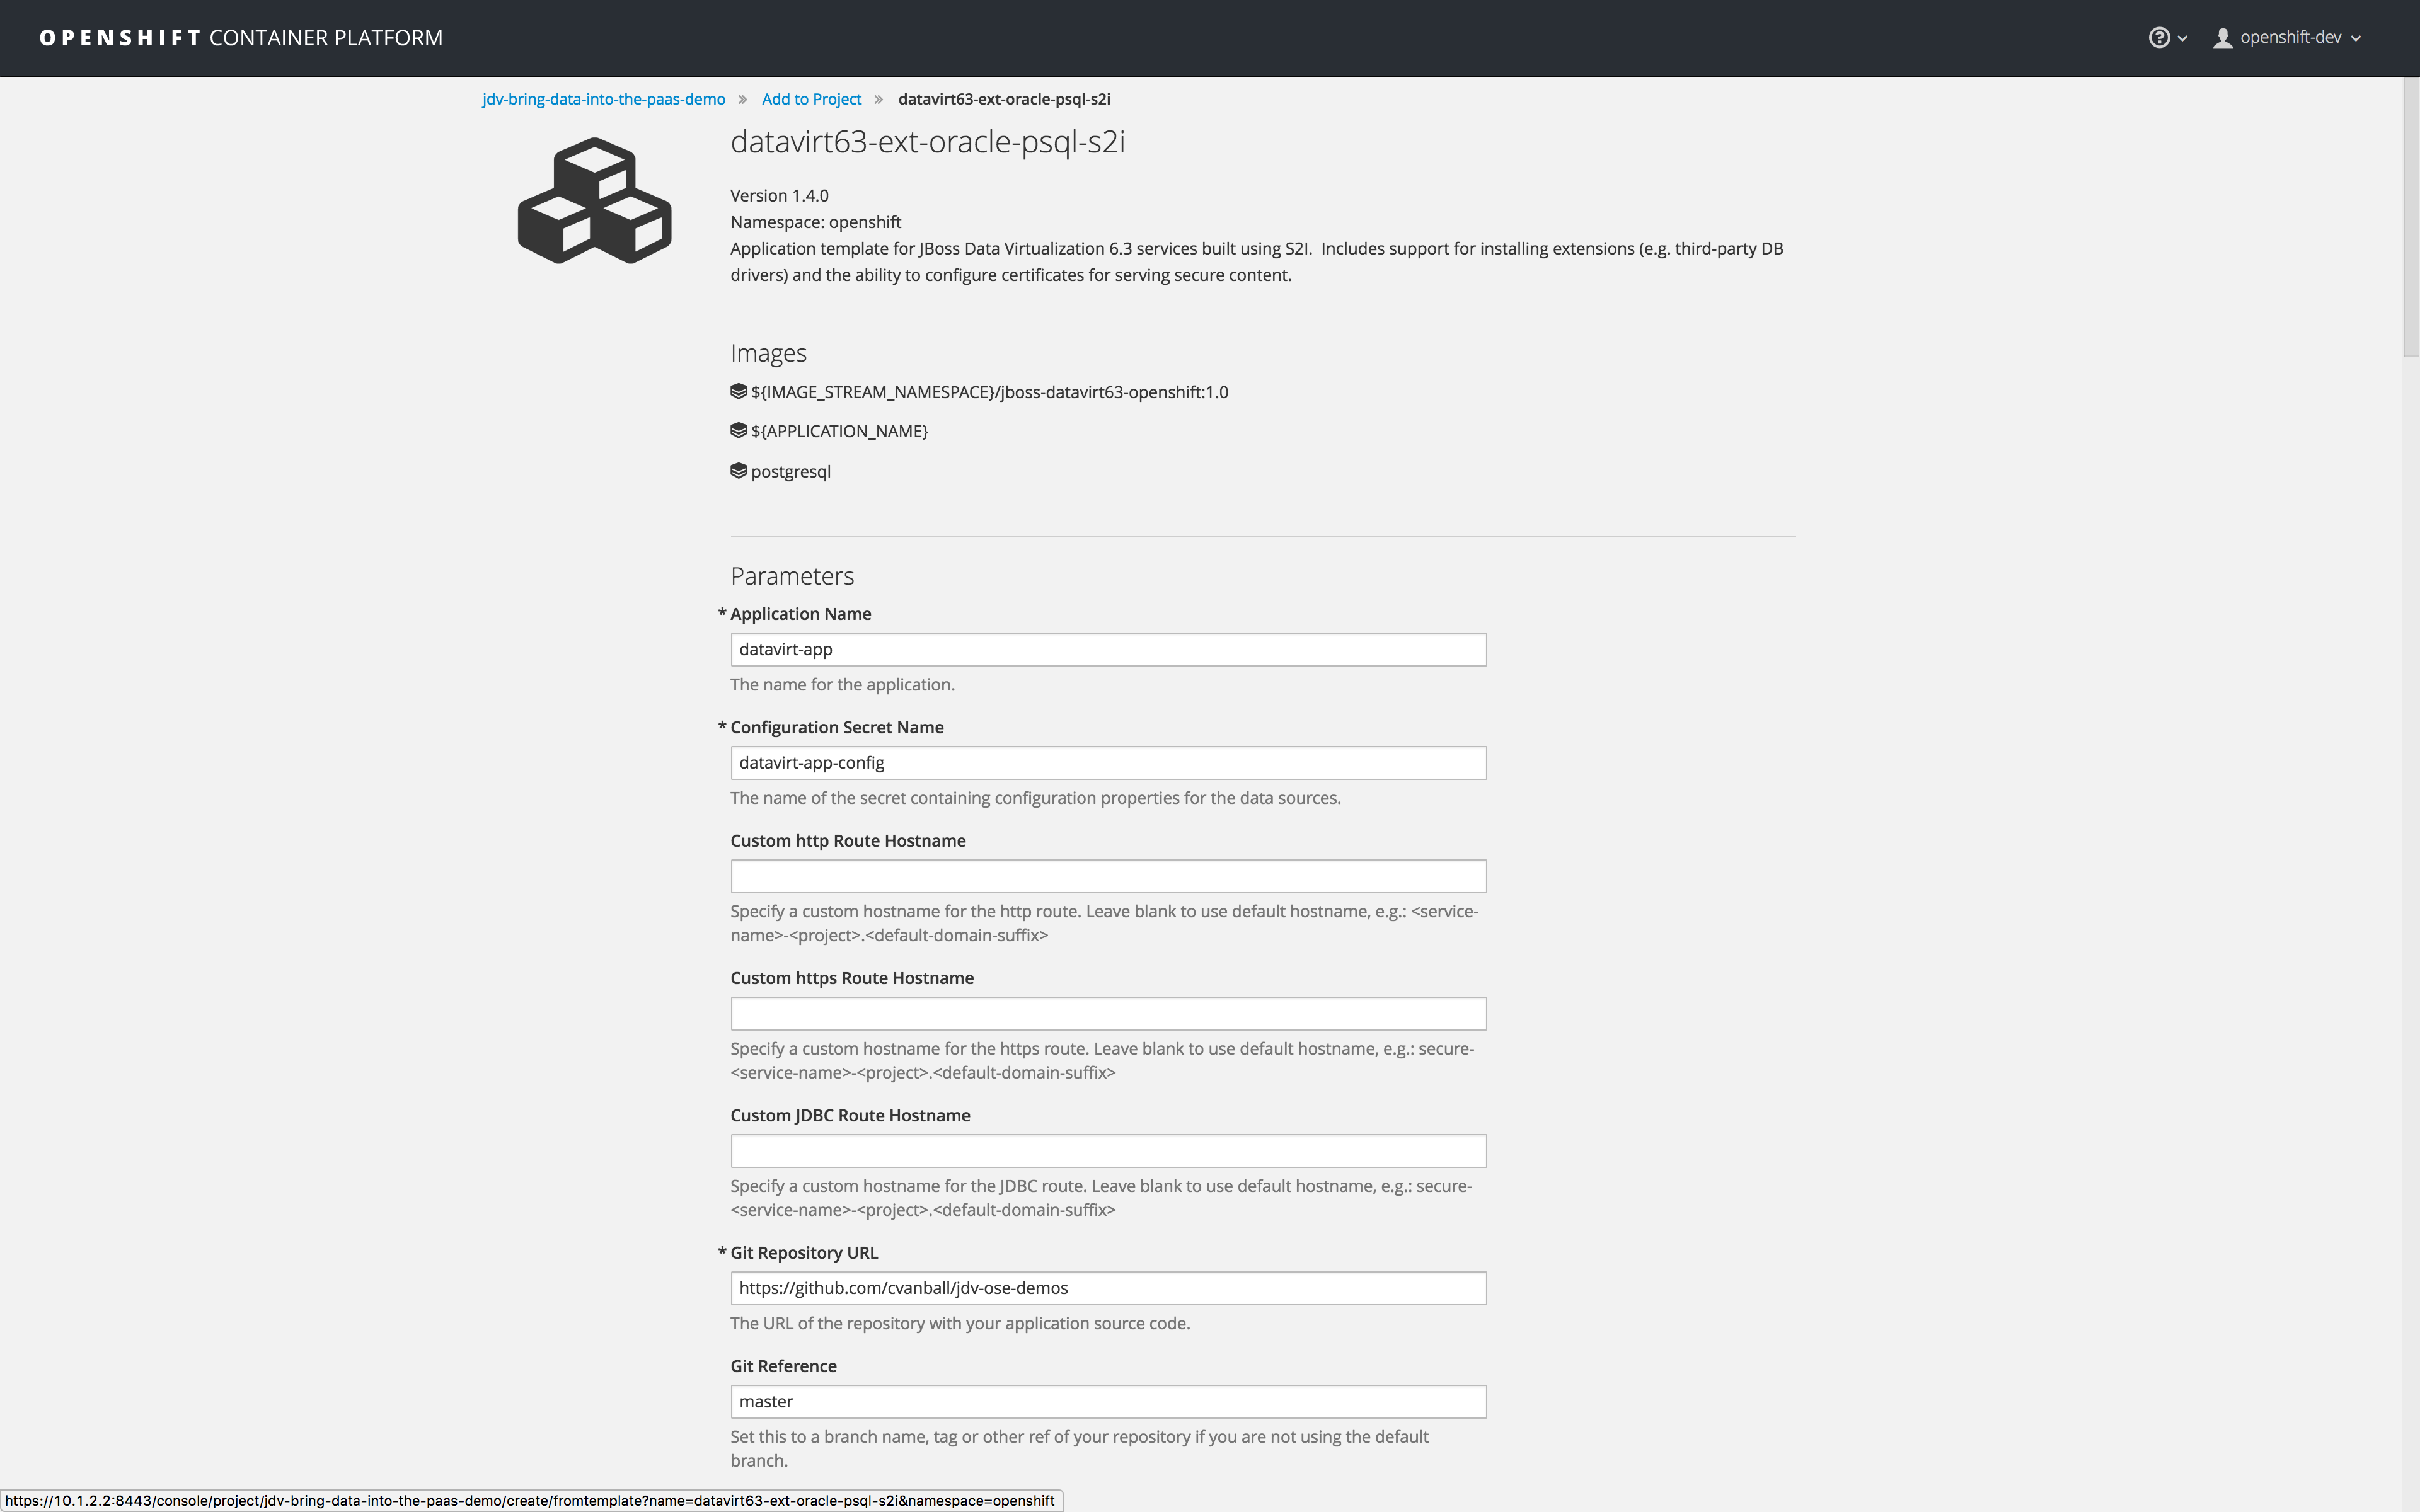

Since we have configured the template datavirt63-ext-oracle-psql-s2i, there's no need to change any of the template variables. We can now proceed by clicking the Create button to start the build and deployment process of the PostgreSQL and JDV pods.
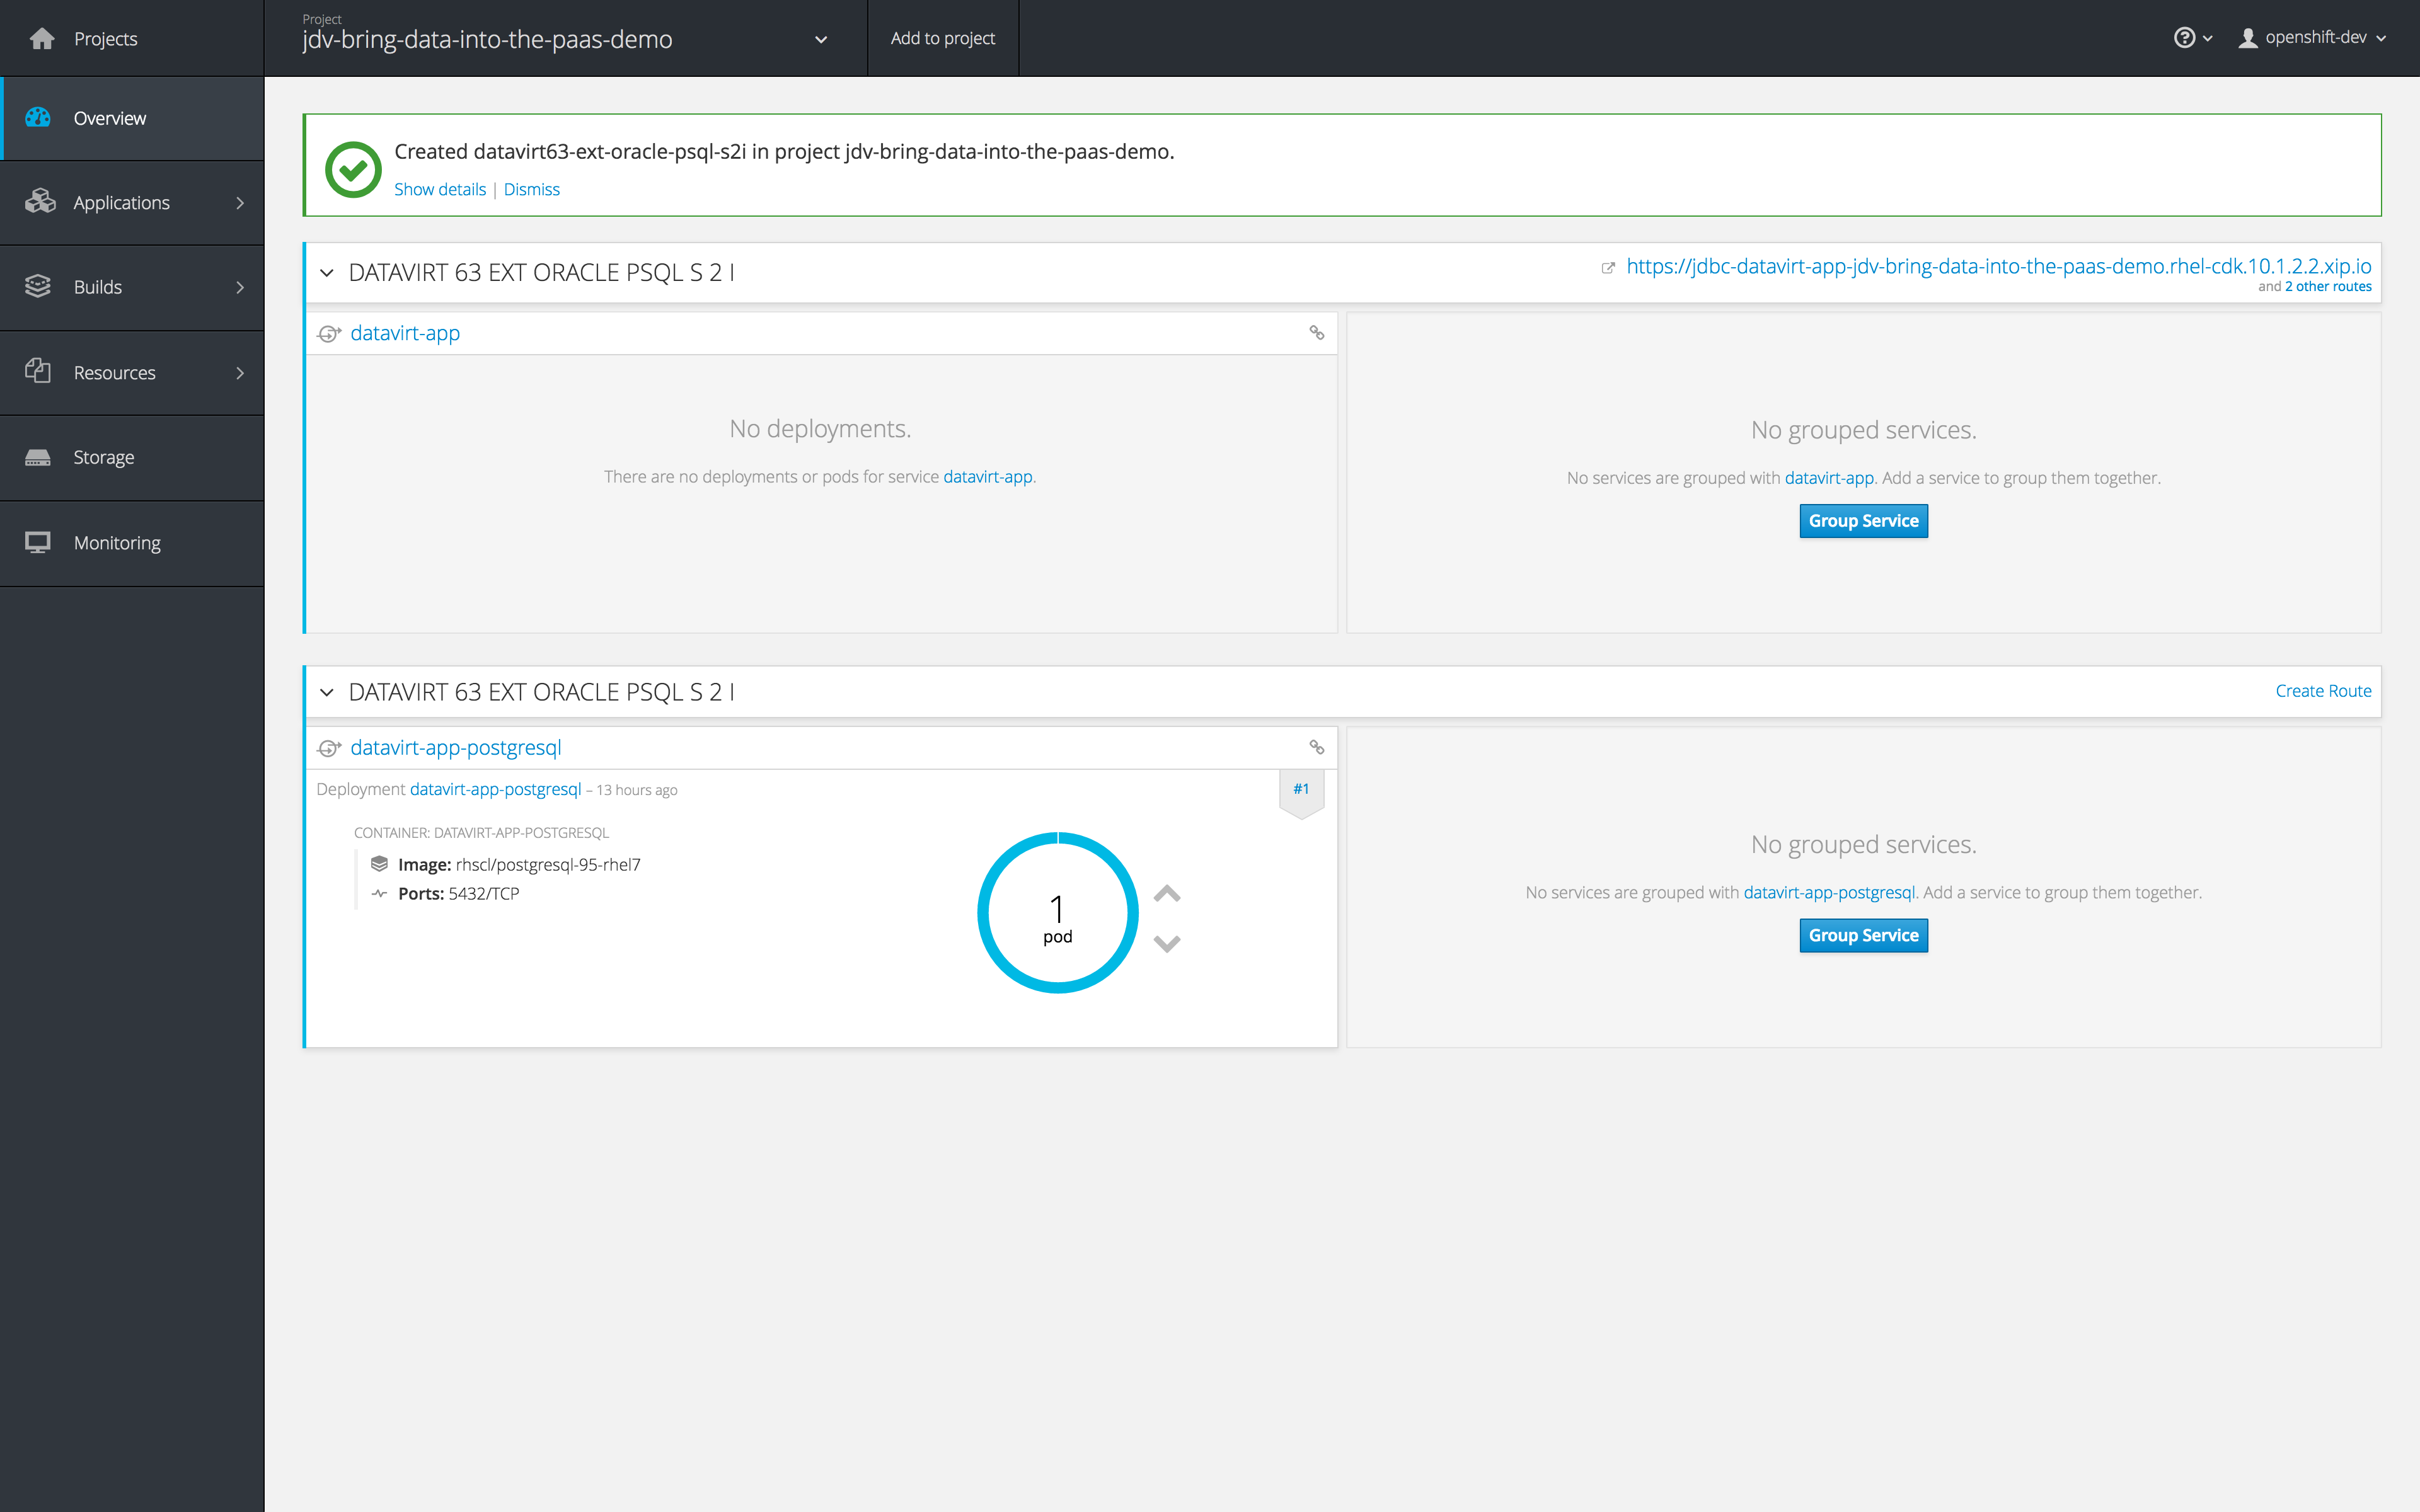
The PostgreSQL pod will be created first, JDV will then be built and deployed. If the build and deployment are successful, you should see similar results as depicted in the image below.

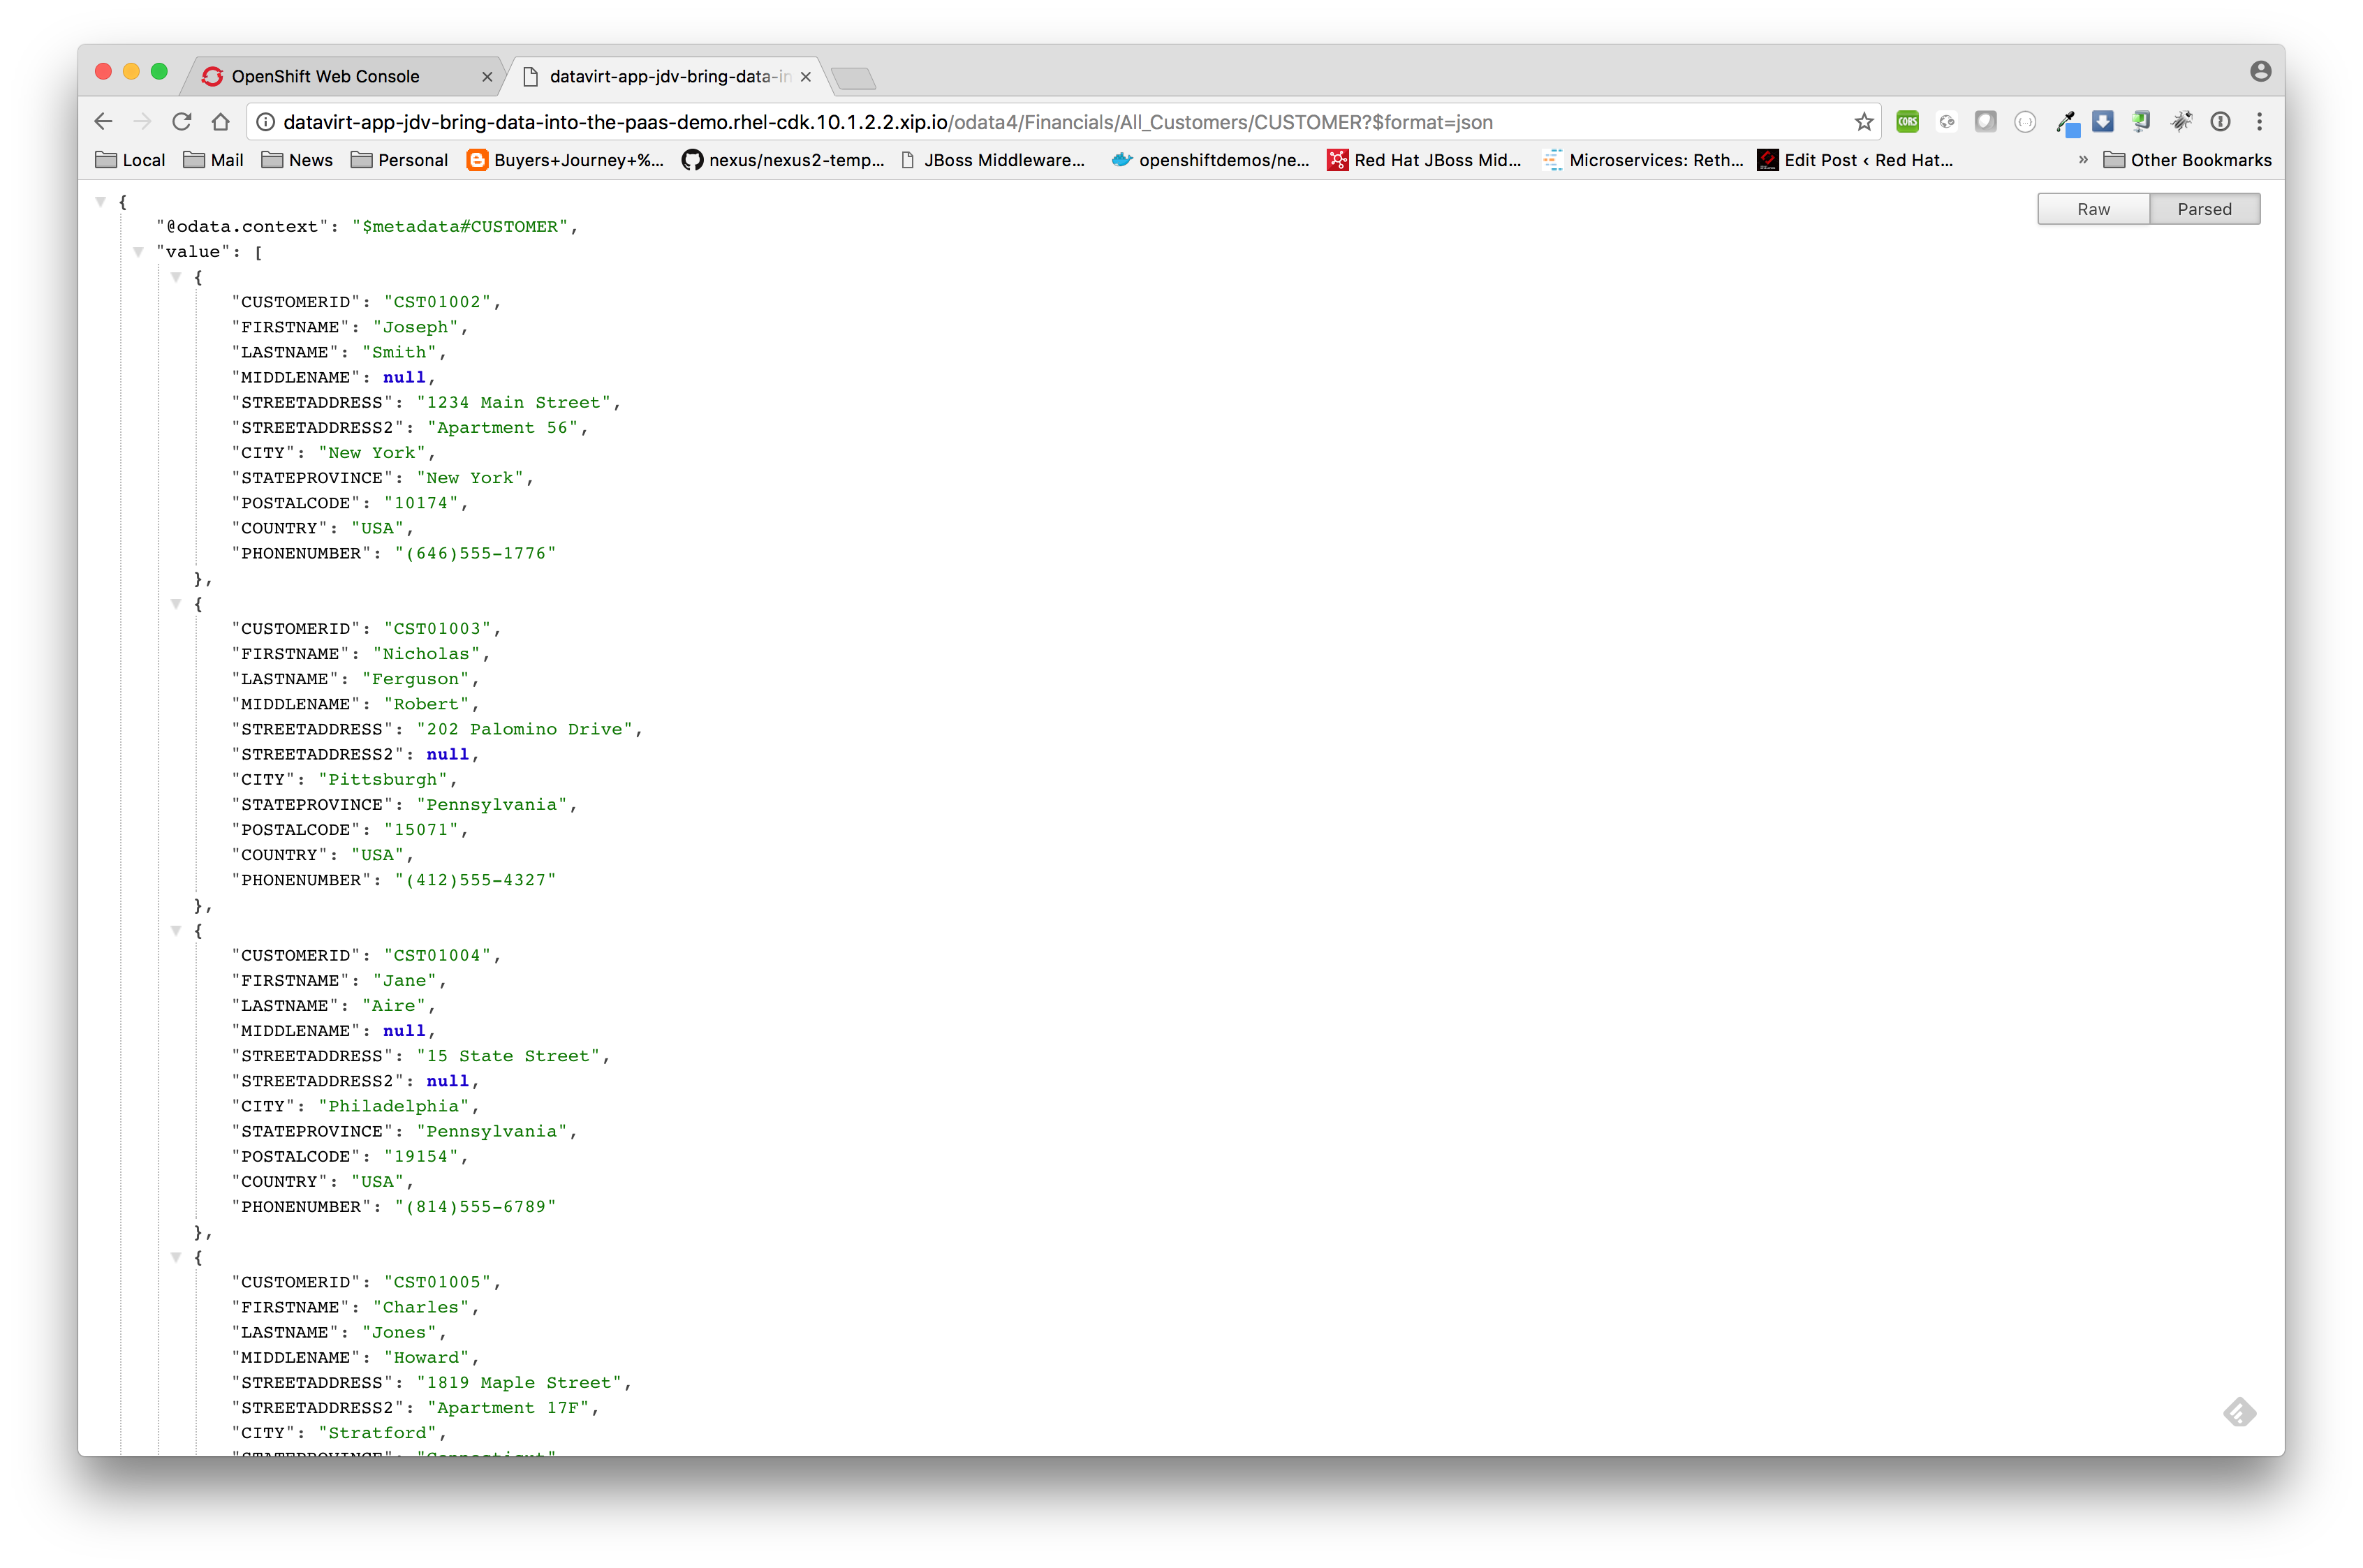
Access the federated view model, All_Customers.CUSTOMER by using OData.
After a successful build and deployment, we can now access the federated view model, All_Customers.CUSTOMER by using the following OData url:
http://datavirt-app-jdv-bring-data-into-the-paas-demo.rhel-cdk.10.1.2.2.xip.io/odata4/Financials/All_Customers/CUSTOMER?$format=json
For your convenience, we provide a shell script called jdv-ocp-setup.sh, to run the above setup completely from the command line.
Conclusion
In just a few clicks, we created a new OpenShift project, added a JDV and PostgreSQL database environment, and connected to an external Oracle datasource using a ready to go OpenShift template. We populated the two databases with schemas, tables, and customer data. The Financials VDB were deployed bringing customer data from outside to inside the PaaS and access the federated model, All_Customers.CUSTOMER, using OData-based REST provided out-of-the-box service by running JDV on OpenShift.
Resources
- Red Hat JBoss Data Virtualization on OpenShift: Part 1 – Getting started
https://developers.redhat.com/blog/2016/12/06/red-hat-jboss-data-virtualization-on-openshift-part-1-getting-started/ - Red Hat JBoss Data Virtualization on OpenShift: Part 2 – Service enable your data
https://developers.redhat.com/blog/2016/12/07/red-hat-jboss-data-virtualization-on-openshift-part-2-service-enable-your-data/ - Red Hat JBoss Data Virtualization on OpenShift: Part 3 – Data federation
https://developers.redhat.com/blog/2016/12/14/red-hat-jboss-data-virtualization-on-openshift-part-3-data-federation/ - JDV Workshop
https://github.com/DataVirtualizationByExample/DVWorkshop - OData
http://www.odata.org - PostgreSQL
https://www.postgresql.org/ - Oracle
http://www.oracle.com
You can get additional information at Red Hat JBoss Data Virtualization, a data supply, and integration solution.
