Red Hat Quay provides an enterprise grade container registry for organizations and allows administrators to host and distribute images across different environments. In some scenarios, the required images may not be hosted on premise and additional steps need to be taken in order to make them available in the environment. This blog post demonstrates how to use Red Hat Quay's proxy cache for upstream registries to pull images on demand from remote locations.
Environment setup
I set up a Red Hat OpenShift cluster v4.18.1 running on AWS with Red Hat Quay 3.13 deployed and installed via the Red Hat Quay Operator. I also used OpenShift Data Foundation to provide the necessary storage requirements for Red Hat Quay.
Enable the proxy cache flag
To enable the proxy cache, set FEATURE_PROXY_CACHE to true in the Red Hat Quay config.yaml. You can do this through the OpenShift web console by navigating to Workloads → Secrets in the project hosting the Quay registry deployment.
Search for "config" to retrieve and edit the config bundle used by your Red Hat Quay deployment to enable the proxy cache, as shown in Figure 1. If the operator generated the secret name, it typically follows this format: <registry-name>-config-bundle-<uid>.
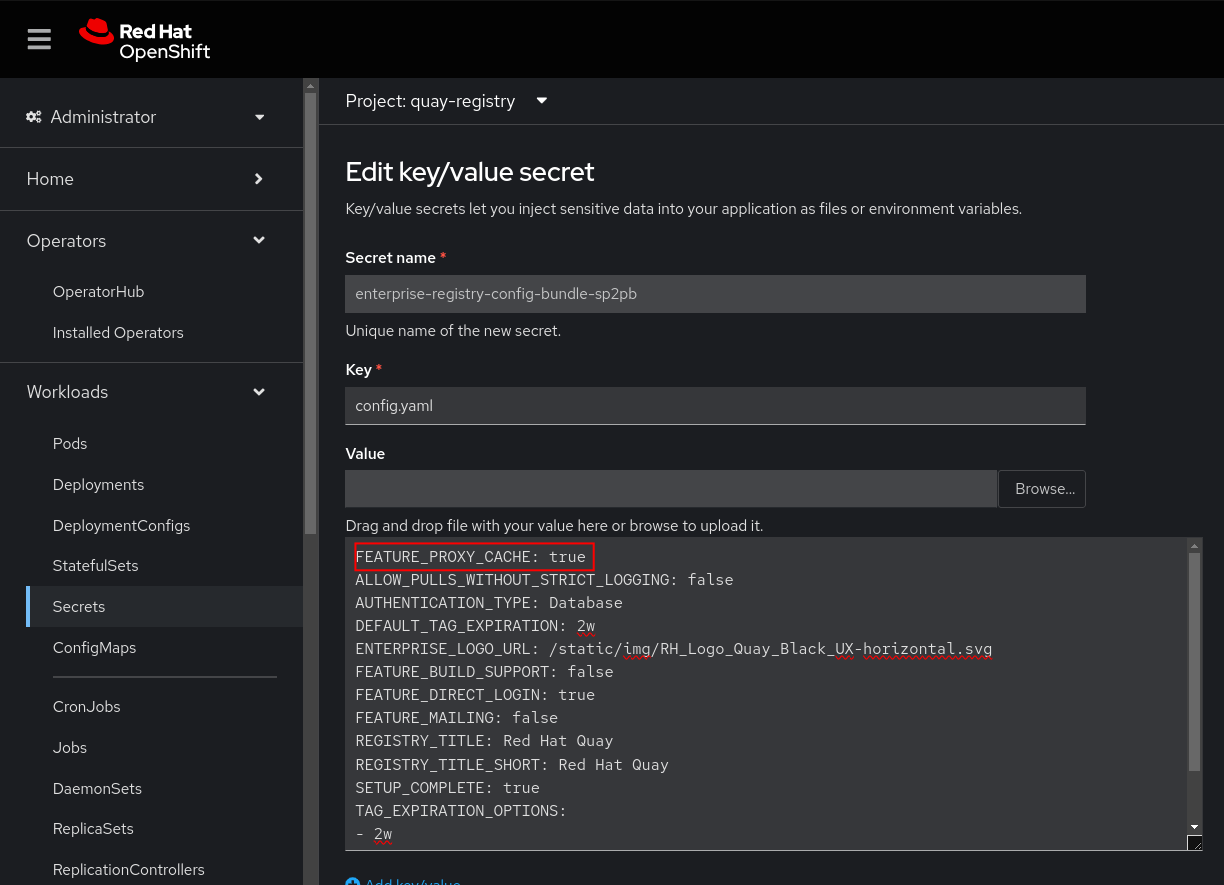
After updating and saving the secret, the Red Hat Quay operator triggers a rollout of the registry pods and deploys new pods based on the updated configuration.
Creating an organization
With the proxy cache enabled, create a new organization in Red Hat Quay to proxy images from remote sources. Navigate the Red Hat Quay console to create an organization.
After logging in, create a new organization for the purpose of proxy caching. In this example, we named it proxy.
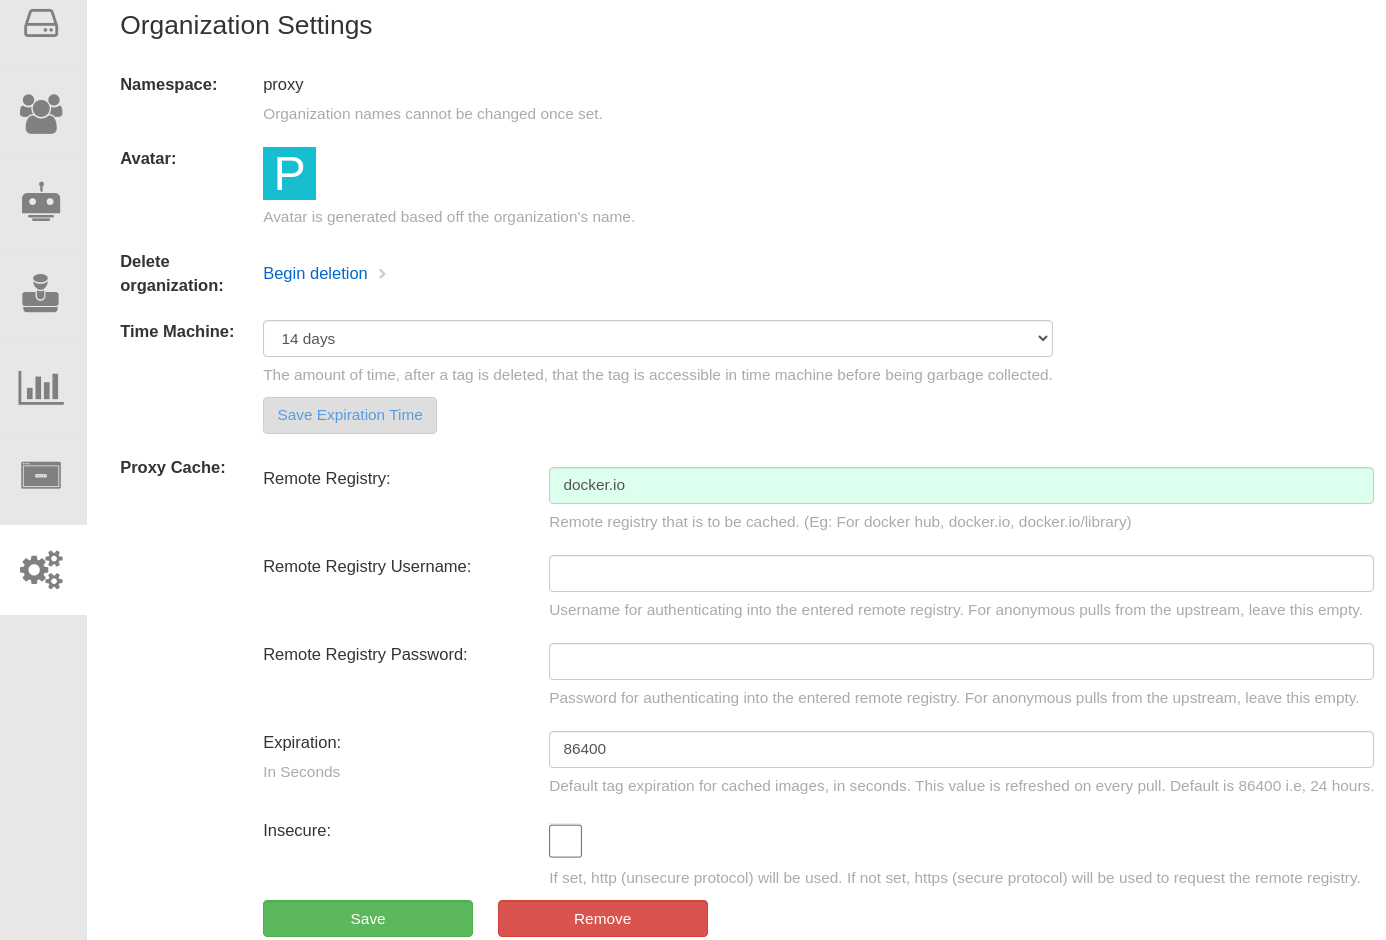
After creating the organization, click on it and navigate to the organization settings. Provide the remote registry information in the proxy cache section of the settings. In this example, I used docker.io as my remote registry for proxy caching. See Figure 2.
Command-line proxy pull testing
With the new organization set up with proxy caching, test remote pulling using Podman. First, log in to your Red Hat Quay registry using the following command and the registry's credentials. Replace <registry-url> with your Red Hat Quay registry URL.
abashir@abashir-thinkpad:~/podman login <registry-url>
Username: admin
Password:
Login Succeeded!
Now you can test the proxy cache by pulling an image that exists in Docker Hub, but not your Red Hat Quay registry. I used the hello-openshift image for this example.
abashir@abashir-thinkpad:~/podman pull <registry-url>/proxy/openshift/hello-openshift:latest

Trying to pull <registry-url>/proxy/openshift/hello-openshift:latest...

Getting image source signatures

Copying blob 8b32988996c5 done   |

Copying blob 4f4fb700ef54 done   |

Copying config 7af3297a3f done   |

Writing manifest to image destination
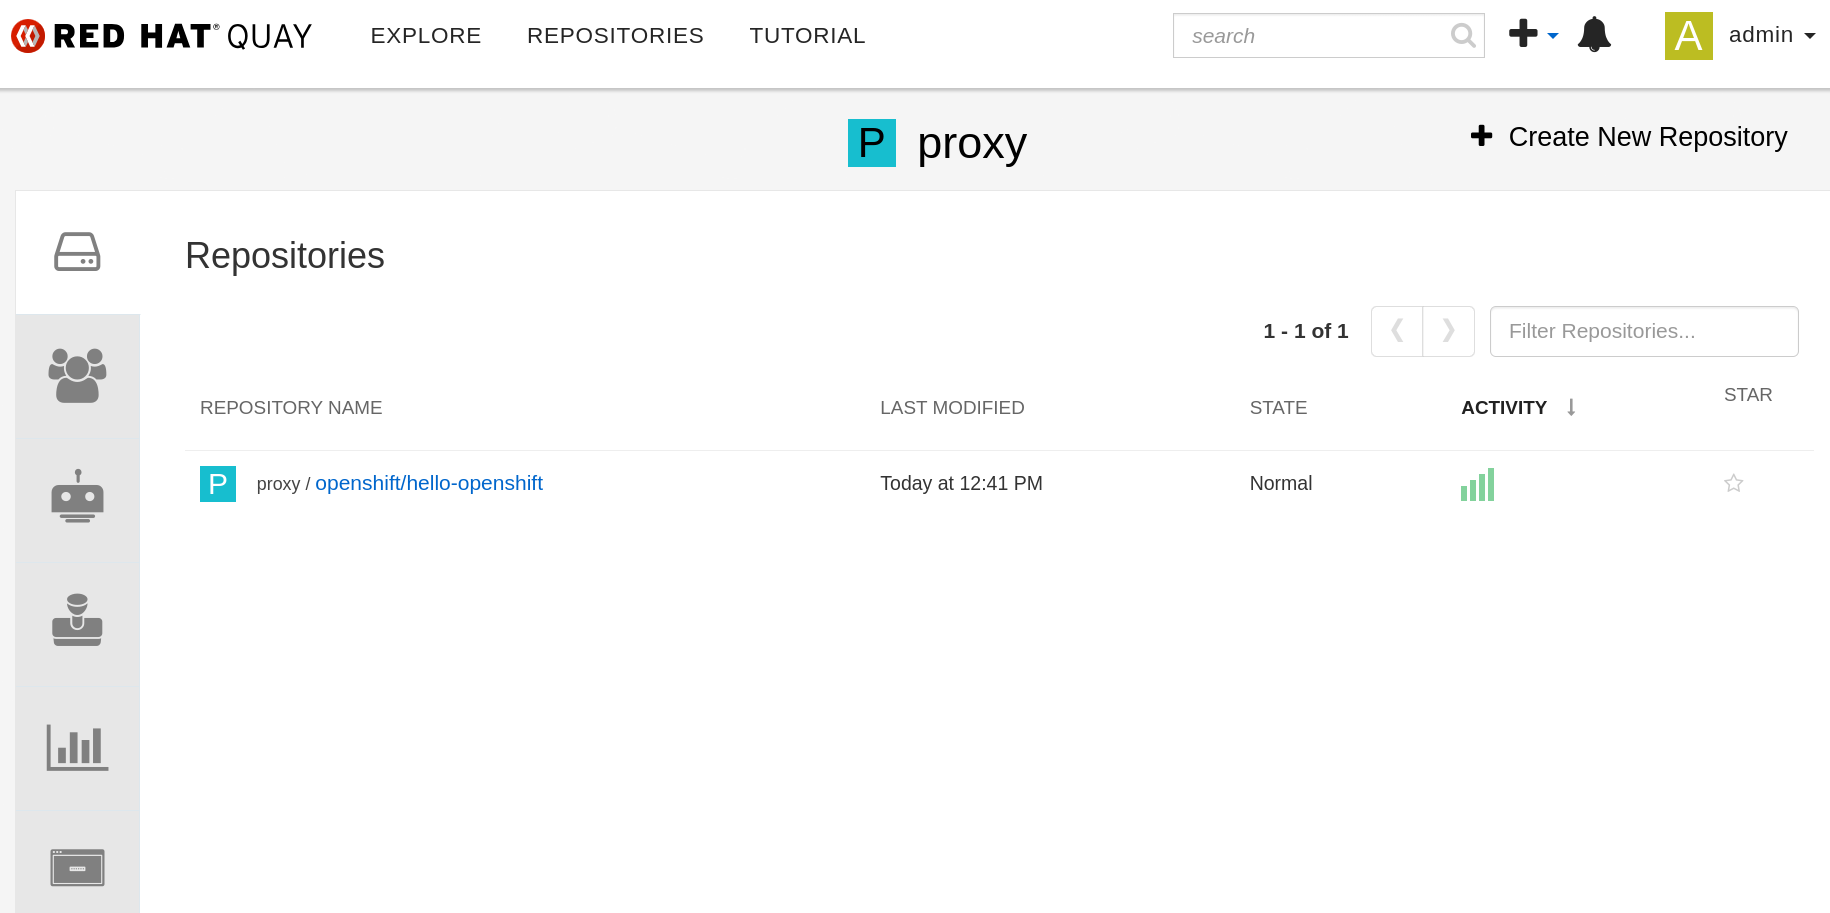
As you can see, you can successfully pull the image even though it does not exist in your registry. In the background, Red Hat Quay pulls the required image on demand and saves it to the registry based on the remote proxy cache settings you specified. If you navigate to the proxy organization you created in the Red Hat Quay console, you can see the hello-openshift image after the podman pull command requests it (Figure 3).
Application deployment proxy pull testing
With the proxy cache configuration in place, we can test a common use case: deploying an application that uses a container image proxied from the remote source via Red Hat Quay. First, create a new project called my-apps to host your application by navigating to Home → Projects in the OpenShift web console and clicking the Create Project button.
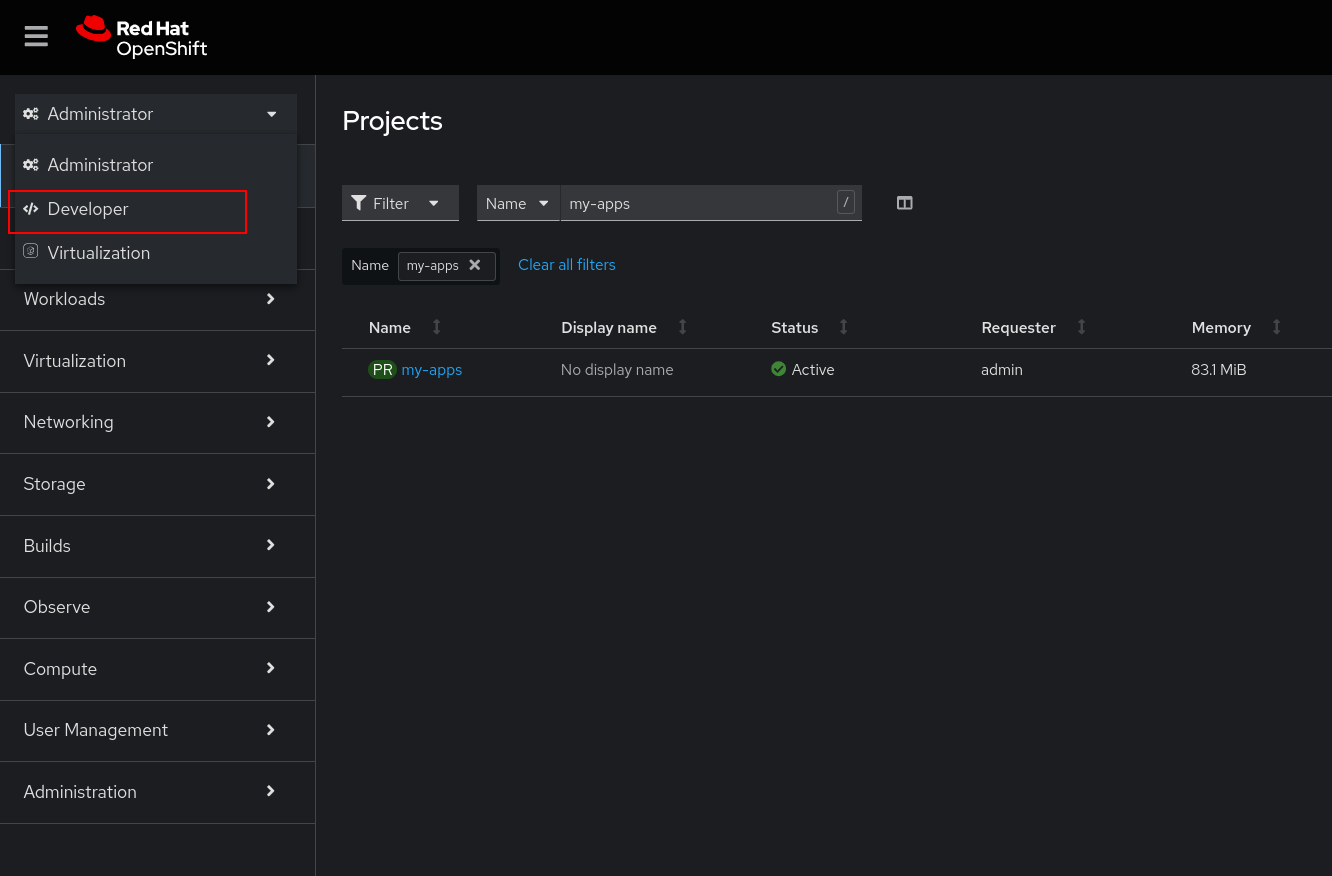
From there, navigate to the Developer view in the OpenShift console (marked in Figure 4) to switch the context to Developer. You can proceed to create the application.
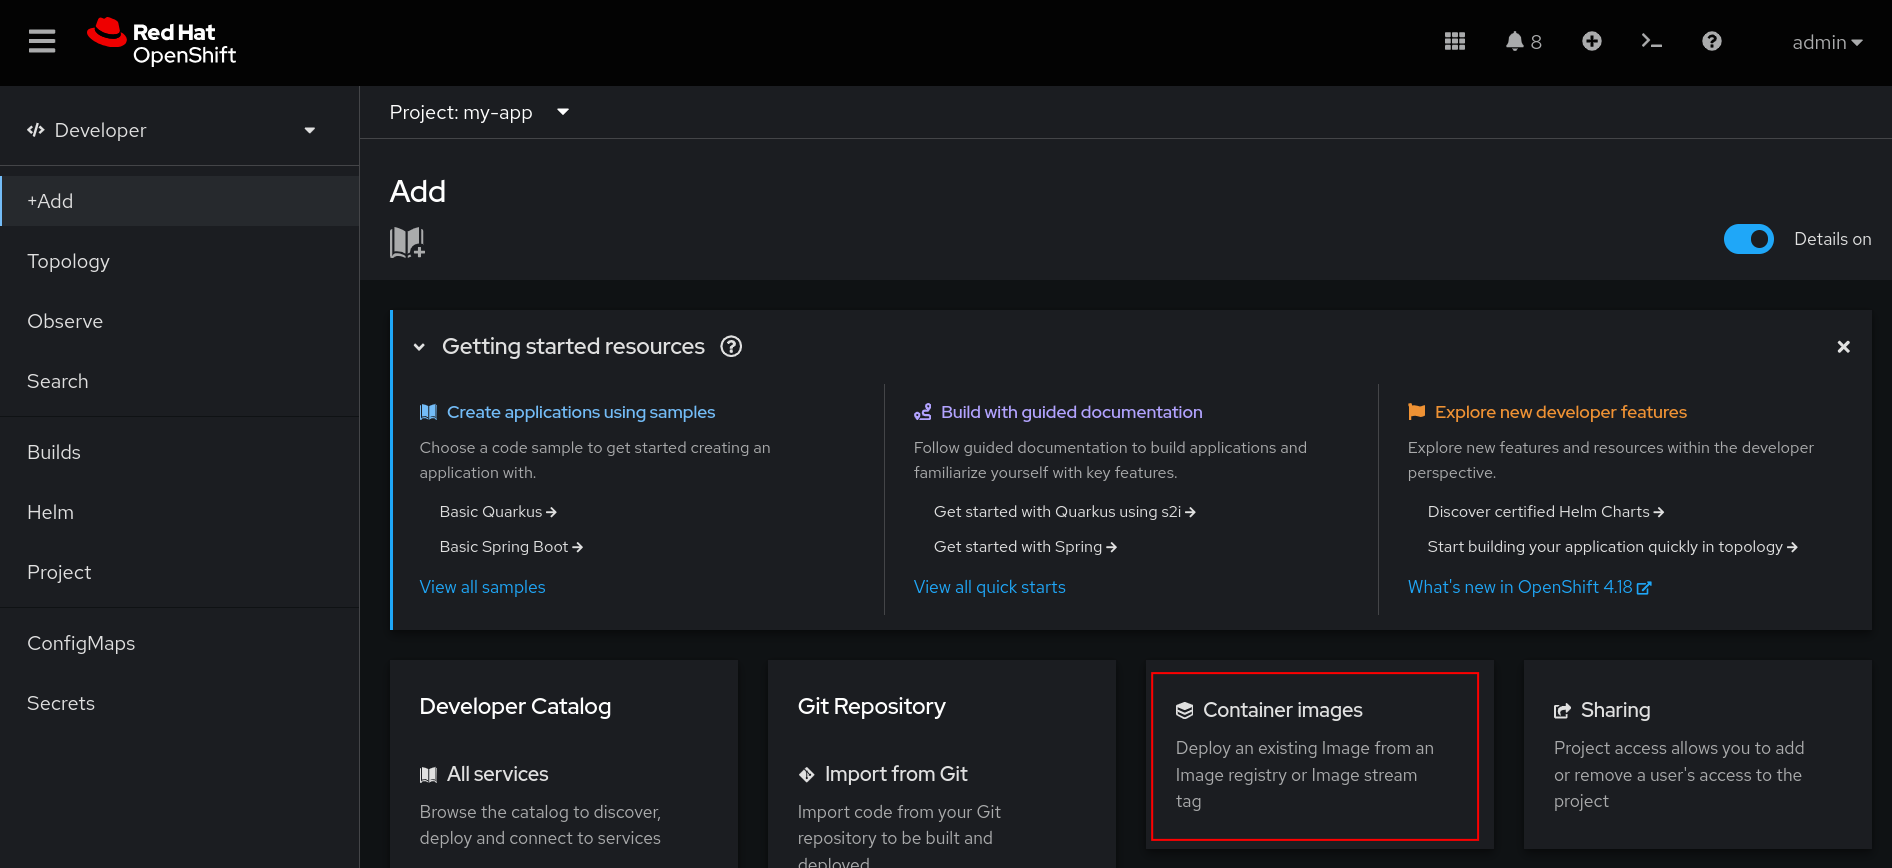
From the navigation menu, click +Add and then Container images (Figure 5) to create a new application based on a container image.
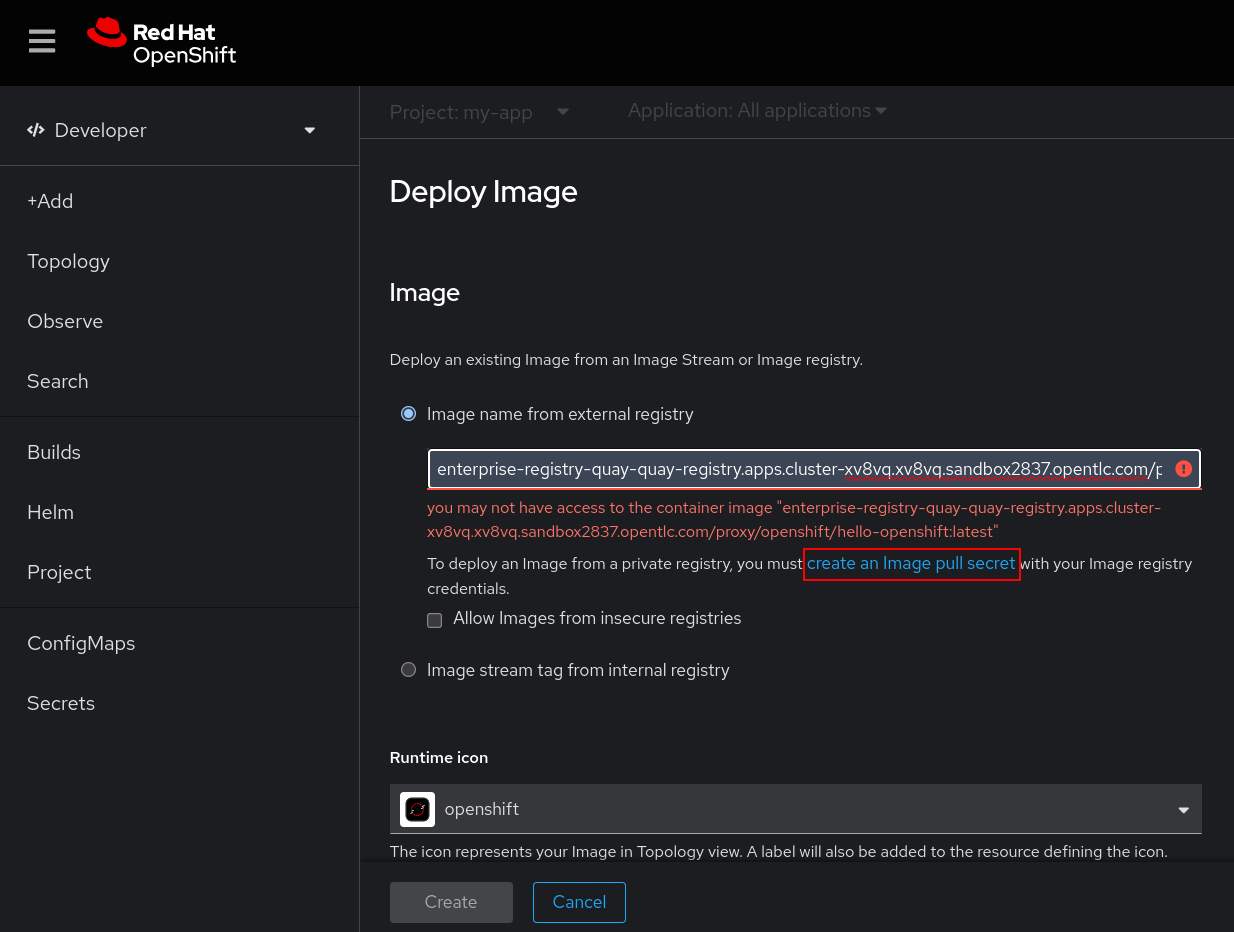
In the Image name from external registry field, specify the Red Hat Quay registry and image name. After you specify the image name, OpenShift will detect that Red Hat Quay's authentication protection prevents image access. To allow OpenShift to pull the image, create a new image pull secret that specifies the Red Hat Quay registry credentials. You can do this by clicking the create an Image pull secret link shown below the validation message in Figure 6.
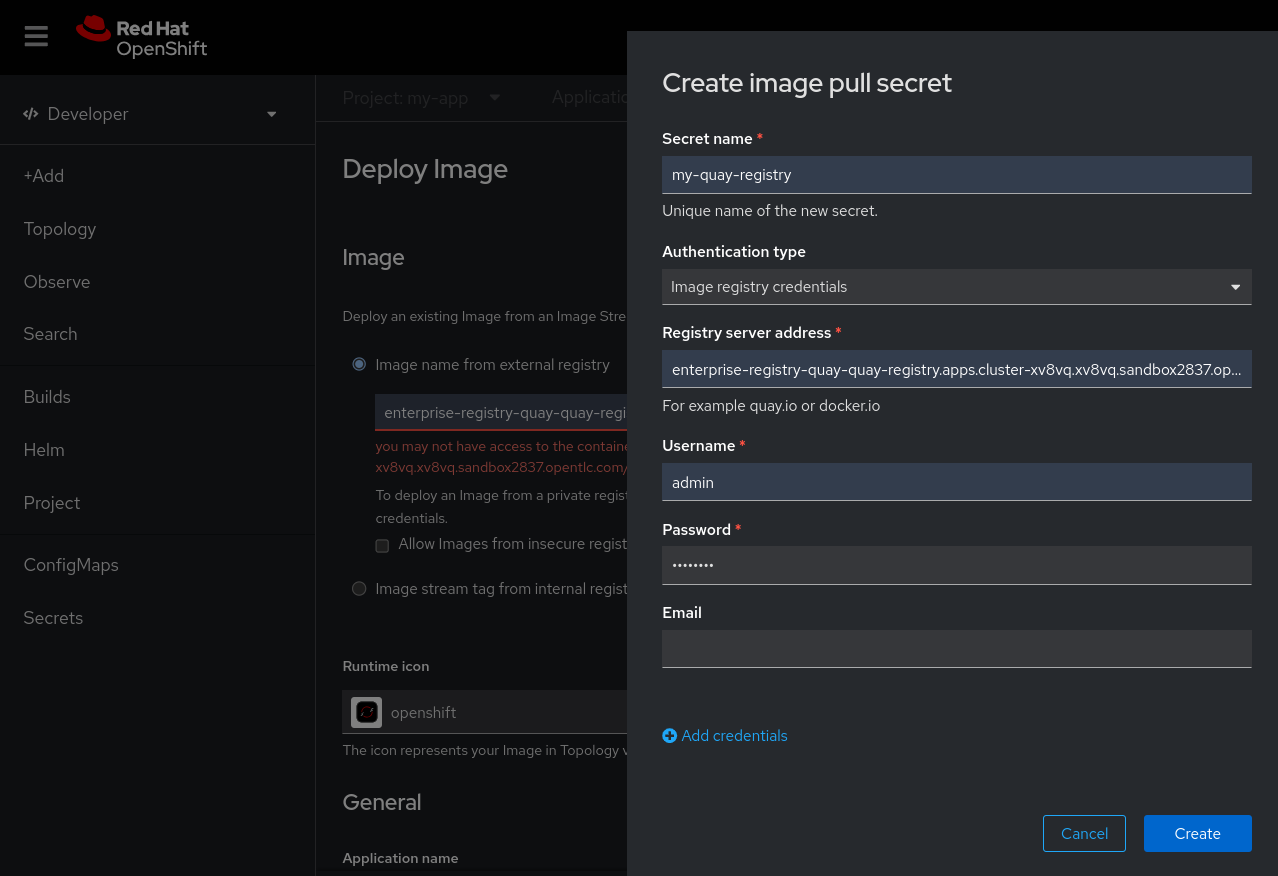
Once you click on the link to create an Image pull secret, you can input the Red Hat Quay details, including the name of the secret to be created, your Red Hat Quay registry server address, and the username and password for authentication. See Figure 7.
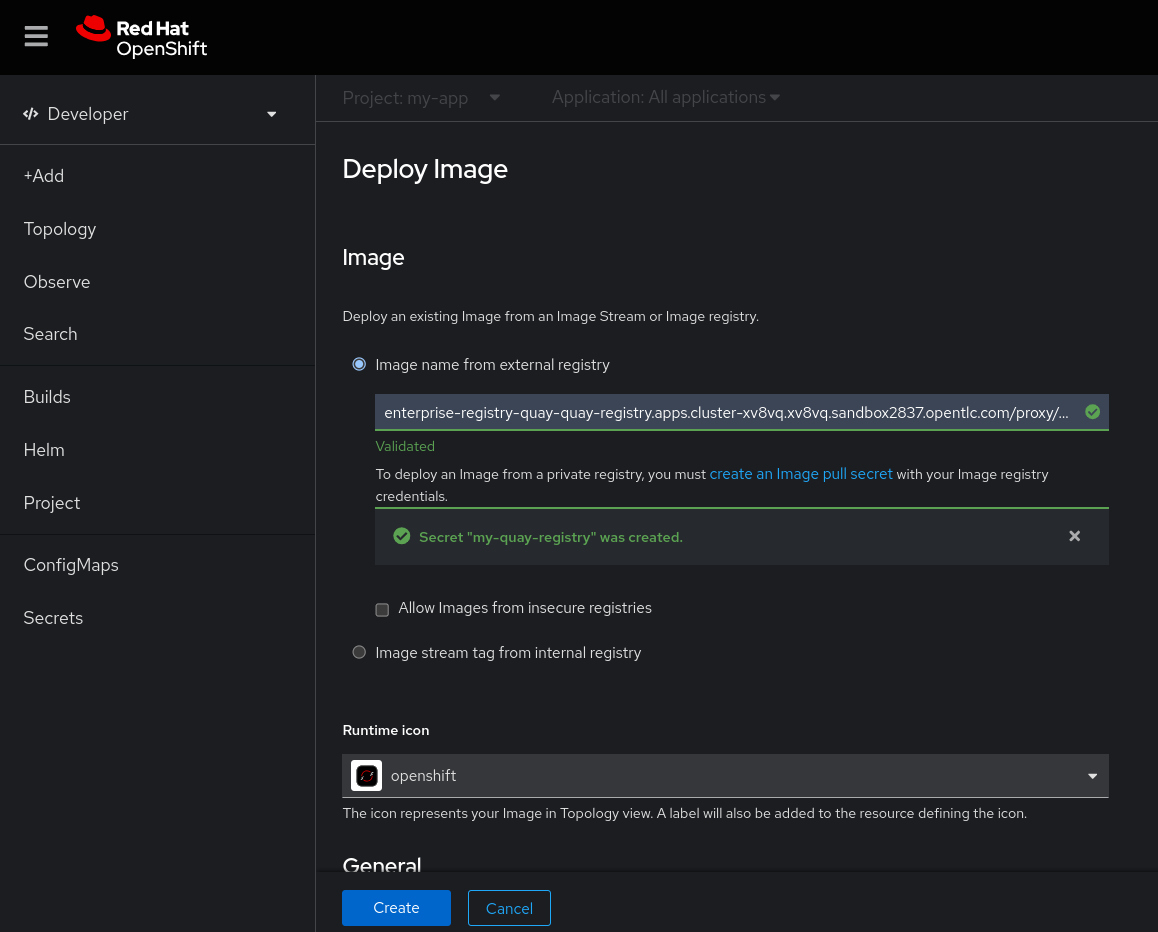
After providing the registry information, you can see that the image is now accessible and the validation error is gone (Figure 8). You can now create your application.
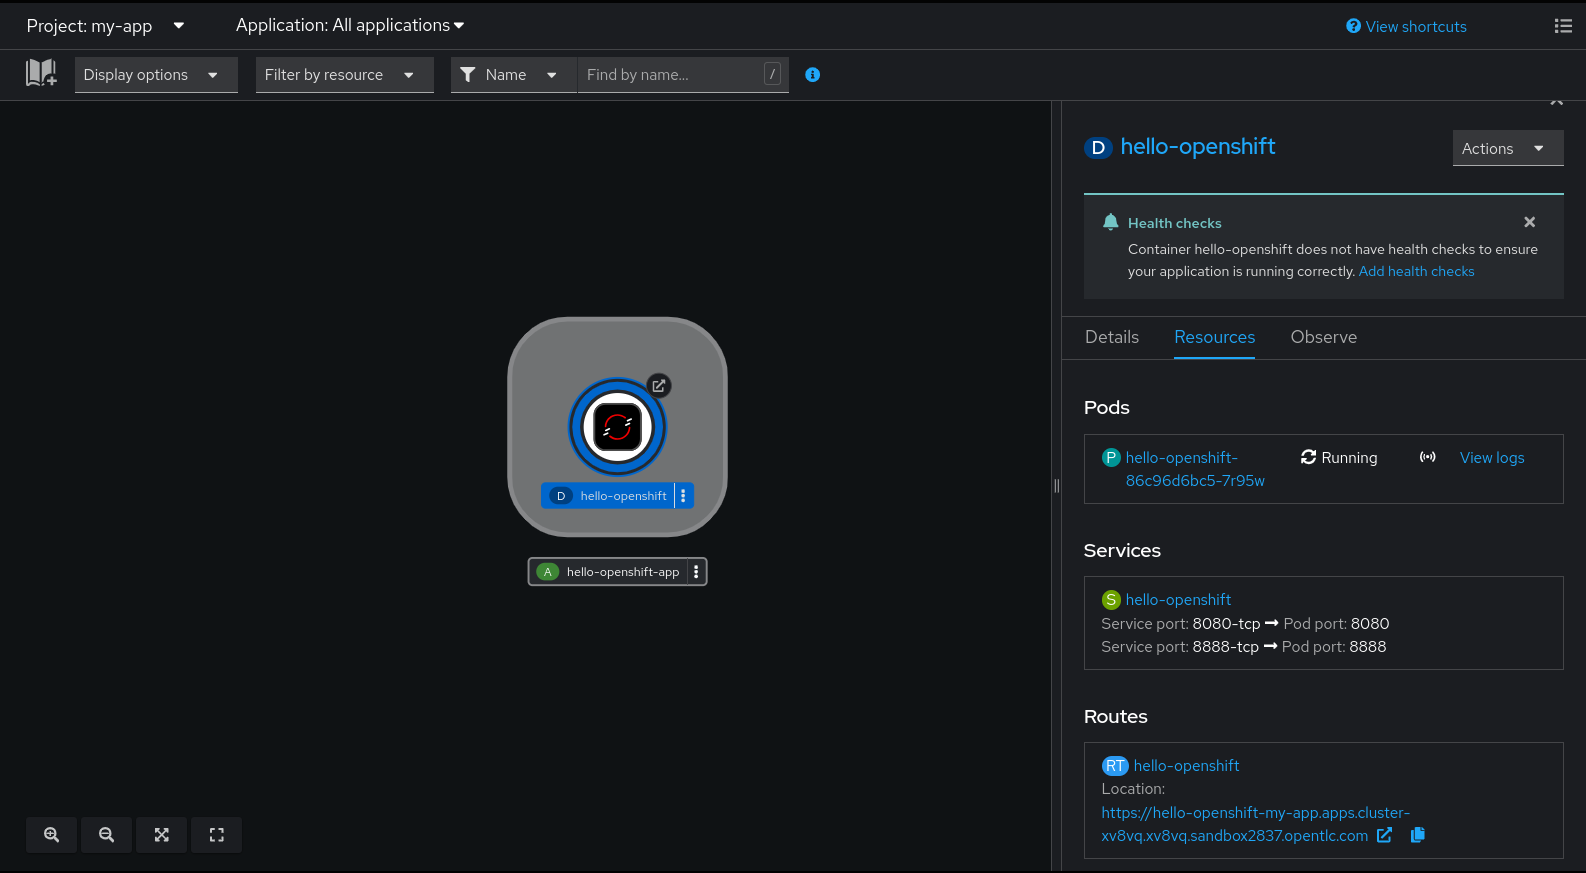
Now with the application created, the application container image has been proxied through our Red Hat Quay registry, and the application container is up and running. You can also view the application resources such as the pods, service and route that have been created.
Now that you have created the application, the Red Hat Quay registry proxies the application container image, and the application container is running. You can also view the application resources that have been created, such as the pods, service, and route. See Figure 9.
By navigating your browser to the application route, you can validate that the application is operational. Figure 10 shows the webpage response in the browser.

Conclusion
This post demonstrated how to configure your Red Hat Quay registry to proxy cache container images from remote sources and how to configure remote command-line clients to pull proxied images. It also detailed how to create an OpenShift application based on a proxy cached image from a remote source and validated the connectivity and reachability to your application.
To learn more, visit:
