Managing secrets securely is non-negotiable for many enterprises today across cloud and on-premise environments. Organizations are poised to take advantage of deeper integration opportunities between HashiCorp Vault and Red Hat OpenShift to strengthen their security posture.
In this article, we’ll demonstrate the integration of Red Hat OpenShift Data Foundation with HashiCorp Vault to enable cluster-wide encryption using Vault as a key management system (KMS). We will deploy this demo on Amazon Web Services (AWS) using local devices as the backing store to the OpenShift Data Foundation cluster.
5 steps to deploy Vault on OpenShift
While many enterprises use an external Vault instance for demo purposes, we will deploy Vault within the OpenShift cluster using Helm.
- Follow the instructions in this guide to deploy the Vault instance via Helm with TLS certificates managed by cert-manager.
- The TLS certs will be created with a locally generated root CA.
Step 1: Initialize Vault
Once Vault is running, initialize it. You can either do these series of steps by executing each command with an oc exec wrapper or by simply obtaining your tokens and running oc exec -n vault -ti vault-0 -n vault -- sh to run everything within the Vault shell:
$ oc exec -n vault vault-0 -- vault operator init -key-shares=1 -key-threshold=1 -format=json > init-keys.jsonThis command generates the unseal keys and a root token. Make sure to store them securely. You’ll often be prompted to unseal Vault.
Unseal Vault with the following:
$ cat init-keys.json | jq -r ".unseal_keys_b64[]"
hmeMLoRiX/trBTx/xPZHjCcZ7c4H8OCt2Njkrv2yXZY=
$ VAULT_UNSEAL_KEY=$(cat init-keys.json | jq -r ".unseal_keys_b64[]")
$ oc exec -n vault vault-0 -- vault operator unseal $VAULT_UNSEAL_KEY
$ cat init-keys.json | jq -r ".root_token"
s.XzExf8TjRVYKm85xMATa6Q7U
$ VAULT_ROOT_TOKEN=$(cat init-keys.json | jq -r ".root_token")
oc exec -n vault vault-0 -- vault login $VAULT_ROOT_TOKEN

Success! You are now authenticated. The token information displayed below
is already stored in the token helper. You do NOT need to run "vault login"
again. Future Vault requests will automatically use this token.

Key                  Value
---                  -----
token                s.P3Koh6BZikQPDxPSNwDzmKJ5
token_accessor       kHFYypyS2EcYpMyrsyXUQmNa
token_duration       ∞
token_renewable      false
token_policies       ["root"]
identity_policies    []
policies             ["root"]
Step 2: Configure Vault
Next, configure Vault for Kubernetes Auth and enable the KV backend path by running the following:
oc -n vault exec pods/vault-0  -- \
        vault auth enable kubernetes

oc -n vault exec pods/vault-0  -- \
        vault secrets enable -path=odf kv-v2
A note on OpenShift Data Foundation Vault roles
The official OpenShift Data Foundation documentation recommends creating an odf-vault-auth service account in the openshift-storage namespace with an auth delegator role. This role allows Vault to authenticate against the OpenShift TokenReview API by using a long-lived service account token (token_reviewer_jwt).
For this demo, instead of introducing a dedicated service account (SA) for delegation, we have bound the authentication role directly to the existing OpenShift Data Foundation operator-managed service accounts. While keeping the token authentication process separate from the OpenShift Data Foundation operator’s service accounts is generally recommended in organizations for better access control flexibility, this adjustment simplifies our setup.
The odf-rook-ceph-op role in Vault is bound to the rook-ceph-osd SA. This SA is used by the object storage daemon (OSD) pods when creating OSD encryption keys in Vault.
From v1.22, Kubernetes discourages the use of long-lived SA tokens and recommends using short-lived tokens via the TokenRequest API. We align with this best practice by setting a short time to live (TTL) in the Vault role policy, ensuring tokens are automatically rotated on the Vault side.
Step 3: Configure Vault roles
The next step is to configure the Vault roles as follows:
oc -n vault exec pods/vault-0  -- \
        vault write auth/kubernetes/role/odf-rook-ceph-op \
        bound_service_account_names=rook-ceph-system,rook-ceph-osd,noobaa \
        bound_service_account_namespaces=openshift-storage \
        policies=odf \
        ttl=1h

oc -n vault exec pods/vault-0 -- \
        vault write auth/kubernetes/role/odf-rook-ceph-osd \
        bound_service_account_names=rook-ceph-osd \
        bound_service_account_namespaces=openshift-storage \
        policies=odf \
        ttl=1h
Step 4: Configure the K8s authentication
Note:
If Vault is hosted on Kubernetes, kubernetes_ca_cert can be omitted from the config of a Kubernetes Auth mount.
To configure the K8s authentication method to use location of the Kubernetes API, run the following:
oc -n vault exec pods/vault-0  -- \
    vault write auth/kubernetes/config \
    kubernetes_host="https://kubernetes.default.svc:443"
Step 5: Create an ACL policy
Create an access control list (ACL) policy as follows:
oc -n vault exec -i pods/vault-0 -- vault policy write odf - <<EOF
path "odf/*" {
  capabilities = ["create", "read", "update", "delete", "list"]
}
path "sys/mounts" {
  capabilities = ["read"]
}
EOF
Deploy OpenShift Data Foundation cluster
Now that you have Vault configured, we’re ready to head over to the OpenShift console and step through the OpenShift Data Foundation wizard to get our storage cluster.
Get to the stage where you’ve installed both the Local Storage Operator (LSO) and the OpenShift Data Foundation Operator via Operator Hub.
Typically, when calling a Vault instance external to the cluster, we’re required to explicitly delegate authentication decisions to the Kubernetes API Server. In our scenario, Vault is set up to authenticate Kubernetes services accounts via the Kubernetes auth method in Vault.
When deployed internally, the OpenShift Data Foundation-Vault token handshake looks a little different:
- OpenShift Data Foundation Rook passes its service account token (automatically mounted in the pod) to Vault.
- Vault is responsible for verifying that token with the Kubernetes API.
- Vault’s service account has the permission to do TokenReview (observed by the following output):
$ oc adm policy who-can create tokenreviews.authentication.k8s.io | grep vault
        system:serviceaccount:vault:vault
In short, explicitly defining an auth-delegator RoleBinding is not required here.
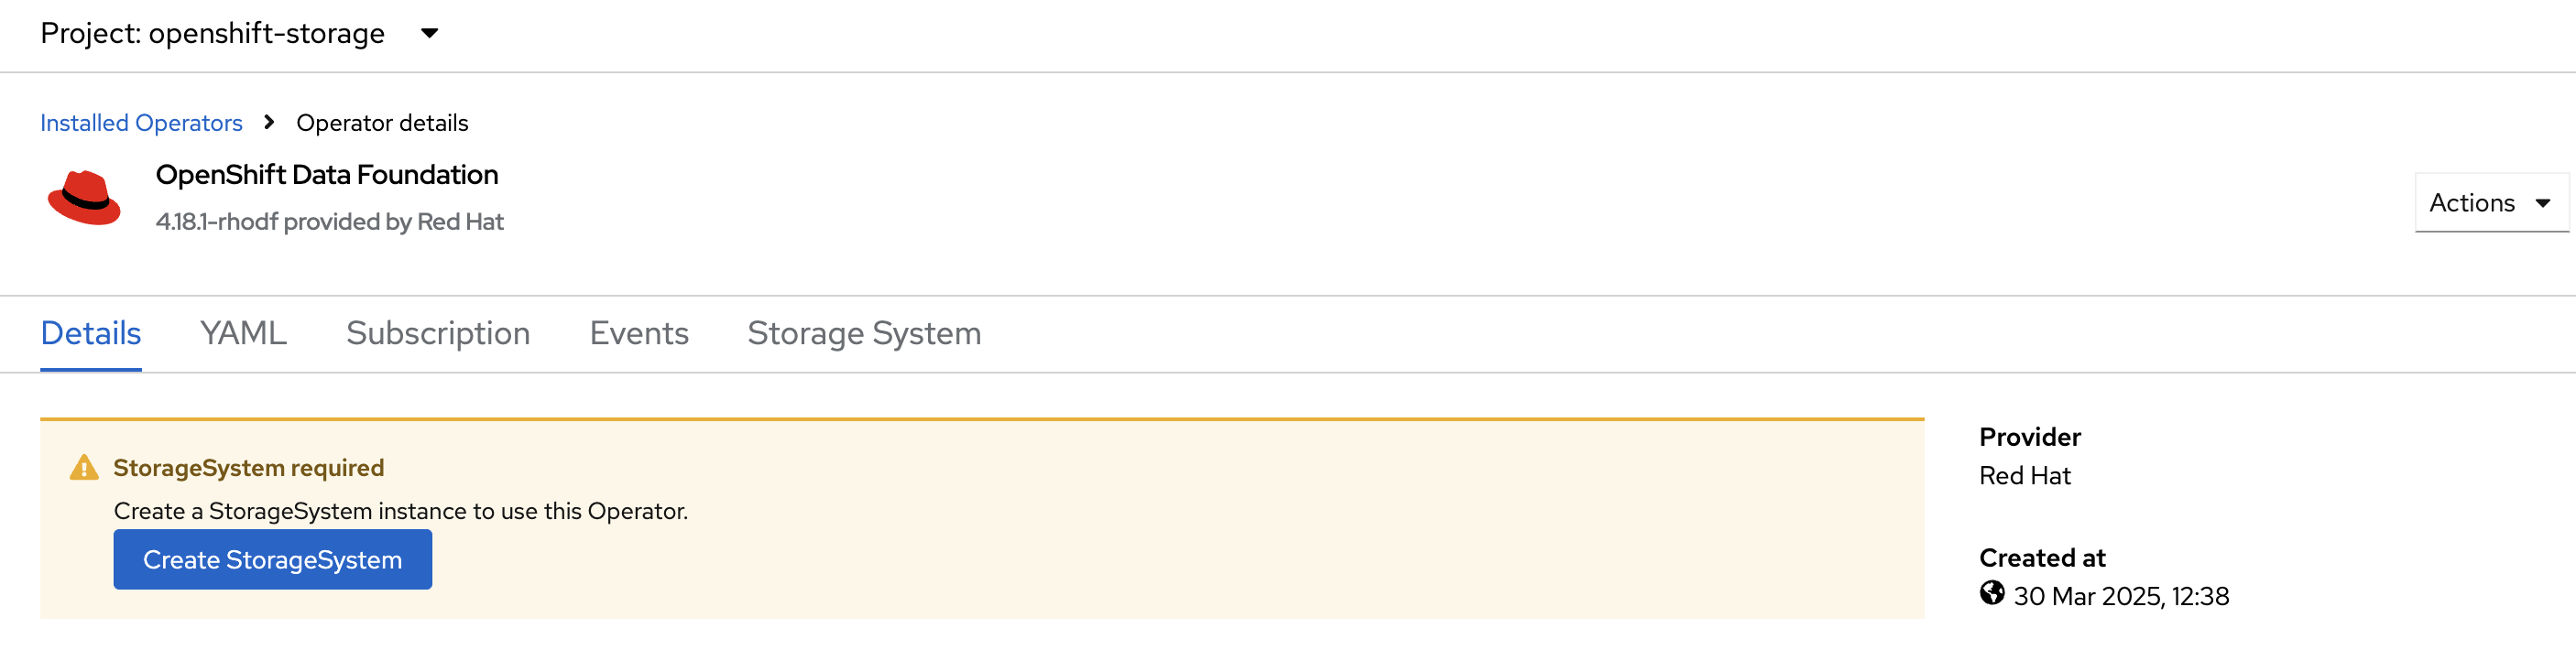
Create the storage system
With the operators deployed, select Create StorageSystem (Figure 1) to get to the OpenShift Data Foundation configuration screen.
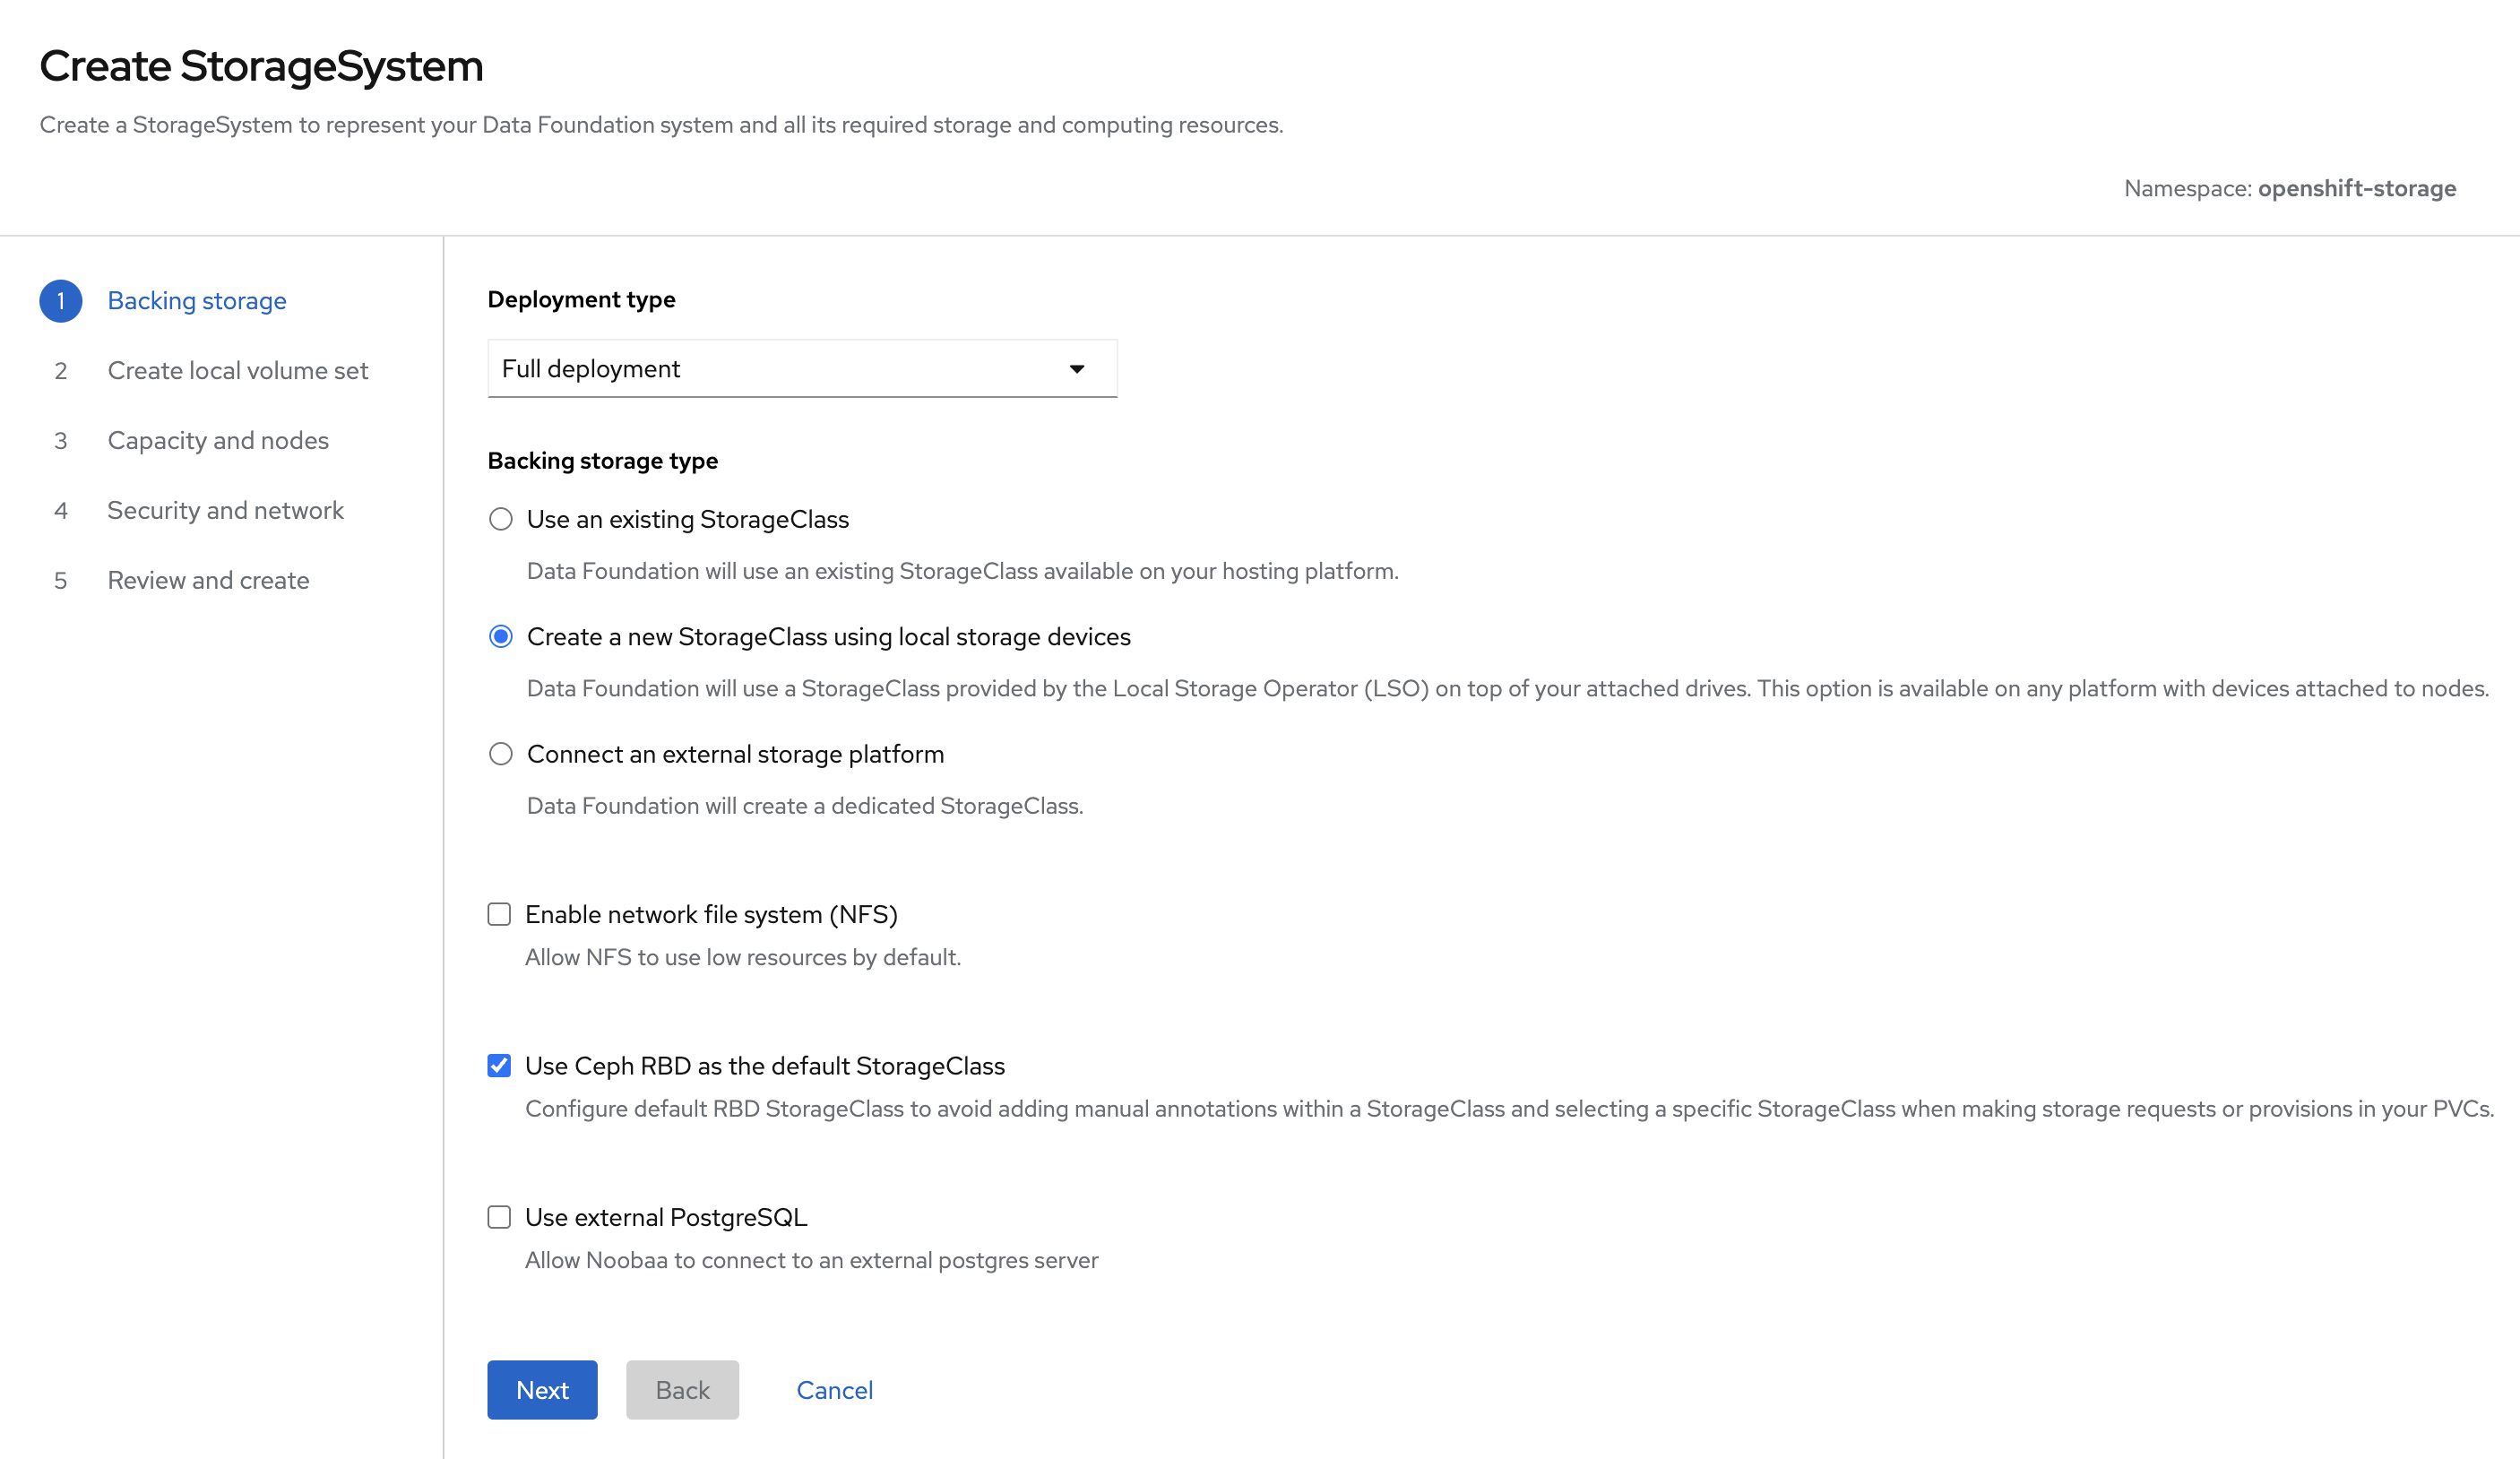
You will then be presented with the StorageSystem wizard (Figure 2). By opting for local devices, the LSO will kick off a discovery of our drives.
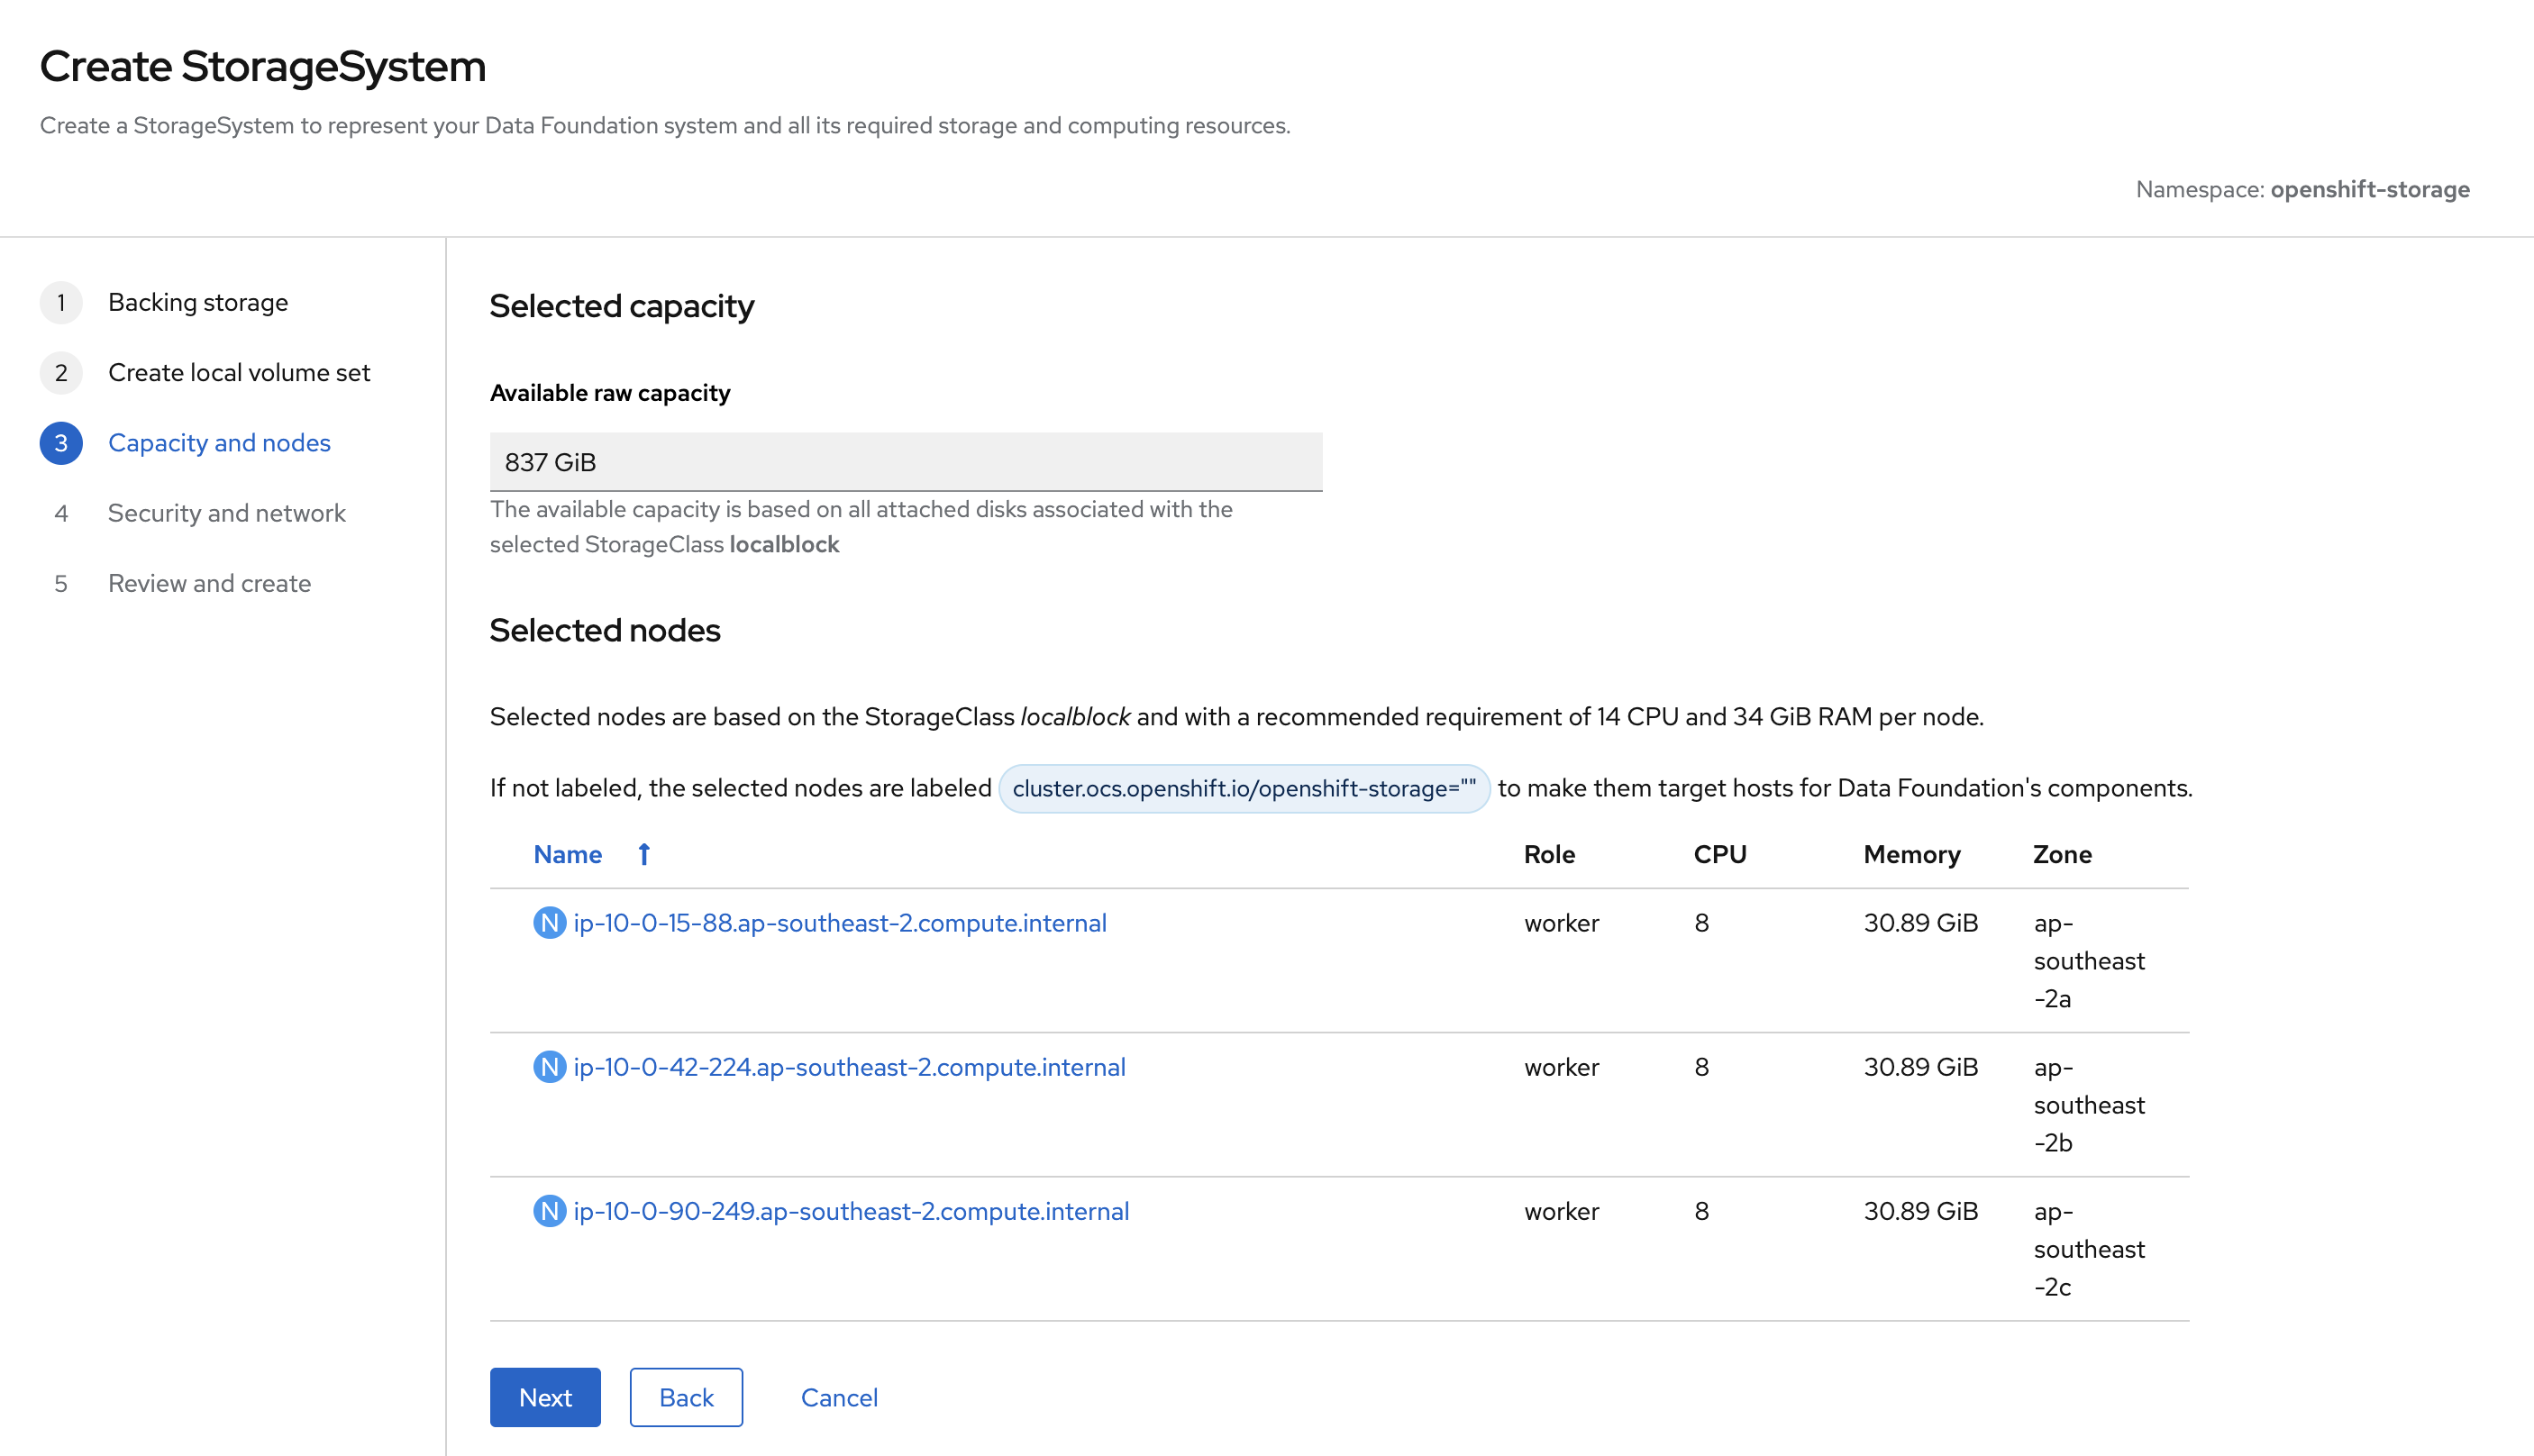
On the next screen in Figure 3, we’ll set our LocalVolumeSet (LVS) and StorageClass name. The selected capacity confirms that all our disks have been picked up correctly.
Click Confirm to create the LVS.

Once we've provisioned our localblock-backed PersistentVolumes (PVs), we can view the target hosts for the OpenShift Data Foundation cluster.
$ oc get localvolumeset -A
NAMESPACE                 NAME          AGE
openshift-local-storage   local-block   3m7s
For this demo, we will select a performance profile of Lean (Figure 4).
The screen depicted in Figure 5 shows where we’ll set up everything we need for KMS integration with Vault.
By default, it uses Kubernetes as the authentication method. Enter a connection name "odf." This is a suitable choice since we’re configuring this specifically for the OpenShift Data Foundation.
Provide the address of the Vault cluster. Since the deployment is within the cluster, you can use the service address along with the default Vault Port, 8200.
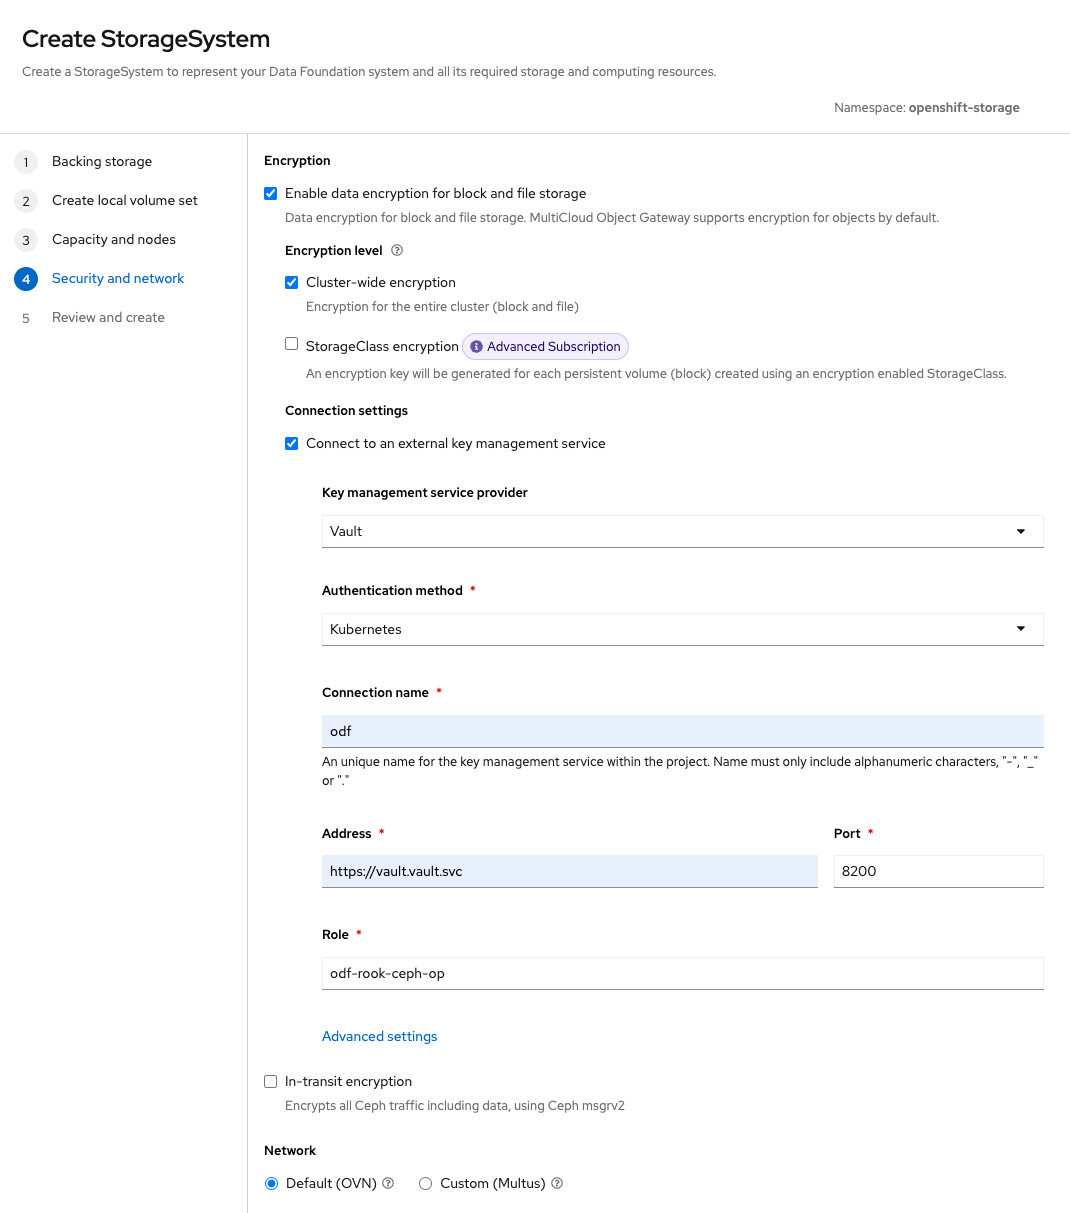
Click Advanced settings.
In line with our Vault settings we configured earlier, set the backend and authentication path to odf and kubernetes, respectively (Figure 6). Then upload the Root CA that was used to issue your cert-manager (or other) issuer-backed Vault certificates. This will generate a secret in the openshift-storage namespace.

Under Review and create, select Create StorageSystem (Figure 7).
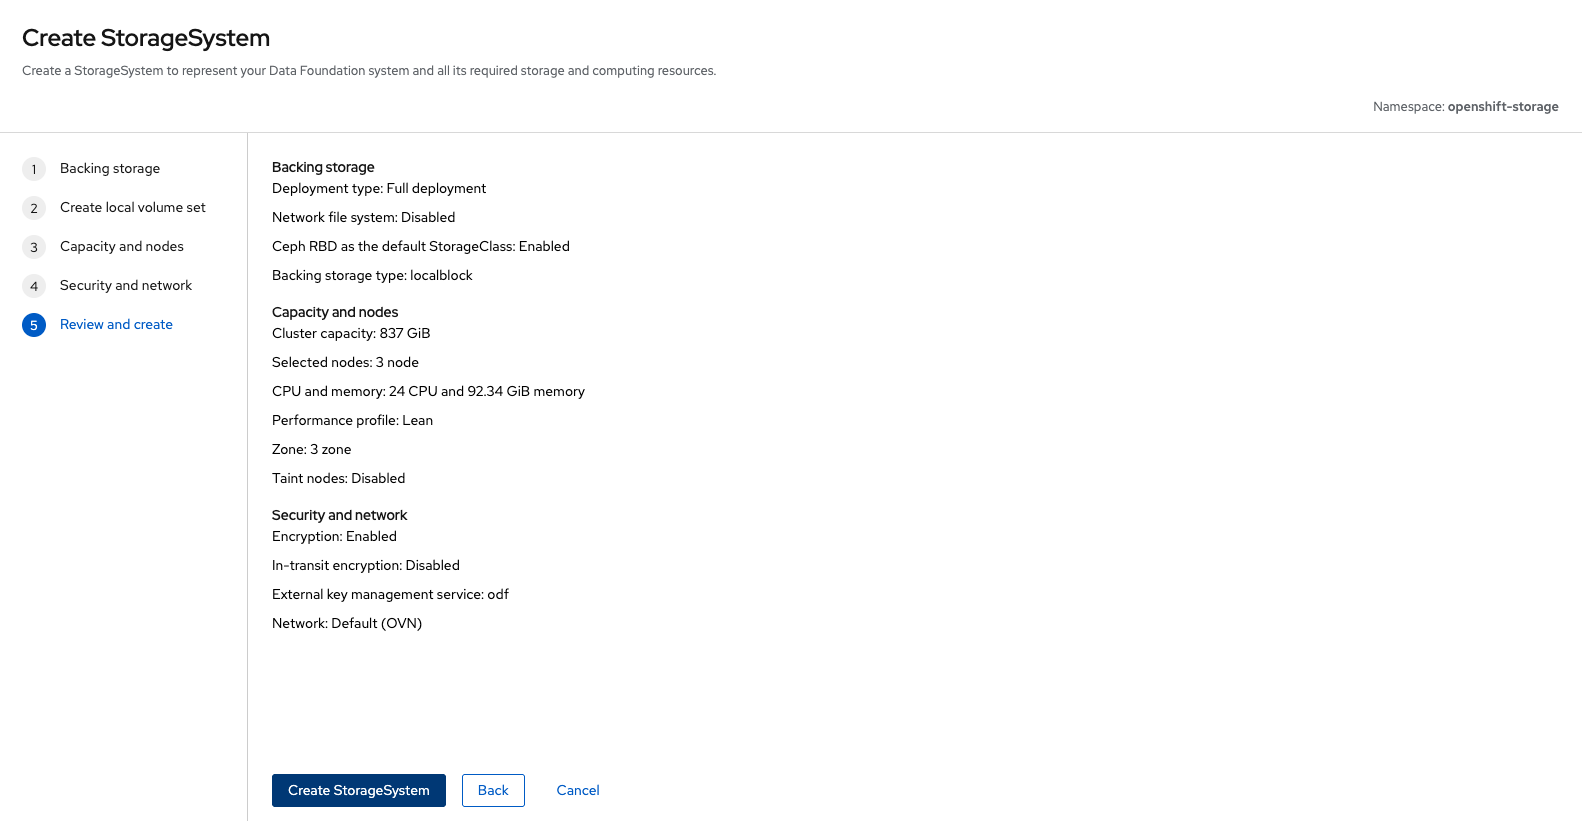
The OpenShift Container Storage (OCS) operator should spawn an ocs-kms-ca-secret-<hash> K8s secret in addition to a csi-kms-ca-secret-<hash> secret (if it doesn’t do this immediately, delete the pod and let it recreate). A ConfigMap containing the KMS connection details should also be present in the openshift-storage namespace.
Inspect its contents to verify all the relevant data you entered via the OpenShift Data Foundation console is there.
It should look something like this:
kind: ConfigMap
apiVersion: v1
metadata:
  name: ocs-kms-connection-details
  namespace: openshift-storage
data:
  KMS_SERVICE_NAME: odf
  VAULT_AUTH_KUBERNETES_ROLE: odf-rook-ceph-op
  VAULT_AUTH_METHOD: kubernetes
  VAULT_NAMESPACE: ''
  VAULT_CACERT: ocs-kms-ca-secret-pzm5nwjd
  VAULT_AUTH_MOUNT_PATH: kubernetes
  VAULT_TLS_SERVER_NAME: ''
  VAULT_BACKEND_PATH: odf
  VAULT_ADDR: 'https://vault.vault.svc:8200'
  KMS_PROVIDER: vault
You can tail the logs of the rook-ceph operator pod to check for any errors. However, the ultimate test is to verify that the encryption keys have been created in the backend path in Vault.
There’s a chance that you will encounter the following error. It just means that Vault is in need of being unsealed again.
$ oc logs -f rook-ceph-operator-65d9d759c9-6g4s5
...
URL: PUT https://vault.vault.svc:8200/v1/auth/kubernetes/login
Code: 503. Errors:

* Vault is sealed
Simply rerun the oc exec -n vault vault-0 -- vault operator unseal $VAULT_UNSEAL_KEY command as follows:
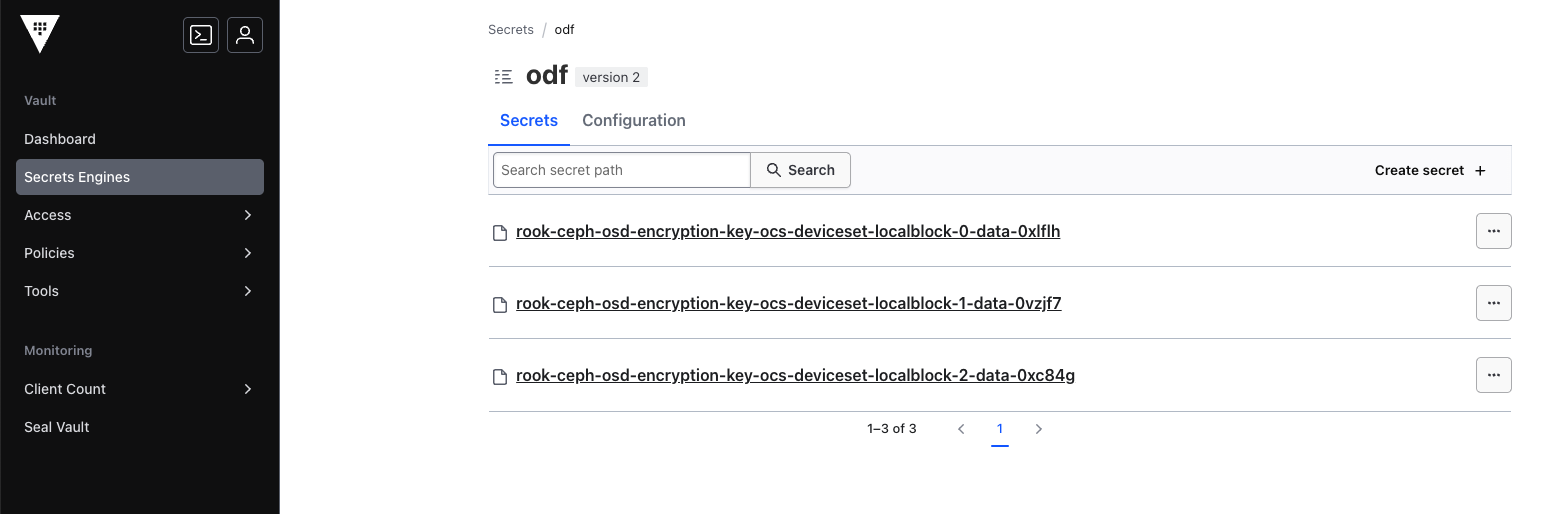
$ oc -n vault exec vault-0 -- vault kv list odf
Keys
----
rook-ceph-osd-encryption-key-ocs-deviceset-localblock-0-data-0xlflh
rook-ceph-osd-encryption-key-ocs-deviceset-localblock-1-data-0vzjf7
rook-ceph-osd-encryption-key-ocs-deviceset-localblock-2-data-0xc84g
Or you can do the following in the Vault console as shown in Figure 8.
With these present in Vault, you should now see the OSD pods come up.
$ oc get pod -l app=rook-ceph-osd
NAME                               READY   STATUS    RESTARTS   AGE
rook-ceph-osd-0-84755dcfbc-jsfhk   2/2     Running   0          92s
rook-ceph-osd-1-bb58bf7f6-qzsb4    2/2     Running   0          90s
rook-ceph-osd-2-54d85d8b55-kz6hd   2/2     Running   0          84s
And there we have it. The OpenShift Data Foundation cluster is complete and ready for use, with the following storage classes available for PV consumption on the cluster:
$ oc get sc
NAME                                    PROVISIONER                             RECLAIMPOLICY   VOLUMEBINDINGMODE      ALLOWVOLUMEEXPANSION   AGE
gp2-csi                                 ebs.csi.aws.com                         Delete          WaitForFirstConsumer   true                   7h2m
gp3-csi (default)                       ebs.csi.aws.com                         Delete          WaitForFirstConsumer   true                   7h2m
localblock                              kubernetes.io/no-provisioner            Delete          WaitForFirstConsumer   false                  34m
ocs-storagecluster-ceph-rbd (default)   openshift-storage.rbd.csi.ceph.com      Delete          Immediate              true                   7m26s
ocs-storagecluster-cephfs               openshift-storage.cephfs.csi.ceph.com   Delete          Immediate              true                   7m56s
openshift-storage.noobaa.io             openshift-storage.noobaa.io/obc         Delete          Immediate              false                  4m39s
Wrap up
Integrating OpenShift Data Foundation with HashiCorp Vault gives you a secure, centralized way to manage encryption for your data at rest. Whether you’re using Vault as your KMS or looking to enhance security with HSM-backed key storage, there’s a lot of flexibility in how you approach the setup. Vault’s policies also allow for fine-grained access control, ensuring that only the right services can access your sensitive data. We can imagine a world in which certain industries require this more than others.
This guide covers the basics, but the true value of this setup lies in its flexibility to adapt to your organization’s specific needs. OpenShift Data Foundation encryption doesn’t stop at cluster-wide encryption for OSDs. You can also configure what I would loosely reference as double encryption. This involves encrypting not only the cluster-wide storage but also individual StorageClass-level encryption, where PVs are encrypted at-rest, per namespace, really locking things down. I’ll show you how in the next article in this series.