In general public cloud environments, confidential virtual machines (VMs) provide confidentiality and protection of runtime data with great care. This data is mostly referring to data in RAM and CPU registers. Users will also want to protect confidentiality of data in storage to make the solution whole. Naturally this means full disk encryption.
As the pioneer in confidential computing in the public cloud, Microsoft Azure provides the capability of encrypting the OS disk for its confidential VMs. The feature is named confidential OS disk encryption, and it works extremely well on images from Red Hat Enterprise Linux and other distributions. The whole process runs on the Azure infrastructure. So there comes the argument of not trusting the cloud provider/host for providing such service. Therefore, this article introduces an alternative to bring your own encrypted RHEL images to deploy on Azure confidential VMs.
The alternative procedure summary
We will reuse the script which is the backend of the mentioned functionality to accomplish OS disk encryption.
The procedure summary:
- Create a confidential VM on Azure to provide VMGS (virtual machine guest state).
- Encrypt the RHEL image with SRK from above TPM.
- Upload the encrypted image to Azure.
- Detach the OS disk from the confidential VM and extract VMGS.
- Create an Azure disk from encrypted image and above VMGS.
- Swap OS disk of the confidential VM with above disk (or create a new confidential VM from it).
Disclaimer
At the time of writing, Red Hat has not decided to turn any of the mentioned scripts/procedures into production. Please use it with caution and at your own risk.
The tool encrypts the root volume of the image and seals the key to the target vTPM device. On Azure, vTPM state is preserved in so-called VMGS (VM guest state) volume created alongside root volume. As each vTPM has its own unique state, the VMGS volume must be preserved when swapping the instance's root disk.
Prerequisites
- Azure subscription with quota to confidential VM sizes.
- RHEL image for confidential VM. You may download the latest from the Red Hat customer portal or bring one of your own. If it is of yours, please make sure it satisfies the qualifications in this description.
- An on-premise machine to execute encryption with Azure CLI logged in with your Azure account.
Encrypt the RHEL image
Create a resource group in the region where you have quota to deploy a confidential VM. Then create a confidential VM in it from any RHEL image you prefer. It can be an image from the Azure Marketplace or one from your compute gallery. For the ease of demonstration, let’s use a Marketplace image as in Figure 1. You may choose any Linux distributions you like.
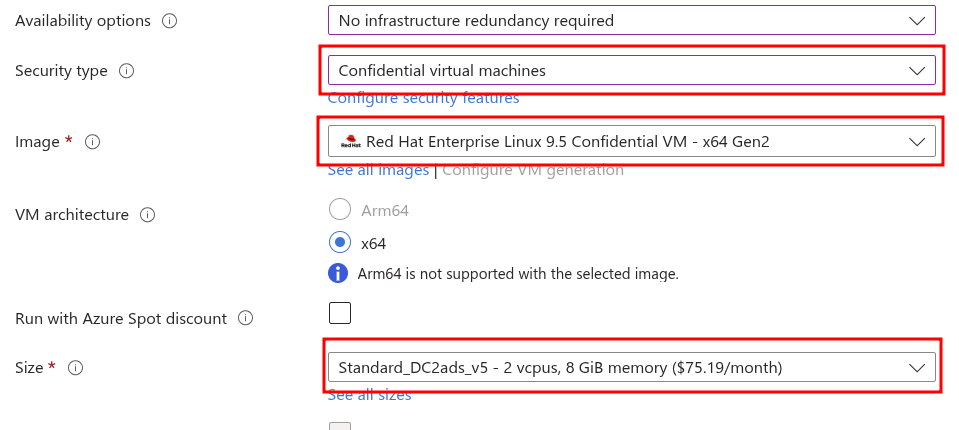
Do not choose the confidential OS disk encryption option.
After you create the confidential VM successfully, export the SRK (storage root key) of TPM from it.
# tpm2_readpublic -c 0x81000001 -o public.srkCopy your image for encryption and above public.srk file to the on-premise machine. Then execute encrypt-rhel-image script against it.
# yum install -y qemu-img
# curl -O https://gitlab.com/vkuznets/encrypt-rhel-image/-/raw/master/encrypt-rhel-image.py
# chmod +x encrypt-rhel-image.py
# ./encrypt-rhel-image.py encrypt MyImage.vhd
# ./encrypt-rhel-image.py deploy -s ./public.srk MyImage.vhd
The encrypt step simply does the LUKS encryption against the VHD image. Next the deploy step binds the encryption key to TPM of the confidential VM with the SRK.
Note that it is impossible to create a confidential VM directly from this image alone because it is bound to the TPM that holds the key. It will need the VMGS attached.
Create a CVM from the encrypted image
Let’s upload the resulting VHD to Azure blob to create an Azure Disk from it. If you do not have a storage account or storage container, please follow the instructions to create them.
# az storage blob upload -c MyStorageContainer --account-name MyStorageAccount --auth-mode login -n MyImage.vhd -f ./MyImage.vhdWe will need the VMGS from the previous confidential VM. Let’s shut it down and detach its OS disk.
# az vm deallocate -g MyResourceGroup -n MyConfidentialVM
# az disk grant-access -s --duration-in-seconds 3600 -g MyResourceGroup -n MyOsDisk
Note the securityDataAccessSAS from the output of the last command. Let’s upload it to Azure blob and create an Azure Disk from it.
# az storage blob copy start --account-name MyStorageAccount -c MyStorageContainer --auth-mode login -b MyOsDiskVmgs.vhd -u "(securityDataAccessSAS from previous)"
# az disk create -g MyResourceGroup -n MyNewOsDisk --security-type ConfidentialVM_VMGuestStateOnlyEncryptedWithPlatformKey --hyper-v-generation V2 --architecture x64 --os-type linux --security-data-uri <VMGS_blob_URL> --source <Encrypted_VHD_blob_URL>
Once the Azure disk is created, you may choose to create a new confidential VM from it or swap it with that of the existing confidential VM. Here is how we may create a new one.
# az vm create -g MyResourceGroup -n MyNewConfidentialVM --size Standard_DC2as_v5 --security-type ConfidentialVM --enable-secure-boot true --os-disk-security-encryption-type VMGuestStateOnly --enable-vtpm true --os-type linux --attach-os-disk MyNewOsDiskNote that by attaching an existing OS disk to VMs assumes it has access credentials embedded in it. If not, you can use the following command to reset it once the confidential VM is running. Alternatively, you can use the virt-customize command to pre-process your own image before encryption.
# az vm user update -g MyResourceGroup -n MyNewConfidentialVM -u AdminUsername -p AdminPasswordNow we can log in the new confidential VM and verify the OS disk is encrypted.
# lsblk
NAME     MAJ:MIN RM  SIZE RO TYPE  MOUNTPOINTS
sda        8:0    0    7G  0 disk
├─sda1     8:1    0  512M  0 part  /boot/efi
└─sda2     8:2    0  6.5G  0 part
  └─root 253:0    0  6.5G  0 crypt /
Normally cloud-init service will fail because Azure does not expect to pass any initialization data.
Even though the TPM state is integrated into the VMGS we just exported, and so the SRK associated with it, which we also kept, can be used again to encrypt more images. To avoid compromising subsequent disks, we don't recommend reusing SRK and VMGS to encrypt more than one disk.
Summary
In this article, we acquired an SRK from a TPM of a confidential VM and saved its VMGS to encrypt our image. Then we used the SRK to do a LUKS encryption of our image in an on-premise environment. Finally, we used the encrypted image with the VMGS to create a new confidential VM. By doing so, we accomplished the goal of bringing our own encrypted image to deploy Azure confidential VM.