MLOps, short for machine learning operations, is a set of practices and tools that combines DevOps principles applied to the development cycle of artificial intelligence applications.
Kubeflow Pipelines is an open source platform for implementing MLOps, providing a framework for building, deploying, and managing machine learning workflows in a scalable, repeatable, secure, and cloud-oriented manner on Kubernetes.
With the ability to drive agility and efficiency in the development and deployment of machine learning models, MLOps with Kubeflow Pipelines can also improve collaboration between data scientists and machine learning engineers, ensuring consistency and reliability throughout every step of the workflow.
MLOps
Created from the DevOps discipline, MLOps can be defined as a combination of cultural philosophies, practices and processes supported by platforms and tools with the goal of increasing an organization's ability to deliver artificial intelligence and machine learning applications and services with greater speed, without compromising safety and quality.
In general, a machine learning model development cycle has these steps, as shown in Figure 1 and described below:
- Gather and prepare data
- Develop model
- Deploy models in an application
- Model monitoring and management
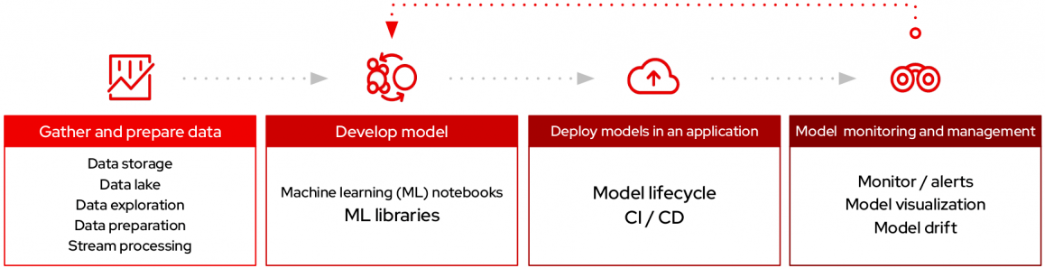
Gather and prepare data
Gather and prepare structured and/or unstructured data from data storages, data lakes, databases, and real-time data from streams like Kafka.
Develop model
Develop the model using libraries such as TensorFlow and PyTorch.
Deploy models in an application
Automate the model build and deployment process, implementing CI/CD, using tools such as Kubeflow Pipelines.
Model monitoring and management
Use tools for observability, such as Prometheus and Grafana, implementing logging and monitoring and using this feedback to improve model performance, in addition to detecting biases and model drift.
Kubeflow Pipelines
In the context of MLOps, an AI/ML pipeline refers to the end-to-end process of deploying and managing machine learning models in a production environment. It encompasses various stages from data preparation and model training to deployment, monitoring, and continuous improvement. An AI/ML pipeline is crucial for automating and streamlining the workflow of machine learning projects, ensuring efficiency, reproducibility, and scalability.
Kubeflow Pipelines is an open source machine learning platform designed to orchestrate and automate the building, deployment, and management of machine learning workflows on Kubernetes, with the ability to implement every step of operations on development of machine learning models, MLOps.
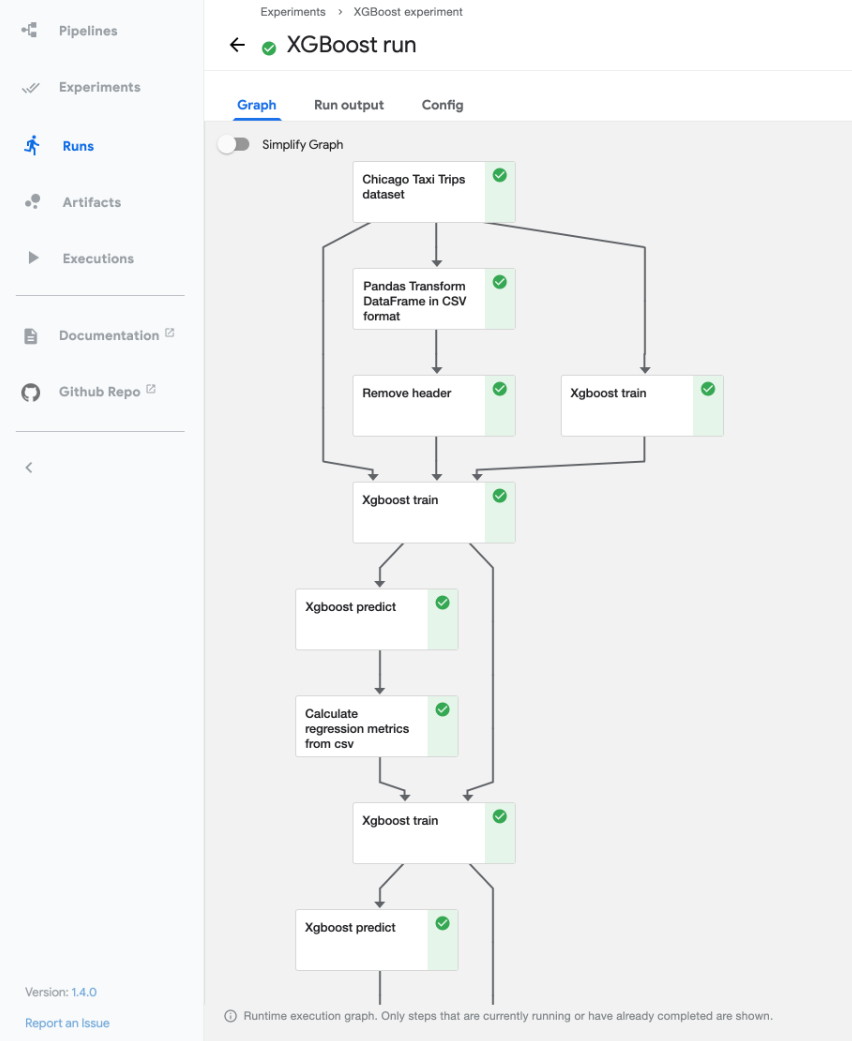
By leveraging Kubeflow Pipelines, organizations can streamline their machine learning operations and enable collaboration between team members, data scientists and machine learning engineers. Figure 2 shows an example of a pipeline run.
Creating a pipeline
As a requirement to create your pipeline, you need access to a Kubernetes environment with Kubeflow Pipelines installed. In addition to the infrastructure, Python (also possible with R) and Jupyter notebook (optional) will be used.
There are no restrictions, but we suggest using Red Hat OpenShift AI, as all these components are already installed by default. It is possible to create a sandbox environment through the Red Hat Developer website at no cost.
The pipeline to be created will have 3 tasks: generating a message for a given name, generating a random number within a given range and generating a final message, an odds or evens game message, based on the previous message and the random number.
All the code can be found in the ml_pipelines repository.
Creating the tasks
The tasks will be functions implemented in Python and executed by the pipeline. There are other ways to implement tasks, but in this format it is simple to maintain and reuse the code, making it possible to scale and make it also possible for different teams to work together.
You can find the implementation for all tasks in the components folder of the repository.
Create Hello World message
Creates a personalized greeting message for the given name. Here is the implementation of this task, in which you can find in the script create_hello_world_message.py:
def create_hello_world_message(name : str) -> str:
    """
    Creates a personalized greeting message for the given name.

    Parameters:
        - name (str) : The name for which the message is created.

    Returns:
        - hello_world_message (str) : A personalized greeting message for the given name.

    Raises:
        - ValueError : If the given name is empty or None.
    """

    if not name:

        raise ValueError

    hello_world_message = f'Hello World, {name}!'

    print(f'name                : { name }')
    print(f'hello_world_message : { hello_world_message }')

    return hello_world_message
Create random number
Creates a random integer within the specified range, minimum and maximum, both included.
Create odds or evens message
Creates a game result message based on the given random number, containing the given hello world message.
Create the pipeline using Kubeflow Pipelines SDK for Tekton
There is an SDK that makes creating pipelines easier: Kubeflow Pipelines SDK. In this example, we will use the Kubeflow Pipelines SDK for Tekton to compile, upload, and run Kubeflow Pipeline DSL scripts on a Kubeflow Pipelines back end with Tekton.
The code for this pipeline implementation can be found in the kfp_tekton folder of the repository, specifically on the notebook 01_hello_world.ipynb.
Install kfp-tekton package
!pip install kfp-tekton==1.5.9
Import the necessary packages, including task functions
import os
import sys
sys.path.append(os.path.dirname(os.getcwd()))

import kfp
import kfp_tekton

from components.create_hello_world_message   import create_hello_world_message
from components.create_odds_or_evens_message import create_odds_or_evens_message
from components.create_random_number         import create_random_number
Create the tasks components
Building Python function-based components.
task_base_image = 'registry.access.redhat.com/ubi9/python-311'

create_hello_world_message_op = kfp.components.create_component_from_func(
    func       = create_hello_world_message,
    base_image = task_base_image
)

create_random_number_op = kfp.components.create_component_from_func(
    func       = create_random_number,
    base_image = task_base_image
)

create_odds_or_evens_message_op = kfp.components.create_component_from_func(
    func       = create_odds_or_evens_message,
    base_image = task_base_image
)
Create the pipeline
pipeline_name        = '01_hello_world'
pipeline_description = 'Hello World Pipeline'

@kfp.dsl.pipeline(
    name        = pipeline_name,
    description = pipeline_description
)
def pipeline(
    name    : str,
    minimum : int,
    maximum : int
):

    create_hello_world_message_task = create_hello_world_message_op(
        name = name
    )

    create_random_number_task = create_random_number_op(
        minimum = minimum,
        maximum = maximum
    )

    create_odds_or_evens_message_op(
        hello_world_message = create_hello_world_message_task.output,
        random_number       = create_random_number_task.output
    )
Create pipeline YAML
In this step, a Tekton-compatible PipelineRun YAML file will be created.
pipeline_package_path = os.path.join('yaml', f'{ pipeline_name }.yaml')

kfp_tekton.compiler.TektonCompiler().compile(
    pipeline_func = pipeline,
    package_path  = pipeline_package_path
)
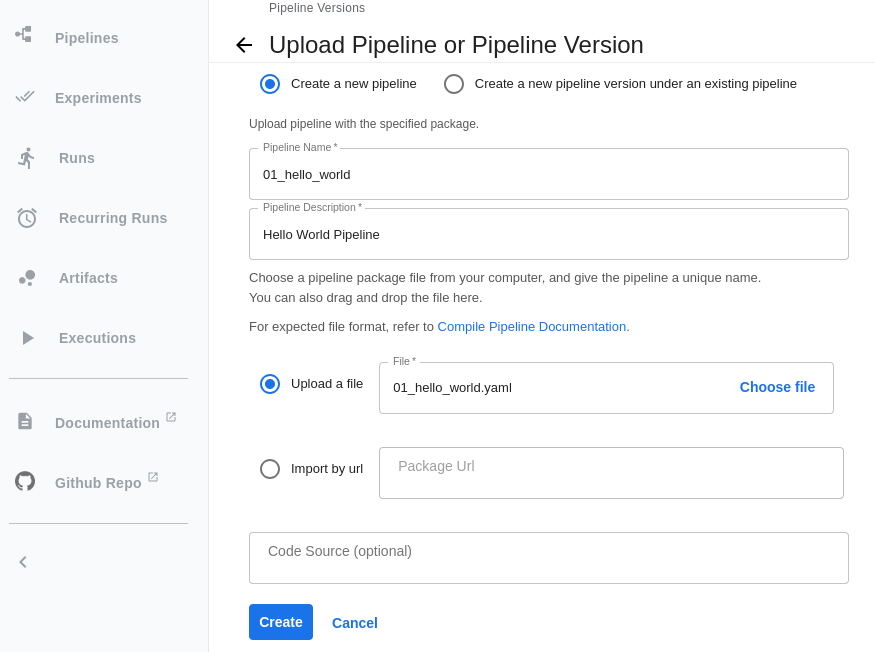
Using the Kubeflow Pipelines graphical interface, you can use the generated YAML file to import the pipeline, as shown in Figure 3.
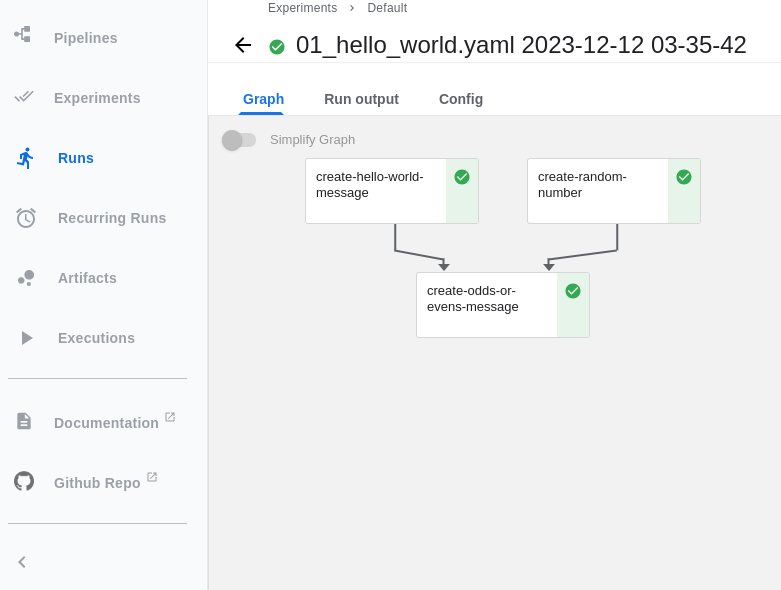
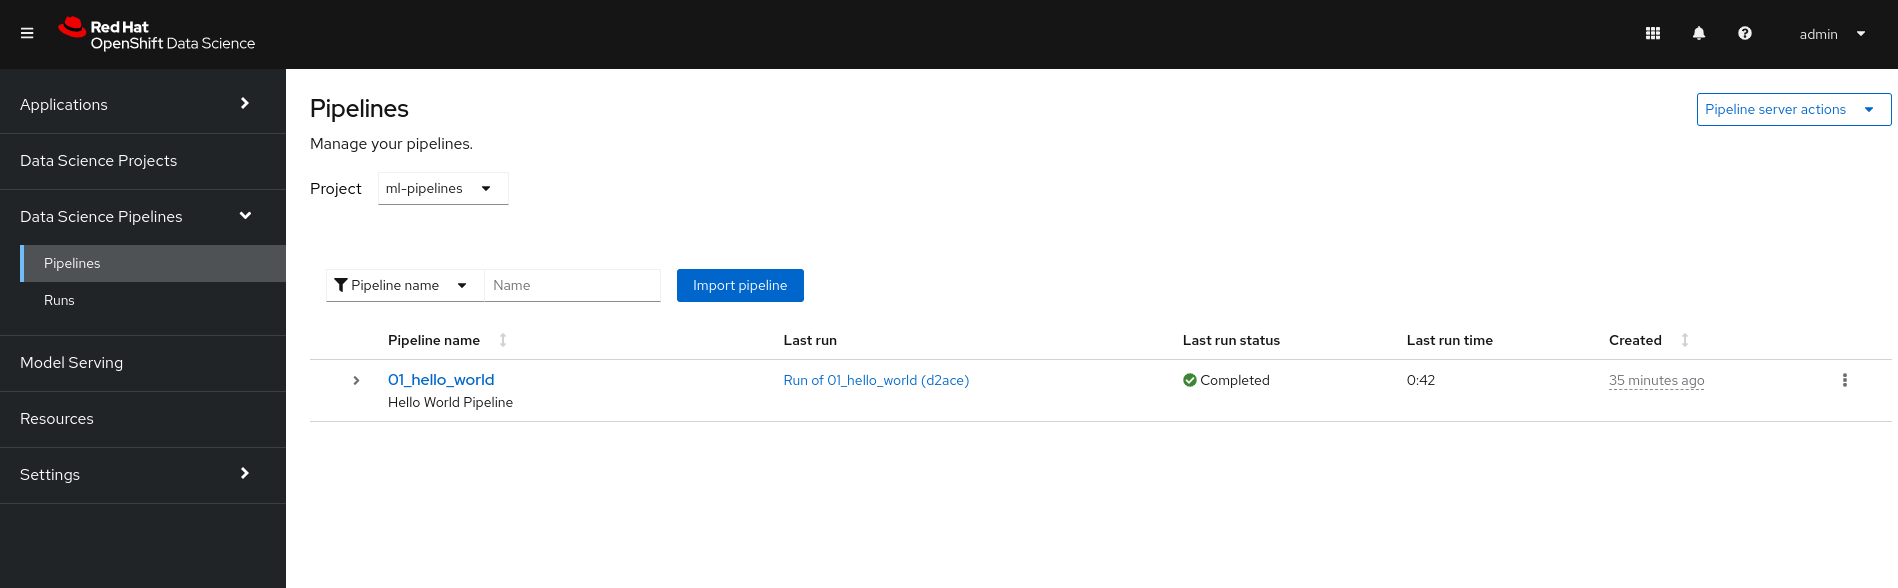
The newly imported pipeline should be visible, showing the flow of tasks and available to be executed (Figure 4).

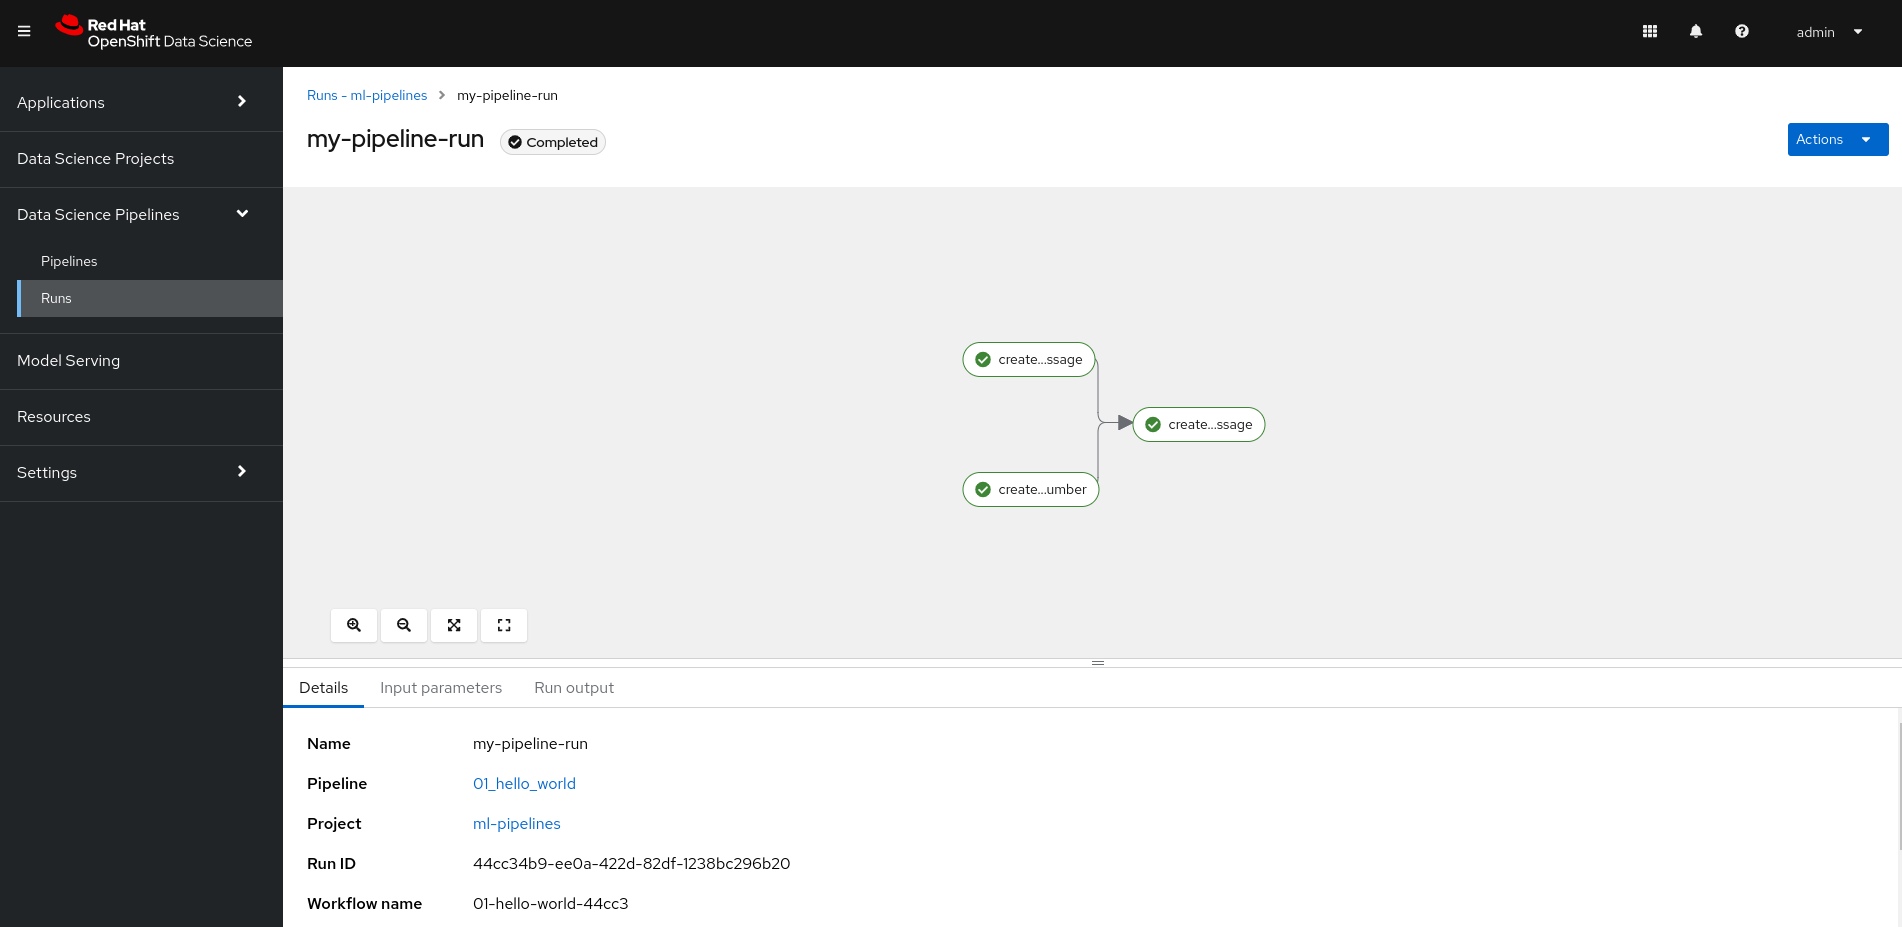
Once imported, we can run the pipeline through the graphical interface and monitor its progress (Figure 5).

Create pipeline run
It is possible to execute a pipeline via code, either through the function annotated by @pipeline or by executing the pipeline definition YAML file.
kubeflow_host  = ''
kubeflow_token = ''

pipeline_arguments = {
    'name'    : 'ML Pipelines',
    'minimum' : 1,
    'maximum' : 100
}

kfp_tekton.TektonClient(host = kubeflow_host, existing_token = kubeflow_token).create_run_from_pipeline_package(
    pipeline_file = pipeline_package_path,
    arguments     = pipeline_arguments
)
As before, we can observe the pipeline execution through the Kubeflow Pipelines graphical interface (Figure 6).
Creating the pipeline using Elyra
Elyra is an open source set of extensions to JupyterLab notebooks focused on AI/ML development. It provides a Pipeline Visual Editor for building AI pipelines from notebooks, Python scripts, and R scripts, simplifying the conversion of multiple notebooks or scripts files into batch jobs or workflows.
Pipelines created by this plug-in are .json files with a .pipeline extension. You can check the Hello World Pipeline in the elyra folder of the repository, and it can be opened directly in a Jupyter notebook (make sure you have the extension installed).
Before creating the pipeline, configure the runtime and runtime images to run the tasks. If you are using Red Hat OpenShift AI, all configuration will be set by default.
Drag and drop the components to create the tasks
You can also connect the outputs and inputs of the tasks (see Figure 7).
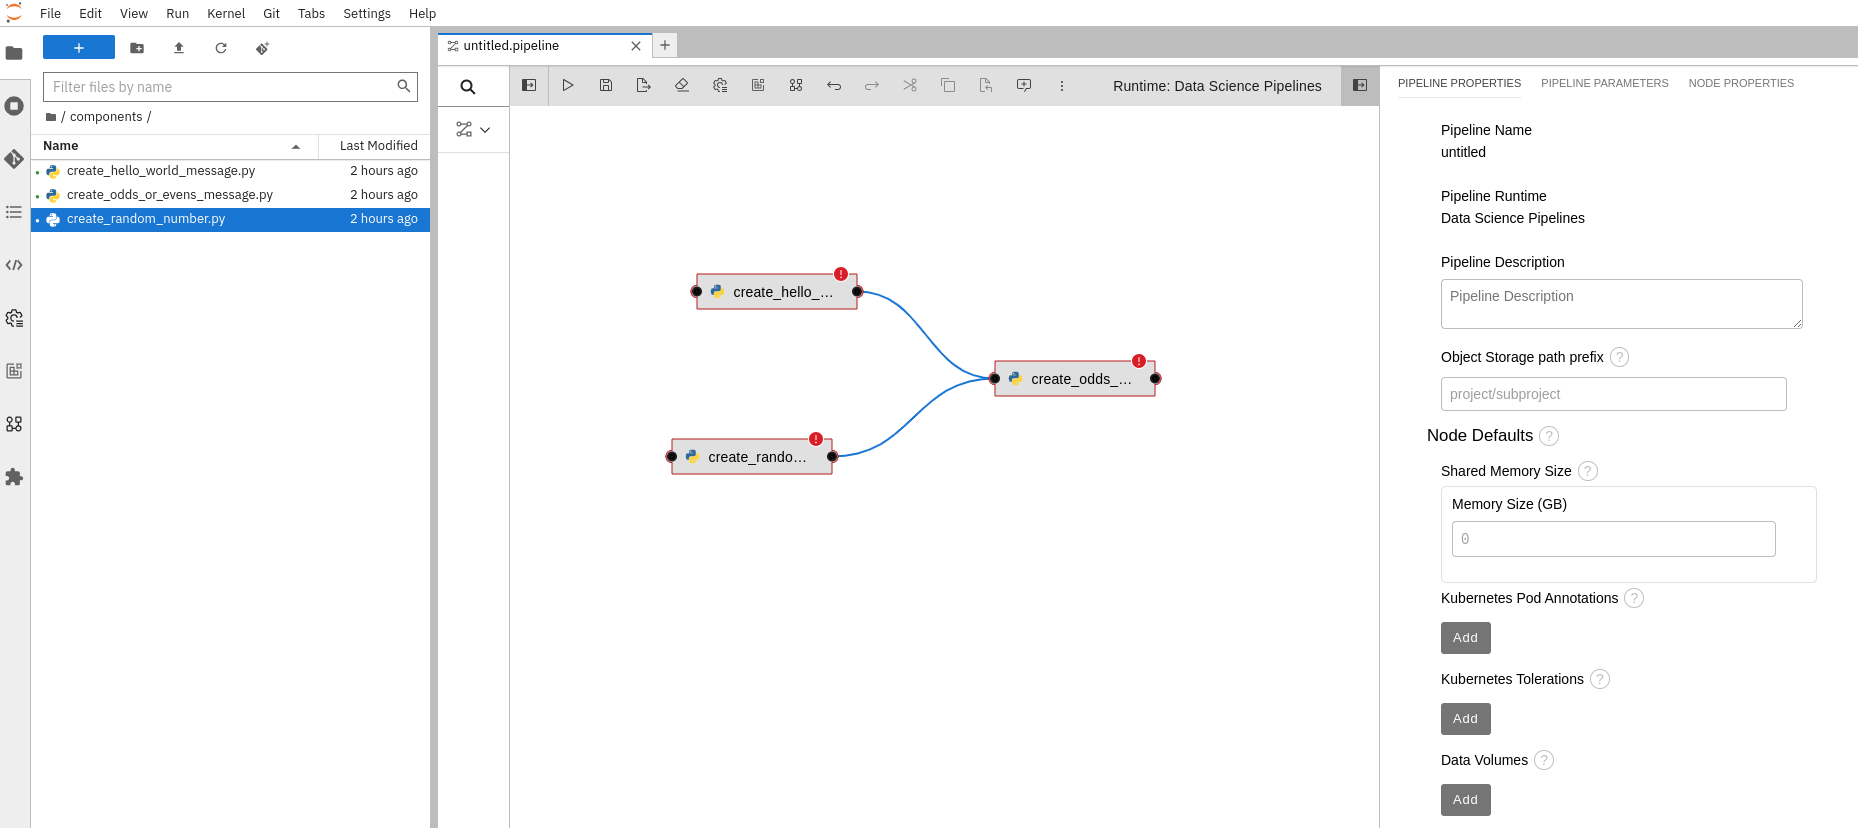
Configure tasks
Create the pipeline parameters and inject them into the corresponding tasks. Also, configure the runtime image and output file. Everything can be done from the graphical interface.
create_hello_world_message.py
runtime image: Python 3
pipeline parameter: name (str)
output: create_hello_world.json
create_random_number.py
runtime image: Python 3
pipeline parameter: minimum (int)
pipeline parameter: maximum (int)
output: create_random_number.json
create_odd_or_evens_message.py
runtime image: Python 3
output: create_odds_or_evens_message.json
Warning alert:
Elyra Pipeline
Using the Elyra Pipeline plug-in, components are executed in script format. It is necessary to code a wrapper to handle the execution. Example from create_hello_world_message.py:
if __name__ == '__main__':
    """
    Elyra Pipelines
    """

    import os
    import json

    name = os.getenv('name')

    hello_world_message = create_hello_world_message(
        name = name
    )

    output = {
        'name'                : name,
        'hello_world_message' : hello_world_message
    }

    with open('create_hello_world_message.json', 'w', encoding = 'utf-8') as output_file:

        json.dump(output, output_file, ensure_ascii = False, indent = 4)
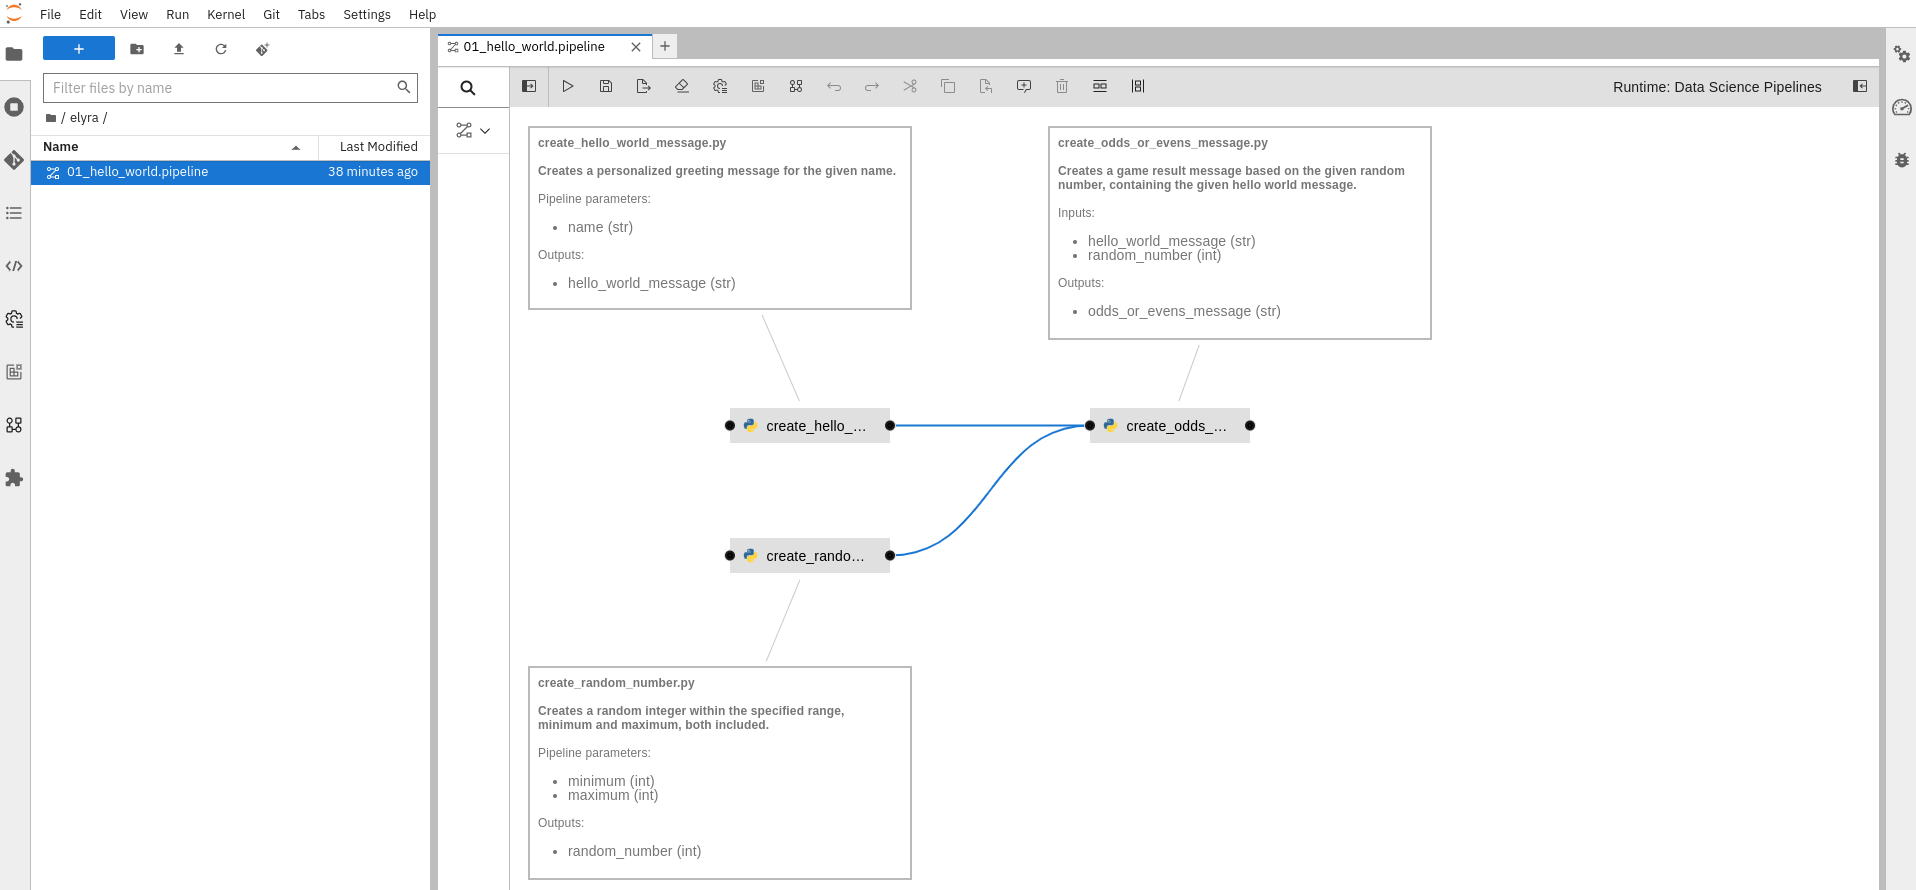
If everything is configured correctly, you will be able to run the pipeline. Figure 8 shows the Hello World pipeline from the repository 01_hello_world.pipeline:
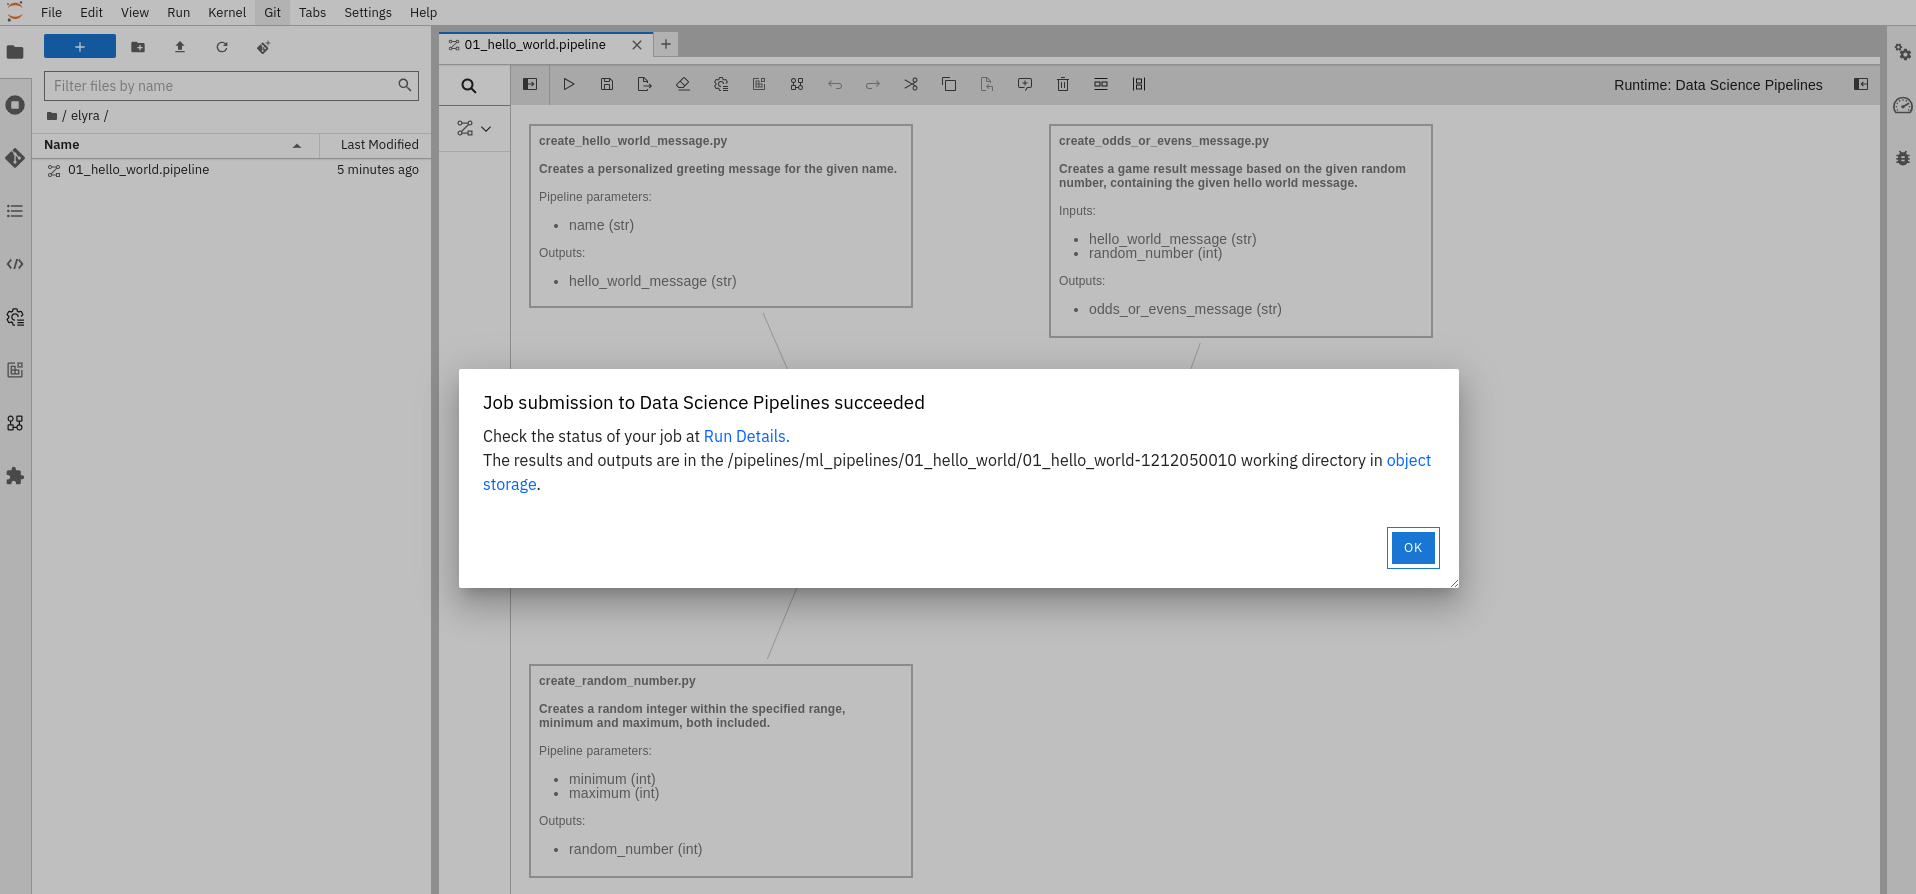
When running the pipeline, you should receive a job submission confirmation message, as illustrated in Figure 9.
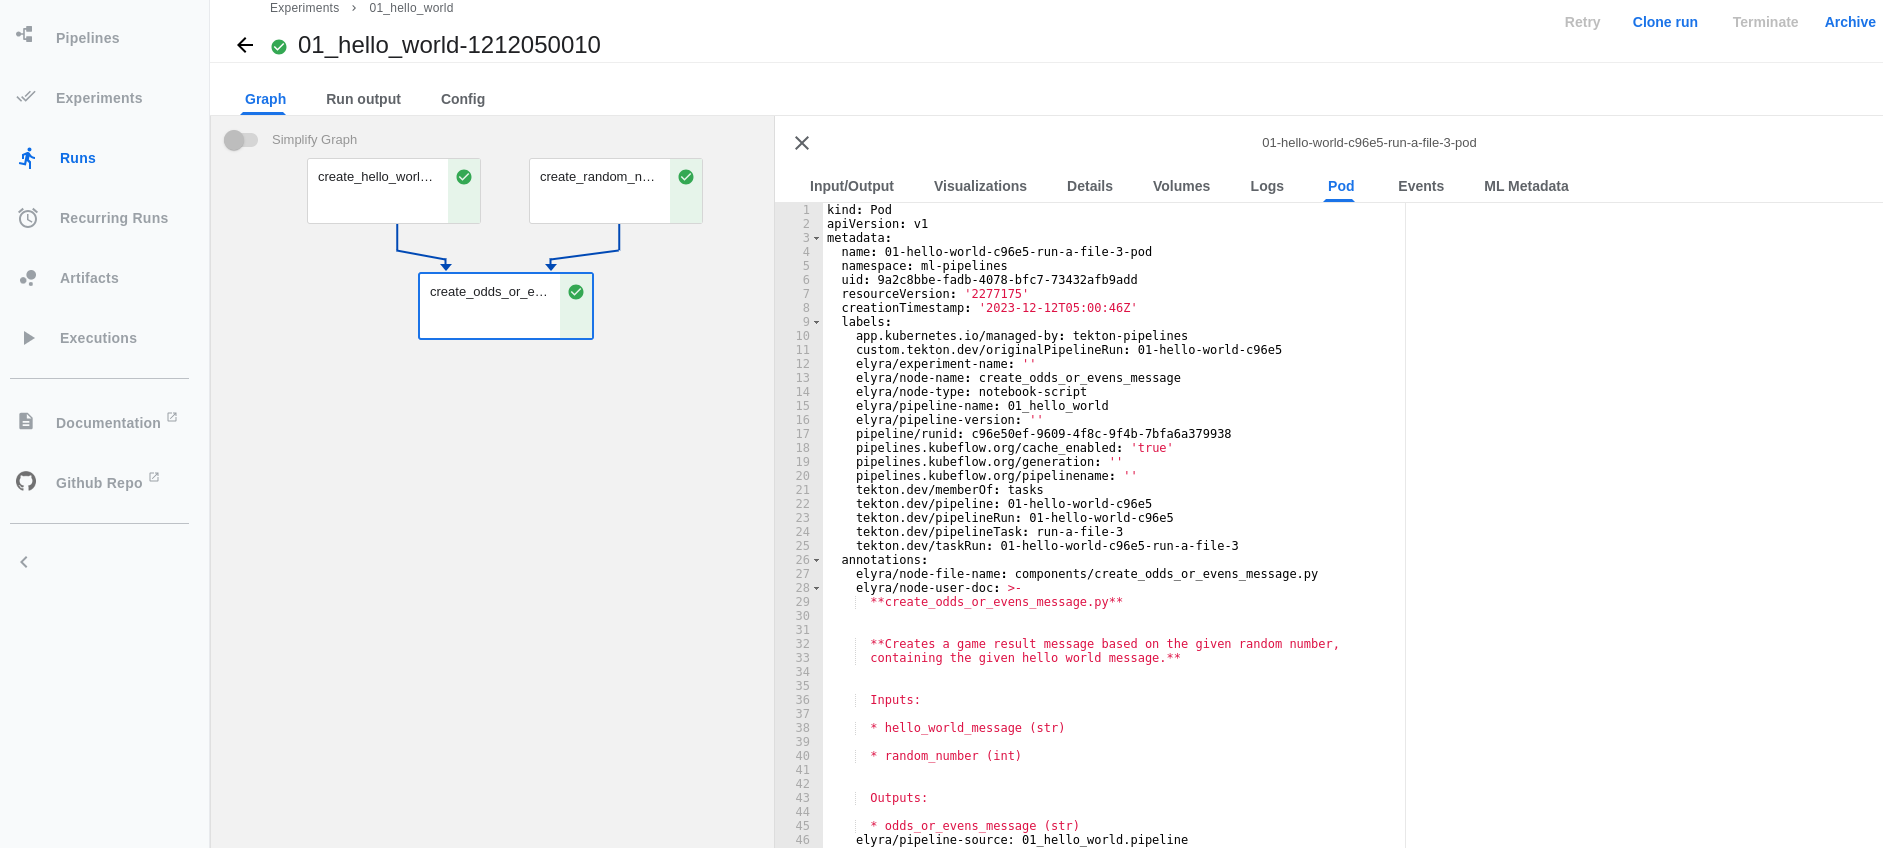
You can follow the execution through the Kubeflow Pipelines graphical interface (Figure 10).
Red Hat OpenShift AI
If you are using OpenShift AI, just like before using kfp-tekton, you can import PipelineRun YAML files or check imported pipelines directly through the OpenShift console (Figure 11).
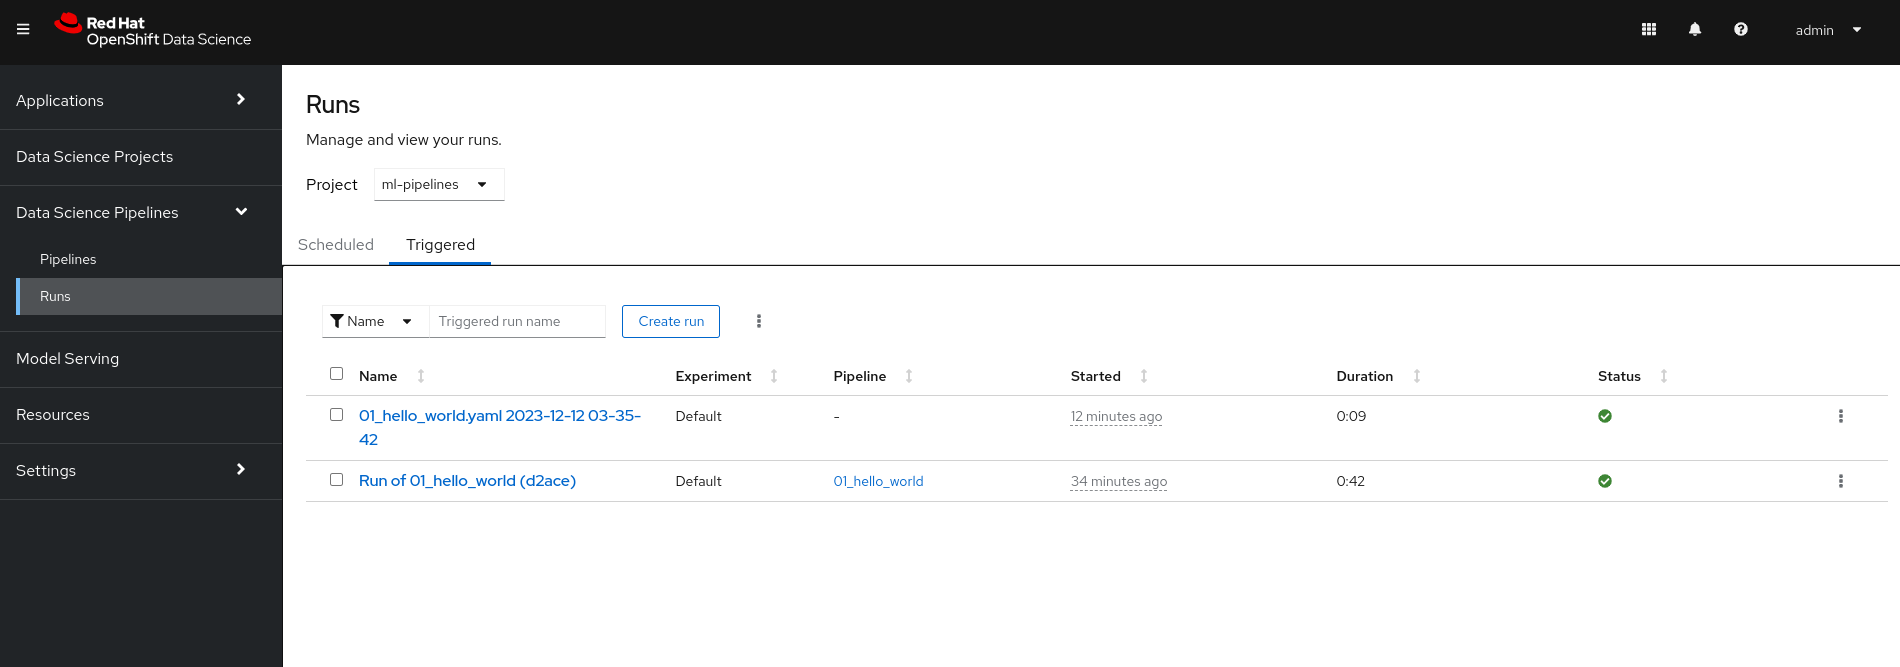
You can also search and check previous execution of pipelines executed through kfp-tekton or Elyra, as shown in Figure 12.
Finally, you can create new runs and experiments (Figure 13).
Conclusion
There are several tools for automating machine learning workflows. In this article, we presented 2 ways to create and run pipelines in a code (kfp-tekton) or visual way (elyra). Choose the way that best suits your process, that you and your team feel most comfortable with.
In conclusion, implementing MLOps with Kubeflow Pipelines represents a fundamental advancement in establishing a robust and efficient machine learning lifecycle.
As organizations increasingly recognize the importance of seamless collaboration between data scientists, machine learning engineers, and operations teams, Kubeflow Pipelines emerges as a powerful orchestration platform that simplifies deployment, monitoring, and management of machine learning workflows.
Last updated: April 1, 2024