Streamline automation in OpenShift Dev Spaces with Ansible

In the ever-evolving landscape of software development, the quest for streamlined workflows and increased productivity is constant. This learning path, created by Valerii Svydenko, will guide you through the symbiotic relationship between Red Hat OpenShift Dev Spaces and Ansible, unlocking a realm where efficiency reigns supreme. You'll delve into the seamless integration of OpenShift Dev Spaces and Ansible, where each element complements the other in perfect harmony. OpenShift Dev Spaces, which provides isolated and tailored development environments, meets Ansible, the powerful automation tool. The result is a synergy that transforms the way we approach developing and testing Ansible automation.

Now that you have started a workspace, it's time to test a sample Ansible role using Molecule. 

Ansible Molecule is a project that aids in the development and testing of Ansible roles. Molecule provisions and manages test infrastructure that the automation can be tested against. In this example, we'll be testing automation for backing up files and using pods as the test infrastructure.

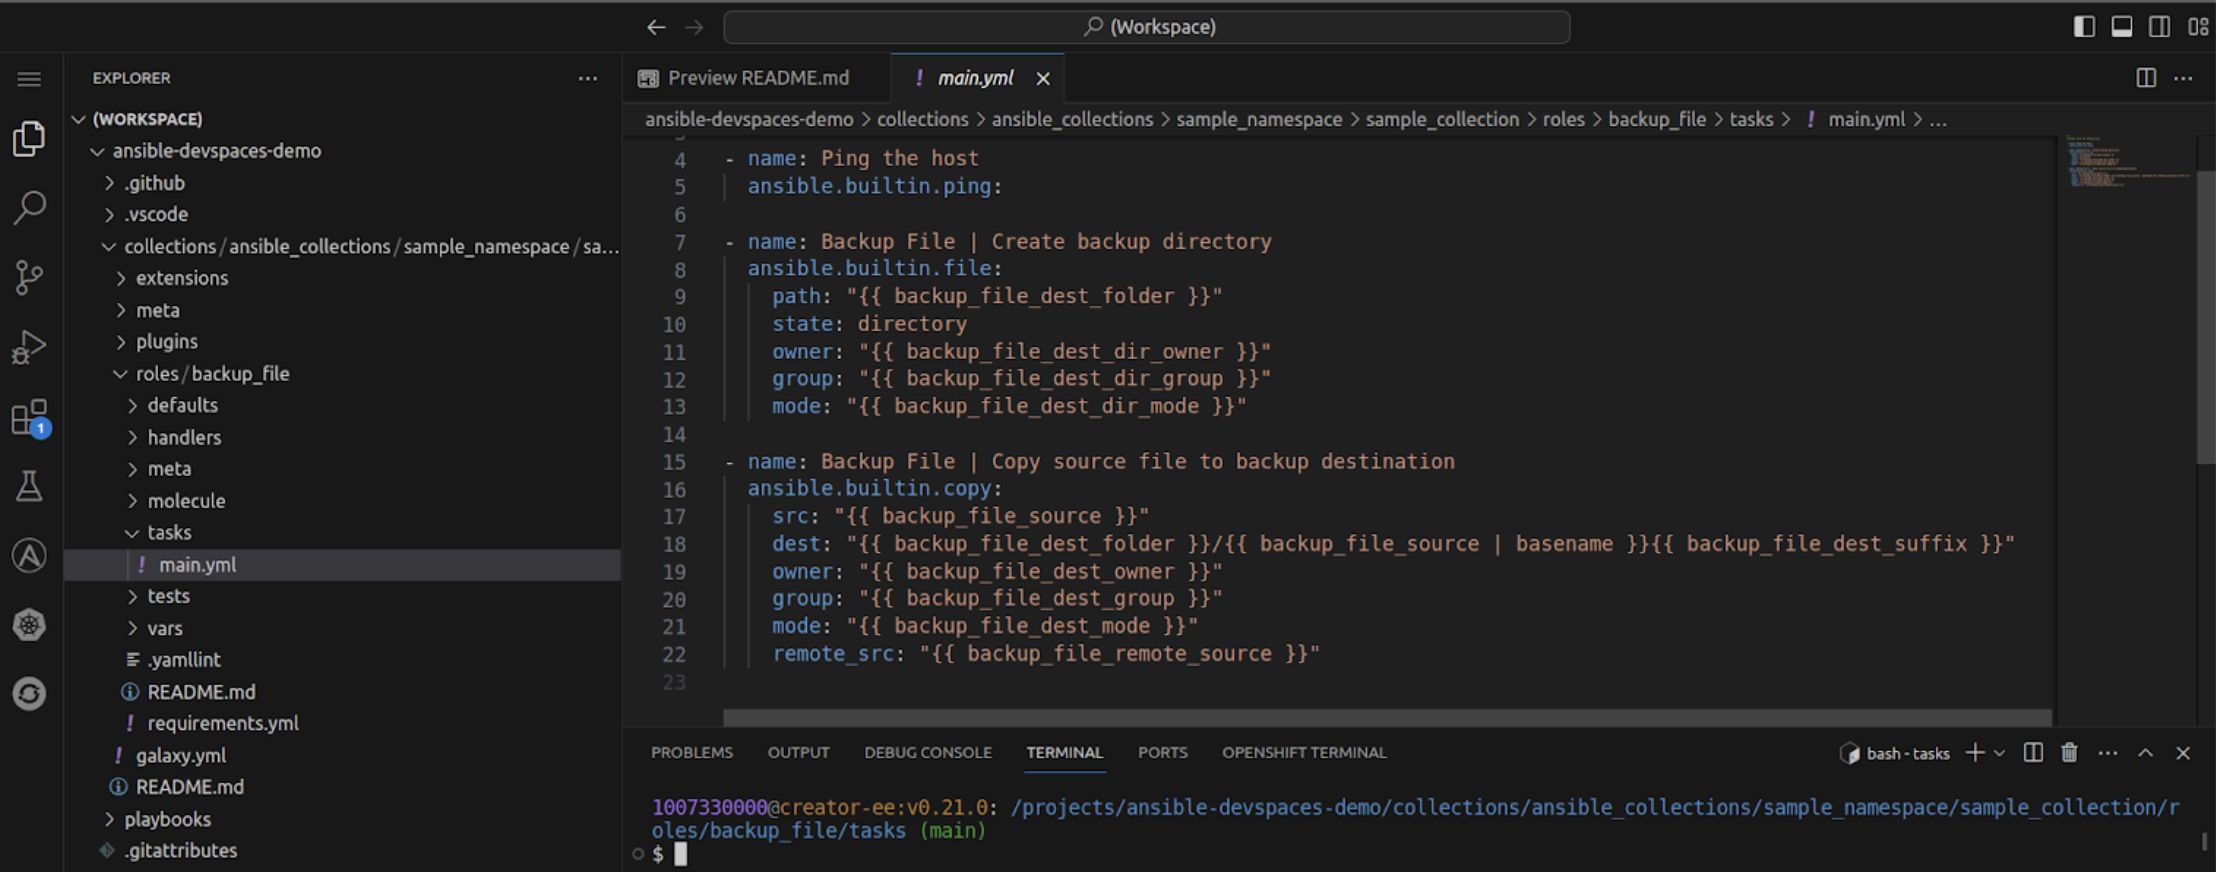
An example role is located here: collections/ansible_collections/sample_namespace/sample_collection/roles/backup_file. This role generates a backup copy of a file and places it in an alternative directory (Figure 8).

An example role is located at collections/ansible_collections/sample_namespace/sample_collection/roles/backup_file and involves the task of generating a backup copy of a file and placing it in an alternative directory.
Figure 8: The example role involves the task of generating a backup copy of a file and placing it in an alternative directory.

A detailed description of the backup role can be found in the backup_file README.md.  Let's use the Molecule project to test the backup_file role. To do that in your workspace, select Terminal -> Run Task -> devfile -> 1.Molecule: start a test pod for the automation (Figure 9).

Use the Molecule project to test the backup_file role. To do that in the workspace, click “Terminal” -> “Run Task” -> “devfile” -> “1.Molecule: start a test pod for the automation.
Figure 9: Use the Molecule project to test the backup_file role.

Doing this will start a test pod for the automation to run against, as defined in collections/ansible_collections/sample_namespace/sample_collection/extensions/molecule/default/molecule.yml. (Figure 10).

This will start a test pod for the automation to run against.
Figure 10: Doing this will start a test pod for the automation to run against.

You can use the following Kubernetes extension to check that the test pod was created: Clusters → Workloads → Pods → molecule-ubi8-init1 (Figure 11).

Use the Kubernetes extension (Clusters → Workloads → Pods → molecule-ubi8-init1) to check that the test pod was created.
Figure 11: Use the Kubernetes extension (Clusters → Workloads → Pods → molecule-ubi8-init1) to check that the test pod was created.

If you don’t see the installed extensions, refresh the workspace web page or execute another workspace command. To do that in your workspace, select Terminal -> Run Task -> devfile -> 2.Molecule: view the test instance that was created (Figure 12).

If you don’t see installed extensions, refresh the web page with the workspace or execute another workspace command by clicking “Terminal” -> “Run Task” -> “devfile” -> “2.Molecule: view the test instance that was created”.
Figure 12: To see the created test pod.

You can also access the OpenShift console directly from the workspace to inspect the test pod. To do this, select VS Code - Open Source Web then choose Dev Spaces: Open OpenShift Console (Figure 13).

Access the OpenShift console directly from the workspace.
Figure 13: Access the OpenShift console directly from the workspace by clicking on VS Code - Open Source Web and choosing Dev Spaces: Open OpenShift Console.

The list of pods will contain your Molecule test pod (Figure 14).

Find the molecule test pod from the list of pods.
Figure 14: Find the molecule test pod from the list of pods.

The next step is running the verification against the test pod. To do that, press Terminal -> Run Task -> devfile -> 3.Molecule: run the verification against the test pod (Figure 15). 

Run the verification against the test pod. To do that press Terminal -> Run Task -> devfile -> 3.Molecule: run the verification against the test pod, which will run the “molecule verify” command line under the hood.
Figure 15: Run the verification against the test pod.

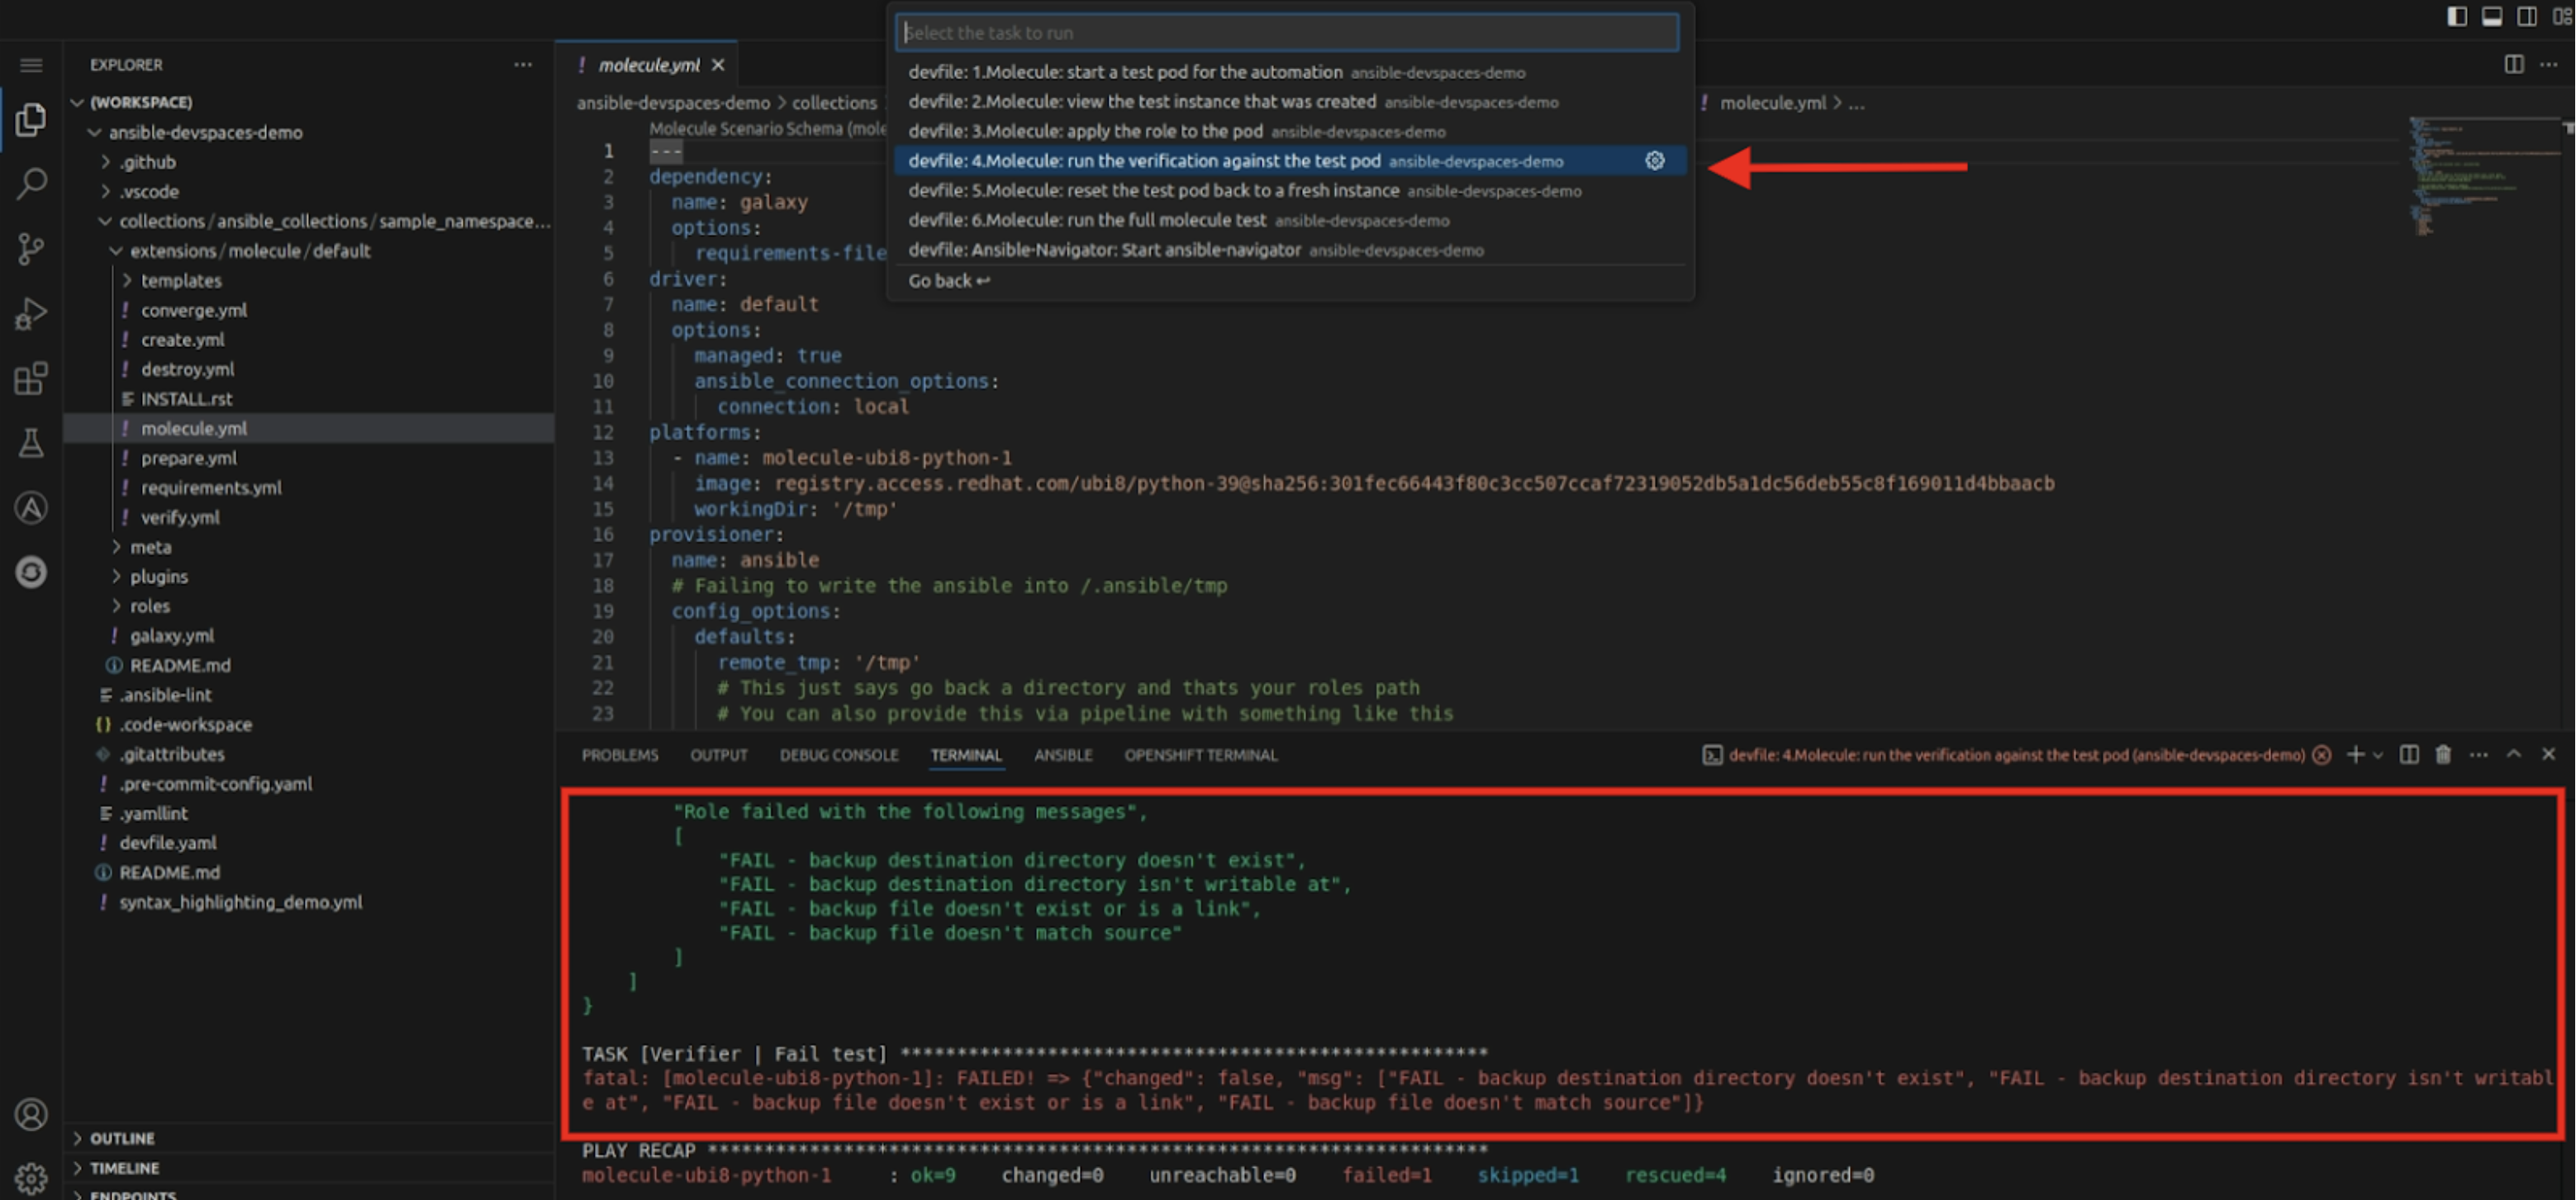
Running your verification will execute the molecule verify command line under the hood. As a result, you will see failures like backup destination directory doesn't exist, which means you didn't create your backup file, and the Molecule tests failed.

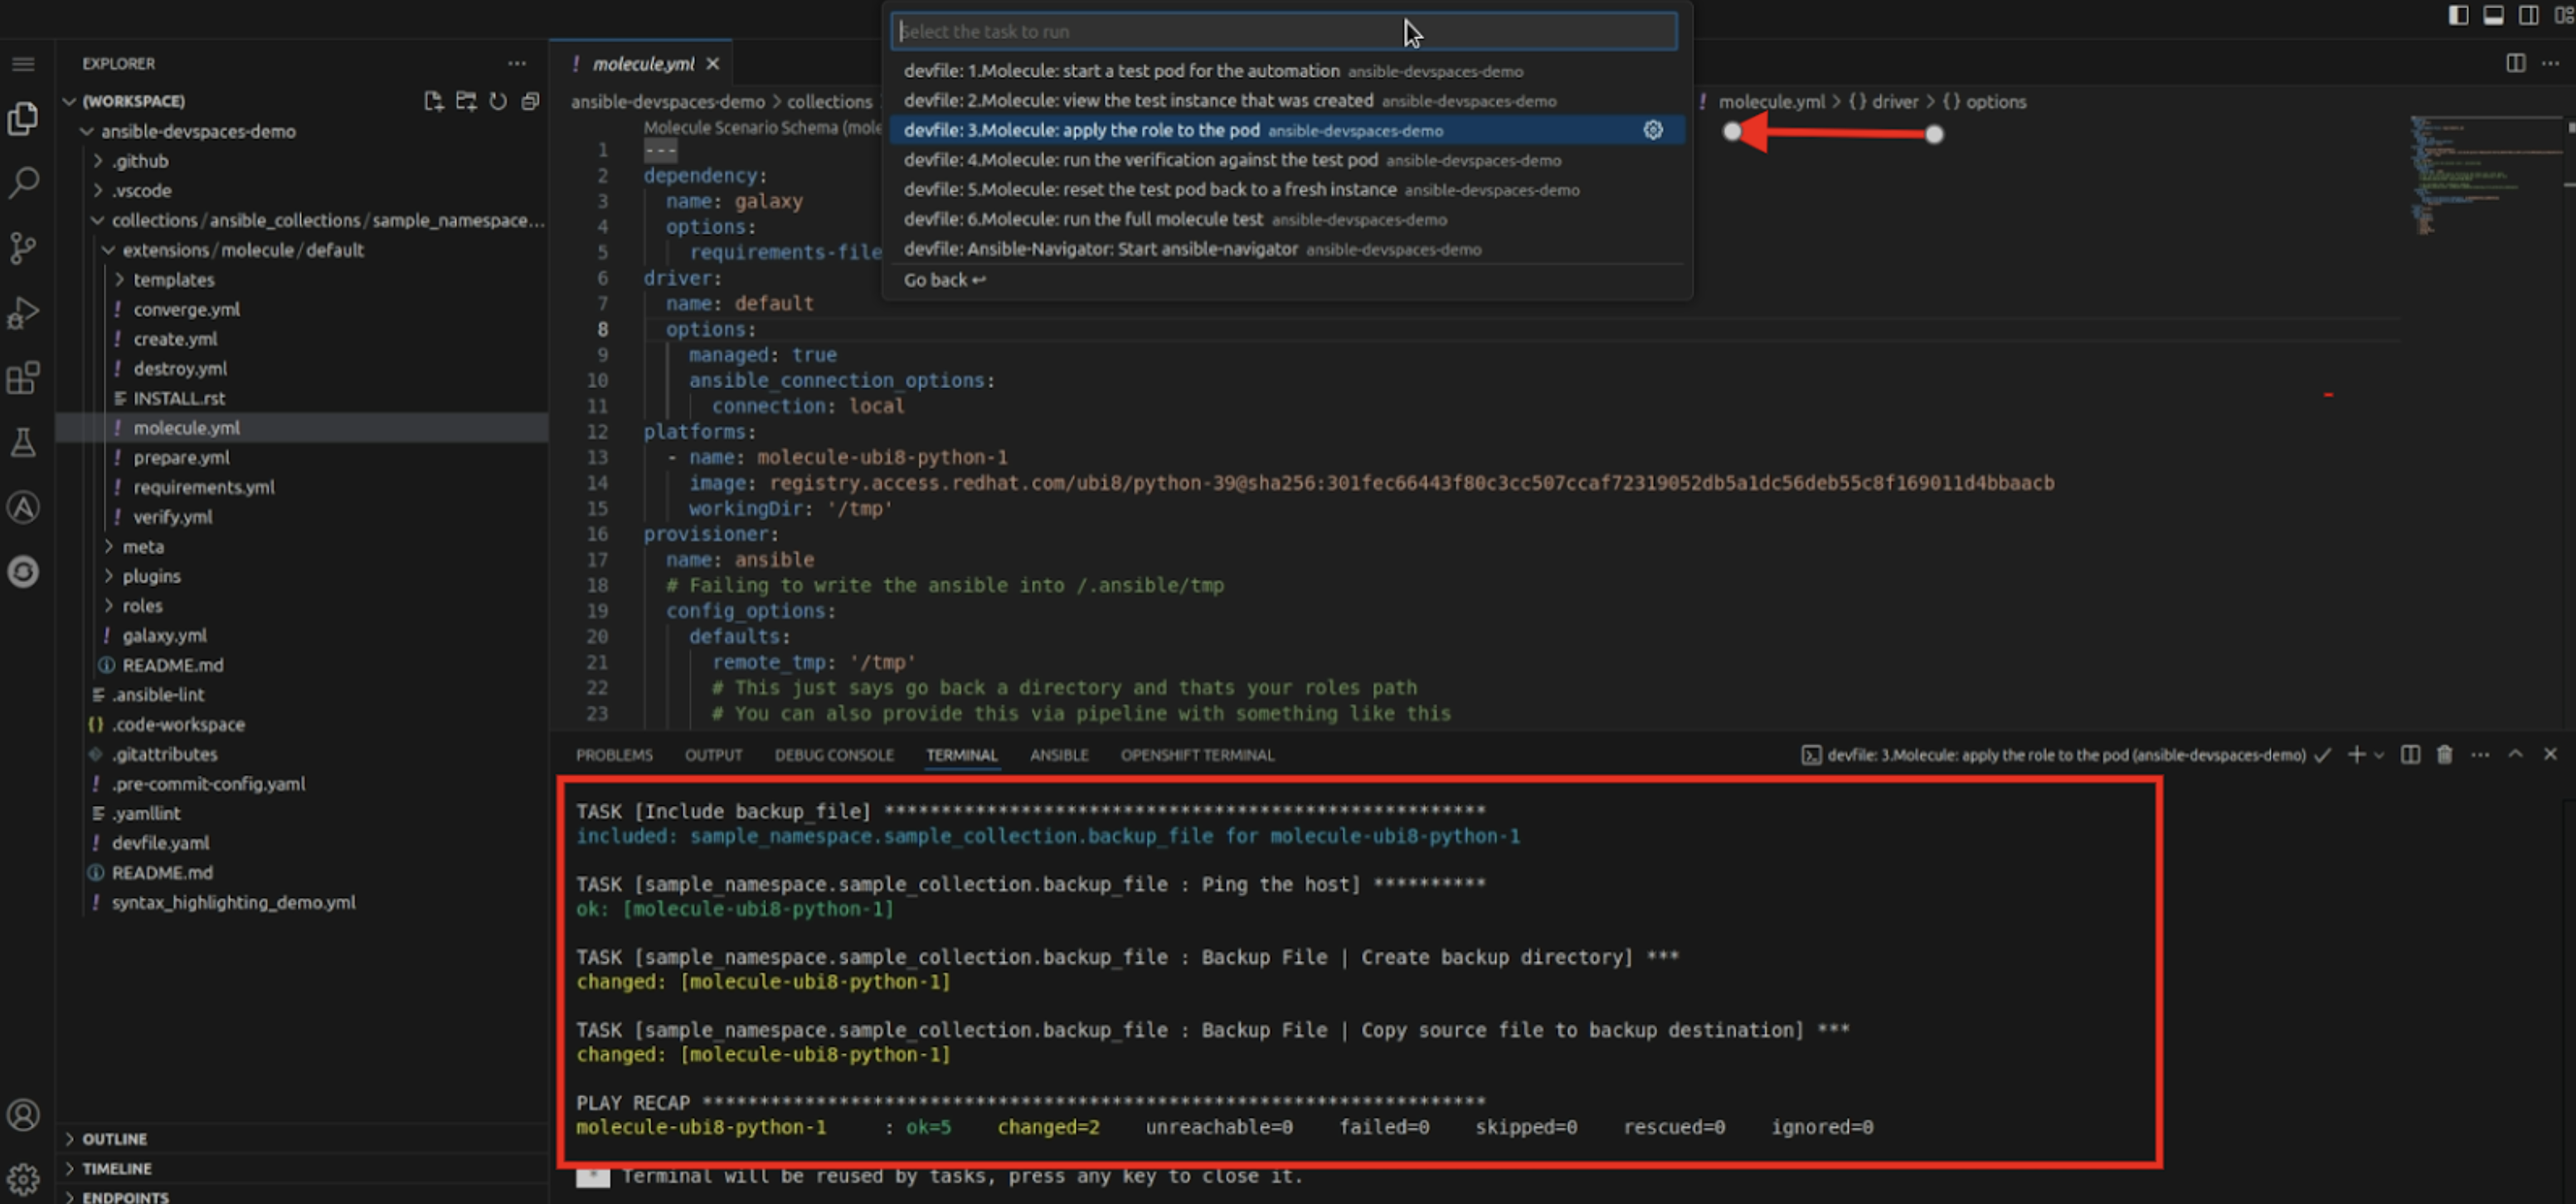
To fix that, run the backup_file role against the instance provisioned by Molecule. Select Terminal -> Run Task -> devfile -> 4.Molecule: apply the role to the pod, which will run the molecule converge command line under the hood and a backup file will be created in the test pod (Figure 16).

If the backup file was not created and the Molecule tests failed, run the  backup_file role against the instance provisioned by Molecule.
Figure 16: If the backup file was not created and the Molecule tests failed, run the backup_file role against the instance provisioned by Molecule.

Check again to see if you created the backup file. Use the Kubernetes extension that has access to your namespace, then select the Terminal button on the test pod to make sure that the file exists.

In the terminal, execute cd/tmp/backups/ and check files in the folder ls -a(Figure 17). You can also see the content of the hosts.bak file, cat hosts.bak.

Check that the backup file was created by clicking the Terminal button on the test pod and checking the files in the folder.
Figure 17: Check that the backup file was created by clicking the Terminal button on the test pod and checking the files in the folder.

Now, when you apply the backup_file role to the test pod, run the 3.Molecule: run the verification against the test pod command one more time and your tests should pass (Figure 18).

Run the 3.Molecule: run the verification against the test pod command one more time and the file should be there.
Figure 18: Run the 3.Molecule: run the verification against the test pod command one more time and the file should be there.

If you’d like to run the full Molecule test without stepping through each stage, you can execute the 5.Molecule: run the full molecule test workspace command. Executing that command will automatically execute all of your Molecule test sequences (dependency, syntax, create, converge, idempotence, and verify) one by one.

Imagine integrating this workflow into the development of your own Ansible automation. You can easily create or enhance your roles and playbooks, and simply test them against lightweight, ephemeral infrastructure provided by OpenShift.

Congratulations! You've tested an Ansible role. Now it's time to explore Ansible Navigator.

Previous resource
Access OpenShift Dev Spaces in the Developer Sandbox
Next resource
Troubleshoot Ansible content with Ansible Navigator

Info alert: Streamline automation in OpenShift Dev Spaces with Ansible

In the ever-evolving landscape of software development, the quest for streamlined workflows and increased productivity is constant. This learning path, created by Valerii Svydenko, will guide you through the symbiotic relationship between Red Hat OpenShift Dev Spaces and Ansible, unlocking a realm where efficiency reigns supreme.

You'll delve into the seamless integration of OpenShift Dev Spaces and Ansible, where each element complements the other in perfect harmony. OpenShift Dev Spaces, which provides isolated and tailored development environments, meets Ansible, the powerful automation tool. The result is a synergy that transforms the way we approach developing and testing Ansible automation.