If you are new to OpenShift, then you might want to install Apache Tomcat on top of it for simpler experimentation. This article guides you through installing Apache Tomcat from a Docker image and then using it to deploy a Java web app on Red Hat OpenShift. I also show you how to access the Tomcat management console on OpenShift.
To follow the examples, you must have an OpenShift account. We will use the OpenShift command-line interface (CLI) for this demonstration, so be sure to install the CLI (oc) before you begin.
A note about the sample application: You will need a Java web application to use for the deployment example. I am using the Sample Java Web Application from the OpenShift Demos GitHub repository. It is a simple application that is useful for understanding basic concepts. You may use the provided sample or choose your own application to work with.
About the Tomcat management console
The Tomcat Manager is for deploying a new web application (or undeploying an existing one) without having to shut down and restart the entire container. In addition, the Tomcat Manager lets you request that an existing application reload itself, even if you have not declared it to be reloadable in the Tomcat server configuration file.
This manager consists of a web application (installed by default on the context path /manager) that supports the following functions:
- Deploy a new web application from the uploaded contents of a WAR file.
- Deploy a new web application, on a specified context path, from the server file system.
- List the currently deployed web applications, as well as the sessions that are currently active for those web applications.
- Reload an existing web application, to reflect changes in the contents of
/WEB-INF/classesor/WEB-INF/lib. - List the OS and JVM property values.
- List the available global JNDI resources, for use in deployment tools that prepare
<ResourceLink>elements nested in a<Context>deployment description. - Start a stopped application (thus making it available again).
- Stop an existing application (so that it becomes unavailable), but do not undeploy it.
- Undeploy a deployed web application and delete its document base directory (unless it was deployed from the file system).
Step 1: Install Tomcat on OpenShift
To start, let's install Apache Tomcat 9 from a Docker image. As previously mentioned, we'll use the OpenShift command-line tool, oc, for our installation:
- From the command line, log in to your OpenShift console:
$ oc login --server=https://openshift.testcluster.lab.redhat.com -u user -p password
- Enter your Red Hat registry service account username and password:
sh-4.2# sudo sh - sh-4.2# docker login Username: {REGISTRY-SERVICE-ACCOUNT-USERNAME} Password: {REGISTRY-SERVICE-ACCOUNT-PASSWORD} Login Succeeded - Here is the command to pull the Docker image from the Red Hat container registry, followed by status output:
sh-4.2# docker pull registry.redhat.io/jboss-webserver-5/webserver53-openjdk8-tomcat9-openshift-rhel7

Using default tag: latest

Trying to pull repository registry.redhat.io/jboss-webserver-5/webserver53-openjdk8-tomcat9-openshift-rhel7 ...

latest: Pulling from registry.redhat.io/jboss-webserver-5/webserver53-openjdk8-tomcat9-openshift-rhel7

1f1202c893ce: Pull complete

32be9843afa0: Pull complete

c927648f9ad0: Pull complete

8ac7bcea2a65: Pull complete

Digest: sha256:bd637c88fdc94cd4e4476e00af1baeb3c1f3a6d9a873a73bee646950cdf076fc

Status: Downloaded newer image for registry.redhat.io/jboss-webserver-5/webserver53-openjdk8-tomcat9-openshift-rhel7:latest
Step 2: Create a new project
Next, we'll create a new project to deploy the web application using Tomcat.
- Enter the following to create a new project:
sh-4.2# oc new-project tomcat

Now using project "tomcat" on server "https://openshift.testcluster.lab.redhat.com:443".
- Go to your new
tomcatproject:sh-4.2# oc project tomcat Already on project "tomcat" on server "https://openshift.testcluster.lab.redhat.com:443".
Step 3: Create the Java web application
Now, we create a Java web application.
- Create a
new-appusing the sample application that you chose (mine isos-sample-java-web):$ oc new-app registry.redhat.io/jboss-webserver-5/webserver53-openjdk8-tomcat9-openshift-rhel7~https://github.com/openshiftdemos/os-sample-java-web.git
- Verify that the application was deployed and the pod was created:
sh-4.2# oc get pods

NAME READY STATUS RESTARTS AGE

os-sample-java-web-1-build 0/1 Completed 0 2m

os-sample-java-web-1-k5sqz 1/1 Running 0 1m
- Verify that the cluster service was created:
sh-4.2# oc get svc

NAME TYPE CLUSTER-IP EXTERNAL-IP PORT(S) AGE

os-sample-java-web ClusterIP x.x.x.x <none> 8080/TCP,8443/TCP,8778/TCP 1m

sh-4.2#
- Verify whether or not the route was created. If the route is not present (as shown below), then run the following command to expose the service:
sh-4.2# oc get route

No resources found.sh-4.2# oc expose svc os-sample-java-web

route.route.openshift.io/os-sample-java-web exposedsh-4.2# oc get route

NAME HOST/PORT PATH SERVICES PORT TERMINATION WILDCARD

os-sample-java-web os-sample-java-web-tomcat.openshift.testcluster.lab.redhat.com os-sample-java-web 8080-tcp None
- Using the route that you have just discovered, confirm that you can access application:
os-sample-java-web-tomcat.openshift.testcluster.lab.redhat.com
Step 4: Access the Tomcat Manager on OpenShift
For security purposes, you can only access the Tomcat Manager on localhost. If you tried entering the following, for example, you would receive a "403 forbidden" error:
os-sample-java-web-tomcat.openshift.testcluster.lab.redhat.com/manager
Here is the command-line procedure to access the management console for Tomcat:
- Copy the
secure-mgmt-console.shandcontext.xmlfile from your pods to your master machine:sh-4.2# oc cp os-sample-java-web-1-k5sqz:/opt/jws-5.3/tomcat/bin/launch/secure-mgmt-console.sh secure-mgmt-console.sh sh-4.2# oc cp os-sample-java-web-1-k5sqz:/opt/jws-5.3/tomcat/webapps/manager/META-INF/context.xml context.xml sh-4.2# ls ansible.cfg context.xml hosts htpasswd log openshift-ansible secure-mgmt-console.sh
- Back up the main
secure-mgmt-console.shfile:cp -pr secure-mgmt-console.sh secure-mgmt-console.sh_ORIG
- Make the following changes in the new
secure-mgmt-console.shfile (note that users with themanager-guirole should not be granted themanager-scriptormanager-jmxrole):sh-4.2# diff secure-mgmt-console.sh secure-mgmt-console.sh_ORIG 13c13 < sed -i -e"s|</tomcat-users>|\n<role rolename=\"manager-gui\"/>\n<user username=\"${JWS_ADMIN_USERNAME}\" password=\"${JWS_ADMIN_PASSWORD}\" roles=\"manager-gui\"/>\n</tomcat-users>|" $JWS_HOME/conf/tomcat-users.xml --- > sed -i -e"s|</tomcat-users>|\n<user username=\"${JWS_ADMIN_USERNAME}\" password=\"${JWS_ADMIN_PASSWORD}\" roles=\"manager-jmx,manager-script\"/>\n</tomcat-users>|" $JWS_HOME/conf/tomcat-users.xml - Now, back up the main
context.xmlfile:sh-4.2# cp -pr context.xml context.xml_ORIG sh-4.2# diff context.xml context.xml_ORIG 19,20c19,20 < <!-- <Valve className="org.apache.catalina.valves.RemoteAddrValve" < allow="127\.\d+\.\d+\.\d+|::1|0:0:0:0:0:0:0:1" /> --> --- > <Valve className="org.apache.catalina.valves.RemoteAddrValve" > allow="127\.\d+\.\d+\.\d+|::1|0:0:0:0:0:0:0:1" /> 23c23 < <!-- <Valve className="org.apache.catalina.valves.RemoteAddrValve" allow="127\.\d+\.\d+\.\d+|::1|0:0:0:0:0:0:0:1"/> -->
> <Valve className="org.apache.catalina.valves.RemoteAddrValve" allow="127\.\d+\.\d+\.\d+|::1|0:0:0:0:0:0:0:1"/>
- Create config maps for
secure-mgmt-console.shandcontext.xml, respectively:sh-4.2# oc create configmap mgmtsecure --from-file=secure-mgmt-console.sh configmap/mgmtsecure created sh-4.2# oc create configmap mgmtcontext --from-file=context.xml configmap/mgmtcontext created
- Set the
volumefor themgmtsecureandmgmtcontextconfig maps:sh-4.2# oc set volume dc/os-sample-java-web --add --name=mgmtsecure --configmap-name=mgmtsecure --default-mode=0777 --mount-path=/opt/jws-5.3/tomcat/bin/launch/secure-mgmt-console.sh --sub-path=secure-mgmt-console.sh deploymentconfig.apps.openshift.io/os-sample-java-web volume updated sh-4.2# oc set volume dc/os-sample-java-web --add --name=mgmtcontext --configmap-name=mgmtcontext --default-mode=0777 --mount-path=/opt/jws-5.3/tomcat/webapps/manager/META-INF/context.xml --sub-path=context.xml deploymentconfig.apps.openshift.io/os-sample-java-web volume updated
- Overwrite
JWS_ADMIN_USERNAMEandJWS_ADMIN_PASSWORDas shown:sh-4.2# oc set env dc/os-sample-java-web --overwrite JWS_ADMIN_USERNAME=jwsadmin deploymentconfig.apps.openshift.io/os-sample-java-web updated sh-4.2# oc set env dc/os-sample-java-web --overwrite JWS_ADMIN_PASSWORD=jwsadmin deploymentconfig.apps.openshift.io/os-sample-java-web update sh-4.2# oc set env dc/os-sample-java-web --overwrite SCRIPT_DEBUG=true deploymentconfig.apps.openshift.io/os-sample-java-web updated
- Verify that the application was deployed and the pod was created with your changes:
os-sample-java-web-2-build 0/1 Completed 0 27m

os-sample-java-web-7-rghgk 1/1 Running 0 26m
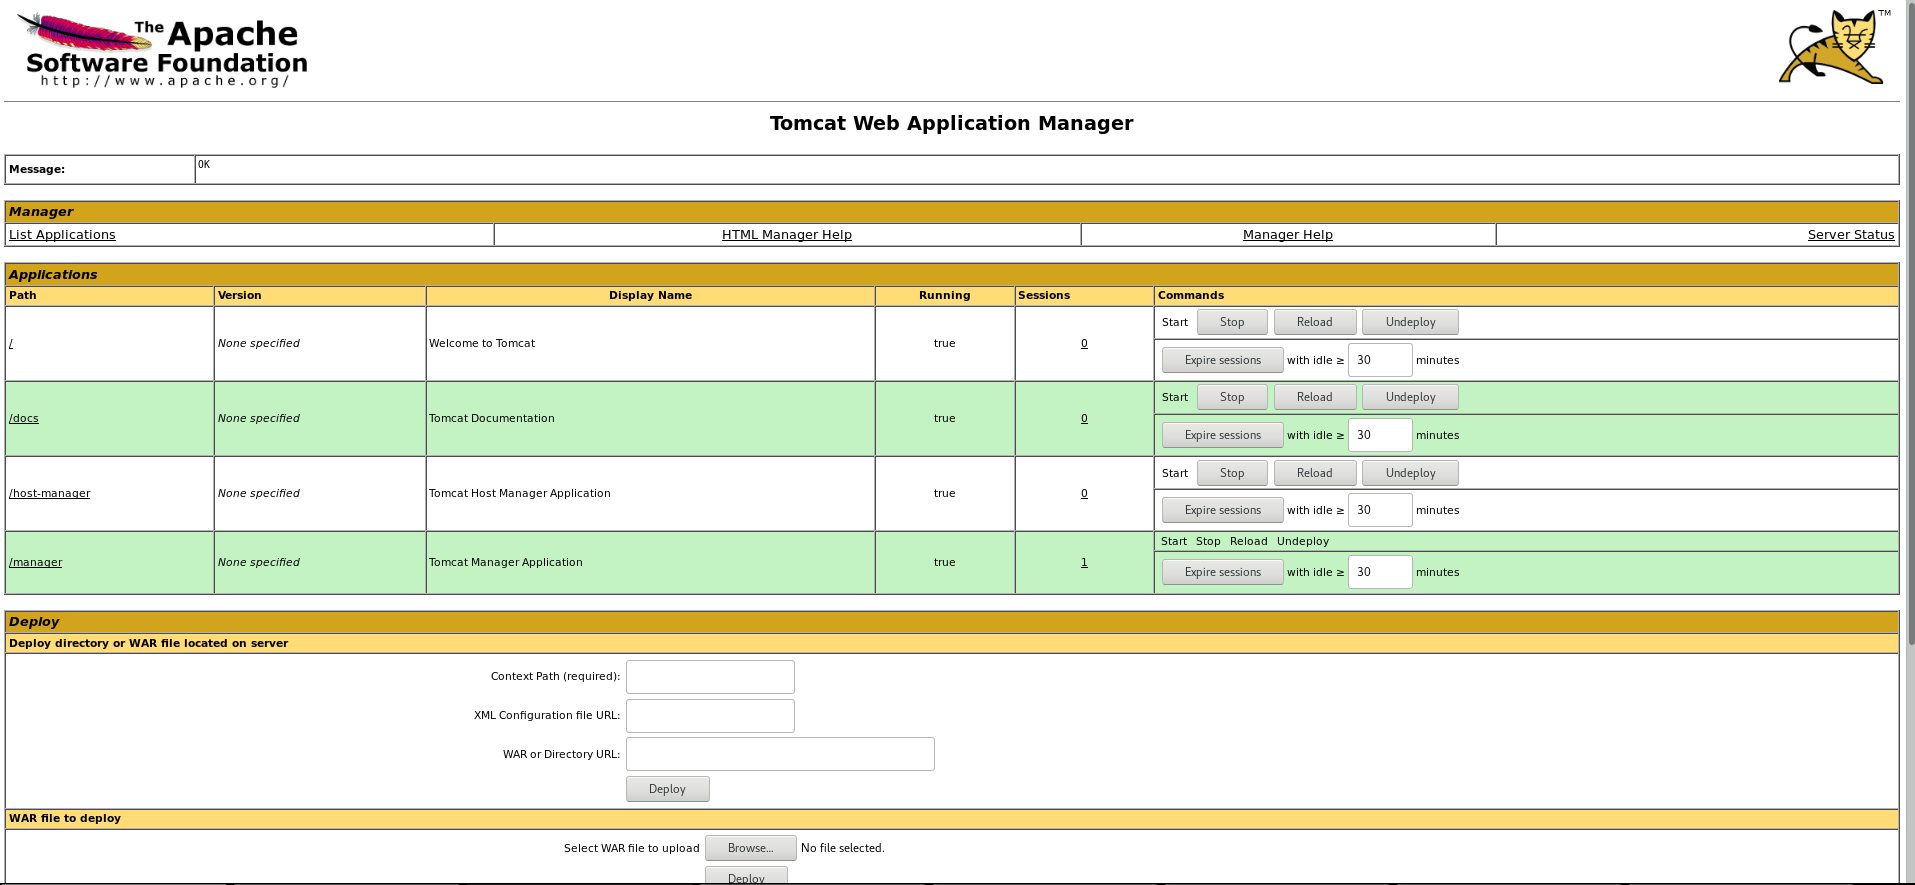
Open the Tomcat Manager
The last step is to open the /manager page. It will pop up a login console. Enter your user ID (jwsadmin) and password (jwsadmin) to access the Tomcat Manager in the OpenShift console.
Conclusion
You now know how to install Tomcat on OpenShift, use Tomcat to deploy a web application to OpenShift, and access the Tomcat /manager page. I hope this tutorial helps you get started with your OpenShift explorations.
