In the first article in this series, Designing an event-driven business process at scale: A health management example, Part 1, you found the business use case and data model for a concrete example from the health management industry. You then began implementing the example in jBPM (an open source business automation suite) by creating the Trigger process.
In the second article, you implemented the Task subprocess and, among other things, you also configured the call parameters for the Reminder and Escalation subprocesses within the Task subprocess. Now you will implement these subprocesses.
The Reminder subprocess
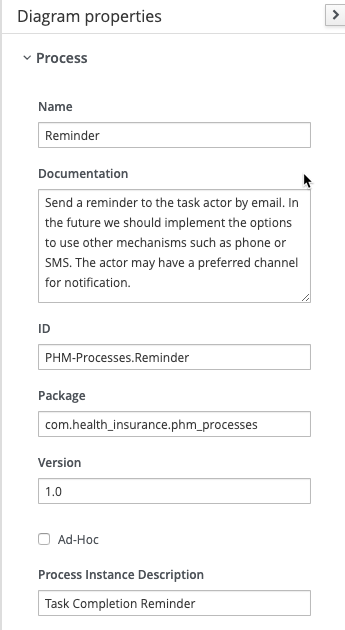
You should now create the email reminder subprocess with the properties shown in Figure 1.
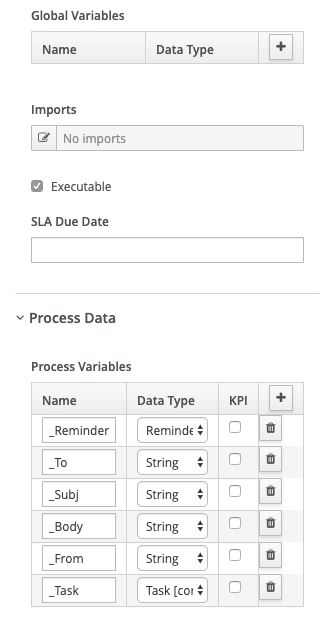
This subprocess needs the variables shown in Figure 2 to be defined.
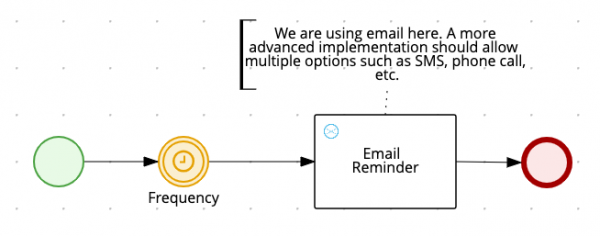
Now, create the process diagram as shown in Figure 3.
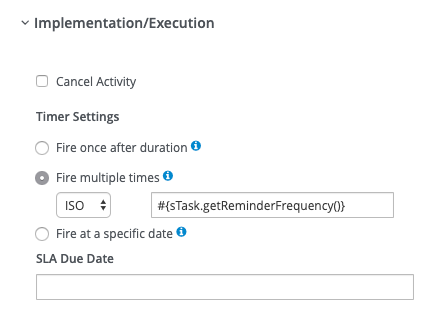
Next, you need the timer, which causes the email reminder to be executed at the frequency defined in the reminderFrequency attribute of the Task object, as shown in Figure 4.
The email reminder consists of the email custom work item handler that comes pre-installed in jBPM. You can see the service task parameters in Figure 5.
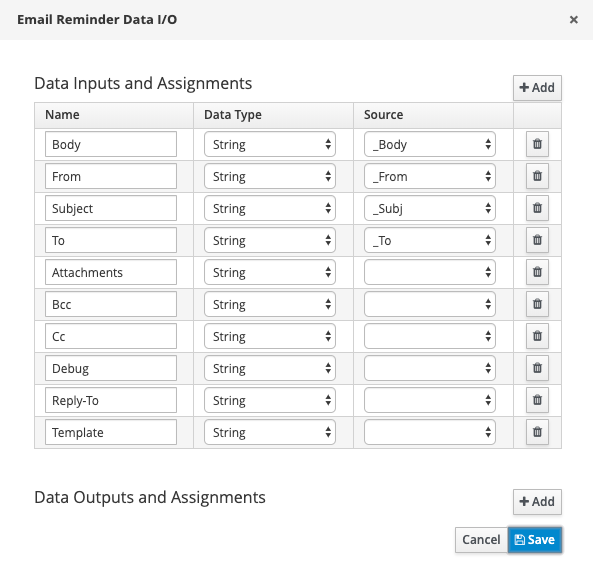
You can use the following on entry action to set the parameters for the email service task:
Reminder r = (Reminder)kcontext.getVariable("_Reminder");
kcontext.setVariable("_To",r.getAddress());
kcontext.setVariable("_Subj",r.getSubject());
kcontext.setVariable("_Body",r.getBody());
kcontext.setVariable("_From",r.getFrom());
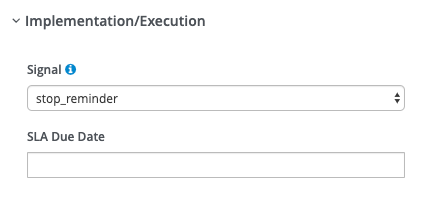
Don't forget to catch the signal to stop the reminder, as shown in Figure 6.
The Escalation subprocess
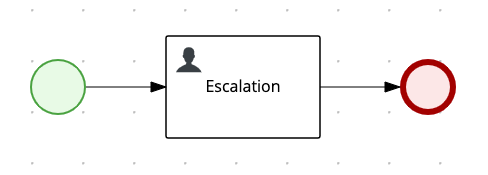
This process is the simplest of all. It's just a human task as you can see in Figure 7.
The Get the Data service
The Get the Data service is implemented in the Express framework on node.js and can be cloned from GitHub. This is a simple REST service with hard-coded responses. Its only purpose is to be used in live demos of the business process described in this series. In a future article, I will show you how to implement this service using business rules. That way, this setting will no longer be hard-coded and it will be easy for nontechnical people to configure the "triggers" without involving developer work. Stay tuned!
Here is the app.js:
const express = require('express')
const app = express()
const bodyparser = require('body-parser')
const port = process.env.PORT || 3200

app.use(bodyparser.json())
app.use(
  bodyparser.urlencoded({
    extended: false
  })
)

app.get('/get_trigger/:trigger_id/:member_id', (req, res) => {
  res.status(200).send([
    /**
    * Getting Provider Info
    */
  {
    task: {
      id: 35,
      origId: 'A490.0',
      suppressed: false,
      suppressionPeriod: '',
      expirationDate: '2020-12-31T12:00:00.000Z',
      close: 'HARD',
      reminderInitiation: 'P15D',
      reminderFrequency: 'R/P15D',
      escalationTimer: 'P30D',
      description: 'Getting provider info'
    },
    assignment: {
      actor: 'Peter',
      channel: 'MCC',
      escalationActor: 'Patricia',
      escalationChannel: 'CCN'
    },
    reminder: {
      address: 'peter@doctor.com',
      body: 'XYZ',
      from: 'PHM@healthinsurance.com',
      subject: 'Reminder'
    }
  },
/**
* Getting Community Health Worker Info
*/
{
  task: {
    id: 58,
    origId: 'B143',
    suppressed: false,
    suppressionPeriod: '',
    expirationDate: '2020-12-31T12:00:00.000Z',
    close: 'HARD',
    reminderInitiation: 'P30D',
    reminderFrequency: 'R/P30D',
    // reminderInitiation : 'PT60S',
    // reminderFrequency : 'R/PT60S',
    escalationTimer: 'P90D',
    // escalationTimer : 'PT60S',
    decription: 'Getting Community Info'
  },
  assignment: {
    actor: 'Charlie',
    channel: 'CCN',
    escalationActor: 'Marc',
    escalationChannel: 'CCN'
  },
  reminder: {
    address: 'charlie@healthinsurance.com',
    body: 'XYZ',
    from: 'PHM@healthinsurance.com',
    subject: 'Reminder'
  }
},
/**
* Getting Member Info
*/
{
  task: {
    id: 128,
    origId: 'C201',
    predecessor: 'A490.0',
    suppressed: false,
    suppressionPeriod: '',
    expirationDate: '2020-12-31T12:00:00.000Z',
    close: 'SOFT',
    reminderInitiation: 'P7D',
    reminderFrequency: 'R/P7D',
    escalationTimer: 'P30D',
    description: 'Getting member info'
  },
  assignment: {
    actor: 'Mary',
    channel: 'MLP',
    escalationActor: 'Charlie',
    escalationChannel: 'CCN'
  },
  reminder: {
    address: 'mary@mail.com',
    body: 'XYZ',
    from: 'PHM@healthinsurance.com',
    subject: 'Reminder'
  }
},
/**
* Getting Pharmacist Info
*/
{
         task: {
           id: 112,
           origId: 'C178',
           predecessor: 'A490.0',
           suppressed: false,
           suppressionPeriod: '',
           expirationDate: '2020-12-31T12:00:00.000Z',
           close: 'SOFT',
           reminderInitiation: 'P7D',
           reminderFrequency: 'R/P7D',
           escalationTimer: 'P30D',
           description: 'Geting member info'
          },
          assignment: {
            actor: 'Robert',
            channel: 'CCN',
            escalationActor: 'Matthew',
            escalationChannel: 'CCN'
          },
          reminder: {
            address: 'robert@pharmacy.com',
            body: 'XYZ',
            from: 'PHM@healthinsurance.com',
            subject: 'Reminder'
          }
    }
  ])
})

app.listen(port, () => {
  console.log(`running at port ${port}`)
})
and this is the deployment descriptor in src/main/resources/META-INF/kie-deployment-descriptor.xml:
<work-item-handler>
    <resolver>mvel</resolver>
    <identifier>new org.jbpm.process.workitem.rest.RESTWorkItemHandler(System.getenv("DEMO_REST_USER"), System.getenv("DEMO_REST_PWD"))</identifier>
    <parameters/>
    <name>Rest</name>
</work-item-handler>
The Email service
<work-item-handler>
    <resolver>mvel</resolver>
    <identifier>new org.jbpm.process.workitem.email.EmailWorkItemHandler(System.getenv("DEMO_SMTP_SERVER"), System.getenv("DEMO_SMTP_PORT),System.getenv("DEMO_SMTP_USER"),System.getenv("DEMO_SMTP_PWD"))</identifier>
    <parameters/>
    <name>Email</name>
</work-item-handler>
Considerations when using timers
By default, jBPM uses EJB timer services to implement timers when deployed on a Java EE (Jakarta EE) server. EJB timers are not recommended for high volume situations. Quartz is a better alternative and is also available in a Spring Boot deployment.
Another option is to use the service-level agreement (SLA) due date property of a node. This blog by Maciej Swiderski covers the SLA due date capability in jBPM.
Each capability, whether you choose timers or the SLA, has pros and cons. Make your choice depending on the specifics of your use case. Here, while the number of members may be large, the number of PHM triggers per member in a given time period is typically small. The period of each timer is large (weeks), so the chance of many timers triggering at the same instant is not high.
Forms
Data entry forms can be automatically generated for each human task, and for each process. These forms are used mostly for the purpose of testing process execution during development. Typically, the production user interface of a human task is custom made. In this specific use case, the actor of each task should enter data using an existing application that passes the data to jBPM through a REST API exposed by jBPM. Therefore, you will not concern yourself with UI development.
Event listeners
The jBPM project is configured to use event listeners to trace process and rule information at runtime. If you want to take advantage of event listeners, you need to clone the PHM-Tracing and Tracing projects, and then build two jar files to install in the Kie server's lib directory. Otherwise, just unregister them in the process deployment descriptor:
<event-listeners>
        <event-listener>
            <resolver>mvel</resolver>
            <identifier>new com.health_insurance.tracing.PHMProcessEventListener()</identifier>
            <parameters/>
        </event-listener>
        <event-listener>
            <resolver>mvel</resolver>
            <identifier>new com.health_insurance.tracing.PHMAgendaEventListener()</identifier>
            <parameters/>
        </event-listener>
    </event-listeners>
    <task-event-listeners>
        <task-event-listener>
            <resolver>mvel</resolver>
            <identifier>new com.health_insurance.tracing.PHMTaskLifeCycleEventListener()</identifier>
            <parameters/>
        </task-event-listener>
    </task-event-listeners>
Demo users
A shell script is provided in the directory src/main/sh that creates users and groups to run a few scenarios with this business process. This script is intended to be used with JBoss Wildfly.
Conclusion
You have now implemented your own health management demo of an event-driven process with jBPM that is designed to scale with the complexity of the event logic as well as with the volume of events. By now you should better understand several topics through implementing this process:
- Business process abstraction.
- Service tasks or work item handlers.
- REST API calls from within a process.
- Email sending from within a process.
- Signal sending and catching.
- Timer-based reminders and escalations.
Of course, the design and development of a process are not enough. You certainly would like to see this process in action, as well. The next articles in this series will cover deploying and executing this process.
Last updated: May 29, 2023