This post describes how to configure OpenID Connect (OIDC) authentication using an external Identity Provider (IdP). With the new release of Red Hat 3scale API Management, version 2.3, it is possible to use any OIDC-compliant IdP during the API authentication phase. This is a very important new feature because it makes it possible to integrate any IdP already present in your environment—without having to use an Identity Broker—thus reducing overall complexity.
API authentication before version 2.3
Let’s recap what was possible before this release in terms of API authentication.
Up to and including version 2.2, the typical configuration scenario for setting up OIDC authentication would require three components:
- Red Hat 3scale API Management (manager + gateway)
- Red Hat Single Sign-On
- Customer IdP
After the configuration was completed (you can find more details here), the end-user application would first authenticate the end user with Red Hat Single Sign-On. This presented the interface for the Customer IdP and there, the end user would authenticate. There was also a token exchange between the Customer IdP and Red Hat Single Sign-On and this would return a valid access token to the application. Then, by attaching the token to the headers and forwarding the request towards the 3scale API Management gateway, the application would use this token to get access to the API backend protected by 3scale API Management. The gateway would validate the token by performing sanity checks on the access token, which needed to be a JSON Web Token (JWT). (You can find more details on OIDC and OAuth here.)
The three main checks performed to actually authenticate the call were:
- Verifying the token was signed with the public key of the IdP (more details about the process are available here)
- Checking that the Client ID inside the token corresponded to the one in 3scale API Management
- Verifying that the TTL (Time To Live) of the token had not expired
These checks were based on the minimum requirements for complying with the OIDC standard.
As of version 2.3, as long as the Customer IdP complies with the OIDC specifications, the flow described above will be simplified by removing the need for Red Hat Single Sign-On, as described below.
OIDC compliance
What is OIDC compliance? You can find more info on the OpenID certification page. As you can see, Red Hat is there with Keycloak. This list of certified implementations is important because there are many IdPs out there that implement the basics to support an OAuth2.0 authentication scenario, but they are not compliant with the stricter OIDC standard. (It's important to know that before starting any integration effort.)
Let’s take two major providers mentioned in that list and see how 3scale API Management can work with them. In the following scenarios, I will use:
- My 3scale SaaS account for the API manager component
- A locally running API gateway image in Docker format
- A cloud-based third-party IdP
- An API backend running in the cloud
For the last item, I will be using a service called RandomUser that generates random user data, which is useful when you are populating your application with dummy users.
Integrating with Oracle IDCS
Oracle Identity Cloud Service is an online IdP that supports OAuth2.0, OIDC, and SAML 2.0.
I will not get into the details of the features of this IdP or how to sign up for an Oracle Cloud account, but be aware that as of today, you can sign up for a free trial.
As a starting point, I will use an article from an Oracle expert for configuring the application.
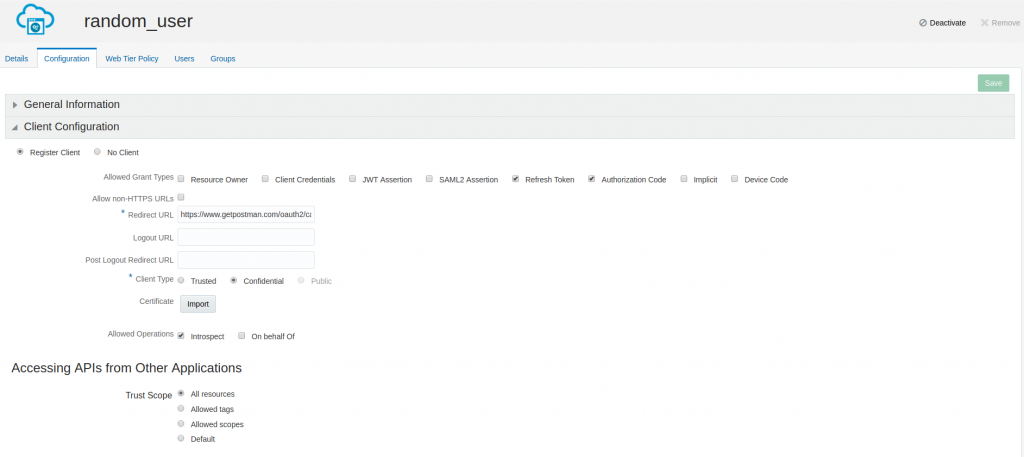
Let's start with the configuration of Oracle IDCS by creating a new application.
Notice I configured the client as confidential. Remember to activate the client before using it.
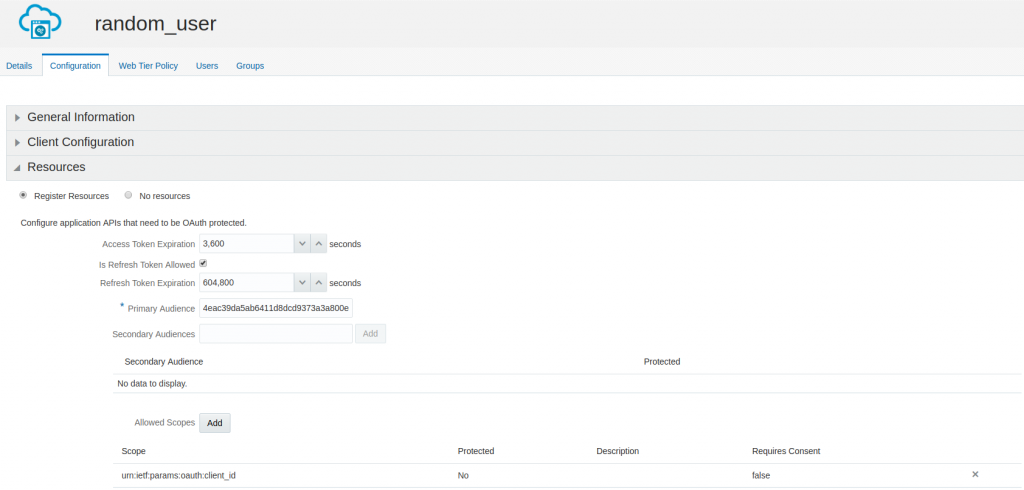
Then, configure the resources the client is allowed to access:
In particular, notice the Primary Audience configuration, which contains the value of the Client ID (I will explain the reason later).
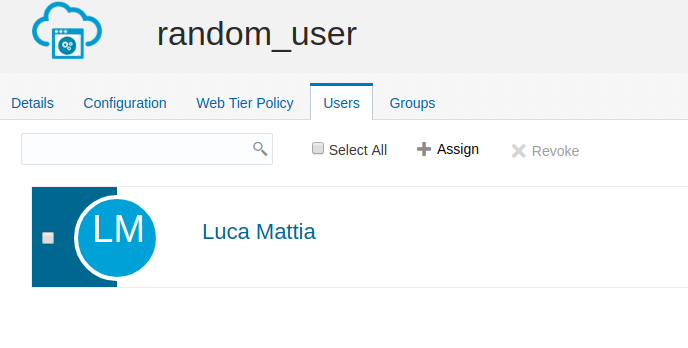
Assign a user to the application:
Last, don’t forget to make the endpoint to access the public key of Oracle IDCS publicly accessible.
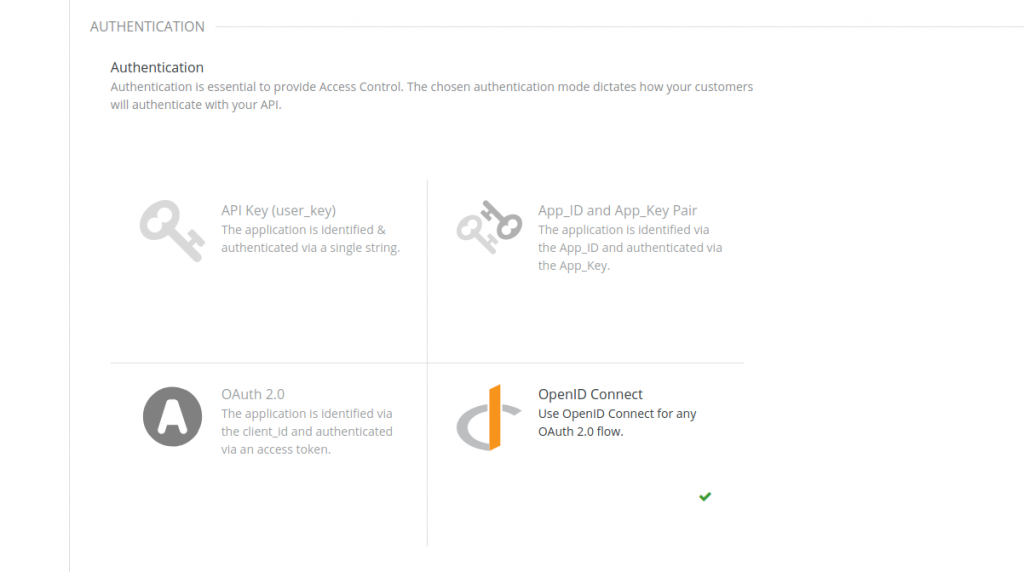
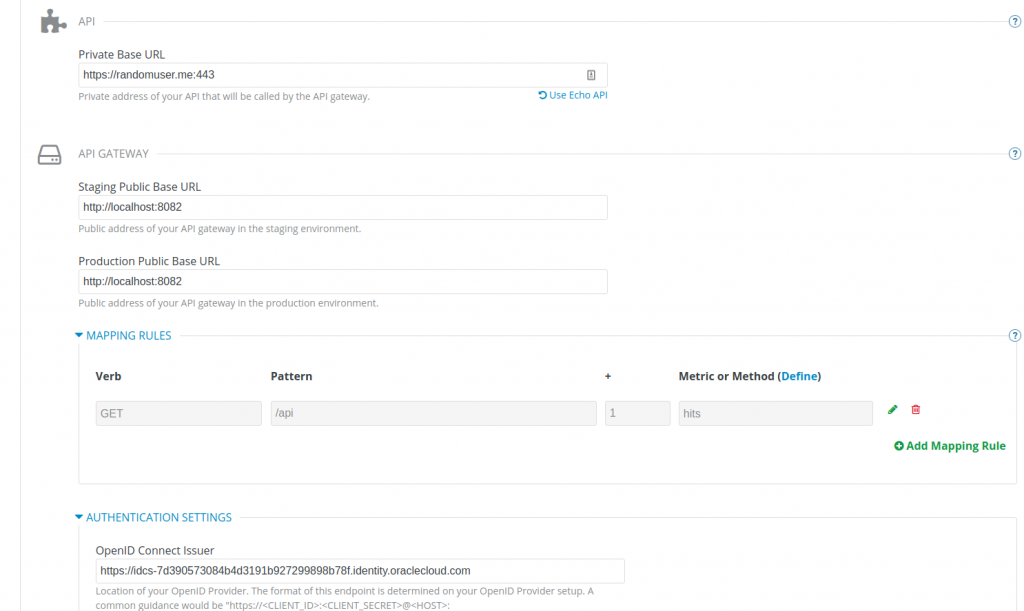
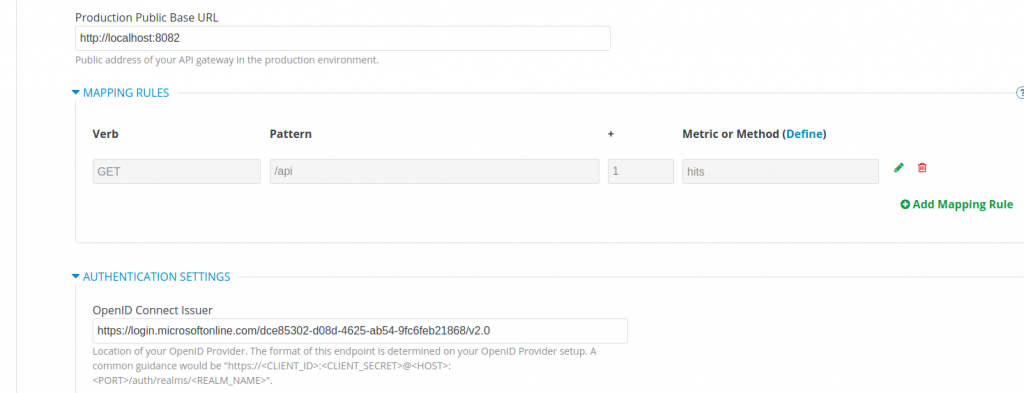
Let’s now configure 3scale API Management. Start with the configuration of the API authentication:
Then, specify the endpoint for the Oracle IDCS IdP as the OpenID Connect Issuer (as a reference, this should be the Discovery Endpoint minus the .well-known/openid-configuration part).
(When you update the staging configuration, ignore the validation error because this is related to the functionality for dynamic client registration, which is available only for Red Hat Single Sign-On). I also had to add a header policy to the configuration, because the backend service I picked doesn’t seem to accept long headers, such as ones containing an access token.
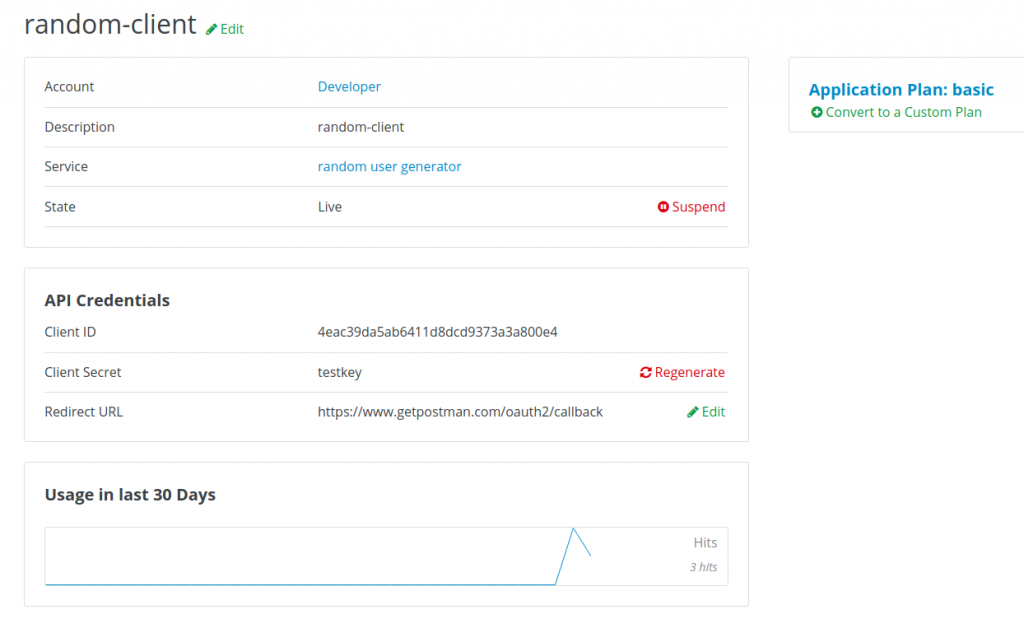
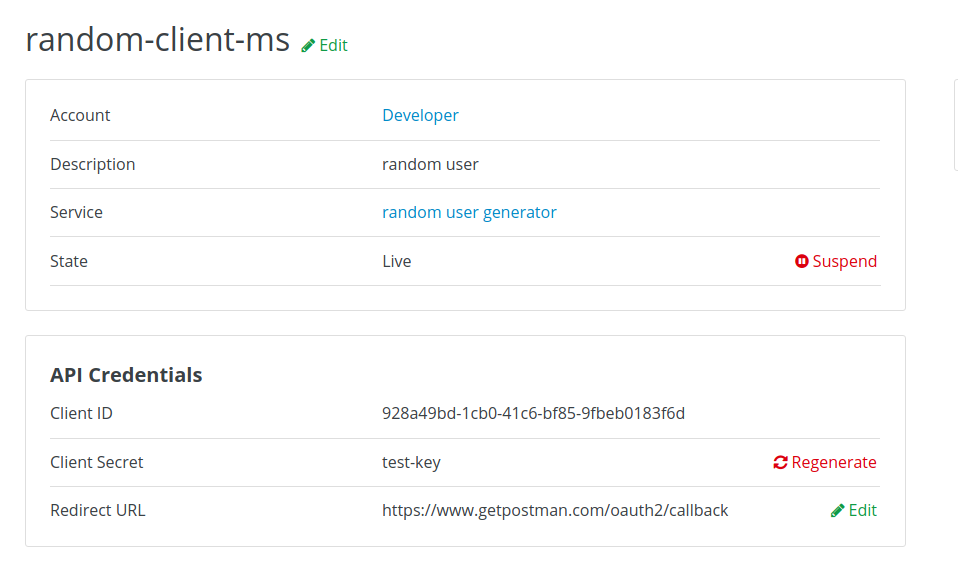
Last, create the application on 3scale API Management:
Let’s now launch the 3scale API Management gateway on my machine:
docker run --name apicast --rm -p 8082:8080 -e THREESCALE_PORTAL_ENDPOINT=https://*access_token*@lmf-admin.3scale.net -e APICAST_RESPONSE_CODES=true -e APICAST_SERVICES_LIST=2555417760770 -e APICAST_CONFIGURATION_CACHE=300 -e APICAST_LOG_LEVEL=info quay.io/3scale/apicast:master
As you can see, I’m filtering the services on the gateway (to make troubleshooting easier) and I’m using the latest version of the community gateway, since this feature is yet to be released.
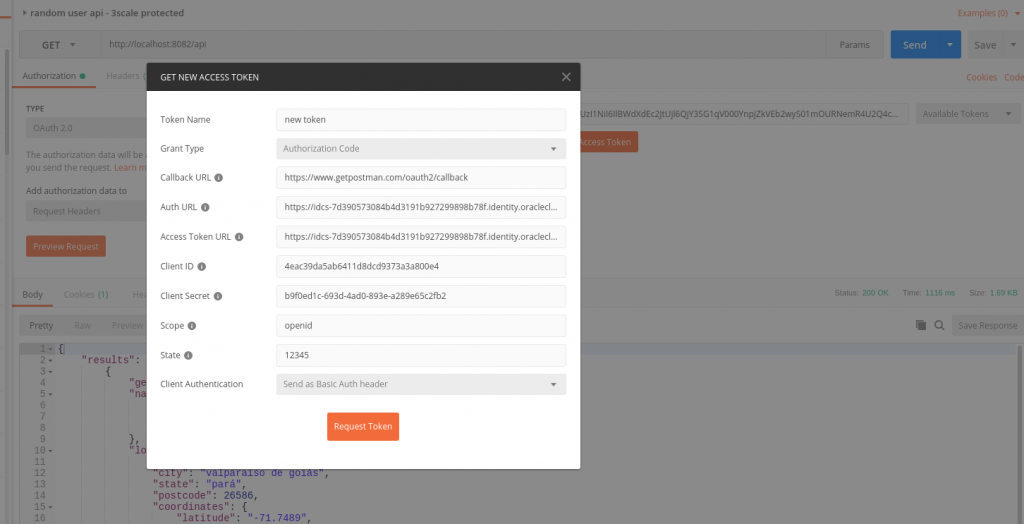
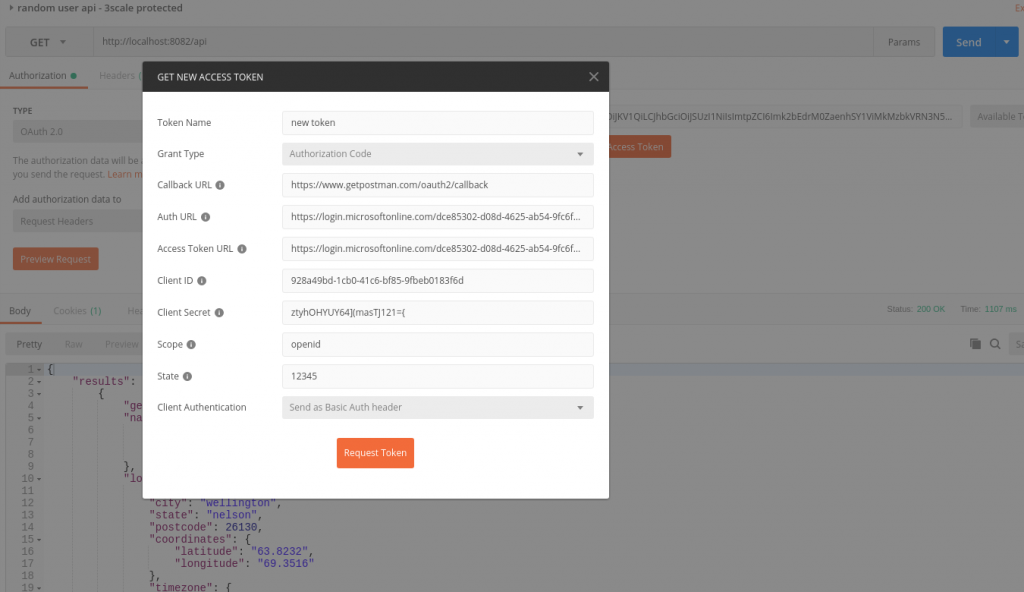
Let’s now test the complete integration with Postman:
Once you authenticate with your end users, you will receive two tokens: the access token and the ID token. You can decode the content of the tokens here. As you can see by comparing the two tokens, the aud claim is different in content. In the case of the ID token, it contains the value of the client ID as well. Audience or aud generally indicates who can consume the service, and according to the official OIDC specs:
aud
REQUIRED. Audience(s) that this ID Token is intended for. It MUST contain the OAuth 2.0 client_id of the Relying Party as an audience value. It MAY also contain identifiers for other audiences.
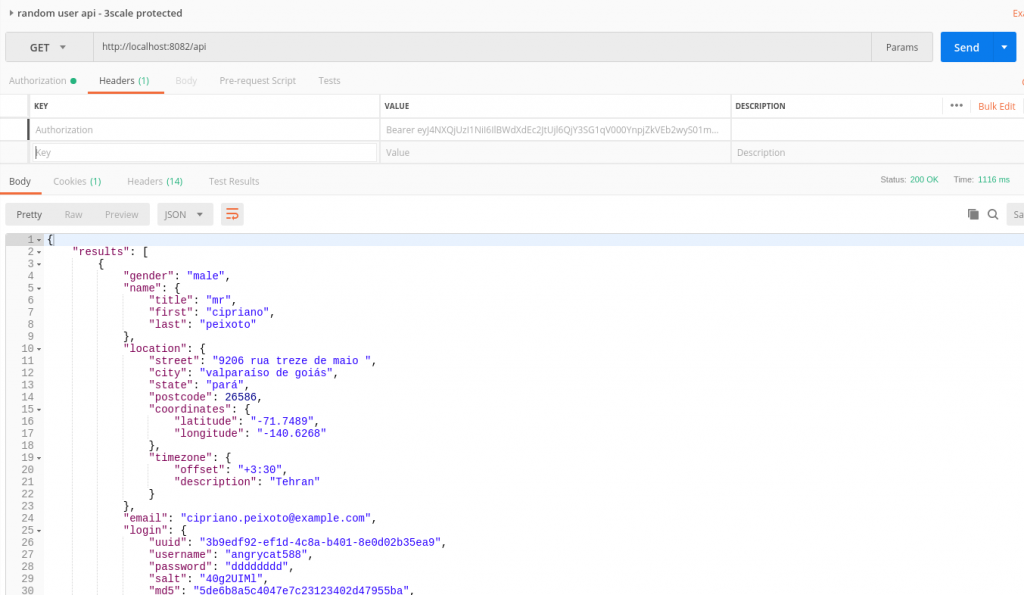
We are going to use the ID token and add that to the headers in the request.
It works!
Integrating with Microsoft Azure Active Directory
I hope you are still with me. Let’s move now to the second integration. (How to set up an Azure account and information about the full feature list of the product are out of the scope of this tutorial.)
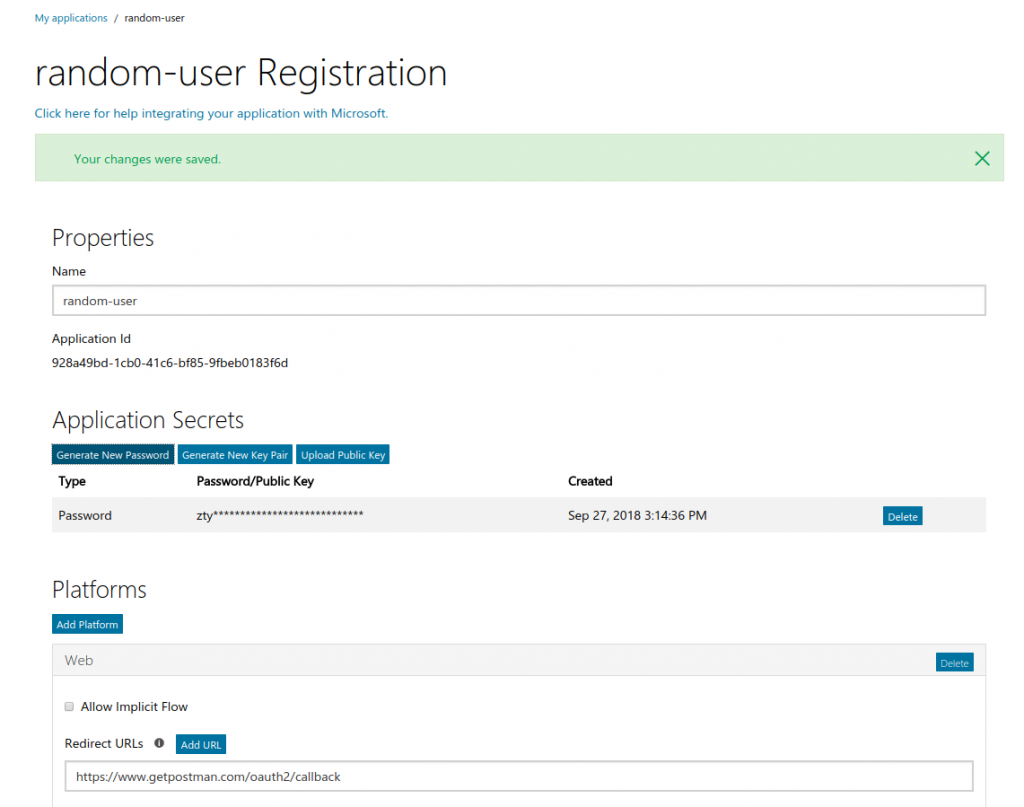
We will start with the creation of the application on the Microsoft side. I will use this Microsoft page as the starting point.
Here are some notes before continuing with this effort:
- I will be using v2 of the endpoints for Active Directory Federation Services (ADFS) since they are OIDC-compliant.
- You will need the tenant ID, which you can find by navigating to the Properties pane of the Azure Active Directory section, inside the Azure Portal.
- I will configure the application on the Microsoft Application Console.
Here is my application created on the Azure Portal:
I will now modify the service configuration in 3scale API Management:
And create a new application:
Once again, we will be using Postman to obtain the access token.
And now here is the actual request (once again using the ID token for the same reasons explained above).
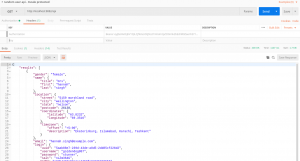
Great! Thank you for staying with me through all the technical details related to OIDC.
Stay tuned for more blog posts about API authentication and authorization!
Last updated: March 24, 2023