In my last article, I wrote about how API Management and Identity Management can work together in a complementary fashion to secure and manage the services/endpoints which applications expose as APIs. In that article I covered how Red Hat 3scale API Management can be used to integrate an identity manager, in addition to providing API management functions such as rate limiting and throttling.
This article will show how to integrate ForgeRock with 3scale by Red Hat. ForgeRock is one of the popular and growing identity management companies. ForgeRock helps organizations interact securely with customers, employees, devices, and things.

For this tutorial, the following installers are used:
- ForgeRock OpenAM 13.0.0
- 3scale APIcast API gateway v3.0
- 3scale SAAS API Manager
Below are the components:
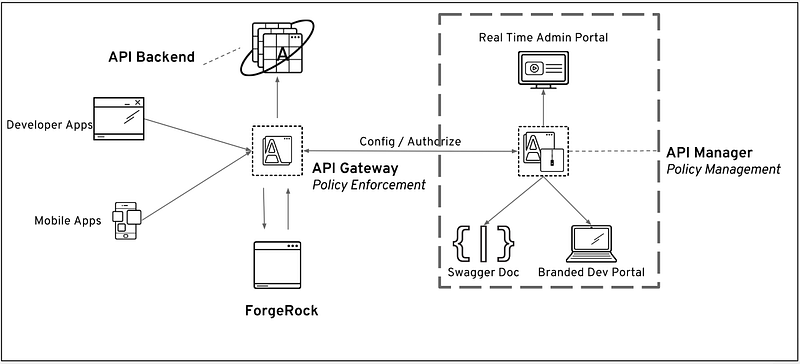
Workflow
- Client App sends requests to APIcast API gateway with desired request parameters.
- APIcast verifies the credentials with API Manager, and stores in cache if valid.
- APIcast sends the request to ForgeRock, where it authenticates the user and obtains end user consent/authorization.
- ForgeRock sends the End-User back to the Client with an
id_token, and if requested, anaccess_token. - For every API call, the JWT token is sent via APIcast to API backend where it verifies the incoming
JWTwith the ForgeRock public key. If valid, then proxy the call to the API backend. - The backend API extracts the JWT, verifies the scope for the user, and sends back an API response to the client application.
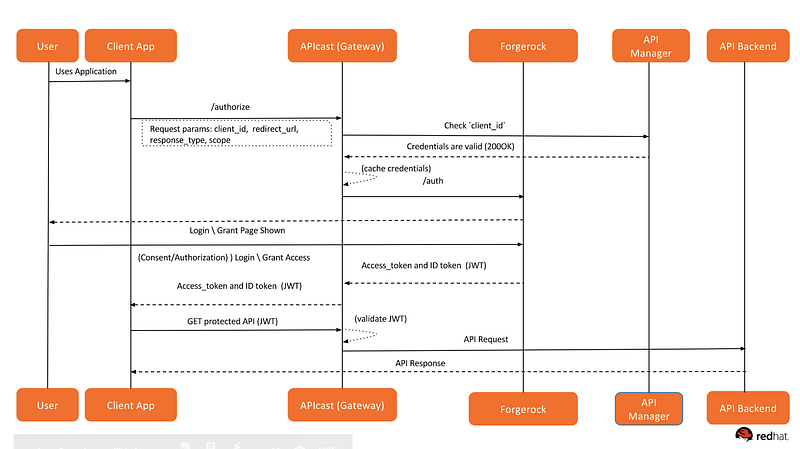
Sequence Diagram
To complete the end-to-end integration we should set up all pieces one by one. Below are the components and the instructions.
Setting up API backend
For this demo, I will be using the echo API service hosted by 3scale by Red Hat. You can always write a service that will extract the JWT, parse the JSON payload, extract the user profile, and send back the product subscription status for that user.
Setting up API Manager
- Login to 3scale by Red Hat admin portal.
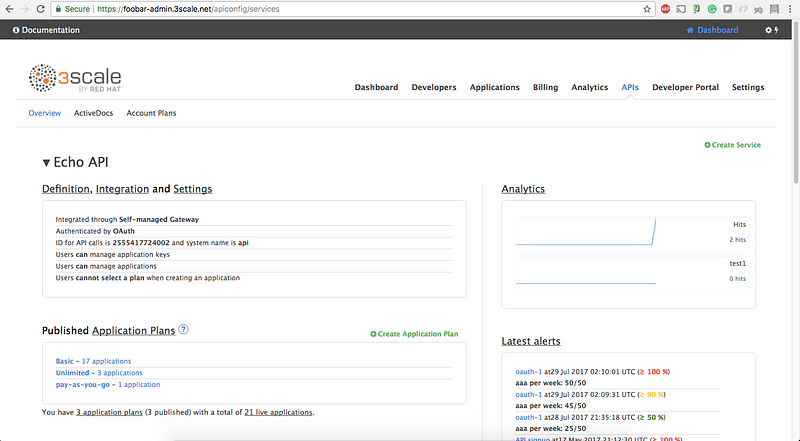
- Select the service that you want to use to enable OpenId Connect integration with ForgeRock. Click on the APIs tab, select the Service, and click on the Integration link. We are using the default Echo API:
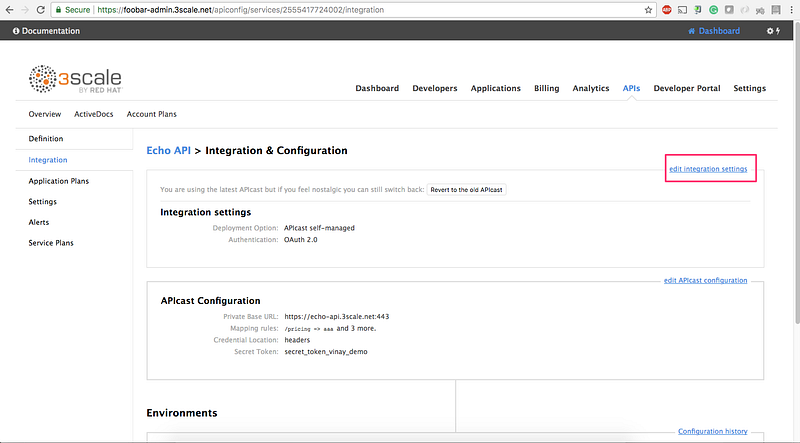
3. Click on edit integration settings:
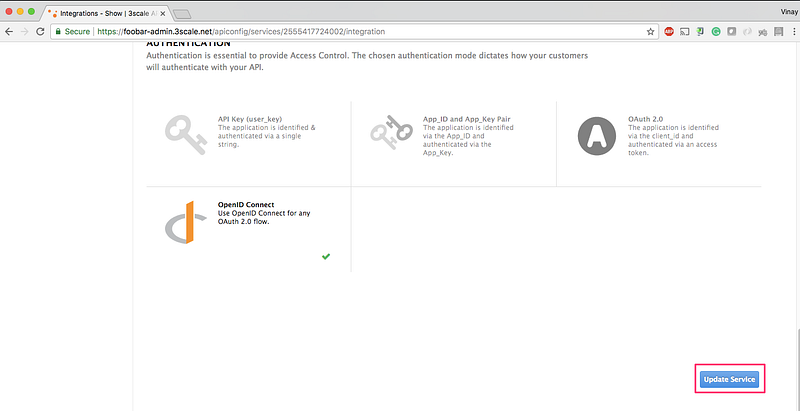
4. Select OpenID Connect and click on Update Service:
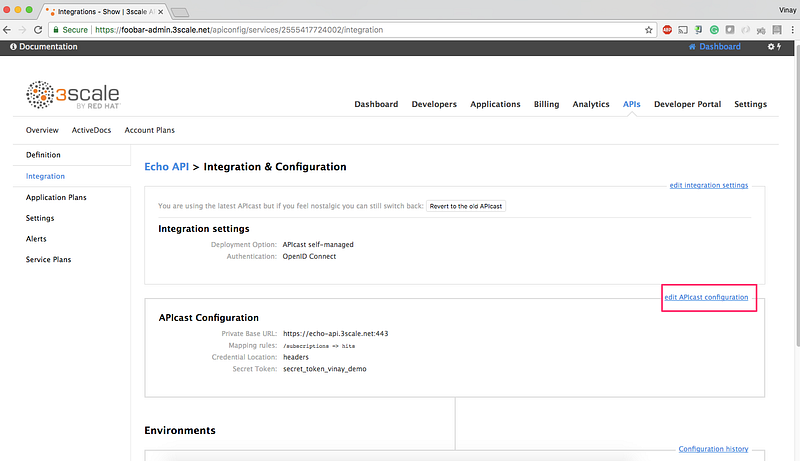
5. Go back to the integration page, and click on edit APIcast configuration:
6. Enter the Staging and Production base URL. We will deploy the APIcast gateway locally on docker, so name it as http://localhost:8080:
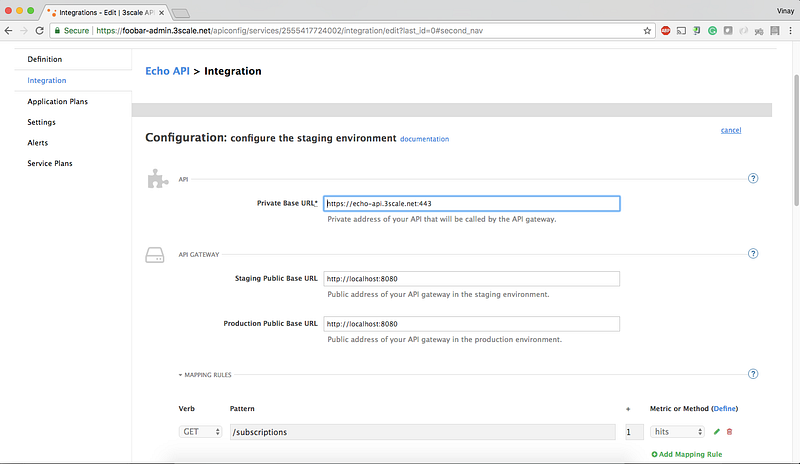
7. Finally, click on Update Staging Environment. You can also promote it to Production (optional).
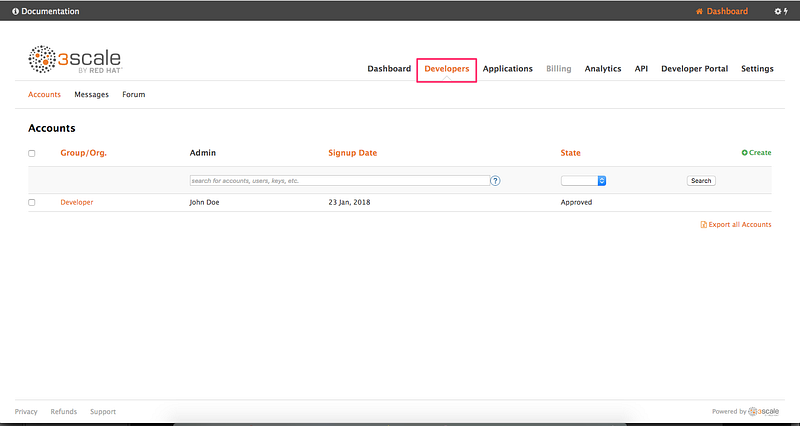
8. Create an application and get the client_id and client_secret .
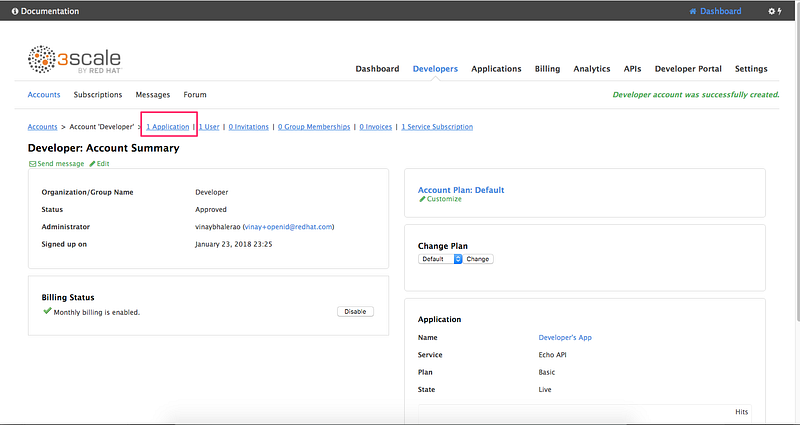
8.1 Go to the Developers tab and click on Developers:
8.2 Click on Application:
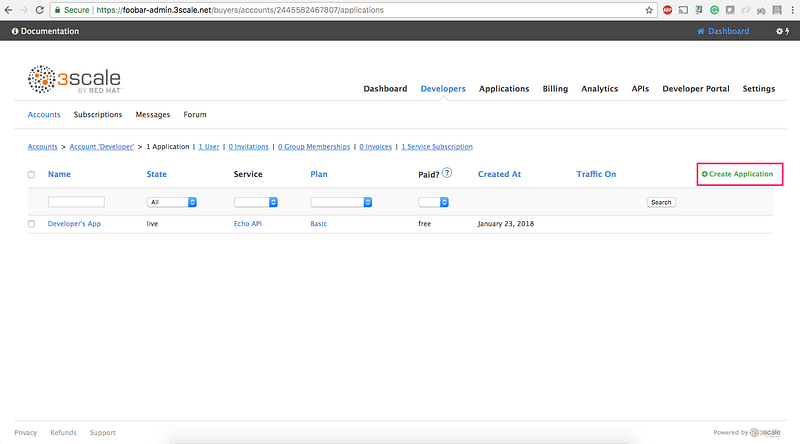
8.3 Click on Create Application link:
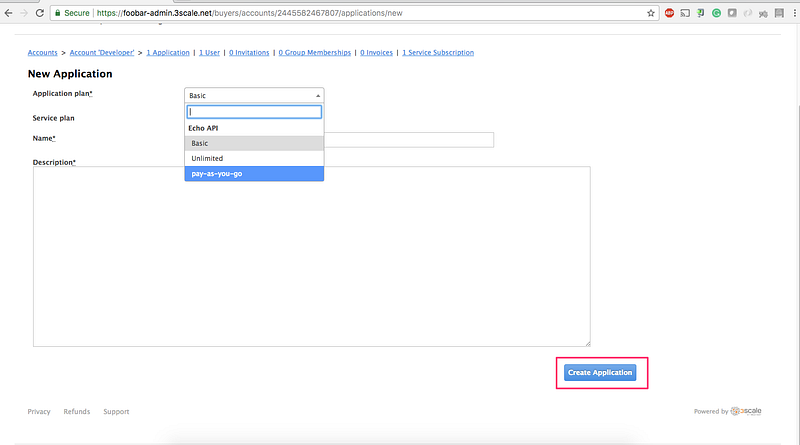
8.4 Select the Application Plan for the service and then click on Create Application:
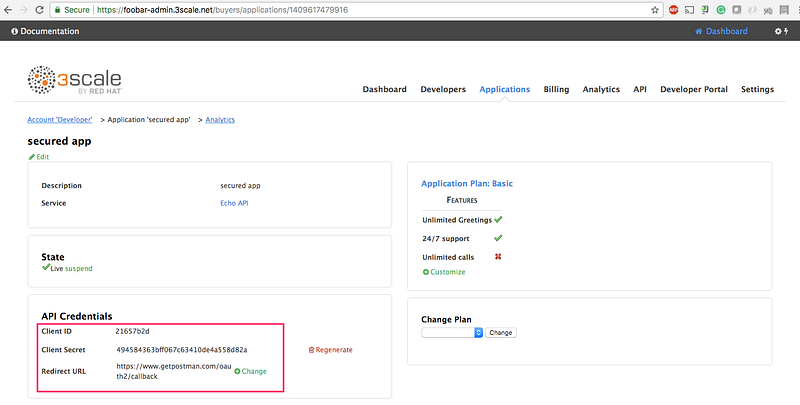
8.5 Note down the client_id and client_secret . We will use the Postman to test our integration so we will fill in the callback information with a fixed link. Type in `https://www.getpostman.com/oauth2/callback`. in the Redirect URL field. Click on the Update button.
That’s all!
Now let’s move toward the ForgeRock setup.
Setting up ForgeRock
Installation of ForgeRock is outside the scope of this tutorial. Please refer ForgeRock documentation for installation. After installing ForgeRock, make sure you are able to access the URL on http://openam.mydomain.com:8080/openam.
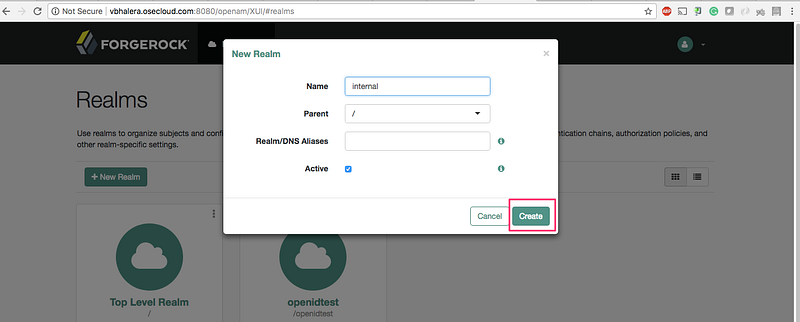
- Create
Realm:
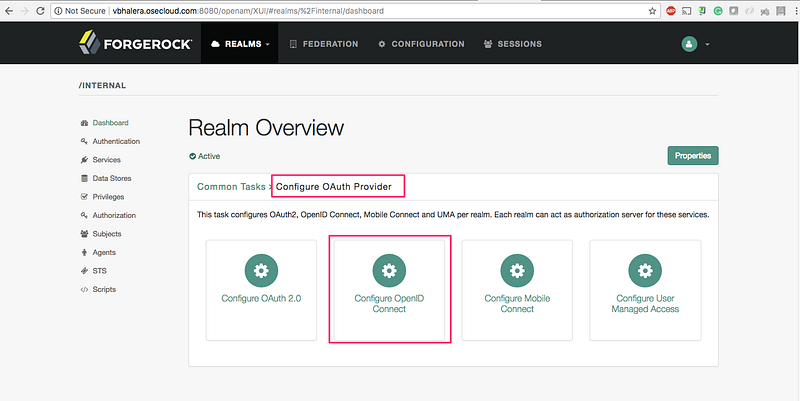
2. Click on Configure Oauth Provider → Configure OpenID Connect:
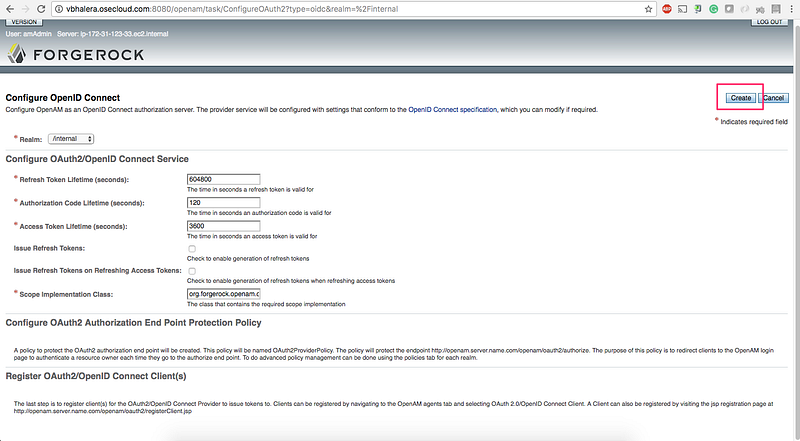
3. Click on Create:
4. Creating (or syncing) the 3scale by Red Hat client_id with ForgeRock.
Our lead developer, Michal Cichra, wrote a tool called Zync to synchronize all 3scale by Red Hat client_ids to IDP. So every time when an application is created (i.e
client_idandclient_secreton 3scale by Red Hat), the same is automatically created on the IDP side. For this exercise, I have manually created the client_ids using the below registration. If you prefer to create the ids runtime, edit the tool with the client registration endpoint of ForgeRock. PRs are welcome.
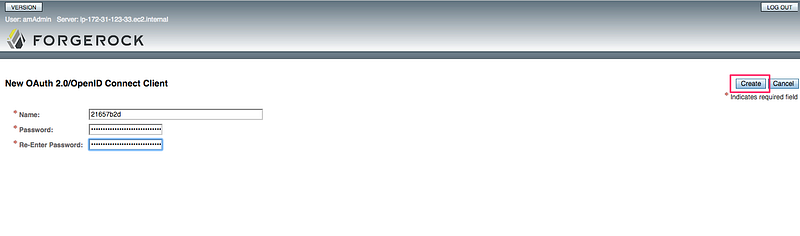
4.1 Click on Agents → Oauth2.0/OpenID Connect Client → New:
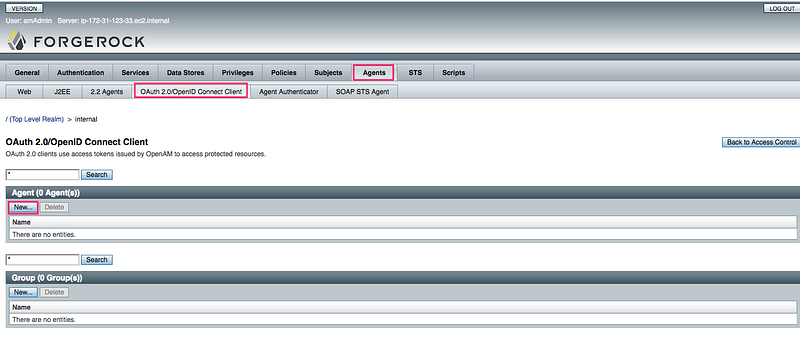
4.2 Copy the 3scale by Red Hat client_id and client_secret from the admin portal that you created earlier. Enter Name as client_id and Password as client_secret. Click Create:
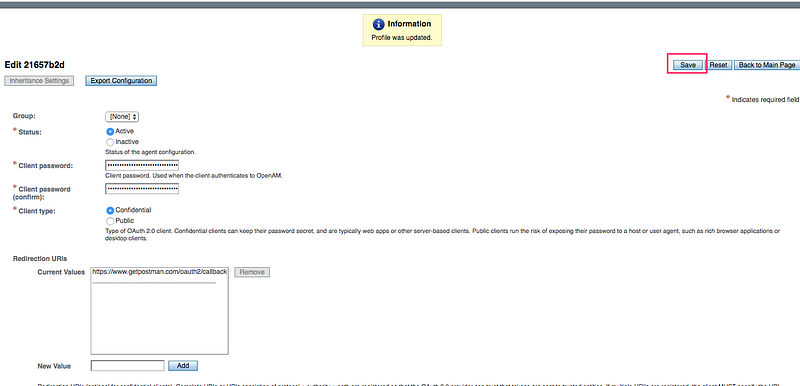
4.3 Enter Redirection URIs → https://www.getpostman.com/oauth2/callback and Scope → openid. Click Save:
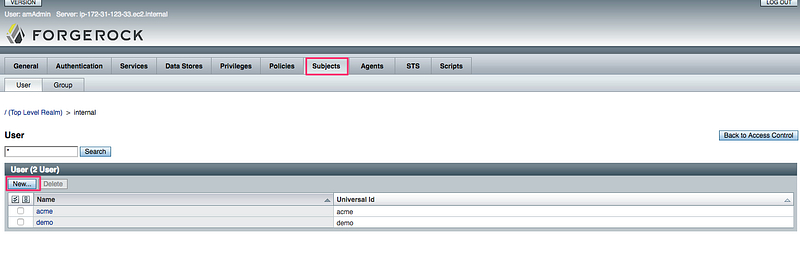
5. Creating an End user that will Authenticate against the IDP.
5.1 Goto Realms → Subjects. Click on New:
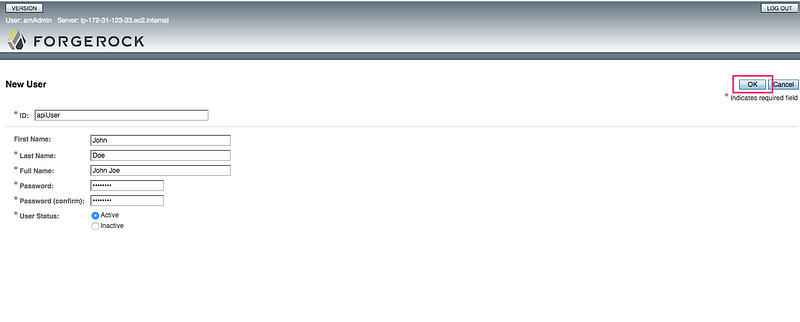
5.2 Enter `ID: apiUser` and `password: 12345678`:
All set for ForgeRock!
Setting up APIcast API gateway
Make sure to install docker and docker-compose before executing the next commands. We will be running APIcast API gateway locally and it will accept all incoming requests from the client.
1. git clone git@github.com:VinayBhalerao/3scale-forgerock-integration.git
2. Edit the .env file per your setup
3. docker-compose up
Send Request to APIcast
- Send Authorize request to APIcast
GET http://localhost:8080/authorize?client_id=21657b2d&scope=openid&response_type=token id_token&nonce=1234&redirect_uri=https://www.getpostman.com/oauth2/callback&realm=internal
where,
client_id = 3scale client id
scope = openid
response_type = token id_token
nonce = 1234
redirect_uri = https://www.getpostman.com/oauth2/callback
realm = internal
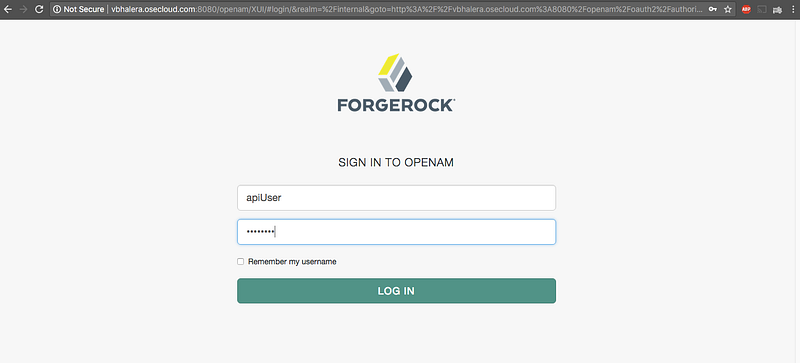
2. A login page is shown from Forgerock. Enter the credentials that we created earlier for End User:
Enter credentials as: apiUser / 12345678 :
Click on Allow:
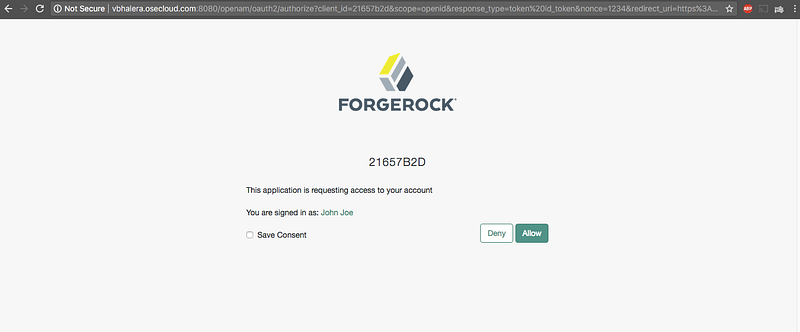
An access_token and id_tokenis redirected back to the application. The id_token is the JWT token generated by the IDP.
Paste the token on JWT.io website to decrypt the contents (optional):
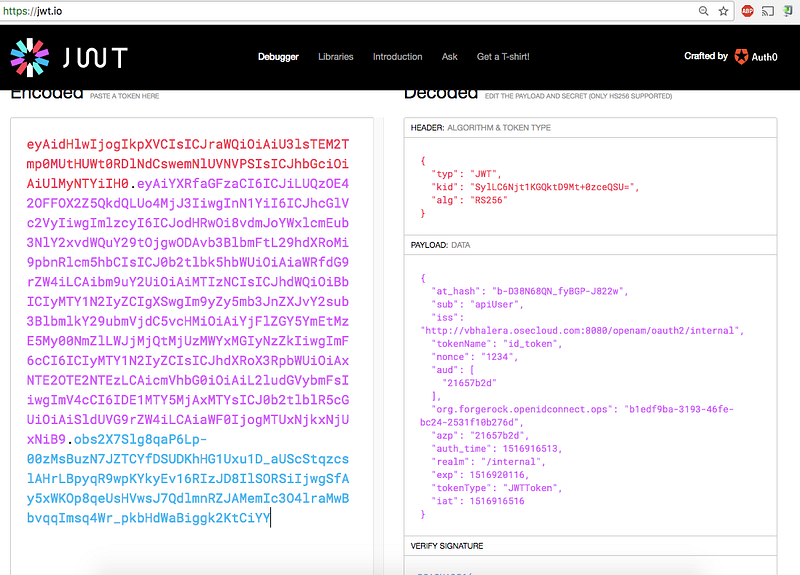
The above token is sent to the APIcast gateway for every call. The gateway will verify the signature of JWT using the public key. If valid, the call is proxied to the API backend along with the JWT. It’s then the backend responsibility to base64 decode the JWT, extract the user profile from JSON payload, and then (depending on the profile) send back the API response. [Refer How microservices verify a JWT for in-depth details]
Request and Response from APIcast:
curl -H "Authorization: Bearer eyAidHlwIjogIkpXVCIsICJraWQiOiAiU3lsTEM2Tmp0MUtHUWt0RDlNdCswemNlUVNVPSIsICJhbGciOiAiUlMyNTYiIH0.eyAiYXRfaGFzaCI6ICJUcUd5c2dRZURsWDhIOFNHR1FjcEF3IiwgInN1YiI6ICJhcGlVc2VyIiwgImlzcyI6ICJodHRwOi8vdmJoYWxlcmEub3NlY2xvdWQuY29tOjgwODAvb3BlbmFtL29hdXRoMi9pbnRlcm5hbCIsICJ0b2tlbk5hbWUiOiAiaWRfdG9rZW4iLCAibm9uY2UiOiAiMTIzNCIsICJhdWQiOiBbICIyMTY1N2IyZCIgXSwgIm9yZy5mb3JnZXJvY2sub3BlbmlkY29ubmVjdC5vcHMiOiAiNjk2YmRlNTYtZmNiZi00ZTFkLWIzOGItYmMzNzQ4OGVhODRiIiwgImF6cCI6ICIyMTY1N2IyZCIsICJhdXRoX3RpbWUiOiAxNTE2OTE3NTQwLCAicmVhbG0iOiAiL2ludGVybmFsIiwgImV4cCI6IDE1MTY5MjEyMzUsICJ0b2tlblR5cGUiOiAiSldUVG9rZW4iLCAiaWF0IjogMTUxNjkxNzYzNSB9.SuYI1tP5uJ94y8XRc6QQClXlmuLzMFEcE1LlW_31GafXv91jg3QwbRI-1RV1XOISfWnLW7l-1eGyKZtK_P8nroLjXYs2c-HrIgTwK16FBTcM9-Gt_jzbntwN4hiLD4PbhVb562fTkdqQCA4ZlNR9QOmQUE0ZKlMSwB3b0bNSmys" http://localhost:8080/subscriptions -v
*   Trying ::1...
* Connected to localhost (::1) port 8080 (#0)
> GET /subscriptions HTTP/1.1
> Host: localhost:8080
> User-Agent: curl/7.43.0
> Accept: */*
> Authorization: Bearer eyAidHlwIjogIkpXVCIsICJraWQiOiAiU3lsTEM2Tmp0MUtHUWt0RDlNdCswemNlUVNVPSIsICJhbGciOiAiUlMyNTYiIH0.eyAiYXRfaGFzaCI6ICJUcUd5c2dRZURsWDhIOFNHR1FjcEF3IiwgInN1YiI6ICJhcGlVc2VyIiwgImlzcyI6ICJodHRwOi8vdmJoYWxlcmEub3NlY2xvdWQuY29tOjgwODAvb3BlbmFtL29hdXRoMi9pbnRlcm5hbCIsICJ0b2tlbk5hbWUiOiAiaWRfdG9rZW4iLCAibm9uY2UiOiAiMTIzNCIsICJhdWQiOiBbICIyMTY1N2IyZCIgXSwgIm9yZy5mb3JnZXJvY2sub3BlbmlkY29ubmVjdC5vcHMiOiAiNjk2YmRlNTYtZmNiZi00ZTFkLWIzOGItYmMzNzQ4OGVhODRiIiwgImF6cCI6ICIyMTY1N2IyZCIsICJhdXRoX3RpbWUiOiAxNTE2OTE3NTQwLCAicmVhbG0iOiAiL2ludGVybmFsIiwgImV4cCI6IDE1MTY5MjEyMzUsICJ0b2tlblR5cGUiOiAiSldUVG9rZW4iLCAiaWF0IjogMTUxNjkxNzYzNSB9.SuYI1tP5uJ94y8XRc6QQClXlmuLzMFEcE1LlW_31GafXv91jg3QwbRI-1RV1XOISfWnLW7l-1eGyKZtK_P8nroLjXYs2c-HrIgTwK16FBTcM9-Gt_jzbntwN4hiLD4PbhVb562fTkdqQCA4ZlNR9QOmQUE0ZKlMSwB3b0bNSmys
>
< HTTP/1.1 200 OK
< Server: openresty/1.11.2.2
< Date: Thu, 25 Jan 2018 22:03:31 GMT
< Content-Type: application/json
< Content-Length: 1480
< Connection: keep-alive
< Cache-control: private
< Set-Cookie: d8c1dd0e39ac4456ed39ce5889b9a5a5=e3380f4380dfce29d71b1a31cd3dd973; path=/; HttpOnly
< Vary: Origin
< X-Content-Type-Options: nosniff
<
{
  "method": "GET",
  "path": "/subscriptions",
  "args": "",
  "body": "",
  "headers": {
    "HTTP_VERSION": "HTTP/1.1",
    "HTTP_HOST": "echo-api.3scale.net",
    "HTTP_ACCEPT": "*/*",
    "HTTP_AUTHORIZATION": "Bearer eyAidHlwIjogIkpXVCIsICJraWQiOiAiU3lsTEM2Tmp0MUtHUWt0RDlNdCswemNlUVNVPSIsICJhbGciOiAiUlMyNTYiIH0.eyAiYXRfaGFzaCI6ICJUcUd5c2dRZURsWDhIOFNHR1FjcEF3IiwgInN1YiI6ICJhcGlVc2VyIiwgImlzcyI6ICJodHRwOi8vdmJoYWxlcmEub3NlY2xvdWQuY29tOjgwODAvb3BlbmFtL29hdXRoMi9pbnRlcm5hbCIsICJ0b2tlbk5hbWUiOiAiaWRfdG9rZW4iLCAibm9uY2UiOiAiMTIzNCIsICJhdWQiOiBbICIyMTY1N2IyZCIgXSwgIm9yZy5mb3JnZXJvY2sub3BlbmlkY29ubmVjdC5vcHMiOiAiNjk2YmRlNTYtZmNiZi00ZTFkLWIzOGItYmMzNzQ4OGVhODRiIiwgImF6cCI6ICIyMTY1N2IyZCIsICJhdXRoX3RpbWUiOiAxNTE2OTE3NTQwLCAicmVhbG0iOiAiL2ludGVybmFsIiwgImV4cCI6IDE1MTY5MjEyMzUsICJ0b2tlblR5cGUiOiAiSldUVG9rZW4iLCAiaWF0IjogMTUxNjkxNzYzNSB9.SuYI1tP5uJ94y8XRc6QQClXlmuLzMFEcE1LlW_31GafXv91jg3QwbRI-1RV1XOISfWnLW7l-1eGyKZtK_P8nroLjXYs2c-HrIgTwK16FBTcM9-Gt_jzbntwN4hiLD4PbhVb562fTkdqQCA4ZlNR9QOmQUE0ZKlMSwB3b0bNSmys",
    "HTTP_USER_AGENT": "curl/7.43.0",
    "HTTP_X_3SCALE_PROXY_SECRET_TOKEN": "secret_token_vinay_demo",
    "HTTP_X_REAL_IP": "172.21.0.1",
    "HTTP_X_FORWARDED_FOR": "76.102.119.200, 10.0.103.186",
    "HTTP_X_FORWARDED_HOST": "echo-api.3scale.net",
    "HTTP_X_FORWARDED_PORT": "443",
    "HTTP_X_FORWARDED_PROTO": "https",
    "HTTP_FORWARDED": "for=10.0.103.186;host=echo-api.3scale.net;proto=https"
  },
  "uuid": "4b100977-4b31-4dc7-9b45-bf5dadb50d97"
* Connection #0 to host localhost left intact
Thanks for taking the time and reading this tutorial. In my next blog post, I will cover how to integrate 3scale by Red Hat with PingFederate using OpenID Connect.
Last updated: August 28, 2023