Today I want to talk of one of the great, brand new features that Ansible Tower introduced in version 3.2: Ansible Tower Isolated Nodes.
Thanks to this feature, you'll be able to create an isolated (Ansible-Tower) node in a restricted network that will manage automation jobs for the main tower, reporting results!
To quote the release statement:
"A Tower Isolated Node is a headless Ansible Tower node that can be used for local execution capacity, either in a constrained networking environment such as a DMZ or VPC, or in a remote data center for local execution capacity. The only prerequisite is that there is SSH connectivity from the Tower Cluster to the Isolated Node. The Tower Cluster will send all jobs for the relevant inventory to the Isolated Node, run them there, and then pull the job details back into Ansible Tower for viewing and reporting."
In this article, I'll guide you in properly configuring Ansible Tower for managing target machines on an isolated network through an Ansible Tower Isolated Node.
For getting into a real scenario, we'll install Gitlab Community Edition through Ansible Tower on a VM not directly reachable by the Tower.
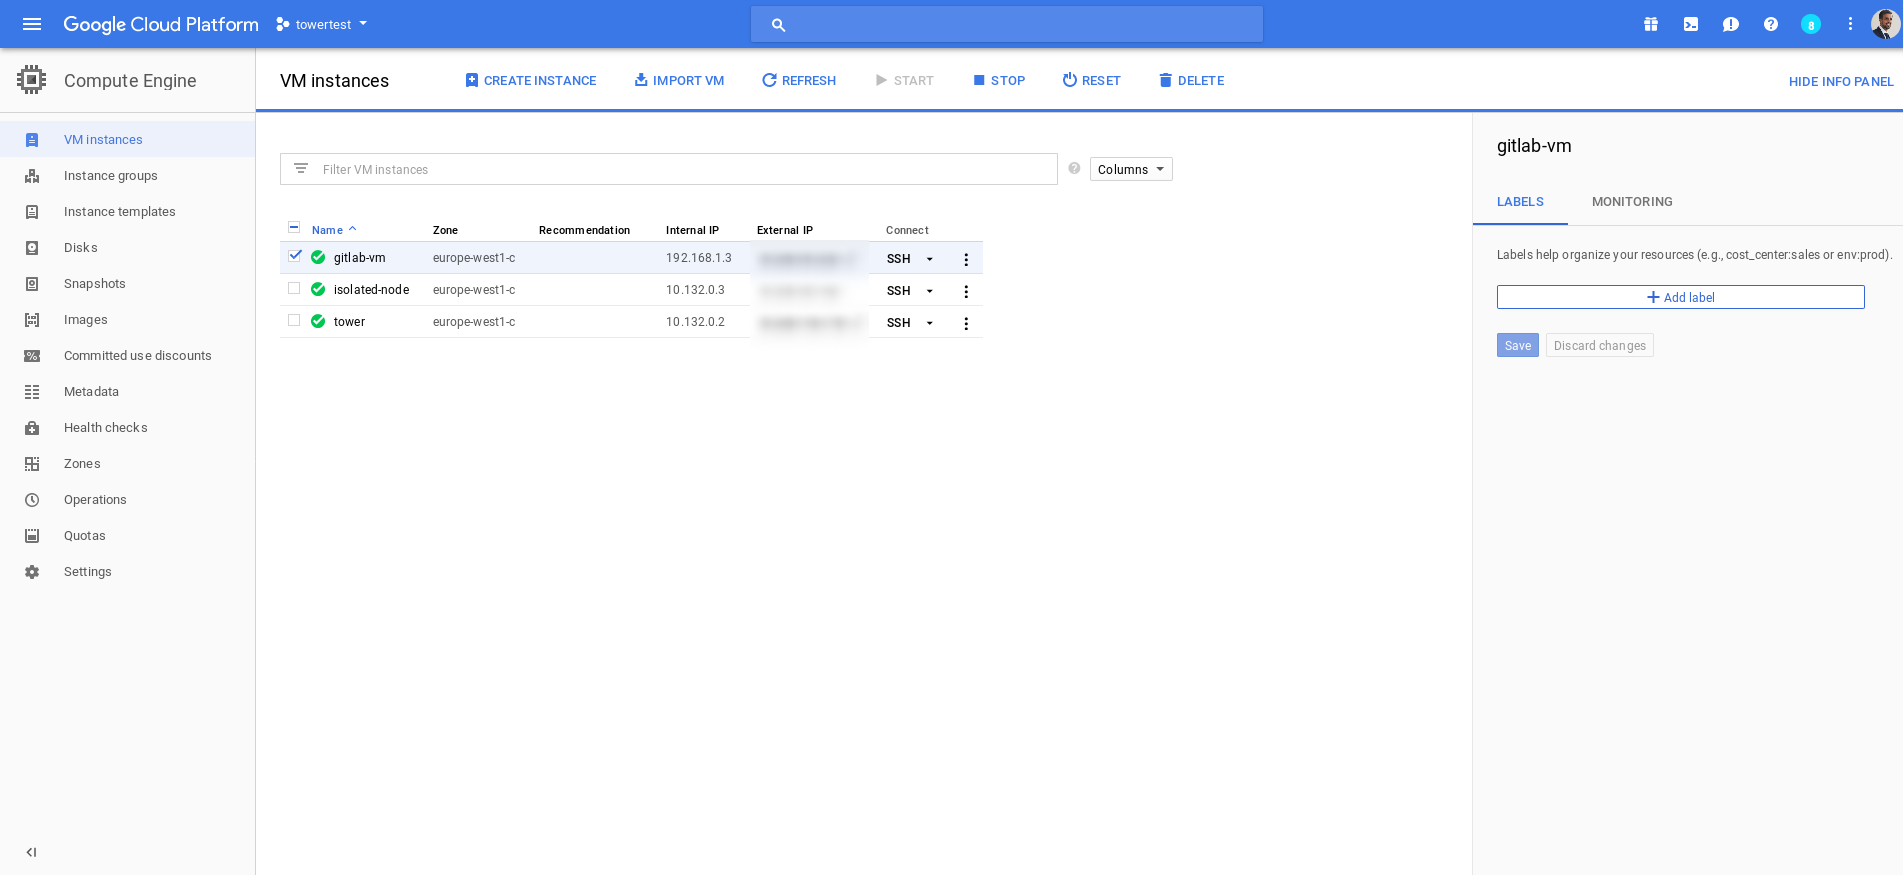
I've created on Google Cloud the following network architecture:

Then I've started creating the three virtual machines (I've also created a VPC Network for using 2 different networks):
After that, I've just followed the Ansible Tower Installation guide for setting up the environment:
# curl https://releases.ansible.com/ansible-tower/setup/ansible-tower-setup-latest.tar.gz -o ansible-tower-setup-latest.tar.gz
# tar -vxf ansible-tower-setup-latest.tar.gz
# cd ansible-tower-setup-3.2.2/
Then I started configuring the base inventory for the installation playbook:
[tower]
localhost ansible_connection=local

[database]

[all:vars]
admin_password='******'

pg_host=''
pg_port=''

pg_database='awx'
pg_username='awx'
pg_password='******'

rabbitmq_port=5672
rabbitmq_vhost=tower
rabbitmq_username=tower
rabbitmq_password='******'
rabbitmq_cookie=cookiemonster

# Needs to be true for fqdns and ip addresses
rabbitmq_use_long_name=false


[isolated_group_restrictedzone]
isolated-node.c.towertest-188910.internal


[isolated_group_restrictedzone:vars]
controller=tower
As you can see I've added the definition for an isolated_group named "restrictedzone" and I defined in the section the host that will schedule jobs in that zone. Then I also defined in the vars the controller instance_group for that isolated_group: tower.
Just in case you have multiple Tower machines in clustering, you may choose a subset of these machines creating a dedicated instance_group and assigning as the controller the name of that instance_group you may create.
For ensuring that Ansible Tower virtual machine will be able to jump inside the isolated node, I've created an ssh-keypair that I've distributed to the isolated node:
# ssh-keygen
# cat .ssh/id_rsa.pub
Finally, I just launched the setup:
# ./setup.sh
Once the Ansible Tower installation is completed, you can navigate to the Settings page looking for "Instance Groups" and once inside, look at the "restrictedzone" instance group.
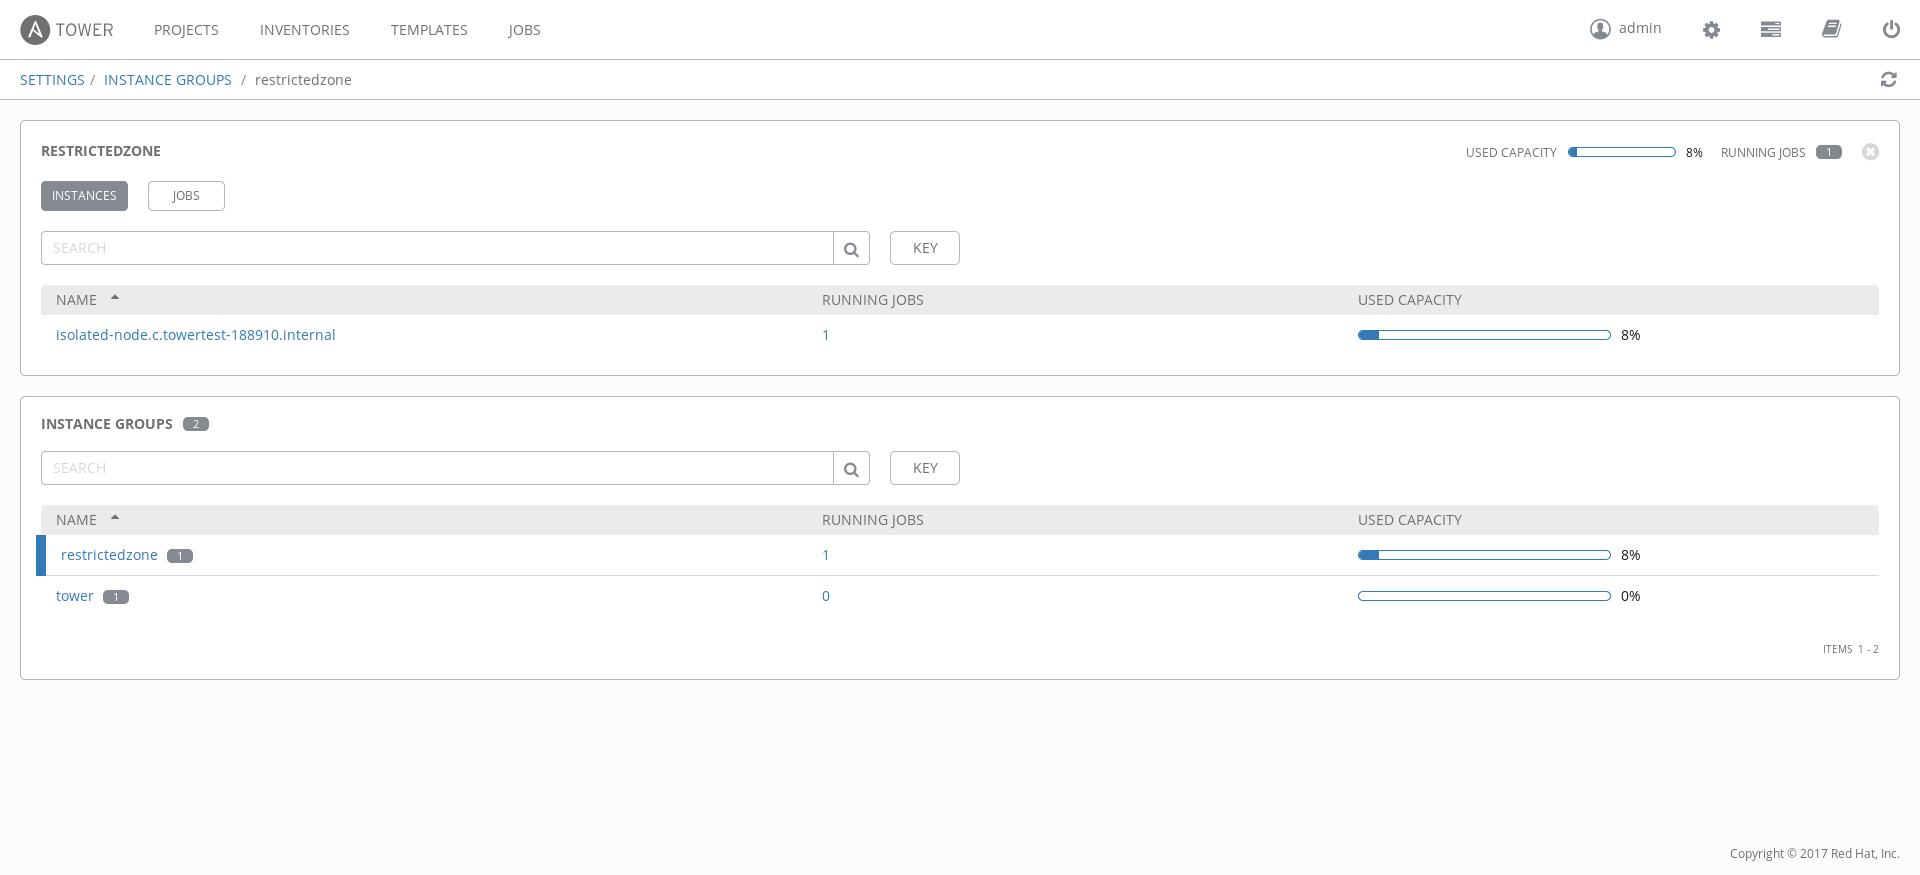
As you can see by the previous image in my case, I found the isolated-node vm.
Ok, then you may start asking: how can I use this restricted zone with my target virtual machine and playbooks? I'll explain that in the following paragraphs.
First, I'll skip all the steps necessary for creating/adding a host, credentials, projects of playbooks and templates. I suppose you're able to do that. If this is not the case, you can search the Ansible Tower documentation for tons of examples.
You have two options for using Isolated Node:
- Define the association at inventory level.
- Define the association at the template level.
Because my target machine is only reachable through the isolated node (the tower has no chance to connect to it), I've added the association at inventory level.
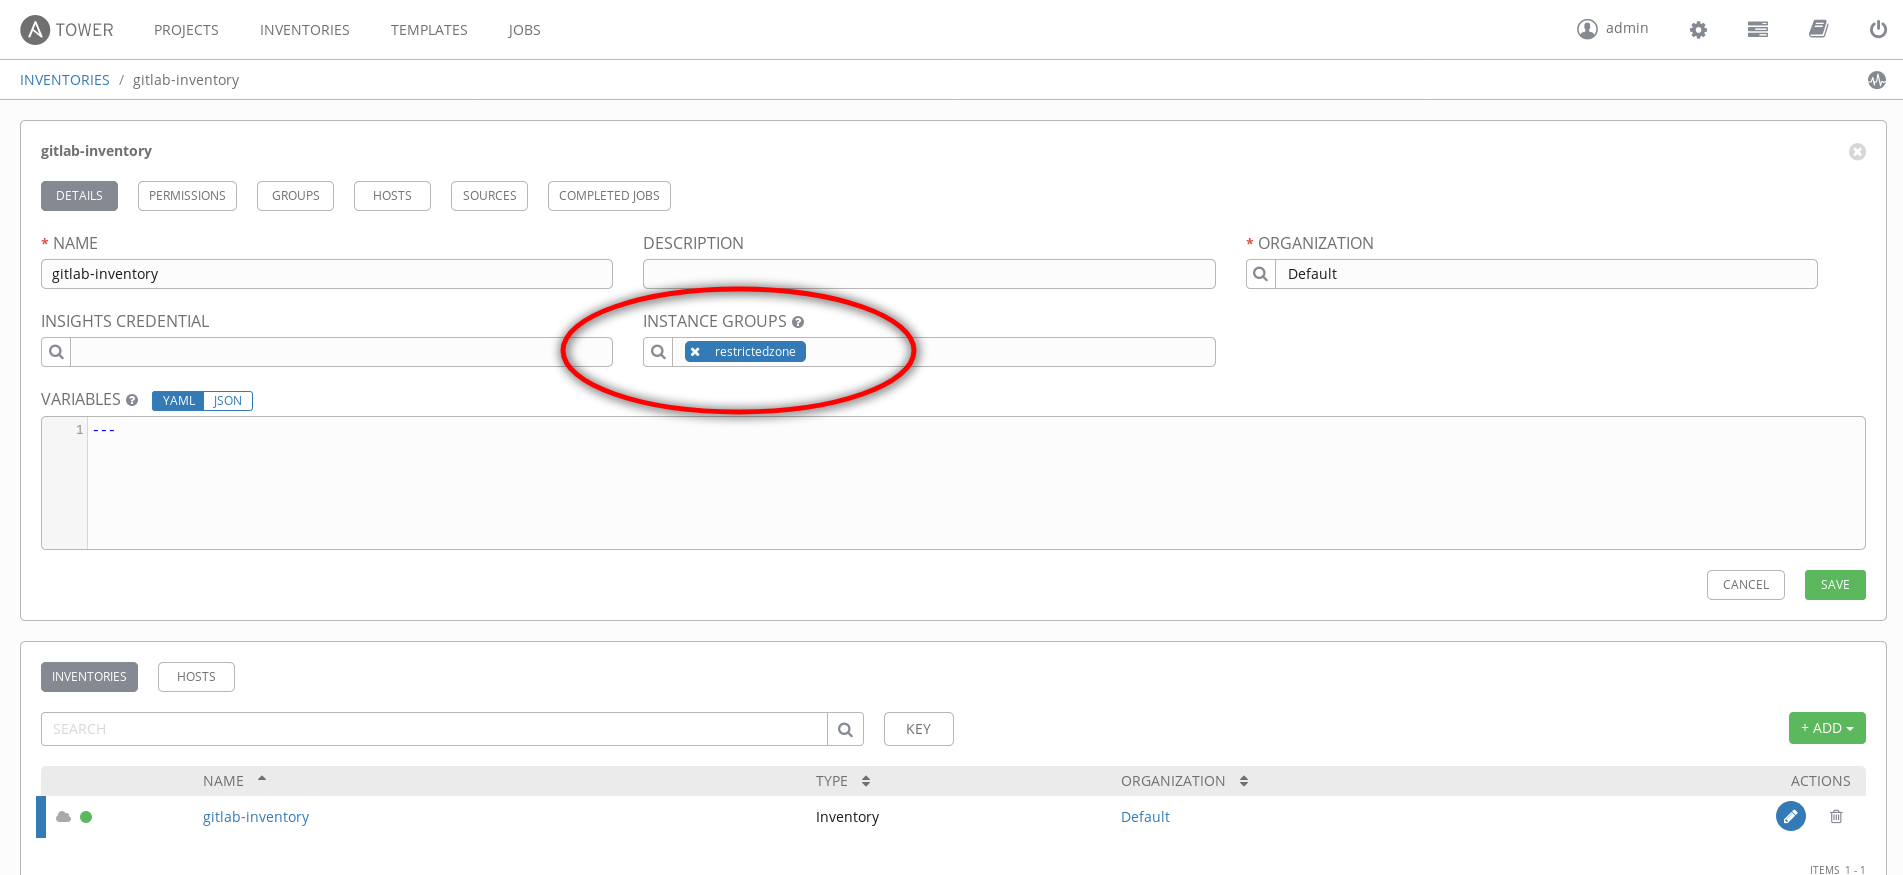
As you can see by the previous screenshot I've defined the "restrictedzone Instance Group" associated to the gitlab-inventory.
Then after adding, projects, and credentials and so on, I just run the Ansible Template:
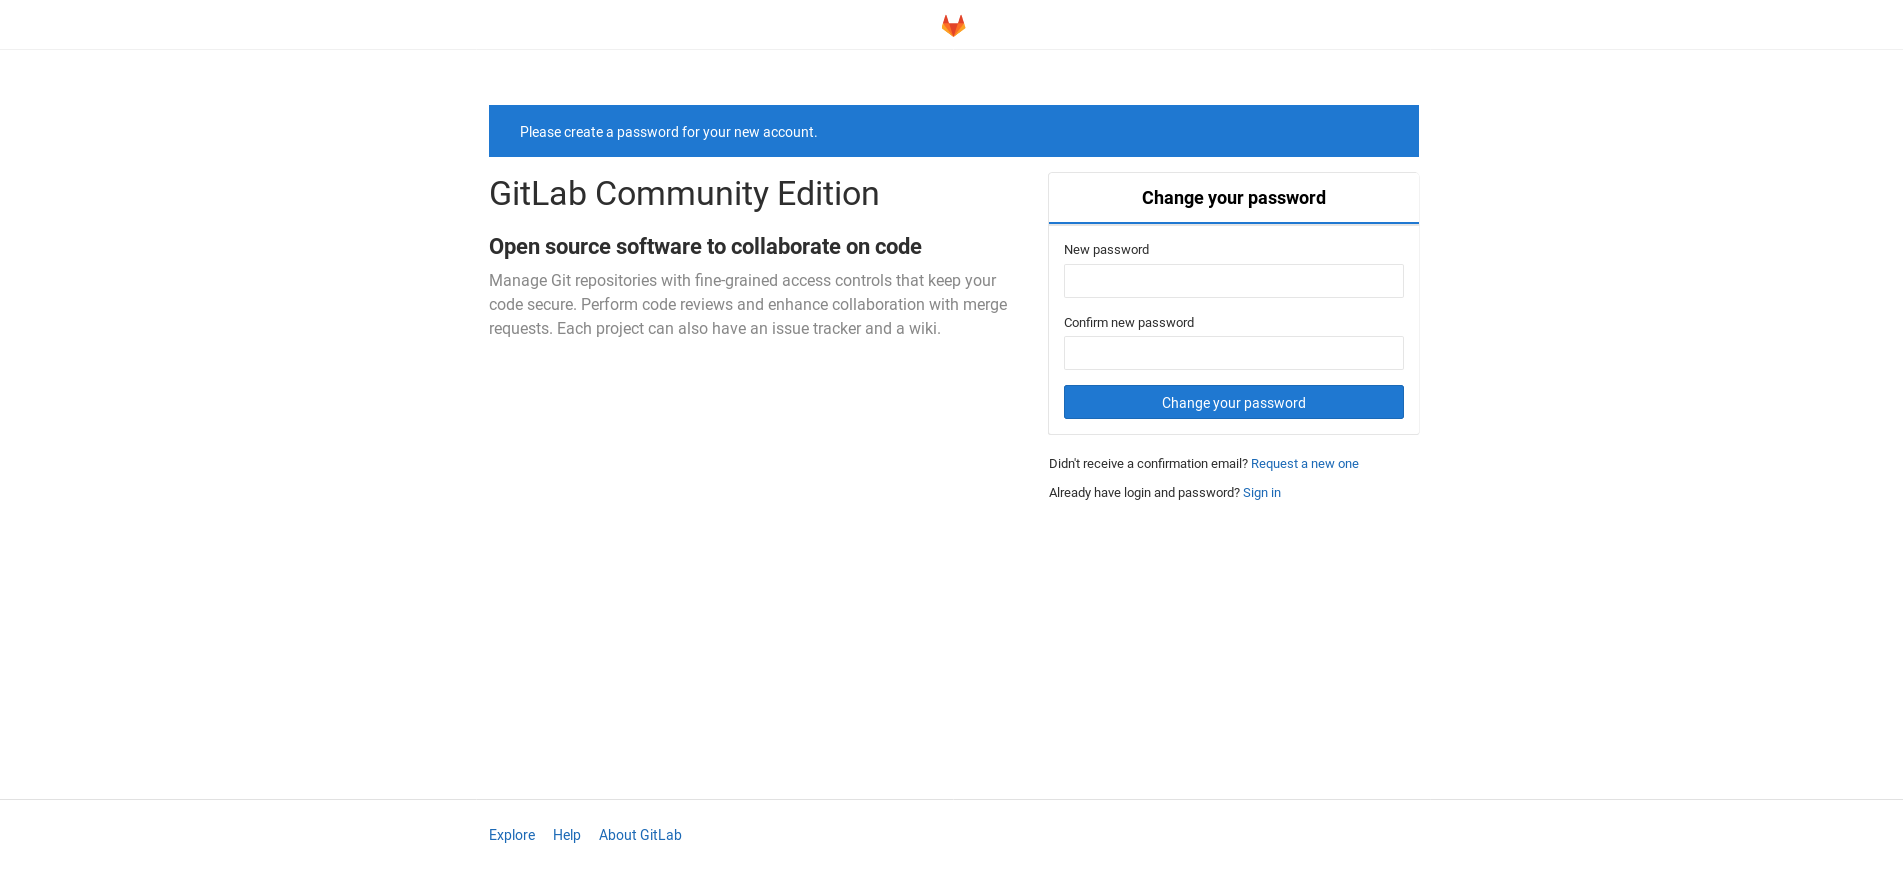
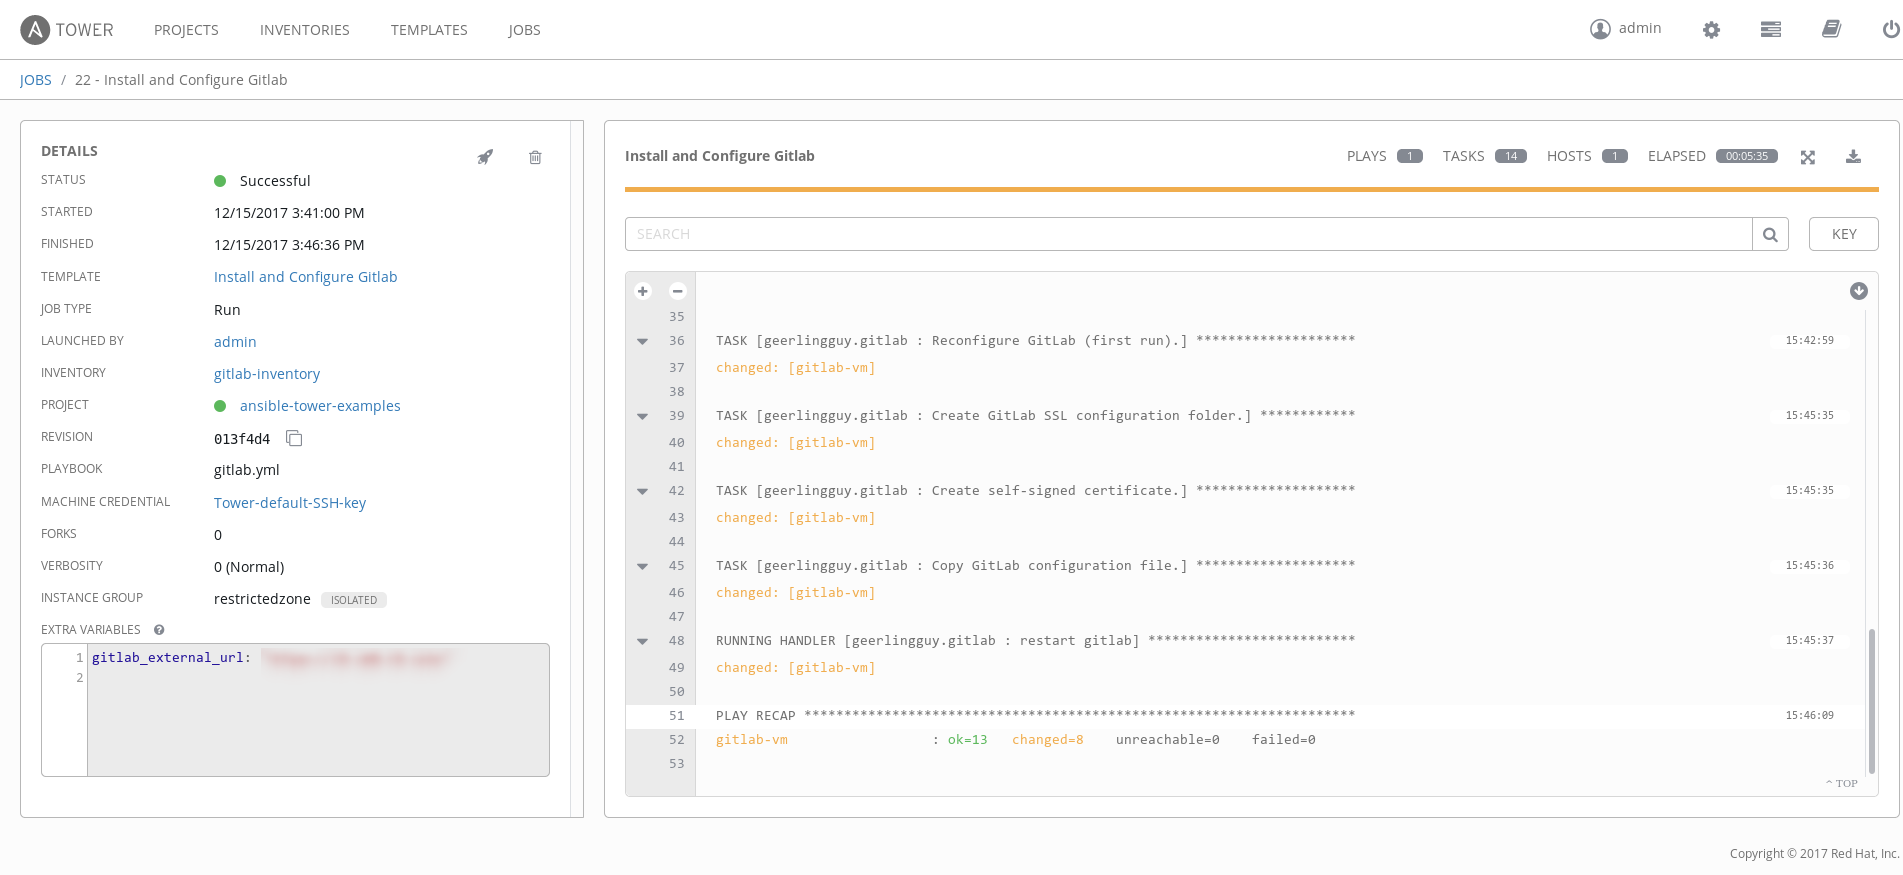 As you can see, the job completed successfully and our Gitlab Community Edition was correctly installed:
That's all for now!
PS: Are you curious about the playbook I used in this example? You can look at https://github.com/alezzandro/
Ciao
About Alessandro
 Alessandro Arrichiello is a Solution Architect for Red Hat Inc. He has a passion for GNU/Linux systems, which began at age 14 and continues today. He worked with tools for automating Enterprise IT: configuration management and continuous integration through virtual platforms. He’s now working on distributed cloud environment involving PaaS (OpenShift), IaaS (OpenStack) and Processes Management (CloudForms), Containers building, instances creation, HA services management, workflows build.
Take advantage of your Red Hat Developers membership and download Red Hat Enterprise Linux today at no cost.
Last updated: May 8, 2024