This step-by-step guide is a follow-up to the Red Hat 3scale API Management new 2.1 version announcement. As many of you will know, this new version simplifies the integration between APIcast gateway and Red Hat Single Sign-On through OpenID Connect (OIDC) for API authentication. As a result, now you can select OpenID Connect as your authentication mechanism besides API Key, App Key pair, and OAuth. Also, the on-premise version adds a new component that synchronizes the client creation on the Red Hat Single Sign-On domain.
Introduction
Like most guides of this type, this one is intended to be used ONLY for local development or just demoing the new features. By no means, it is intended to be used in a production environment as it could bypass security and/or high availability recommendations.
First, you need a running 3scale on-premise instance. I would recommend using the openshift CDK to set up a local environment that can run on your laptop or VM. If you don't have a running environment, you can follow my HOW-TO setup 3scale on-premise guide to set up one from scratch. Remember to increase the number of resources in case you're deploying Red Hat Single Sign-On (RH-SSO) in the same minishift instance. The first step allows you to set up an RH-SSO instance from scratch. If you already have a running instance, skip to section 2 - Configuring RH-SSO.
Setting up Red Hat Single Sign-On
If you don't have a running instance of Red Hat Single Sign-On or just want to set up an additional instance just for this integration follow the next steps.
- Login to the running instance using the system:admin user:
$ oc login -u system:admin --insecure-skip-tls-verify=true <your-master-url>
- If you haven't, add the JBoss image streams:
$ oc create -f https://raw.githubusercontent.com/jboss-openshift/application-templates/master/jboss-image-streams.json -n openshift
- Add the RH-SSO templates:
$ for i in {https,mysql,mysql-persistent,postgresql,postgresql-persistent}; do oc create -f https://raw.githubusercontent.com/jboss-openshift/application-templates/master/sso/sso71-$i.json -n openshift; done - Create a new project called rh-sso:
$ oc new-project rh-sso
- Create the service account and secrets for the TLS secured route:
$ oc create -f https://raw.githubusercontent.com/jboss-openshift/application-templates/ose-v1.4.7/secrets/sso-app-secret.json -n rh-sso
- Add the view role to the service accounts sso-service-account:
$ oc policy add-role-to-user view system:serviceaccount:rh-sso:sso-service-account
- Create a new app in the project processing the persistent mysql template:
$ oc new-app sso71-mysql-persistent -p HTTPS_NAME=jboss -p HTTPS_PASSWORD=mykeystorepass -p SSO_ADMIN_USERNAME=keyadmin -p SSO_ADMIN_PASSWORD=keypassword
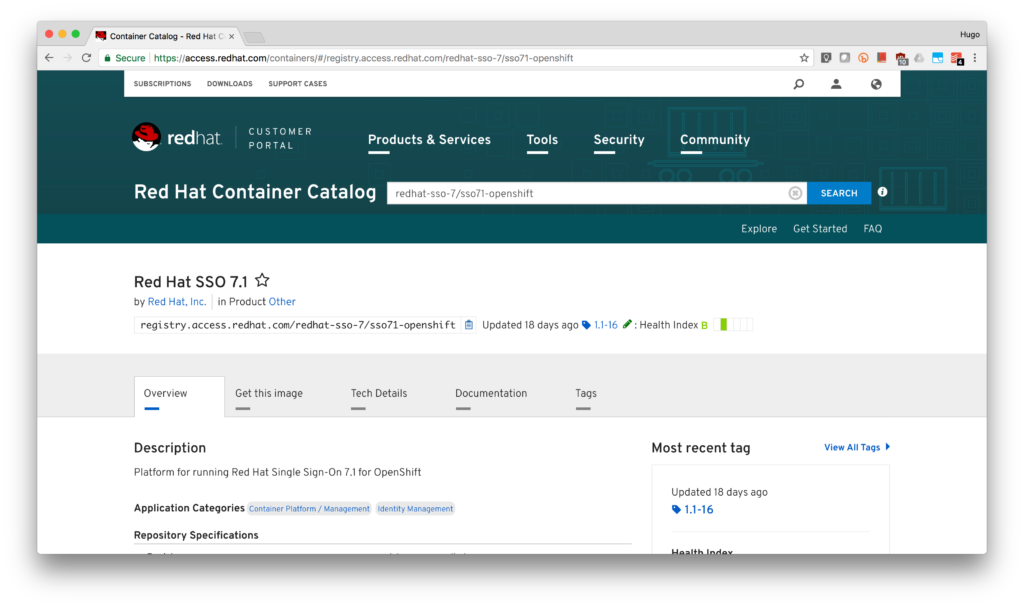
- While most of the time, there are no problems with this version, if you notice in the web console that your SSO deployment does not start, edit the deployment configuration to change the image stream with the version available at the Red Hat container catalog.

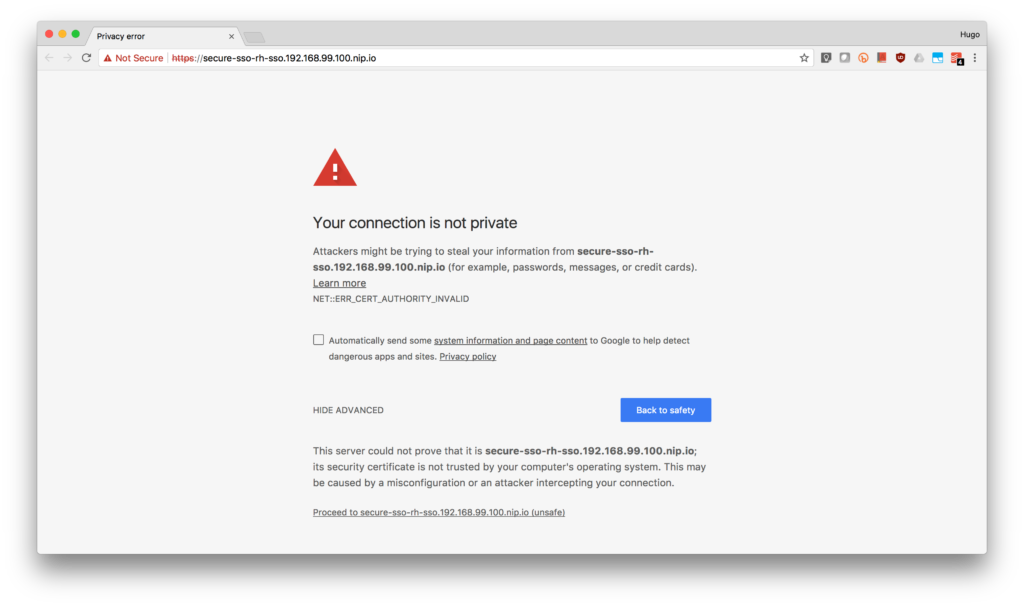
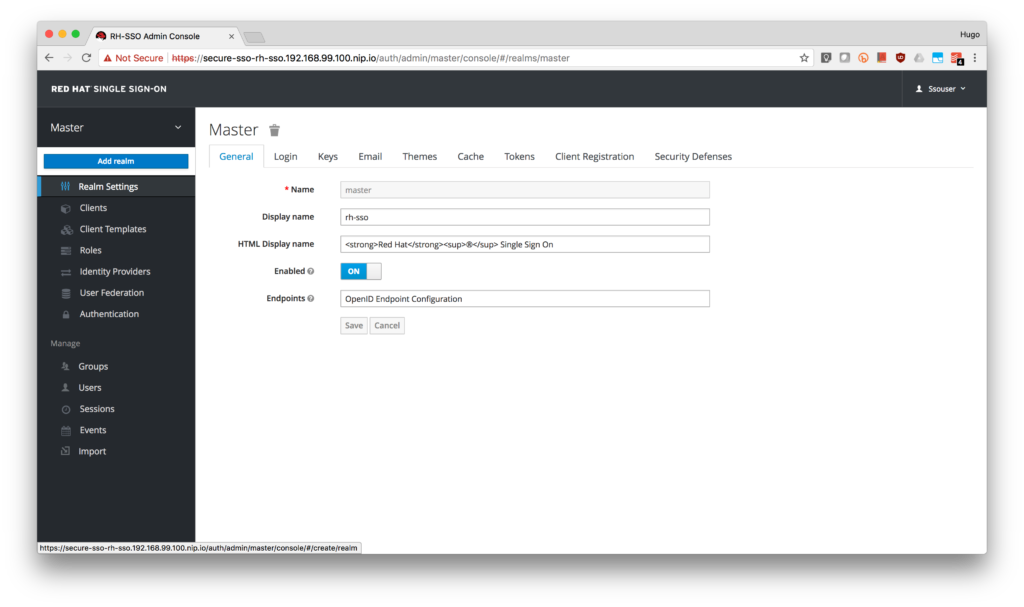
- Access from your browser to the secured route: https://secure-sso-rh-sso.<YOUR-CDK-IP>.nip.io/auth/admin/
- Accept the self-signed certificate.
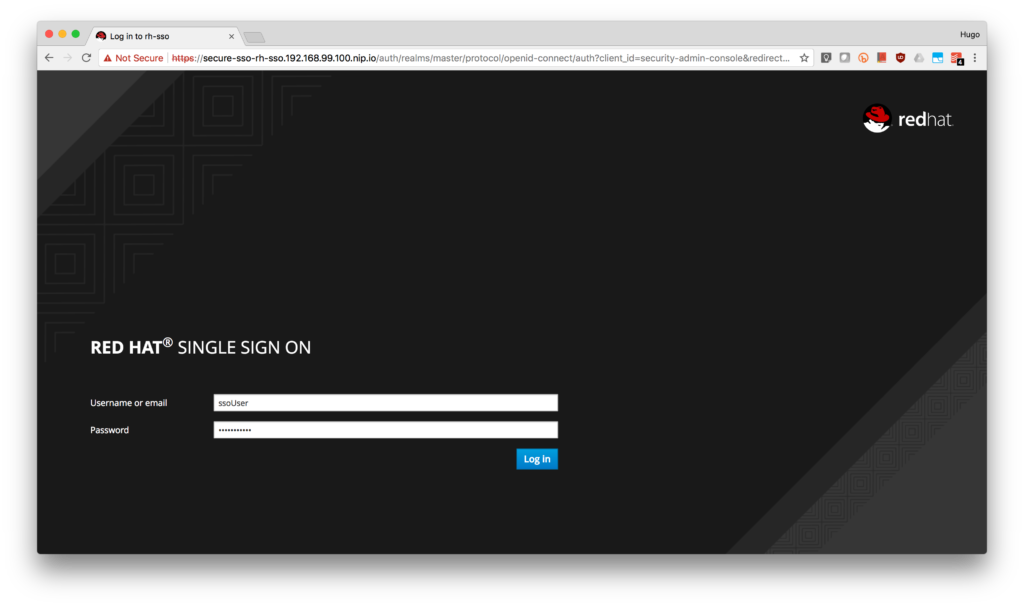
- Log in to the console using username: ssoUser and password: ssoPassword.
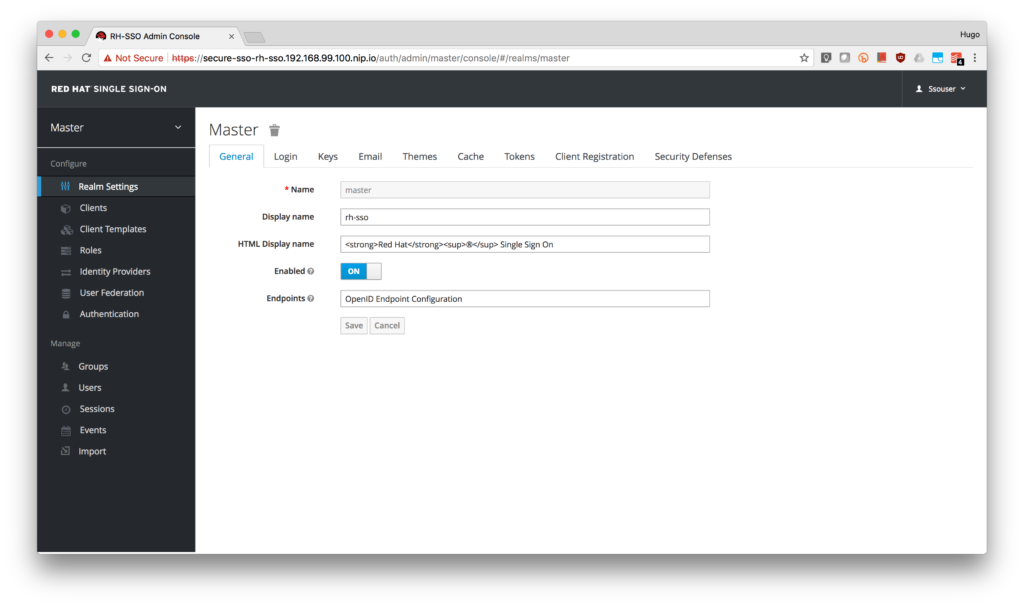
- Done! You now have a running instance of Red Hat Single Sign-On.
Configure RH-SSO for OpenId Connect
Now that you have a running RH-SSO instance, we will need to add some configuration steps to allow 3scale synchronization.
- Create a new realm named 3scale-sso.

- Disable Require SSL for the realm (to simplify the Zync connection to RH-SSO self-signed certificate) under the Login tab.
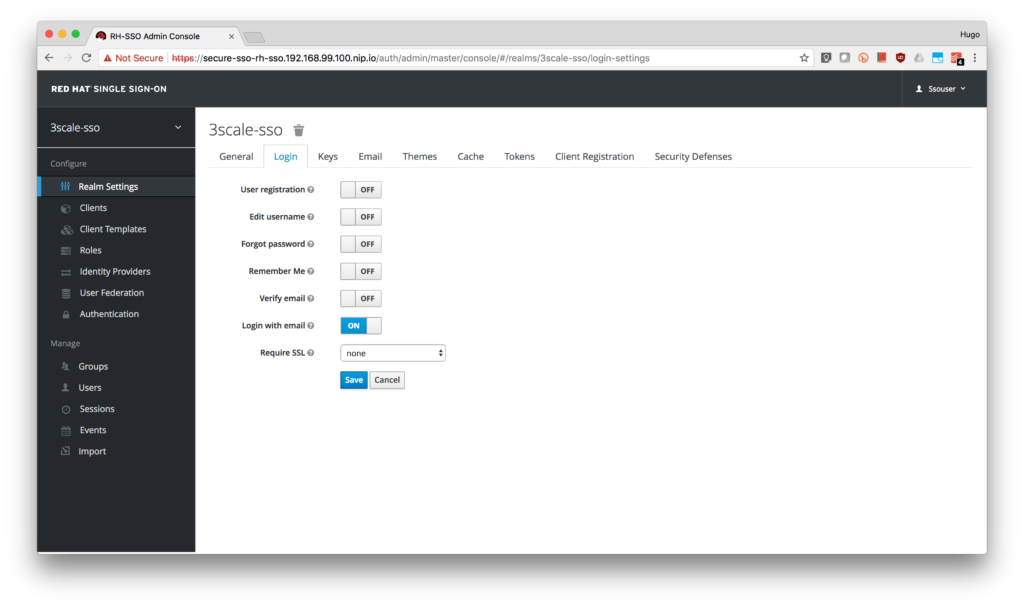
- Sign out.
- Login to the unsecured RH-SSO web console at http://sso-rh-sso.nip.io/auth/admin/ to validate it's now working without SSL.

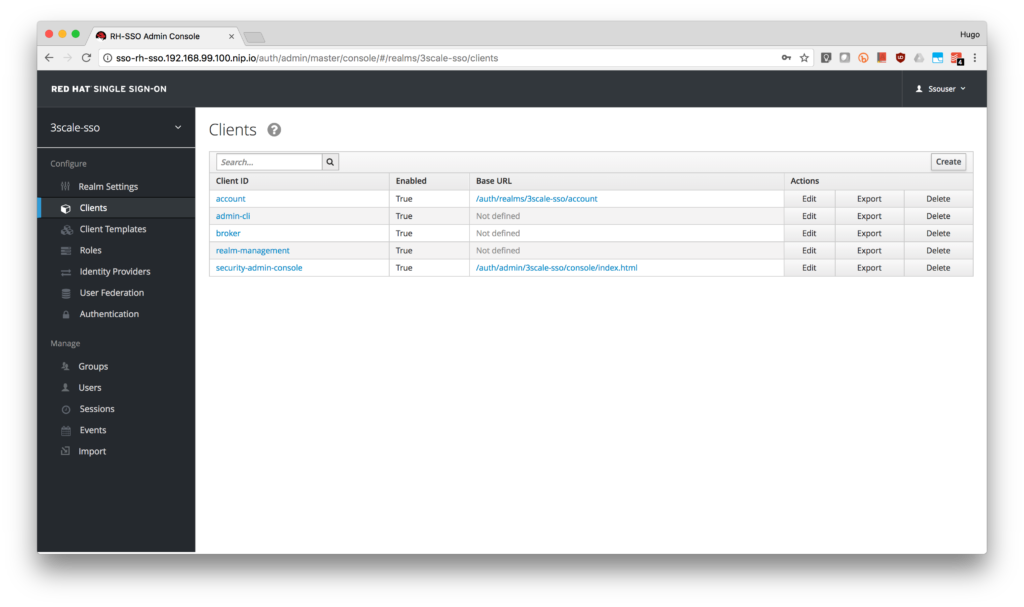
- Click on the Clients menu on the left side and click the Create button.
- Type 3scale-admin as the Client ID, select openid-connect as the Client Protocol and click on the Save button.
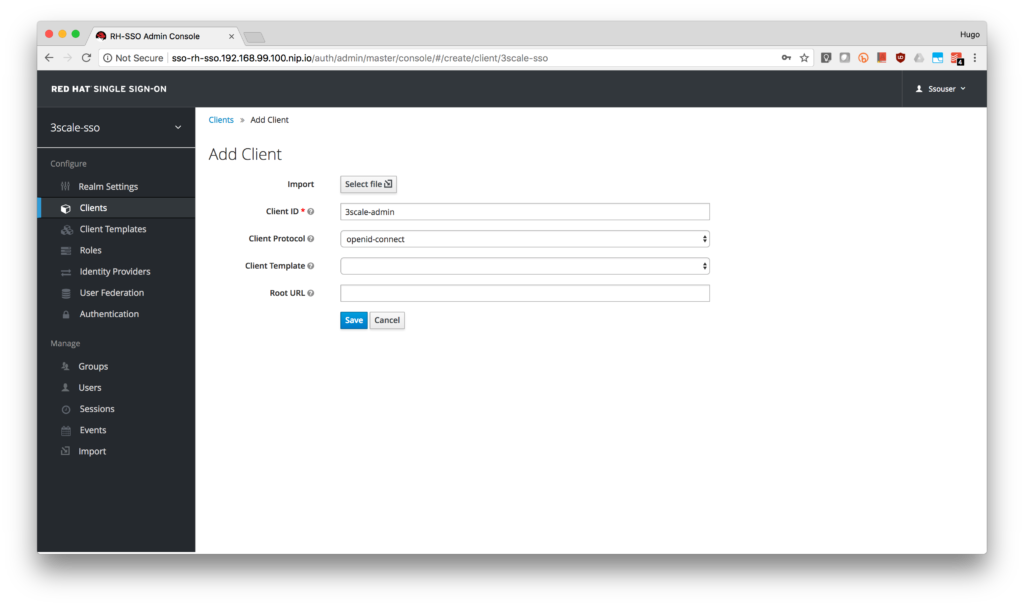
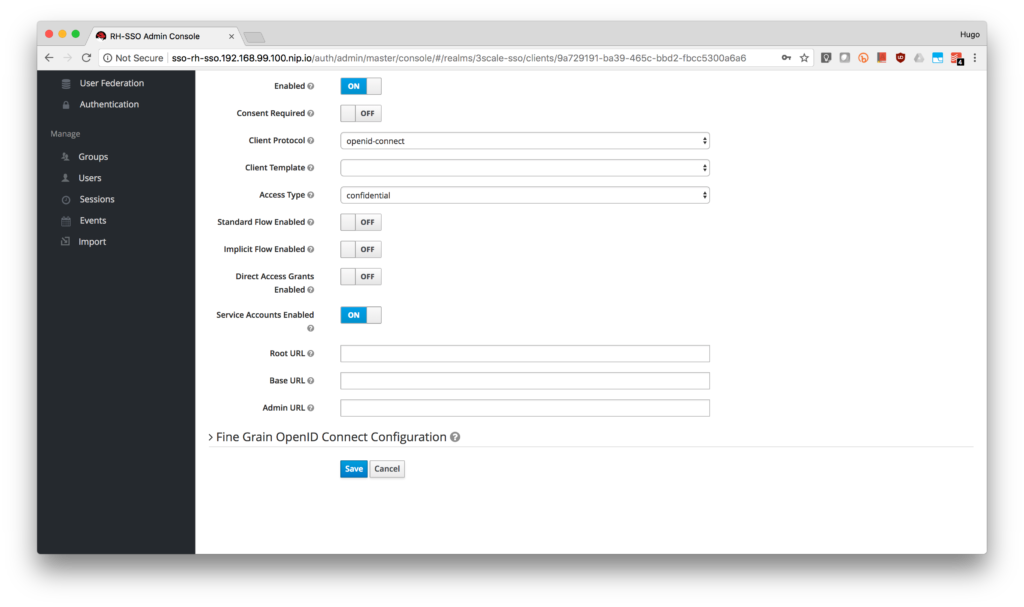
- As this will be the service account used by 3scale to perform client synchronization, in the client settings select confidential as Access Type, turn OFF Standard Flow Enabled and Direct Access Grants Enabled and turn ON Service Accounts Enabled. Finally, click the Save button.
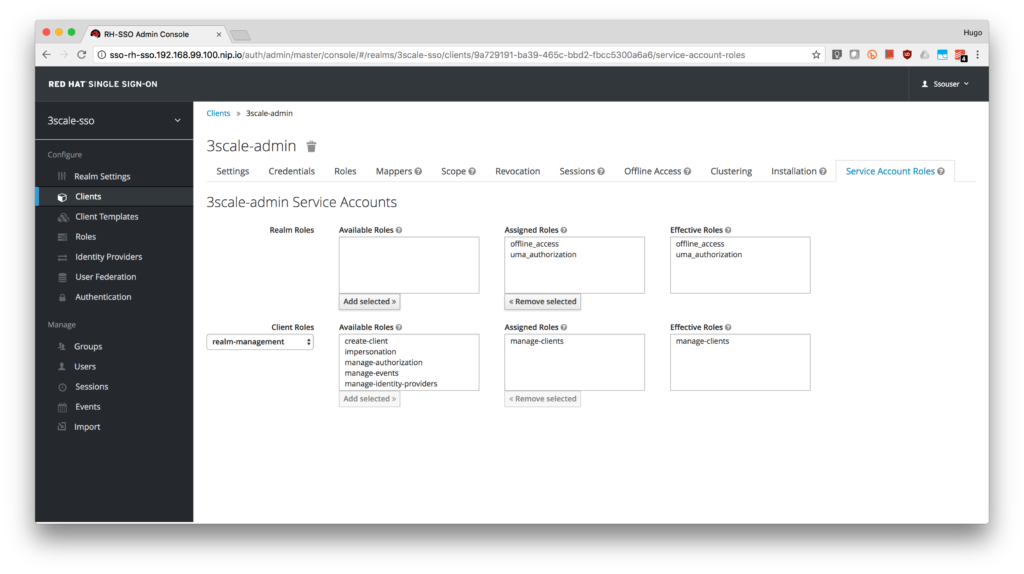
- If the page did not refresh automatically, refresh it. This will enable the Service Account Roles tab for the client. Click on it.

- Select realm-management from the Client Roles.

- Add manage-clients to the account.
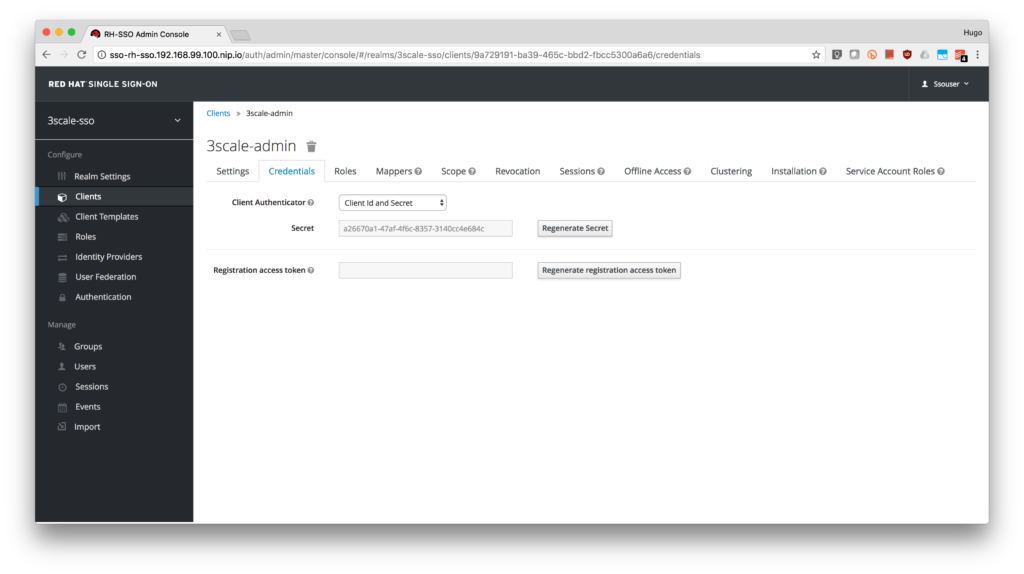
- Finally, click on the Credentials tab and take notice of the Secret. Write it down as you will use it to configure 3scale.
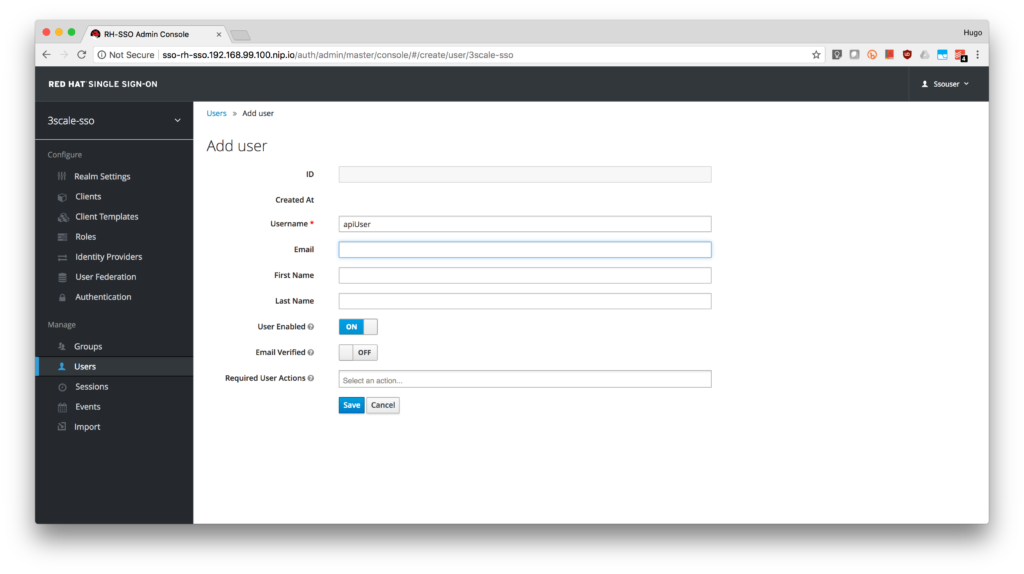
- Add a user to the realm.
- Click on the Users menu on the left side of the screen and click the Add user button.
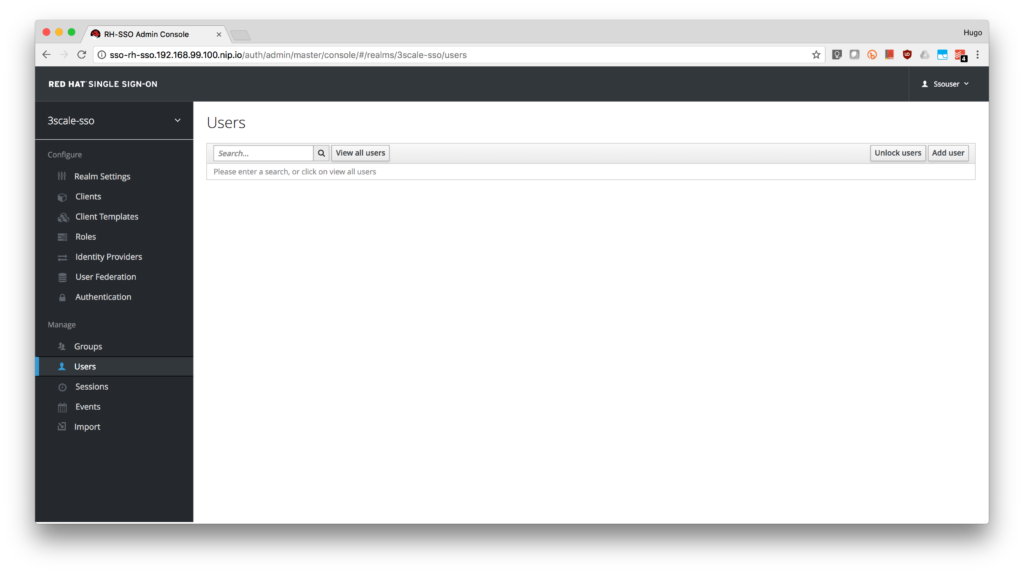
- Type apiUser as the Username. Click on the Save button.
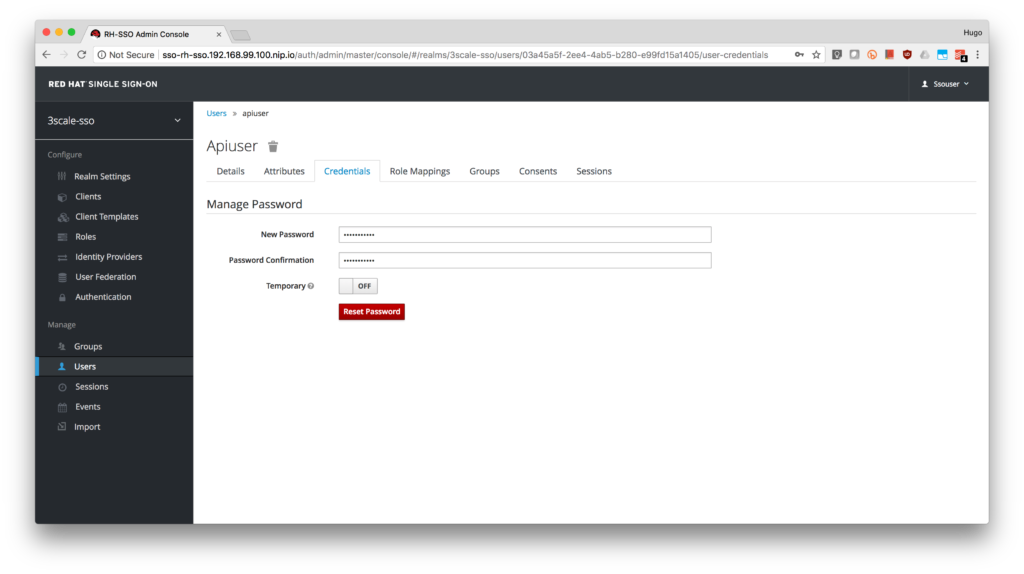
- Click on the Credentials tab to reset the password. Type apiPassword as the New Password and Password Confirmation. Turn OFF the Temporary to avoid the password reset at the next login.
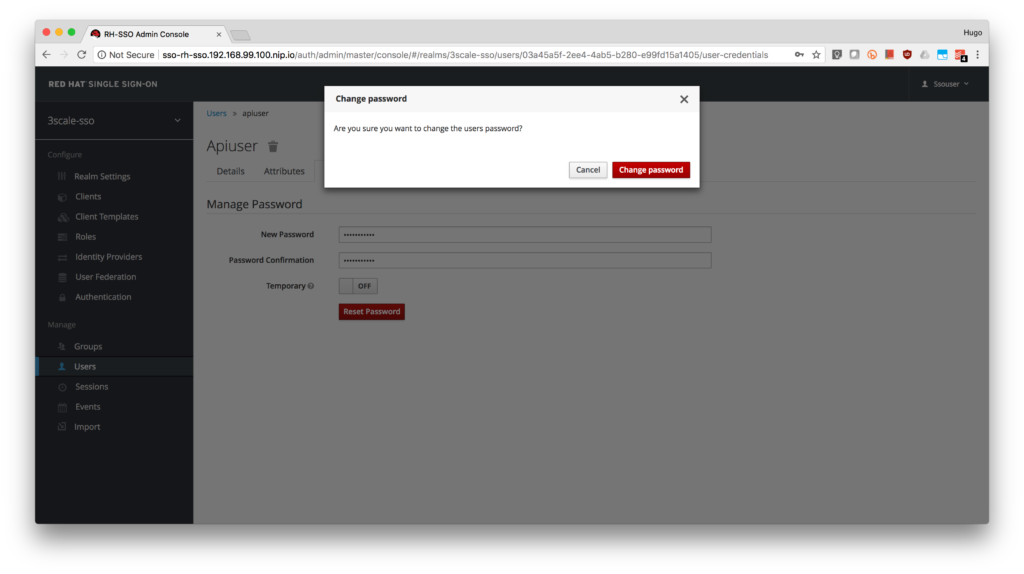
- Click on the Change password button in the pop-up dialog.
- Done! Now you have a user to test your integration.
- Click on the Users menu on the left side of the screen and click the Add user button.
Configure 3scale Integration
- Login to your 3scale admin portal.
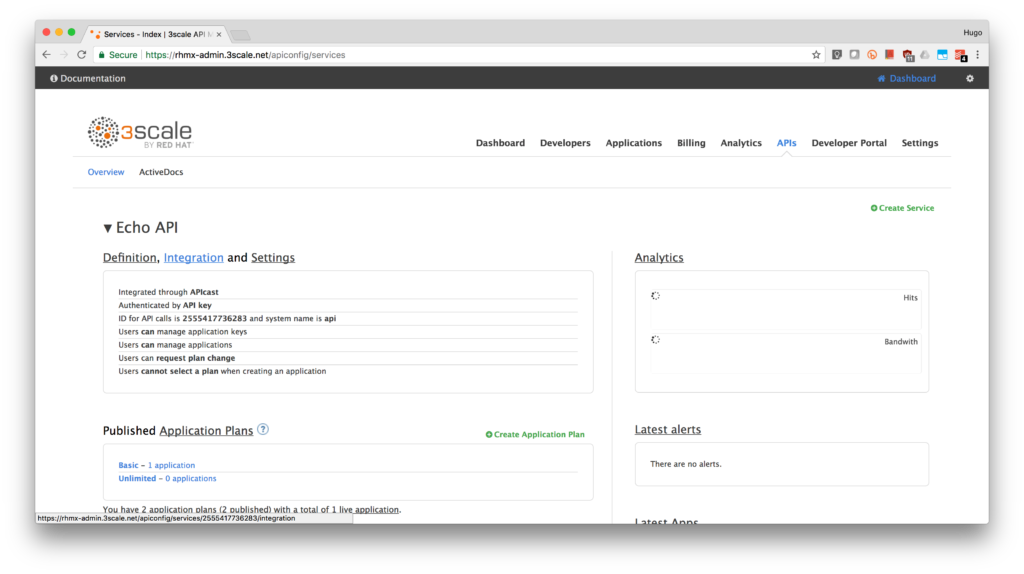
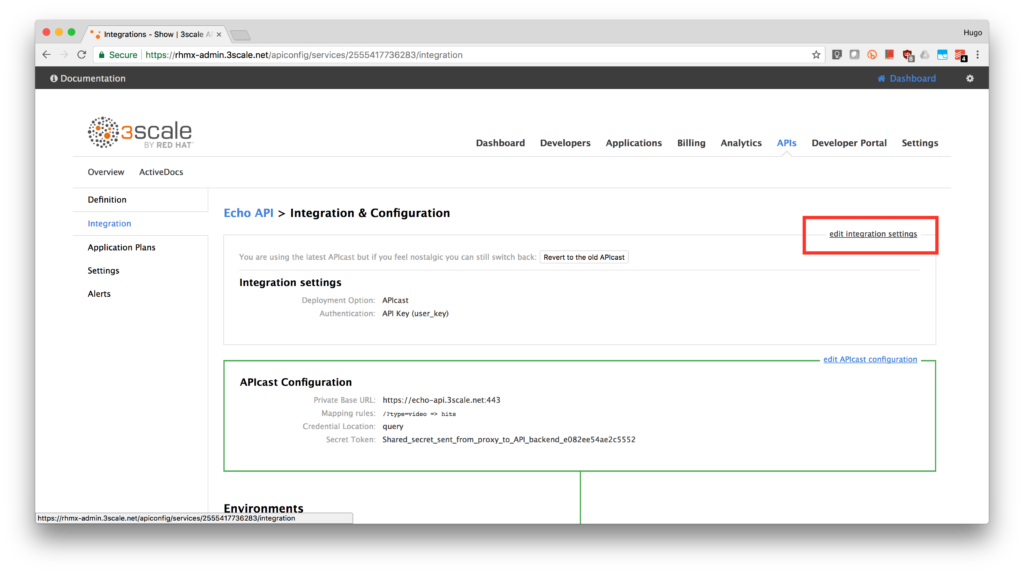
- Select the service you want to enable OpenId Connect integration with RH-SSO. Click on the APIs tab, select the Service and click on the Integration link. We are using the default API.
-
On that page, click on edit integration settings.
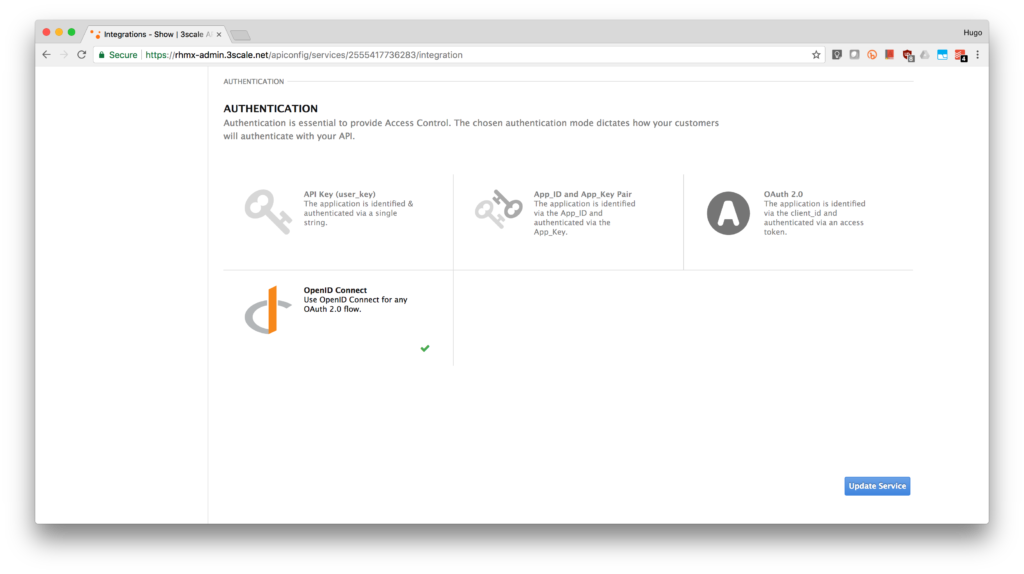
- Under the Authentication deployment options, select OpenID Connect. Click on the Update Service button.
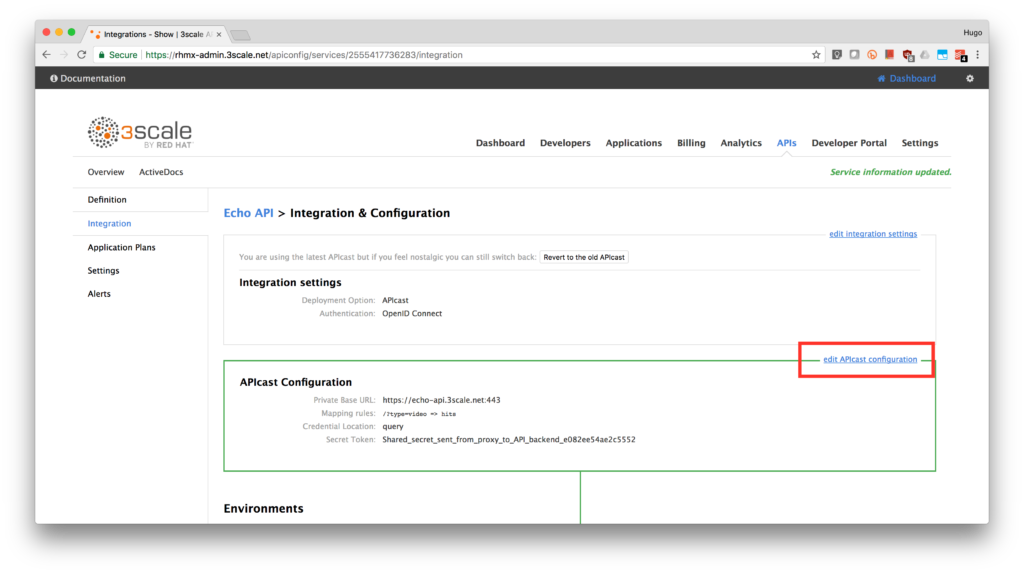
- Back in the service integration, click on the edit APIcast configuration.
- Expand the authentication options by clicking Authentication Settings.
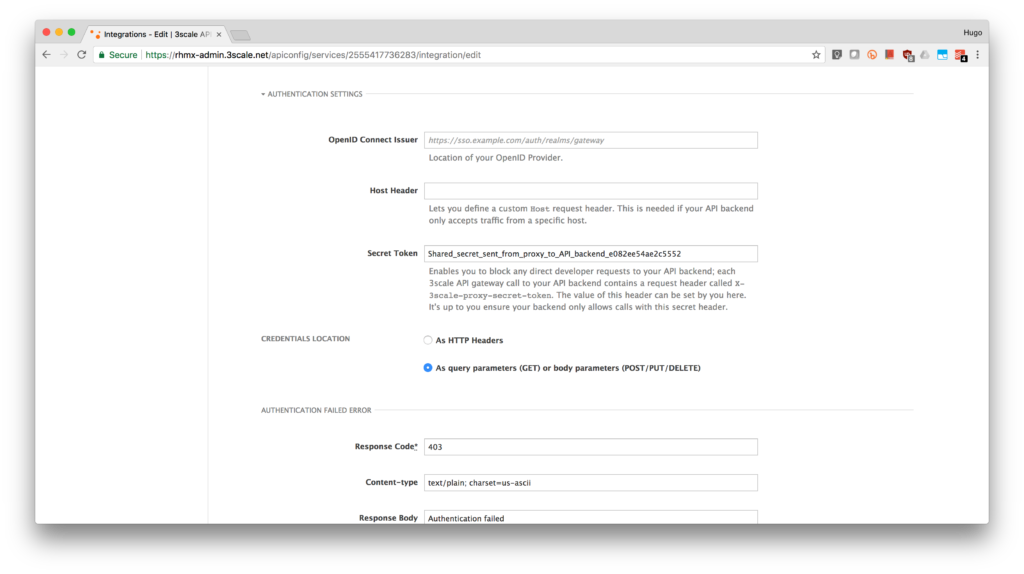
- In the OpenID Connect Issuer field, enter your previously noted client credentials with the URL of your RH-SSO server.
http://3scale-admin:<CLIENT-SECRET>@sso-rh-sso.<YOUR-CDK-IP>.nip.io/auth/realms/3scale-sso
- Finally, click on the Update Staging Environment button.
- (OPTIONAL) Promote to Production by clicking the Promote to Production button.
- Create a new application so 3scale can synchronize it with RH-SSO:
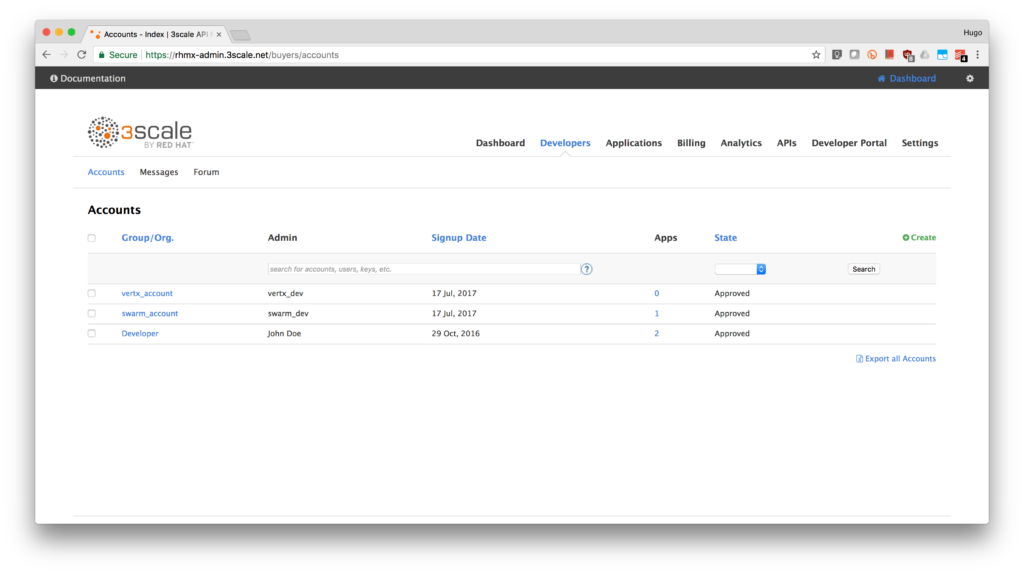
- Go to the Developers tab and click on Developer.
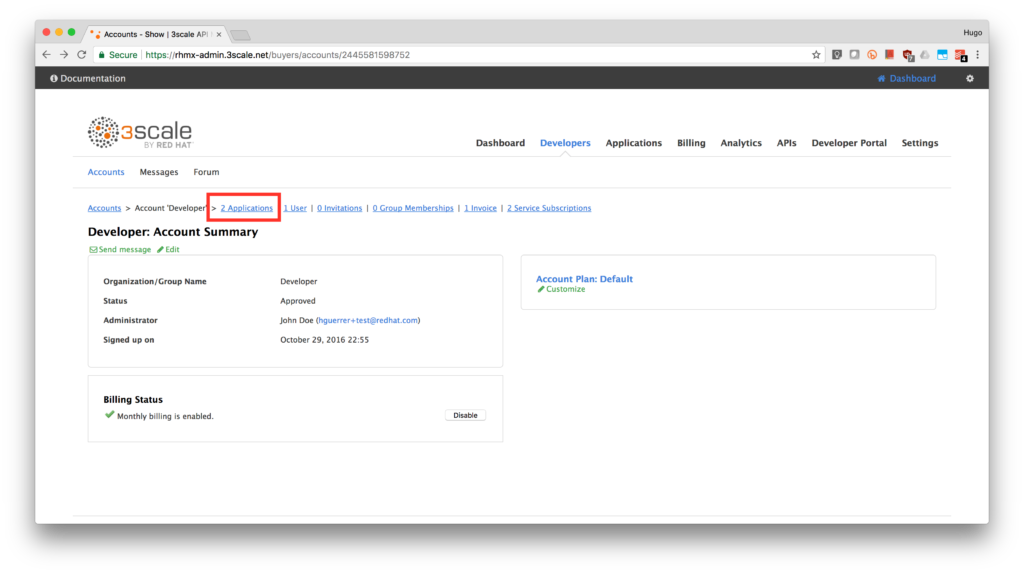
- Click on the Applications link.
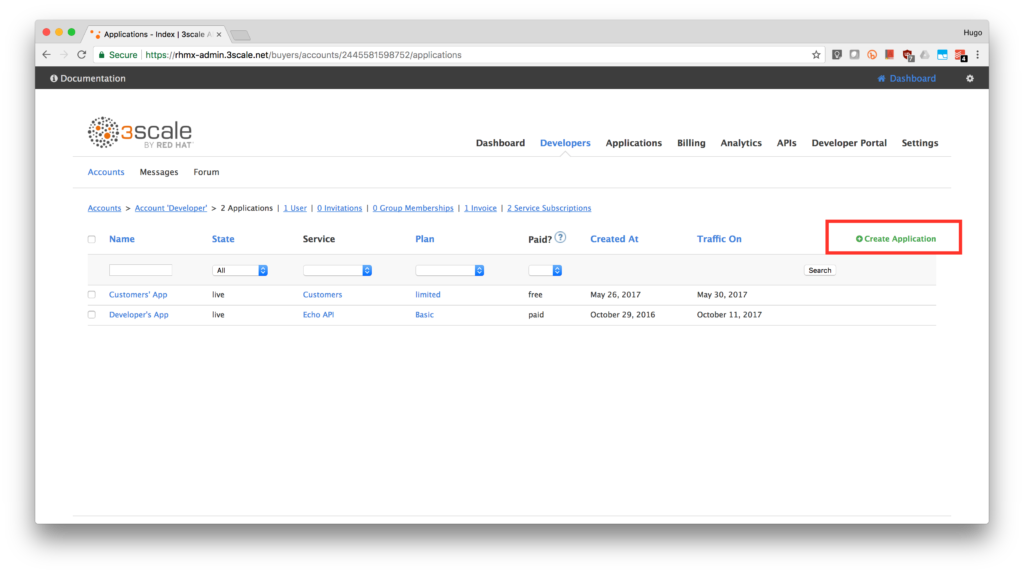
- Click on Create Application link.
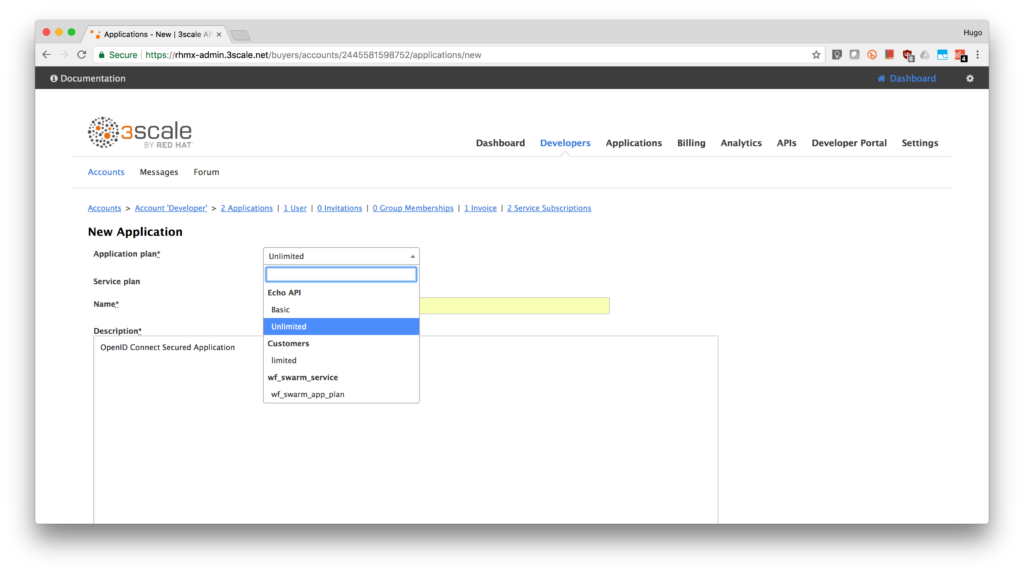
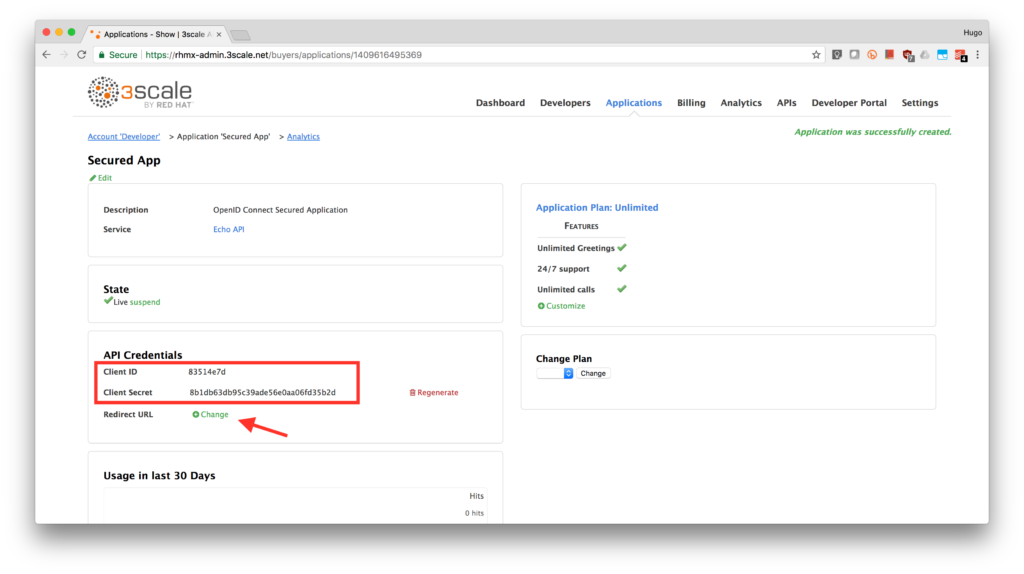
- Select an application plan from the service you are securing. In our case is the Echo API. Type Secure App in the Name field. Type OpenID Connect Secured Application in the Description box. Finally, click on the Create Application button.
- Note the API Credentials. Write them down as you will need the Client ID and the Client Secret to test your integration. Click on the Change link from Redirect URL.
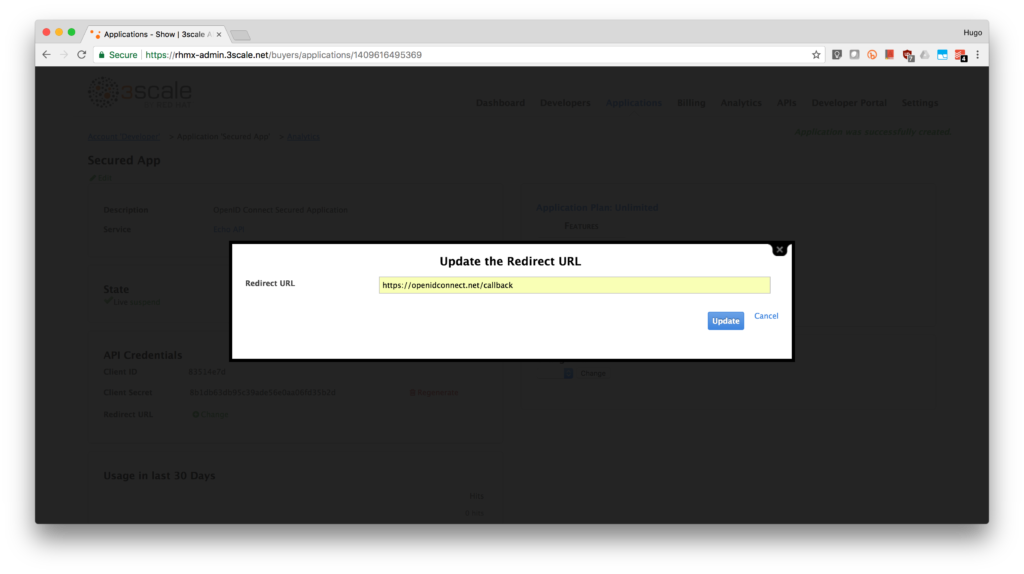
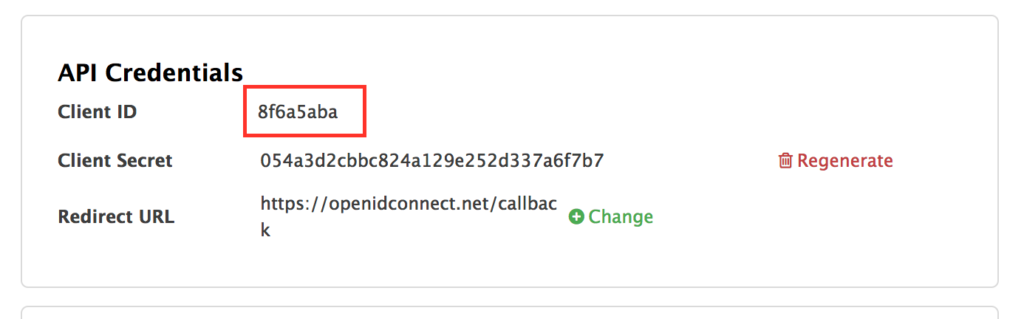
- We will use the Postman to test our integration so we will fill in the callback information with a fixed link. Type in https://openidconnect.net/callback in the Redirect URL field. Click on the Update button.
- Congratulations! You have now an application to test your OpenId Connect integration.
- Go to the Developers tab and click on Developer.
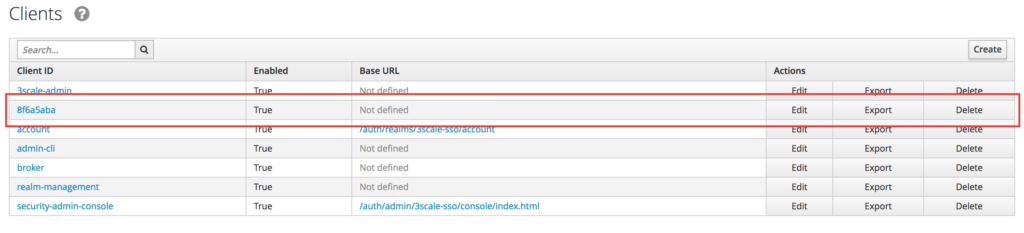
- Login to the RH-SSO console if you are not there already and click on the Clients menu. Now you can check that 3scale zync component creates a new Client in RH-SSO. This new Client has the same ID as the Client ID from the 3scale admin portal.
Test the integration
After checking that our application client is already created in RH-SSO, we can go ahead and test the integration using Postman.
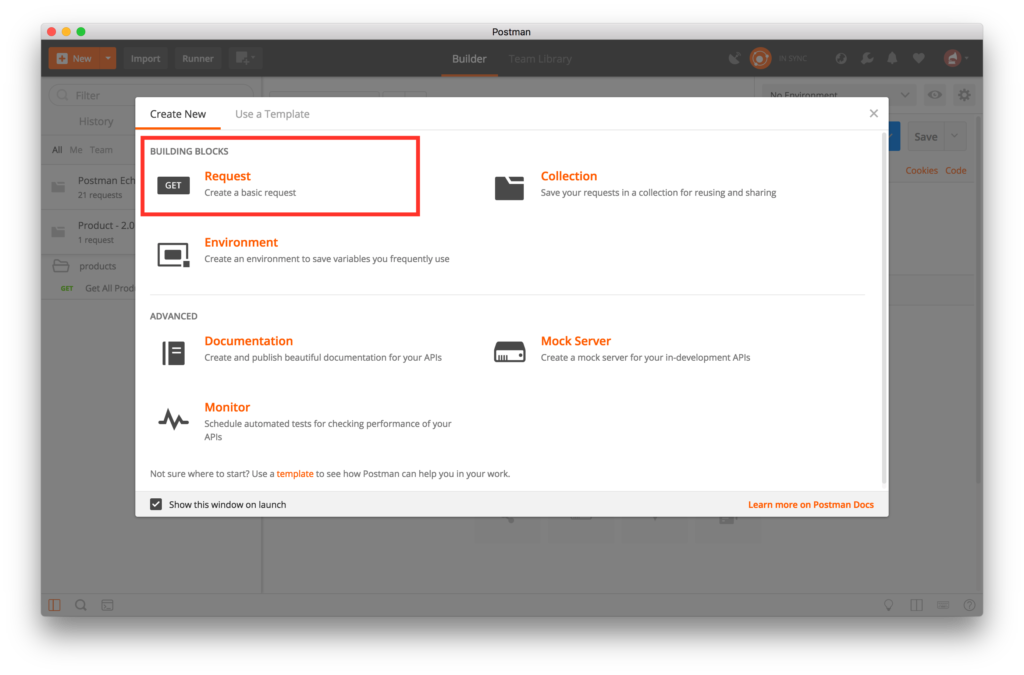
- Open Postman and click on create a new Request.
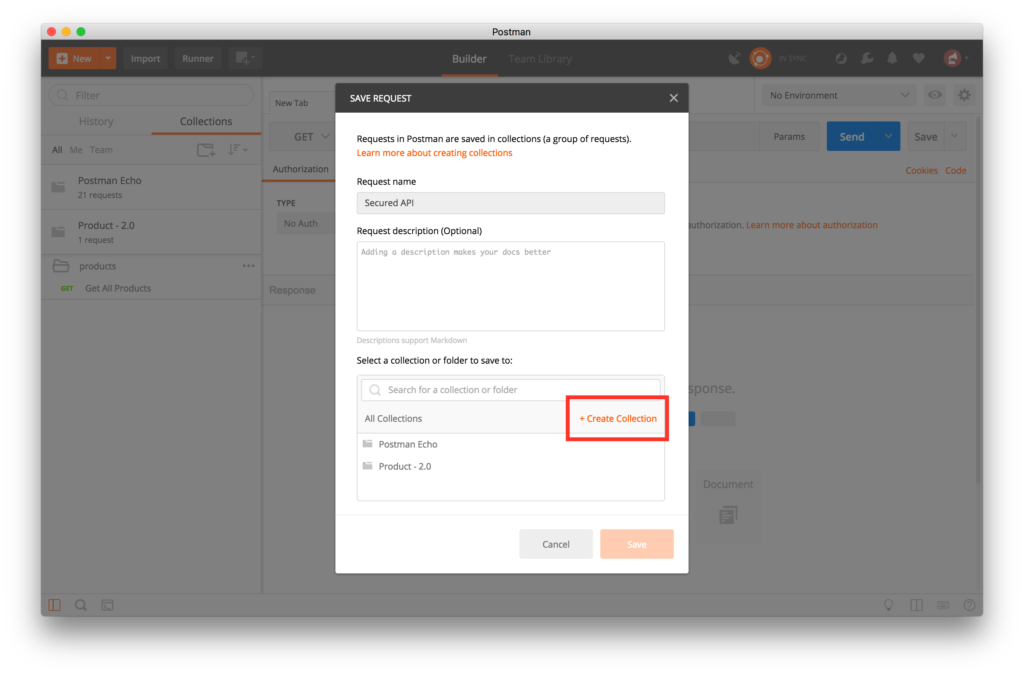
- Type Secure API in the Request Name field. Click on + Create Collection button.
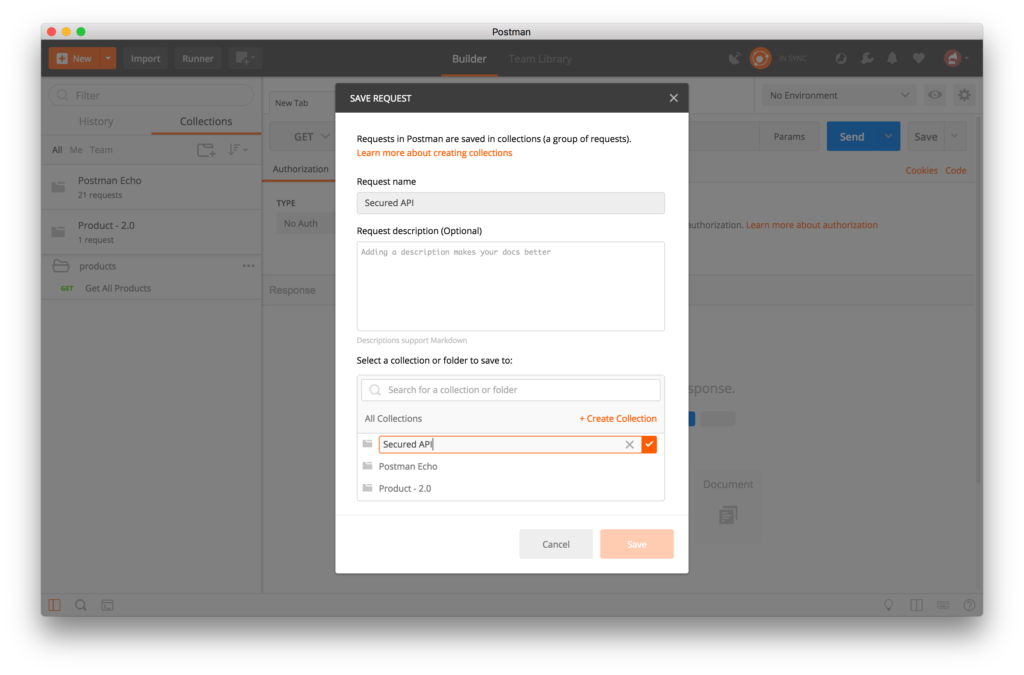
- Type Secure API Collection in the editable field. Click on the checkmark.
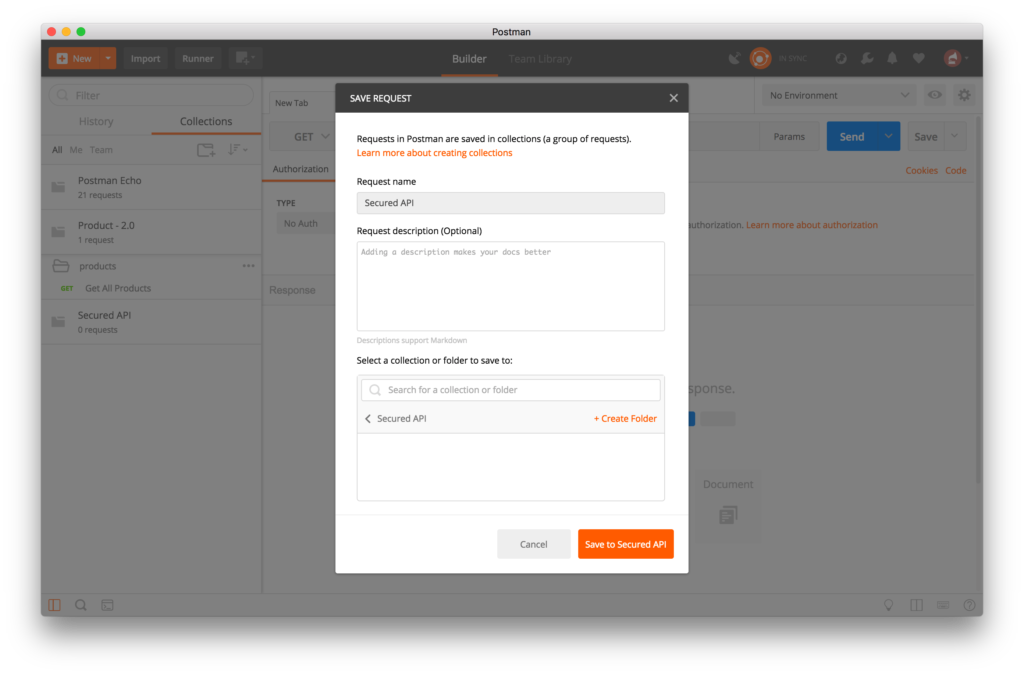
- Click on Save to Secure API Collection button.
- Select OAuth 2.0 from the Authorization TYPE combobox.
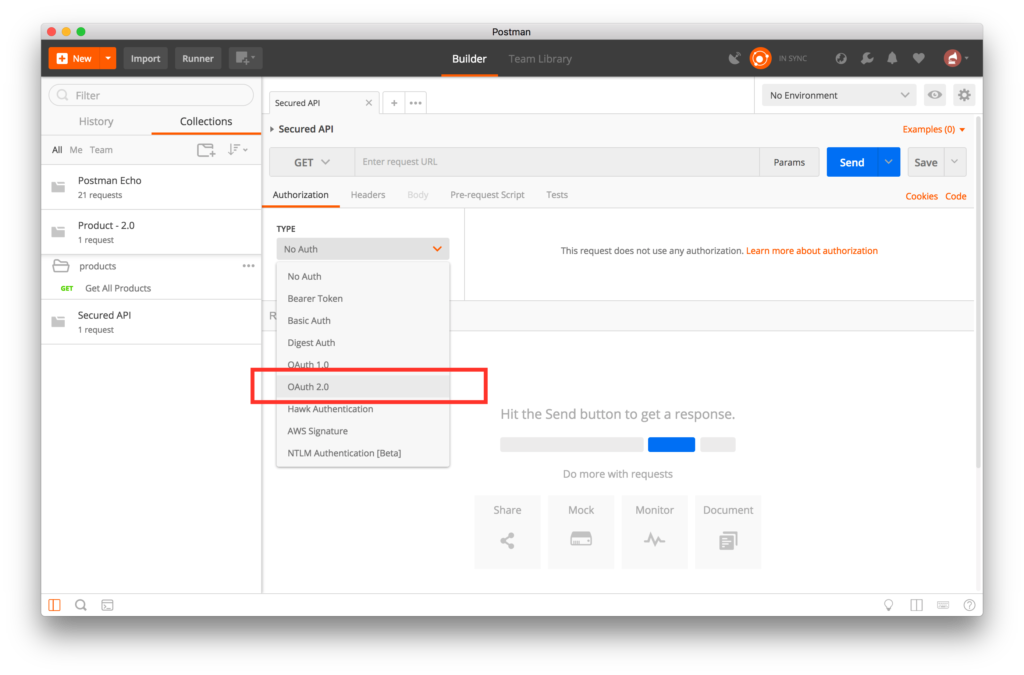
- Click on Get New Access Token button.
- Fill in the settings configuration with the following information:
- Callback URL: https://openidconnect.net/callback
- Auth URL: http://sso-rh-sso.<YOUR-OPENSHIFT-IP>.nip.io/auth/realms/3scale-sso/protocol/openid-connect/auth
- Access Token URL: http://sso-rh-sso.<YOUR-OPENSHIFT-IP>.nip.io/auth/realms/3scale-sso/protocol/openid-connect/token
- Client ID: <YOUR-CLIENT-ID>
- Client Secret: <YOUR-CLIENT-SECRET>
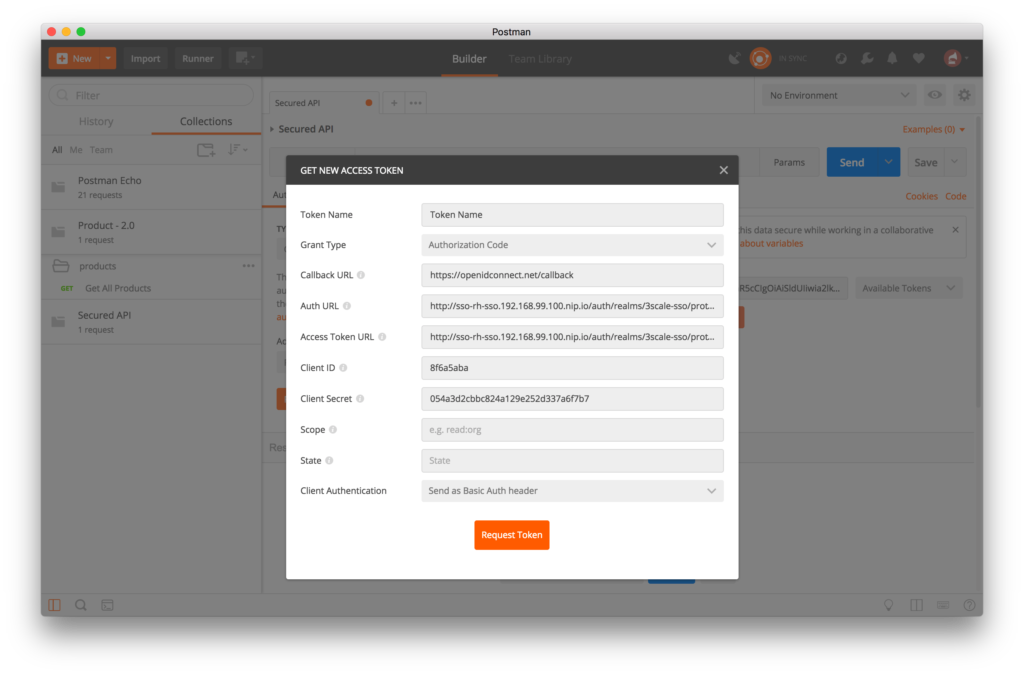
- Click on the Request Token button. You will be redirected to the RH-SSO login page. Log in with your user credentials created in the previous steps: apiUser/apiPassword.
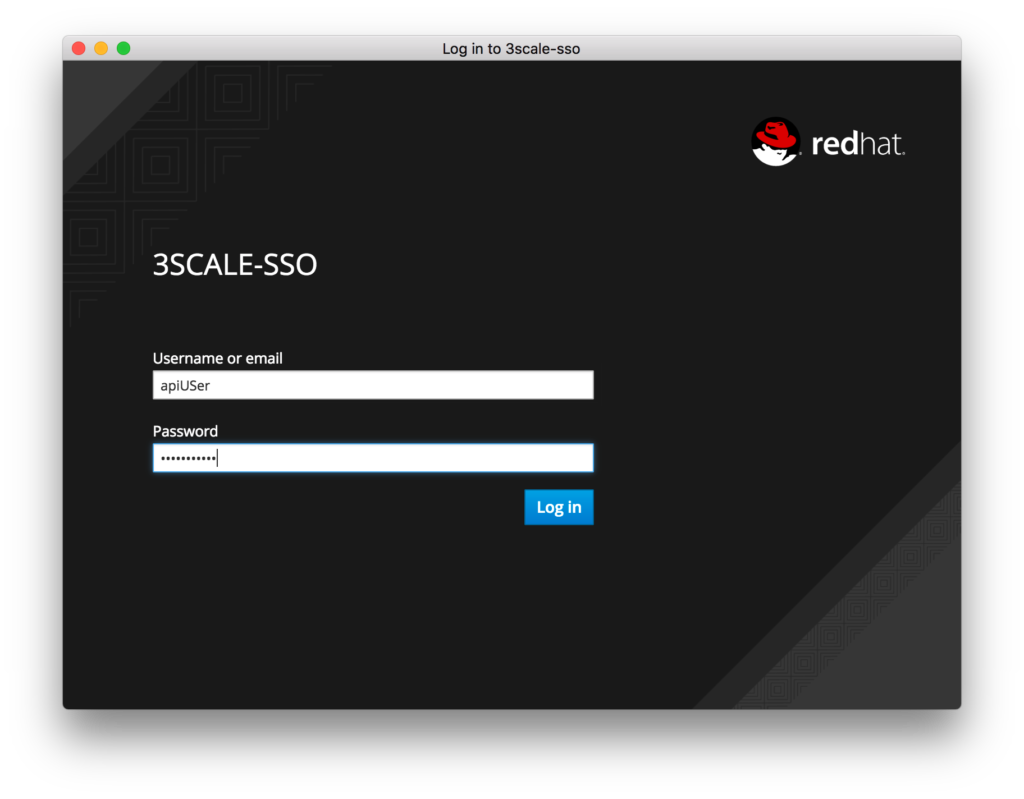
- Click on the Login button.
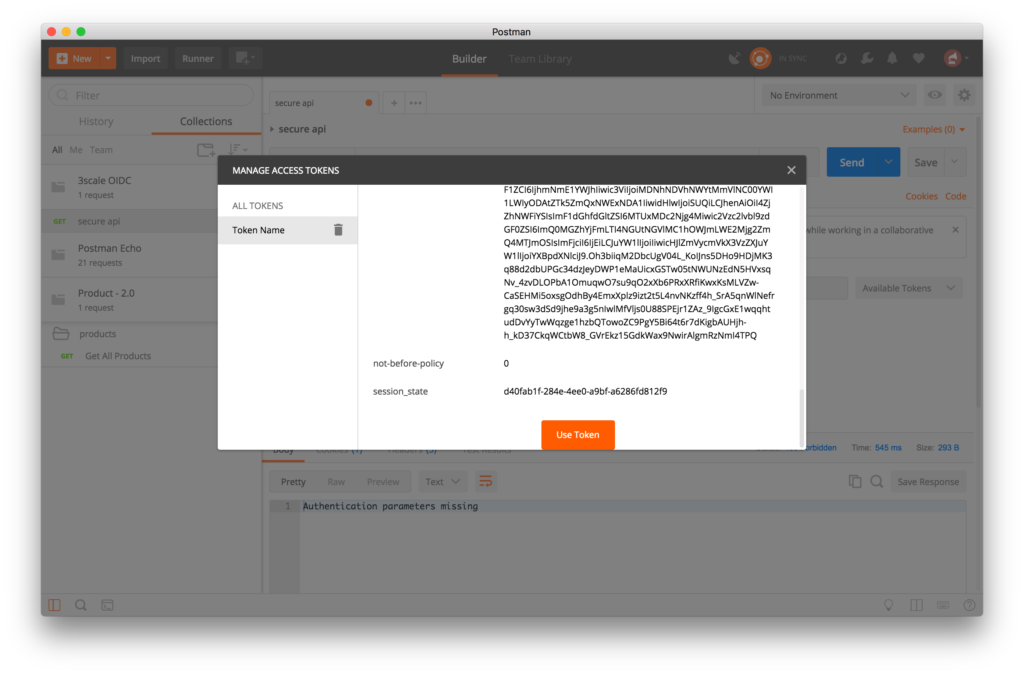
- If successful, you will see a page with the generated token. Scroll to the bottom of the page and click on the Use Token button.
- Enter the request URL in the GET field for the staging endpoint for your secured API:
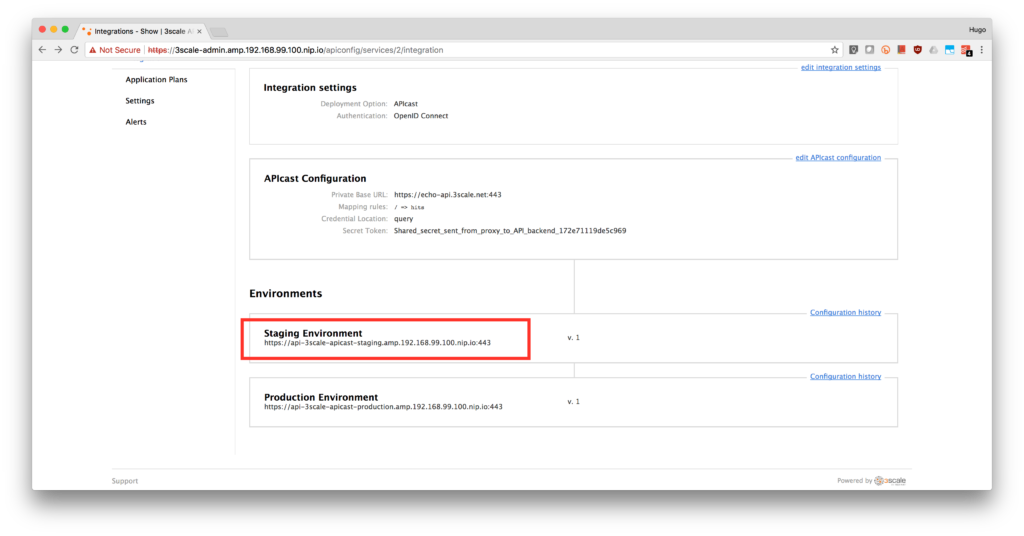
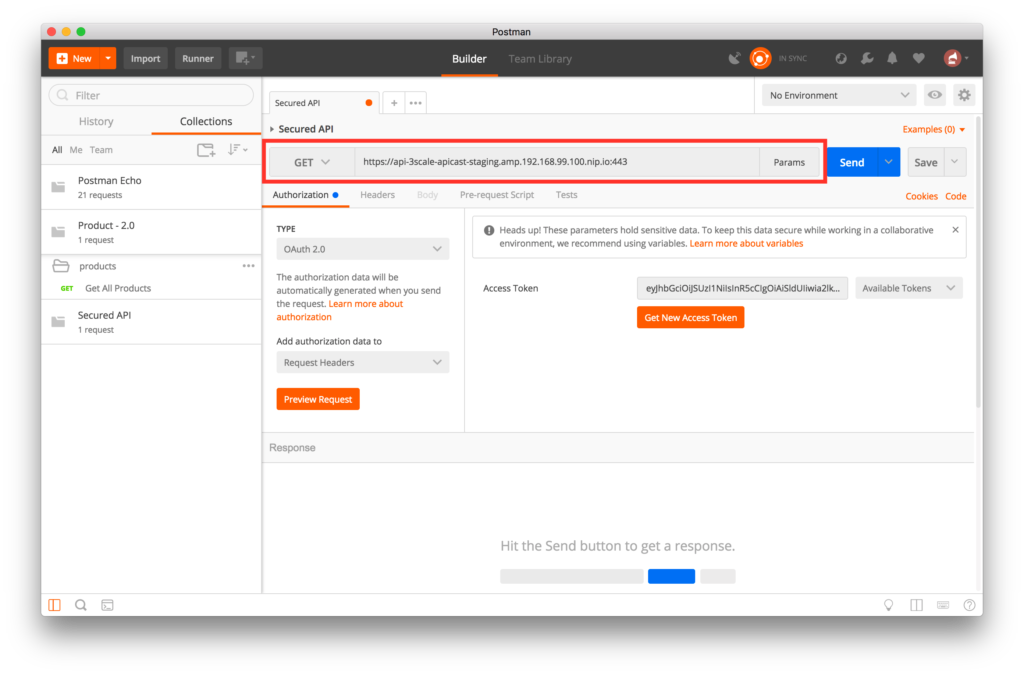
- Click on the blue Send button to execute the request using the selected token. You will see the return from the Echo API.

- If your token has expired or is incorrect, you will get an Authorization error.
- Congratulations, your API is now secured using 3scale API Management OpenID Connect integration.
Next Steps
Now that you can secure your API using three-leg authentication with Red Hat Single Sign-On, you can leverage the current assets of your organization like current LDAP identities or even federate the authentication using other IdP services.
For more information about Single Sign-On, you can check its page.
For insights of 3scale API management, you can review the following link.
If you know the basic commands of Linux then download the Advanced Linux Commands Cheat Sheet, this cheat sheet can help you take your skills to the next level.
Last updated: November 2, 2023