Containerization technology is fundamentally changing the way applications are packaged and deployed. The ability to create a uniform runtime that can be deployed and scaled is revolutionizing how many organizations develop applications. Platforms such as OpenShift also provide additional benefits such as service orchestration through Kubernetes and a suite of tools for achieving continuous integration and continuous delivery of applications. However, even with all of these benefits, developers still need to be able to utilize the same patterns they have used for years in order for them to be productive. For Java developers, this includes developing in an environment that mimics production and the ability to utilize common development tasks, such as testing and debugging running applications. To bridge the gap developers may face when creating containerized applications, the Red Hat Container Development Kit (CDK) can be utilized to develop, build, test and debug running applications.
Red Hat’s Container Development Kit is a pre-built container development environment that enables developers to create containerized applications targeting OpenShift Enterprise and Red Hat Enterprise Linux. Once the prerequisite tooling is installed and configured, starting the CDK is as easy as running the “vagrant up” command. Developers immediately have a fully containerized environment at their fingertips.
More information on the Red Hat Container Development can be found Red Hat Developers, and on the Red Hat Customer Portal
One of the many ways to utilize the CDK is to build, run, and test containerized applications on OpenShift. Java is one of the frameworks that can be run on OpenShift, and these applications can be run in a traditional application server, such as JBoss, as well as in a standalone fashion. Even as runtime methodologies change, being able to debug running applications to validate functionality remains an important component of the software development process. Debugging a remote application in Java is made possible through the use of the Java Debug Wire Protocol (JDWP). By adding a few startup arguments, the application can be configured to accept remote connections, for example, from an Integrated Development Environment (IDE) such as Eclipse. In the following sections, we will discuss how to remotely debug an application deployed to OpenShift running on the CDK from an IDE.
Using Red Hat JBoss Developer Studio to Connect to OpenShift
Note: Both Red Hat JBoss Developer Studio or the OpenShift Command Line tools can be used when performing actions against the OpenShift API. For completeness, both of these options will be shown throughout this post when possible.
When it comes to IDE’s, developers have a range of options. Red Hat JBoss Developer Studio (DevStudio), an Eclipse based platform, is one such option and contains a number of tools pre-installed to work with applications deployed on OpenShift. The first step is to open up a new workspace in DevStudio and open the OpenShift Explorer view. Open DevStudio and create a new workspace.
Connecting to a running OpenShift cluster is accomplished in DevStudio by using the OpenShift Explorer view. If the view is not currently visible, it can be opened by navigating to the menu bar and selecting Window -> Show View -> Other…
From the Show View dialog, expand JBoss Tools and select OpenShift Explorer and hit OK.
With the view open, the instance of OpenShift running in the CDK can be connected to using the New Connection Wizard by clicking the link in the OpenShift Explorer view.
Enter the following parameters into the dialog:
- Server: https://10.1.2.2:8443
- Protocol: Basic
- Username: openshift-dev
- Password: devel
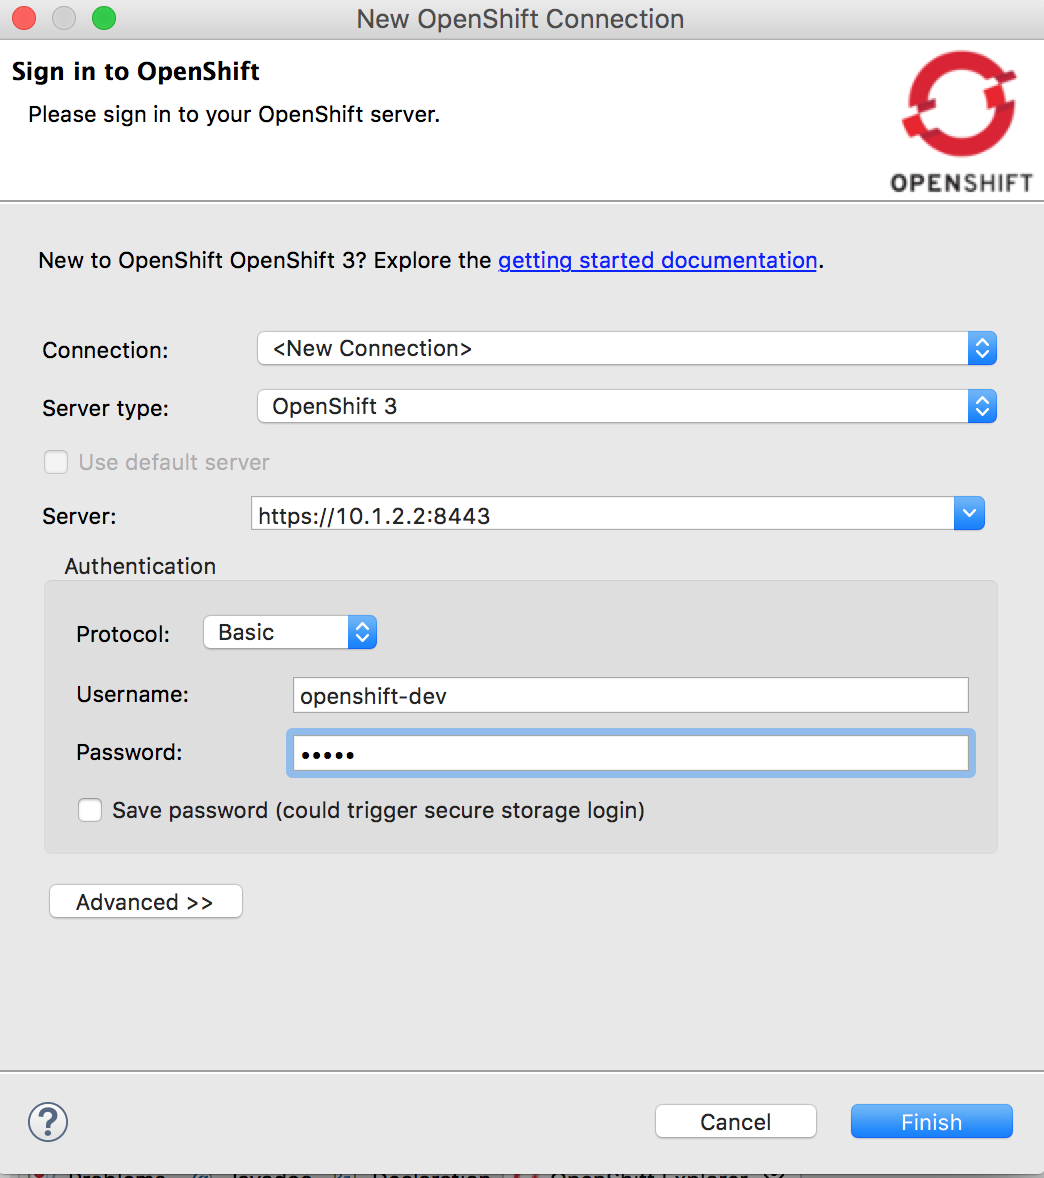
Select Finish. You will be prompted about connecting to a resource that uses a self-signed certificate. Select Yes to accept the certificate presented by OpenShift.
Once complete, a connection called "openshift-dev https://10.1.2.2:8443" will be displayed and contain all of the resources available to the openshift-dev user.

Using the Command Line Tools to Connect to OpenShift
Actions against OpenShift can also be made using the command line tools. To login to OpenShift running on the CDK, be sure the tooling is available on your machine and run the following commands to login as the openshift-dev user:
oc login –u openshift-dev –p devel –-insecure-skip-tls-verify=true https://10.1.2.2:8443
The list of resources will be displayed after a successful authentication
Building and Deploying an Application to OpenShift
With DevStudio and the command line tools connected to OpenShift, let’s deploy a Java application. The application that will be used to demonstrate remote debugging in OpenShift is called Ticket Monster, a sample application utilizing many key Java EE technologies such as JPA, CDI and JAX-RS running on JBoss that allows for searching and to simulate purchasing tickets at events at venues around the world. The source code is found in the following location:
https://github.com/jboss-developer/ticket-monster
Create an OpenShift Project
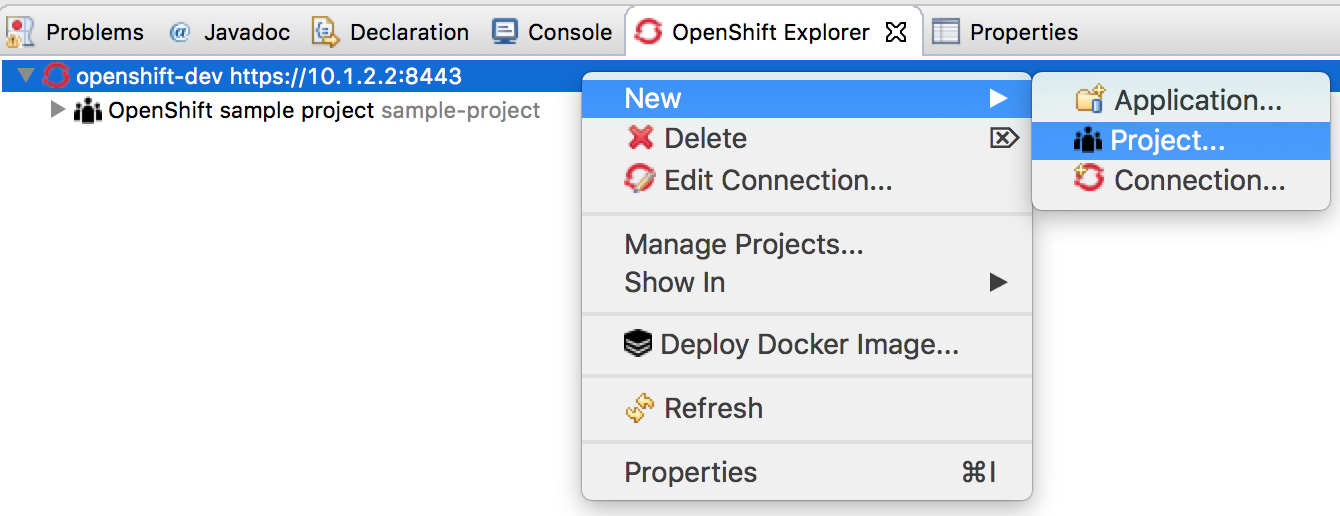
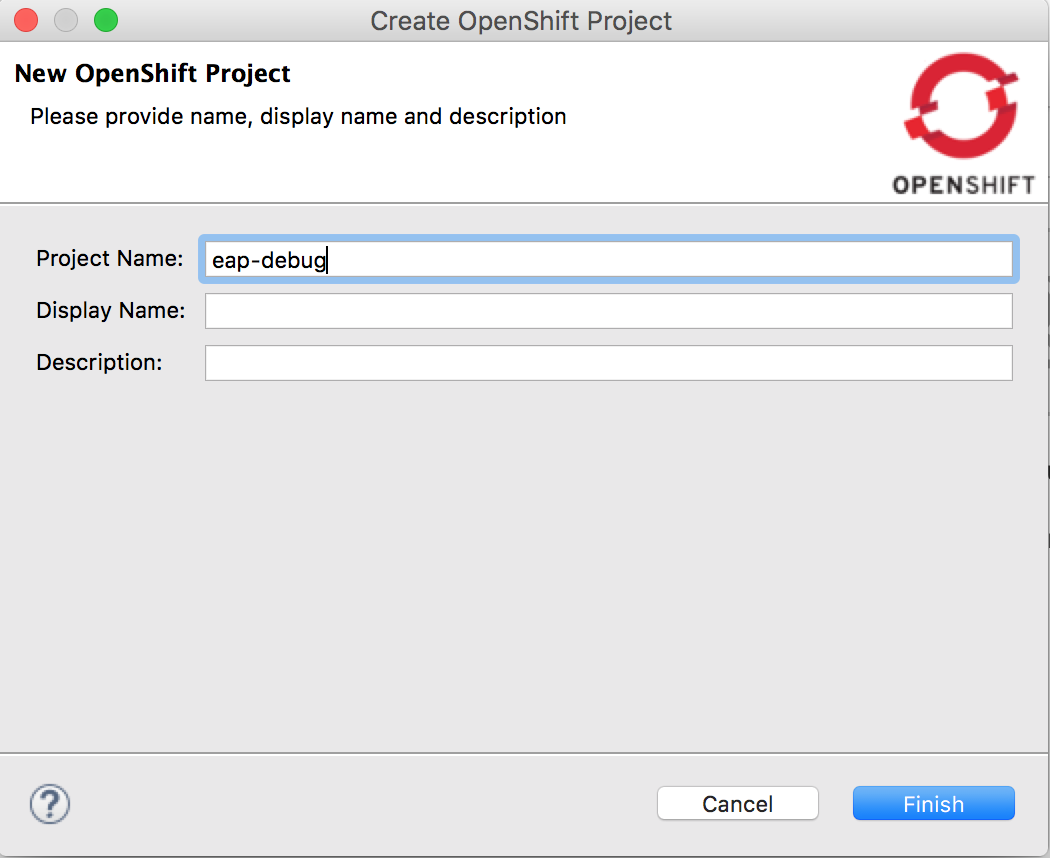
To provide a location for the application in OpenShift, create a new project called eap-debug. In DevStudio, navigate to the OpenShift Explorer view, right click on the connection representing the OpenShift CDK, select New -> Project
Enter the name eap-debug next to the Project Name. A display name and description of the project can be added if desired.
Using the command line tools, execute the following command to create the eap-debug project.
oc new-project eap-debug
Instantiate the Template
OpenShift provides a facility to create the objects to quickly build and deploy applications. One of these templates is called eap64-basic-s2i, and it performs a Source to Image build of an application on top of an existing JBoss image and in turn creates a new image that can be deployed to OpenShift.
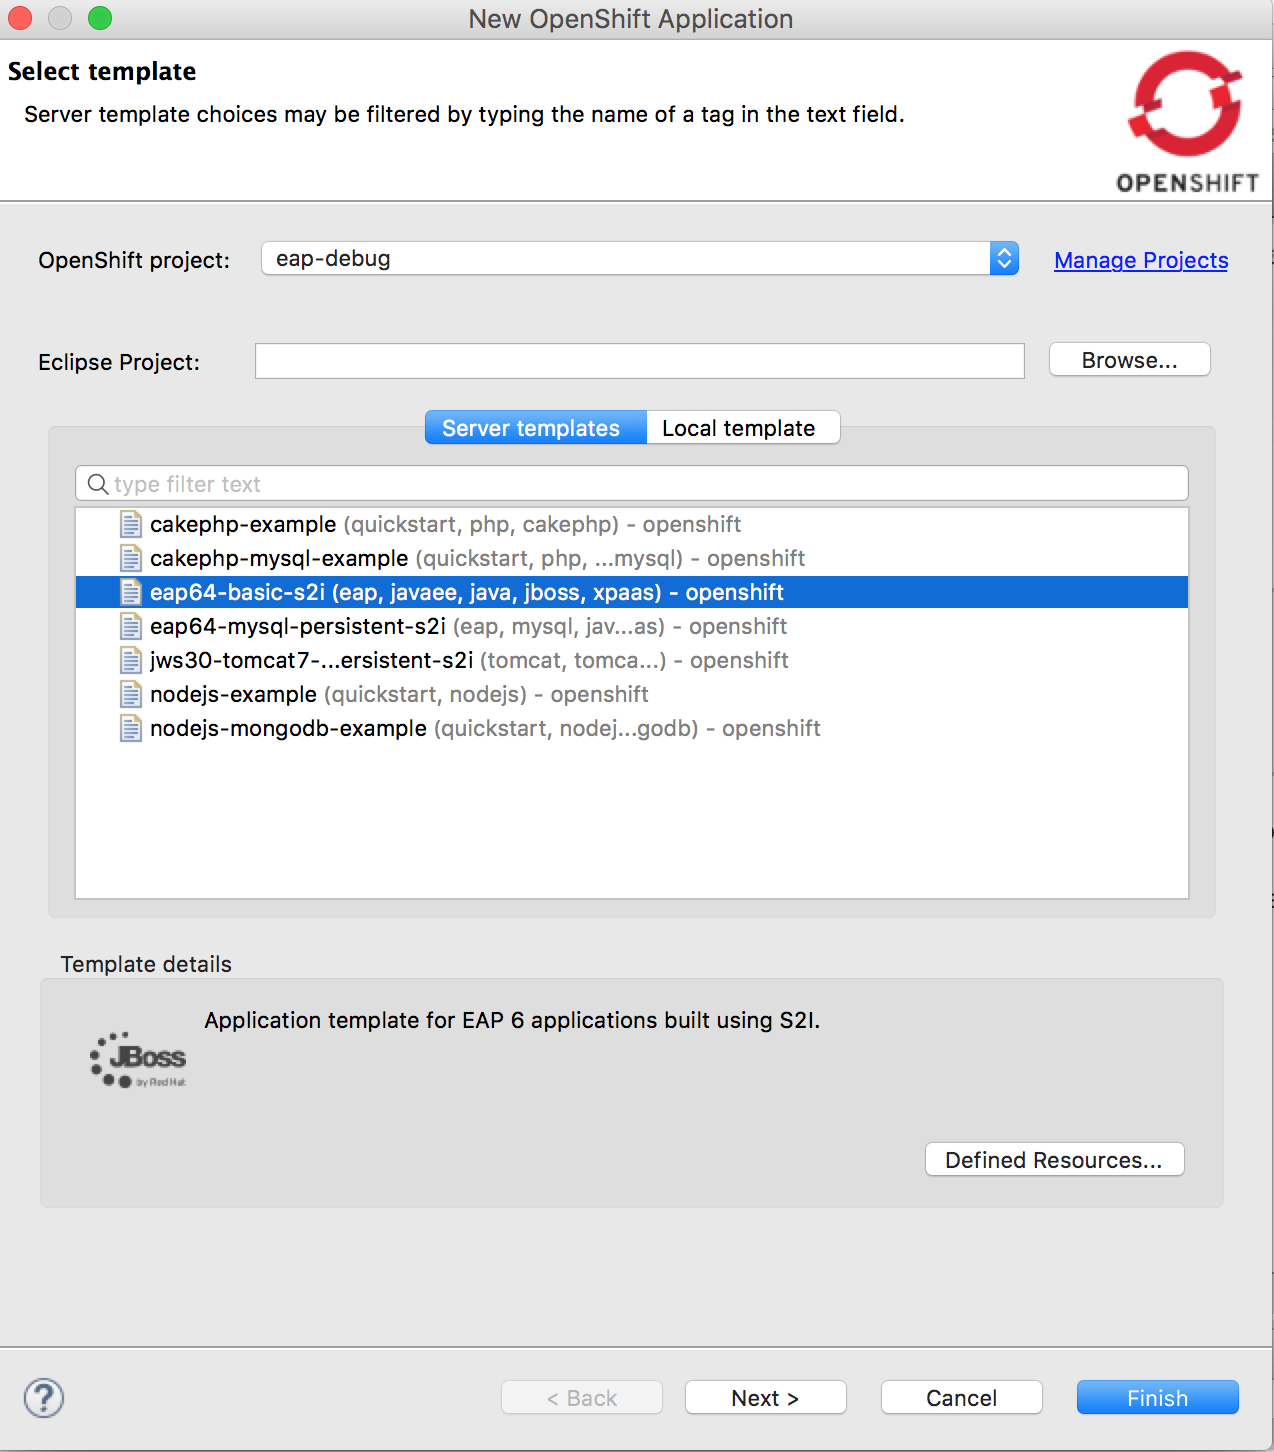
To instantiate a template in DevStudio, expand the connection to the CDK in the OpenShift explorer view. Right click the eap-debug project and select New -> Application.
The new application dialog presents the list of templates defined in the platform. Locate the eap64-basic-s2i template and click Next.
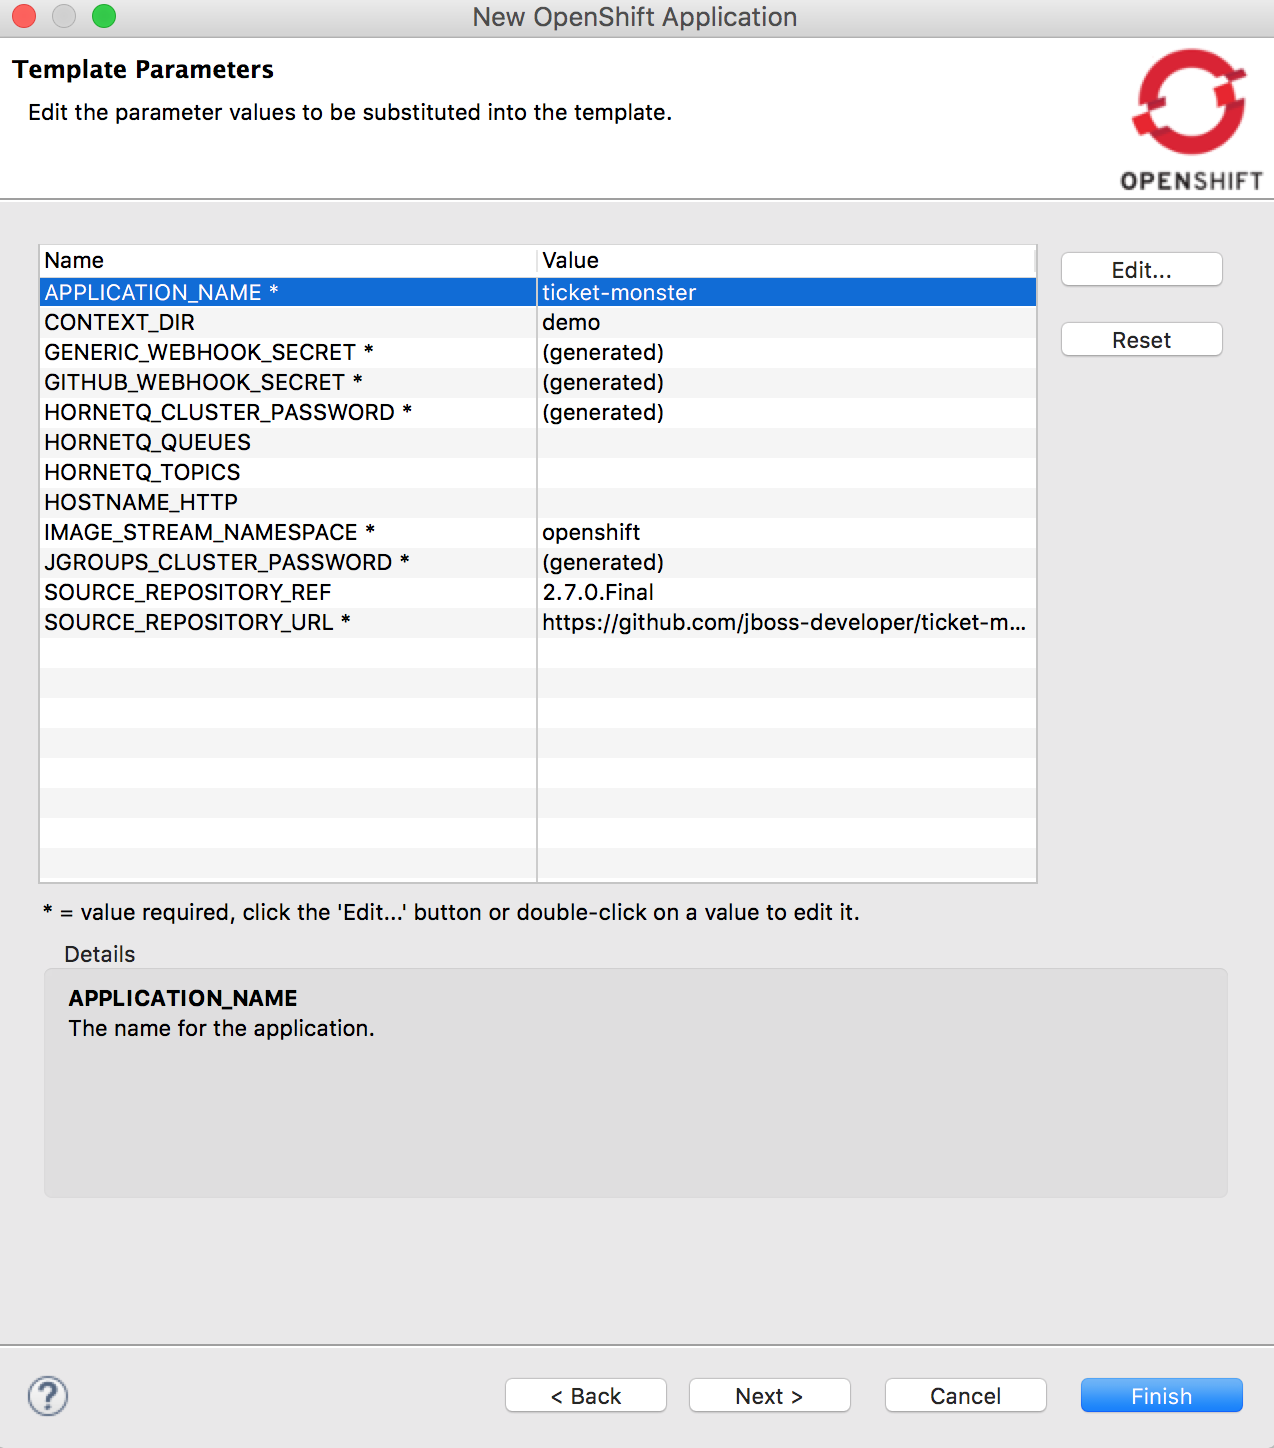
Each template defines a set of parameters that drives the execution of the template instantiation. Configure the following parameters replacing the default values into the dialog box:
- APPLICATION_NAME: ticket-monster
- CONTEXT_DIR: demo
- SOURCE_REPOSITORY_URL: https://github.com/jboss-developer/ticket-monster.git
- SOURCE_REPOSITORY_REF: 2.7.0.Final
Other parameters can remain their default values. Select Next to accept the values and press Finish to create the application.
The results of the template instantiation are then shown
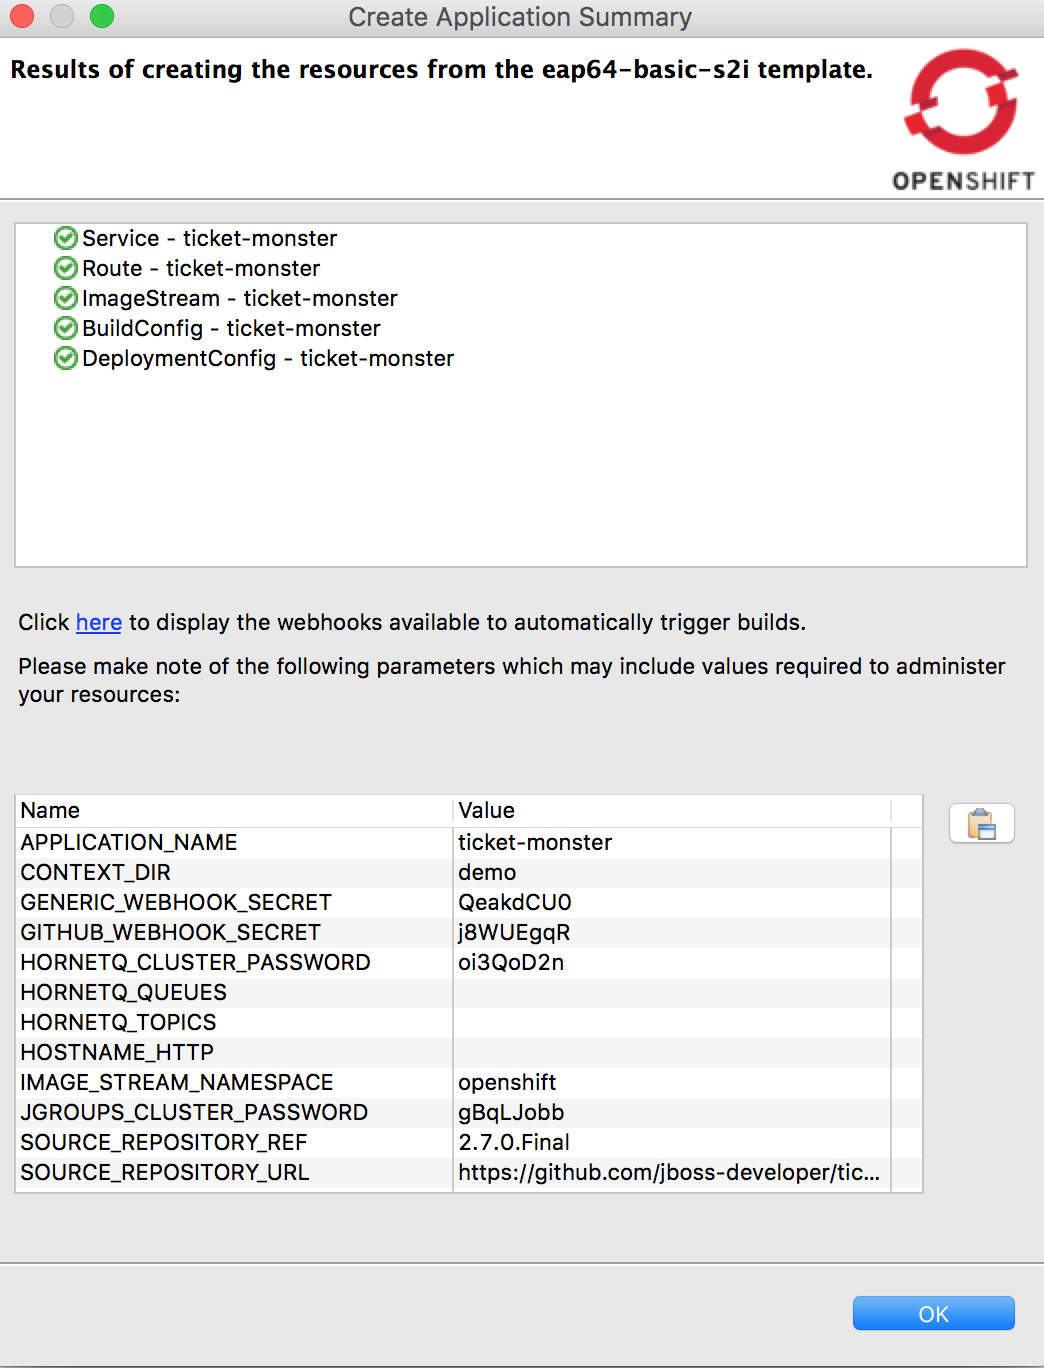
Click OK to proceed.
DevStudio will then attempt to clone and import the newly created application into the current workspace. This step is essential for debugging the application. Select a location on the local machine to clone the repository and select Finish. The source code must be available in the workspace prior to the actual debugging effort.
The Ticket Monster application can also be instantiated using the command line tools. Execute the following command to instantiate the application:
oc new-app --template=eap64-basic-s2i -p=APPLICATION_NAME=ticket-monster,CONTEXT_DIR=demo,,SOURCE_REPOSITORY_URL=https://github.com/jboss-developer/ticket-monster.git,SOURCE_REPOSITORY_REF=2.7.0.Final
Once the template has been instantiated using either method, a new source to image build will occur and once complete, the application will be deployed. The running application can be viewed in a browser at http://ticket-monster-eap-debug.rhel-cdk.10.1.2.2.xip.io
Debugging the Ticket Monster application
To debug an application using JWDP, arguments must be added to the application startup in order to enable this functionality. These arguments typically include the port number for remote clients to connect to and the steps an application will take when hitting a breakpoint set by the developer. Fortunately, the JBoss EAP 6.4 OpenShift image contains logic to abstract the majority of the low level debugging configurations from the developer. At a minimum, the developer only needs to be concerned about configuring the following:
- Enabling debug mode
- Port to remotely connect on
Debug mode is enabled by setting an environment variable called DEBUG_MODE with a value of true with the DeploymentConfig API object. Optionally, a DEBUG_PORT environment variable can also be defined to explicitly specify the debug port. Otherwise, port 8787 will be used. The logic for managing remote debugging in the OpenShift JBoss image is implemented in the standalone.sh script, which is used to start the JBoss platform when the image starts.
The following is a snippet of the arguments that are added when the DEBUG_MODE environment variable is set to true.
JAVA_OPTS="$JAVA_OPTS -agentlib:jdwp=transport=dt_socket,address=$DEBUG_PORT,server=y,suspend=n"
In addition, the running container must be configured to expose the debug port in order for it to accept remote connections. Similar to specifying environment variables, this modification is also made on the DeploymentConfig API object by adding the following:
...
"ports": [
 {
 "name": "debug",
 "containerPort": 8787,
 "protocol": "TCP"
 },
 ...
 ],
 ...
To modify the Ticket Monster application that was already deployed to account for both of these changes to the DeploymentConfig to enable remote debug capabilities, execute the following command using the “oc patch” subcommand of the OpenShift Client Tools:
oc patch dc ticket-monster -p '{"spec":{"template":{"spec":{"containers":[{"name":"ticket-monster","ports":[{"name":"debug","containerPort":8787,"protocol":"TCP"}],"env":[{"name":"DEBUG","value":"true"},{"name":"DEBUG_PORT","value":"8787"}]}]}}}}' --type=strategic
Because the configuration was modified a new deployment of the application will occur with remote debugging capabilities enabled.
Remotely connecting to the running application
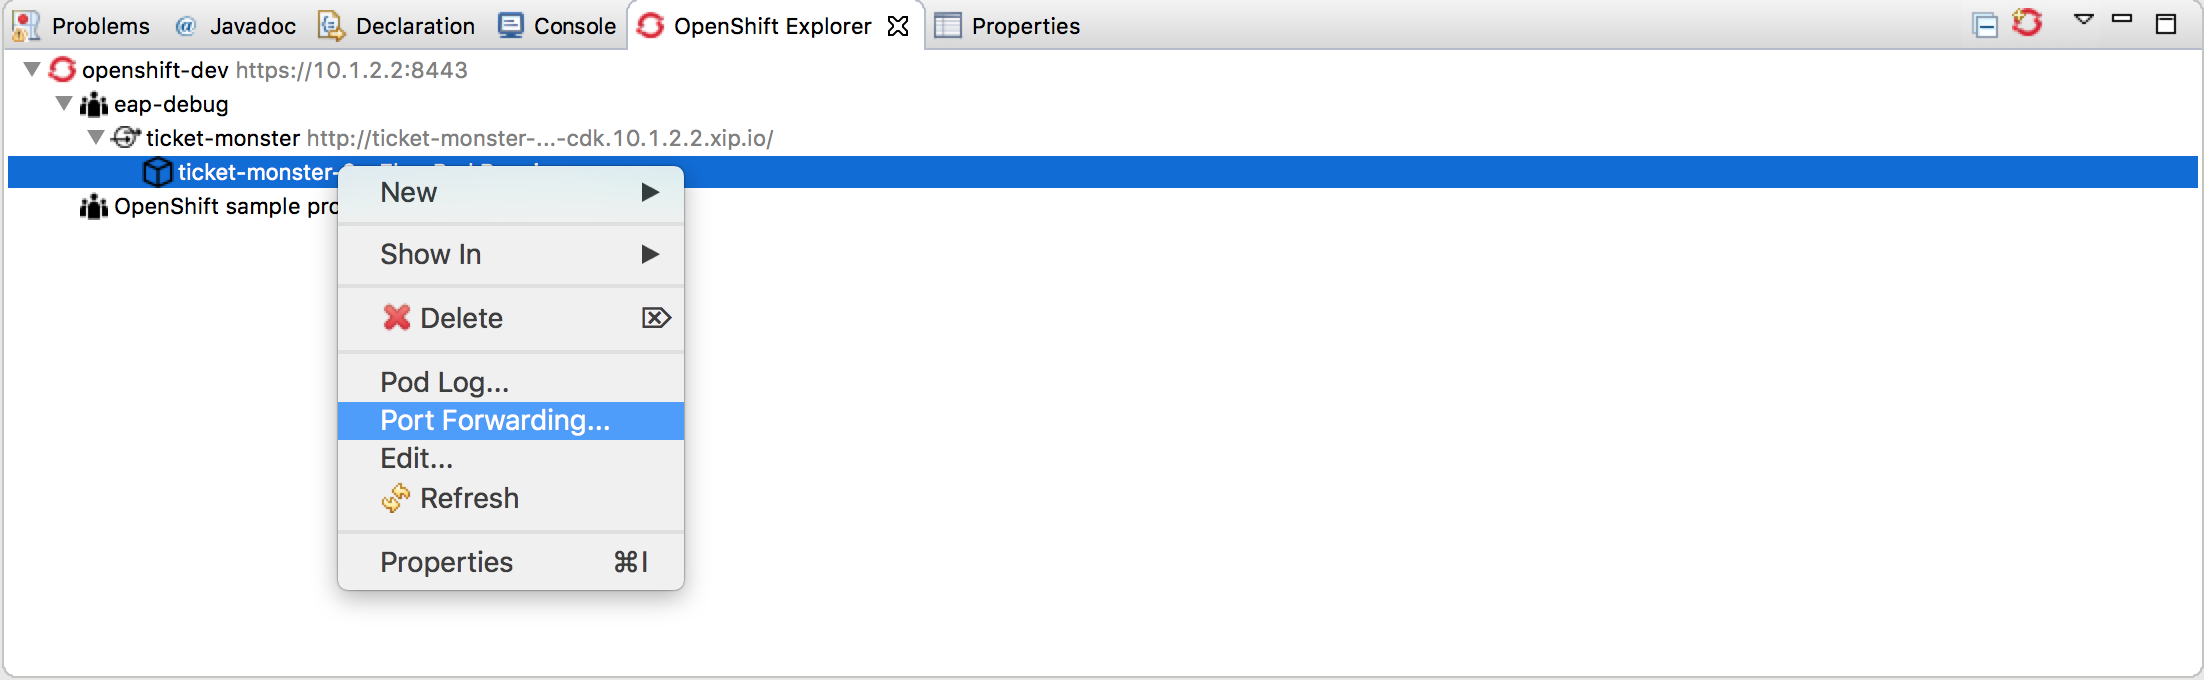
With the application configured to accept remote connections, Red Hat JBoss Developer Studio can be used to debug a portion of the source code. The first step is to connect the IDE to the application. Communication between an external client and a running application in OpenShift typically traverses through the routing layer (HAProxy by default), through the service layer, and then to the running container. Exposing JWDP externally is both a security risk and not currently possible in the OpenShift routing layer as only HTTP/SNI based TLS is allowed by default. Instead, OpenShift provides the functionality to forward local TCP ports to running pods in OpenShift for accessing internal services that are not externally exposed. To enable port forward for the Ticket Monster application in DevStudio, expand the CDK OpenShift connection in the OpenShift Explorer view and expand the eap-debug project. Expand the ticket-monster application to reveal the running pod. Right click the running Ticket Monster pod and click Port Forwarding.
Presented in the dialog is a list of ports exposed by the running pod. Included in this list is port 8787 representing the JWDP port specified earlier. Click the Start all button to begin a port forwarding session.
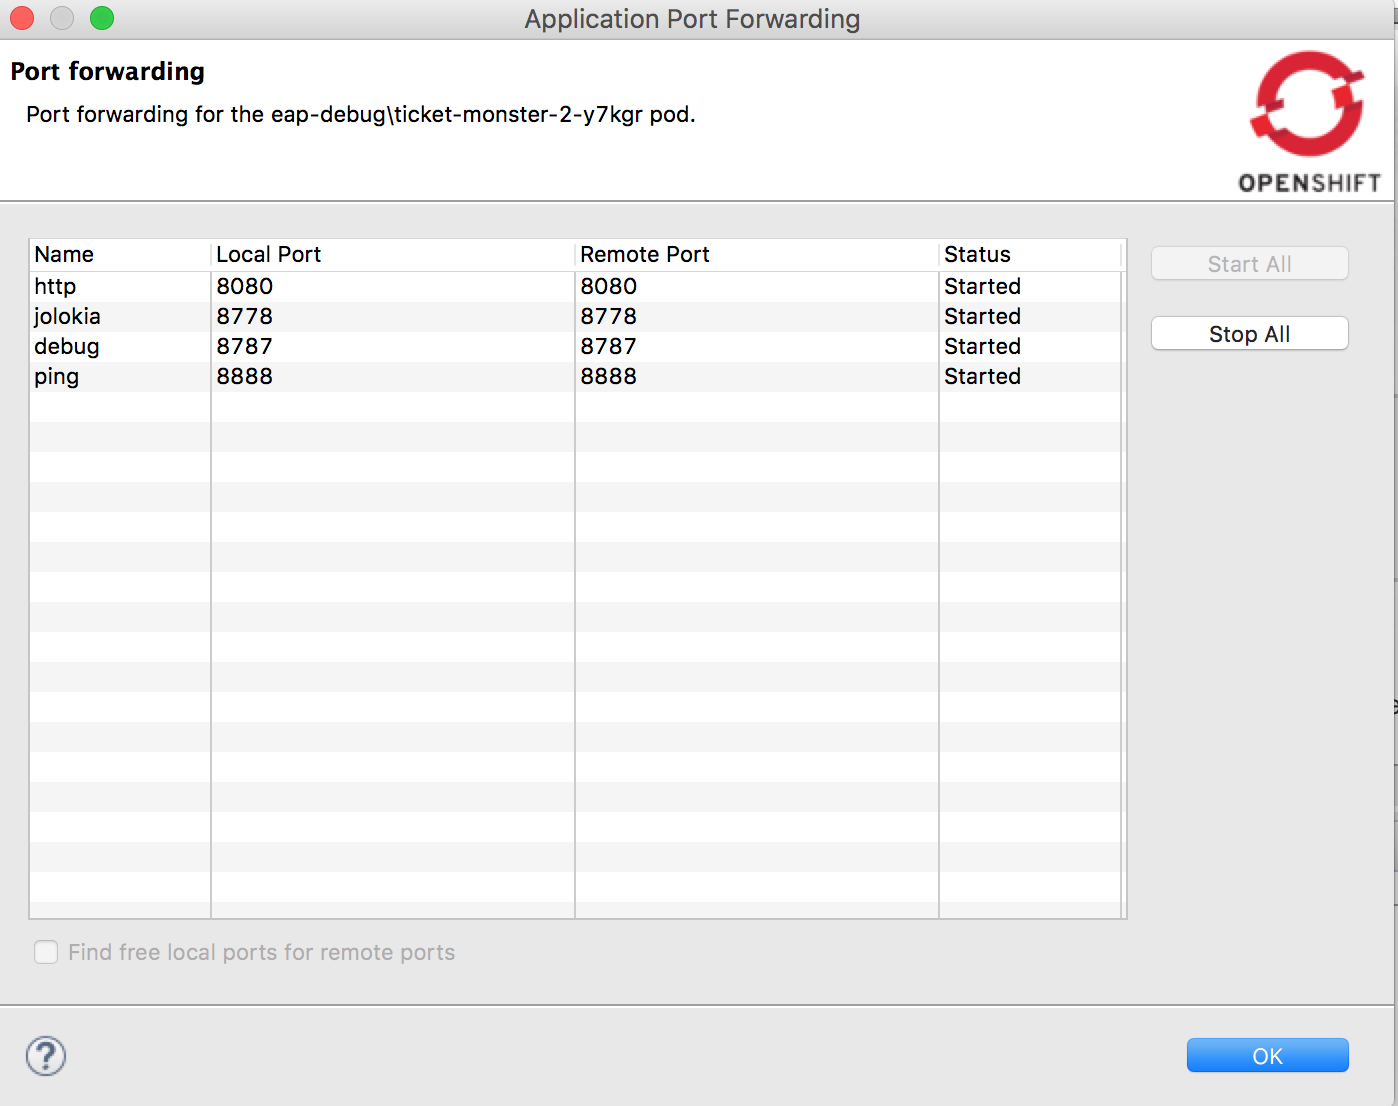
Click OK to close the dialog.
To place the Ticket Monster application in debug mode, right click the project in the Project explorer view, select Debug, and then Debug Configurations to begin configuring the remote connection.

On the lefthand side of the debug configuration page, right click on Remote Java Application and select New. Verify the ticket-monster project is selected as the project and that localhost is configured as the host and port 8787 is configured as the port in the connection properties section. Since port forwarding was enabled previously, connections to port 8787 on the local machine will be forwarded to the running pod in OpenShift.
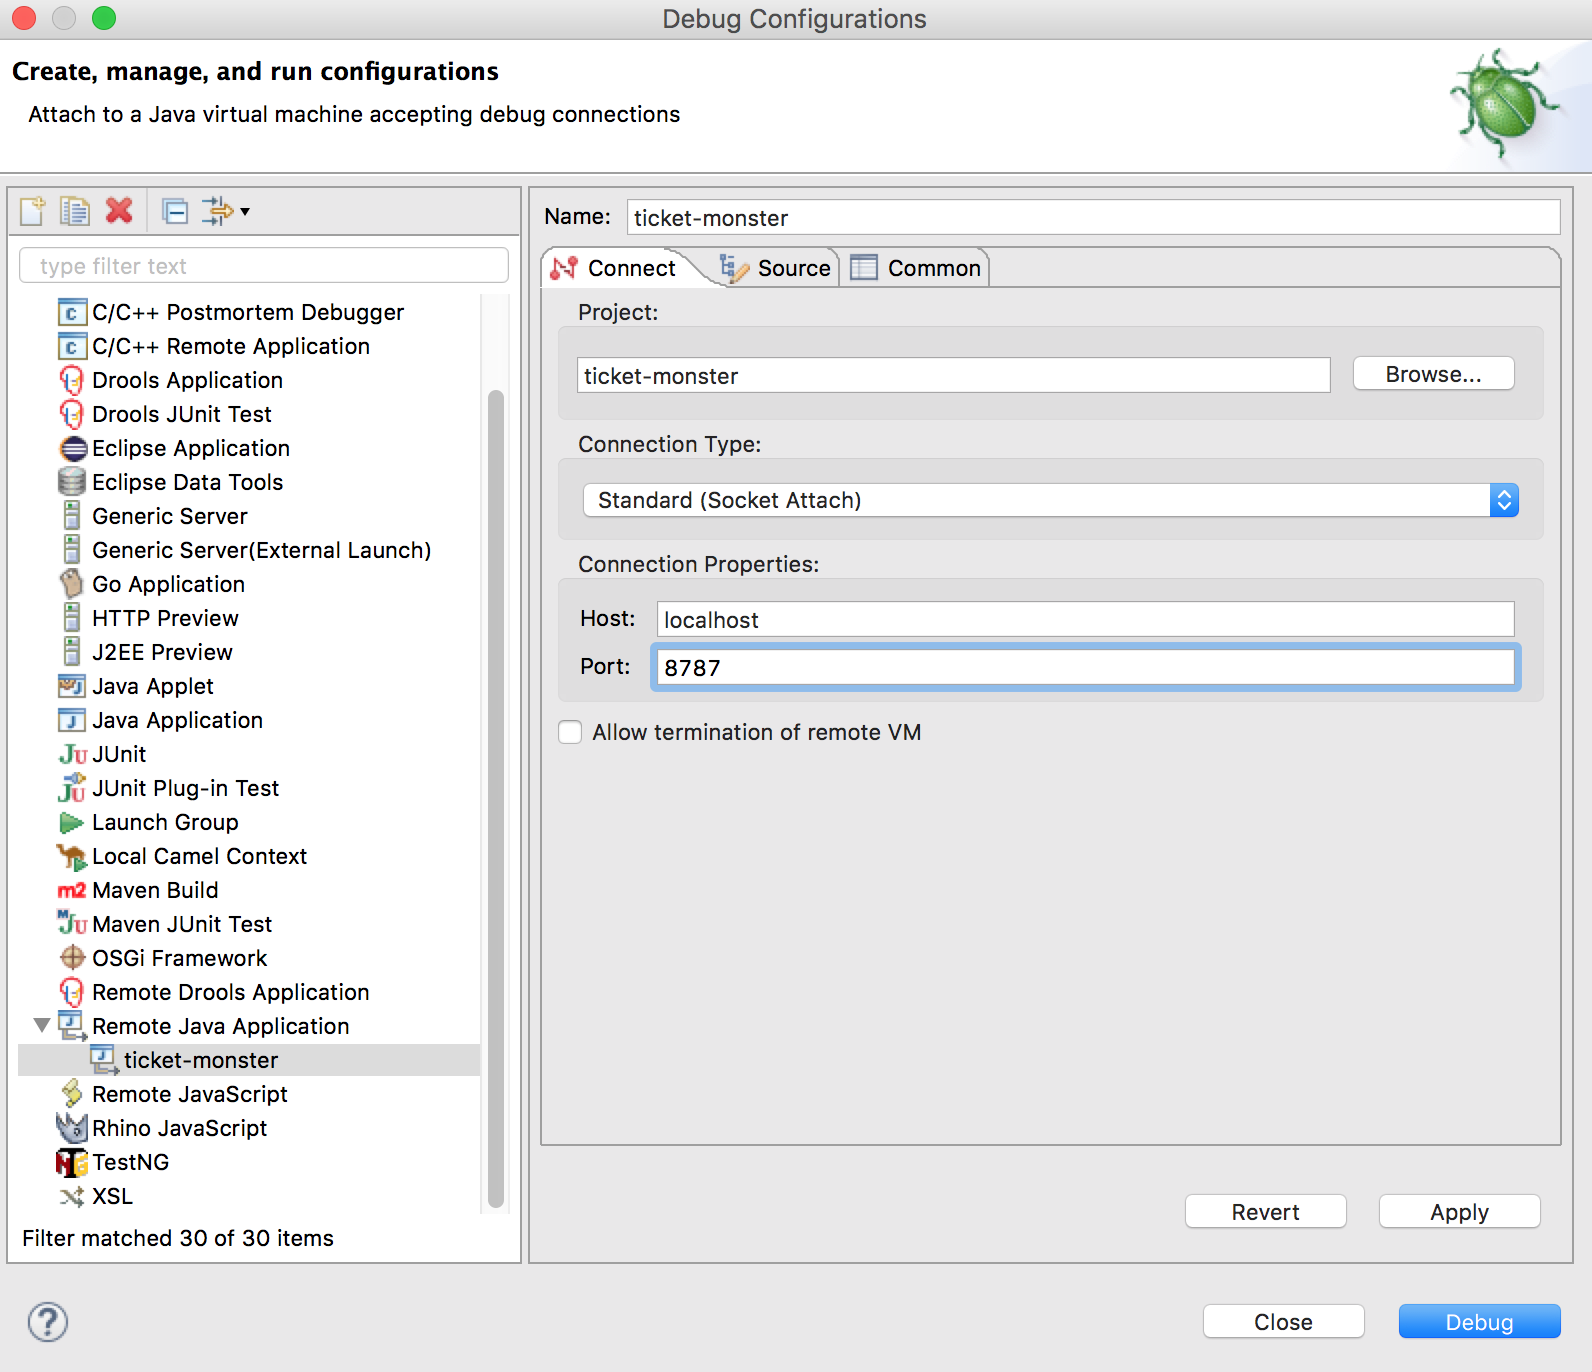
Click Debug to begin the debug session. If an error message does not appear, the IDE is successfully connected.
Debugging the Application
Our performance engineers recently made some changes to the application and we would like to validate a portion of the application. In particular, we want to ensure the email address is being sent correctly when tickets are ordered. First, let’s set a breakpoint in the application. In DevStudio, expand the src/main/java folder and expand org.jboss.examples.ticketmonster.rest package. Double click on the BookingService class to open the file. Scroll down to line 141 in the createBooking method and right click on the area just to the left of the source code and select Toggle Breakpoint.
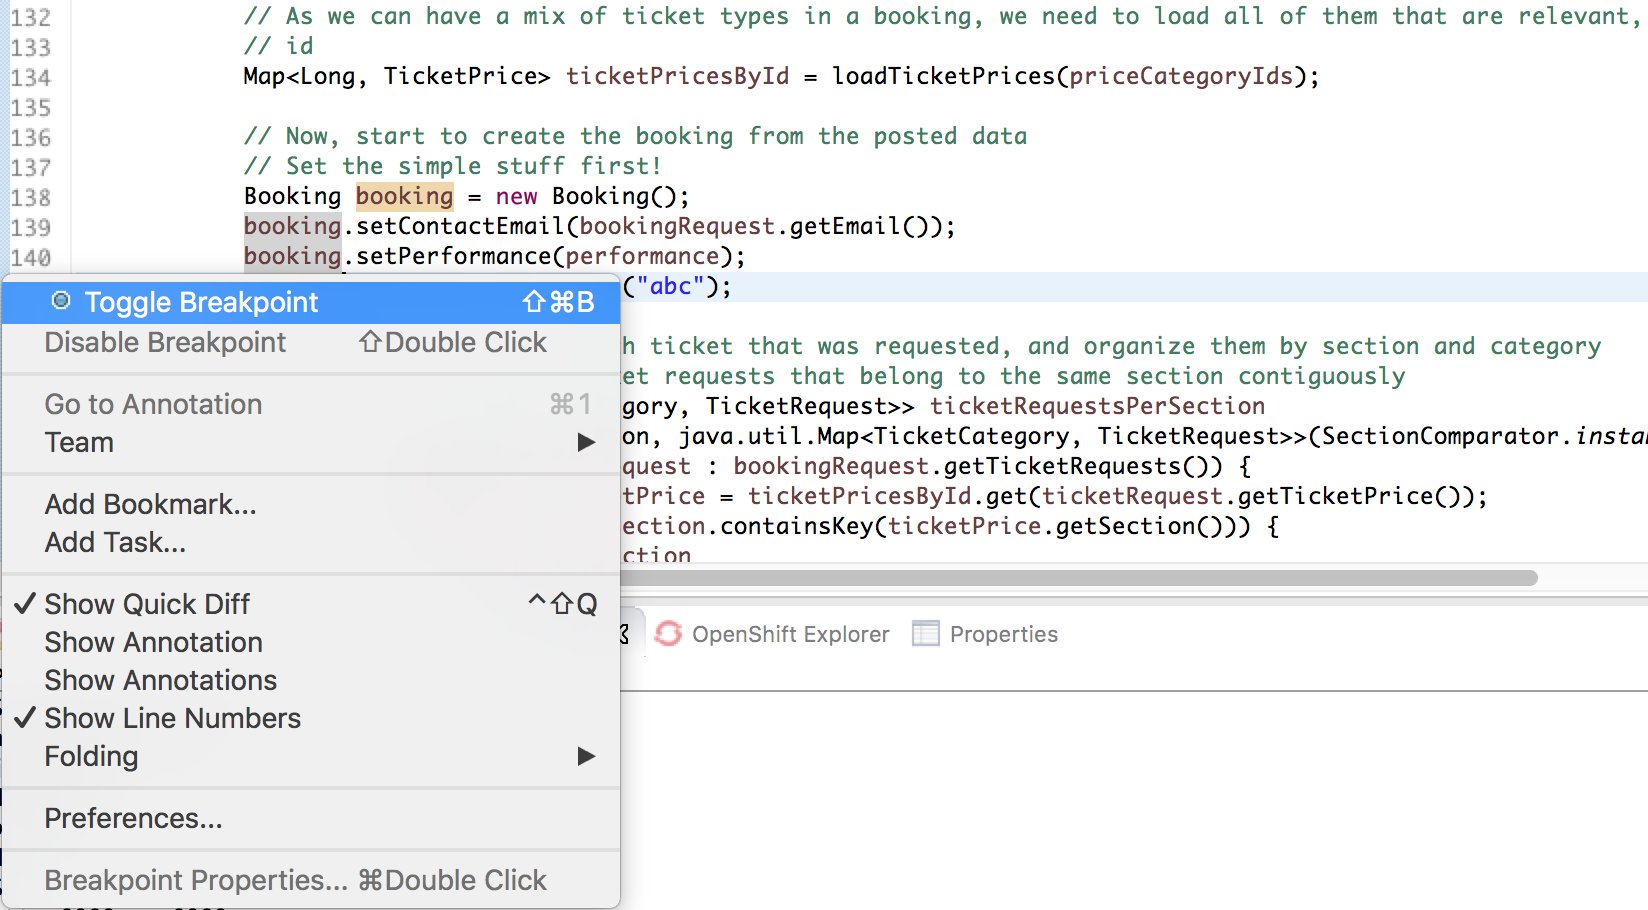
This line of code is executed when new orders are received. By setting the breakpoint, the execution of the application will stop when this line of code is hit.
With the breakpoint set, let’s process an order. Launch a web browser and navigate to http://ticket-monster-eap-debug.rhel-cdk.10.1.2.2.xip.io.

To quickly skip to the booking page and test the application, perform the following actions:
- On the homepage, click Buy tickets now
- On the events page, click Book tickets on the lower righthand side of the page
- Under Where?, pull down the dropdown and choose Sydney: Sydney Opera House
- Choose the first available date under the When? box and click Order Tickets
- On the booking page in the select tickets box, pull down the dropdown box and choose the first available option
- Enter 2 in the textbox next to Adult and click Add tickets
- This is the most important step. Enter any email address. This is what we will use the debugger to confirm the proper value is being passed to the backend application (Don’t worry, this application is not connected to any external system). Click Checkout
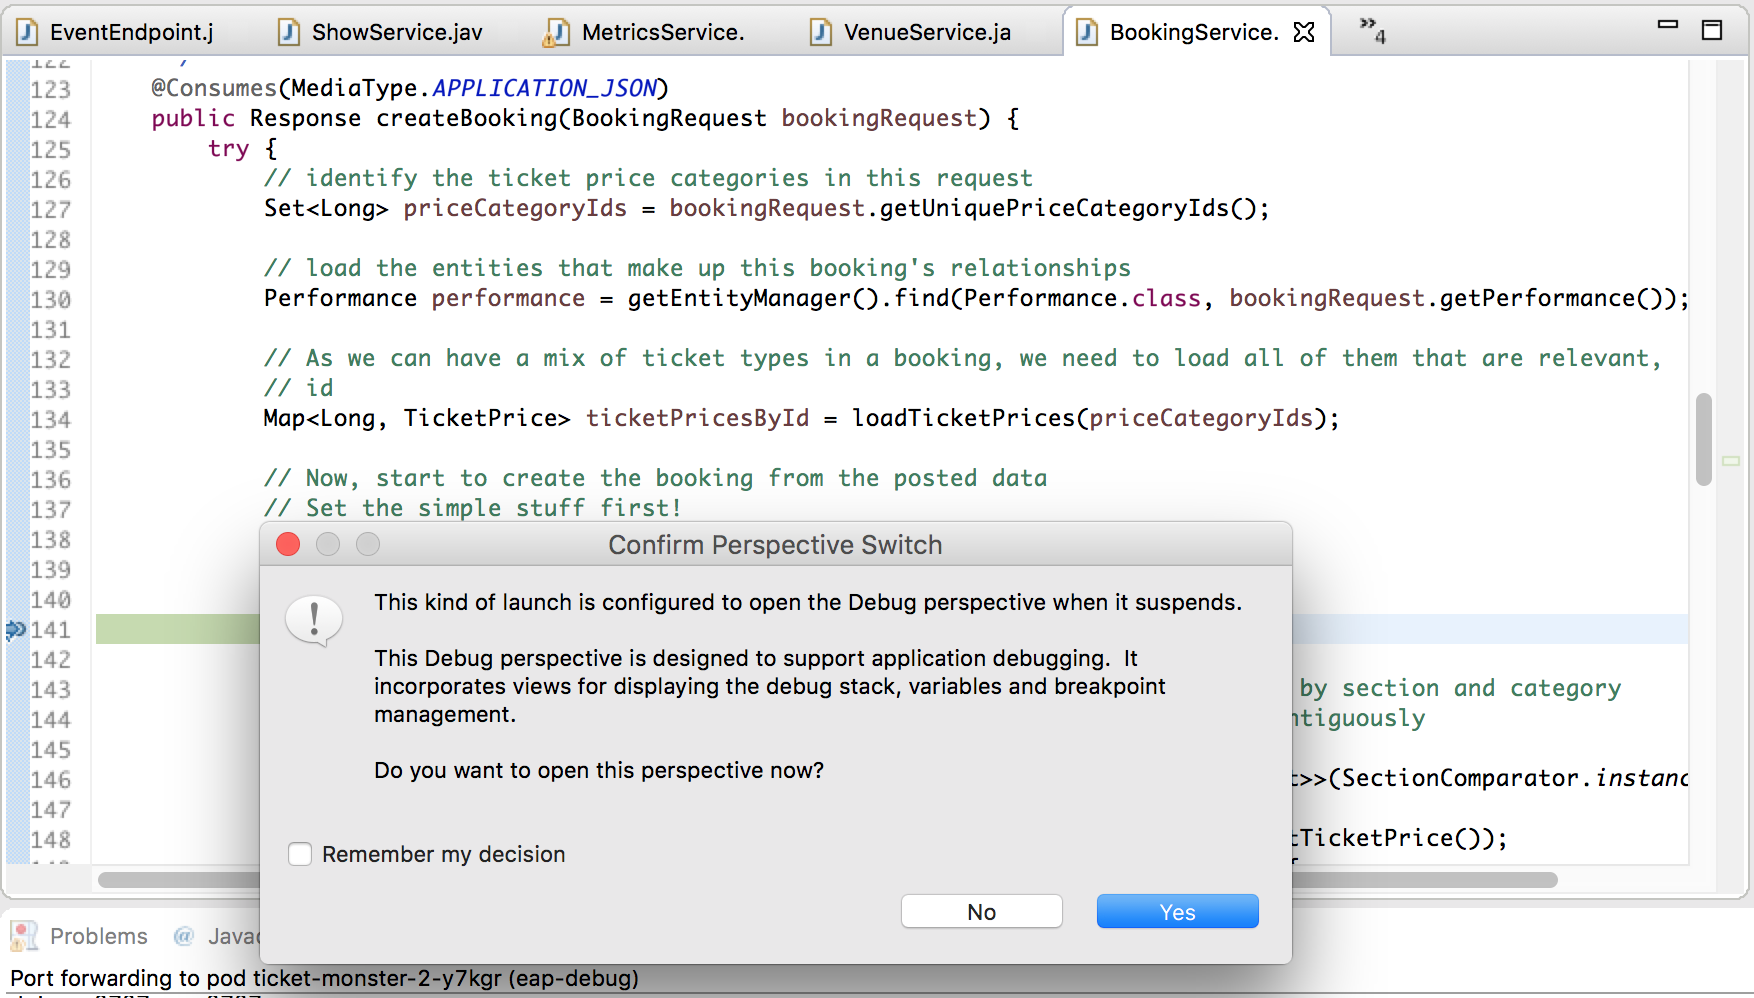
At this point, DevStudio should have triggered when the application reached the execution point where the breakpoint was set earlier. Click Yes in the dialog to enter the debug perspective.
On the top righthand side of the window, the list of active variables is displayed. Expand the booking variable to reveal the contactEmail field. The value in this field should match the value entered when completing the order transaction. If the values do indeed match, the verification of the application was successful.
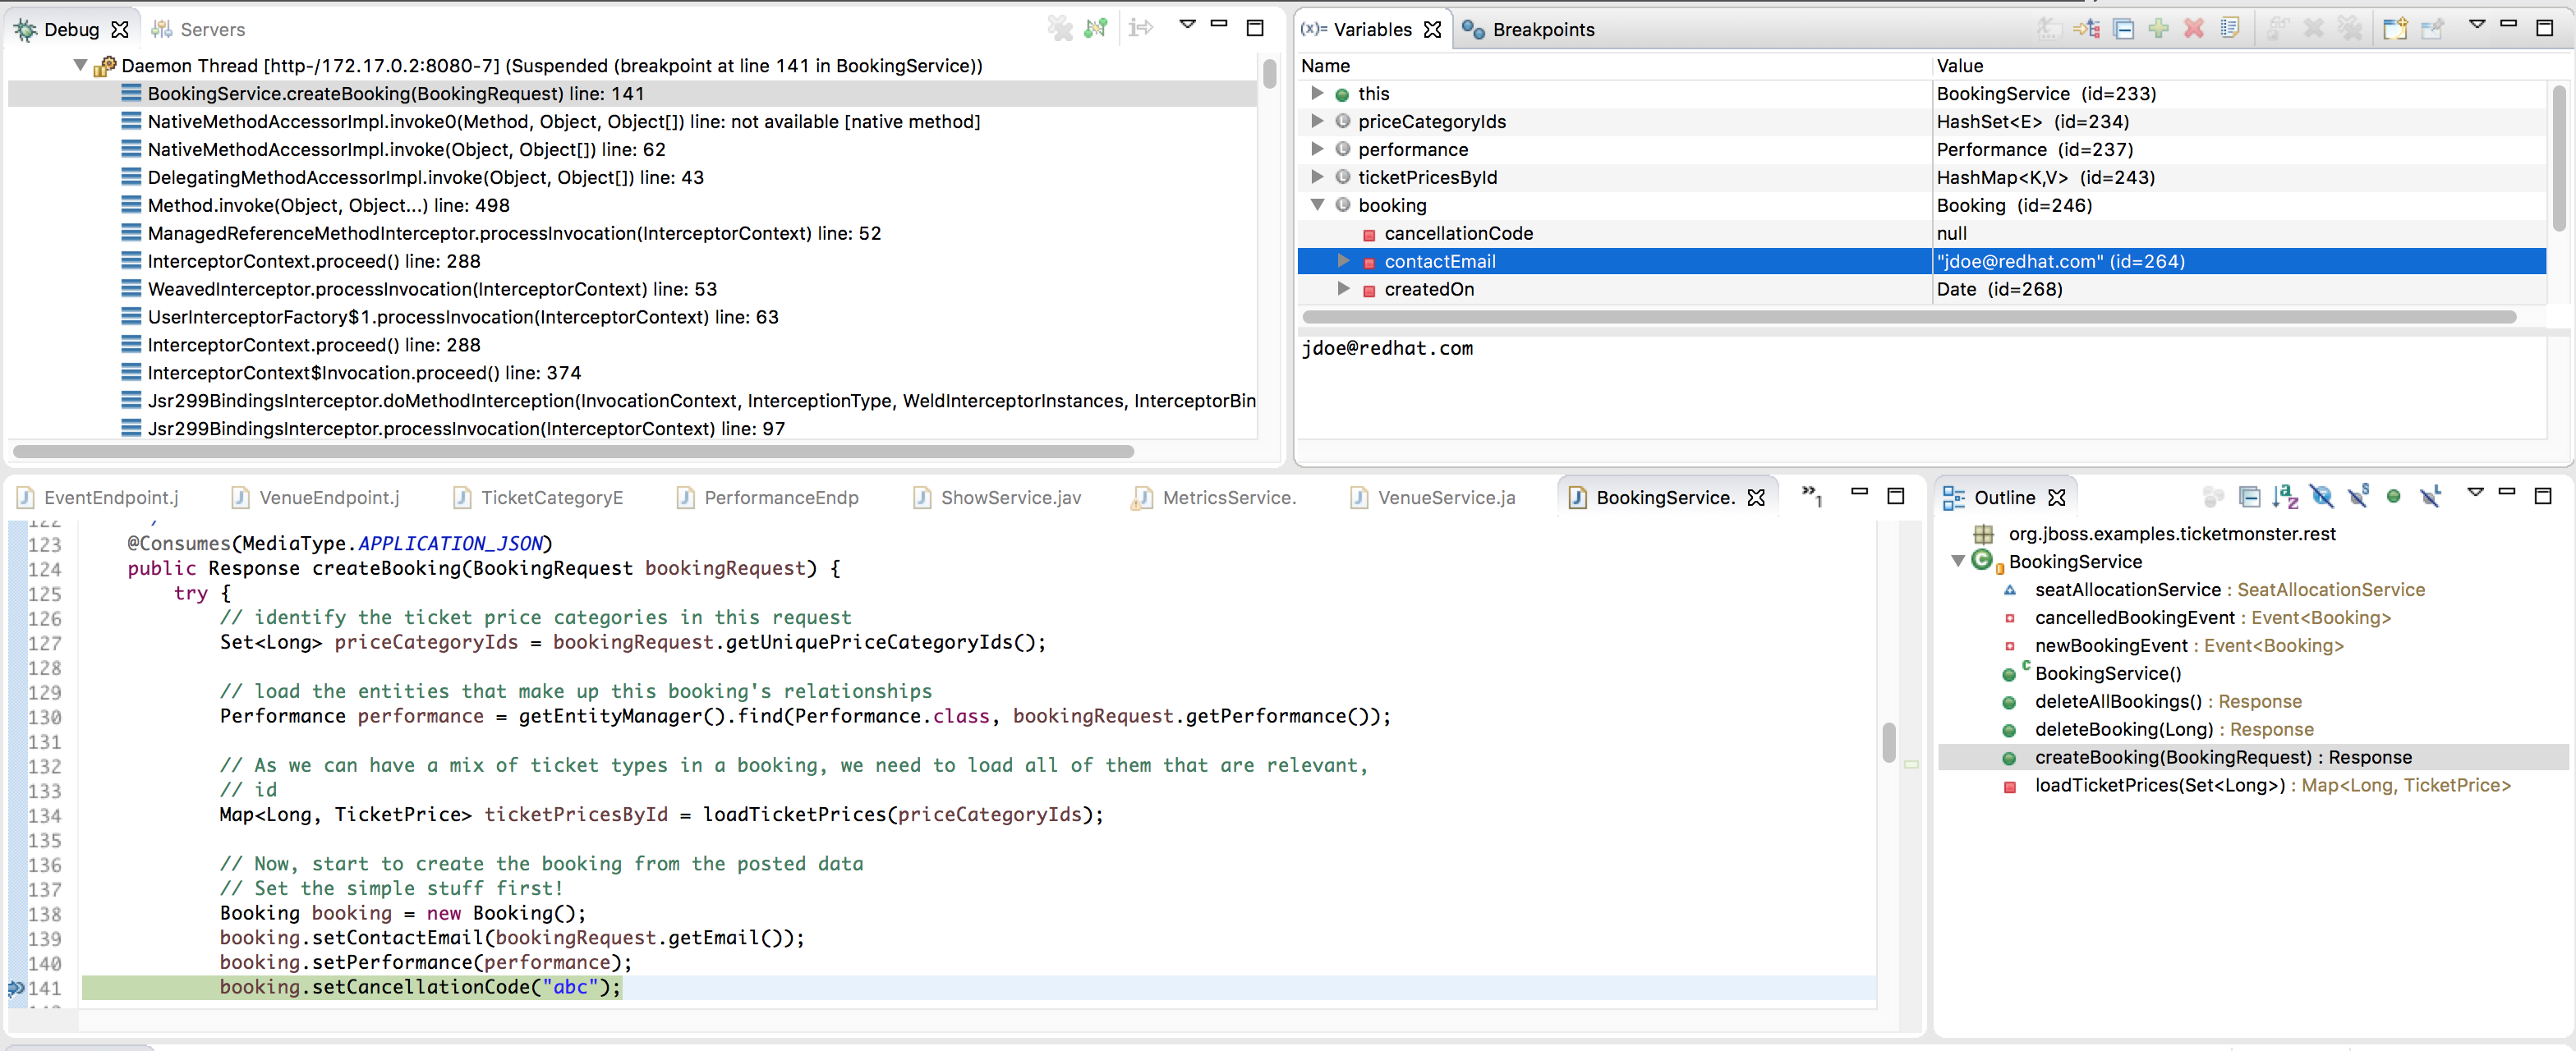
To disconnect the debugger from the application, on the menu bar, select Run and then Disconnect.
As we have seen, it is easy to debug running Java applications running in OpenShift in the Red Hat Container Development Kit. While an example of an application running in JBoss was shown in this demonstration, any Java based application running in a container on OpenShift can take advantage or remote debugging as long as the proper arguments are passed at startup. The ability to remotely debug applications is just one more example of how containerized applications can utilize well-established development patterns along with intuitive, user-friendly tooling.
Last updated: March 16, 2023