We have just completed the deployment of version 3.9 of the Red Hat Mobile Application Platform to all actively updated Grids.
Summary
The main items of note in this release are:
- Data Sources for Forms
- Swift Apps can be built in the Build Farm. Our SDKs will move to Swift in a later release
- New Default Red Hat Forms Theme
- New Read-Only Text type for Forms which can optionally use Data Sources
- Performance improvements and bug fixes for Forms
Forms Data Sources
The major new feature of this release is Data Sources for Forms which I'm really pleased to tell you about.
As you may know, our Forms Builder enables you to generate mobile applications with a dynamic set of Forms that contain both standard web controls and mobile-specific controls like location capture, signature, maps, etc. These apps can be auto-generated, then built in our Build Farm and distributed in our Enterprise App Store without ever seeing a line of code.
Data Sources builds on this by enabling your developers to create reusable data sets from your back-end systems that non-developers can then attach to Forms elements.
- You can create custom Data Sources that can connect to any back-end system
- You can set the update schedule for contents returned by the Data Source
- You implement each Data Source as an MBaaS Service in Node.js
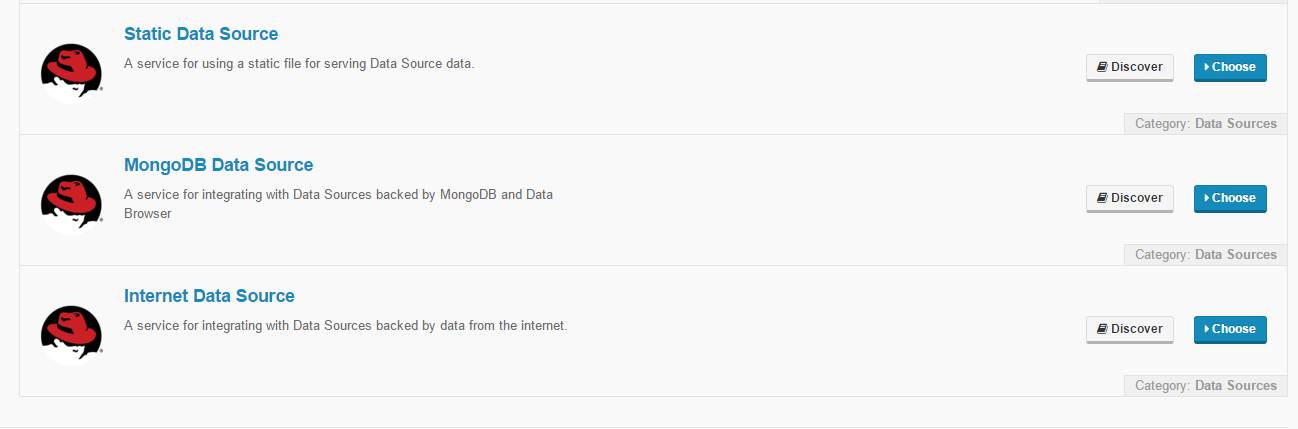
- We provide three example Data Sources as starting points - Static File, MongoDB and Internet
- You can populate various Form fields from Data Sources including drop-downs and radio-boxes
- You can display read-only textual information from Data Sources in Forms using a new field type
- Non-technical users can make use of Data Sources without coding
- You can share Data Sources across Forms
- Multiple Data Sources can be served on different URLs from one MBaaS Service
The easiest way to get started is to use one of our examples. Lets create a Data Source which pulls information from a remote CSV file and makes it usable in a Drop Down field in a Form.
Create a Data Source Service
- In the Studio, navigate to Services & APIs. Click Provision MBaaS Service/API.
- On the left, choose the Data Sources category.

- Select the Static Data Source template
- Choose a name for the service and deploy it to an environment.
- Go to Service Details and make the Service public and then re-deploy when instructed to
Customise the Data Source Service to work with CSV
- Go to the Editor for the Service and change application.js to add the second line here in the appropriate location:
app.use('/static_ds', require('./lib/static-datasource.js')); app.use('/csv_ds', require('./lib/csv-datasource.js')); - Browse to the lib directory in the Editor and create csv-datasource.js with the following contents:
var express = require('express'); var request = require('request'); var router = express.Router(); router.get('/', function (req, res) { var url = 'https://gist.githubusercontent.com/conoro/2090f52225832787766b3340c1c3caaf/raw/847108af1026bc07c42297ac699e0dbdc3a12195/workers.csv'; request(url, function (err, resp, html) { if (err) { console.log(err) return handleError(err, res); } var people = []; var lines = html.toString().split('\n'); for (var i = 0; i < lines.length; i++) { people.push({"key": i, value: lines[i].toString().split(',')[0], selected: true}); } res.send(people); }); }); module.exports = router; - The code above simply reads the remote CSV file and converts it to the specific JSON format we need. Your code here can be as complex as you need to get at the data you want and crunch it down to the data sets for your forms.
- You can view the example CSV I've created over on GitHub Gist. You could host your data anywhere. My example is a simple single column CSV file with a list of names.
Roger Flopple,
Demetrius Levenworth,
Salamander Hammerhead,
Ferrari Montenegro,
Paul Corduroy,
Hank Fracas,
Ludwig Von Instagram,
Lisa Toboggan,
Heather Kerfuffle,
Rebecca Beretta,
Lindsay McMartinhamson,
Mirandella Houndstooth,
- Edit package.json to add the request module in this location:
"express": "^4.13.3", "fh-mbaas-api": "5.9.1", "request": "~2.40.0" }, - Re-deploy the Service code with those changes
- Get the URL of your Service in its details page and browse to https://the.url.of.the.service/csv_ds and you should see a JSON version of your CSV returned.
[{"key":0,"value":"Roger Flopple","selected":true},{"key":1,"value":"Demetrius Levenworth","selected":true},{"key":2,"value":"Salamander Hammerhead","selected":true},{"key":3,"value":"Ferrari Montenegro","selected":true},{"key":4,"value":"Paul Corduroy","selected":true},{"key":5,"value":"Hank Fracas","selected":true},{"key":6,"value":"Ludwig Von Instagram","selected":true},{"key":7,"value":"Lisa Toboggan","selected":true},{"key":8,"value":"Heather Kerfuffle","selected":true},{"key":9,"value":"Rebecca Beretta","selected":true},{"key":10,"value":"Lindsay McMartinhamson","selected":true},{"key":11,"value":"Mirandella Houndstooth","selected":true}]This is the format the Data Source needs.
Create the Data Source
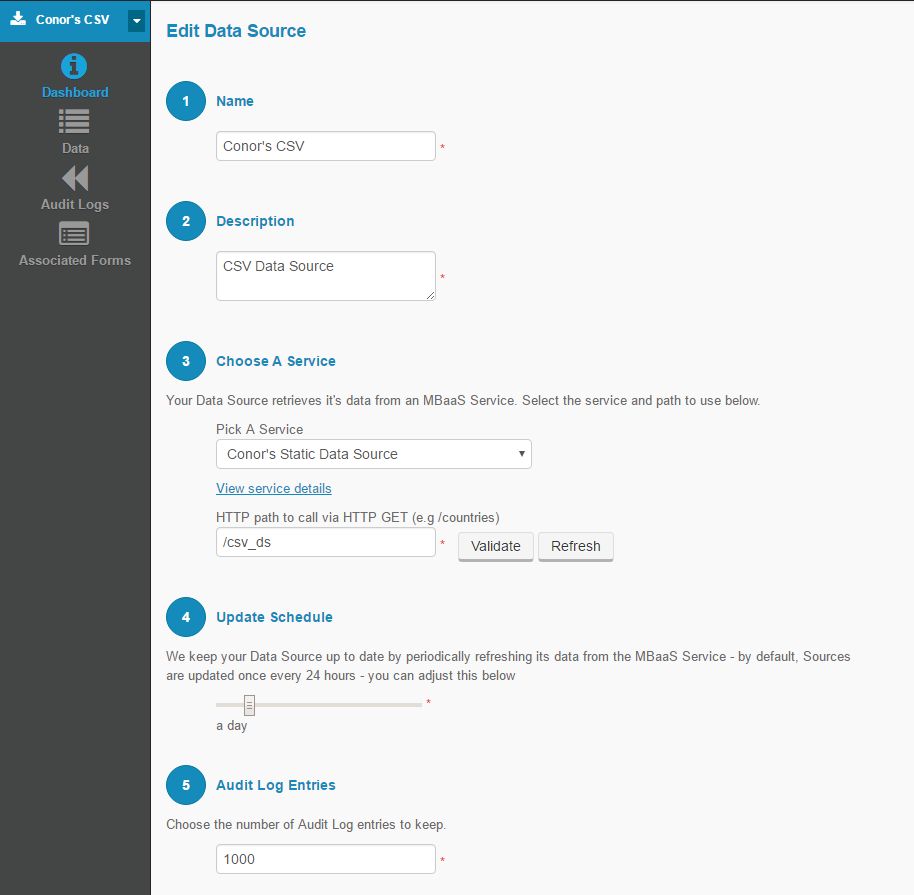
- In the Studio, navigate to Drag & Drop Apps > Data Sources. Click New Data Source.
- Set a name and a description. Both are required.
- Choose your previously created MBaaS service and set /csv_ds as its endpoint
- Check you have done everything correctly using the Validate button
- Leave the other settings as they are
- Click Create Data Source
Using the Data Source in a Form
Note, these steps can be carried out by non-developers. Once you have your Data Sources setup and configured the access to them, your Forms creators can then make use of them without having to know the technical details of where the data is coming from.
- Navigate to Drag & Drop Apps > Forms Builder
- Open an existing form, or create a new form.
- Drag a Dropdown field on to the Form and select the created field
- In the Options section, check Use a Data Source
- Select the data source created in the previous step
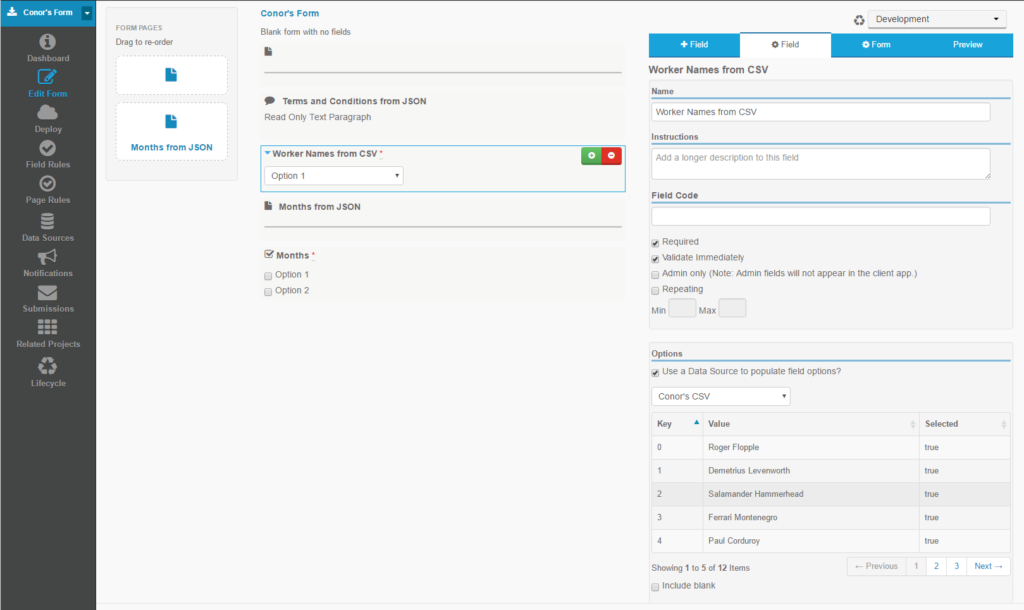
- Save and deploy the form.
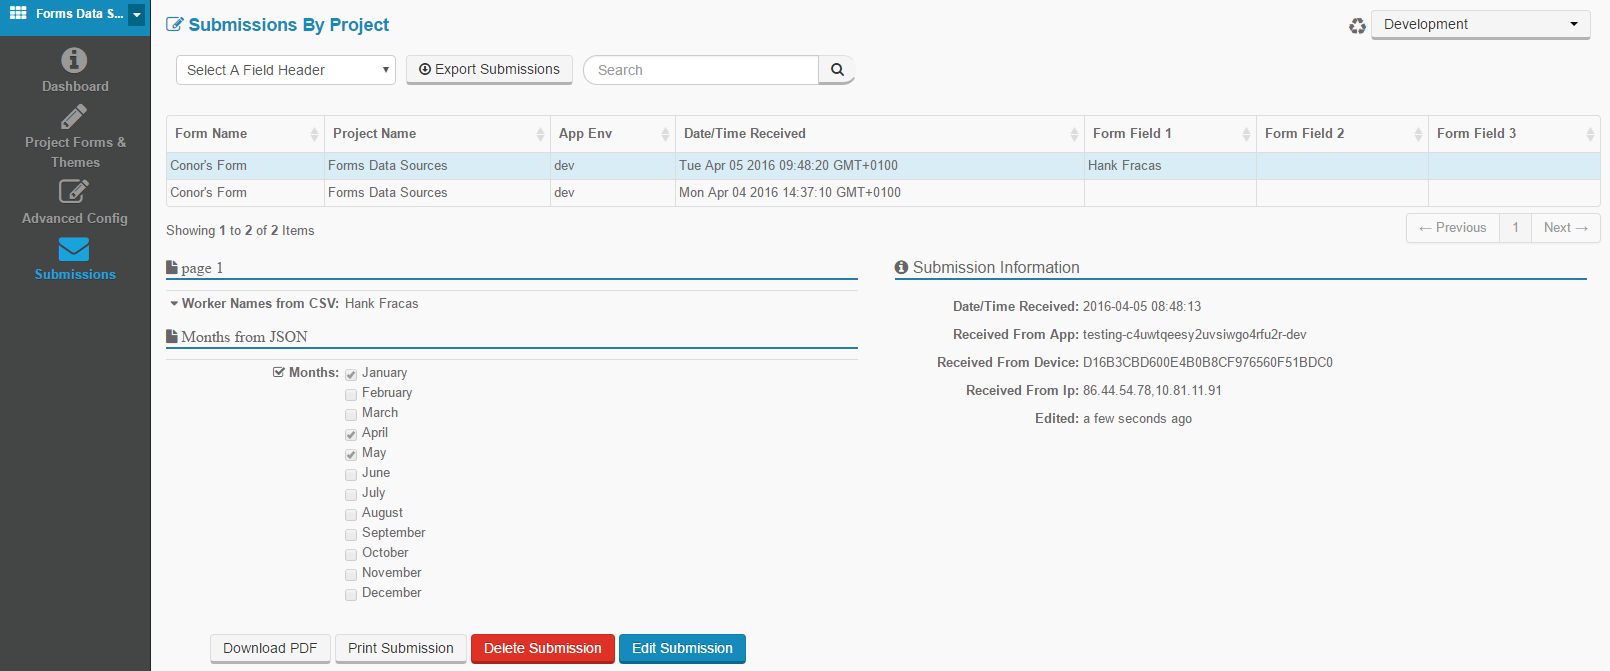
- See the data in the dropdown in the Forms Preview or just Build the App and use it


You can read more of the technical information here and here on our Docs site.
We're looking forward to seeing how you make use of this new feature set that many of you have been eager to try.
Last updated: March 16, 2018