Set up your Dev Environment
You may install Red Hat Developer Studio standalone (A), or also install JBoss Enterprise Edition (B).
A. Install Red Hat Developer Studio standalone
-
Install the Java SE Development Kit (JDK) version 8. We recommend using the OpenJDK or the Oracle JDK.
-
Download Developer Studio 12 standalone.
-
Run the Developer Studio installer.
-
For Mac/Windows development hosts:
-
Navigate to the folder that contains the downloaded Developer Studio JAR file.
-
Right-click
devstudio-12.0.0.GA-installer-standalone.jar -
Select Open With → Jar Launcher.
-
-
For Linux development hosts:
-
Navigate to the folder that contains the Developer Studio JAR file.
-
Execute the installer:
$ java -jar devstudio-12.0.0.GA-installer-standalone.jar
-
-
Follow the on-screen instructions to continue the installation process.
-
-
Start Developer Studio. See Developer Studio 12 Installation documentation for details.
-
Configure Maven:
-
In Developer Studio, click Window→Preferences.
-
Type maven in the text box to view options related to Maven.
-
In the results, expand JBoss Tools and click JBoss Maven Integration.
-
Click Configure Maven Repositories.
-
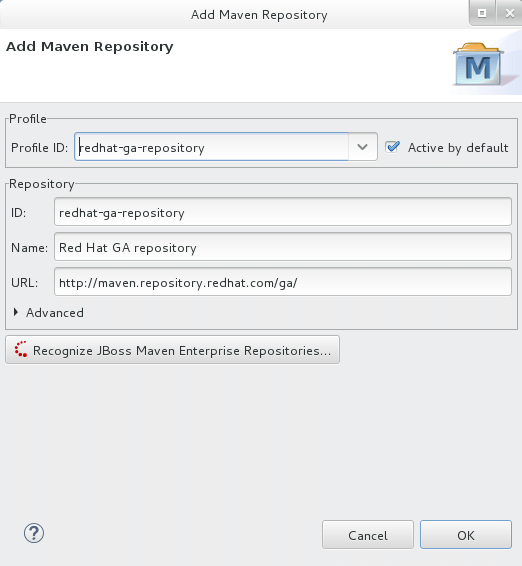
Click Add Repository and then click the downward facing arrow in the Profile ID: field to view the available Maven repositories.
-
Select redhat-ga-repository from the drop-down list profile and then click OK.
-
-
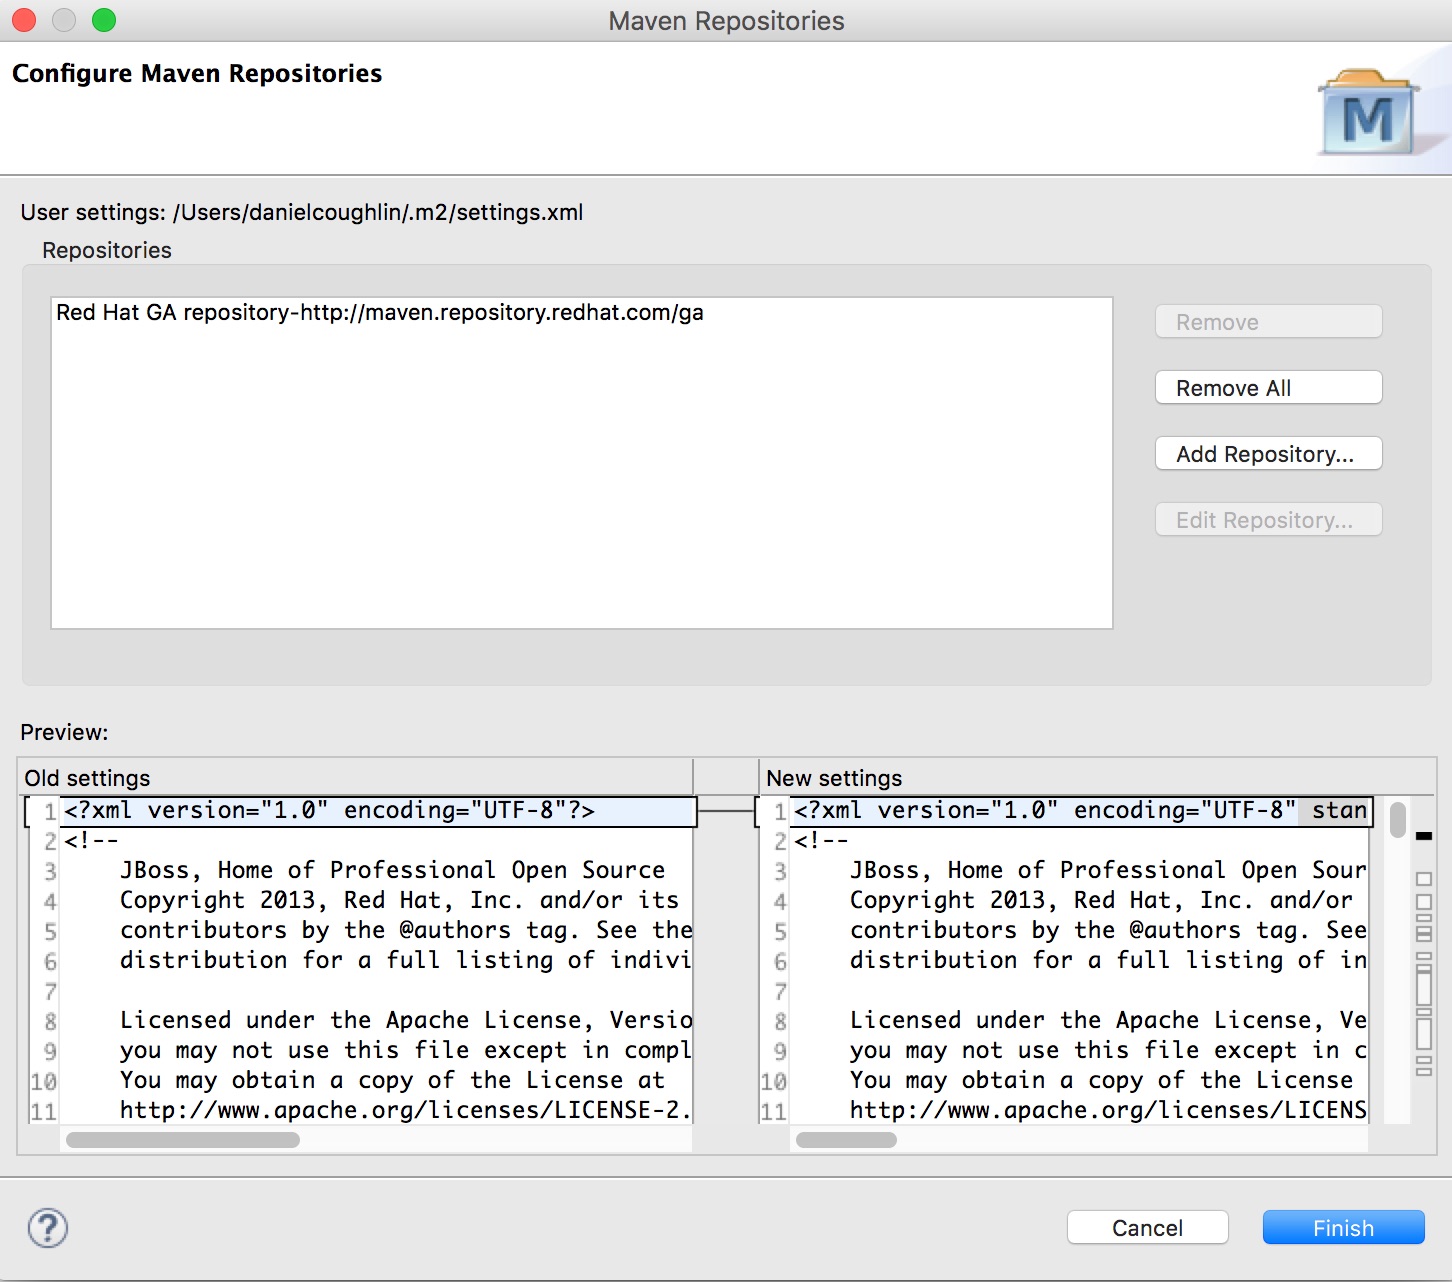
Click Finish.
-
Answer Yes when asked about updating the
settings.xmlfile.
B. Install JBoss EAP
Once Developer Studio is installed (above), you can download, install, and set up JBoss EAP from within the IDE.
To download, install, and set up JBoss EAP from within the IDE:
-
Start the IDE.
-
Click Window → Preferences, expand JBoss Tools, and then click JBoss Runtime Detection.
-
In the Paths pane, click Download.
-
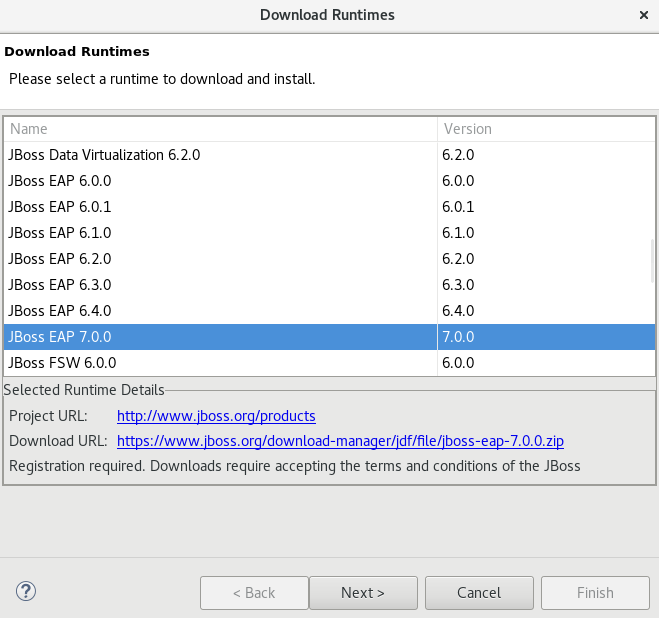
In the Download Runtimes window, from the Download Runtimes table select the JBoss EAP version that you want to download and click Next.
Note: For JBoss EAP 6.1.x and later, continue to follow the steps given here. For JBoss EAP 6.0.x and earlier, follow the on-screen instructions for downloading JBoss EAP from the Red Hat Customer Portal and after JBoss EAP is installed continue to use runtime detection to set up JBoss EAP from within the IDE.
Figure 2.2. Download Runtimes Window Listing Available JBoss EAP Versions
- In the JBoss.org Credentials window, enter your credentials and click Next.
-
In the Runtime JBoss EAP_version window, read the terms and conditions, and then click I accept the terms of the license agreement and then click Next. Note that if you have previously accepted the terms and conditions in the IDE or through the jboss.org website, this window is skipped.
-
In the Download Runtime window, in the Install Folder field, click Browse and choose a location in which to install JBoss EAP and click Finish. The Download 'JBoss EAP 1 window shows the progress of the download.
-
Click Apply and Close to close the Preferences window.
Result: The server is listed in the Servers view in stopped mode.
Install, Configure, and Verify
To verify that Developer Studio and JBoss EAP are working correctly, deploy and execute the helloworld quickstart application in the JBoss EAP server you will now create and configure:
In Developer Studio, Open the Red Hat Central view.
-
Note: If the Red Hat Central view is not visible, click the
 icon on the main menu bar.
 -
Type
helloworldinto the search box and click the helloworld-rs quickstart shown in the result.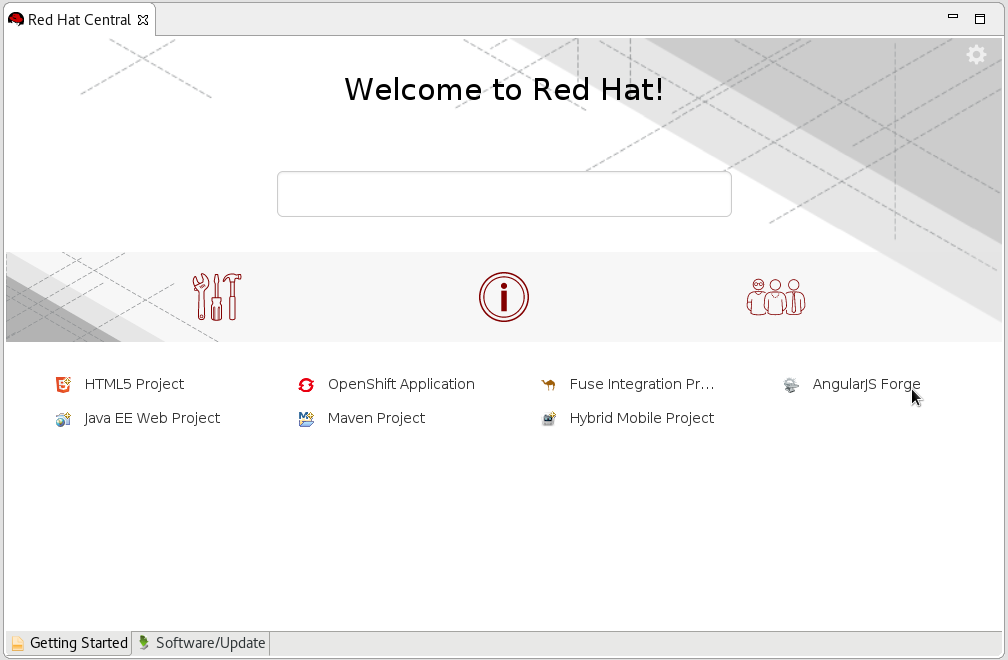
-
Click Finish. This downloads the helloworld application and its Maven dependencies.
-
Once all the dependencies are downloaded, a dialog appears to tell you that your project is ready. Click Finish.
-
In the Servers tab, select Red Hat JBoss EAP 7.0 [Stopped] and click the Start the Server icon to start the JBoss EAP server.

-
Once the server starts, right-click the jboss-helloworld application in the Project Explorer view.
-
From the menu that appears, select Run as.. and then Run on Server.
-
Select the newly created JBoss EAP server, click OK and then Finish.
-
This will build, deploy, and run the helloworld application in the JBoss EAP server. The application opens in the internal default Developer Studio web browser and presents the "Hello World!" Success page.
Build your first JBoss EAP application
Follow the below series to build your first application. You will build some simple examples as well as build a TicketMonster Application using JBoss EAP. The TicketMonster application shows you how to build a modern HTML application that communicates with a Jakarta EE backend using REST. The series walks you through each step of the application development lifecycle, from start to finish.
|
Step 1: Learn more about getting started |
|
|
Step 2: Start exploring TicketMonster |
Want to know more about what you can do with JBoss EAP?
Last updated: November 9, 2023