For virtualization administrators new to Red Hat OpenShift Virtualization, installation and setup can seem intimidating at first. To lower the barrier to entry, Red Hat is excited to introduce an improved, intuitive UI-driven installation experience for OpenShift Virtualization in Developer Preview with Red Hat OpenShift 4.19. This approach simplifies the entire installation workflow, making it easier to navigate isolated environments and accelerate your time-to-value with OpenShift Virtualization.
This article explores how Red Hat designed the new installation experience to make the OpenShift Virtualization setup easier and more efficient. Keep reading to discover key onboarding benefits, understand the impact of core features like the new UI and registry-free installs, review a step-by-step guide to get started, and understand what’s planned for the future.
What’s new?
We've simplified OpenShift Virtualization deployment for faster setup and adoption with:
- UI-Driven configuration: Guided UI simplifies the setup with a simple wizard that provides best practices.
- Pre-installed operators: Essential OpenShift Virtualization operators come pre-installed for rapid day-one readiness.
- Registry-free disconnected installs: Seamless deployment in air-gapped networks without a pre-existing image registry.
- Proven Red Hat technology: Built on reliable Agent-Based and Assisted Installers for a streamlined experience.
The new installation process
Now, let's walk through the steps of this new installation process. In this example, we will share the process of installing a compact OpenShift cluster in more detail, using a small test environment composed of only three machines. Every machine is booted using a generic Agent ISO (~40 GB) containing a 4.19 CI release payload and the essential operators for virtualization.
To download the ISO, navigate to the console, select I’m installing on a disconnected/air-gapped/secured environment, and follow the instructions.
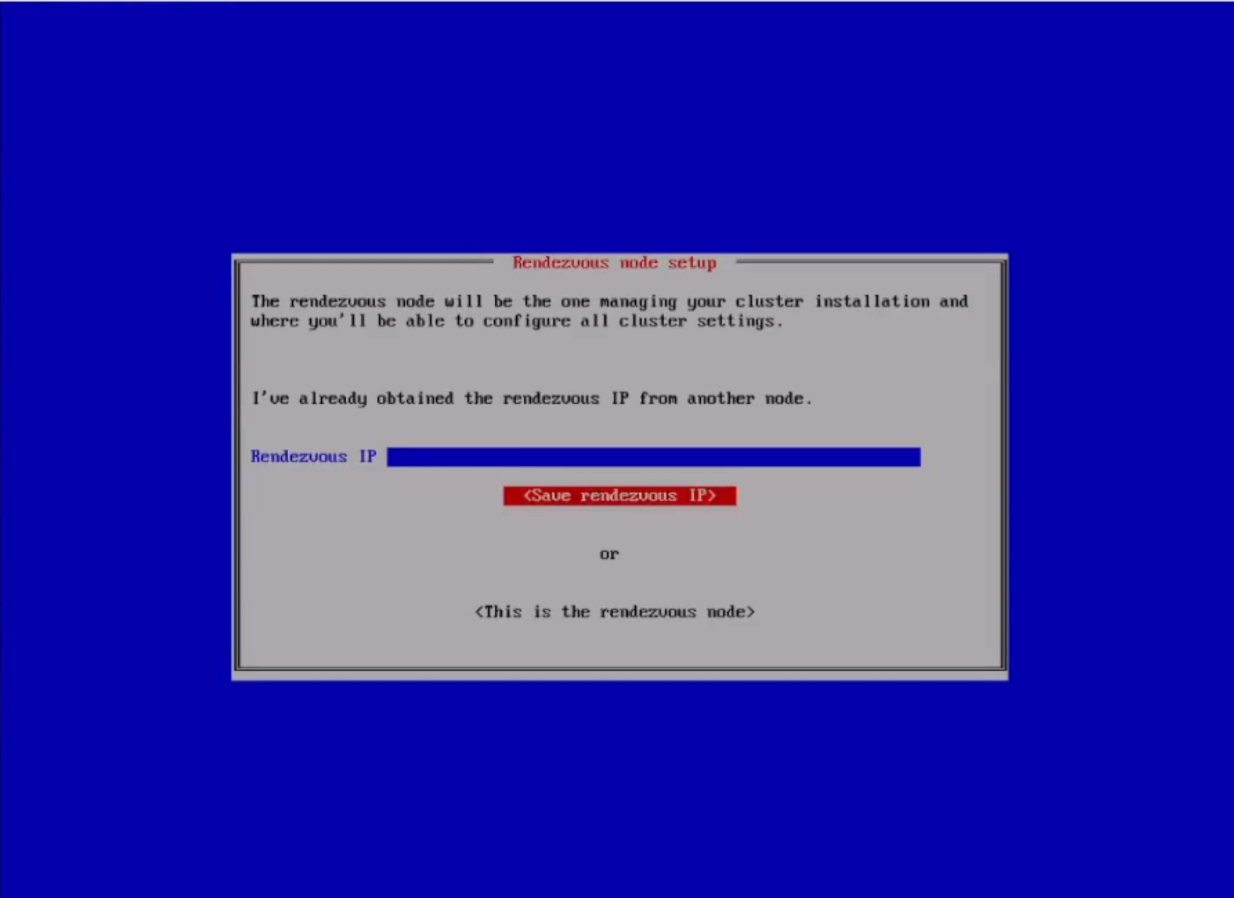
After downloading the ISO image, we can boot all the machines, and a wizard will pop up for you to configure your node, select your Rendezvous node (Figure 1), and configure the other nodes with the chosen Rendezvous IP.
After you complete the boot sequence, you will receive a URL to redirect to the Assisted UI to complete the installation.
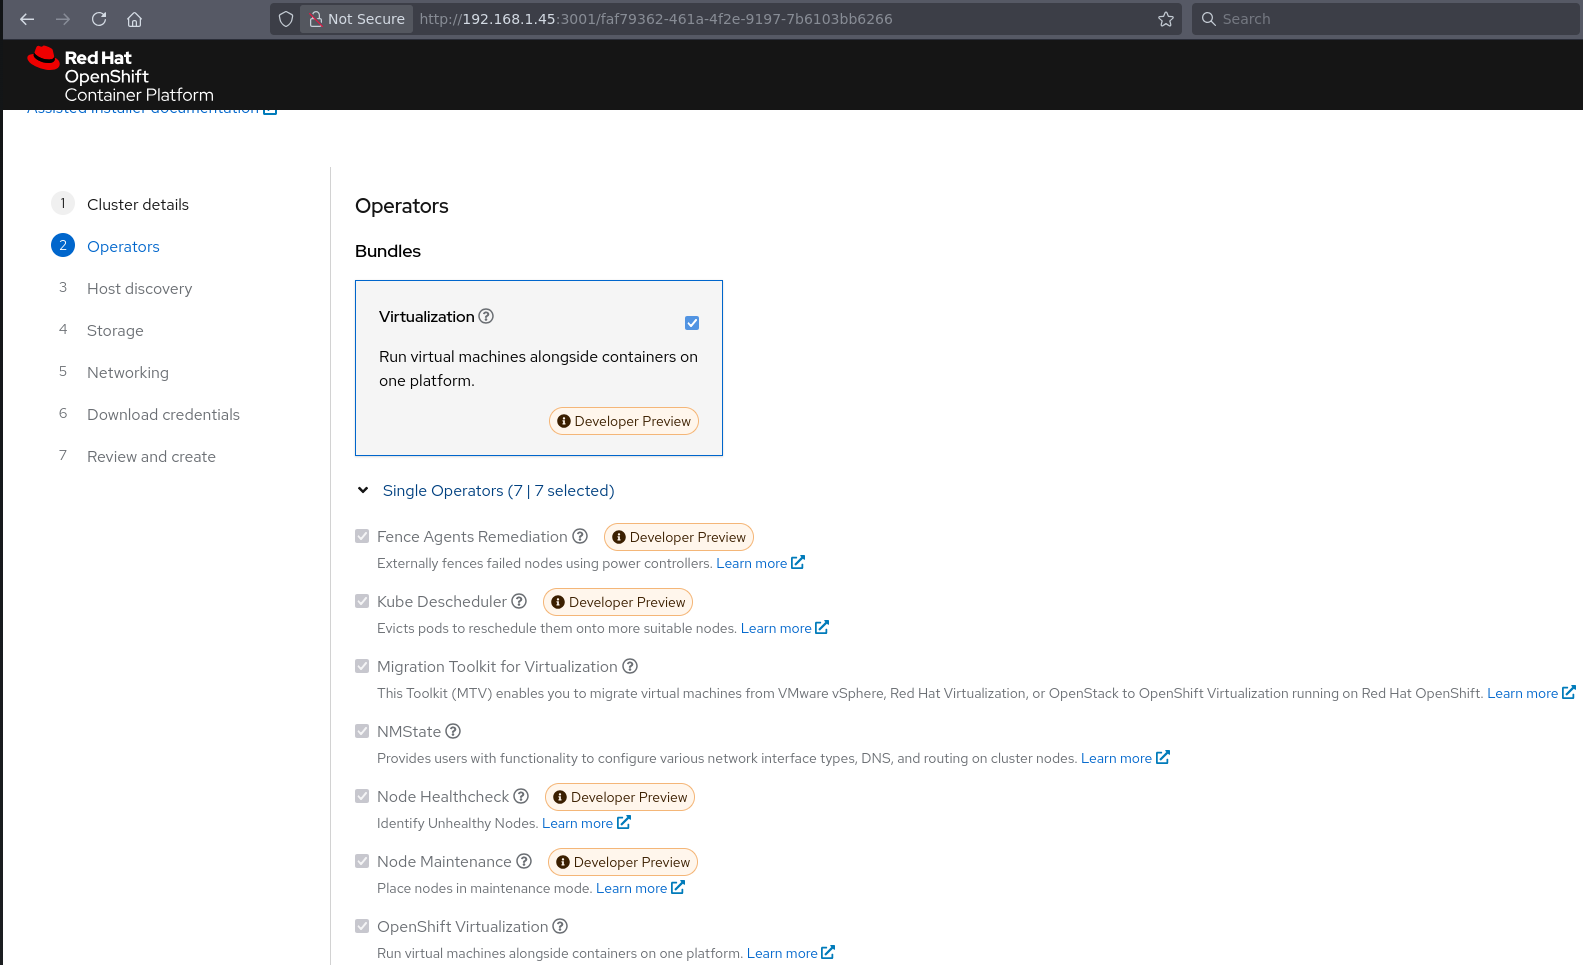
In the Assisted UI, you can provide the installation details, select the operators to install (here we have the virtualization bundle), verify the machines’ hardware specifications, and provide network installation details (Figure 2).
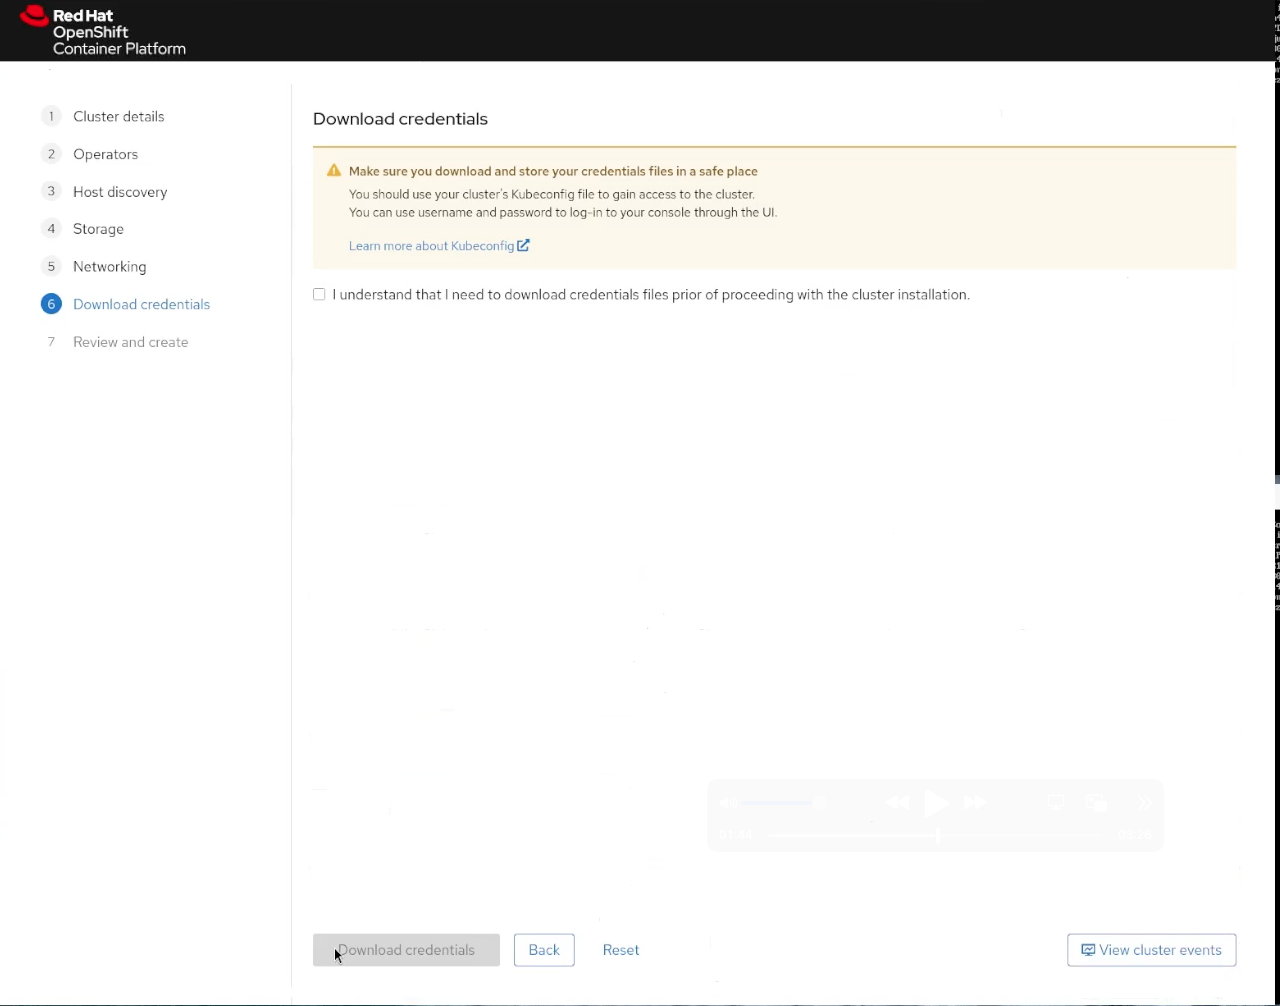
Next, you can download the credentials and save the kube admin password and kubeconfig to access the cluster after installation (Figure 3).
After the completed installation, you can check the cluster console for the operators and nodes installed (Figure 4).
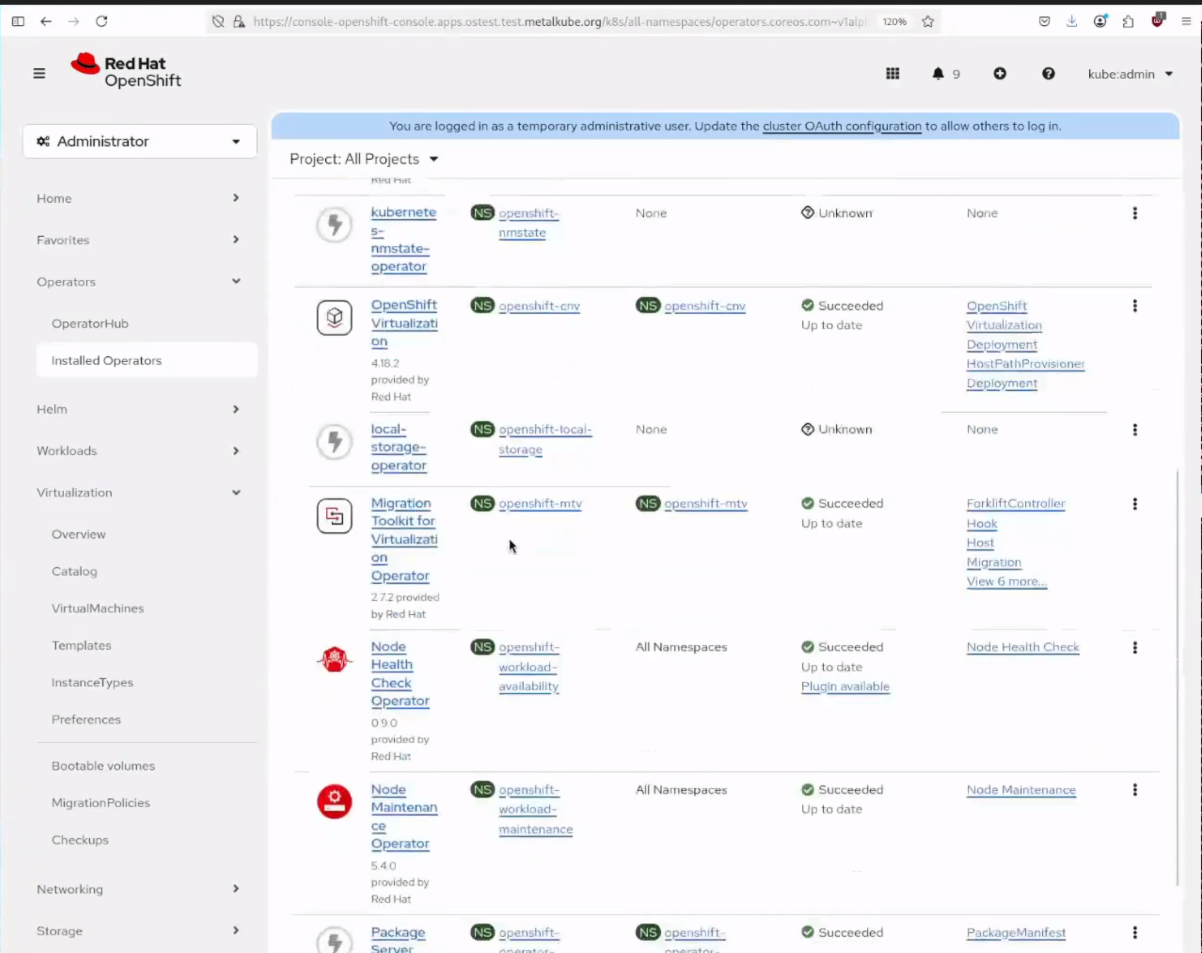
You can see the virtualization tab on the console.
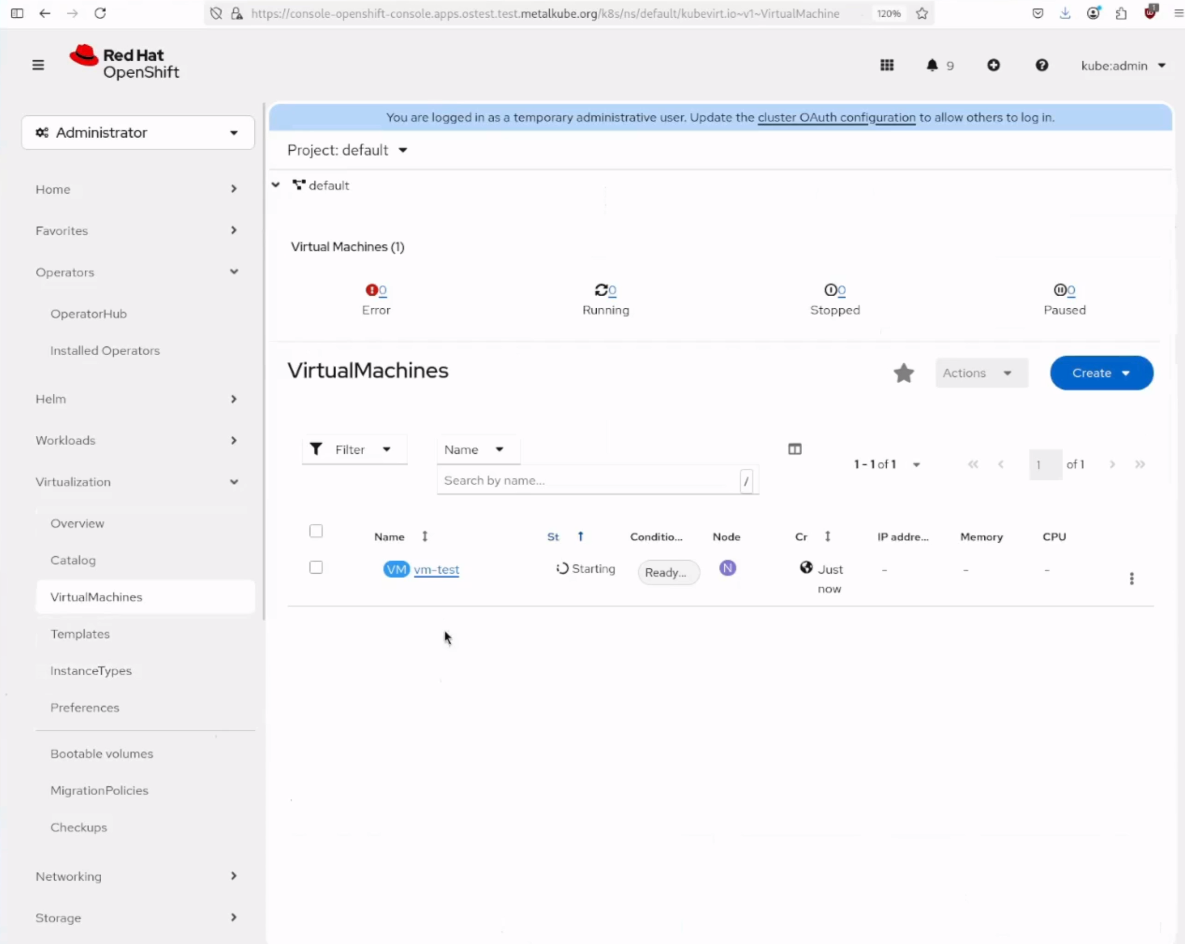
Now we can create a virtual machine.
After a few minutes, you can check on the web console and see the virtual machine up and running (Figure 5).
What's next
We're excited to announce that these installation enhancements for OpenShift Virtualization are in Developer Preview with OpenShift 4.19, and we’re working towards a Technology Preview. Our goal is to simplify your installation experience and speed up your time-to-value. While these updates initially focus on OVE in air-gapped environments, the core improvements (e.g., the intuitive UI and no image registry needed) are foundational. We envision them as simplifying most disconnected OpenShift installations platform-wide in the future.
The new installation experience for OpenShift Virtualization is more than just a UI upgrade; it’s a strategic step toward lowering the barrier to entry for virtualization teams operating in disconnected or resource-constrained environments. By removing friction through guided configuration, pre-installed operators, and registry-free deployment, Red Hat is helping teams accelerate setup, reduce overhead, and focus on what matters: running and managing virtual machines with confidence.
Ready to start your virtualization journey with OpenShift Virtualization? We encourage you to explore this new installation experience. Your feedback is invaluable to us. Please share your thoughts and insights in our community forum.
