Redhat Developers  Logo
  • Products

    Featured

    • Red Hat Enterprise Linux
      Red Hat Enterprise Linux Icon
    • Red Hat OpenShift AI
      Red Hat OpenShift AI
    • Red Hat Enterprise Linux AI
      Linux icon inside of a brain
    • Image mode for Red Hat Enterprise Linux
      RHEL image mode
    • Red Hat OpenShift
      Openshift icon
    • Red Hat Ansible Automation Platform
      Ansible icon
    • Red Hat Developer Hub
      Developer Hub
    • View All Red Hat Products
    • Linux

      • Red Hat Enterprise Linux
      • Image mode for Red Hat Enterprise Linux
      • Red Hat Universal Base Images (UBI)
    • Java runtimes & frameworks

      • JBoss Enterprise Application Platform
      • Red Hat build of OpenJDK
    • Kubernetes

      • Red Hat OpenShift
      • Microsoft Azure Red Hat OpenShift
      • Red Hat OpenShift Virtualization
      • Red Hat OpenShift Lightspeed
    • Integration & App Connectivity

      • Red Hat Build of Apache Camel
      • Red Hat Service Interconnect
      • Red Hat Connectivity Link
    • AI/ML

      • Red Hat OpenShift AI
      • Red Hat Enterprise Linux AI
    • Automation

      • Red Hat Ansible Automation Platform
      • Red Hat Ansible Lightspeed
    • Developer tools

      • Red Hat Trusted Software Supply Chain
      • Podman Desktop
      • Red Hat OpenShift Dev Spaces
    • Developer Sandbox

      Developer Sandbox
      Try Red Hat products and technologies without setup or configuration fees for 30 days with this shared Openshift and Kubernetes cluster.
    • Try at no cost
  • Technologies

    Featured

    • AI/ML
      AI/ML Icon
    • Linux
      Linux Icon
    • Kubernetes
      Cloud icon
    • Automation
      Automation Icon showing arrows moving in a circle around a gear
    • View All Technologies
    • Programming Languages & Frameworks

      • Java
      • Python
      • JavaScript
    • System Design & Architecture

      • Red Hat architecture and design patterns
      • Microservices
      • Event-Driven Architecture
      • Databases
    • Developer Productivity

      • Developer productivity
      • Developer Tools
      • GitOps
    • Secure Development & Architectures

      • Security
      • Secure coding
    • Platform Engineering

      • DevOps
      • DevSecOps
      • Ansible automation for applications and services
    • Automated Data Processing

      • AI/ML
      • Data Science
      • Apache Kafka on Kubernetes
      • View All Technologies
    • Start exploring in the Developer Sandbox for free

      sandbox graphic
      Try Red Hat's products and technologies without setup or configuration.
    • Try at no cost
  • Learn

    Featured

    • Kubernetes & Cloud Native
      Openshift icon
    • Linux
      Rhel icon
    • Automation
      Ansible cloud icon
    • Java
      Java icon
    • AI/ML
      AI/ML Icon
    • View All Learning Resources

    E-Books

    • GitOps Cookbook
    • Podman in Action
    • Kubernetes Operators
    • The Path to GitOps
    • View All E-books

    Cheat Sheets

    • Linux Commands
    • Bash Commands
    • Git
    • systemd Commands
    • View All Cheat Sheets

    Documentation

    • API Catalog
    • Product Documentation
    • Legacy Documentation
    • Red Hat Learning

      Learning image
      Boost your technical skills to expert-level with the help of interactive lessons offered by various Red Hat Learning programs.
    • Explore Red Hat Learning
  • Developer Sandbox

    Developer Sandbox

    • Access Red Hat’s products and technologies without setup or configuration, and start developing quicker than ever before with our new, no-cost sandbox environments.
    • Explore Developer Sandbox

    Featured Developer Sandbox activities

    • Get started with your Developer Sandbox
    • OpenShift virtualization and application modernization using the Developer Sandbox
    • Explore all Developer Sandbox activities

    Ready to start developing apps?

    • Try at no cost
  • Blog
  • Events
  • Videos

MySQL replication between VMs in OpenShift through external network

Achieve high-availability for mission critical databases with OpenShift Virtualization

July 11, 2024
Kalyanaraman Narayanan
Related topics:
DatabasesVirtualization
Related products:
Red Hat OpenShiftRed Hat OpenShift Container PlatformRed Hat OpenShift Virtualization

Share:

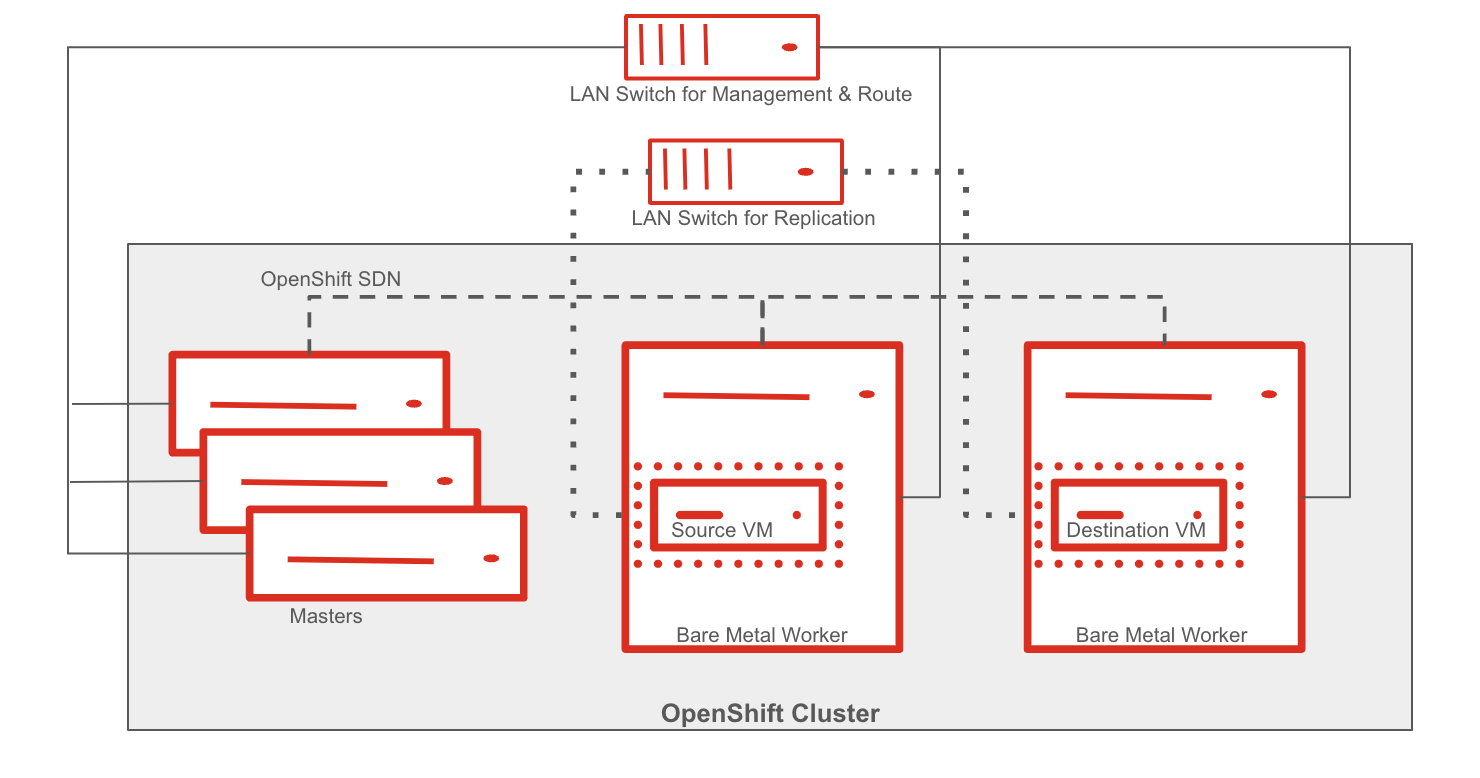
    This article explores setting up MySQL replication using an external network across virtual machines (VMs) in separate projects in a Red Hat OpenShift cluster. The fundamentals discussed here can be used to set up replication across VMs in geographically distinct OpenShift clusters. This configuration offers robust disaster recovery for business critical databases. See Figure 1.

    The setup will have two different network. One for the management and OpenShift route traffic and other for VM to VM communication.
    Figure 1: OpenShift Cluster with two networks. One for Management and other for VM Traffic.

    Set-up Details 

    This blog post explores a unique OpenShift cluster architecture that enables replication across geographically separated clusters. The cluster consists of three master nodes and two worker nodes. Each worker node houses a virtual machine (VM) equipped with an external network interface card managed by the NMState operator. Crucially, MySQL database replication leverages these external interfaces instead of the internal OpenShift network. This approach allows for similar replication to be established between VMs in geographically distinct OpenShift clusters.

    Technical approach:

    1. Provision VMs: Deploy VMs in OpenShift cluster using OpenShift Virtualization with an additional network interface which is directly connected to LAN.
    2. Configure MySQL replication: Establish primary-secondary replication between the VMs using standard MySQL procedures.
    3. Test the replication: Create records in primary database and check if those are replicated to secondary.

    Benefits:

    • Disaster recovery: In case of an outage in one region, the secondary database can be promoted to primary quickly, minimizing downtime and data loss.
    • OpenShift integration: Leverage OpenShift's container orchestration and management capabilities for both database VMs and applications.

    Prerequisite: 

    By default, OpenShift Virtualization is installed with a single, internal pod network.

    You must create a Linux bridge network attachment definition (NAD) in order to connect to additional networks. Refer to this documentation.

    Provision VMs

    Source VM

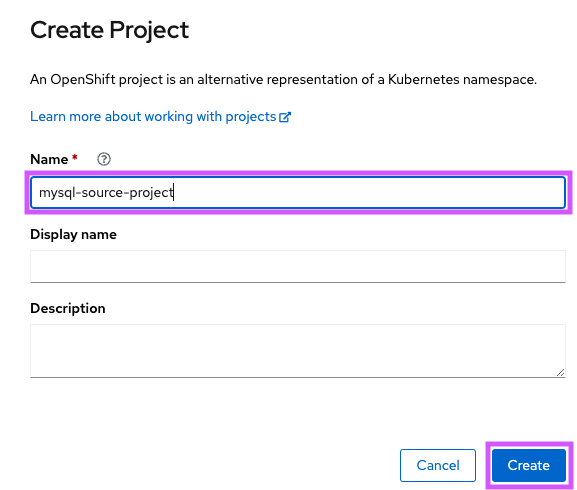
    1. Create the project “mysql-source-project” (Figure 2).
    Provide the Project Name as "mysql-source-project" and select "Create"
    Provide the Project Name as "mysql-source-project" and select "Create"
    Figure 2: Provide the project name as "mysql-source-project” and select Create.
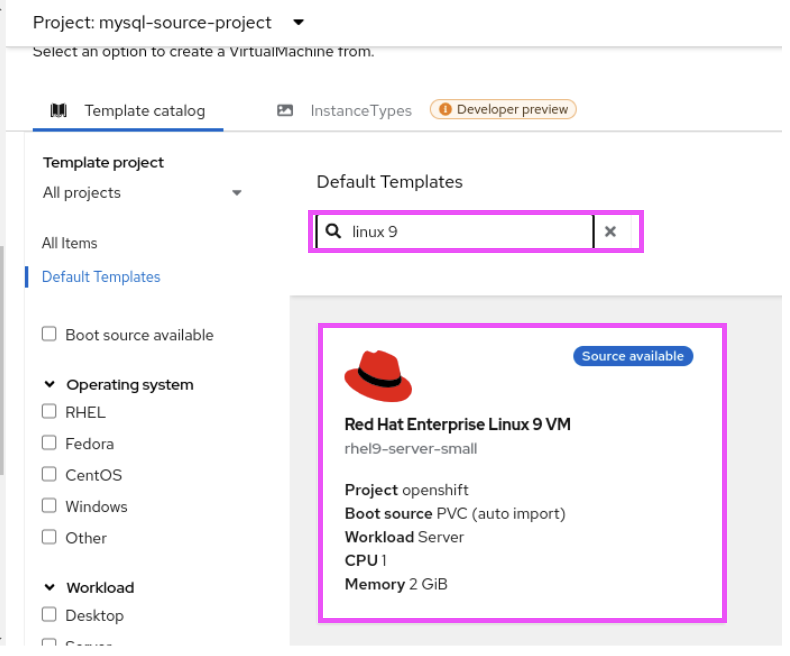
    1. Create source VM leveraging the Red Hat Enterprise Linux 9 VM Template (Figure 3).
    Search for linux 9 in the templates and select Red Hat Enterprise Linux 9 VM
    Figure 3: In the templates, search for "linux 9" and select Red Hat Enterprise Linux 9 VM.
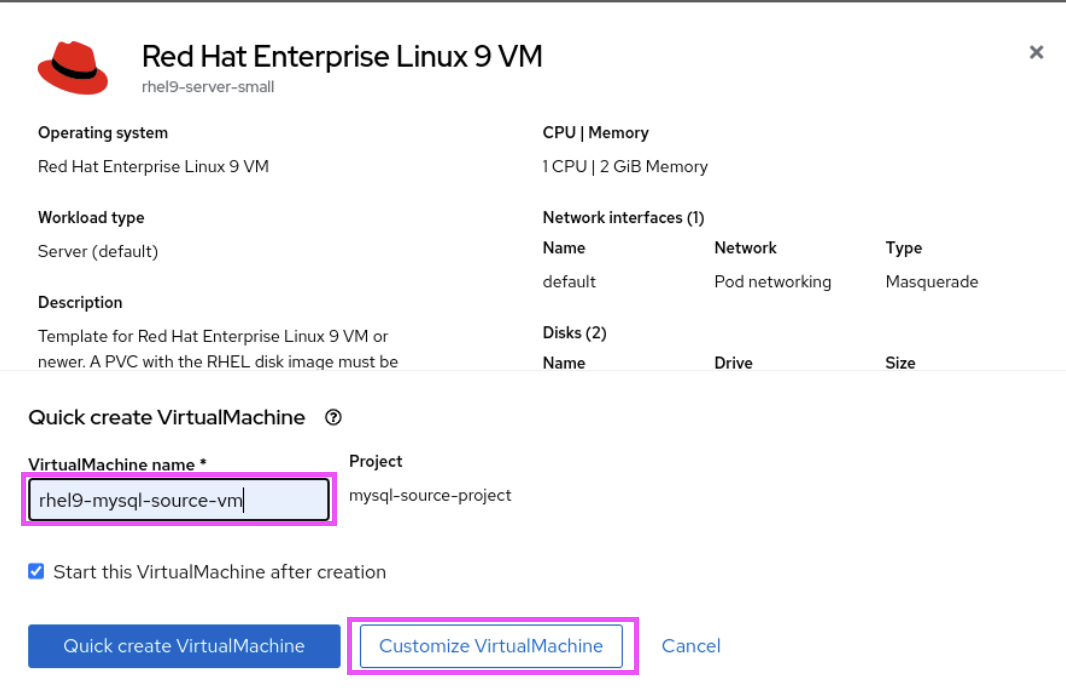
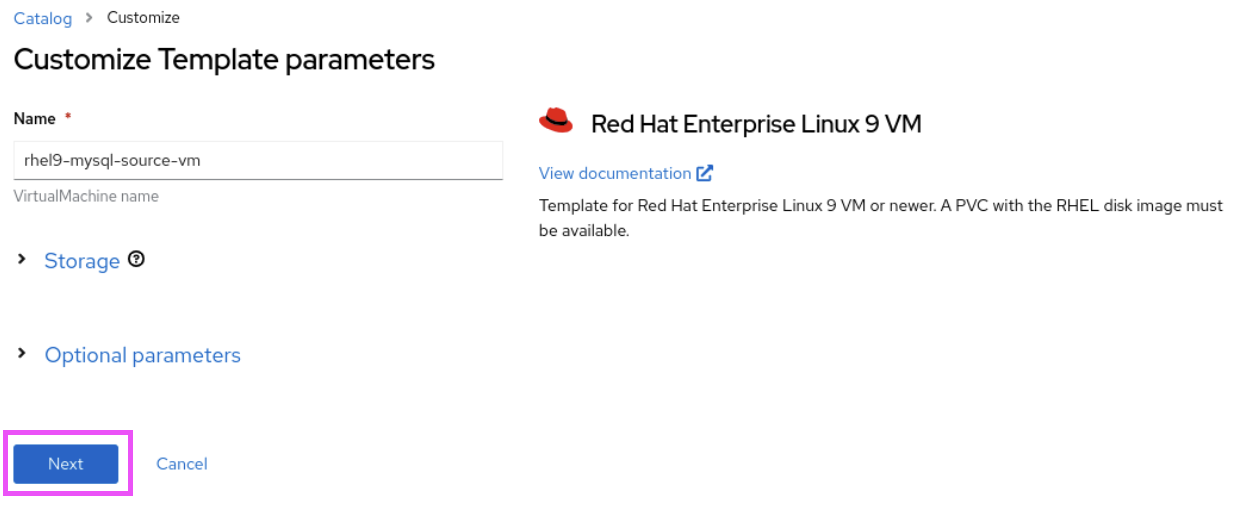
    1. Provide the name for the VM and select Customize VirtualMachine (Figure 4).
    Name the VM as "rhel9-mysql-source-vm" and select "Customize VirtualMachine"
    Name the VM as "rhel9-mysql-source-vm" and select "Customize VirtualMachine"
    Figure 4: Name the VM "rhel-mysqul-source-vm" and select Customize VirtualMachine.
    1. Select Next (Figure 5).
    Select "Next"
    Leave all the parameters as default and Select "Next"
    Figure 5: Leave all parameters as default and select Next.
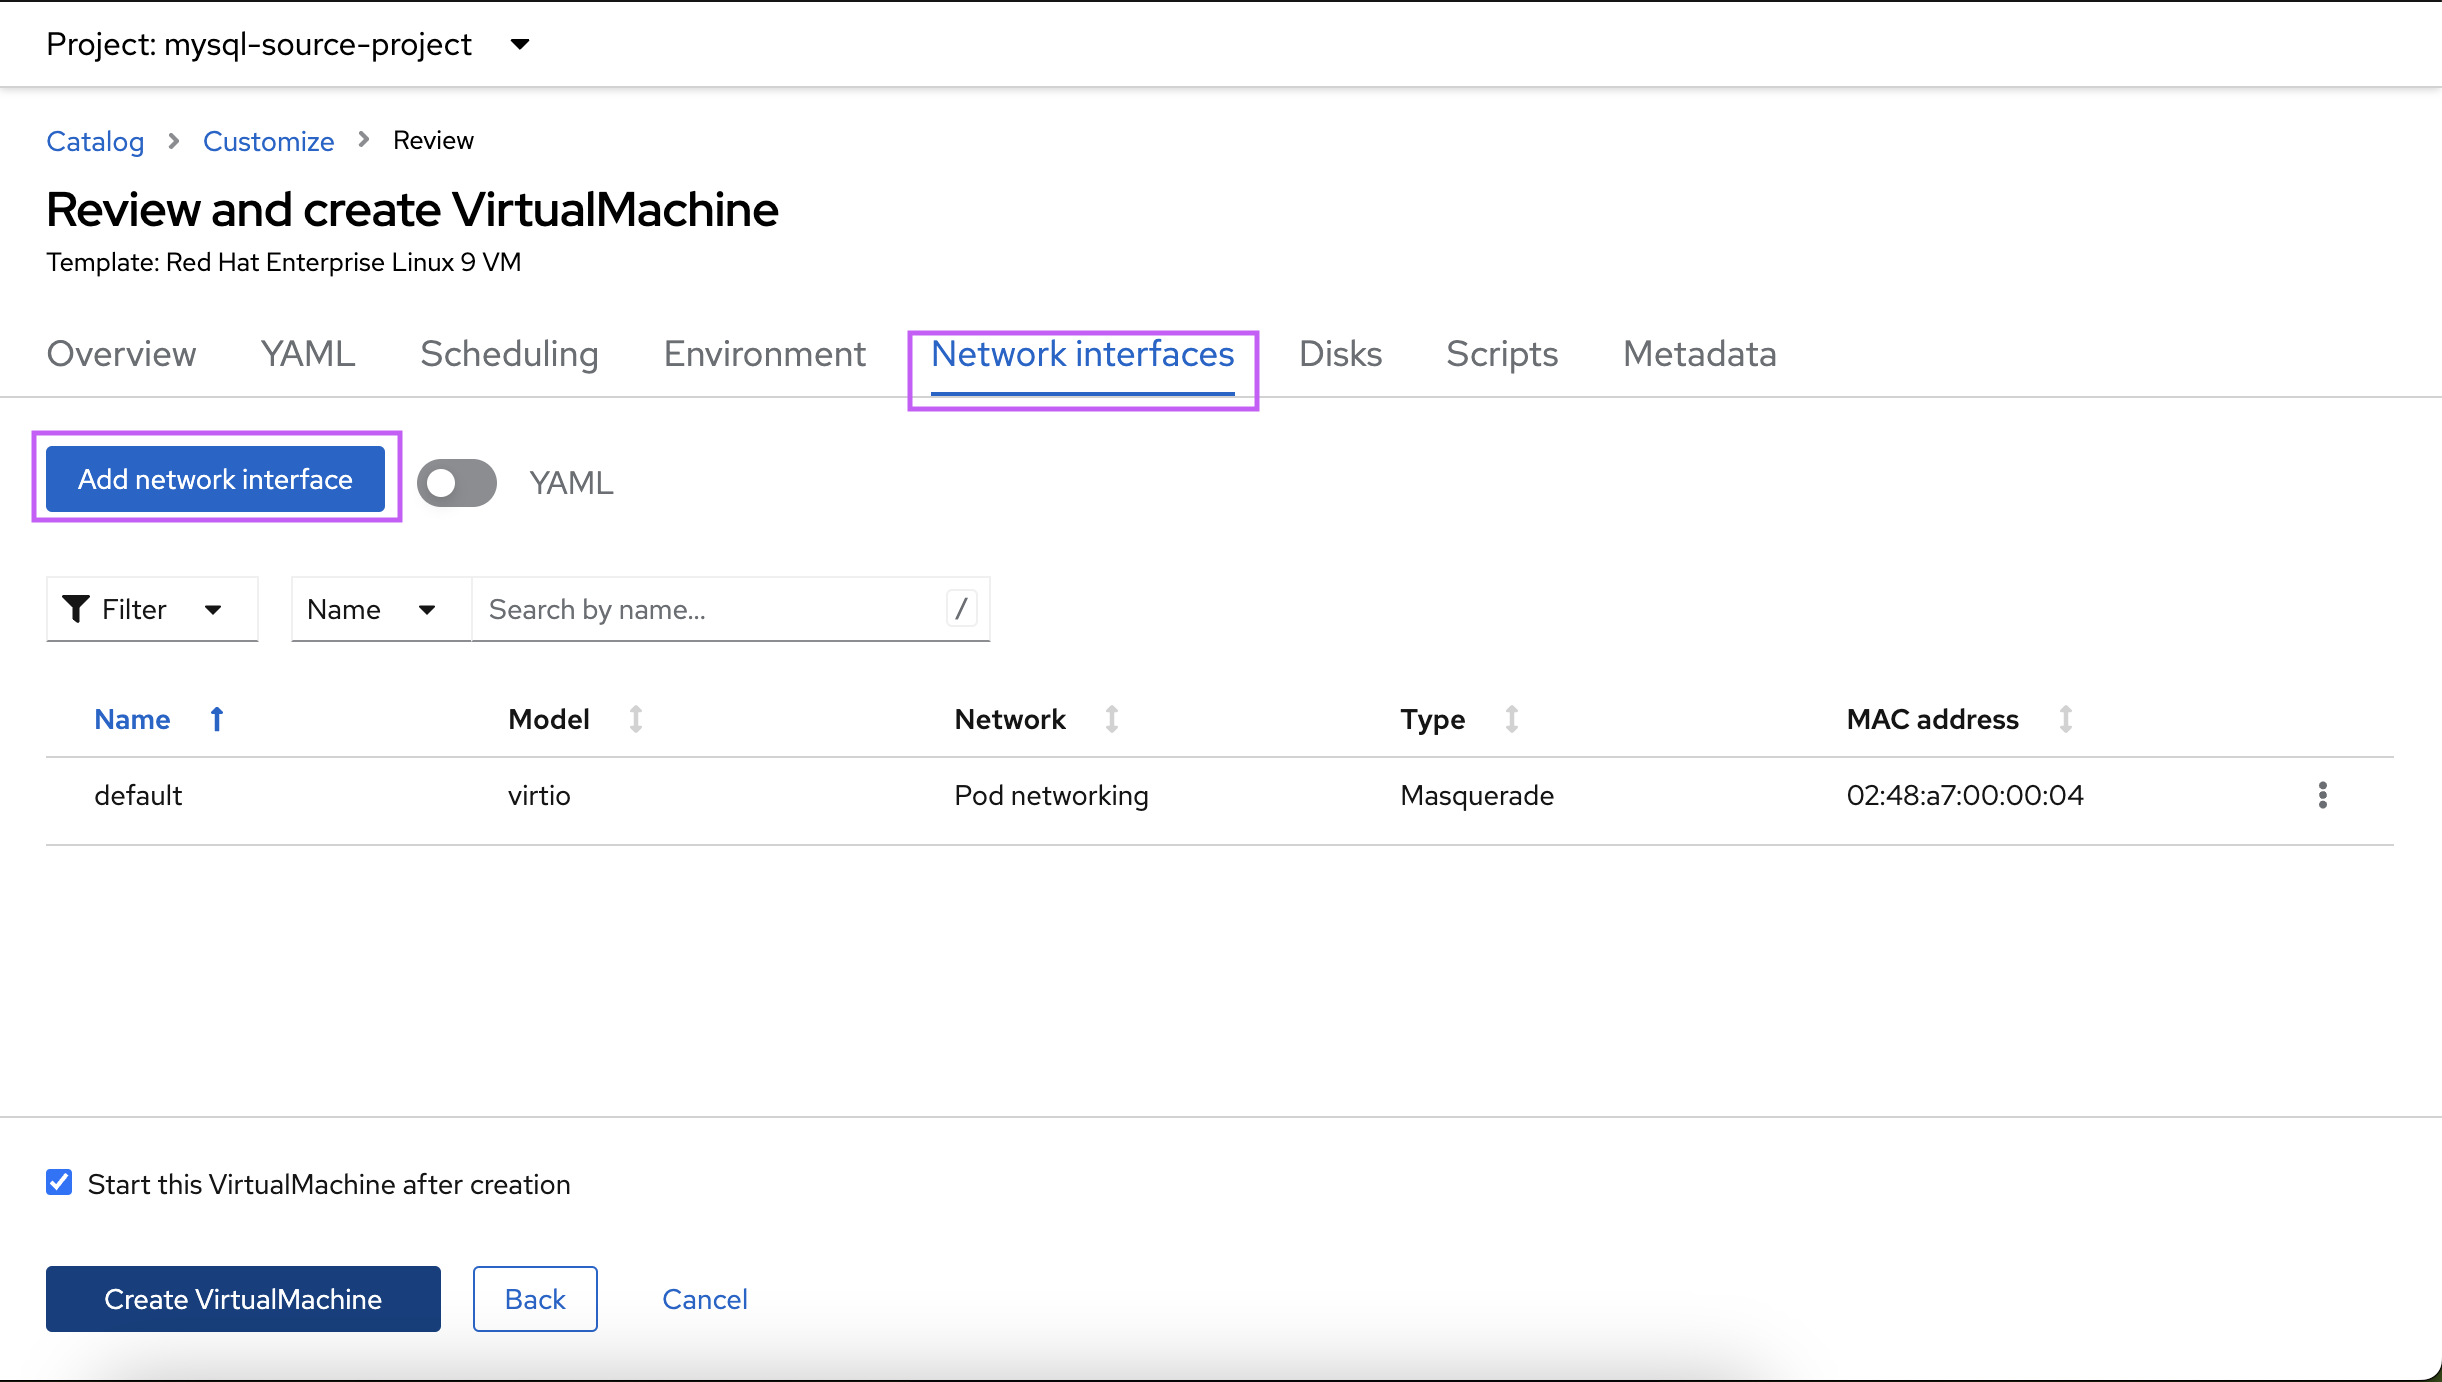
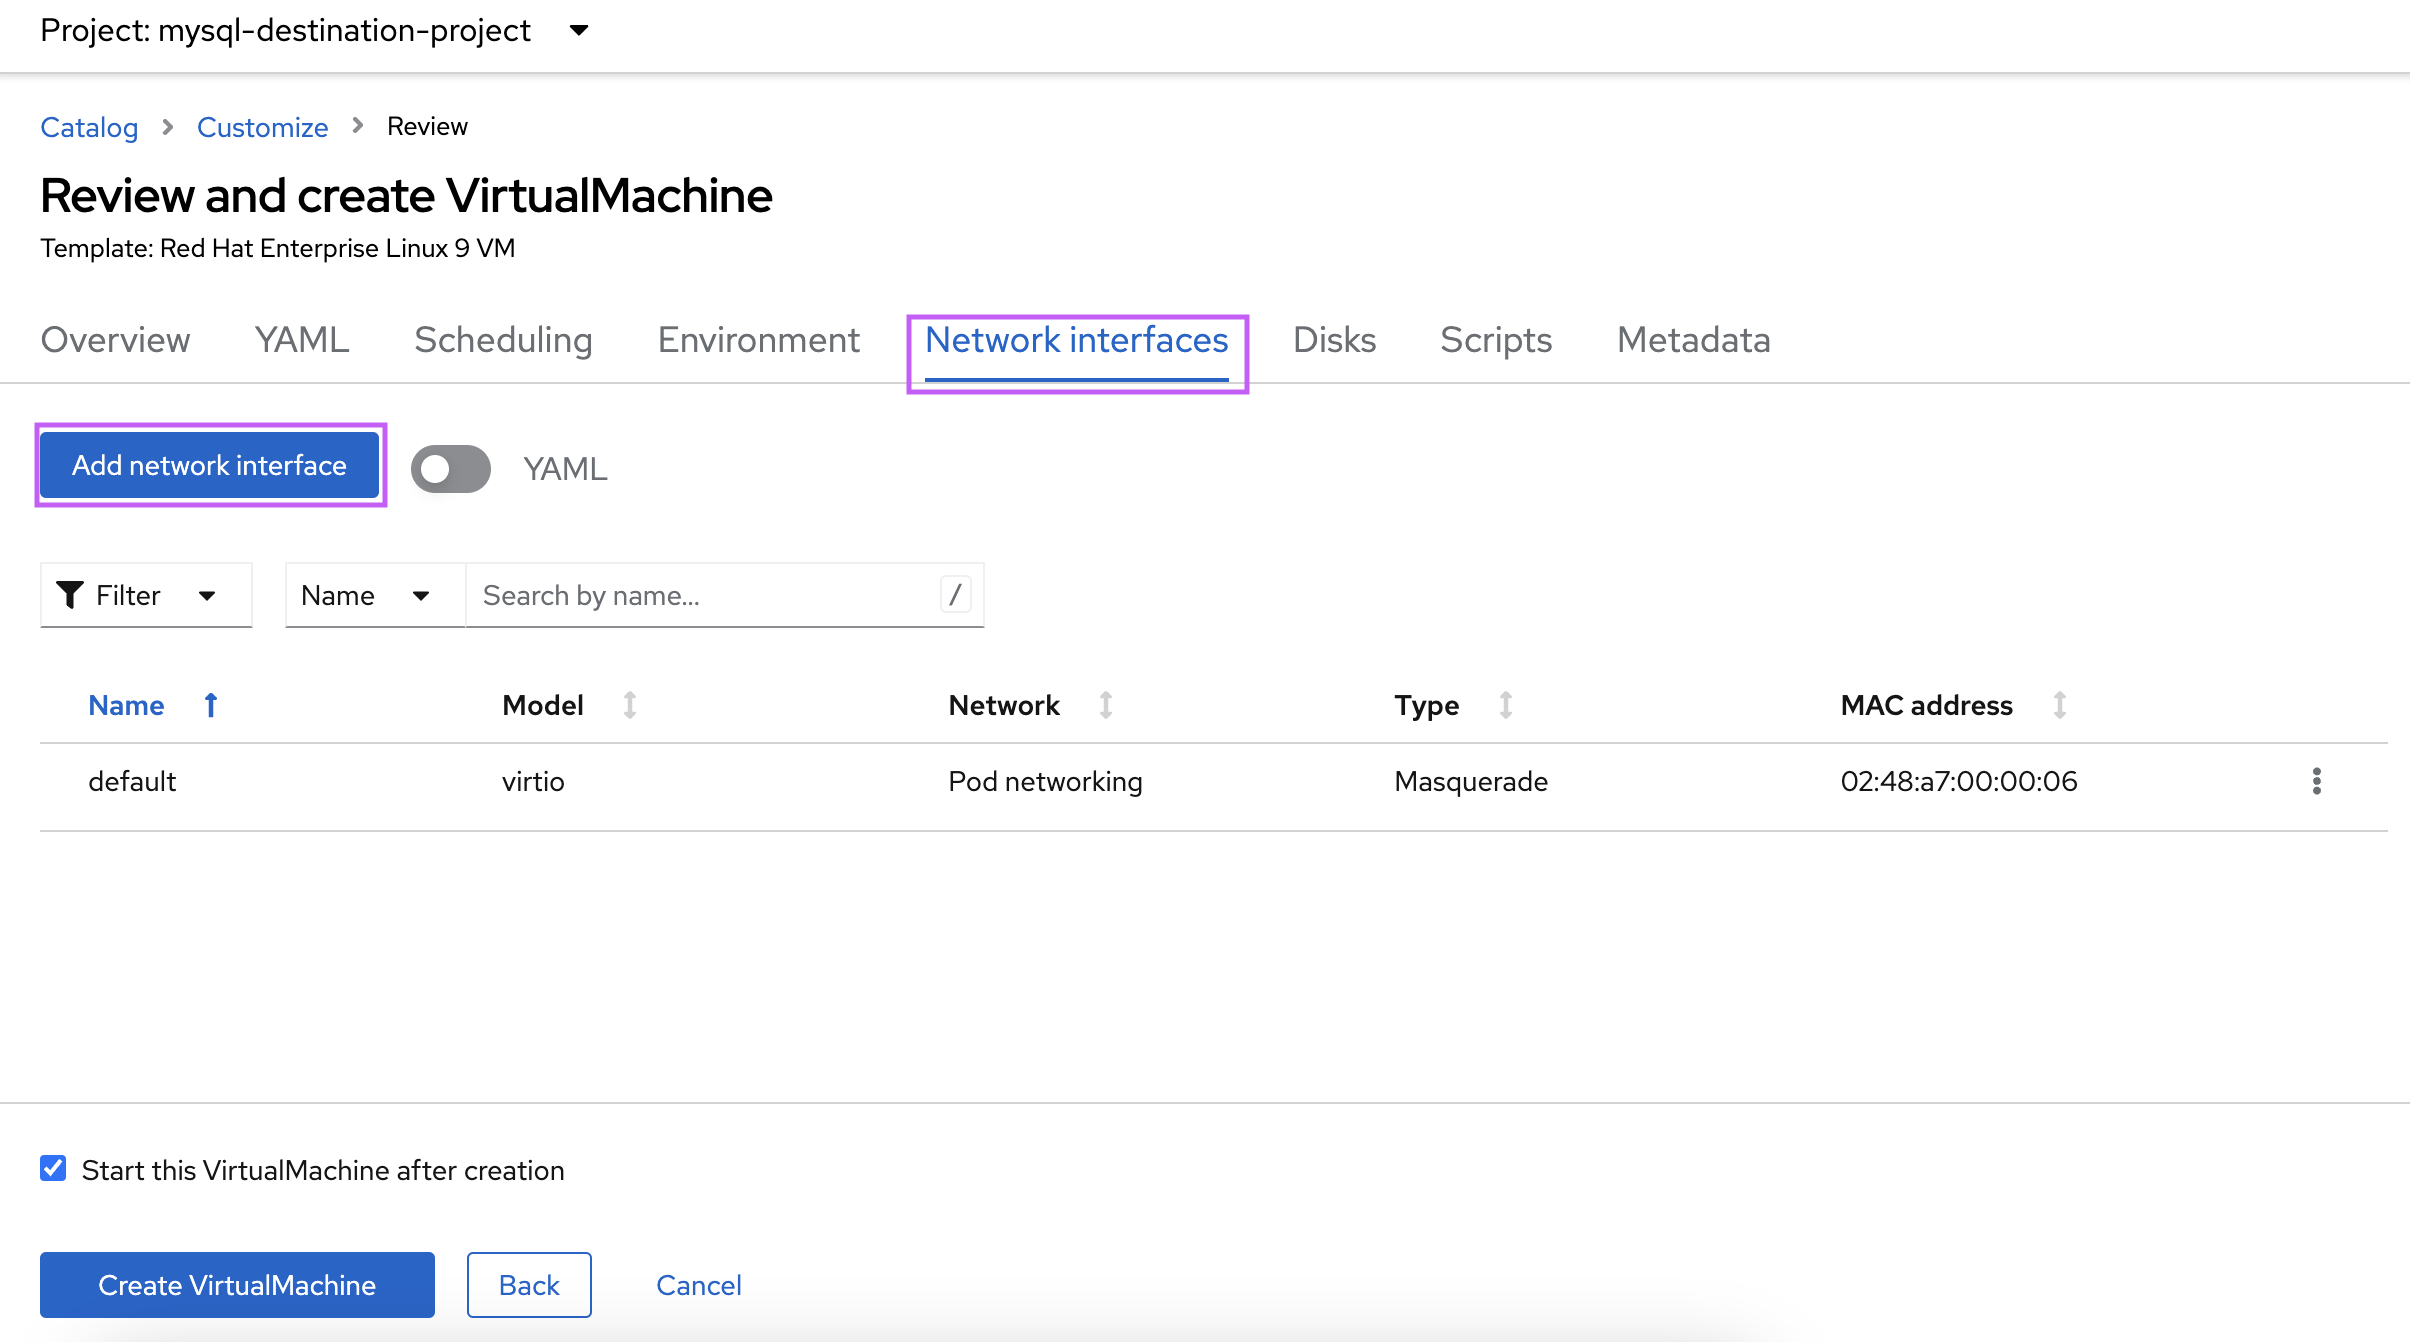
    1. Select Network Interfaces and Add network interface (Figure 6). 
    In the menu select "Network Interfaces" and select "Add Network Interfaces"
    In the menu select "Network Interfaces" and select "Add Network Interfaces"
    Figure 6: In the menu select Network Interfaces and Add network interface.
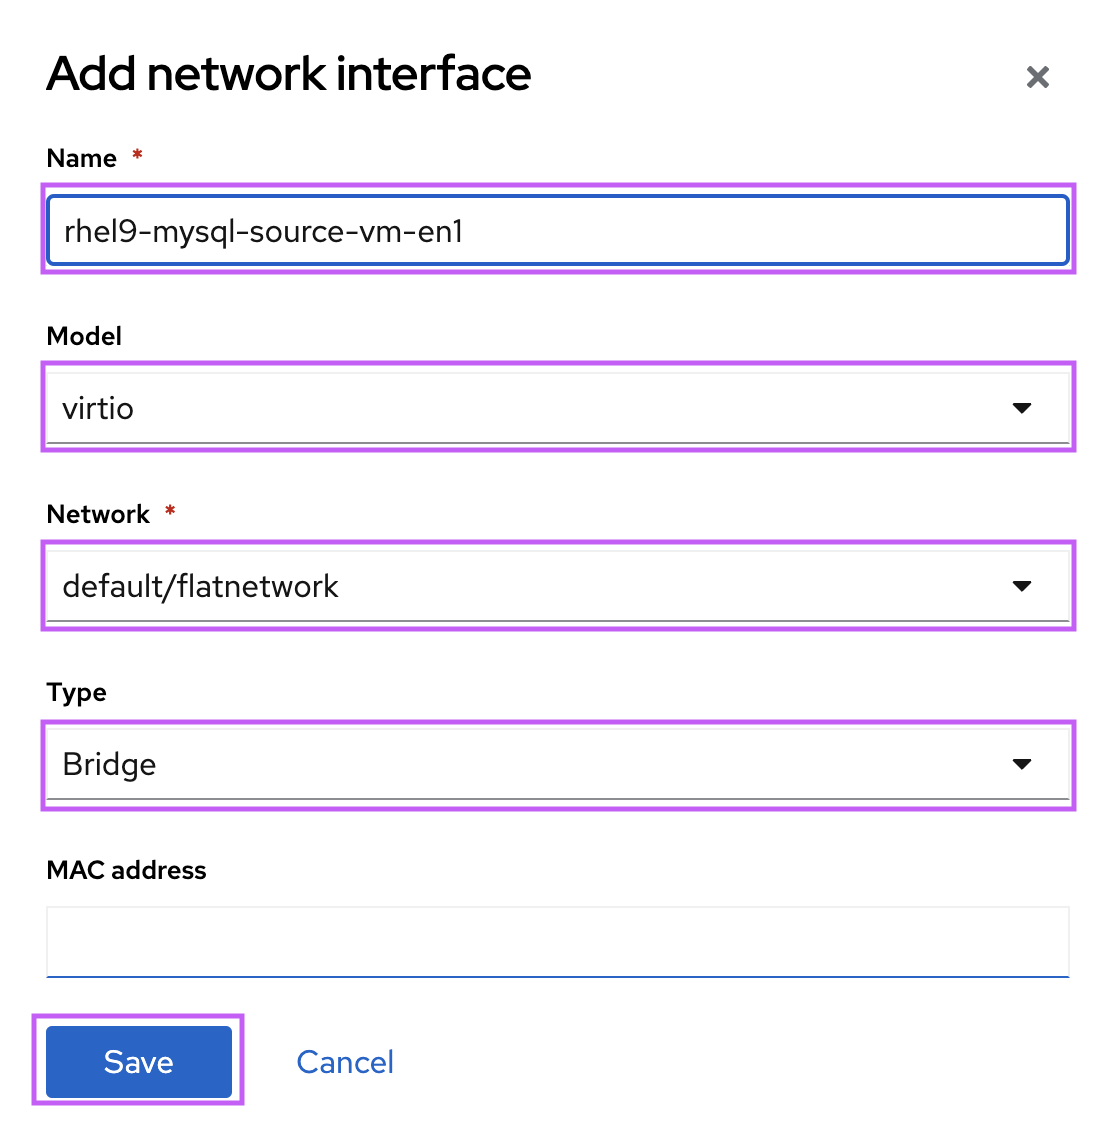
    1. Name the interface and select Save (Figure 7).
    Name the interface and select Model as "virtio", Network as "flatnetwork" and type as "bridge" and select "save"
    Figure 7: Name the interface, select Model as virtio, Network as default/flatnetwork, Type as Bridge, and select Save.
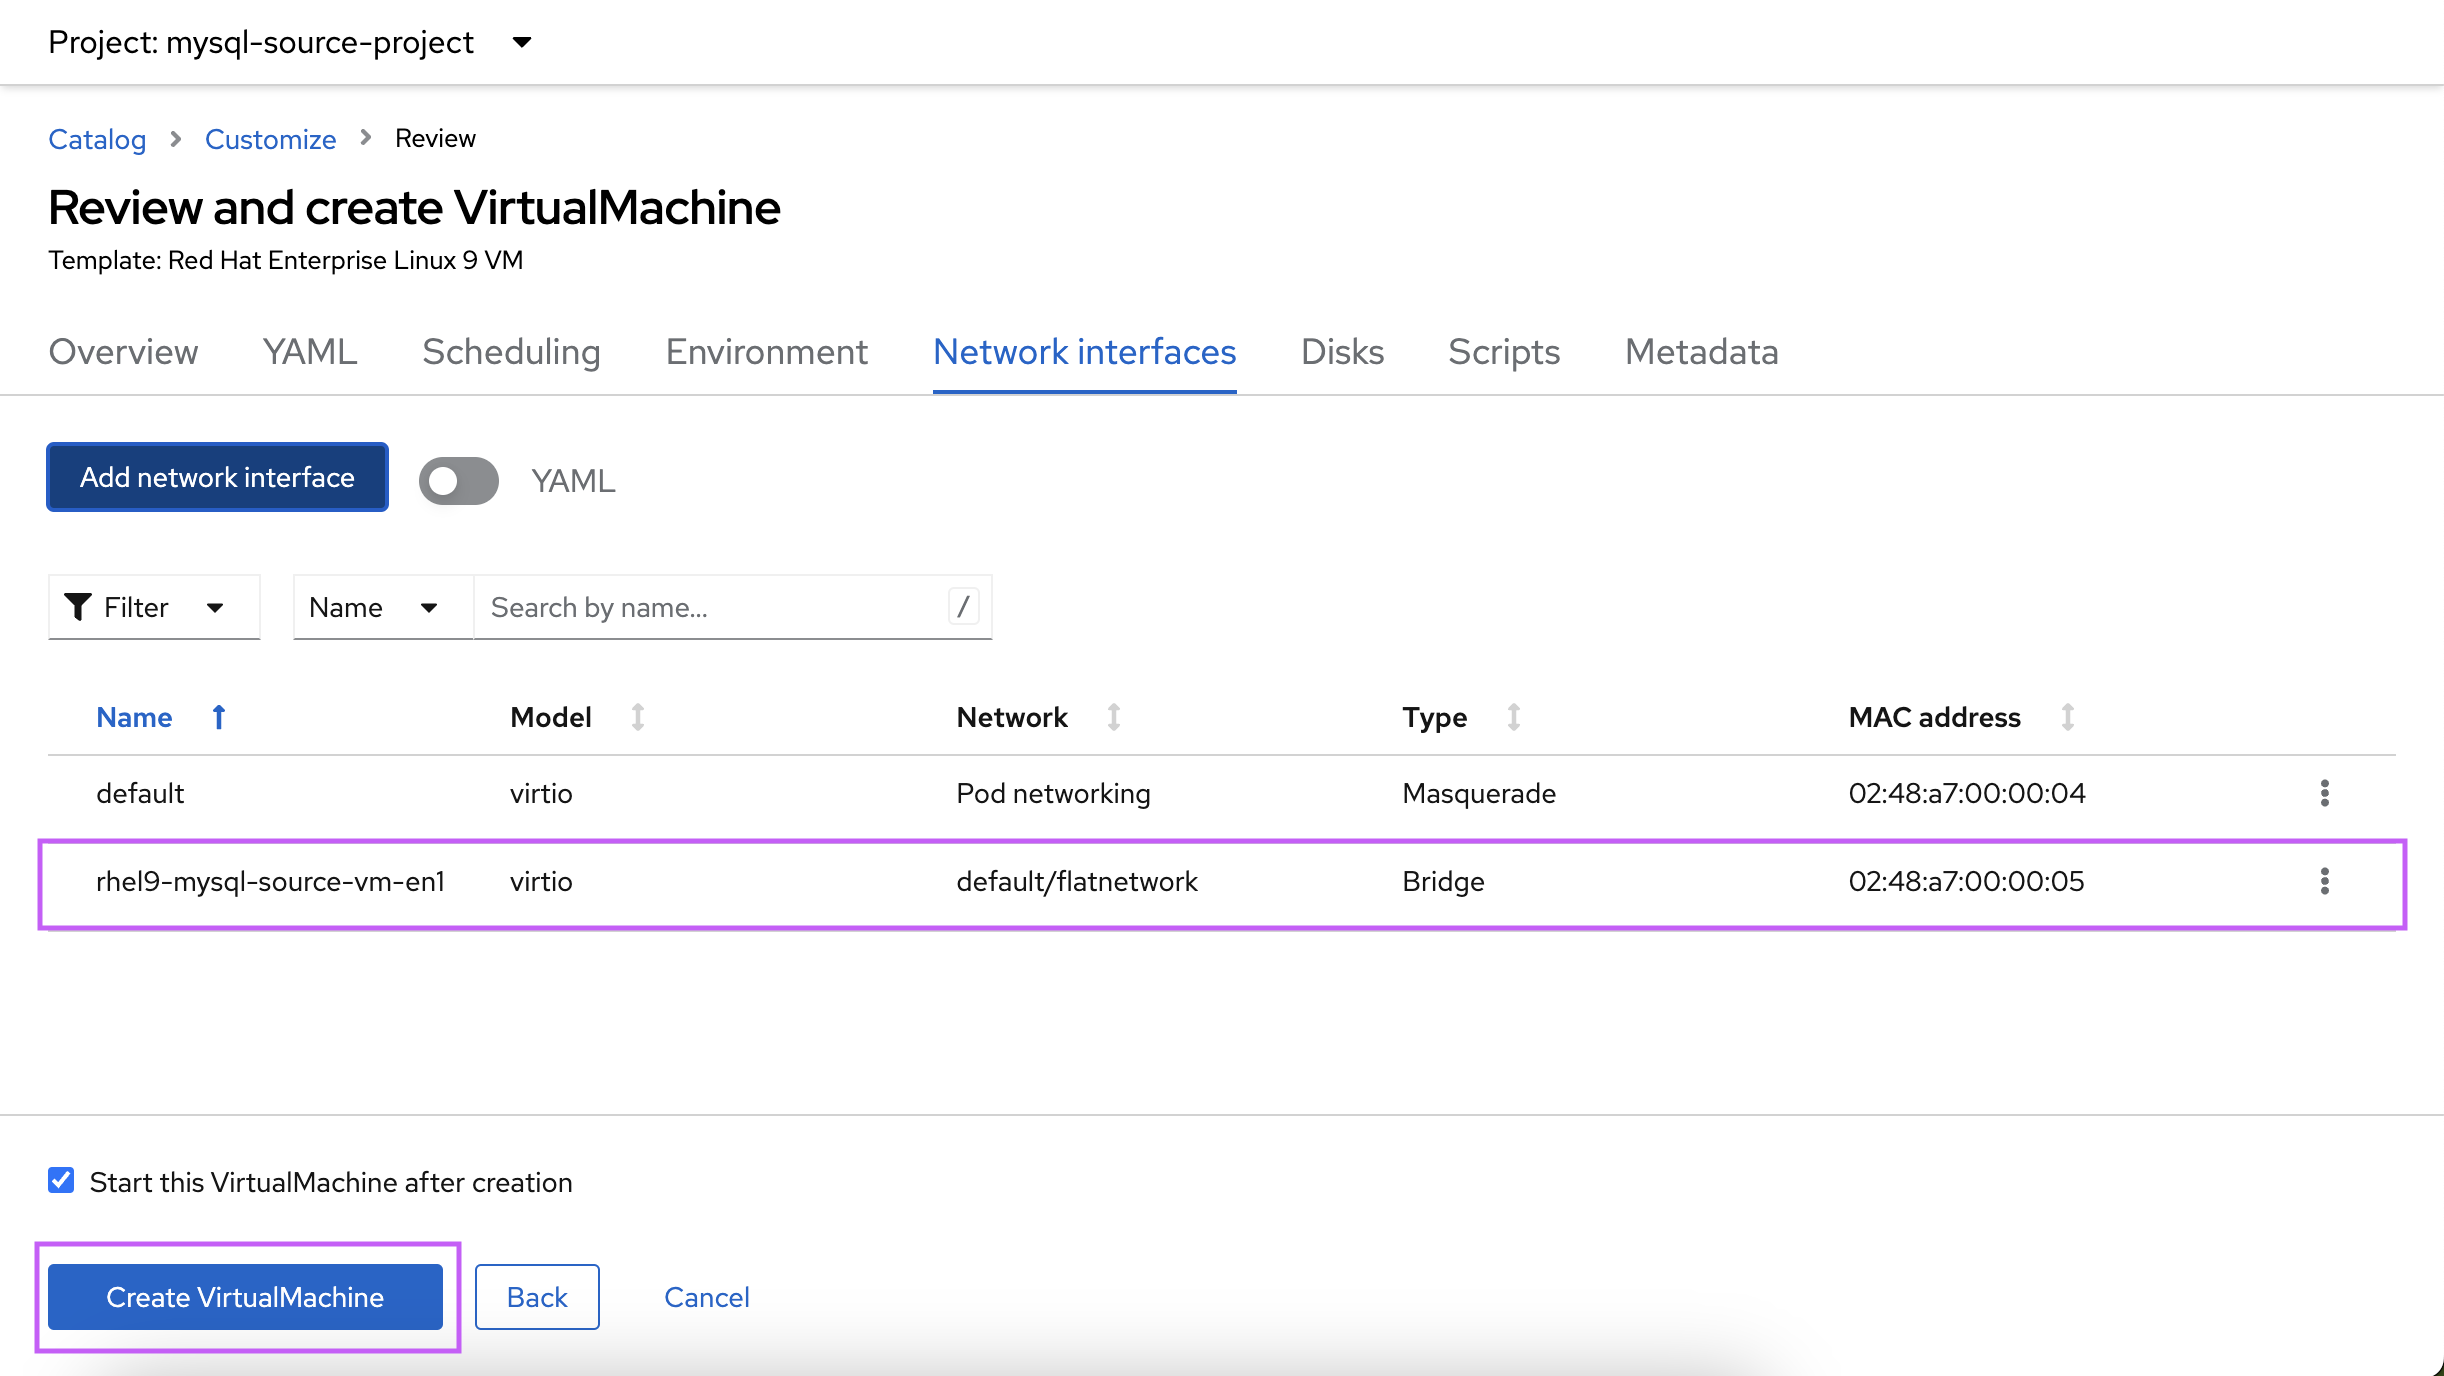
    1. Review and select Create VirtualMachine (Figure 8).
    Confirm the interface is listed and select "Create Virtual Machine"
    Confirm the interface is listed and select "Create Virtual Machine"
    Figure 8: Confirm the interface is listed and select Create VirtualMachine.

    Destination VM

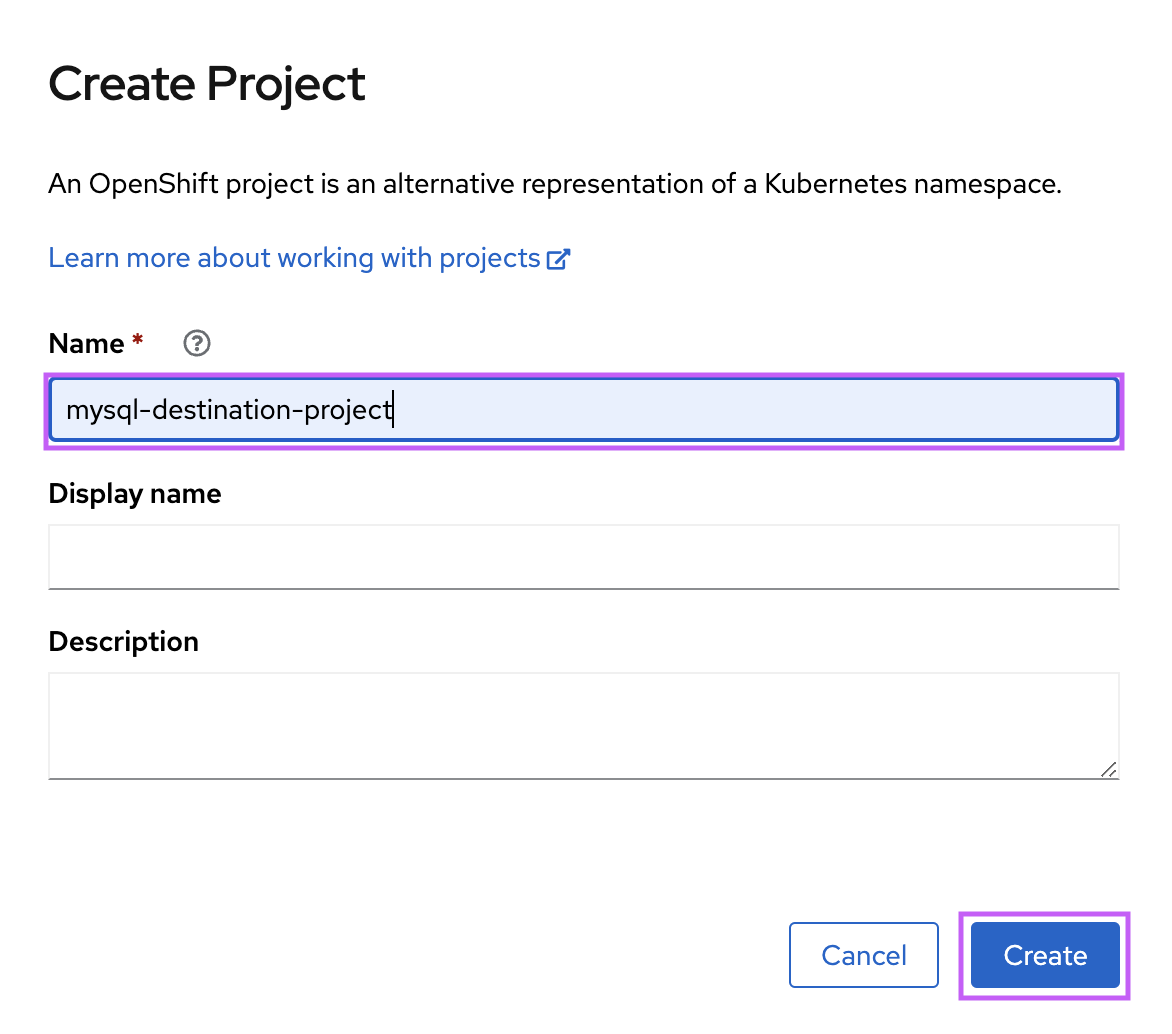
    1. Create the project “mysql-destination-project” (Figure 9).
    Name the project as "mysql-destination-project" and select "Create"
    Provide the Project Name as "mysql-destination-project" and select "Create"
    Figure 9: Provide the project name as "mysqul-destination-project" and select Create.
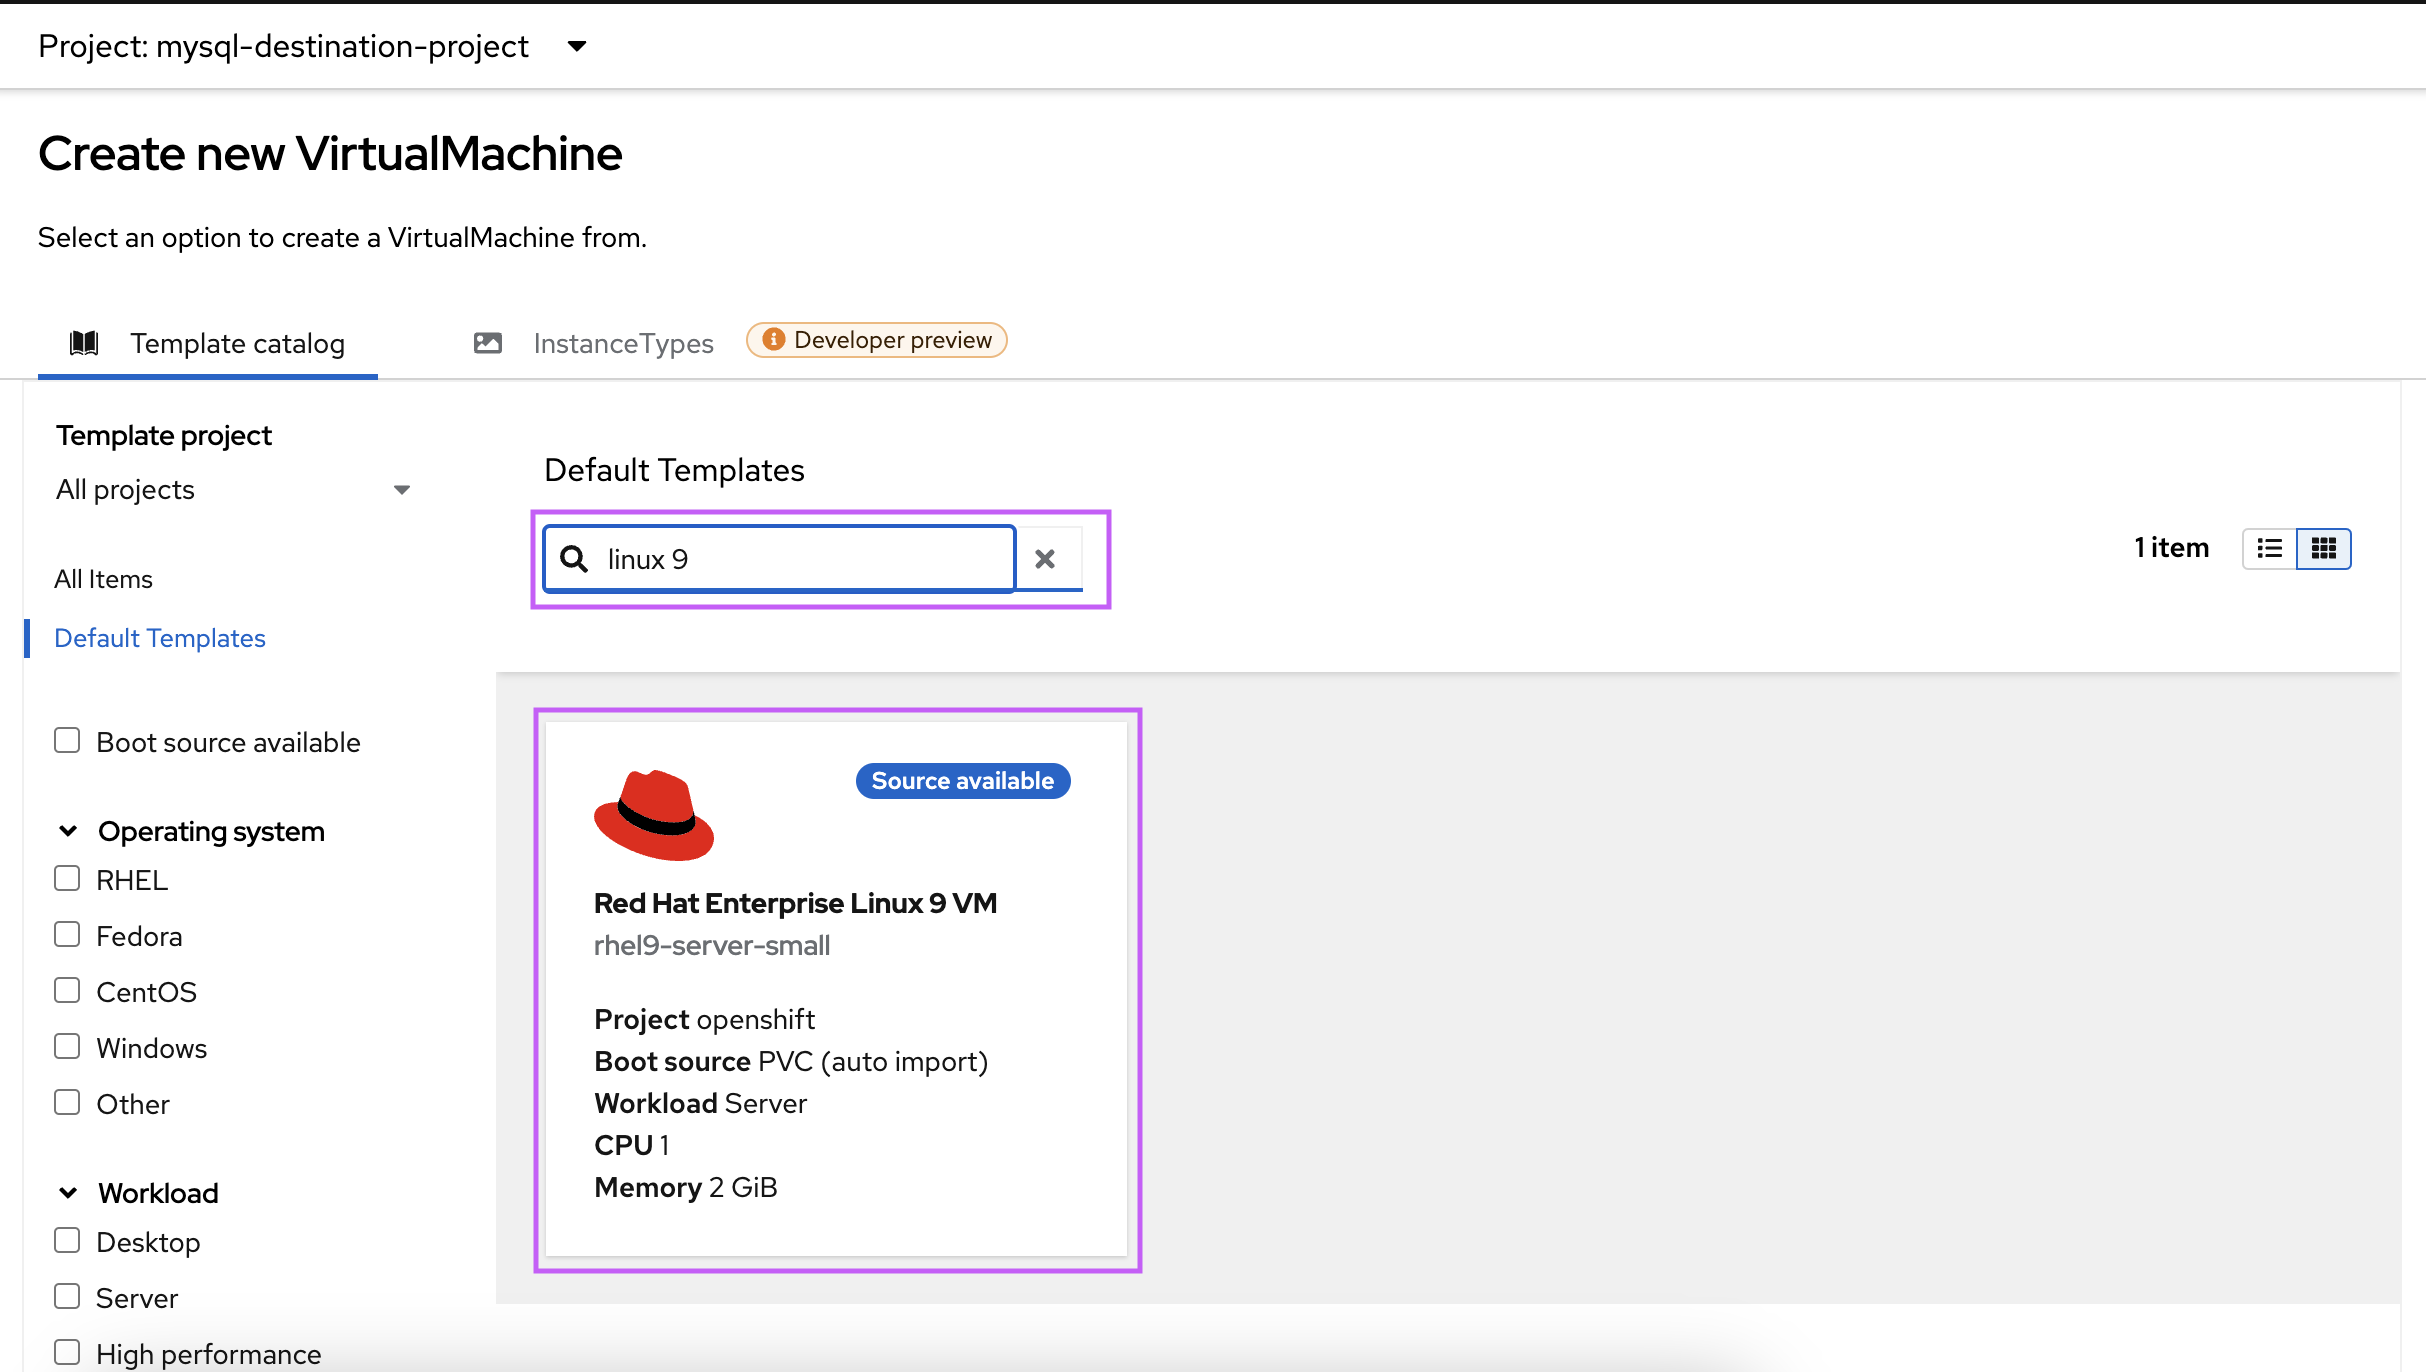
    1. Select the Red Hat Enterprise Linux 9 VM template (Figure 10).
    In the template, search for "linux 9" and select "Red Hat Enterprise linux 9 VM"
    Figure 10: In the template, search for "linux 9" and select Red Hat Enterprise linux 9 VM.
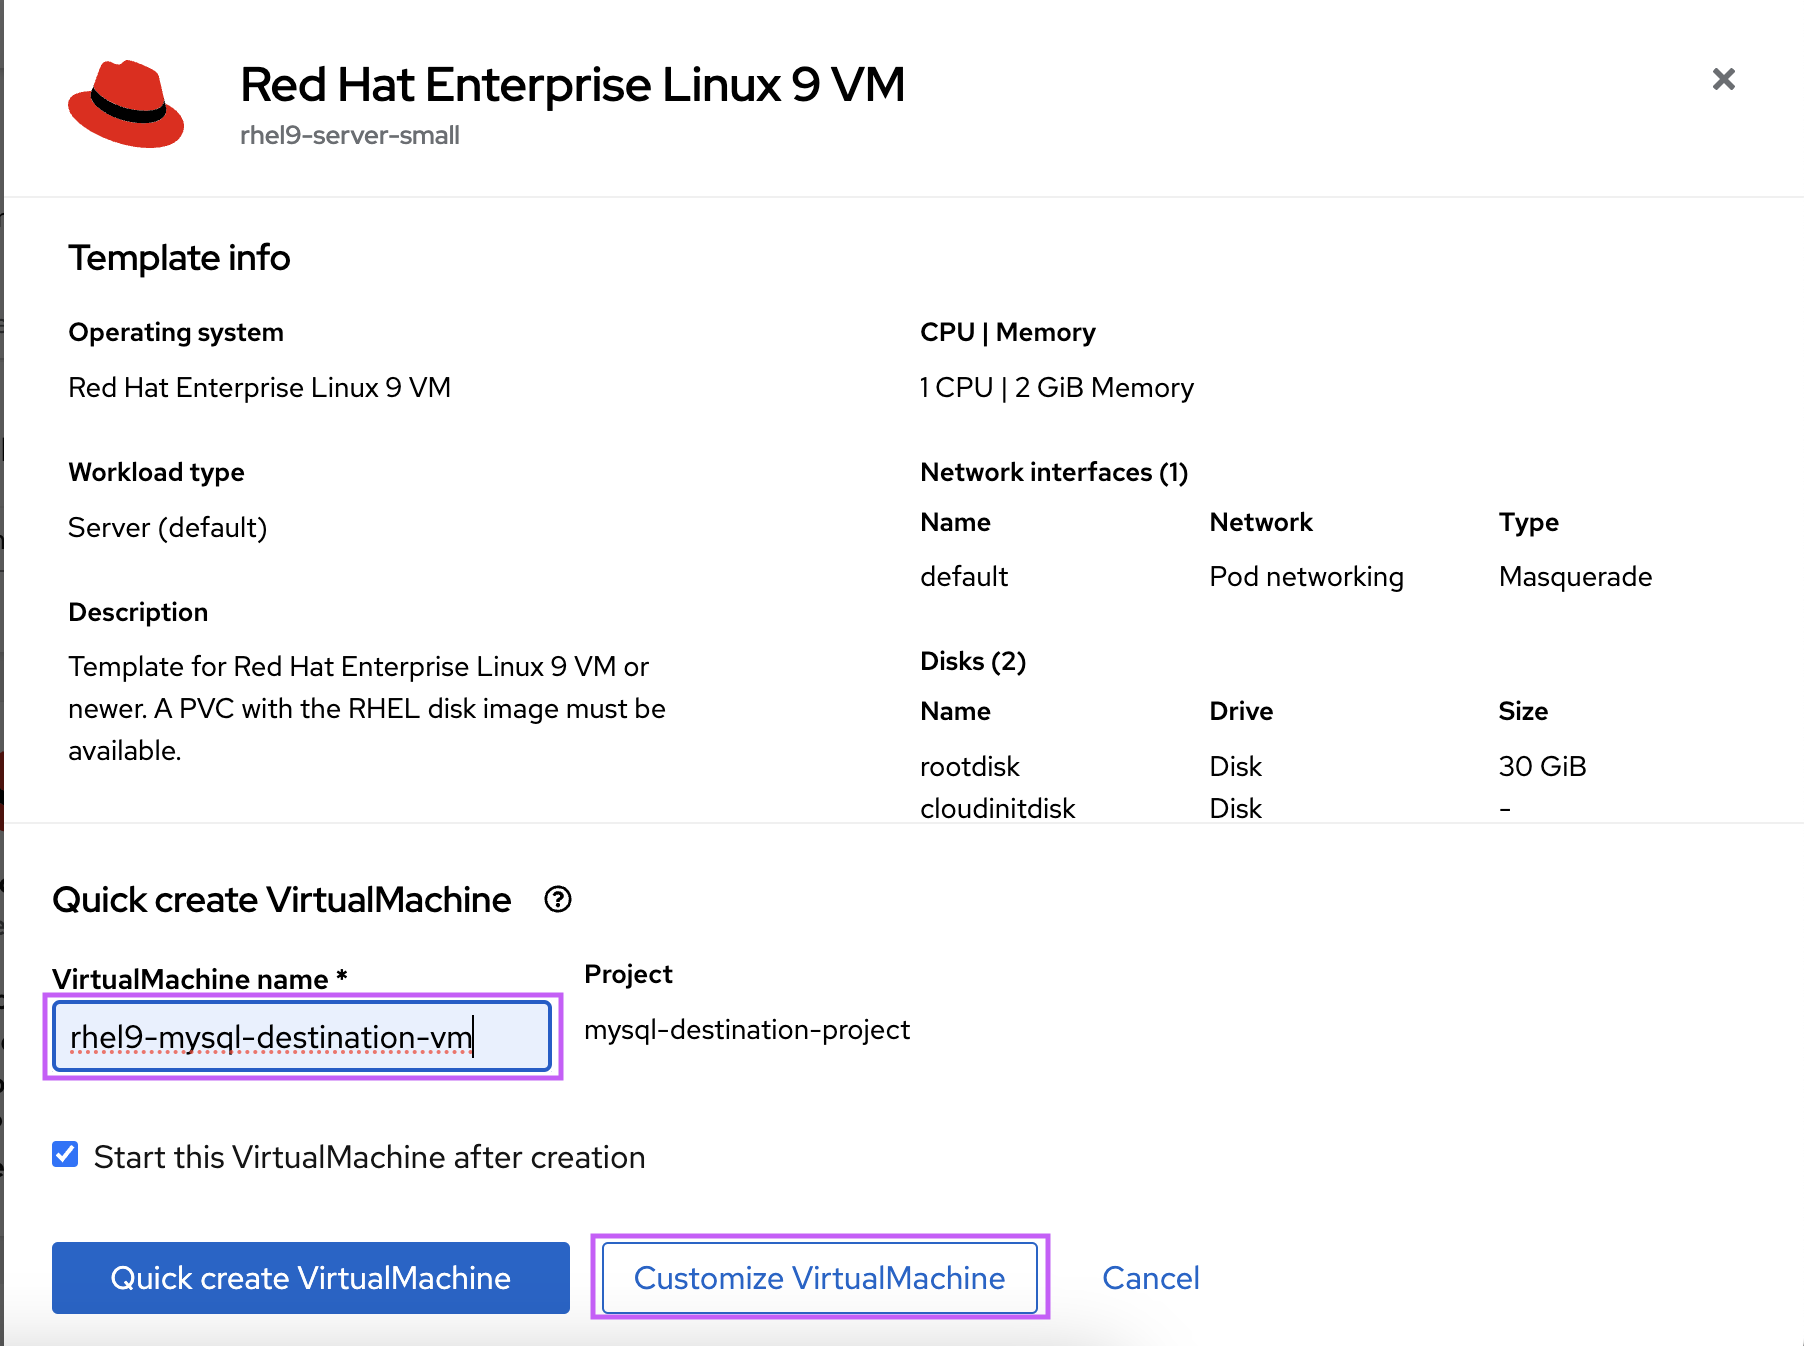
    1.  Select Customize VirtualMachine once you have named the VM (Figure 11).
    Name the VM as "rhel9-mysql-destination-vm" and select "Customize VirtualMachine"
    Figure 11: Name the VM "rhel9-mysql-destination-vm" and select Customize VirtualMachine.
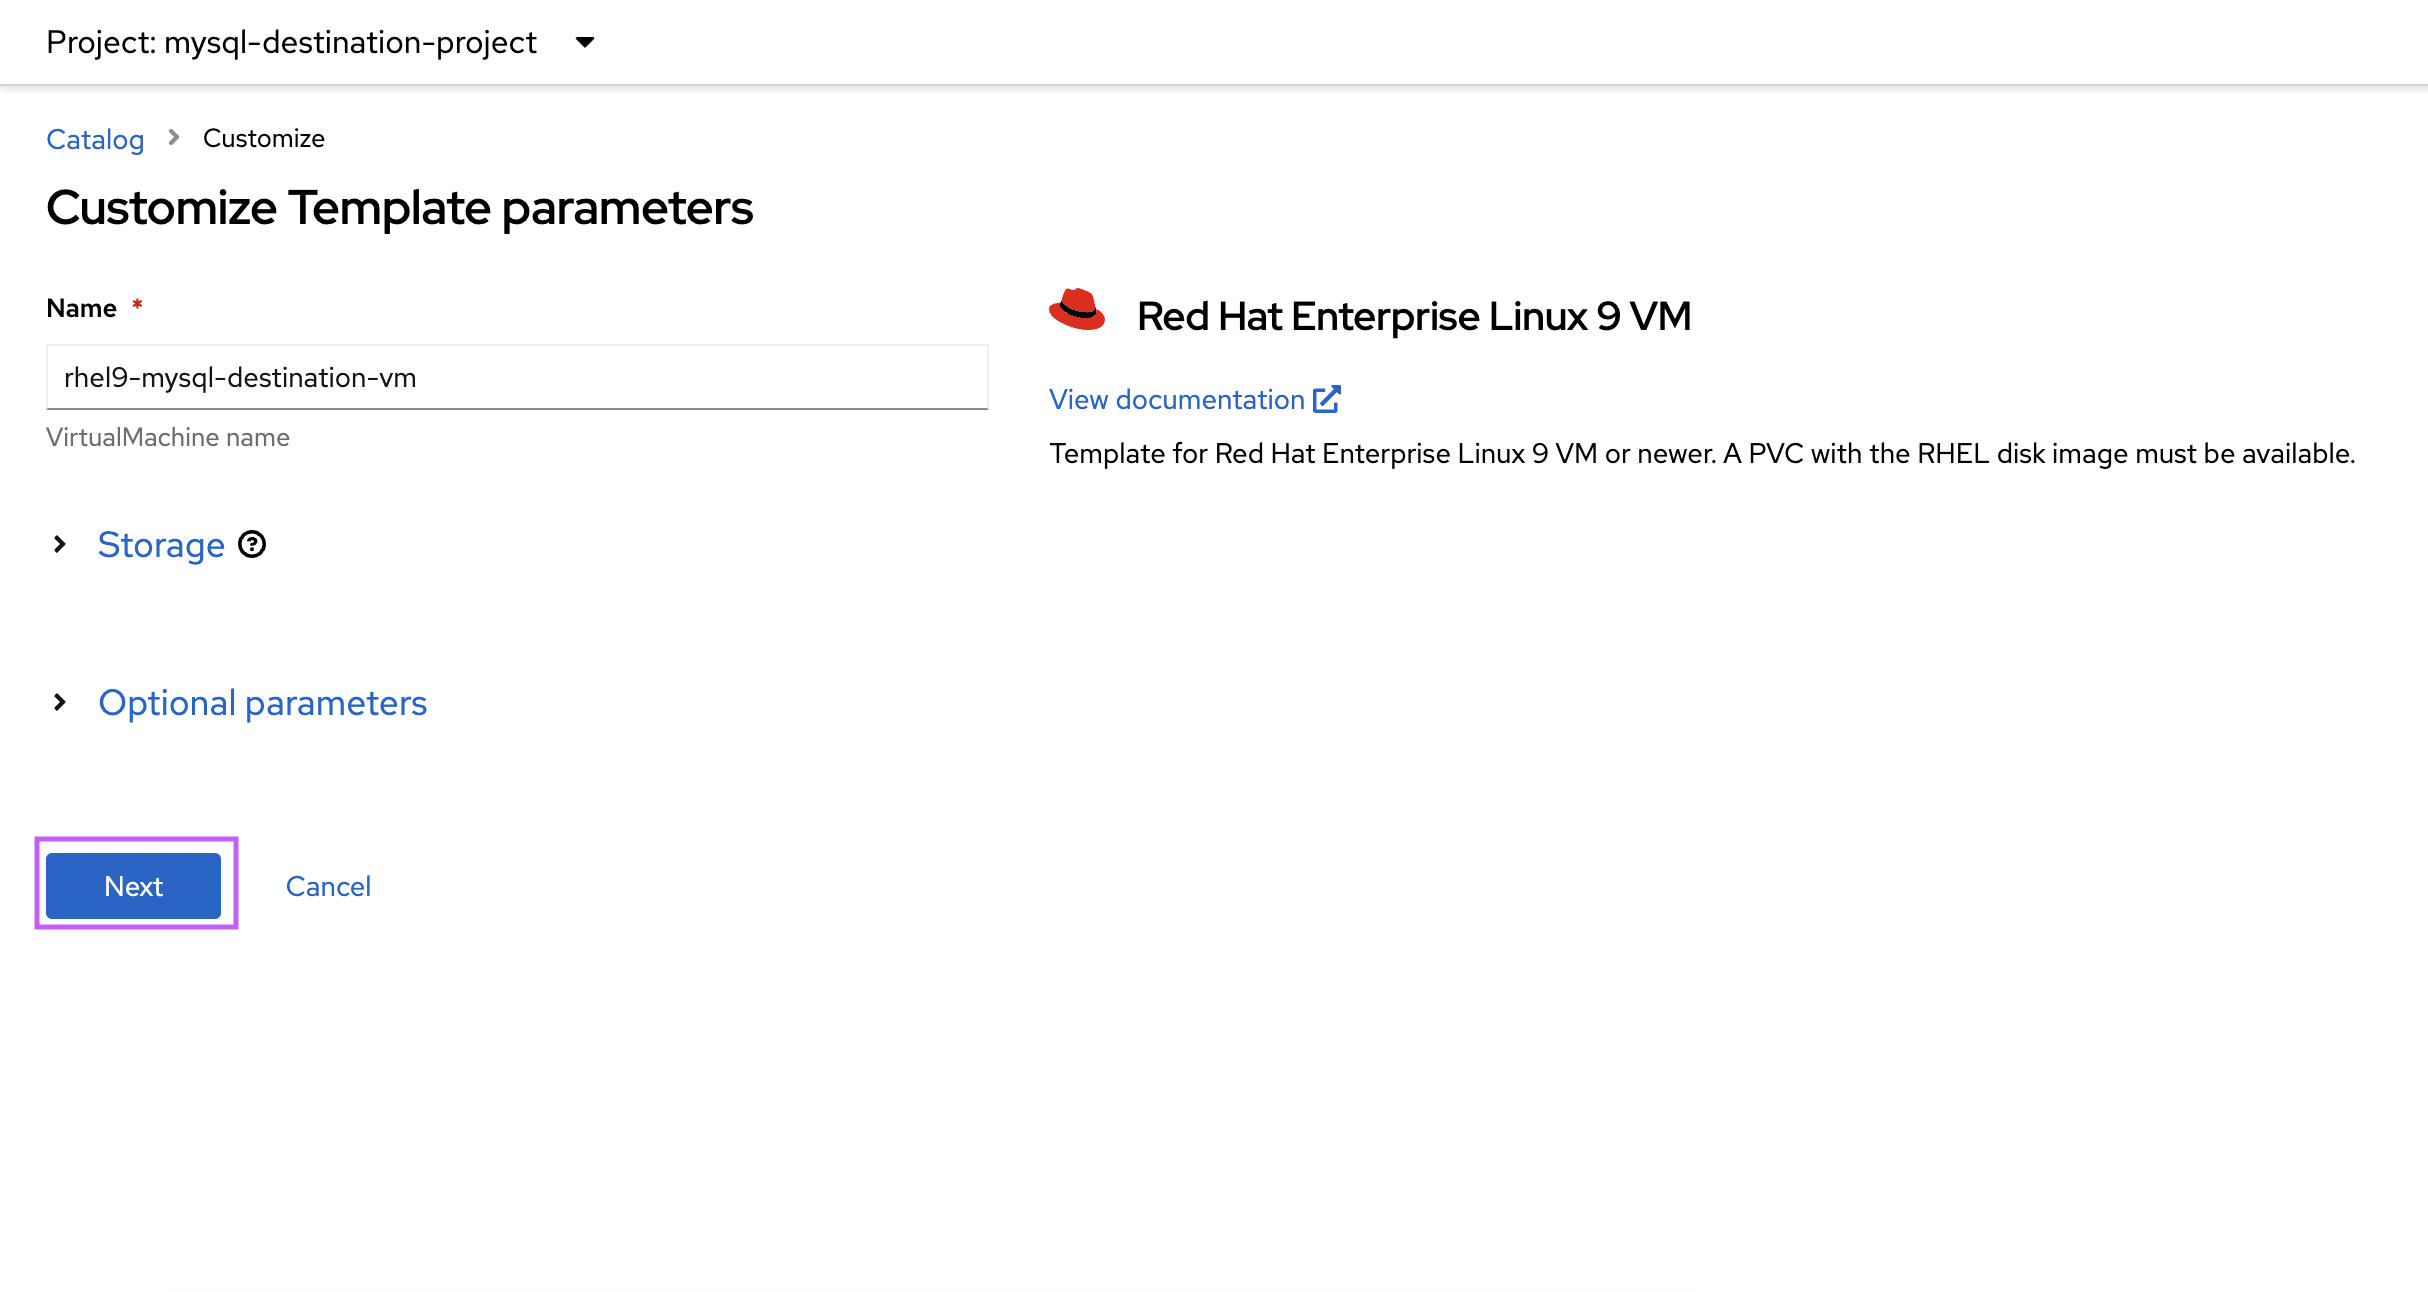
    1. Select Next (Figure 12).
    Select "Next"
    Figure 12: Leave all the parameters as default and select Next.
    1. Select Network Interfaces and Add network interface (Figure 13).
    From the menu select "Network Interfaces" and select "Add Network Interfaces"
    Figure 13: In the menu select "Network Interfaces" and select Add Network Interfaces.
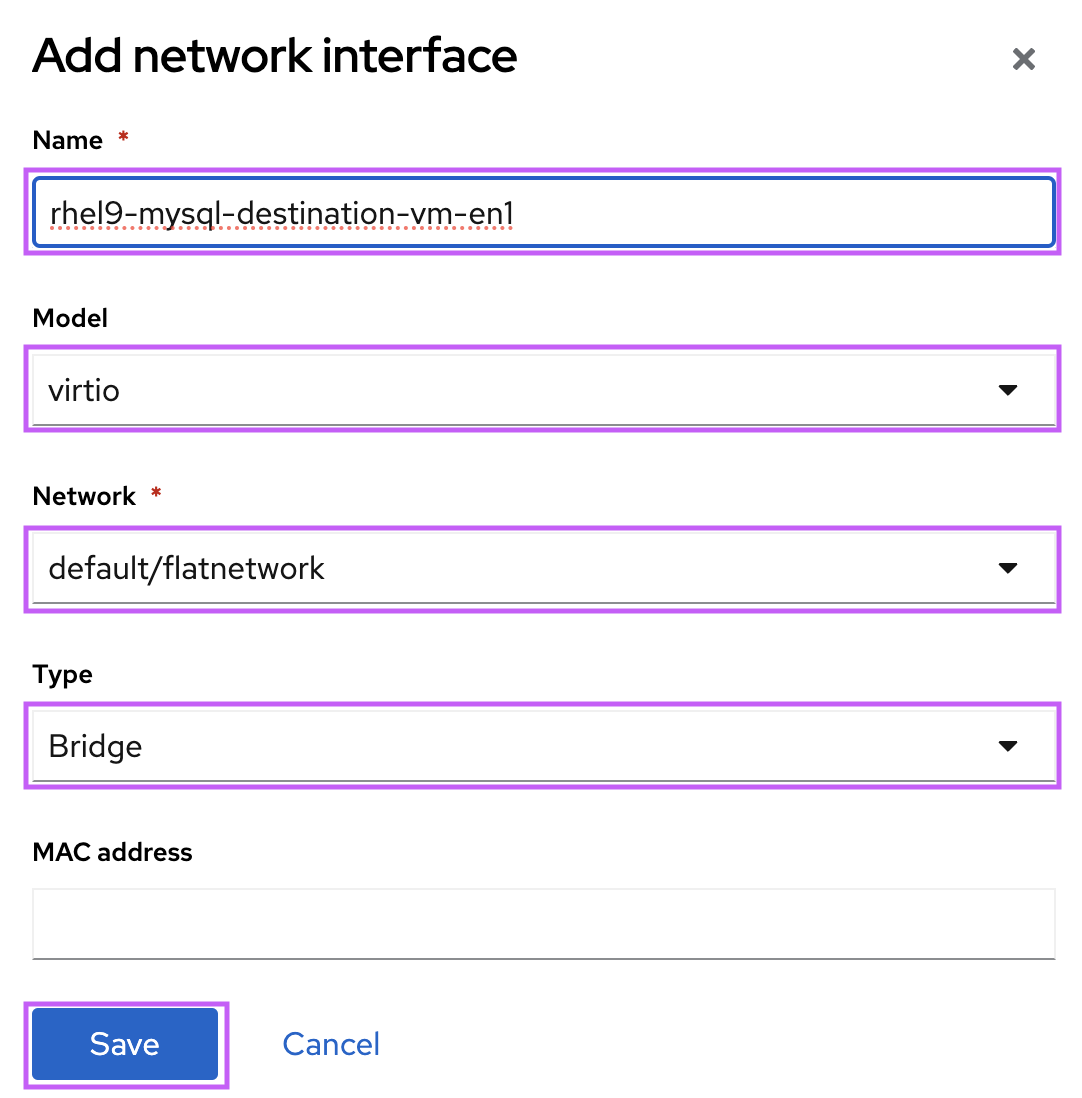
    1. Name the interface and select Save (Figure 14).
    Name the interface and select Model as "virtio", Network as "flatnetwork" and type as "bridge" and select "save"
    Figure 14: Name the interface, select Model as virtio, Network as default/flatnetwork, Type as Bridge, and select Save.
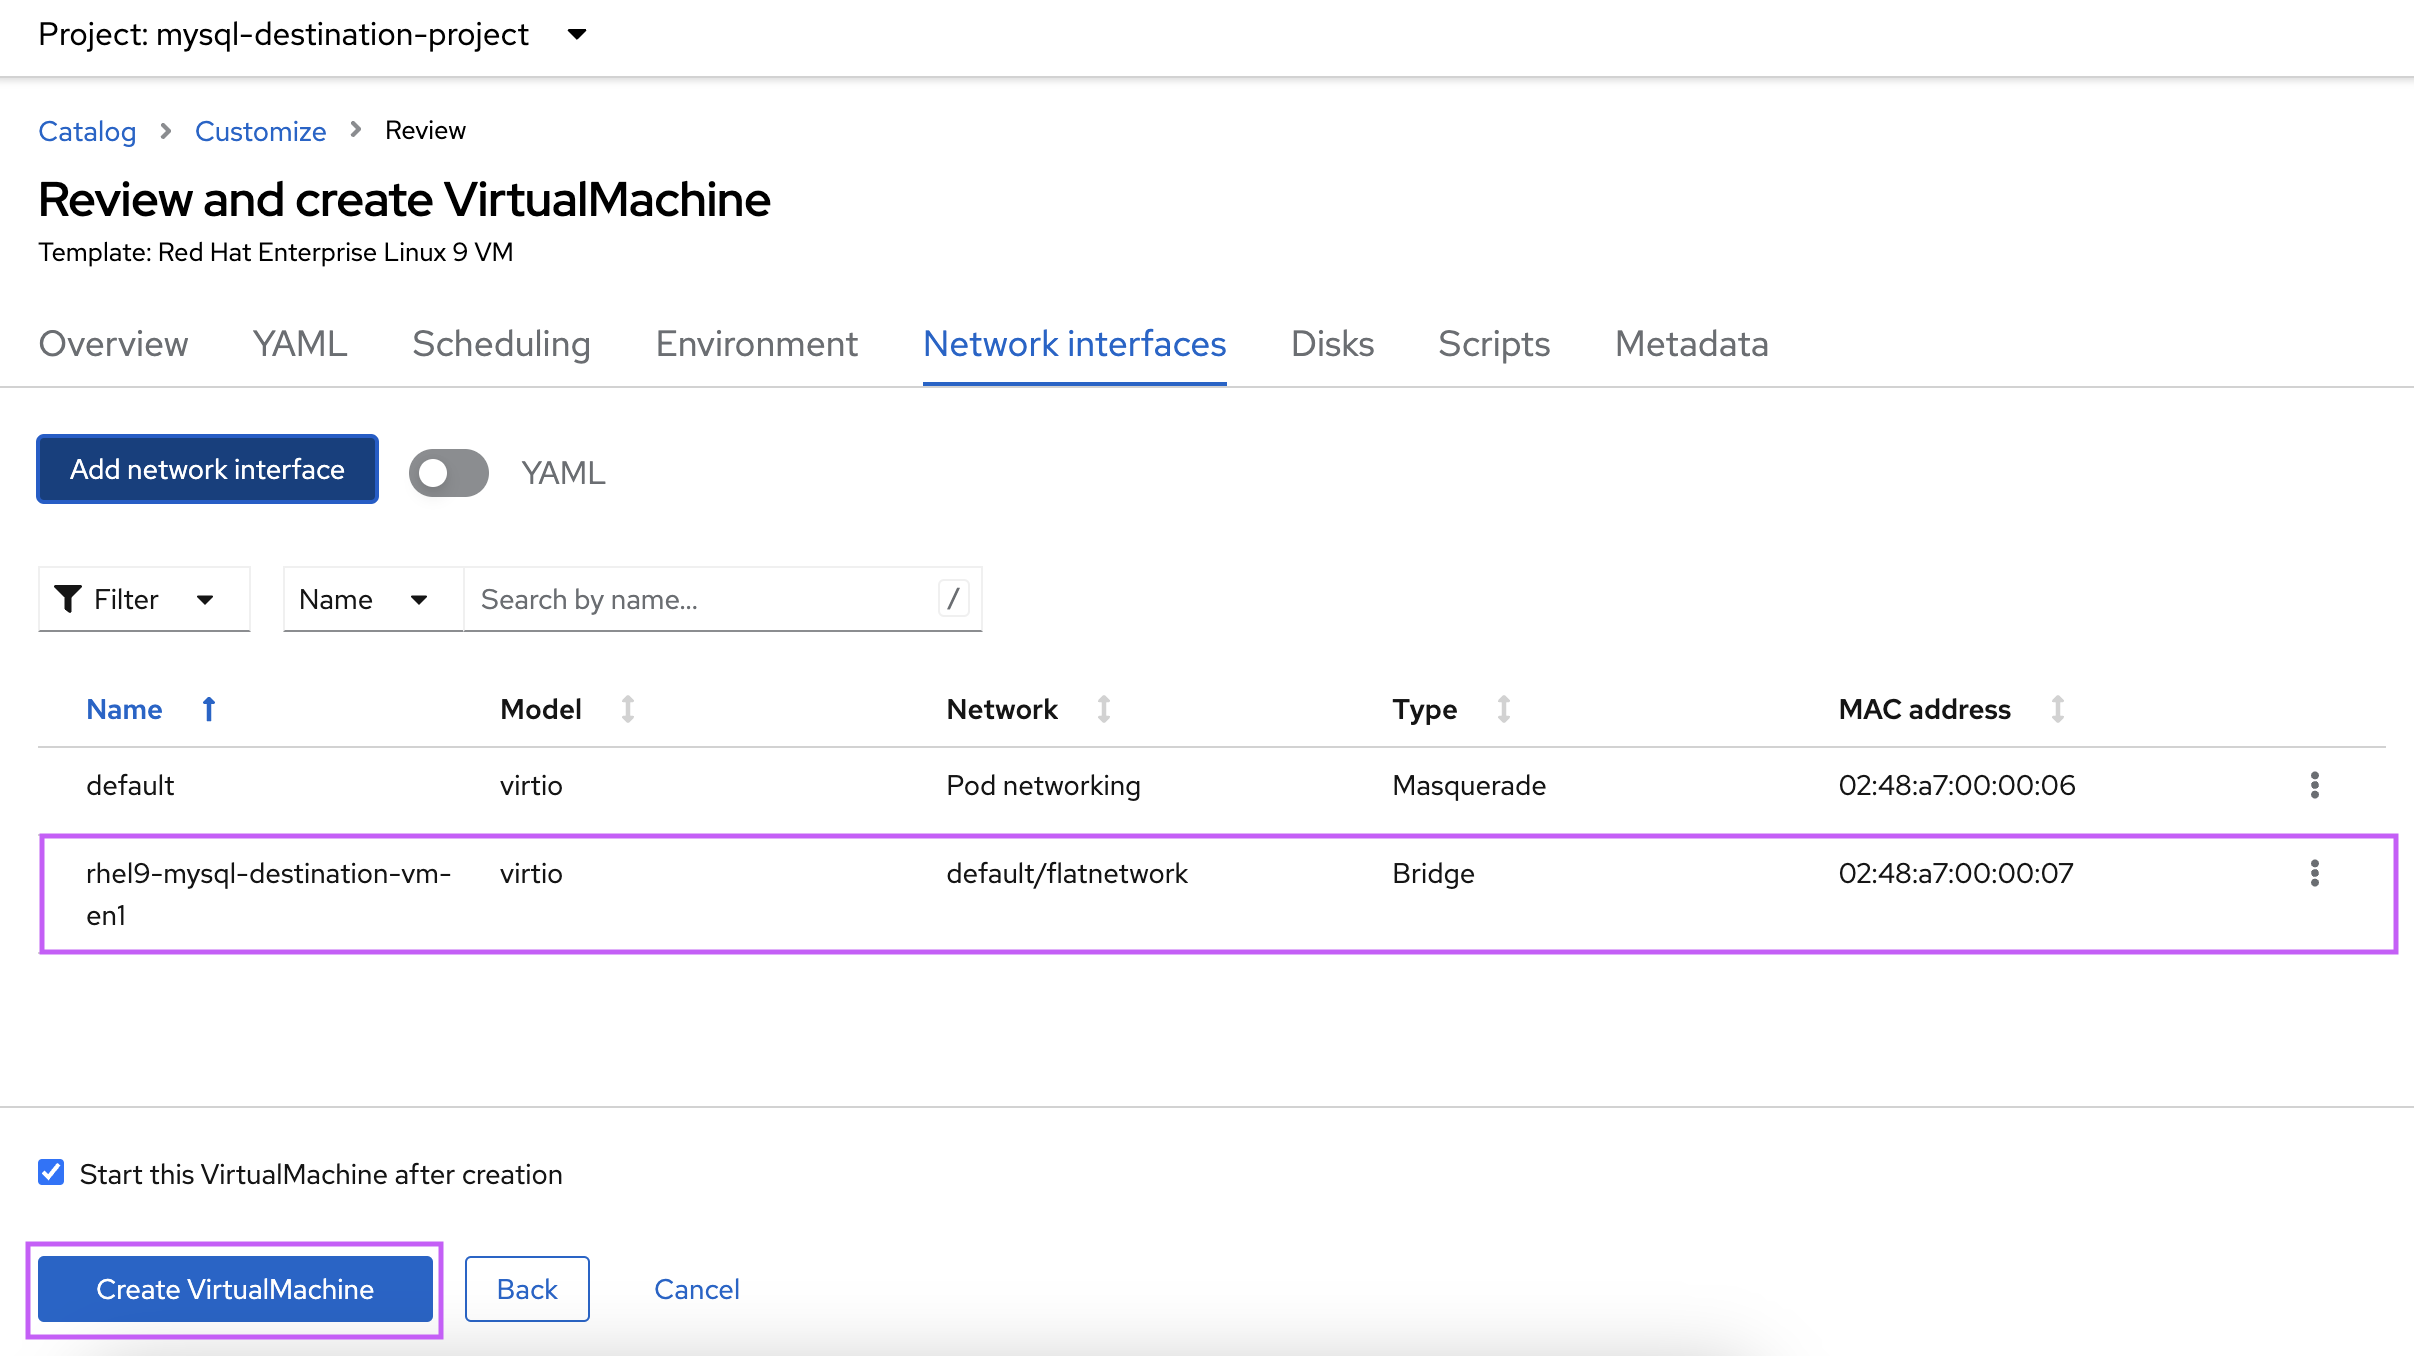
    1. Review and select Create VirtualMachine (Figure 15).
    Confirm the interface is listed and select "Create Virtual Machine"
    Figure 15: Confirm the interface is listed and select Create VirtualMachine.

    Once the VMs boots up, perform the following in both the VMs.

    Register the VMs with repositories:

    #subscription-manager register

    Install mysql-server:

    #dnf install mysql-server

    Configure MySQL replication

    1. In the MySQL source vm add the following in the mysql-server.conf:

      Note: 192.168.3.106 is the IP address of the additional interface added to the MySQL source VM.

      Check “ip addr show” in the VM you created.

      [root@rhel9-mysql-source-vm ~]# cat /etc/my.cnf.d/mysql-server.cnf
      #
      # This group are read by MySQL server.
      # Use it for options that only the server (but not clients) should see
      #
      # For advice on how to change settings please see
      # http://dev.mysql.com/doc/refman/en/server-configuration-defaults.html
      # Settings user and group are ignored when systemd is used.
      # If you need to run mysqld under a different user or group,
      # customize your systemd unit file for mysqld according to the
      # instructions in http://fedoraproject.org/wiki/Systemd
      [mysqld]
      datadir=/var/lib/mysql
      socket=/var/lib/mysql/mysql.sock
      log-error=/var/log/mysql/mysqld.log
      pid-file=/run/mysqld/mysqld.pid
      bind-address=192.168.3.106 server-id=100
      log_bin=/var/log/mysql/mysql-bin.log
      gtid_mode=ON
      enforce-gtid-consistency=ON
      [root@rhel9-mysql-source-vm ~]# 
    2. In the MySQL destination VM, add the following in the mysql-server.conf:

      [root@rhel9-mysql-destination-vm ~]# cat /etc/my.cnf.d/mysql-server.cnf
          #
          # This group are read by MySQL server.
          # Use it for options that only the server (but not clients) should see
          #
          # For advice on how to change settings please see
          # http://dev.mysql.com/doc/refman/en/server-configuration-defaults.html
          # Settings user and group are ignored when systemd is used.
          # If you need to run mysqld under a different user or group,
          # customize your systemd unit file for mysqld according to the
          # instructions in http://fedoraproject.org/wiki/Systemd
          [mysqld]
          datadir=/var/lib/mysql
          socket=/var/lib/mysql/mysql.sock
          log-error=/var/log/mysql/mysqld.log
          pid-file=/run/mysqld/mysqld.pid
          server-id=101
          relay-log=/var/log/mysql/mysql-relay.log
          log_bin=/var/log/mysql/mysql-bin.log
          gtid_mode=ON
          enforce-gtid-consistency=ON
          log-replica-updates=ON
          skip-replica-start=ON
          [root@rhel9-mysql-destination-vm ~]#
    3. Start mysqld in both the VMs:

      #systemctl start mysqld.service
    4. In both the VMs, execute mysql_secure_installation:

      # mysql_secure_installation
    5. In the MySQL source VM, create the replication_user and restrict access to this user only from MySQL destination VM :

      Note: 192.168.3.108 is the IP address of the additional interface added to the destination VM.

      Check "ip addr show” in the VM you created.

      mysql>CREATE USER 'replication_user'@'192.168.3.108' IDENTIFIED WITH mysql_native_password BY 'Test@123';
          Query OK, 0 rows affected (0.01 sec)
    6. For the replication_user in the MySQL destination VM, grant the replication privileges in the MySQL source VM :

      mysql> GRANT REPLICATION SLAVE ON *.* TO 'replication_user'@'192.168.3.108';
              Query OK, 0 rows affected (0.01 sec)
    7. Reload the grant tables in the MySQL database in MySQL source VM :

      mysql> FLUSH PRIVILEGES;
              Query OK, 0 rows affected (0.01 sec)
    8. Set the instance in MySQL source VM (primary) to read-only state:

      mysql> SET @@GLOBAL.read_only = ON;
              Query OK, 0 rows affected (0.00 sec)
    9. Log in to the MySQL destination VM and switch the instance (secondary) to read-only mode:

      mysql> SET @@GLOBAL.read_only = ON;
              Query OK, 0 rows affected (0.00 sec)
    10. Configure the replication source in MySQL destination VM:

      mysql> CHANGE REPLICATION SOURCE TO
                  -> SOURCE_HOST='192.168.3.106',
                  -> SOURCE_USER='replication_user',
                  -> SOURCE_PASSWORD='Test@123',
                  -> SOURCE_AUTO_POSITION=1;
              Query OK, 0 rows affected, 2 warnings (0.07 sec)
    11. Start the replica thread in the MySQL destination VM:

      mysql> START REPLICA;
              Query OK, 0 rows affected (0.02 sec)
    12. Unset the read-only state on both the primary and secondary MySQL servers:

      mysql> SET @@GLOBAL.read_only = OFF;
              Query OK, 0 rows affected (0.00 sec)
    13. Inspect the status of the replication in the MySQL destination VM:

      mysql> SHOW REPLICA STATUS\G;
              *************************** 1. row ***************************
                           Replica_IO_State: Waiting for source to send event
                                Source_Host: 192.168.3.106
                                Source_User: replication_user
                                Source_Port: 3306
                              – snip –
                           Source_Server_Id: 100
                                Source_UUID: f23afe9b-139a-11ef-8cf7-02d8aa000014
                         – snip –
              mysql>  

    Testing the replication 

    1. In the  MySQL source VM, create database test_123:

      mysql>  CREATE DATABASE test_123;
      Query OK, 1 row affected (0.02 sec)
    2. Switch into test_123 database:

      mysql> use test_123;
      Database changed
    3. Create test_table:

      mysql> create table test_table (
          -> name varchar(255),
          -> location varchar(255),
          -> number int
          -> );
      Query OK, 0 rows affected (0.06 sec)
    4. Insert few record into the test_table:

      mysql> insert into test_table values ('Ramu','Delhi','01');
      Query OK, 1 row affected (0.02 sec)
      mysql> insert into test_table values (‘Raju’,'Mumbai','02');
      Query OK, 1 row affected (0.01 sec)
      mysql> insert into test_table values ('Ravi','Bangalore','03');
      Query OK, 1 row affected (0.01 sec)

    In the MySQL destination VM, execute the following commands to check if the replication is successful.

    1. List the databases and check if test_123 is present:

      mysql> show databases ;
      +--------------------+
      | Database           |
      +--------------------+
      | information_schema |
      | mysql              |
      | performance_schema |
      | sys                |
      | test_123           |
      +--------------------+
      5 rows in set (0.00 sec)
    2. Switch into test_123 database:

      mysql> use test_123
      Database changed
    3. List the tables and check if the test_table is replicated:

      mysql> show tables;
      +--------------------+
      | Tables_in_test_123 |
      +--------------------+
      | test_table         |
      +--------------------+
      1 row in set (0.00 sec)
    4. Confirm the records are replicated:

      mysql> select * from test_table;
      +--------+-----------+--------+
      | name   | location  | number |
      +--------+-----------+--------+
      | Ramu | Delhi     |      1 |
      | Raju | Mumbai    |      2 |
      | Ravi | Bangalore |      3 |
      +--------+-----------+--------+
      3 rows in set (0.00 sec)

    Here we can see the records created in the Source VM is replicated to the MySQL instance in the Destination VM.

    Conclusion

    This blog walked you through how to set up MySQL replication across VMs in separate projects within an OpenShift cluster using an external network interface. This demonstrates the viability of setting up replication across VMs in geographically distinct OpenShift clusters, offering robust disaster recovery for business critical databases.

    Last updated: September 16, 2024

    Related Posts

    • Using a MySQL database in your Red Hat OpenShift application

    • MySQL for developers in Red Hat OpenShift

    • Drupal 7, PHP 5.4 and MySQL via Software Collections

    Recent Posts

    • Why Models-as-a-Service architecture is ideal for AI models

    • How to run MicroShift as a container using MINC

    • OpenShift 4.19 brings a unified console for developers and admins

    • 3 steps to secure network segmentation with Ansible and AWS

    • Integrate vLLM inference on macOS/iOS using OpenAI APIs

    What’s up next?

    Read Operating OpenShift, a practical guide to running and operating OpenShift clusters more efficiently using a site reliability engineering (SRE) approach. Learn best practices and tools that can help reduce the effort of deploying a Kubernetes platform.

    Get the e-book
    Red Hat Developers logo LinkedIn YouTube Twitter Facebook

    Products

    • Red Hat Enterprise Linux
    • Red Hat OpenShift
    • Red Hat Ansible Automation Platform

    Build

    • Developer Sandbox
    • Developer Tools
    • Interactive Tutorials
    • API Catalog

    Quicklinks

    • Learning Resources
    • E-books
    • Cheat Sheets
    • Blog
    • Events
    • Newsletter

    Communicate

    • About us
    • Contact sales
    • Find a partner
    • Report a website issue
    • Site Status Dashboard
    • Report a security problem

    RED HAT DEVELOPER

    Build here. Go anywhere.

    We serve the builders. The problem solvers who create careers with code.

    Join us if you’re a developer, software engineer, web designer, front-end designer, UX designer, computer scientist, architect, tester, product manager, project manager or team lead.

    Sign me up

    Red Hat legal and privacy links

    • About Red Hat
    • Jobs
    • Events
    • Locations
    • Contact Red Hat
    • Red Hat Blog
    • Inclusion at Red Hat
    • Cool Stuff Store
    • Red Hat Summit

    Red Hat legal and privacy links

    • Privacy statement
    • Terms of use
    • All policies and guidelines
    • Digital accessibility

    Report a website issue