Podman AI Lab is an open source extension for Podman Desktop that lets you work with large language models (LLMs) on a local environment. From getting started with artificial intelligence (AI) and experimenting with models and prompts to model serving and playgrounds for common generative AI use cases, Podman AI Lab enables you to easily bring AI into your applications without depending on infrastructure beyond your laptop.
In this article, we’ll take a tour of the extension and walk you through each of the different capabilities provided by Podman AI Lab. Discover how you can start integrating generative AI in new and existing applications.
Podman Desktop installation and setup
As a developer working on building an application that will eventually be deployed on Kubernetes, you'll likely need a container development solution for your local environment. One option that is free and open source is Podman Desktop.
Podman Desktop provides a graphical interface that makes it easy to work with containers and even bridges with Kubernetes. This means that you can easily develop and test your application in a containerized environment without having to worry about the underlying infrastructure. Additionally, the graphical interface makes it easy for you to manage your containers and see what's happening in real time, with functionality to easily SSH into your containers, debug, and deploy to local and remote Kubernetes clusters.
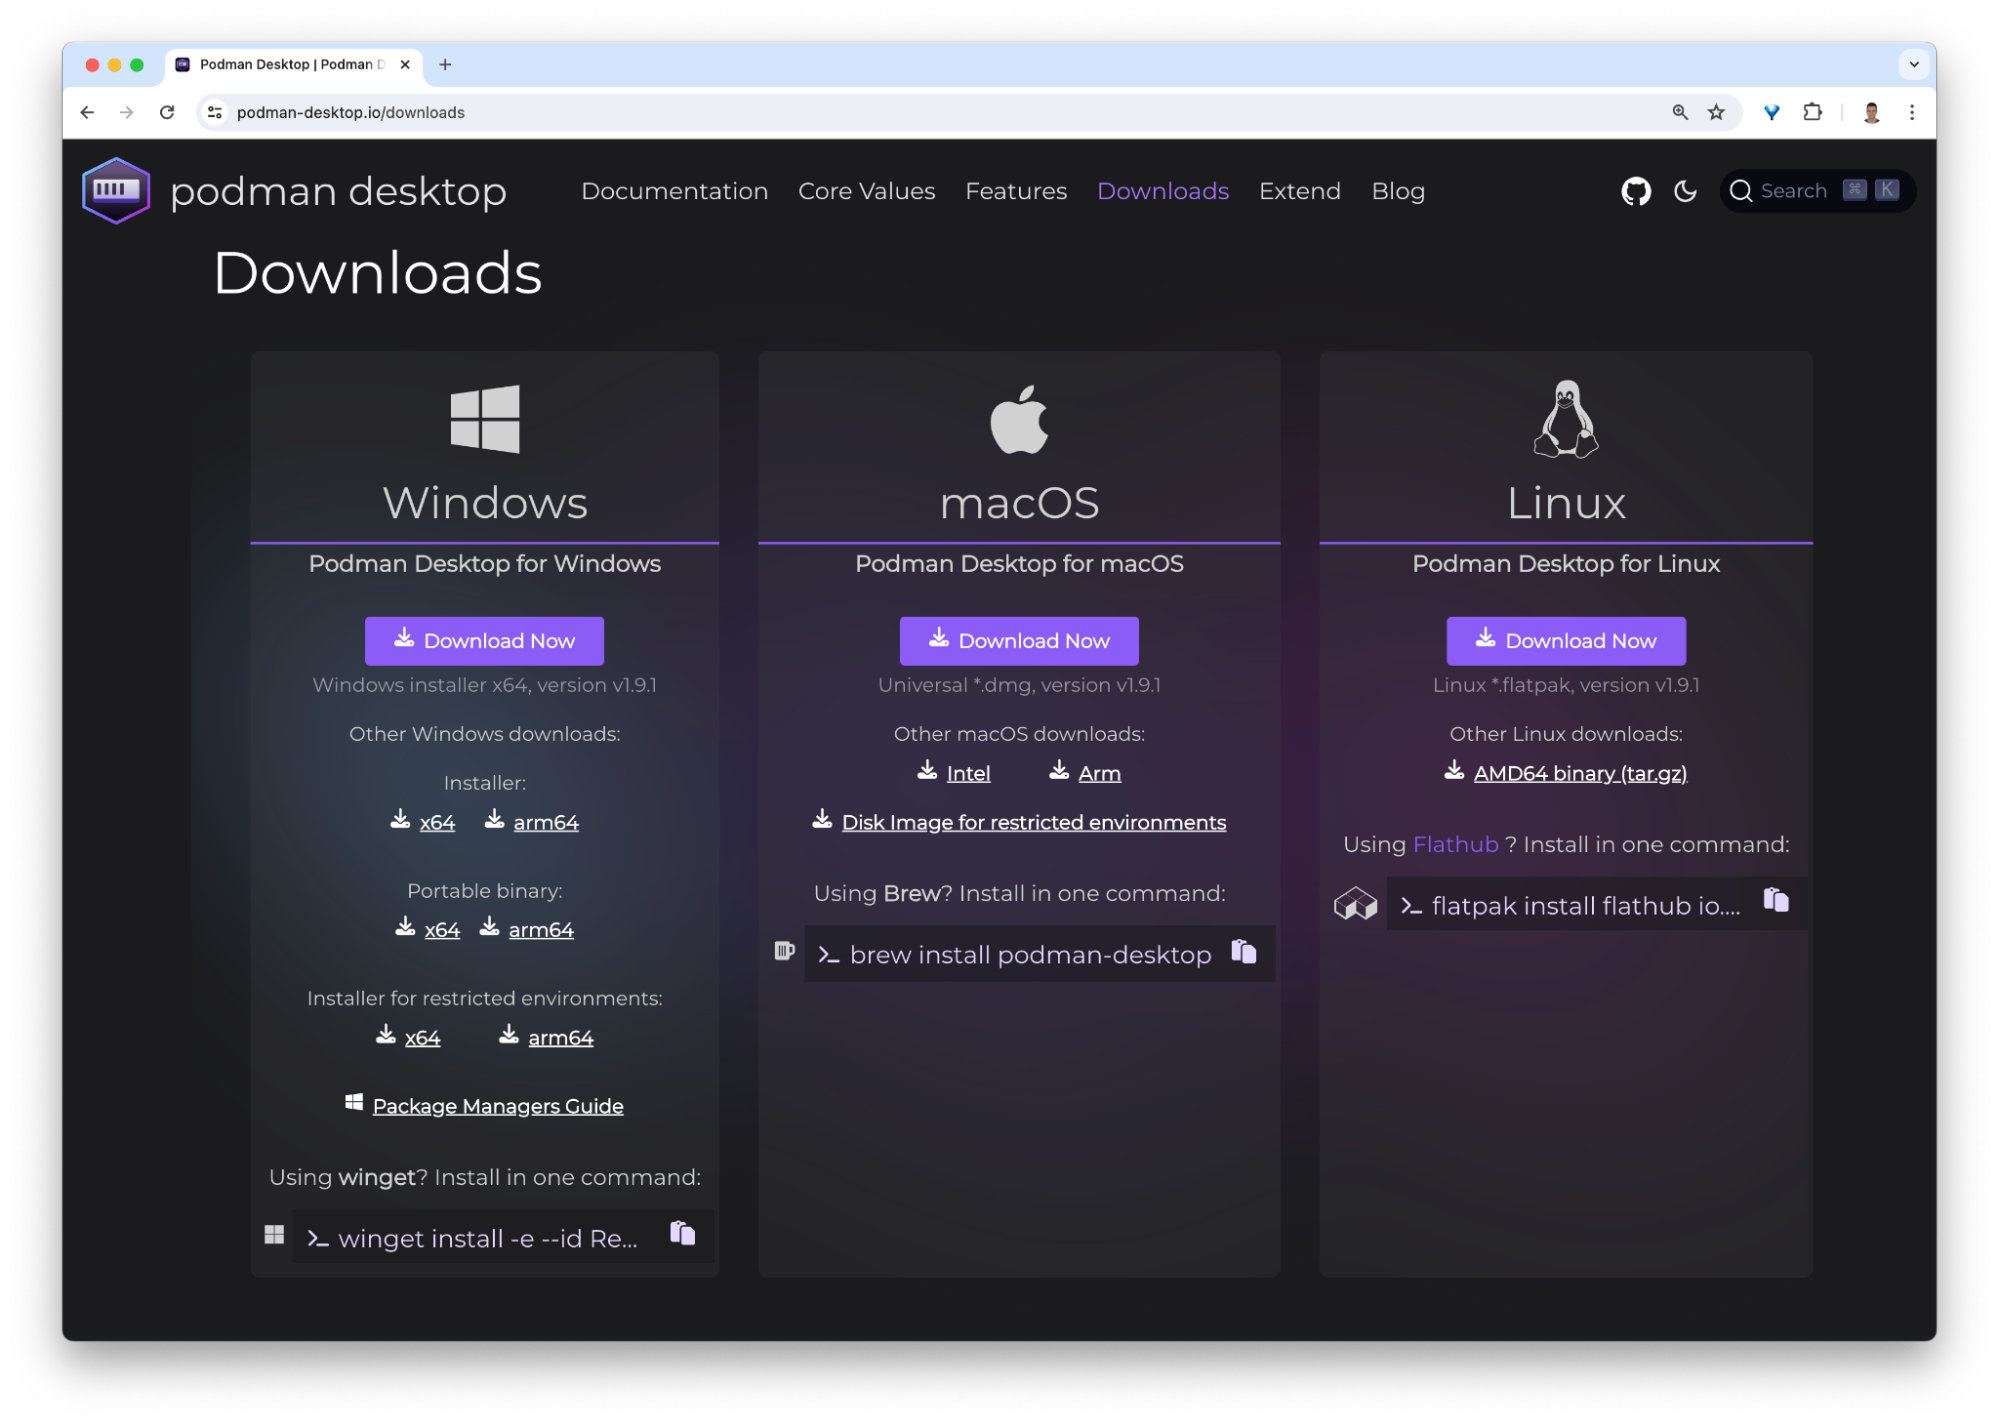
Podman Desktop is available on macOS, Windows, and Linux. To download it, you can go to the website podman-desktop.io/downloads and follow the instructions for your system, as shown in Figure 1.
Once installed, you’ll get an onboarding sequence in Podman Desktop, which will help to configure your environment with the different tools you might need, from installing and keeping the Podman engine updated, to Kubernetes command-line tools such as kubectl, minikube, and more.
Install the Podman AI Lab extension
After installing Podman Desktop, you’ll notice a small “puzzle piece” icon on the left sidebar—this is where all the dedicated extensions for Podman Desktop can be accessed and installed. You can easily extend the functionality of Podman Desktop for your specific use case—for example, working with AI for your application development with the Podman AI Lab extension. See Figure 2.
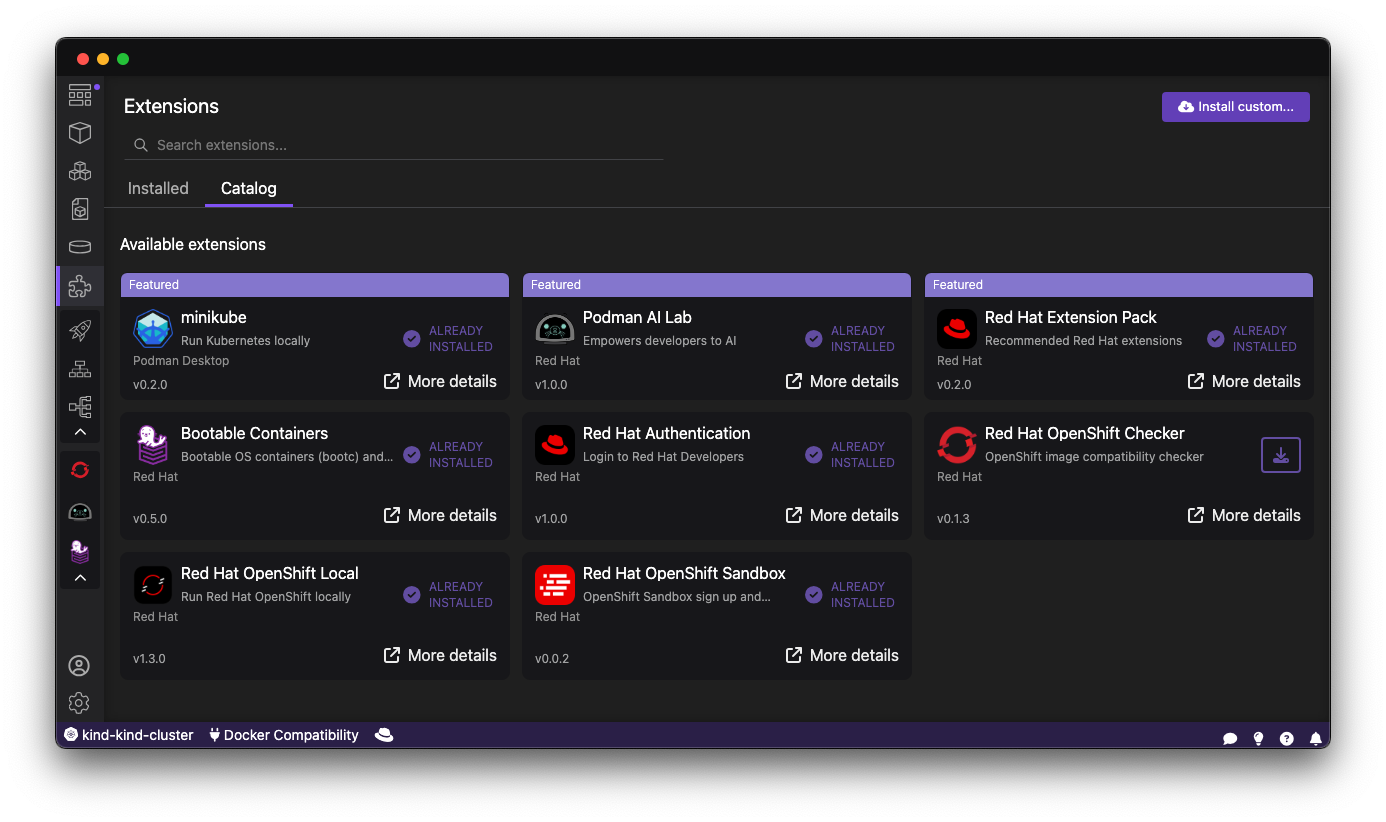
Here, you can install the Podman AI Lab extension by clicking the icon on the right of the Podman AI Lab card or the Red Hat Extension Pack. Feel free to view more details about the extension, and check out the documentation as you begin to learn about Podman AI Lab’s recipes catalog, built-in models, and more.
Alternatively, on the dashboard of Podman Desktop you’ll notice the banner featuring Podman AI Lab extension. See Figure 3.

Discover the Podman AI Lab extension
When you open Podman AI Lab for the first time, you'll be greeted with a dashboard that provides an overview of what the extension offers, as shown in Figure 4. This includes the recipes catalog for common AI use cases and examples, ready-to-use open source models, a dashboard for inferencing models, playgrounds to fine-tune and customize your model, and much more.
Podman AI Lab is your starting point for AI application development from your desktop. Learn more about its key features in the following sections.

Recipes Catalog
One of the most important features of the Podman AI Lab extension is the curated catalog of open source recipes that enable you to navigate common AI use cases and solutions. To begin, click the top left option in the sidebar to open the Recipes Catalog, as shown in Figure 5. This catalog is organized by categories of example use cases that can inspire you on how to infuse your app with AI, with pre-selected models (and the ability to swap), example code, and easy access to your IDE. Browse through the list and find the recipe that best suits your needs.

With Podman AI Lab, you have access to a wide range of tools and resources that can help you begin infusing AI into your own applications. The catalog of recipes is provided to provide the best practices and inspire you with use cases you can eventually benefit from in your applications.
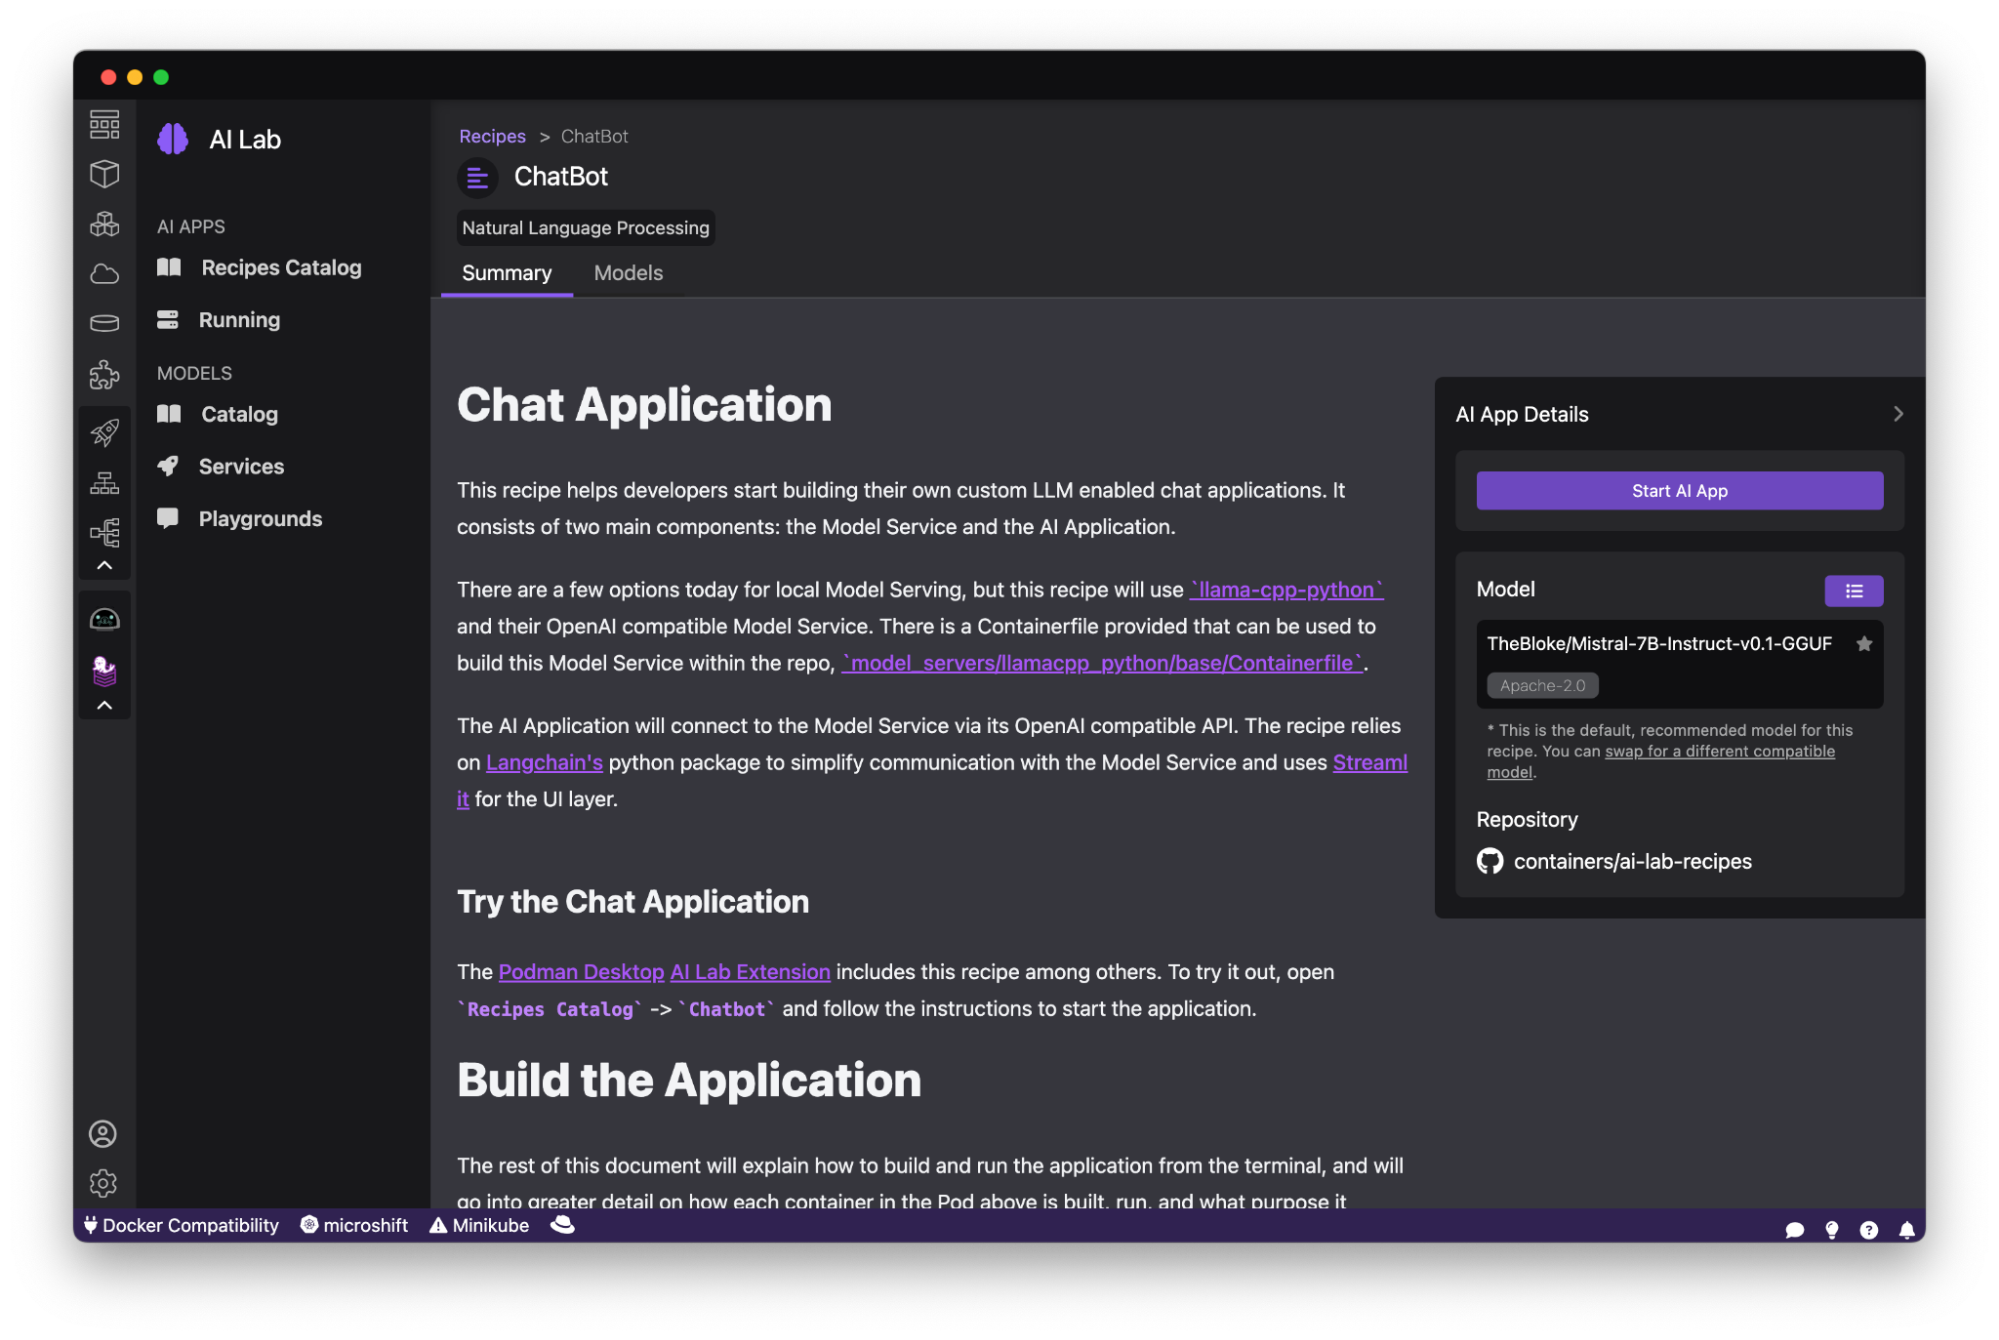
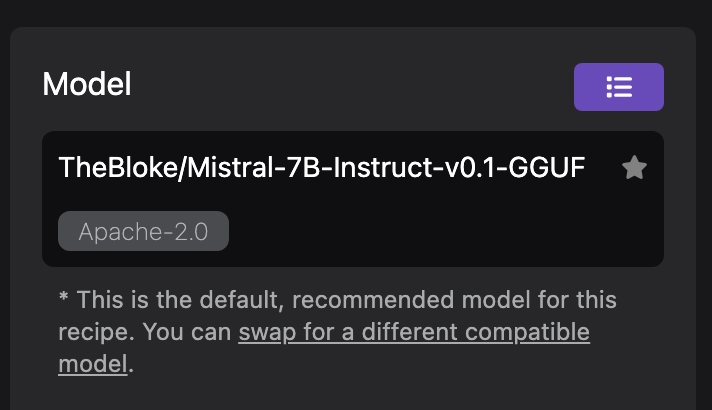
Once you've selected a recipe from the Recipes Catalog, you'll be able to see a summary of what the recipe does and how it works. This will give you a better understanding of the recipe's capabilities and help you decide if it's right for your application. You’ll also find handy links to the application source code and the recommended model, as well as the ability to select other compatible models (curated from Hugging Face’s open source community). Figure 6 depicts this.
When you're ready to see the application live and running, you can start it by clicking the Start AI App button on the upper right-hand side. As the application starts, you'll be able to see the model it uses and where the source code of the application is located (Figure 7). In the background, Podman is running an inference server for the downloaded model within a container using the freely redistributable Red Hat Enterprise Linux Universal Base Image.
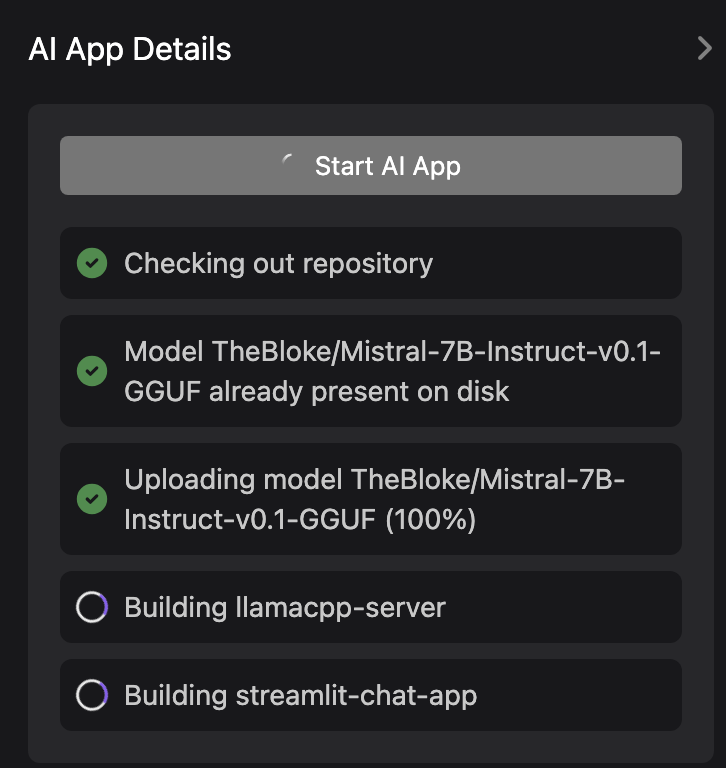
During the startup process, you'll be shown a few steps that will be completed before the application is ready to use. These steps might include downloading the model, building the container images with the model and the application, etc. See Figure 8.
Once the application has started, you can open it from the UI and use it from your web browser. In the chatbot example (Figure 9), we’re able to interact with the front end application, which is inferencing the model server, the selected Mistral-7B model. It’s this easy to set up a model server and start integrating generative AI in your applications.

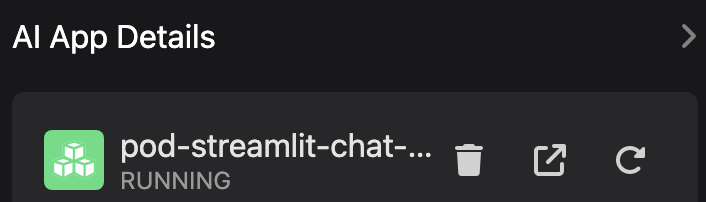
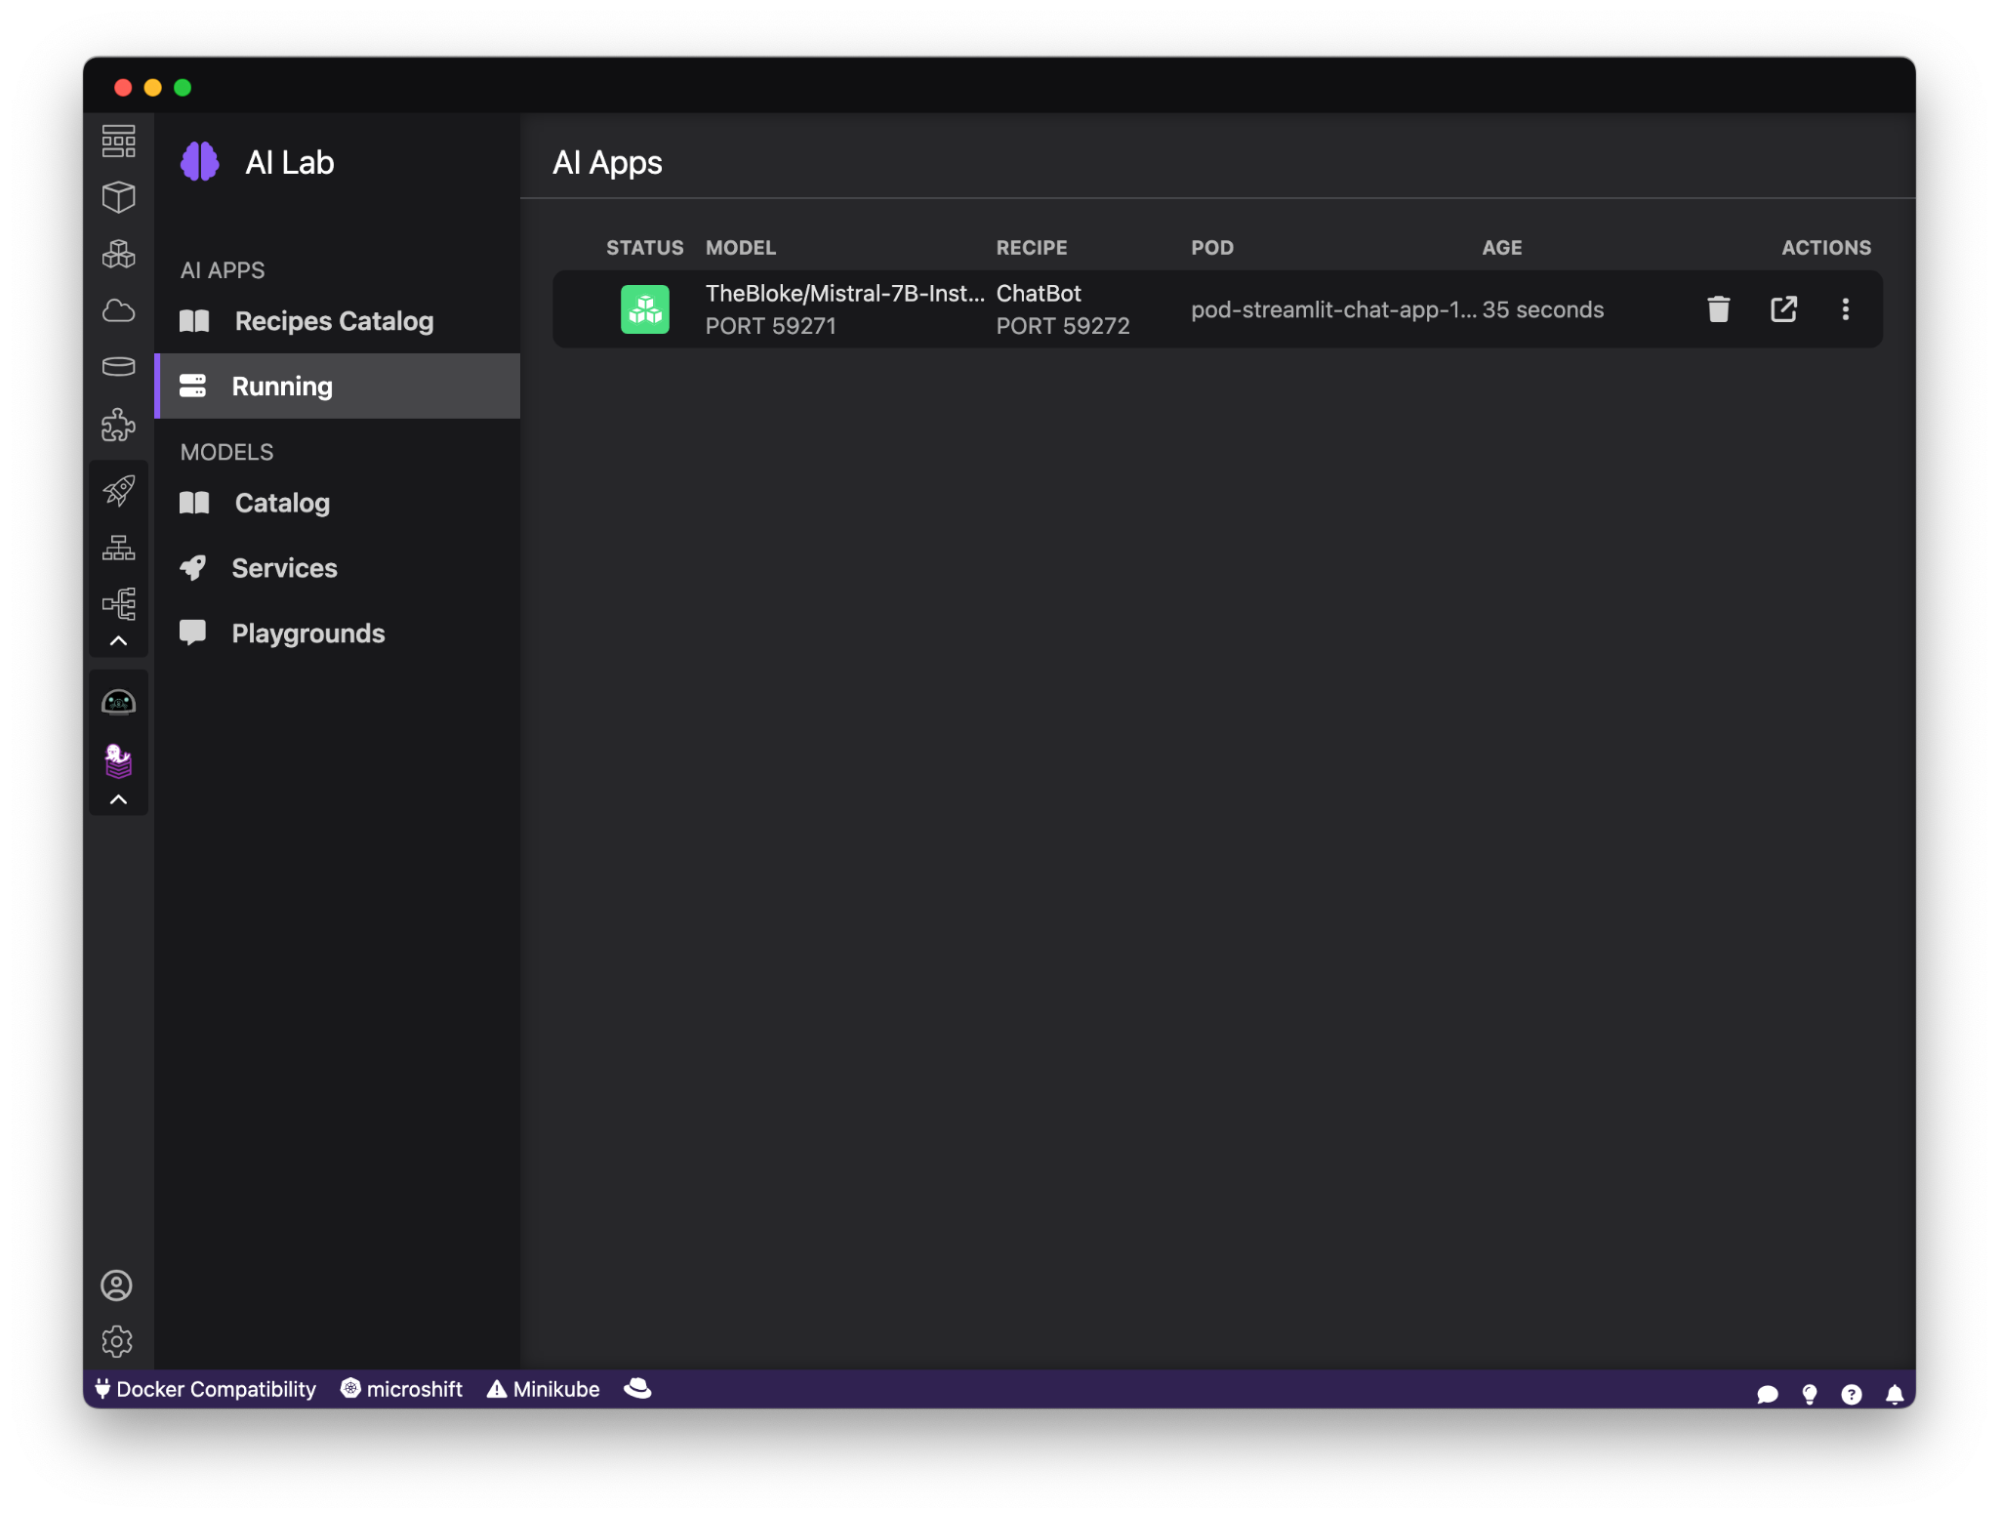
As you work in other areas of Podman Desktop for your container workflow, you’ll always be able to see your running AI apps (i.e., the recipes you started) in the dedicated Running section for Podman AI Lab. Figure 10 depicts this.
Model swapping with recipes
One of the pain points that you might face when building applications with AI is navigating the jungle of models. With so many different models available, it can be difficult to know which one is best suited for a particular use case. Setting things up and comparing how different models work can be a time-consuming and complex process. In Podman AI Lab, you can actually use the pre-built recipes to quickly compare different models and their behaviors, as Figure 11 depicts.
On the AI Apps Details side panel, you can select a different model for the recipe and relaunch the application with this new model by clicking the swapping model button or on the Models tab from the recipe screen.
Once you've selected a new model, you can play with the recipe using the new model and compare it to the one you were just running. To try out a different model, you'll need to stop the current AI app and recreate it with the desired model. See Figure 12.

Application details and Pod view
You might be wondering how the application works and has been packaged all together with the model. If you want, you can see the application’s details by going to the Pods list in Podman Desktop. You’ll notice the started pod associated with the recipe (Figure 14).
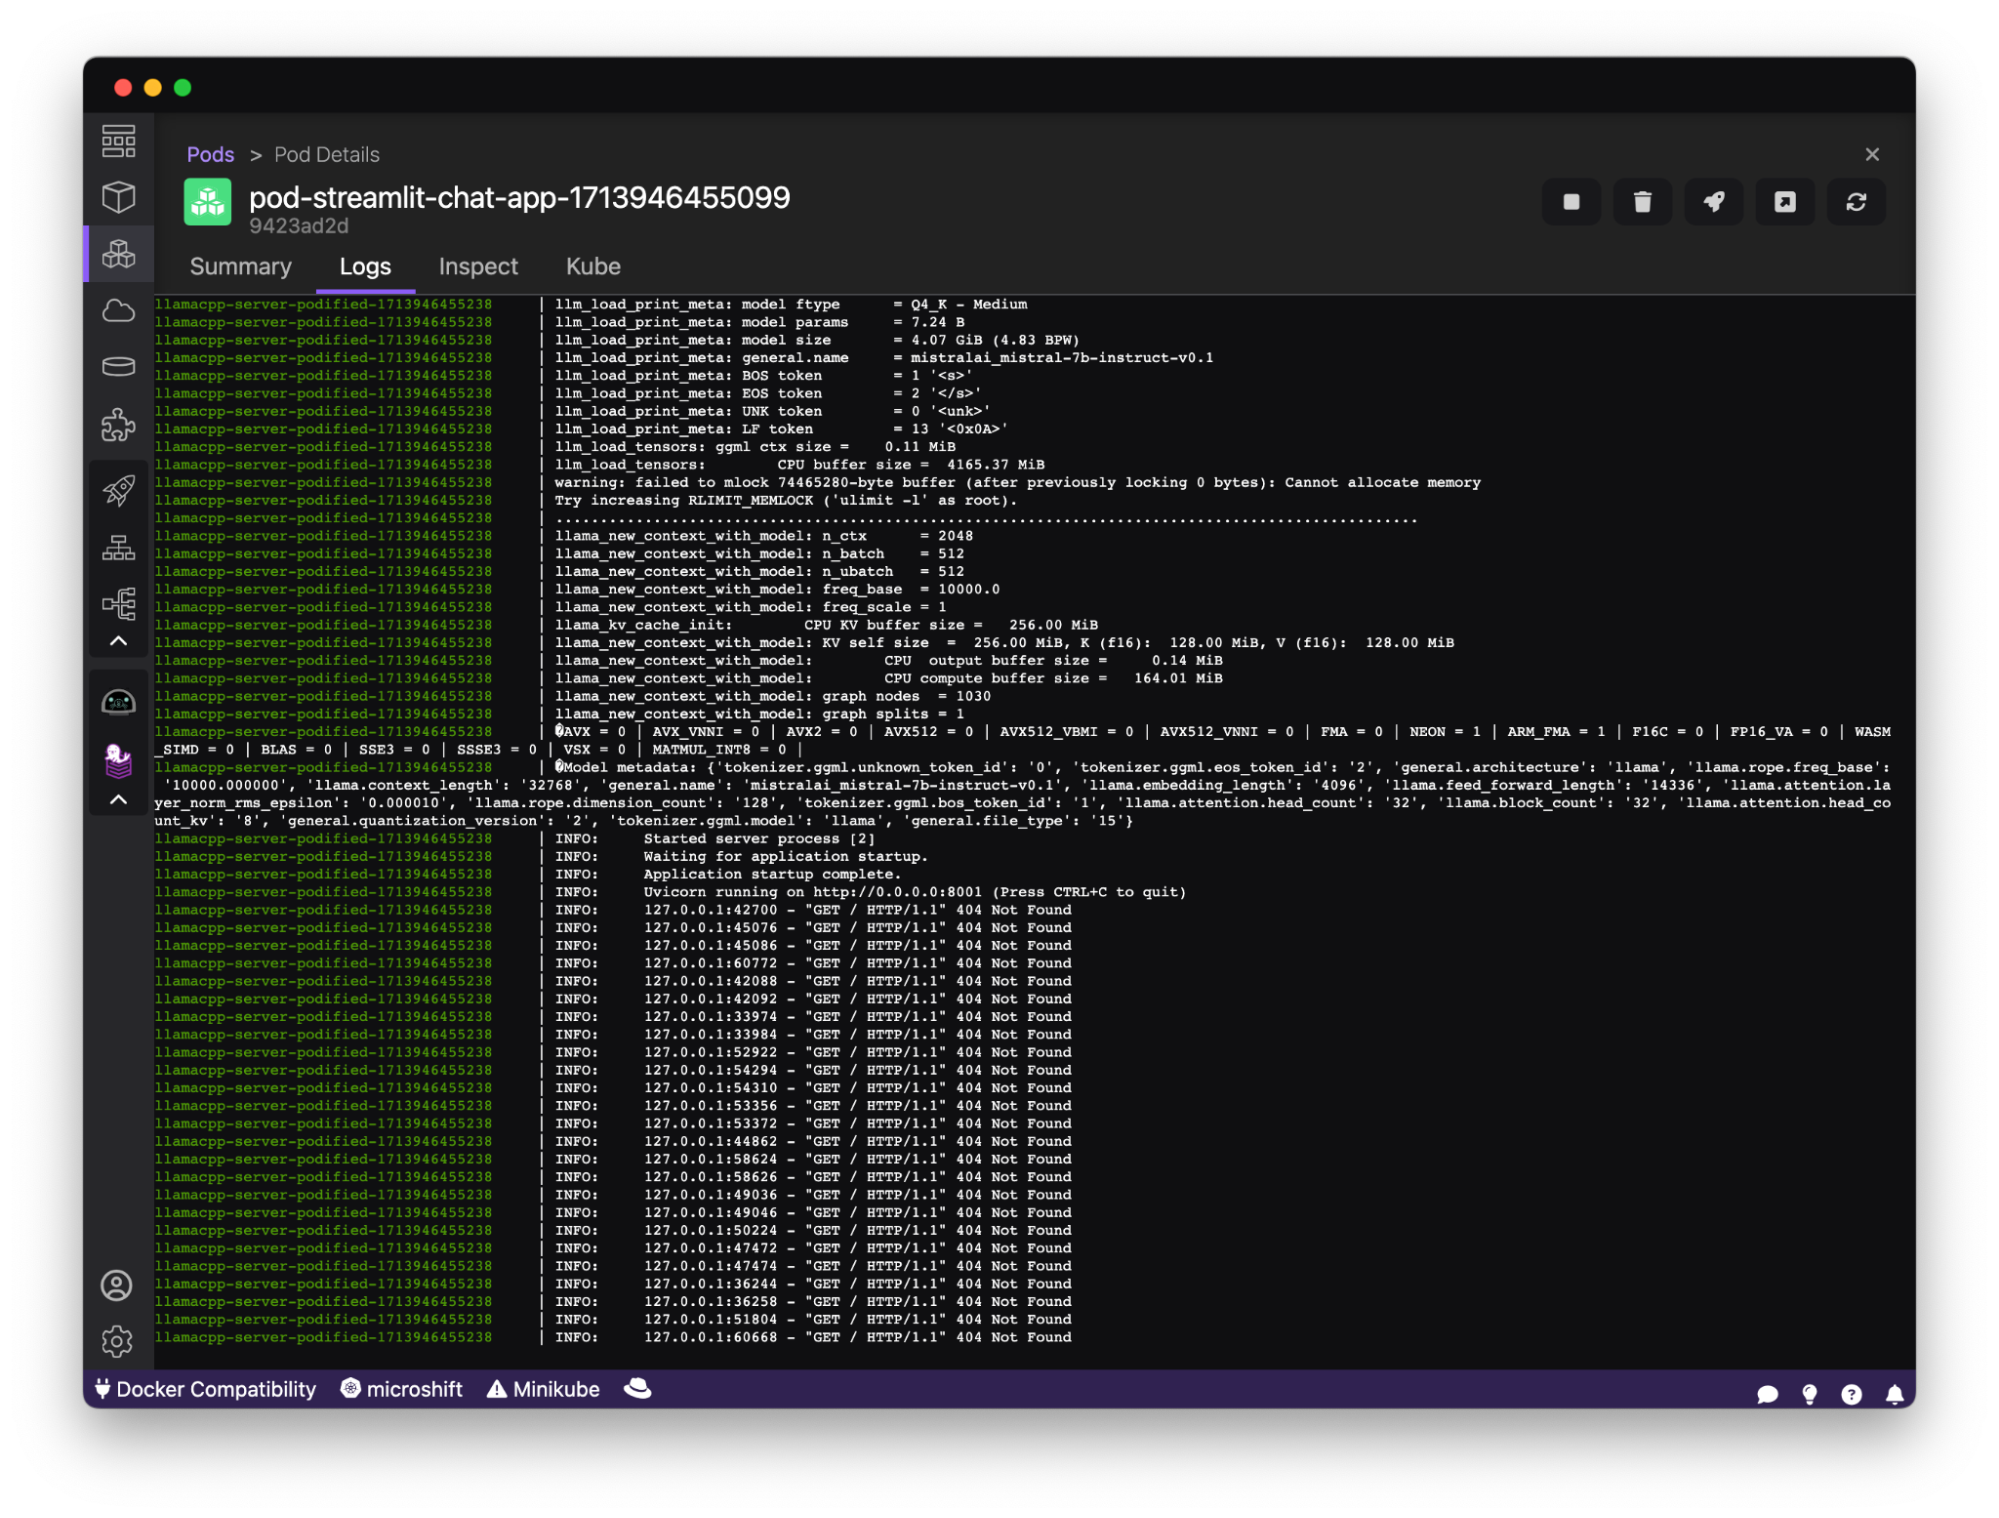
From there, you can see the details, logs, and outputs of each container of the application and if needed, you can also get a terminal to SSH directly into those.
Browse source code and learn best practices
When you see a recipe related to a specific use case, such as text summarization, you might think about how this functionality could improve your pre-existing app's user experience. To learn more about the recipe and its implementation, you can simply select it and open its source code in VS Code, or select the Local clone folder to view the directory in your file explorer, as shown in Figure 14.
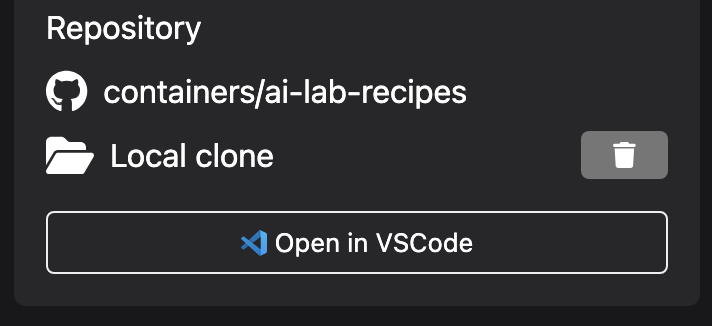
When you view the recipe, you'll be provided with a link to a Git repo containing the source code for the recipe. By examining the source code, you'll be able to learn how the recipe is interacting with the model to provide the summarization functionality. This will give you a better understanding of best practices for integrating AI into your app.
Catalog of open source models
Podman AI Lab provides a catalog of curated open source models (Figure 15), but navigating through the license aspects of the models can be a challenge. Before starting to bring new capabilities and rely on third-party components for your application, you need to validate the legal requirements of using the models you might find from different providers. The Apache 2.0 license is a widely recognized open source license, as well as MIT. The models available in Podman AI Lab have been checked to ensure compatibility and adherence to legal requirements.
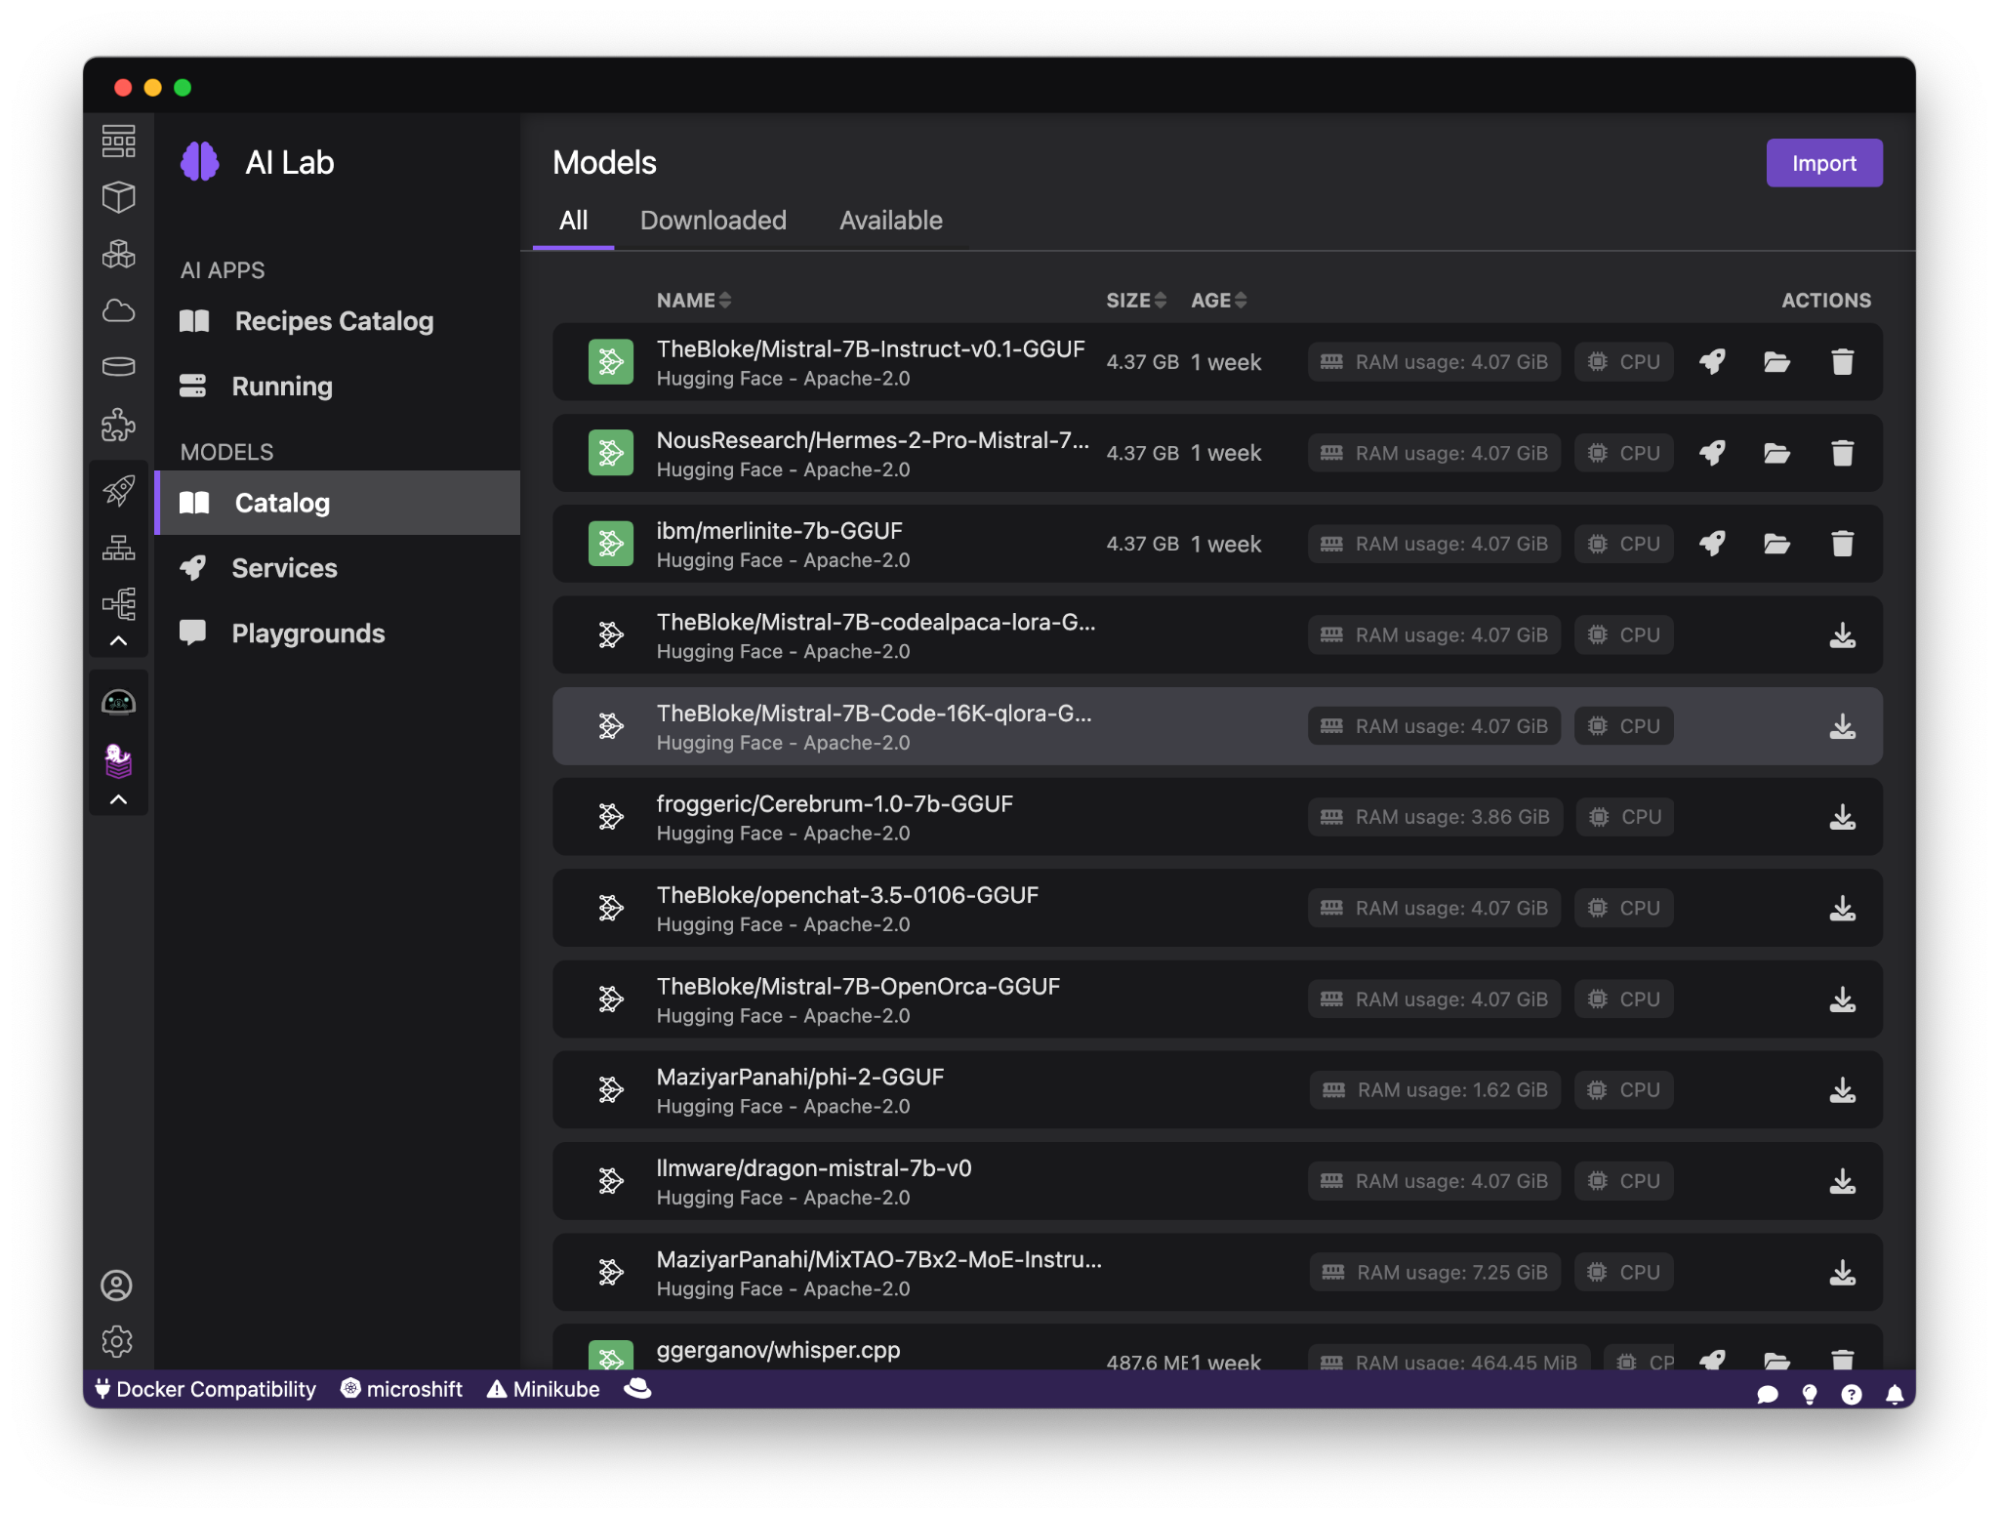
By selecting any of the available models, you can understand some critical information about the model. For each of the models, you’ll find an indication on the provider, the license, release notes, etc. To download a model and make it available locally, click the Download action icon on the right side of the model item in the list. By clicking on the model, you’ll get information about the model and be able to learn more about how it has been built, as shown in Figure 16.

If you're interested in contributing to and extending the catalog, feel free to propose a pull request to the following repository: https://github.com/containers/ai-lab-recipes
Bring your own model
In some cases, you might want to experiment with your own model, whether it's a model that you crafted or a model that you tuned. Podman AI Lab supports importing your own model in common formats such as GGUF. See Figure 17.
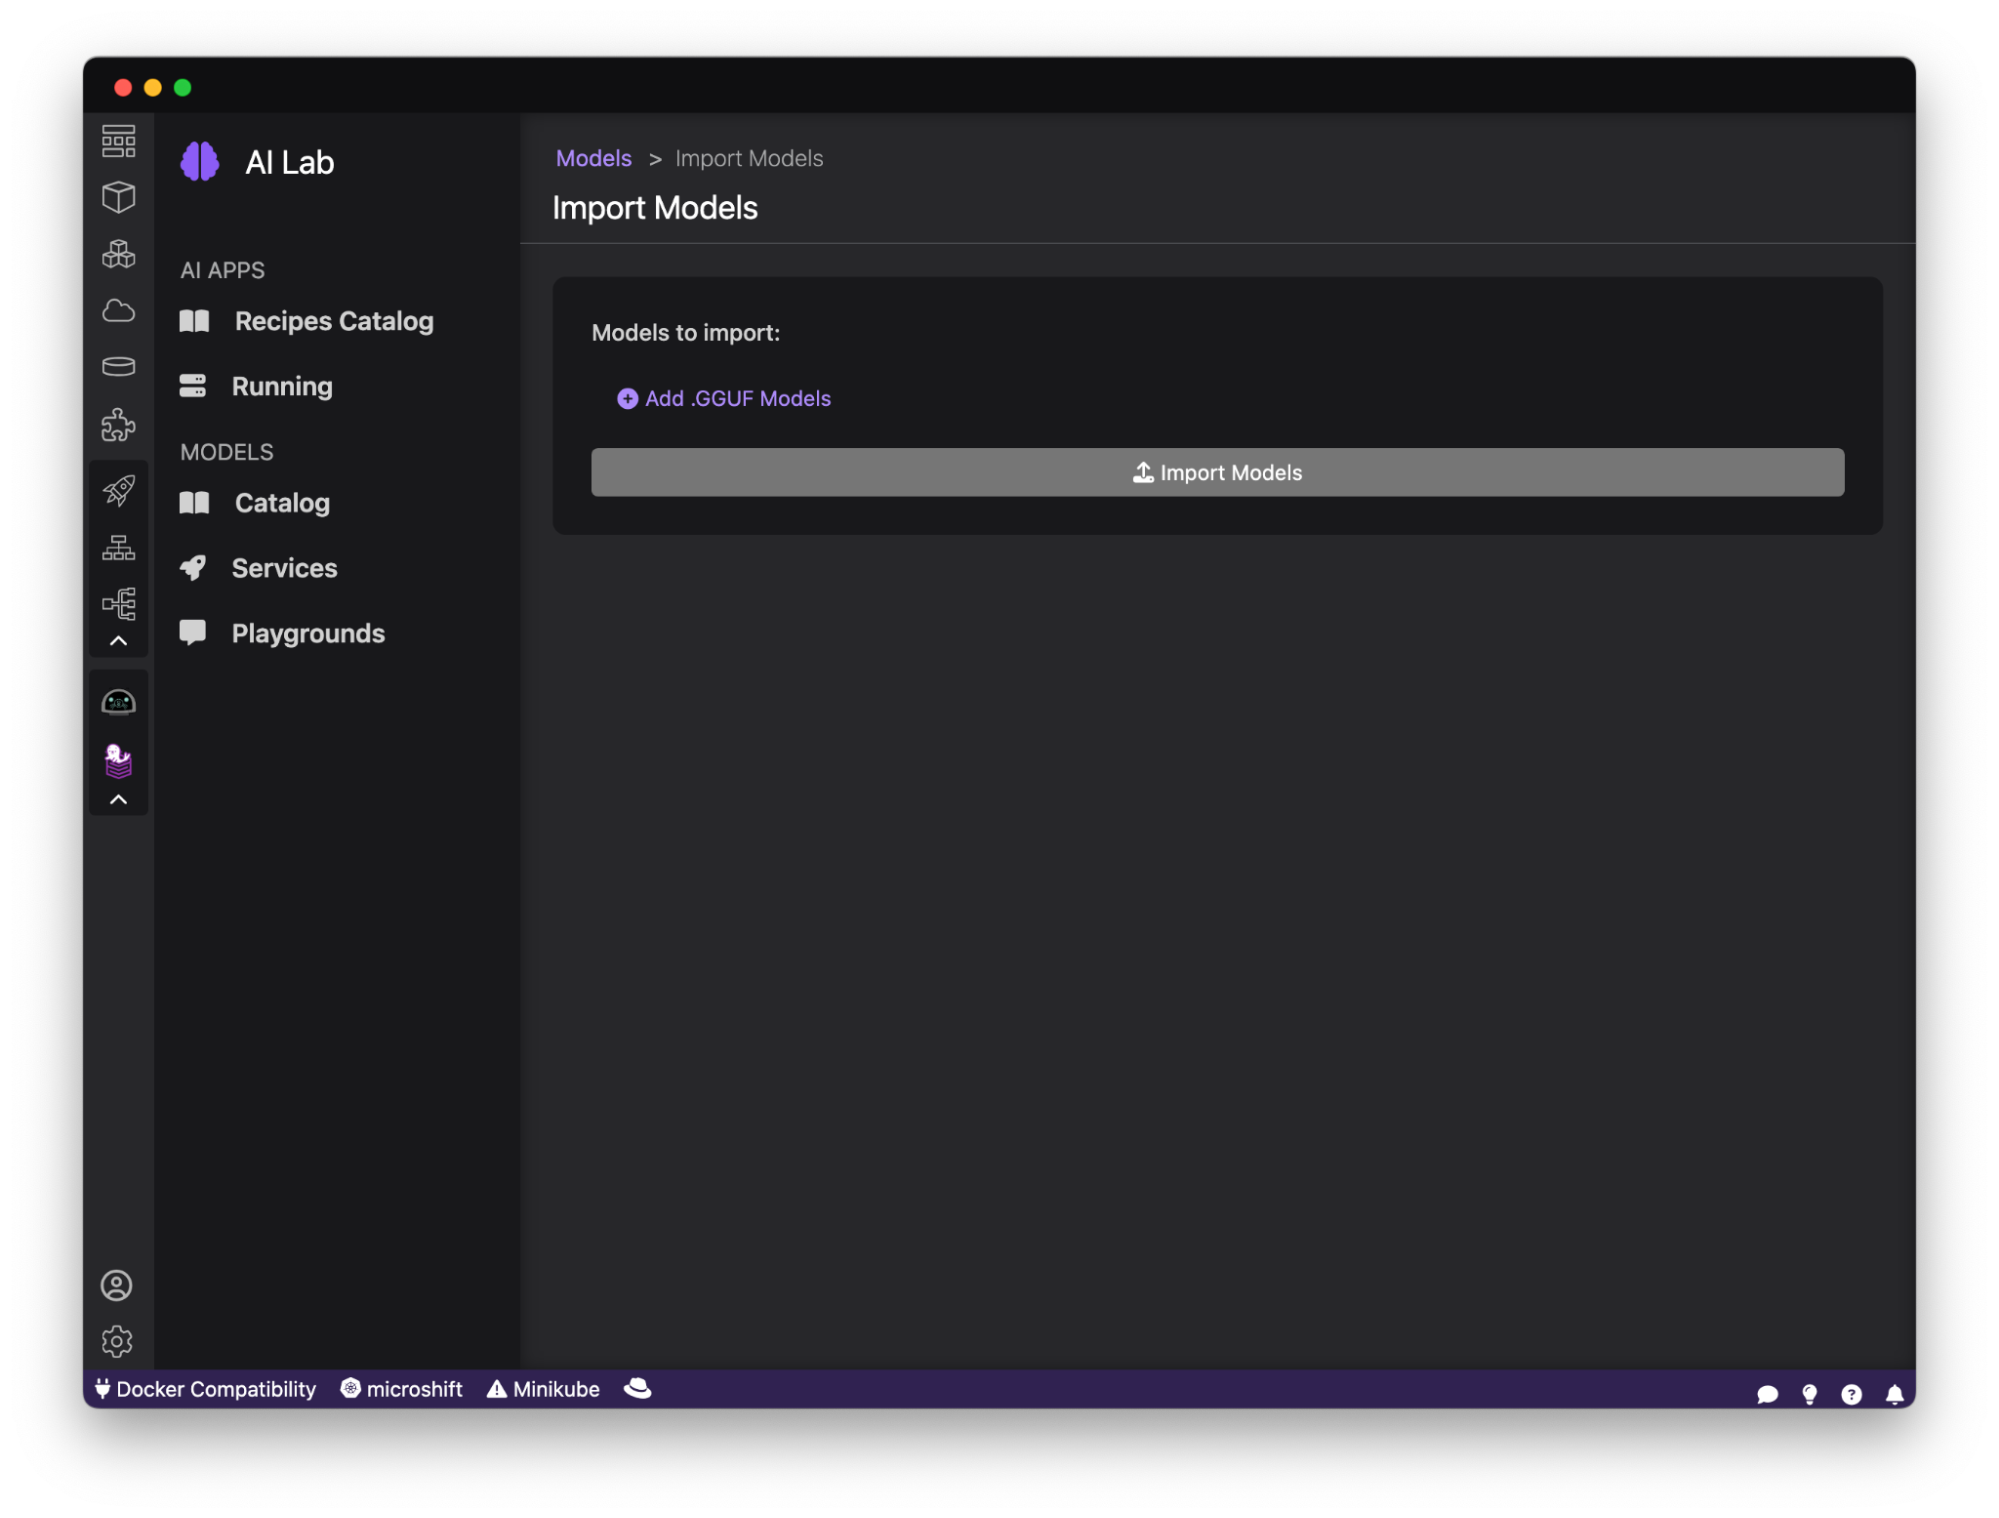
In order to import your own model, from the catalog of models, click the Import button in the top right corner. You’ll have a new screen from which you can select the file from your local environment. Once imported, you can start a model server or a playground environment to experiment with your own model.
Experimenting with models in a playground environment
Testing and experimenting with models is an essential part of the development process. However, it can be challenging to test your models in a safe environment where you can interact with them and observe their behavior. With the built-in playground environments from Podman AI Lab, you can test, experiment, and prototype with models. An intuitive user prompt helps in exploring the capabilities and accuracy of various models and aids in finding the best model and settings for the use case you have in your application. Figure 18 shows the playground environment.

To create a new playground environment, simply click the New Playground environment button and fill out a form with their desired name and selected model. The list of models displayed in the form will only include models that have been previously downloaded.
After clicking the Create playground environment button, the playground environment will start and a user prompt will be displayed (Figure 20). In the background, an inference server is running in a container and exposing the model.
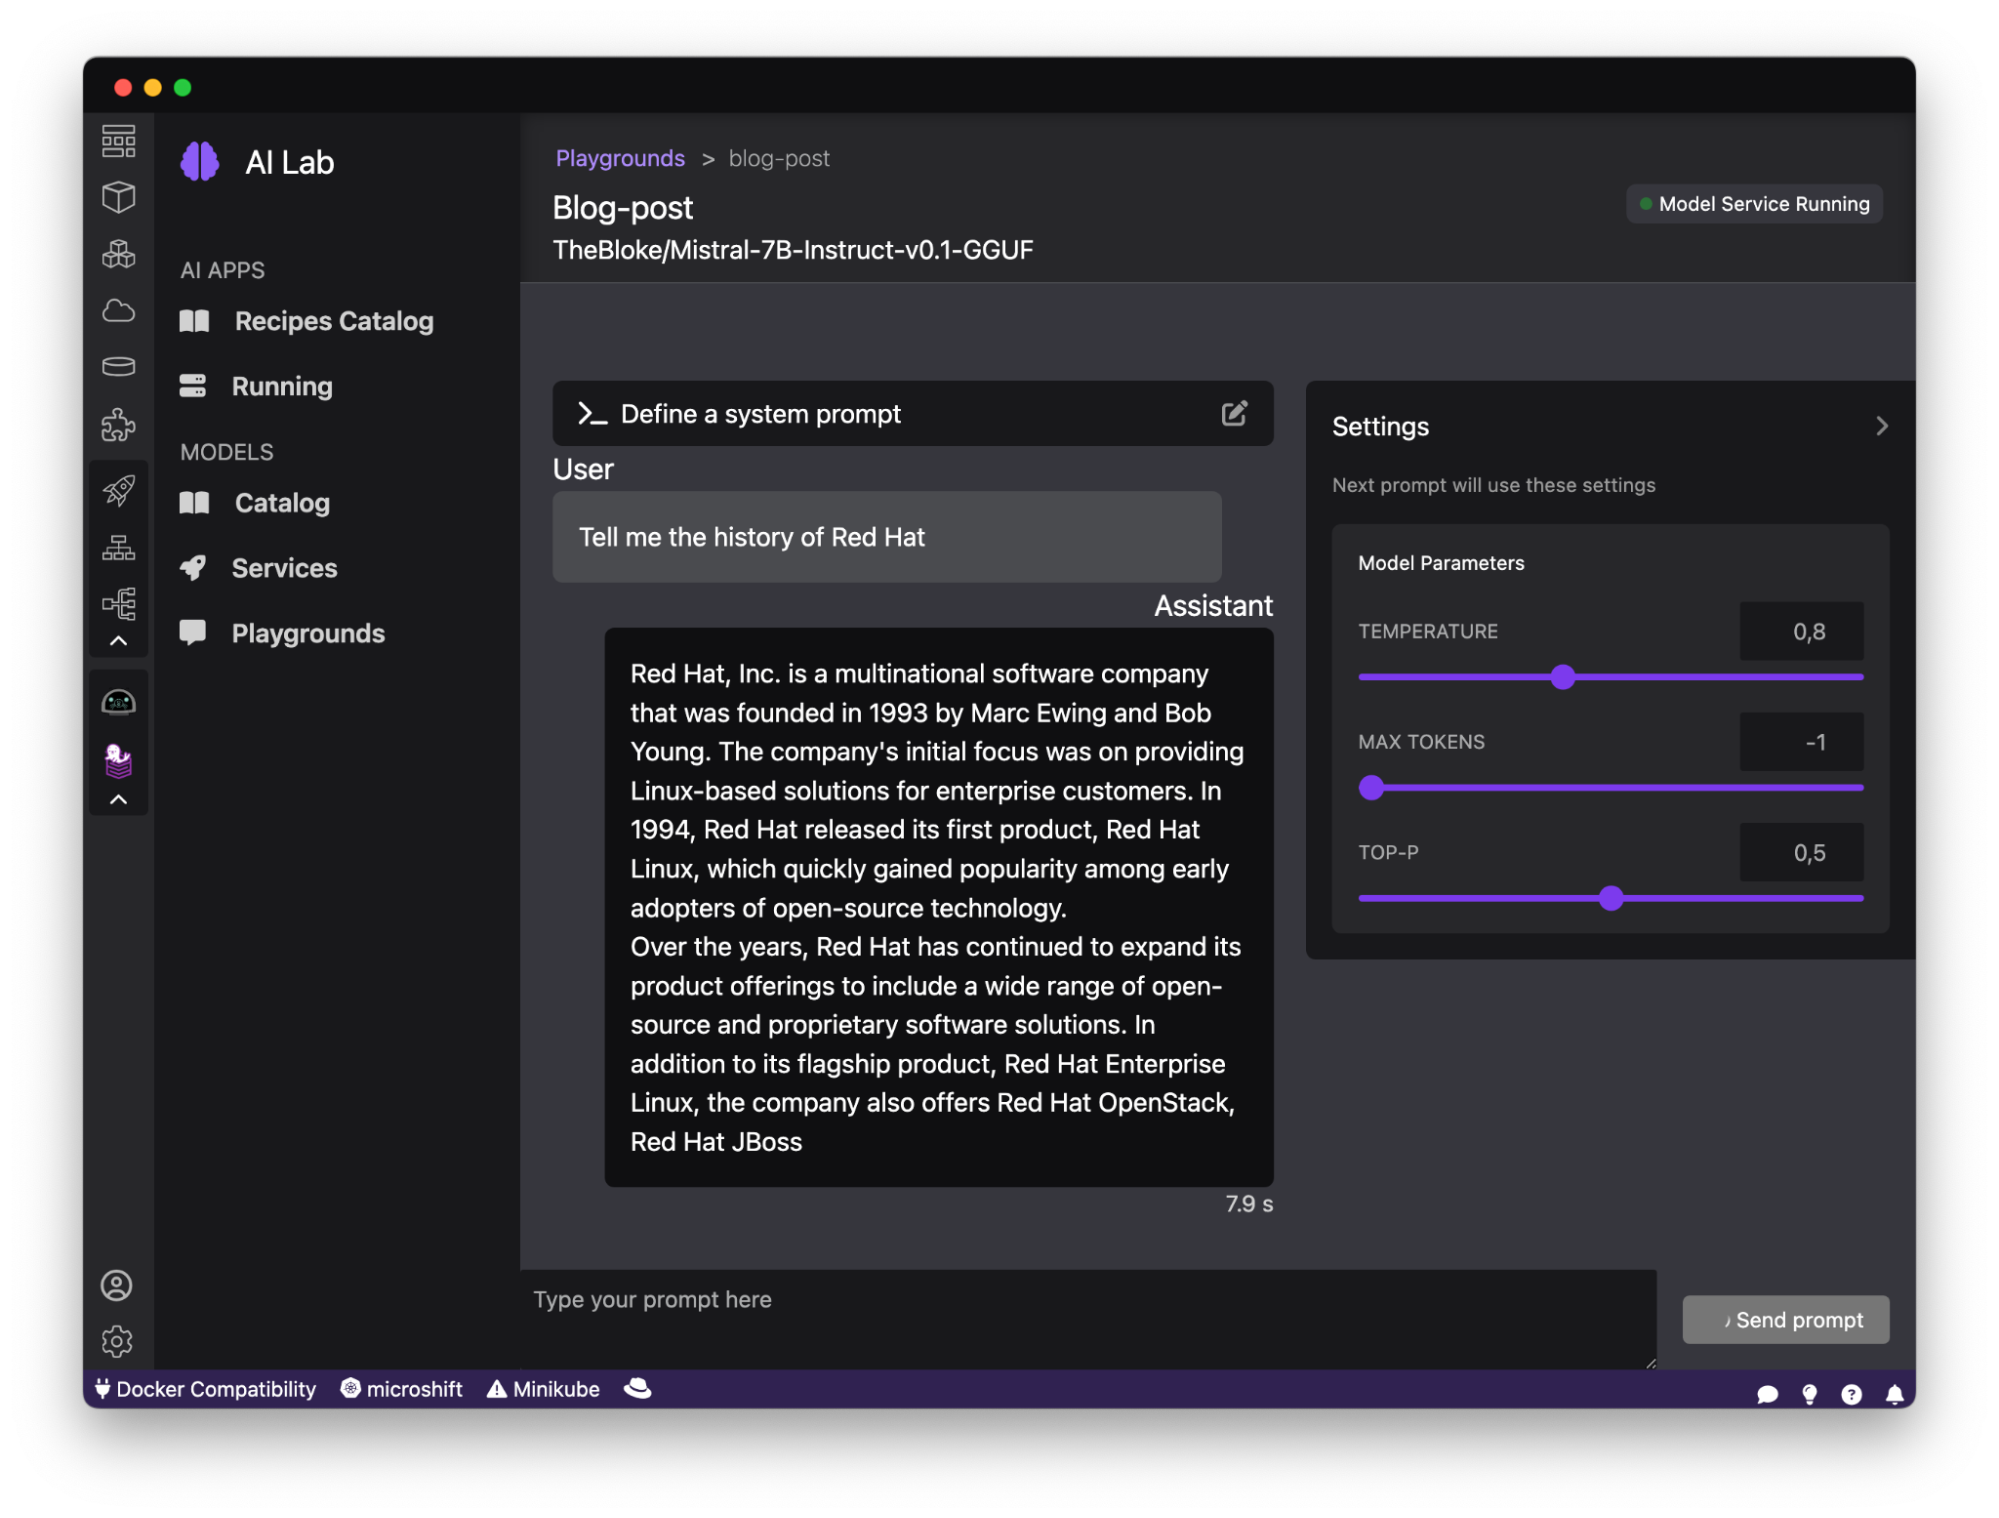
Once the playground environment is started, you will have the ability to interact with the model, and define system prompts for your specific application’s use case. You can use the graphical interface to explore the capabilities of the model, test your prompts, and experiment with different behavior to optimize performance and results. The answers from the model will be streamed natively in the user interface.
If you are interested in comparing two different models, you can create a new playground for another model and ask the same questions. By comparing the differences between the behaviors of the two models, you can gain valuable insights into how the models are performing and identify any issues or errors that might arise.
In the playground environment, you’ll also find some settings that you can configure (Figure 21):
- Temperature: Controls the randomness of the model's output, affecting creativity and predictability.
- Max tokens: Sets the maximum length of the model's response in terms of tokens (words or word pieces).
- Top-p: Restricts the model's word choice to the most likely candidates, ensuring coherence and relevance.

You can use those parameters to change the way the model behaves and answers, as shown in Figure 22.

We touched on this earlier, but you might want to consider defining a system prompt that will be used to define general context, instructions, and guidelines to be used with each query to the model. Overall, the playground environment is excellent when you want to test models locally in a safe and controlled environment.
Local model serving
As a developer, containers have always been an easy way to run databases locally. They provide an isolated environment that allows us to easily set up and manage databases without worrying about conflicts or compatibility issues. However, with LLMs, we can now apply container technology’s same simplicity and ease of use when it comes to running AI models locally.
To do that, Podman AI Lab provides the ability to spin up local inference servers using llama.cpp within containers. It’s now easy to run a model locally, establish an endpoint, and start writing code to wrap new application capabilities around the model.
To create a model server, go to the Services page and click the Create Model service button (Figure 23). If your environment does not have sufficient memory, you’ll get a notification indicating that you need to increase the available memory, which can easily be updated from Podman Desktop’s Settings page. Here, you can select the desired model you want to serve and define the port you want to use. The list of models displayed in the form will only include models that have been previously downloaded.

Once the model service has been started, you can open its detail page. This helps you understand the details of the model-service endpoint and see a number of code snippets that help you learn how to interact with the model service from your application; for instance, an application written in Python and using LangChain. See Figure 24.

As AI continues to grow in popularity, there has been an increase in the number of AI services, tools, and applications that are available. The technology behind Podman AI Lab model serving relies on llama.ccp as an inference server for models and provides Open AI-compatible APIs to simplify adding new AI capabilities into your applications and services.
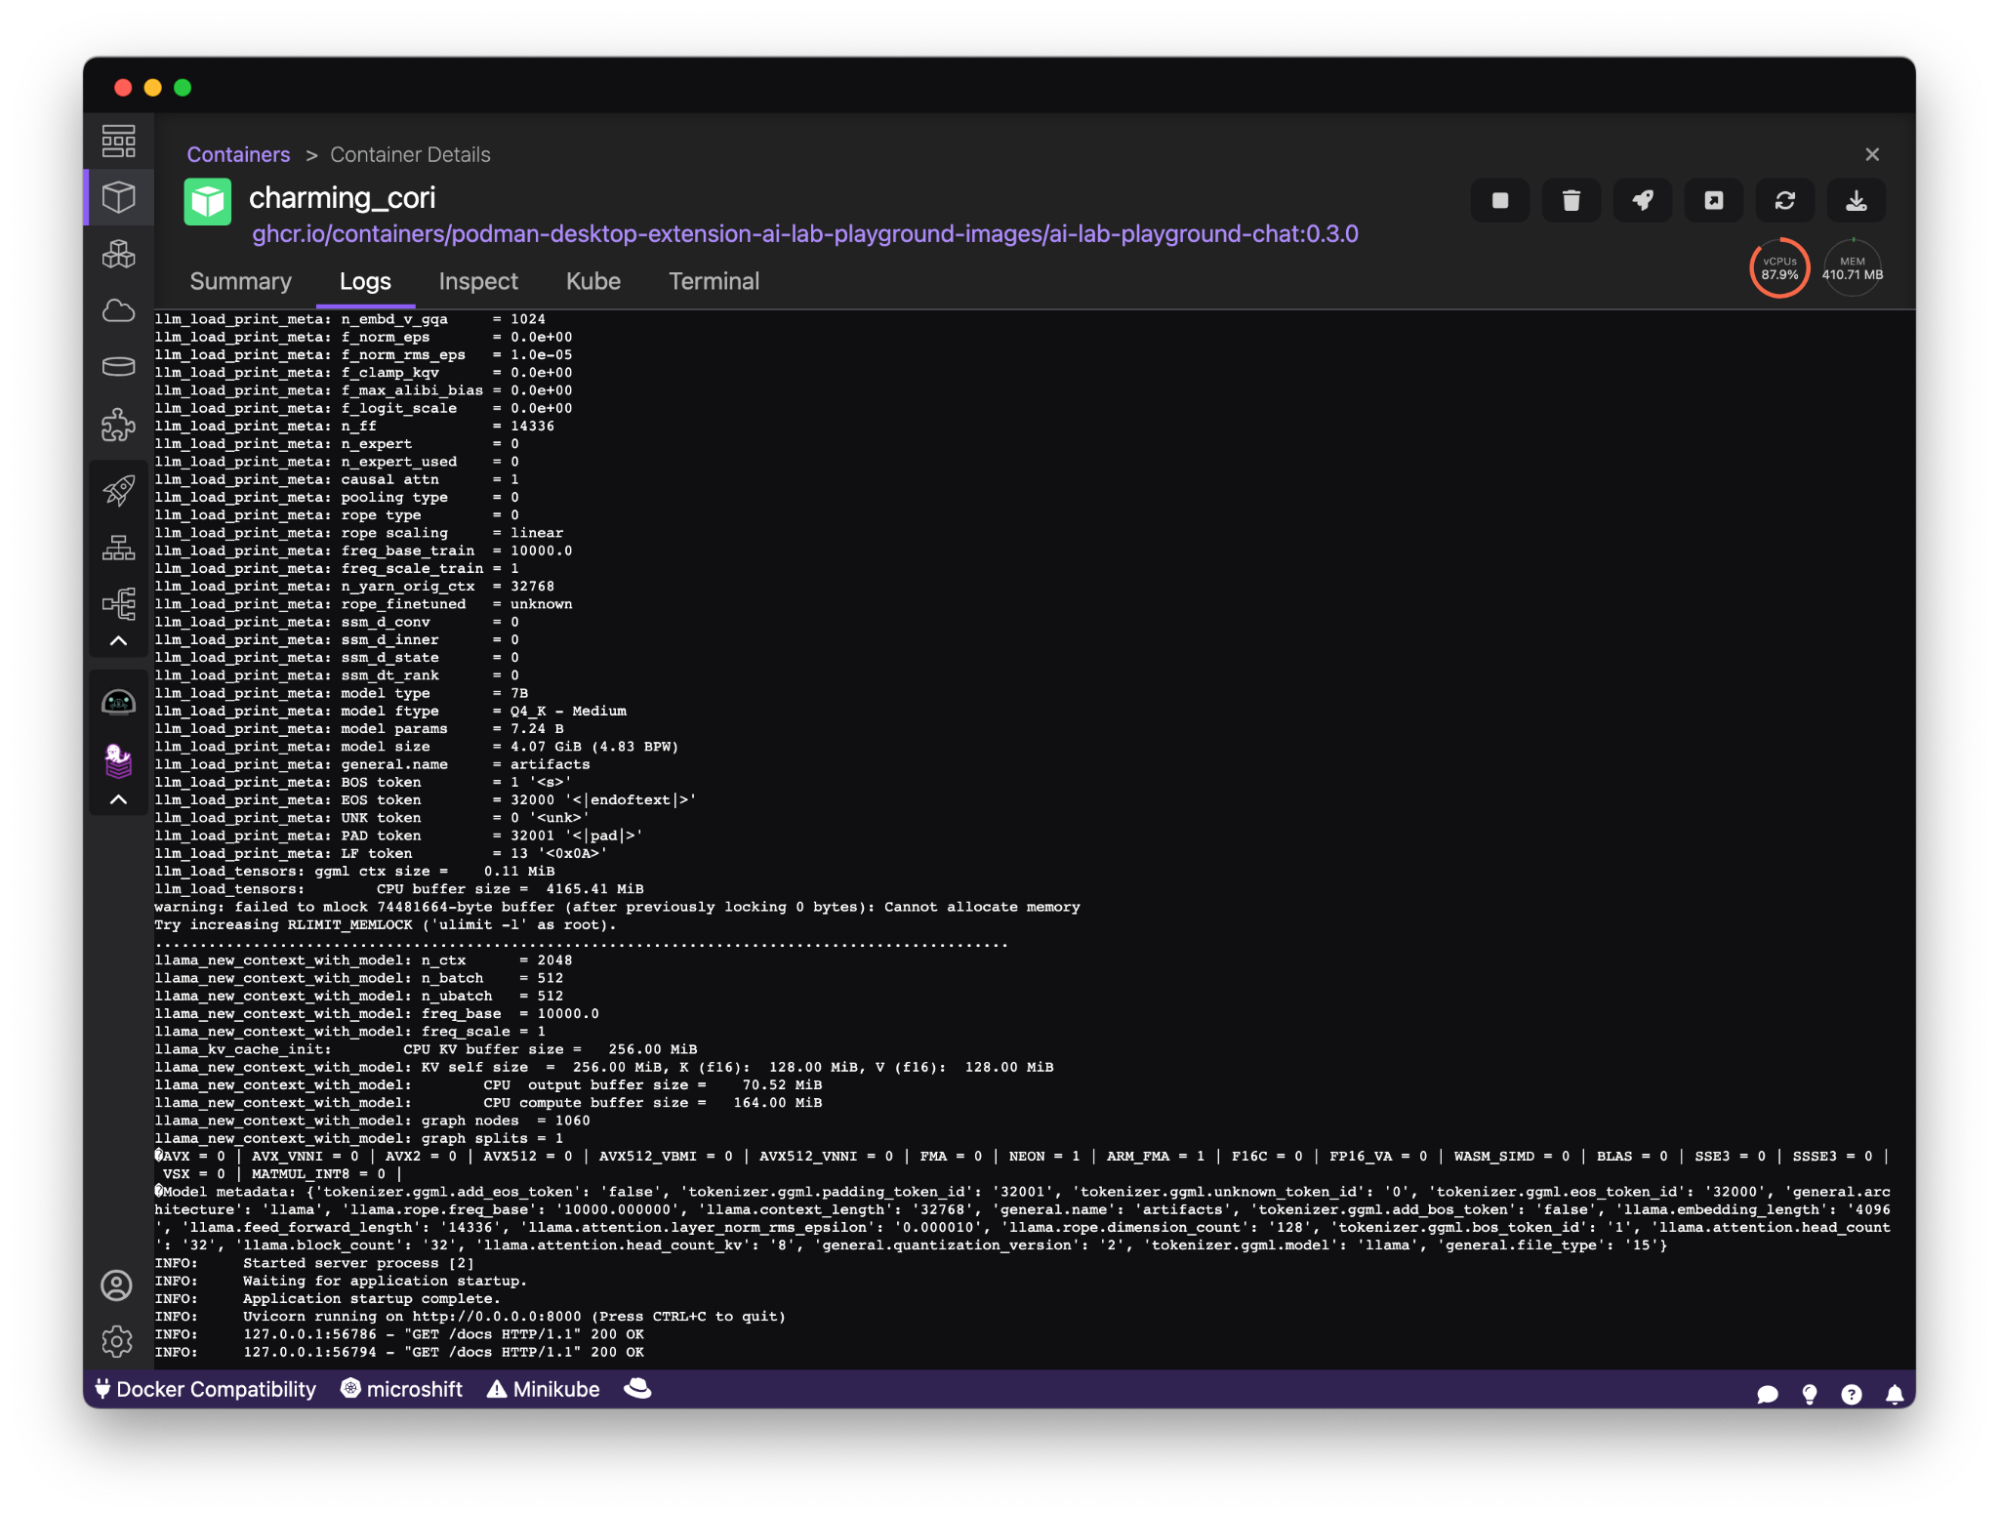
Accessing the model server container
Interested in exploring the model server container and checking its state? That's easy! Podman AI Lab runs on top of Podman Desktop and its components are running as containers. Simply access the list of containers and click on the container to get into its details, as shown in Figure 24.
The model serving page simplifies the process of getting your models up and running, allowing you to concentrate on writing the application's code rather than setting up the infrastructure. You are in a safe zone and your data will remain private. It provides you a user-friendly interface to interact with the model, and code snippets to ease the integration of models in your application. By using the model serving page, you can be confident that your model is functioning correctly. This streamlined approach saves time and effort, enabling you to focus on developing your application and enhancing its functionality.
Final words
With Podman AI Lab, you have access to a wide range of tools and resources that can help you start infusing AI into your applications. Try it out today to embrace the full potential of open source LLMs and generative AI Podman AI Lab has everything you need to create powerful and innovative applications.
Start by exploring the catalog of recipes and finding the perfect use case for your app. Leverage the open source LLMs and start experimenting with the playground environment and model serving. With Podman AI Lab, you'll be able to take your app to the next level and create something truly remarkable.
Download Podman Desktop today, and adopt a seal. :)
Last updated: May 7, 2024