This article is the second in a series that describes the relationship between Kubernetes and Red Hat OpenShift. The first article, Kubernetes 101 for OpenShift developers, described basic Kubernetes concepts, components, and resources. This installment describes what OpenShift is and what it does. I'll also describe the relationship between Kubernetes and OpenShift, and briefly explain some of the basics for working with OpenShift and Kubernetes using both the web console and OpenShift's oc command-line interface (CLI).
OpenShift simplifies Kubernetes
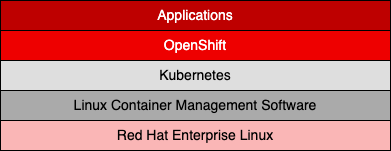
Kubernetes is popular and powerful, but it's not easy to use. You have to know a lot even to do a simple task. The learning curve can be daunting. OpenShift makes working with Kubernetes a lot easier by providing a layer of abstraction over Kubernetes that removes a good deal of Kubernetes's operational complexity from the day-to-day developer experience. Figure 1 shows the place of OpenShift in the software stack.
One button click in the OpenShift web console can do the work on a Kubernetes cluster that otherwise would require fiddling with a configuration file or typing half a dozen commands into a terminal window. In addition to providing a graphical user interface (UI) that makes it easier to work with Kubernetes, OpenShift has a set of features that enhance application deployment and maintenance. For example, OpenShift allows you to deploy an application from source code in a remote repository directly into the underlying Kubernetes cluster.
Also, OpenShift enables application deployment from existing container images that are stored in a container image repository. These two features alone save hours of work for developers and release personnel (who would also need to be part of the deployment process). Again, OpenShift does not replace Kubernetes. Rather, it improves and enhances the experience for those who work with Kubernetes.
The trick to working with OpenShift is to take an application-first approach. This means using OpenShift to select the type of application you want, either by starting from scratch or by using pre-existing code. The pre-existing code can be a container image or source code in a remote source code repository. After you select an application type, OpenShift does the work of setting it up in the underlying Kubernetes cluster. You don't have to fiddle around with configuration files or create Kubernetes resources manually. OpenShift does all that work, thus enabling you to focus on the higher-level concerns of application design.
Understanding OpenShift projects and Kubernetes namespaces
In OpenShift, the project is the organizational unit for applications. A project is OpenShift's way of organizing all the underlying Kubernetes resources that make up a web application into a single formal, operational entity. Under Kubernetes, you create a web application by composing all the underlying Kubernetes resources that make up the application. In contrast, under OpenShift you start by declaring the project and then let OpenShift do the work of creating and organizing the Kubernetes resources required to support the application. It is a subtle difference but an important one. We will discuss the application-first approach later in this article.
An OpenShift project is the same as a Kubernetes namespace. When you create a project in OpenShift, you are also creating a Kubernetes namespace under the covers. That Kubernetes namespace has the same name as the OpenShift project. All the underlying Kubernetes resources that support the OpenShift application are assigned to the Kubernetes namespace that correlates to the OpenShift project under which the application is running.
How to work with oc and kubectl CLI tools
There are two ways for developers to work with OpenShift. One way is using the graphical web console. The other way is to use oc at the command line.
The oc CLI provides all the capabilities available in kubectl, which is the native to Kubernetes. However, oc goes beyond the capabilities of kubectl and allows developers to work with features that are special to OpenShift.
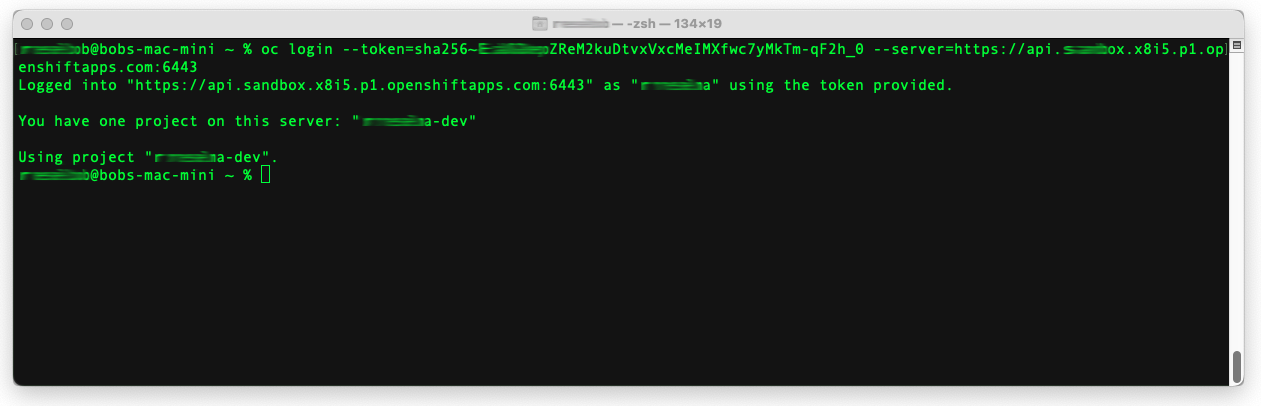
There are also two ways to use oc. The first way is to install oc on your local machine and use it to log in to a remote OpenShift instance. Then, once logged in, you invoke oc to execute commands from a terminal window in your local machine (Figure 2).
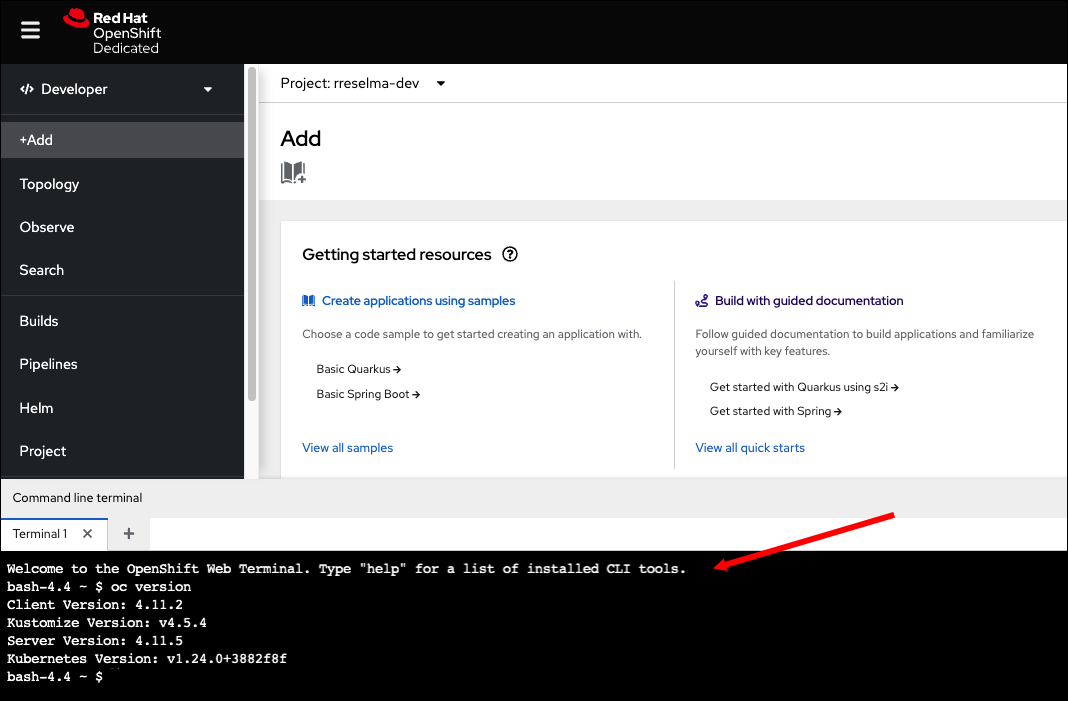
The second way to use oc within the web console's terminal window (Figure 3).
Anything you can do with the kubectl CLI, you can also do with oc. For example, the two terminals in Figure 4 use kubectl and oc to get a list of Kubernetes pods hosted in an OpenShift cluster.
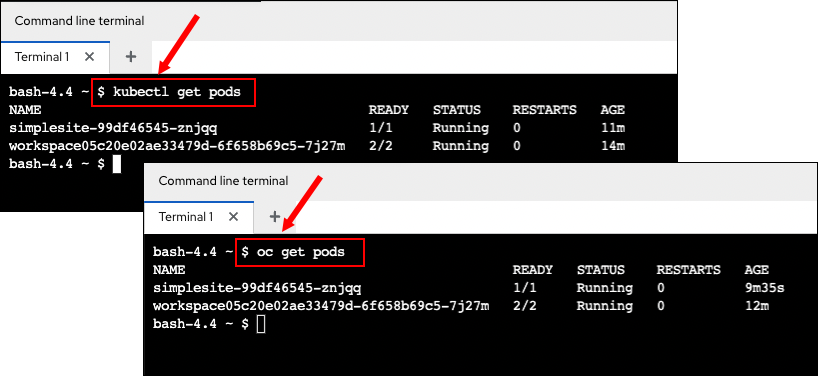
In Figure 4, both kubectl and oc execute the get pods subcommand. Because oc mimics kubectl, the output for each command is identical.
How to use the web console
In addition to using the oc CLI to interact with OpenShift, developers can use the web console. This graphical interface allows developers to work with OpenShift projects, applications, and an application's constituent components. This section provides a basic overview of the console, which you log into through your browser.
You can use the web console to add projects and applications to an OpenShift cluster. You can also manage the various Kubernetes and OpenShift resources in the cluster through the console. You can use the web console to observe application behavior, configure security settings, and set access credentials. These are just a few of the many capabilities available.
The web console UI has two presentation perspectives: administrator and developer (Figure 5). As the names imply, the administrator perspective performs administrative tasks in the web console, such as configuring networks, configuring users, and creating persistent volume claims. The developer perspective is where you can create and maintain applications, as well as observe application behavior. However, there are tasks in either administrator or developer perspective, such as creating secrets.
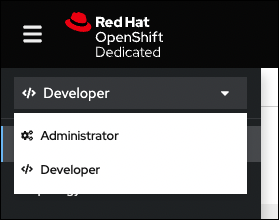
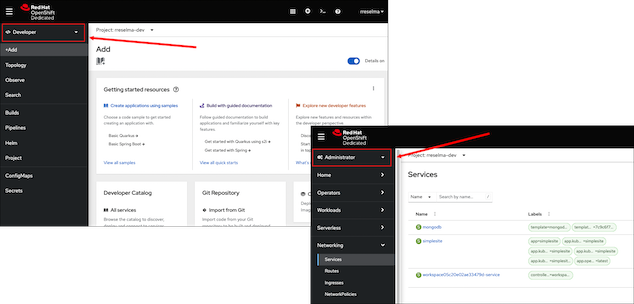
Figure 6 shows screenshots of both the Developer and Administrator perspectives in the web console.
Each perspective provides a number of capabilities in the vertical menu bar on the left side of the console's web page. Clicking on an item in the menu bar presents a web page that has the details of the selected menu item. Be advised that most of the web pages you'll be presented with require some understanding of various Kubernetes resources, so you need a basic understanding of Kubernetes. This makes sense. After all, one of the key benefits of OpenShift is that it enhances one's ability to work with Kubernetes.
The web console does take time to master. But it's not an all-or-nothing undertaking. You can learn what you need to know in small increments, according to the task you want to complete.
How to run an application in OpenShift
Now that you have a very high-level overview of the OpenShift web console, let's use the console to install and run an application in OpenShift. As mentioned previously, OpenShift is an operational layer that sits on top of a Kubernetes cluster. Developers use the OpenShift web console to deploy applications. In turn, OpenShift frees developers from the tedium that goes with creating the various Kubernetes resources that make up the given application.
However, even though you don't have to do the work of creating Kubernetes resources, at some point you might need to interact with them. Fortunately, OpenShift Web Console exposes all of an application's Kubernetes resources. You just need to know where to look for them.
The following sections walk you through the process of installing an application in OpenShift and then show you how to locate the various Kubernetes resources that support the application within the OpenShift UI. Be advised that the demonstration application uses only the basic Kubernetes resources. Kubernetes ships many other resources out of the box. Moreover, developers can create custom resources. To cover them all with any sort of detail would require a good number of articles. But still, there's a lot of value in understanding how to work with these basic Kubernetes resources. Most if not all applications use them.
Installing an application from a container image
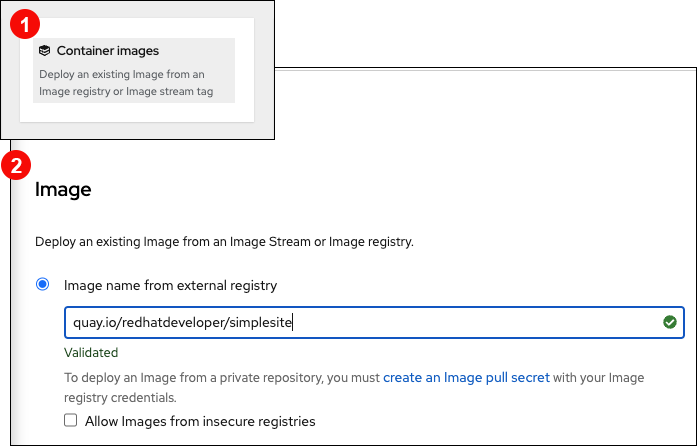
You can use the web console in a variety of ways to install an application on OpenShift. One way is to install an application using a container image that's stored in a container image repository such as Quay.io. Installing an application from a container image involves declaring the URL to the container image from within the console and then entering some minor configuration settings within the same UI.
Figure 7 shows a portion of the web page in the console where you can install an application from a container image.
After you ask OpenShift to install an application from a container image, OpenShift creates all the Kubernetes resources needed to run the application within the cluster. This includes a Kubernetes deployment along with its pods, as well the service that represents the pods on the Kubernetes network. Also, the installation process creates a route in the form of a DNS name that makes the application accessible on the Internet.
As mentioned many times in these articles, a key feature of the OpenShift web console is that it creates all of an application's resources automatically and exposes them in a graphical manner.
Viewing the underlying Kubernetes resources
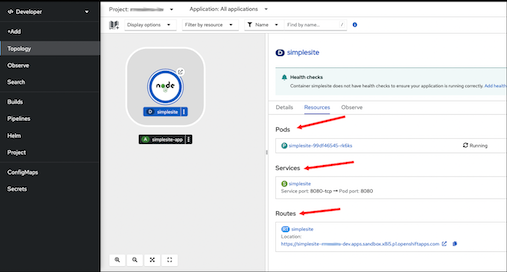
Figure 8 shows the graphical output that shows up in the web console after OpenShift installs an application. The circular graphic in the illustration represents the application, in this case a web application named simplesite. The pane on the right side of Figure 8 appears when you click on the center of the circular graphic. Notice that the pane shows the application's Kubernetes pods as well as the service representing the pods on the Kubernetes network. Also, the URL that represents the route to the application on the Internet appears at the bottom of the pane.
You can view the details of a resource by clicking on the link listed in the pane. The details page provides a variety of views for information about a given resource, organized according to the tabs on the horizontal menu bar on the page.
Figure 9 shows the general overview of information relevant to the application's pods, which is presented when you click the Details tab. In addition, Figure 9 shows the YAML source code implementing the Kubernetes configuration file for the pods. The YAML configuration is created automatically by OpenShift as part of the application installation process. Developers who are familiar with configuration files can tweak the YAML to make changes. The saved changes will cascade into the cluster automatically and the pods will be updated accordingly.
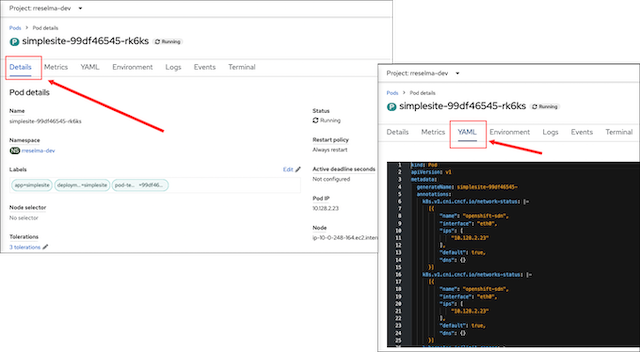
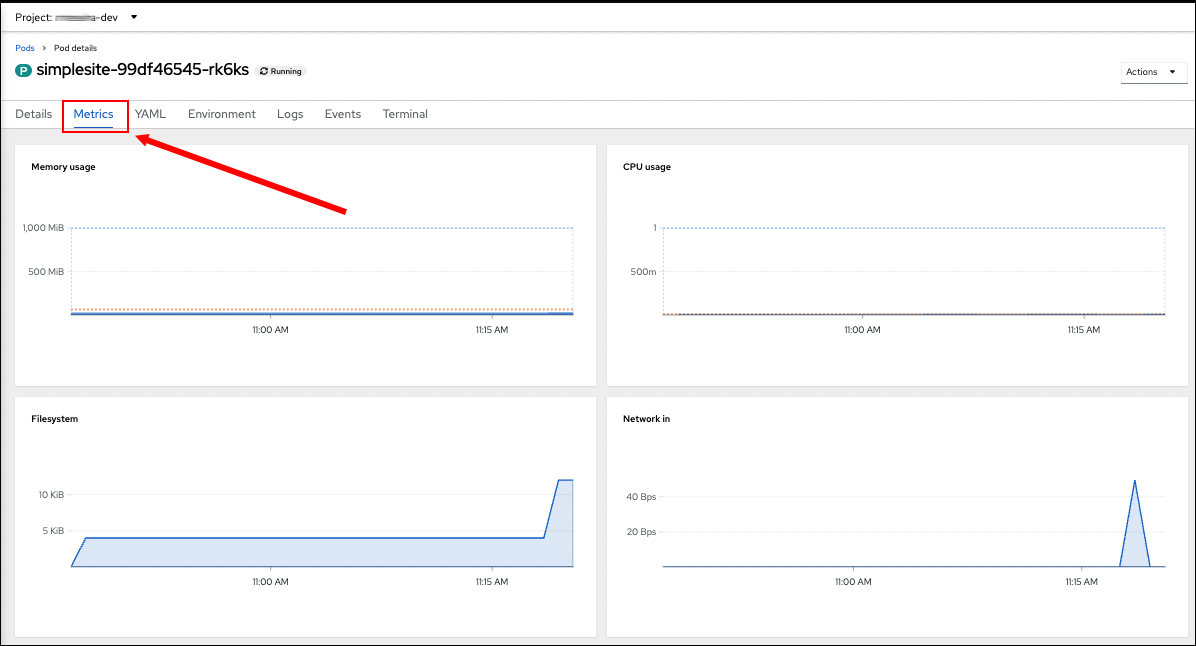
Figure 10 shows the information available when you click the Metrics tab in the pod details. You can view metrics about memory usage, CPU utilization, and network I/O, to name just a few examples. The graphical information is available in the web console by default. You don't need to add any additional tools or plugins.
In short, the details for the Kubernetes resources associated with a given application are available within the OpenShift web console. The console presents both general Kubernetes information and information that is specific to each resource. There's a lot of information to view for each Kubernetes resource. Exploring the details page for each resource is a good place to start.
OpenShift offers a simple interface
The article covered the knowledge required to understand what OpenShift is and what it does. You learned that OpenShift is an operational layer that sits on top of Kubernetes. All the resources that are available in Kubernetes are also available in OpenShift. You learned that you can interact with OpenShift and the underlying Kubernetes resources using either the oc CLI or the web console's graphical interface. Also, you learned about using the Administrator and Developer perspectives in the Web Console to work with different OpenShift features as well as the underlying Kubernetes cluster.
Finally, you saw a high-level example of how to install an application into OpenShift from a container image stored on a public registry. In addition, you learned how to use the graphical features available in the OpenShift web console to view detailed information about the Kubernetes resources associated with the application.
Last updated: September 20, 2023