Cryostat is a tool for managing JDK Flight Recorder data on Kubernetes. If you have Java Management Extensions (JMX) authentication enabled on your containerized Java Virtual Machines (JVMs), Cryostat will prompt you to enter your JMX credentials before it can access the JDK flight recordings on your target JVMs. On the Cryostat console, the Automated Rules, Recordings, and Events tabs will require you to enter your JMX credentials if you want to view existing flight recordings or perform a recording operation on a target with JMX authentication enabled. When monitoring multiple target JVMs with Cryostat features such as automatic rules, you may want Cryostat to remember and reuse your JMX credentials for each target connection.
Cryostat stores JMX credentials according to each target's unique JMX service URL, also known as a connection URL. Even if the underlying JVM instance changes, the target alias changes, or the target application restarts, Cryostat will apply the stored JMX credentials to the connection URL that the credentials are associated with.
If you would like to start an automated rule to automatically start and save recordings on your target applications, you will need to store credentials for each of your selected targets with the Security tab prior to creating the rule. If Cryostat is missing credentials for a target requiring JMX authentication, the rule will be unable to connect to the target JVM and will not start a recording.
Here's how to manage stored JMX credentials with the Cryostat web UI.
How to store JMX credentials in Cryostat
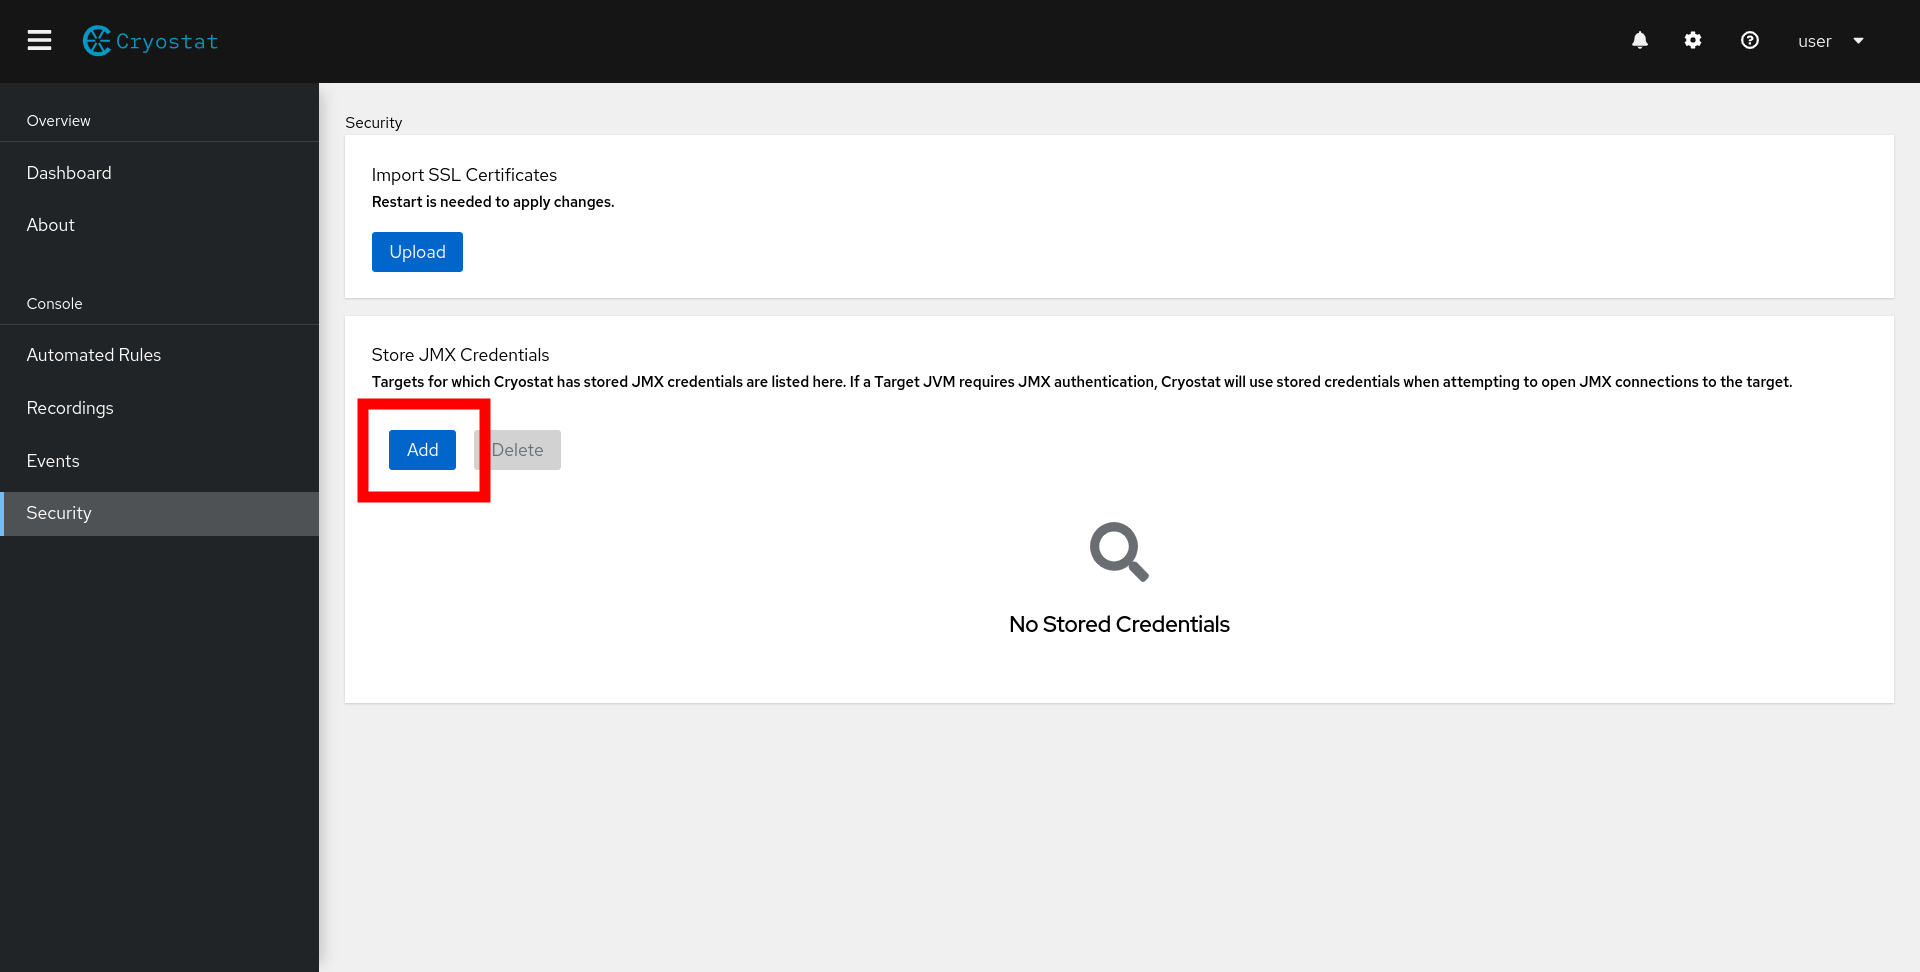
First, navigate to the Security tab. The Stored Credentials table lists all targets for which Cryostat has stored JMX credentials. Click Add as shown in Figure 1 to enter JMX credentials for your desired target JVM.

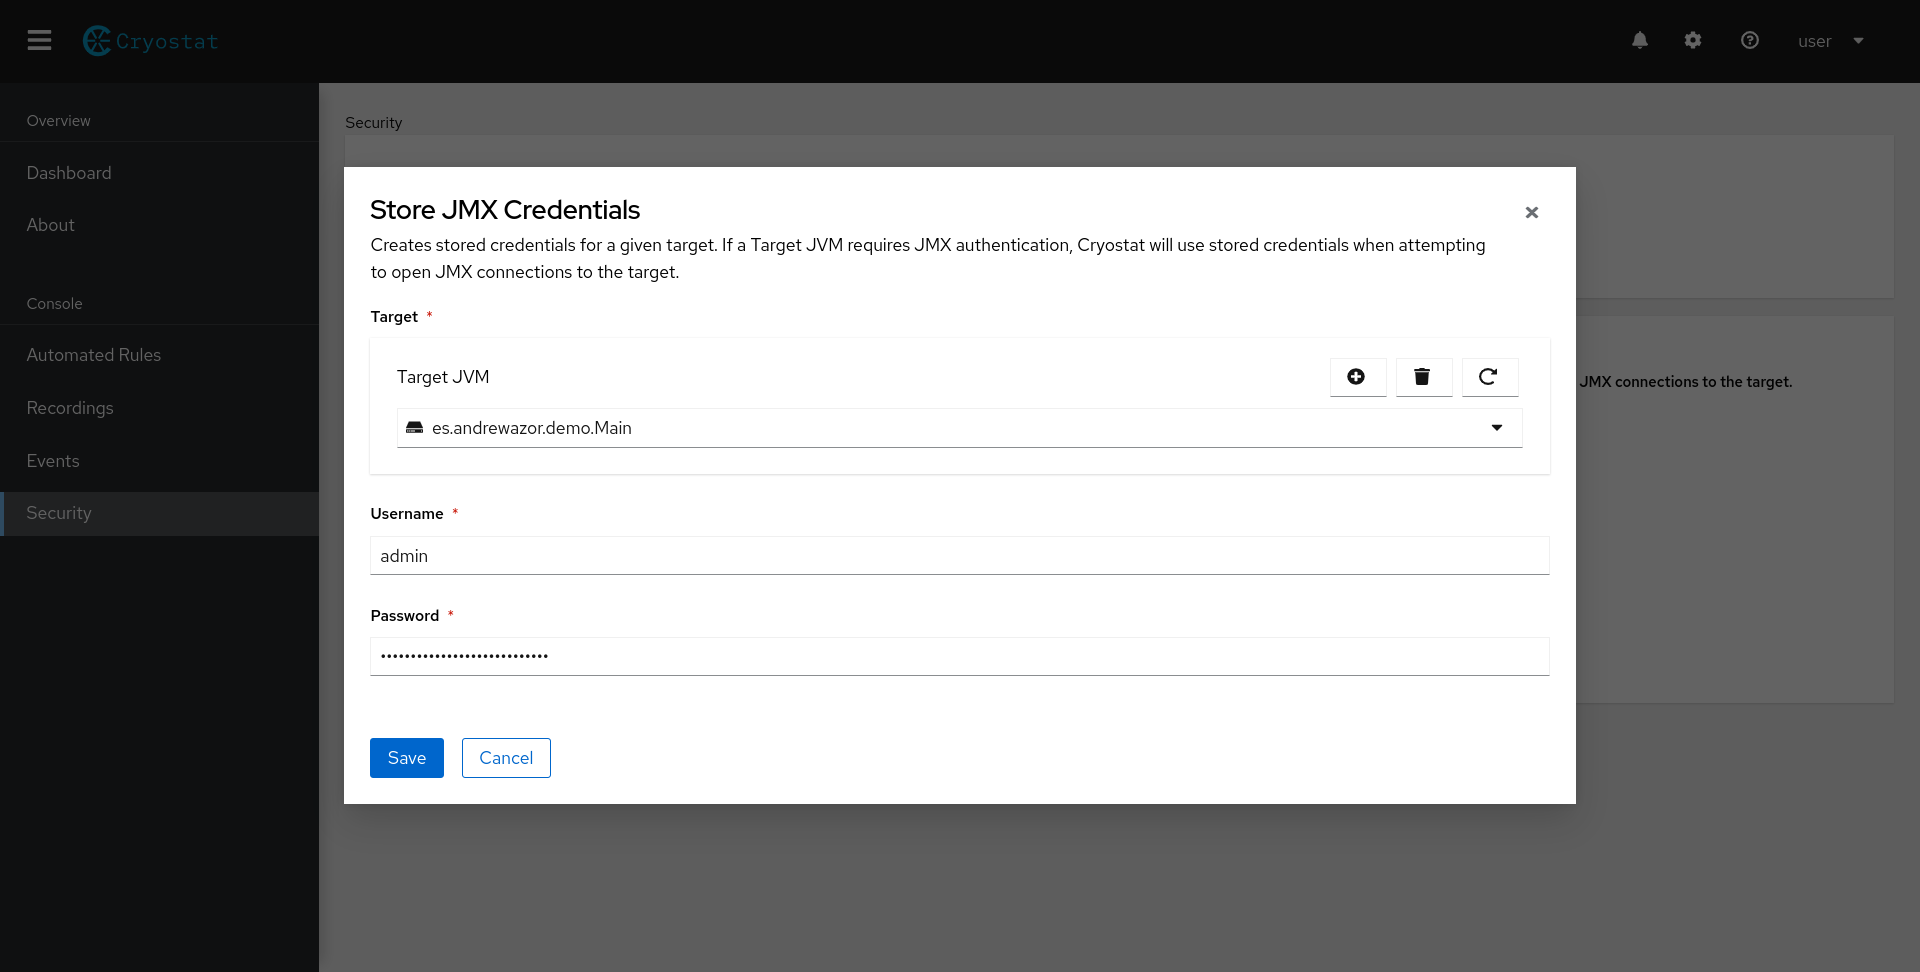
A modal will appear, prompting you to select a target JVM and enter your JMX credentials, as shown in Figure 2.

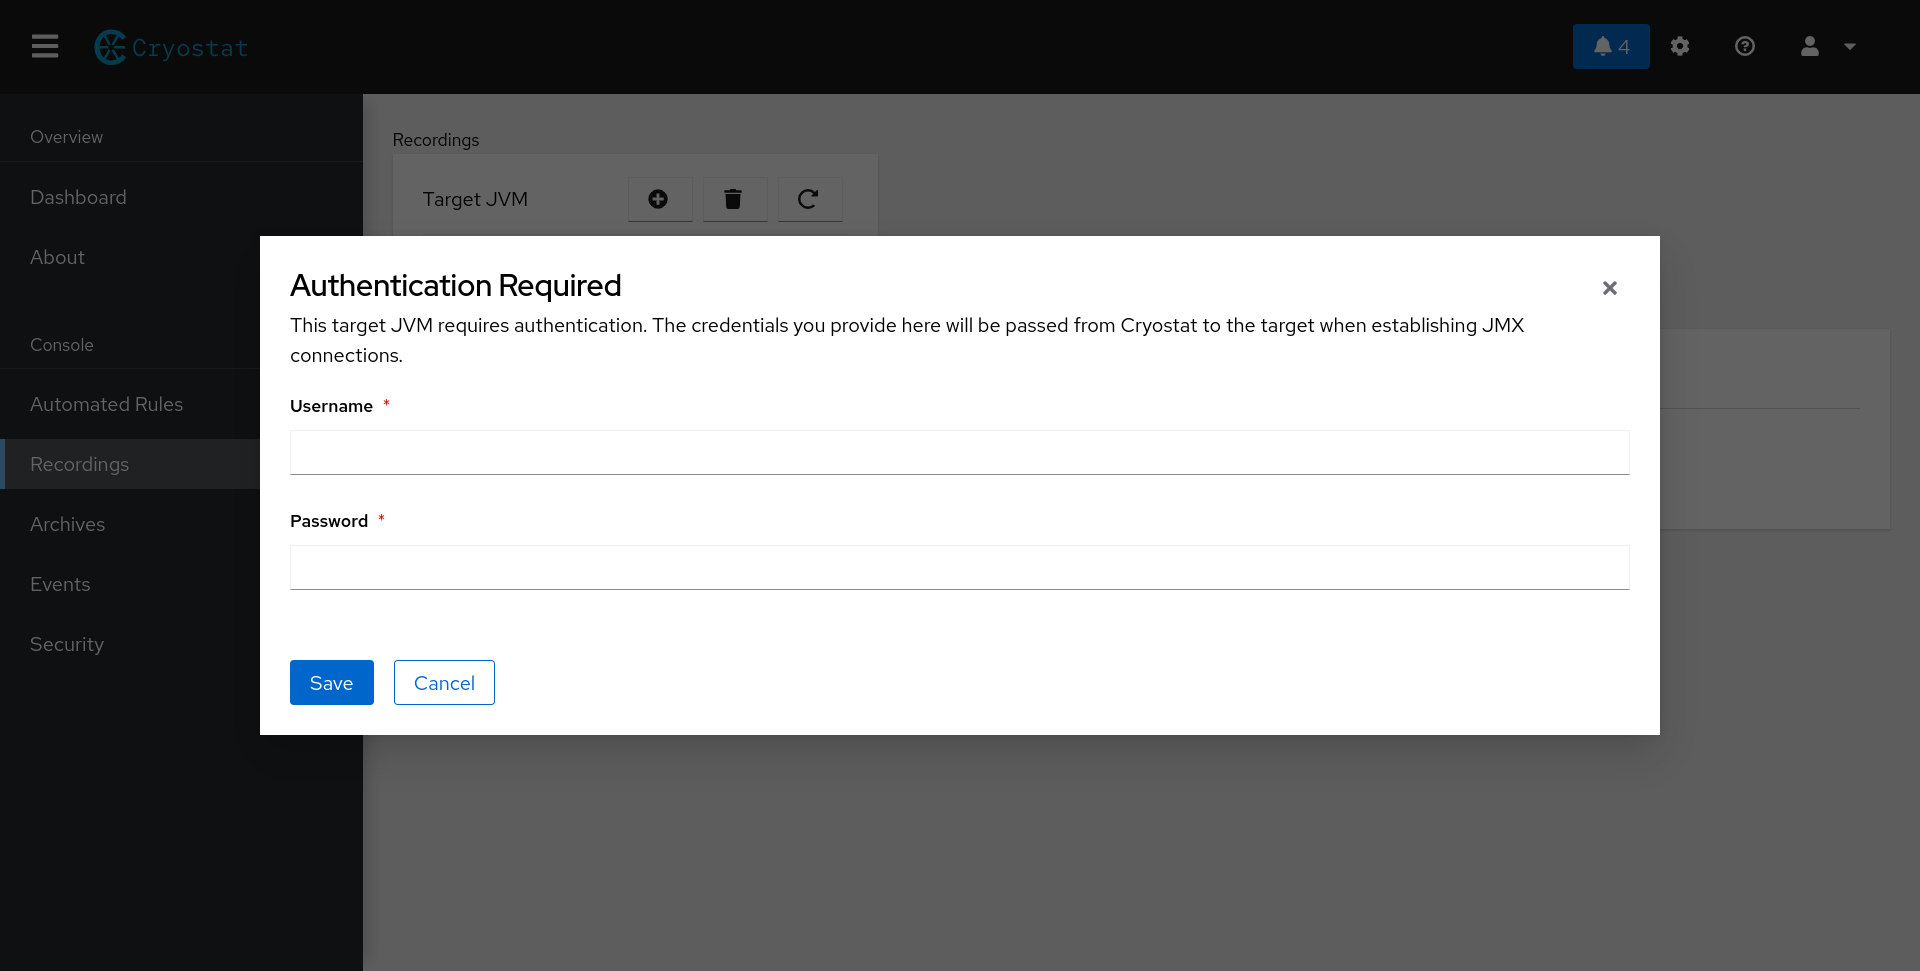
Alternatively, JMX credentials will be automatically stored if you navigate to either the Recordings or Events tab and select a target JVM with JMX authentication enabled, as shown in Figure 3. A similar authentication form will appear, prompting you to enter your JMX credentials. The credentials will be automatically stored and will appear in the Stored JMX Credentials table. Your credentials will be remembered automatically, and you can delete them at any time.

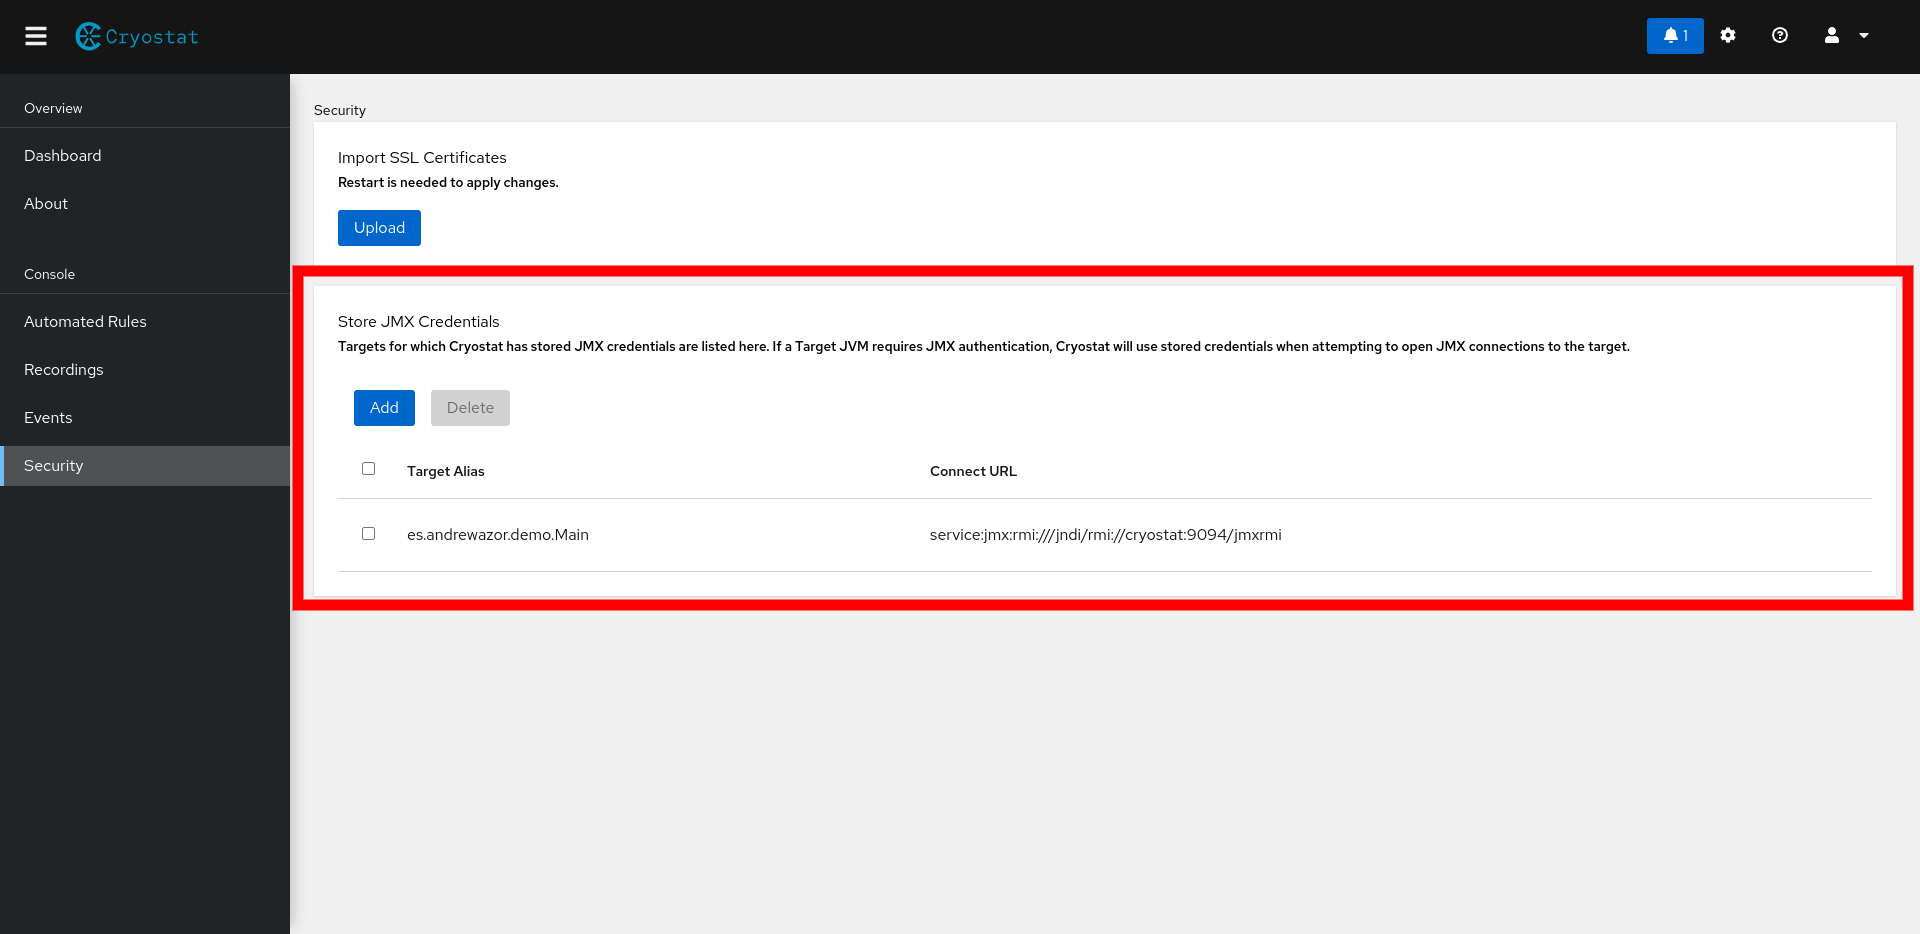
When you store credentials for a target, the target alias and connect URL will appear on the Stored Credentials table in the Security tab to indicate that Cryostat has stored JMX credentials for that target as shown in Figure 4. Again, only the connect URL matters when associating stored credentials for a particular target. You are free to change the target alias at any time without affecting Cryostat's ability to locate or apply stored JMX credentials to your target JVMs.
As a security precaution, you will not be able to view the actual credentials after you have submitted them. If you would like to replace the stored credentials for an existing target, you can delete the old credentials entry and add a new entry with the same connect URL as the old entry. To remove any stored credentials, select the checkbox next to the target and click Delete. To delete all stored JMX credentials, select the header checkbox at the top of the table and click Delete.

Conclusion
This article covers how to store JMX credentials for Cryostat to reuse when connecting to containerized JVMs. For more information about Cryostat, visit cryostat.io. For questions, comments, and feedback, feel free to connect with us on GitHub or join our mailing list.
Last updated: November 6, 2023