Applications running under Kubernetes must expose secrets in order to connect to external services such as REST APIs, databases, and event buses. Each service provider suggests a different way to access their secrets, and for a long time, each application has consumed those secrets in a custom way. The Service Binding Operator makes the life of the application developer a lot easier by providing a consistent and declarative service binding method.
This article will show you how to use the Service Binding Operator to bind an application to a database, enhanced by help from the Red Hat OpenShift console. The example in this article installs a MySQL database and a simple application: the Spring PetClinic sample application, enriched by Spring Cloud Bindings library.
Prerequisites
To bind to a MySQL application, you need to:
- Install the Service Binding Operator in all namespaces
- Create a project
- Install the Percona Distribution for MySQL Operator
To complete these prerequisites, you must be in the Administrator perspective of the Red Hat OpenShift web console, which requires administrator access to the cluster. If you do not have the required access, get in touch with the cluster administrator to perform the steps in this section.
Install the Service Binding Operator in all namespaces
- In the Administrator perspective of the web console, navigate to Operators→Operator Hub.
- Use the Filter by Keyword box to search for Service Binding Operator in the catalog. Click the Service Binding Operator box.
- Read the brief description of the Operator on the Service Binding Operator page, then click Install.
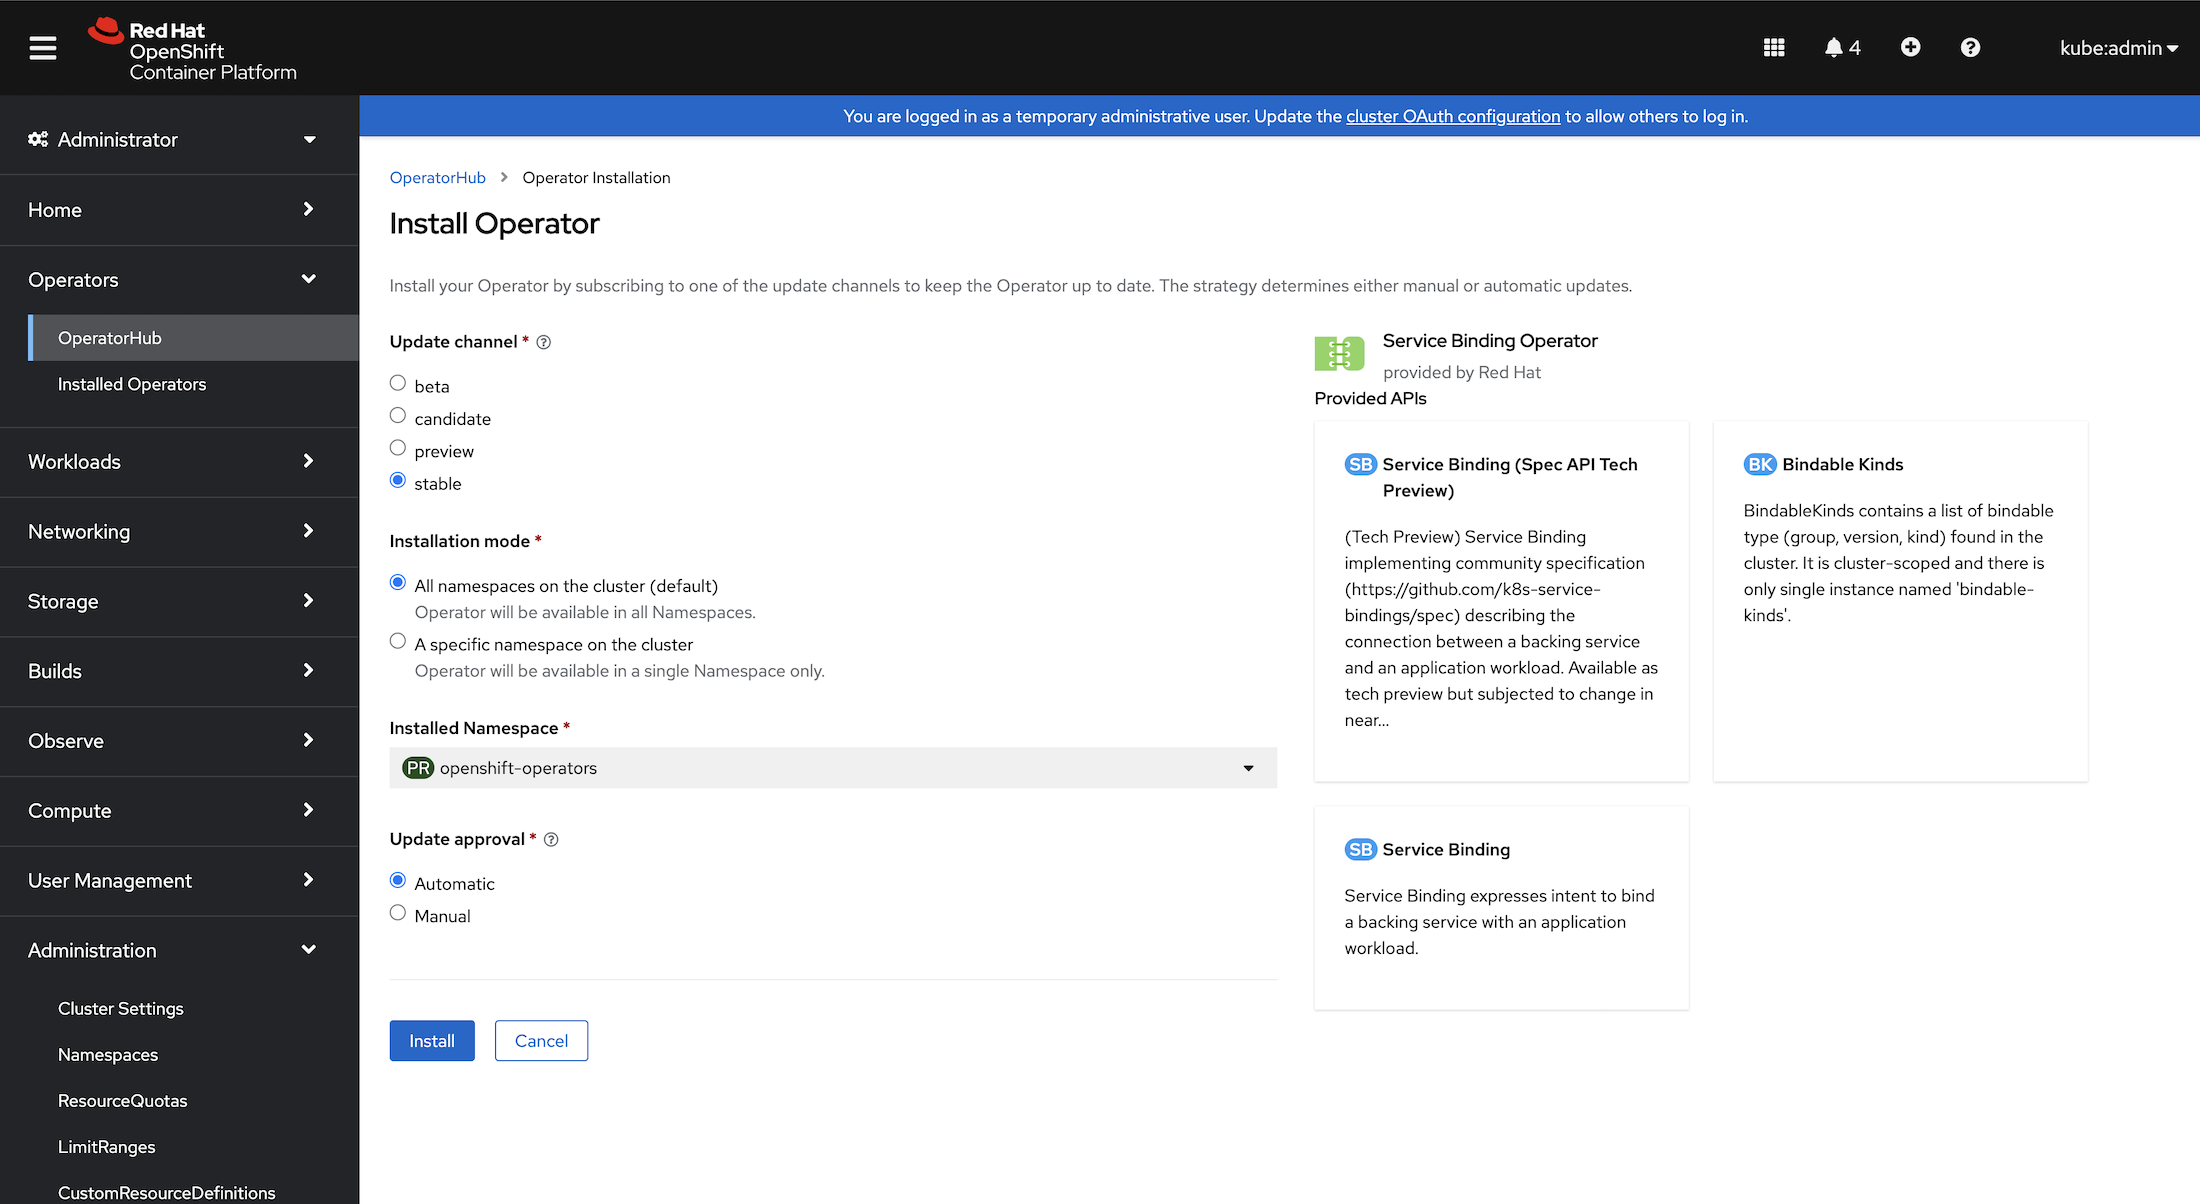
- On the Install Operator page (Figure 1):
- Select All namespaces on the cluster (default) for the Installation Mode. This mode installs the Operator in the default
openshift-operatorsnamespace, which enables the Operator to watch and be available to all namespaces in the cluster. - Select Automatic for the Approval Strategy. This ensures that the future upgrades to the Operator are handled automatically by the Operator Lifecycle Manager (OLM).
- Select an Update Channel. The default stable channel installs the latest stable and supported release of the Operator.
- Select All namespaces on the cluster (default) for the Installation Mode. This mode installs the Operator in the default
- Click Install.
- On the Installed Operator - ready for use pane, click View Operator. The Operator is listed on the Installed Operators page.
- Verify that the Status is set to Succeeded to confirm the successful installation of the Service Binding Operator.
Create a project
Every application runs in a project. To create a project for this application, follow these steps:
- In the Administrator perspective, navigate to Home→Projects.
- Click Create Project.
- In the Name field, enter
my-petclinic. - Click Create.
Install the Percona Distribution for MySQL Operator
This Operator is one of the easiest ways to get a running database, so we'll use the Operator for this article. Install as follows:
- In the Administrator perspective of the web console, navigate to Operators→Operator Hub.
- Use the Filter by Keyword box to search for Percona Distribution for MySQL. Operator in the catalog.
- Click the Percona Distribution for MySQL Operator box and then click Install.
- On the Install Operator page (Figure 2):
- Select A specific namespace on the cluster for the Installation Mode. (The Percona Distribution for MySQL Operator does not support installation in all namespaces.)
- Select my-petclinic from the Installed Namespace dropdown, then click Install.
- On the Installed Operator - Ready for Use pane, click View Operator. The Operator is listed on the Installed Operators page.
- Verify the Status is set to Succeeded to confirm the successful installation of the Percona Distribution for MySQL Operator.

Installing the Percona Distribution for MySQL Operator does not create the database instance itself. You will create one later in this article.
Use the Service Binding Operator
So far you've been setting up the prerequisites in the Administrator perspective of the OpenShift console, but for the rest of this article, you should be working in the Developer perspective of the my-petclinic project.
Create an instance of a Percona XtraDB Cluster
Now you'll create the instance of the cluster you're going to run in Red Hat OpenShift:
- Navigate to the Add+ view.
- Click Import YAML under the From Local Machine section (Figure 3).

Figure 3: Find the From Local Machine box and click Import YAML. - Use
mysqlcluster-deployment.yaml, the minimal custom resource file provided in Service Binding Operator's Github repository, and upload it. - Click Create. It will take a few minutes for the stateful set to be created.
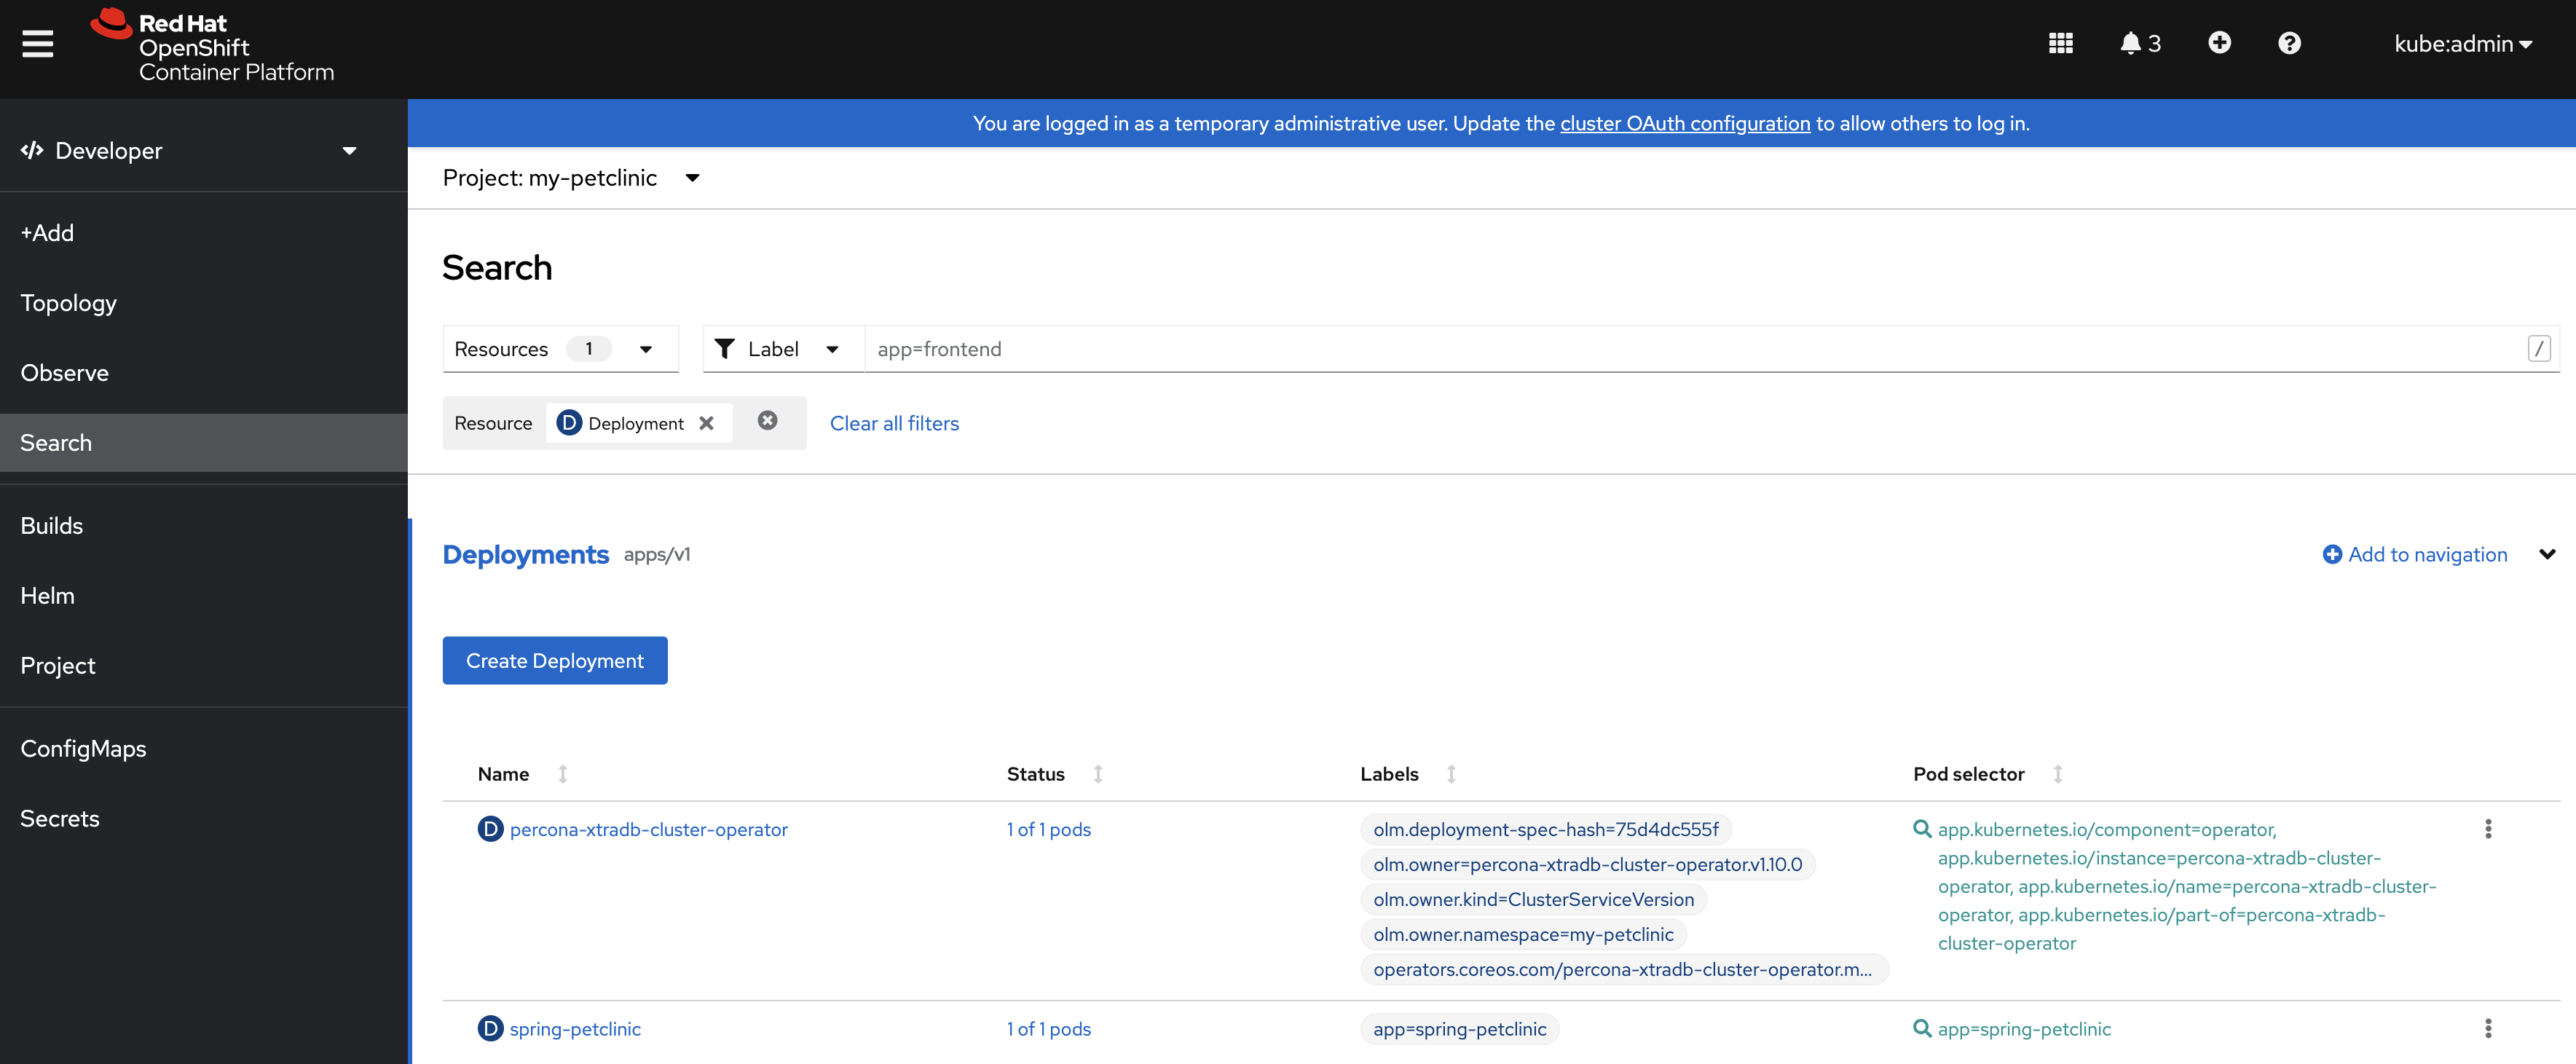
- Click Search on the left-hand navigation bar.
- Use the Resources dropdown and search for StatefulSet.
The Search page (Figure 4) now displays the following stateful sets:
- minimal-cluster-haproxy
- minimal-cluster-pxc

Create the Spring PetClinic application
- Navigate to the Add+ view.
- Click Import YAML under the From Local Machine section.
- Use
petclinic-mysql-deployment, the YAML file provided in the Service Binding Operator's Github repository, and upload it. - Click Create.
- Click Search on the left-hand navigation bar.
- Use the Resources dropdown and search for Deployment.
The spring-petclinic deployment should now be available (Figure 5).
Bind the Spring PetClinic application to the MySQL database service
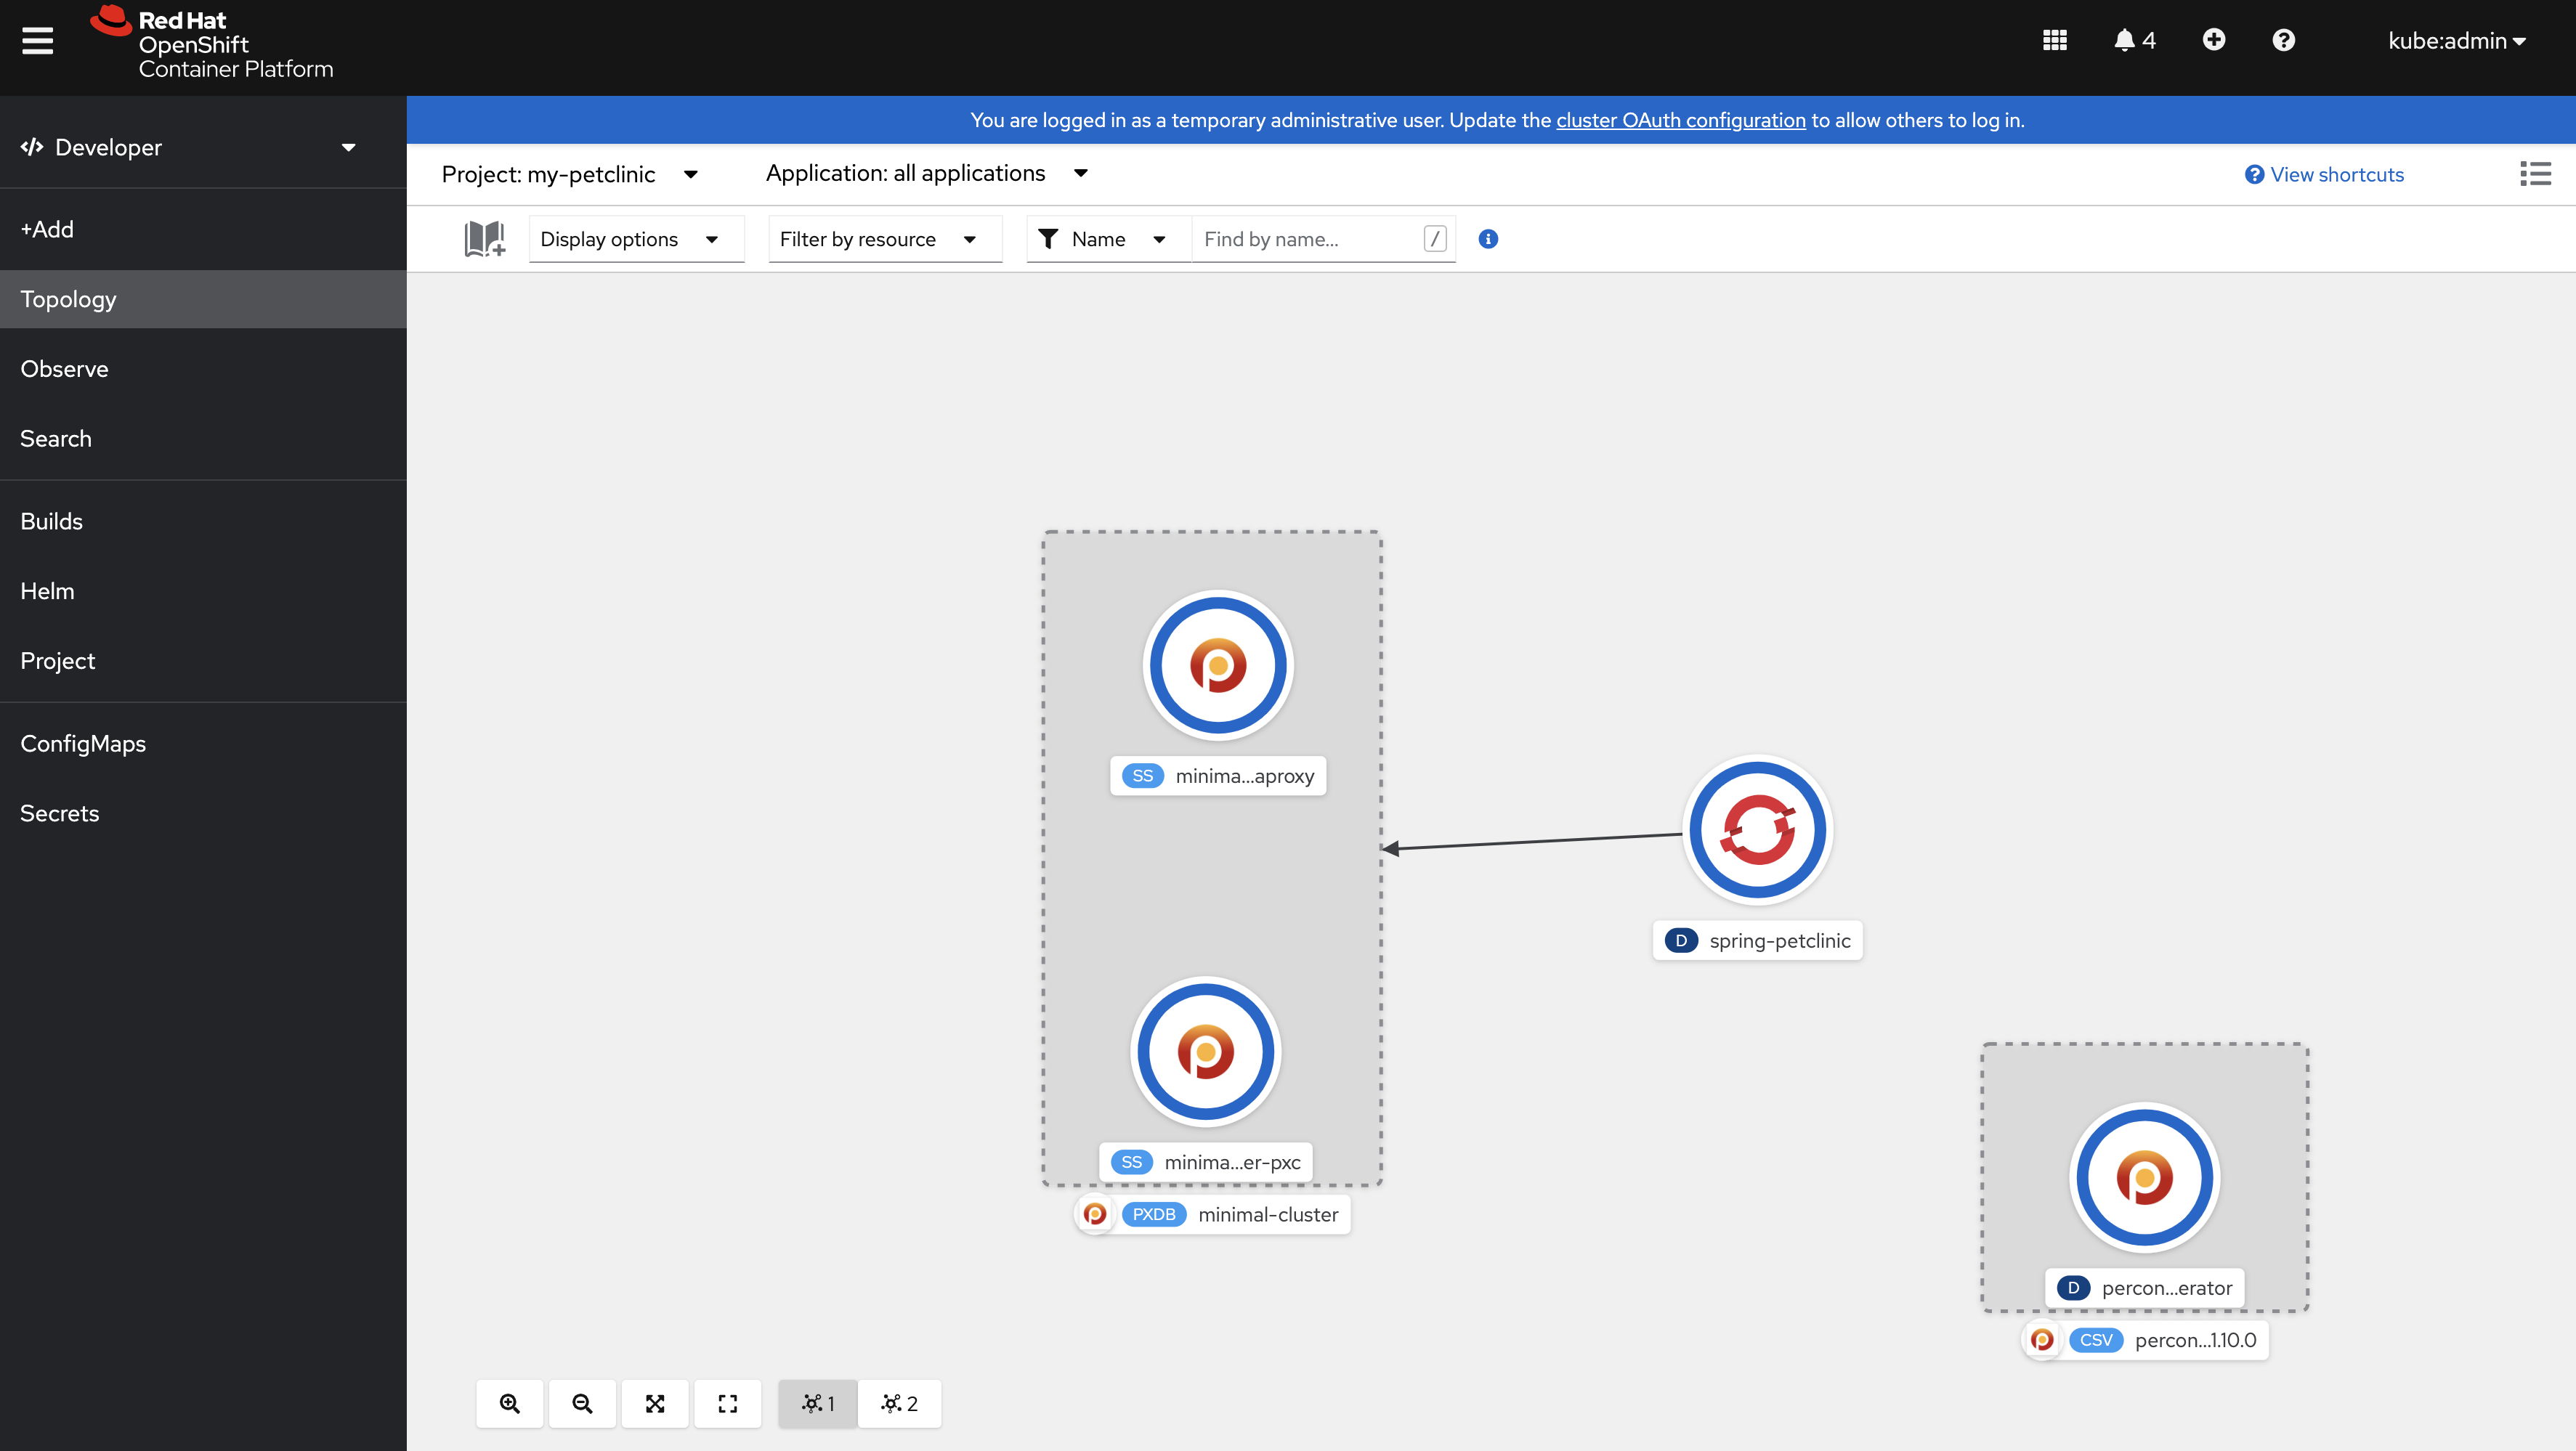
The Service Binding Operator helps you bind the components within a cluster. Red Hat OpenShift makes use of the Operator even easier through a drag-and-drop facility in the Topology view of the web console. Use the interface as follows:
- Ensure that you are in the appropriate project, which is my-petclinic in this example.
- In the Topology view, hover over the spring-petclinic sample application to see a dangling arrow on the node.
- Click and drag the arrow to the minimal-cluster Percona XtraDB cluster instance to make a binding connection.
- Set the name of the connector when prompted. You can use the default name, spring-petclinic-d-minimal-cluster-pxdb.
So what is going on behind the scenes as you implement the binding? The Service Binding Operator creates a binding secret to collect all the binding data, which is then projected into the application. The minimal-cluster-secret created by the instance of the Percona XtraDB cluster is included through annotations, along with other binding data exposed by the Percona XtraDB cluster.
The Spring PetClinic application invokes methods from the Spring Cloud Bindings library, which looks for the SERVICE_BINDING_ROOT environment variable to locate the /bindings directory where the binding data is projected. For more information on how an application uses these values, see the Using Projected Bindings section of the Service Binding Operator's user guide.
For the Service Binding Operator to provide the binding data, the backing services must expose the binding data in a way that the Service Binding Operator can detect. Luckily, the Percona XtraDB instance is a bindable type of service. For more information please see the Exposing Binding Data section of the user guide.
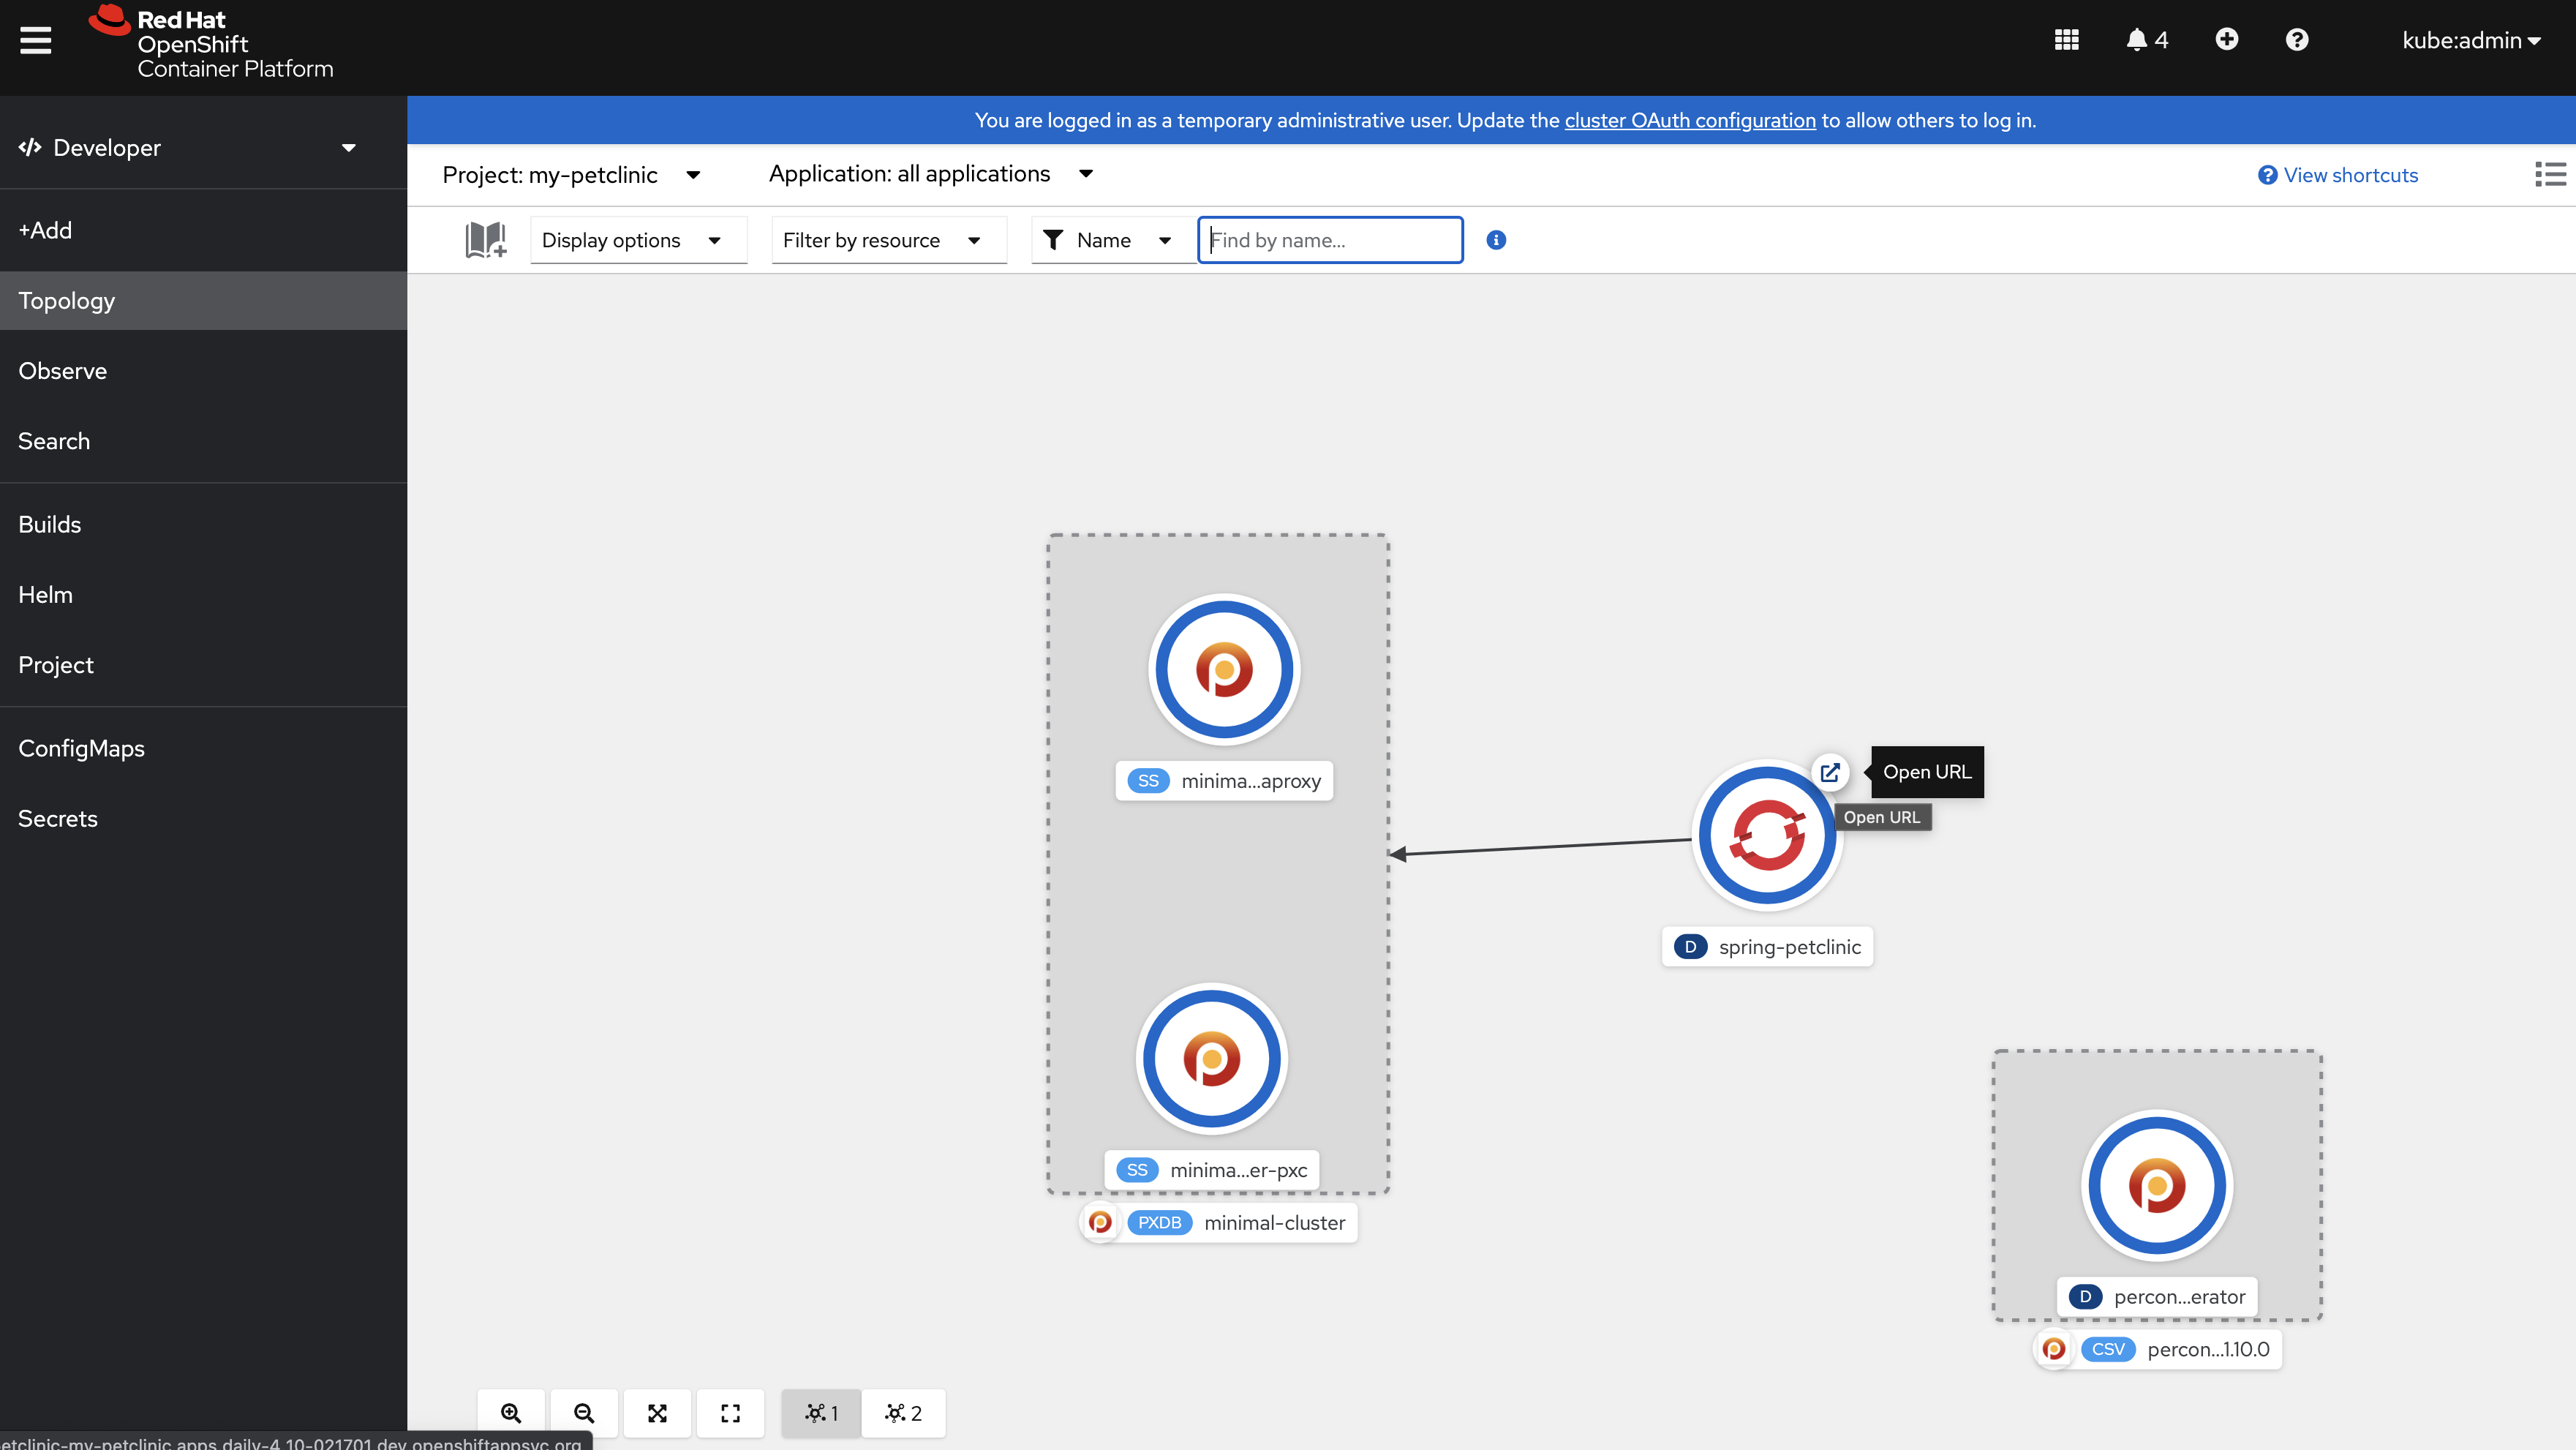
When the binding is successful, it is shown as an arrow connecting the application to the service (Figure 6).
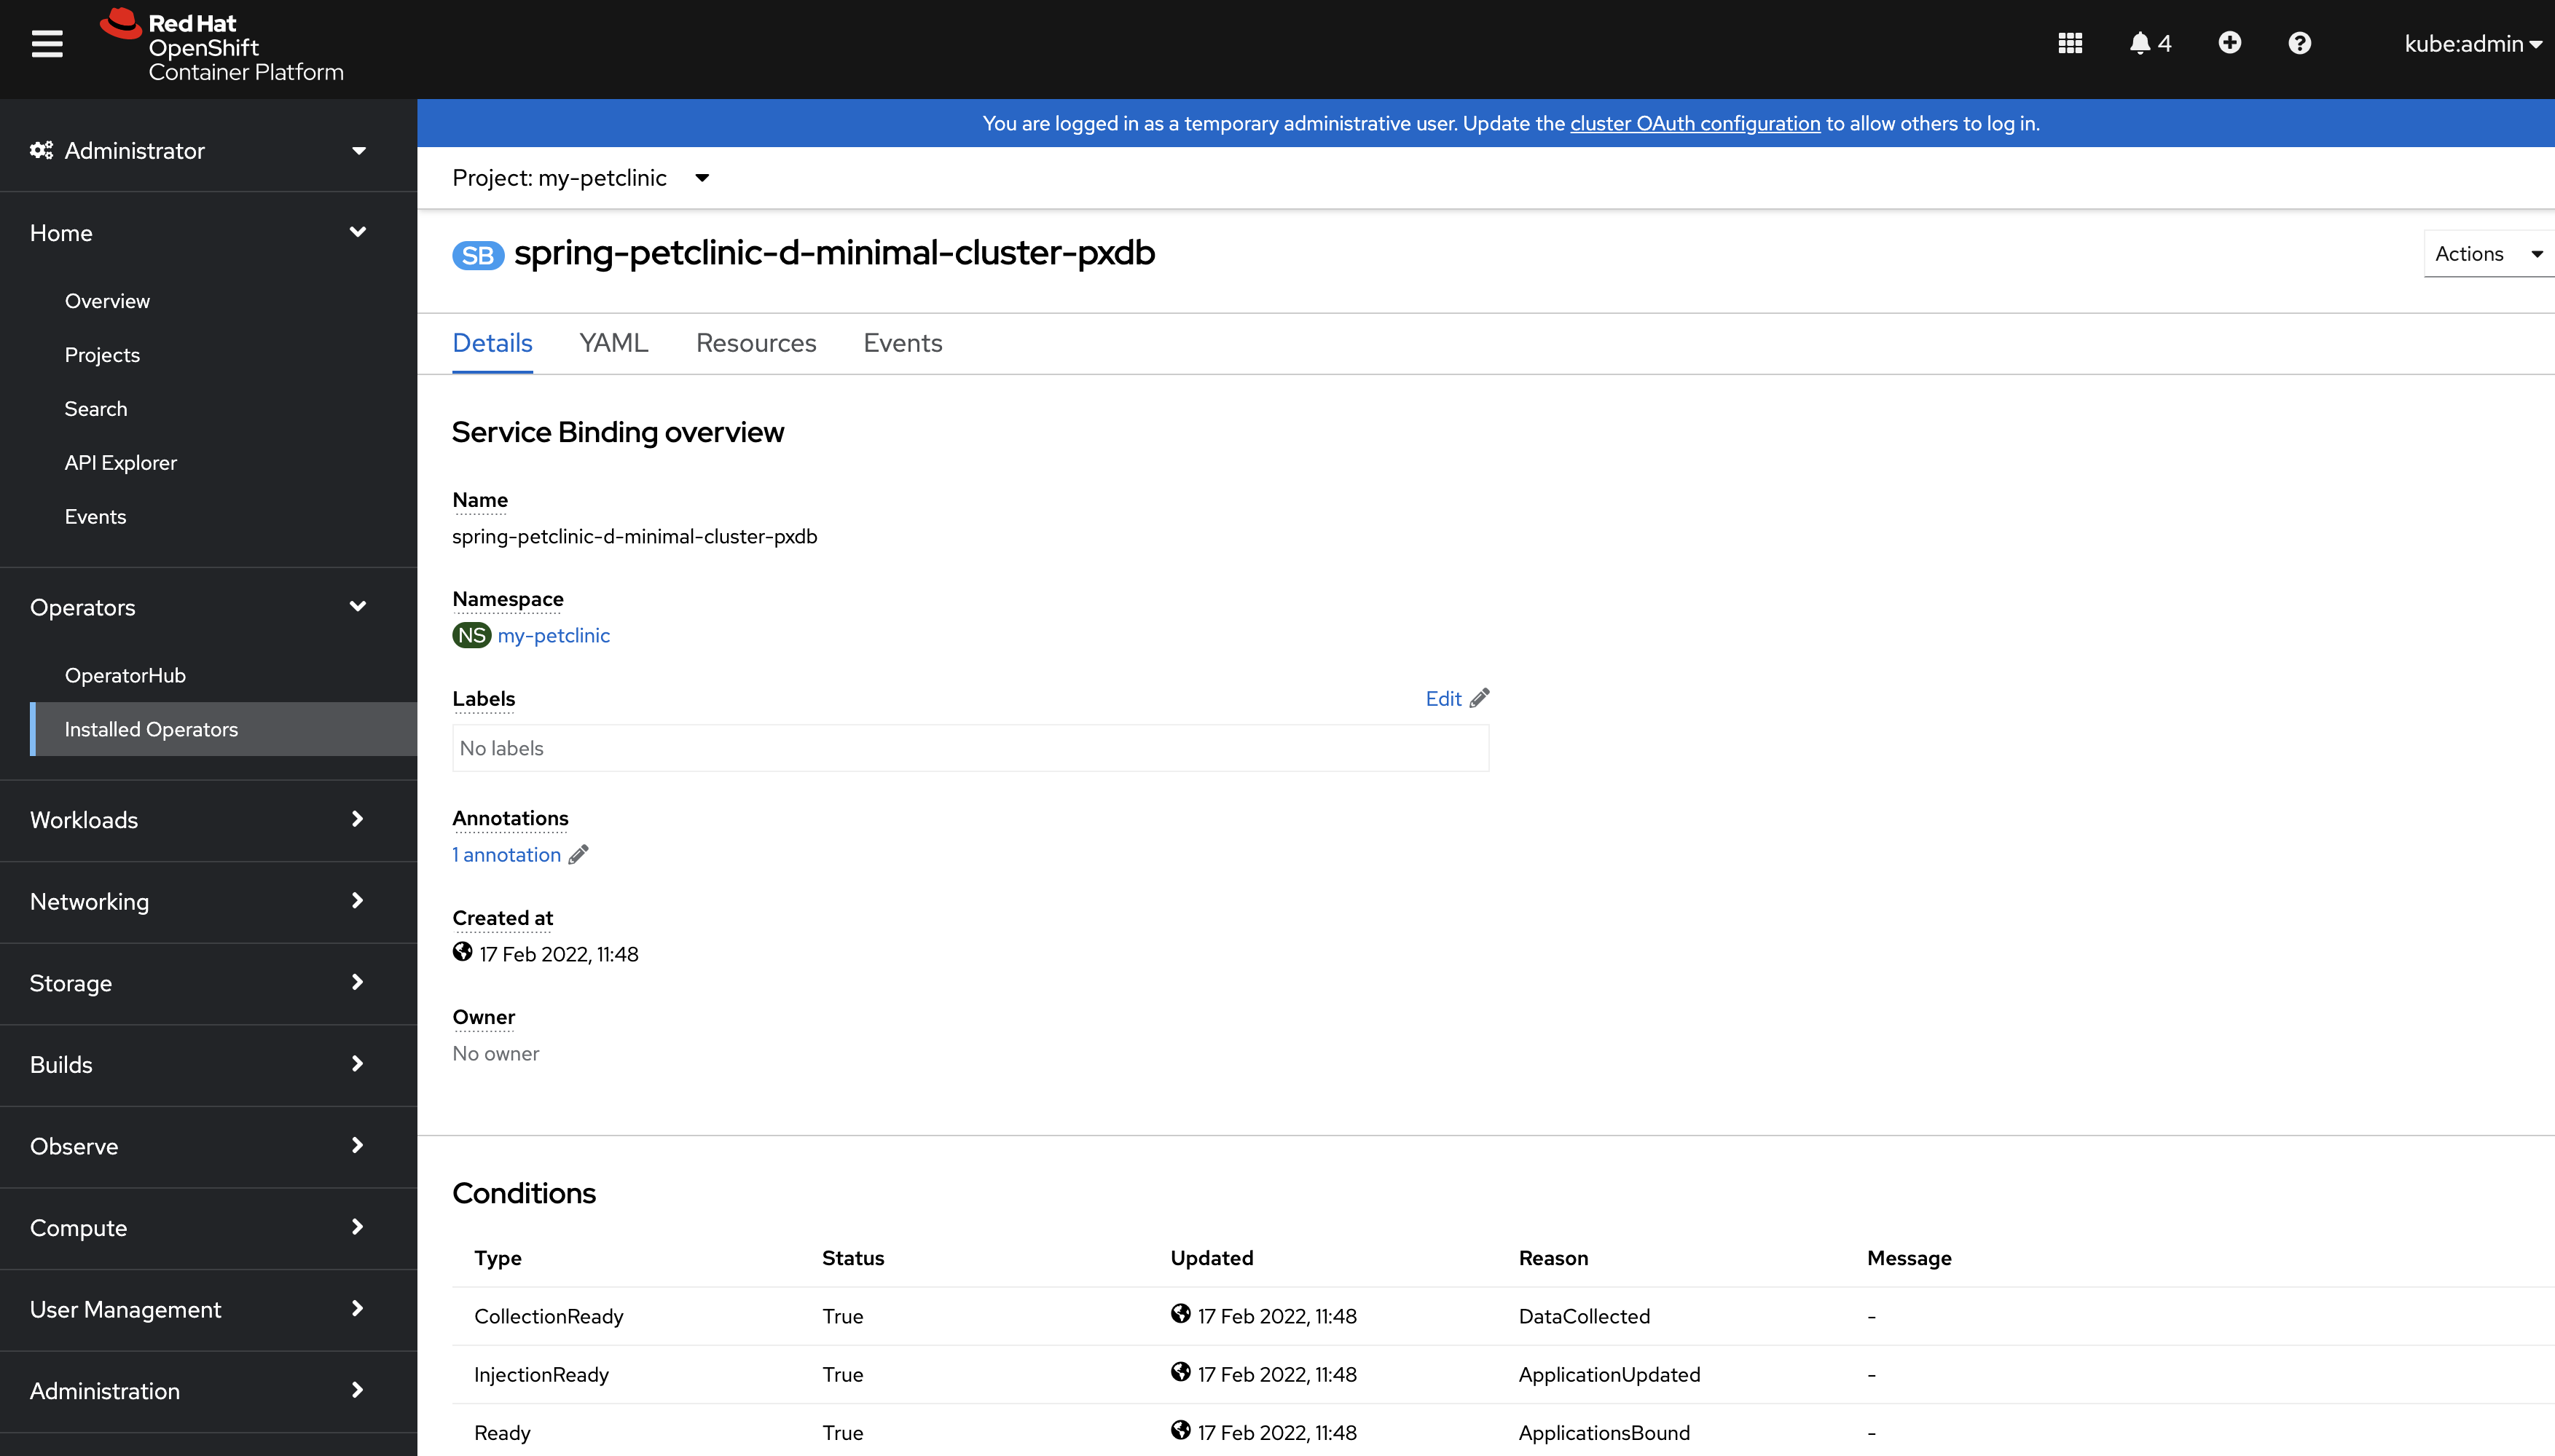
Check the Service Binding status
Now you need to check to see whether the Service Binding Operator has actually created a working connection:
- Click Search on the left-hand navigation bar.
- Use the Resources dropdown and select ServiceBinding. The Search page displays the spring-petclinic-d-minimal-cluster-pxdb service binding.
- Click spring-petclinic-d-minimal-cluster-pxdb.
The console (Figure 7) shows the details of the Service Binding with the following Boolean statuses:
- CollectionReady: The service can collect and persist intermediate manifests.
- InjectionReady: The application manifests can use the intermediate manifests.
- Ready: The application is bound successfully to the backing service.
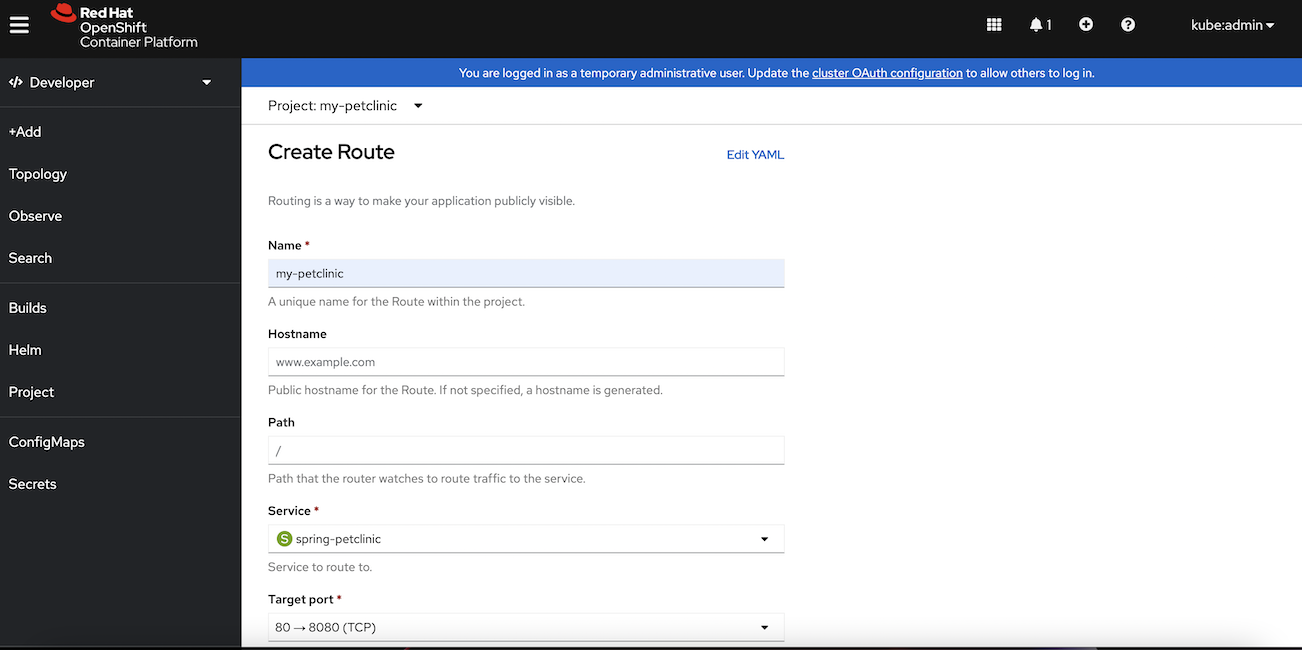
Create a route for the Spring PetClinic service
The backing service has exposed a connection to the Spring PetClinic application, but the application also has to expose a connection to clients. Once again, the OpenShift console makes it easy to create a route:
-
Click Search on the left-hand navigation bar.
-
Use the Resources dropdown and select Route.
-
Click Create Route.
-
Set a name for the route and select spring-petclinic service from the Service dropdown (Figure 8).
-
Select the Target port for the service.
-
Click Create.
In the Developer→Topology view, click the Open URL link to get access to the running application (Figure 9).
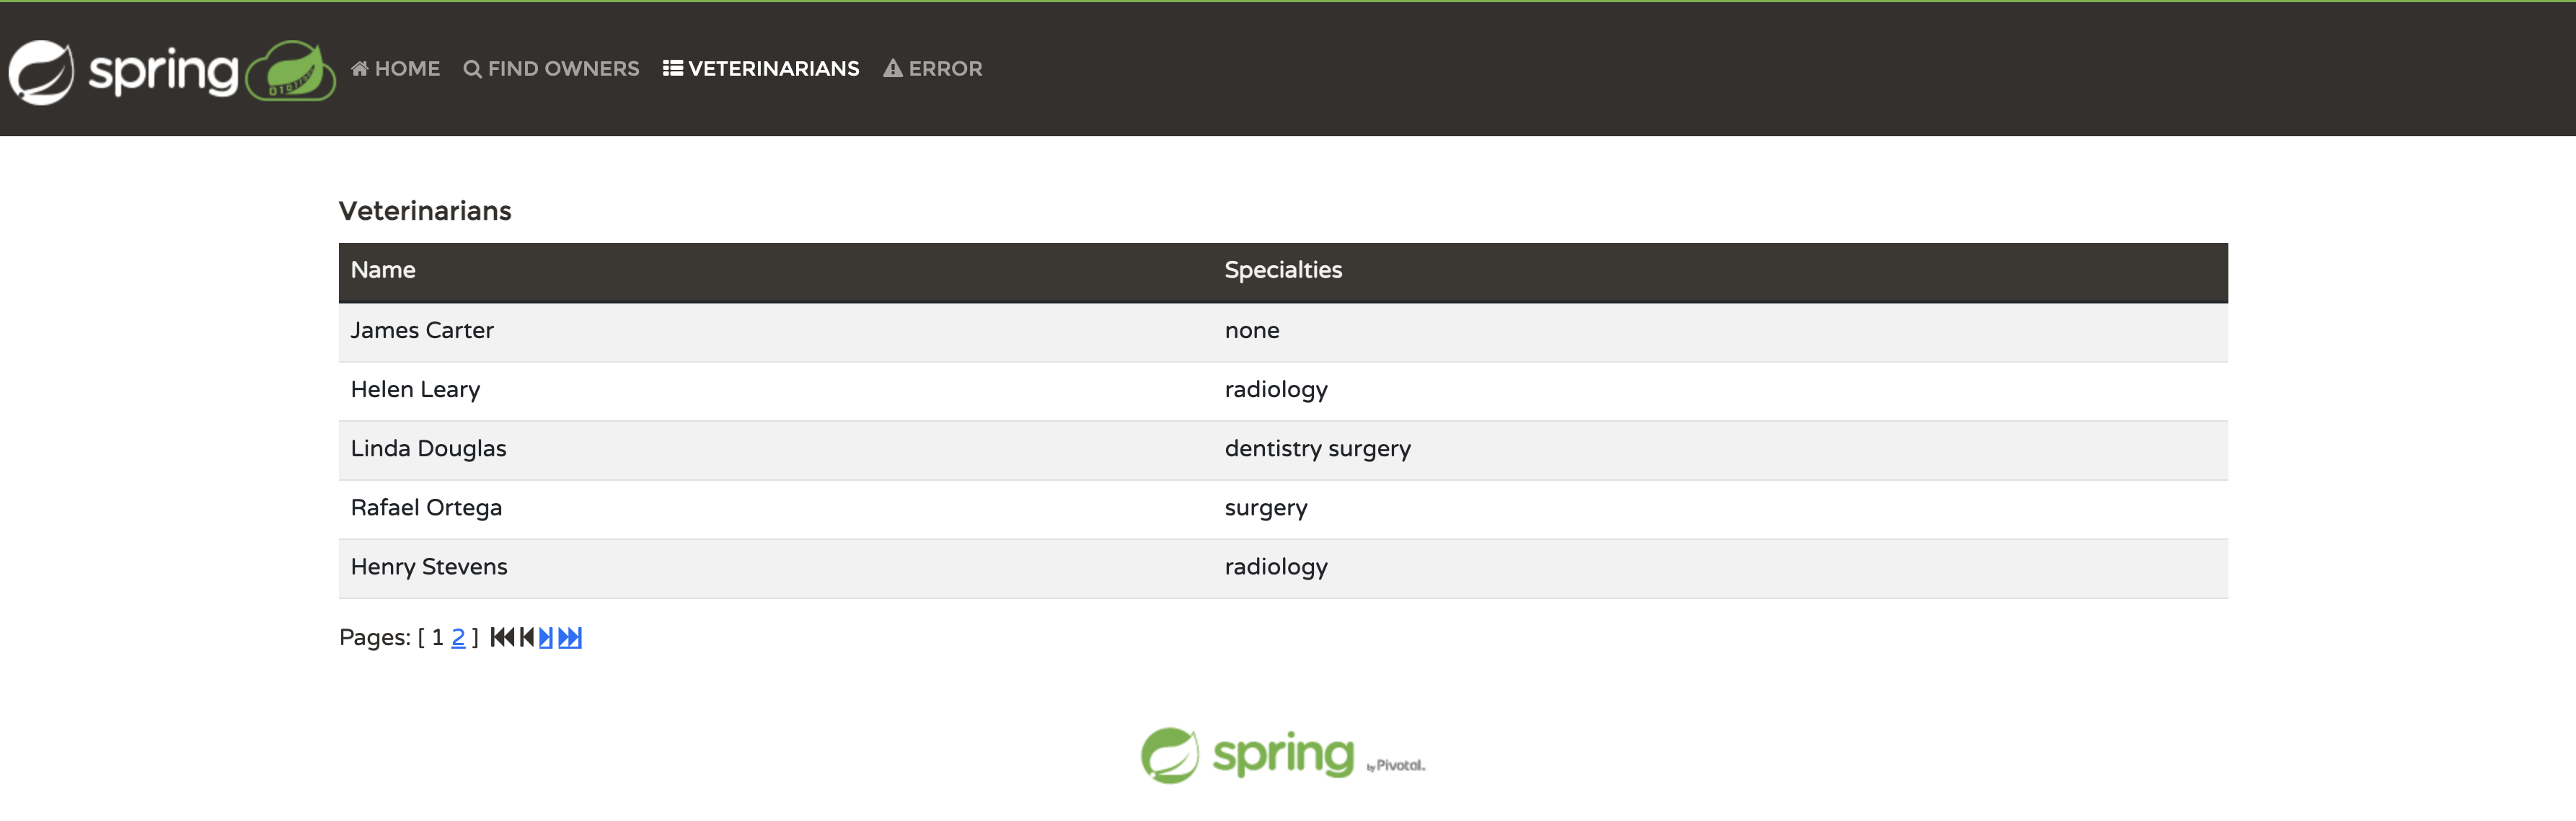
You can now remotely view the Spring PetClinic sample application to confirm that the application is now connected to the database service, and that the data has been successfully projected to the application from the MySQL database service (Figure 10).
Insights and conclusion
Using the Service Binding Operator to bind an application to a backing service provides the following benefits:
- Enabling you to connect your applications to backing services with a consistent and predictable experience.
- Eliminating the error-prone manual configuration of binding information.
- Providing service operators a low-touch administrative experience to provision and manage access to services.
- Enriching the development lifecycle with a consistent and declarative service binding method that eliminates environments' discrepancies.
The Red Hat OpenShift Container Platform web console provides a user interface that simplifies the deployment of applications and custom resources and the binding of applications to backing services using the Service Binding Operator.
Last updated: September 20, 2023