If you do a web search for computing terms that go with the word reactive, you'll find a wealth of phrases: Reactive streams, reactive systems, reactive messaging, and reactive programming are examples. The word reactive is also associated with other popular concepts like non-blocking I/O, functional programming, and backpressure.
Although those are all interesting topics, studying reactive systems is a good place to start. This concept was defined by the Reactive Manifesto as an architectural style for distributed systems that are responsive, elastic, resilient, and message-driven. Other constructs such as reactive streams (an asynchronous and non-blocking backpressure protocol) and reactive programming (such as reactive extensions) are implementation details.
Although the Reactive Manifesto is language-agnostic and framework-agnostic, Node.js is an excellent framework for carrying out its principles. This article provides general background on Node.js in reactive systems, then takes you step-by-step through a reactive service built with Node.js and Apache Kafka.
Node.js in reactive systems
The Reactive Manifesto was initially released in 2013 by a group of developers led by Jonas Boner. In this section, we'll look at the four crucial characteristics the manifesto defines for a reactive system, and how Node.js facilitates them.
Note: Another compendium white paper, The Reactive Principles (2020), explains in detail the patterns and techniques for building reactive systems.
Responsiveness
Reactive systems need to stay responsive even under fluctuating load and when facing failures. Responsiveness is not only about answering calls but doing so in a timely and efficient manner. This last point is essential. Components forming a reactive system must adapt to the available resources and use them carefully. Non-blocking I/O meets this requirement by providing a way to handle multiple concurrent requests with just a few threads. Using non-blocking I/O results in much better resource usage.
Node.js is based on non-blocking I/O, and Node.js developers already know that they must avoid the trap of "blocking the event loop." Having a background in non-blocking I/O means that Node.js developers are thinking about how to ensure that components respond quickly without blocking for a long period of time. As a result, it's easy for Node.js implementations to be more responsive than those in other languages and frameworks.
Resilience
Resilience is not about avoiding failures, because they are inevitable. Resilience is about handling them gracefully. Replication is a crucial approach when handling failures. It avoids service disruption by relying on multiple instances of a service. If an instance crashes, others can handle the requests.
Nowadays, resilience is achieved by running multiple copies of an application in parallel. Its small size and short startup time make Node.js a great fit for building applications as small, isolated components and deploying them with multiple copies. These qualities limit the scope of failures, allow fast recovery when a failure occurs, and impose low overhead when running multiple copies.
Elasticity
Replication is not only a key pattern for handling failures, it is also the cornerstone of elasticity. While non-blocking I/O allows application instances to handle more load than traditional approaches, the ability to scale up and down is essential for adapting the system to the current demand.
Elasticity is a prerequisite for responsive and resilient systems because they must scale to meet the request load. Node.js is a good fit for elastic systems because it can handle a large number of requests with low overhead. Its small size and fast startup allow the number of instances running the Node.js component to scale up and down efficiently.
Message-driven
Node.js uses a non-blocking, event-driven design for everything it does, which makes it a great fit for message-driven systems. That means you don't need extra libraries or abstractions to achieve good performance when using a message-driven approach: You get it for free.
Reactive systems using Node.js
We are going to use the reactive koffeeshop demo to demonstrate the creation of a reactive system, the limits of using HTTP to communicate between our components (aka services), and how to build a message-driven reactive system with Kafka. Although this example uses the popular Kafka event streaming platform, any service that implements a modern messaging protocol, such as RabbitMQ, NATS, or ActiveMQ, would work.
Because we're building a reactive system that includes multiple services, we can choose whatever programming language we prefer. This example sticks with Node.js for all services, but a multi-language example of the koffeeshop demo is also available.
Services in the koffeshop demo
The koffeshop demo consists of three different services:
koffeeshop-service: This is the application front end and the service that initially takes customer orders.barista-http: This service uses the HTTP protocol to communicate with every other service. Its purpose is to prepare a beverage for every given order.barista-kafka: This service does exactly the same thing asbarista-http, but uses a messaging protocol to communicate.
Building the demo
To run the demo, you will need Docker, Docker Compose, Node.js, and Kafka. You can download Kafka or run brew install kafka if you are a macOS user.
Install the demo's services as follows:
$ git clone git@github.com:nodeshift-starters/reactive-koffeeshop-demo.git

$ cd reactive-koffeeshop-demo

$ cd koffeeshop-service/ && npm install

$ cd barista-http/ && npm install

$ cd barista-kafka/ && npm install
Running the example
Use the following commands to run the demo:
# terminal-1 - this will spin up the Kafka cluster
$ docker-compose up

# terminal-2
$ ./create-topics.sh
$ cd koffeeshop-service
$ npm start

# terminal-3
$ cd barista-http
$ npm start

# terminal-4
$ cd barista-kafka
$ npm start
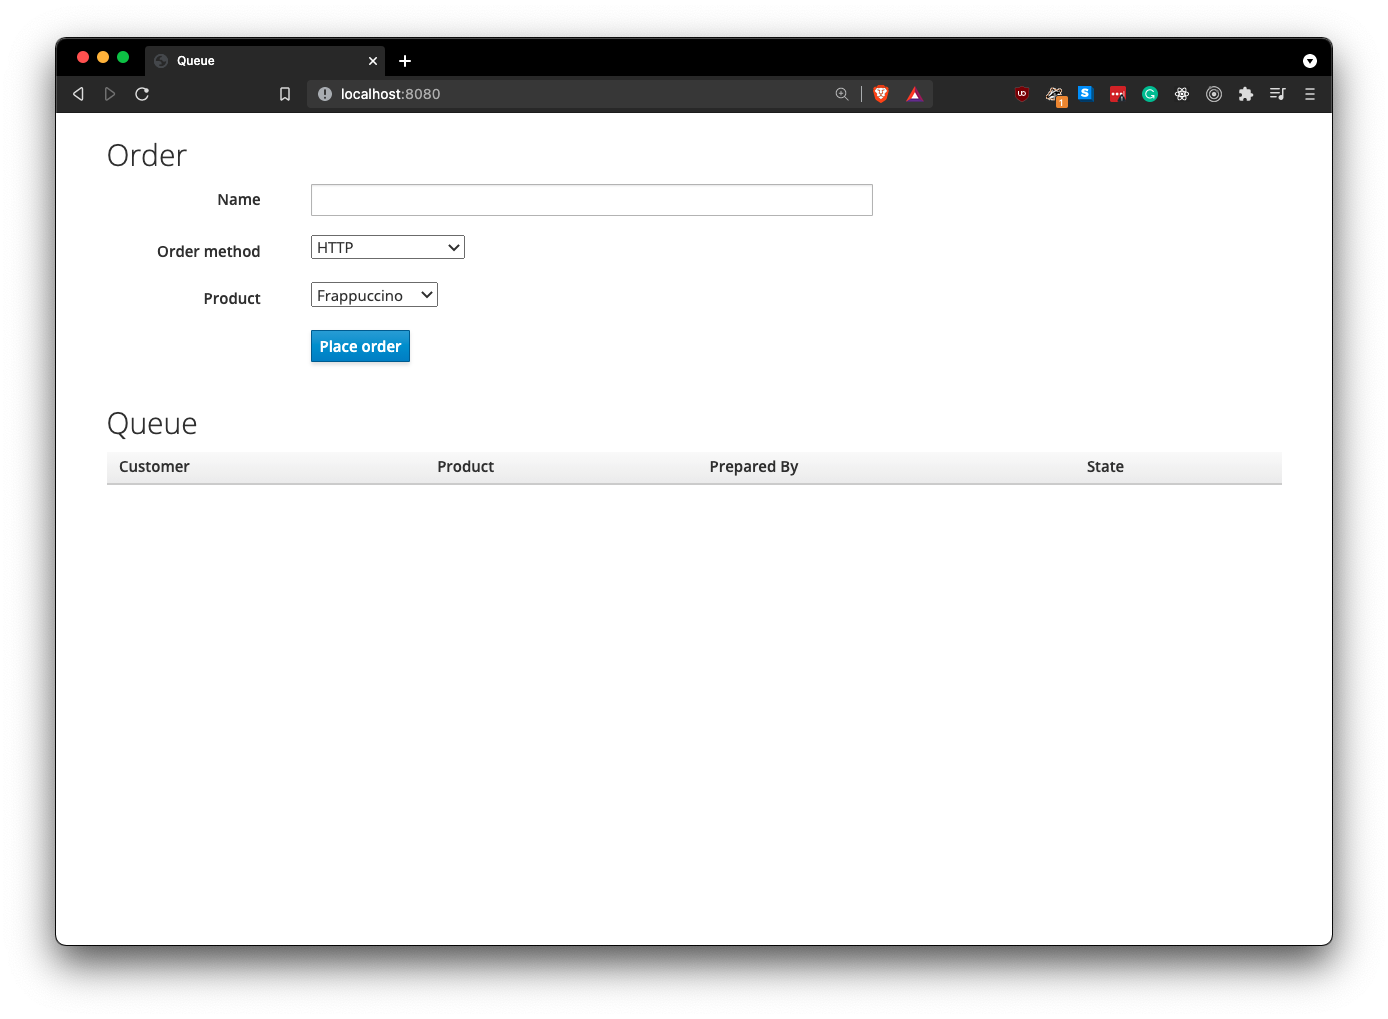
Now you should have four terminals open. Each of the three services is running in a separate terminal. If you visit the URL http://localhost:8080, you should be presented with the order screen in Figure 1.
The koffeeshop-service
Let's take a quick look at the code for the koffeeshop-service:
const path = require('path');
const { EventEmitter } = require('events');
const Fastify = require('fastify');
const FastifySSEPlugin = require('fastify-sse');
const { nanoid } = require('nanoid');
const { Kafka } = require('kafkajs');
const axios = require('axios');

const { createFallbackBeverage, inQueue } = require('./models/beverage');

require('dotenv').config();

const fastify = Fastify({ logger: { prettyPrint: true } });

fastify.register(require('fastify-static'), {
  root: path.join(process.cwd(), 'public')
});

fastify.register(FastifySSEPlugin);

fastify.post('/http', async (request, reply) => {
  // if we get an order through http just forward it to the barista-http-services
  const { name, product } = request.body;
  const order = { orderId: nanoid(), customer: name, beverage: product };
  try {
    const response = await axios.post('http://localhost:8081', order);
    reply.send(response.data);
  } catch (err) {
    reply.send(createFallbackBeverage(order));
  }
});

const kafka = new Kafka({
  clientId: 'koffeeshop-services',
  brokers: [process.env.KAFKA_BOOTSTRAP_SERVER ]
});

const queue = new EventEmitter();

const producer = kafka.producer(); // orders
const consumer = kafka.consumer({ groupId: 'koffeeshop' }); // beverages

fastify.get('/queue', (_, reply) => {
  queue.on('update', (data) => {
    reply.sse(data);
  });
});

fastify.post('/messaging', (request, reply) => {
  const { name, product } = request.body;
  const order = { orderId: nanoid(), customer: name, beverage: product };
  producer.send({
    topic: 'orders',
    messages: [{ value: JSON.stringify({ ...order }) }]
  });
  queue.emit('update', inQueue(order));
  reply.send(order);
});

const start = async () => {
  // connect the consumer and producer instances to Kafka
  await consumer.connect();
  await producer.connect();

  // subscribe to the `queue` topic
  await consumer.subscribe({ topic: 'queue', fromBeginning: true });

  // start the fastify server
  fastify.listen(8080, '0.0.0.0', async (err) => {
    if (err) {
      console.error(err);
      process.exit(1);
    }
  });

  // start listening for kafka messages
  consumer.run({
    eachMessage: ({ message }) => {
      const beverage = JSON.parse(message.value.toString());
      queue.emit('update', beverage);
    }
  });
};

start();
This service uses the Fastify framework to build a simple server and the kafkajs library to communicate with the Kafka cluster. The server is responsible for:
- Serving our web application to the client's browser. The application is written with HTML and jQuery.
- Receiving orders at the
/httpendpoint and forwarding them to thehttp-service. - Receiving orders at the
/messagingendpoint and sending them to Kafka for later consumption by thebarista-service. - Listening for finished orders and notifying the client about them (using server-sent events).
The barista-kafka service
Now let's look at the barista-kafka service:
const pino = require('pino');
const { Kafka } = require('kafkajs');
const Beverage = require('./models/beverage');

require('dotenv').config();

const logger = pino({
  prettyPrint: true
});

const kafka = new Kafka({
  clientId: 'barista-kafka-node',
  brokers: [process.env.KAFKA_BOOTSTRAP_SERVER ]
});

const producer = kafka.producer();
const consumer = kafka.consumer({ groupId: 'baristas' });

const run = async () => {
  // connect the consumer adn producer instances to Kafka
  await consumer.connect();
  await producer.connect();

  // subscribe consumer to the `orders` topic
  await consumer.subscribe({ topic: 'orders', fromBeginning: true });

  // start listening for messages
  await consumer.run({
    eachMessage: async ({ message }) => {
      // get the order from kafka and prepare the beverage
      const order = JSON.parse(message.value.toString());
      const beverage = await Beverage.prepare(order);
      // debug statement
      logger.info(`Order ${order.orderId} for ${order.customer} is ready`);
      // create a kafka-message from a JS object and send it to kafka
      producer.send({
        topic: 'queue',
        messages: [{ value: JSON.stringify({ ...beverage }) }]
      });
    }
  });
};

run().catch((err) => logger.error(err));

process.once('SIGINT', consumer.disconnect);
process.once('SIGINT', producer.disconnect);
Using the kafkajs library, we create a consumer instance that will be used to receive orders registered to Kafka by the koffeeshop-service. We also create a producer instance to send back notifications to Kafka when a beverage has been prepared.
Using HTTP in a Node.js reactive system
The first time we try to place an order, we use the HTTP order method. When we select the HTTP option, as shown in Figure 2, the koffeshop-service notifies the barista-service (which is responsible for preparing our beverage) about this new order using plain HTTP.
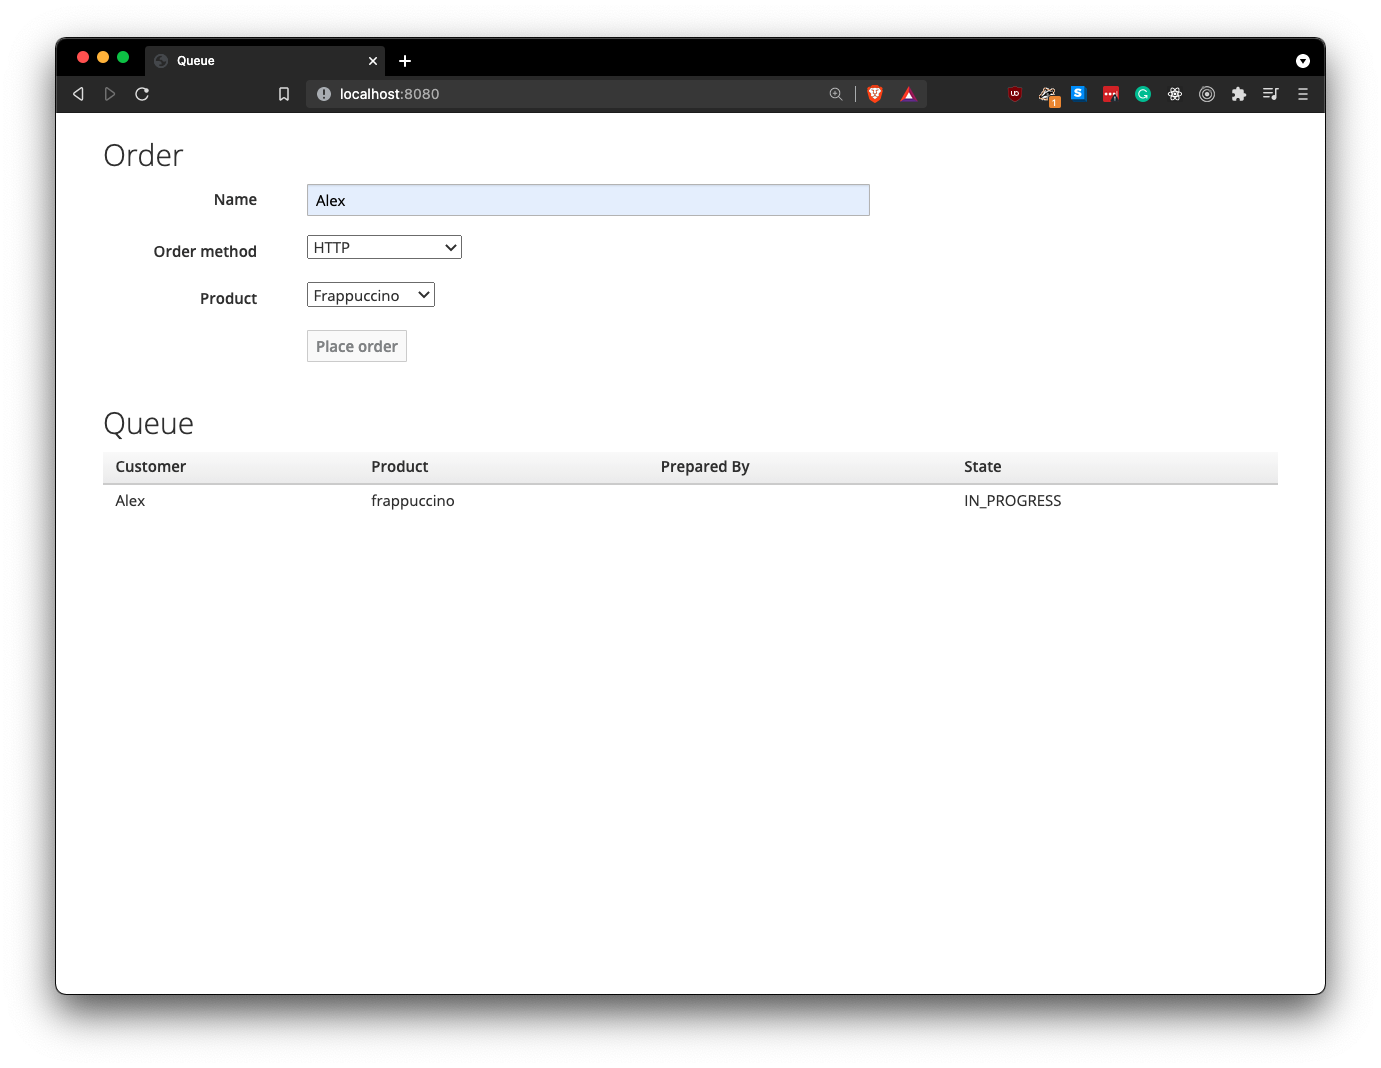
As the figure shows, the HTTP method allows us to place only one order at a time. If we were in a real coffee shop, that would mean a lot of waiting while the barista prepared each beverage. Using the HTTP method also means that, if for some reason the barista-service became unavailable, our order would be completely lost.
Using Kafka messaging in a Node.js reactive system
This time we choose the Messaging/Kafka order method, as shown in Figure 3. The koffee-shop service sends our order to Kafka (for later consumption by a barista) rather than sending it directly to the barista-service.
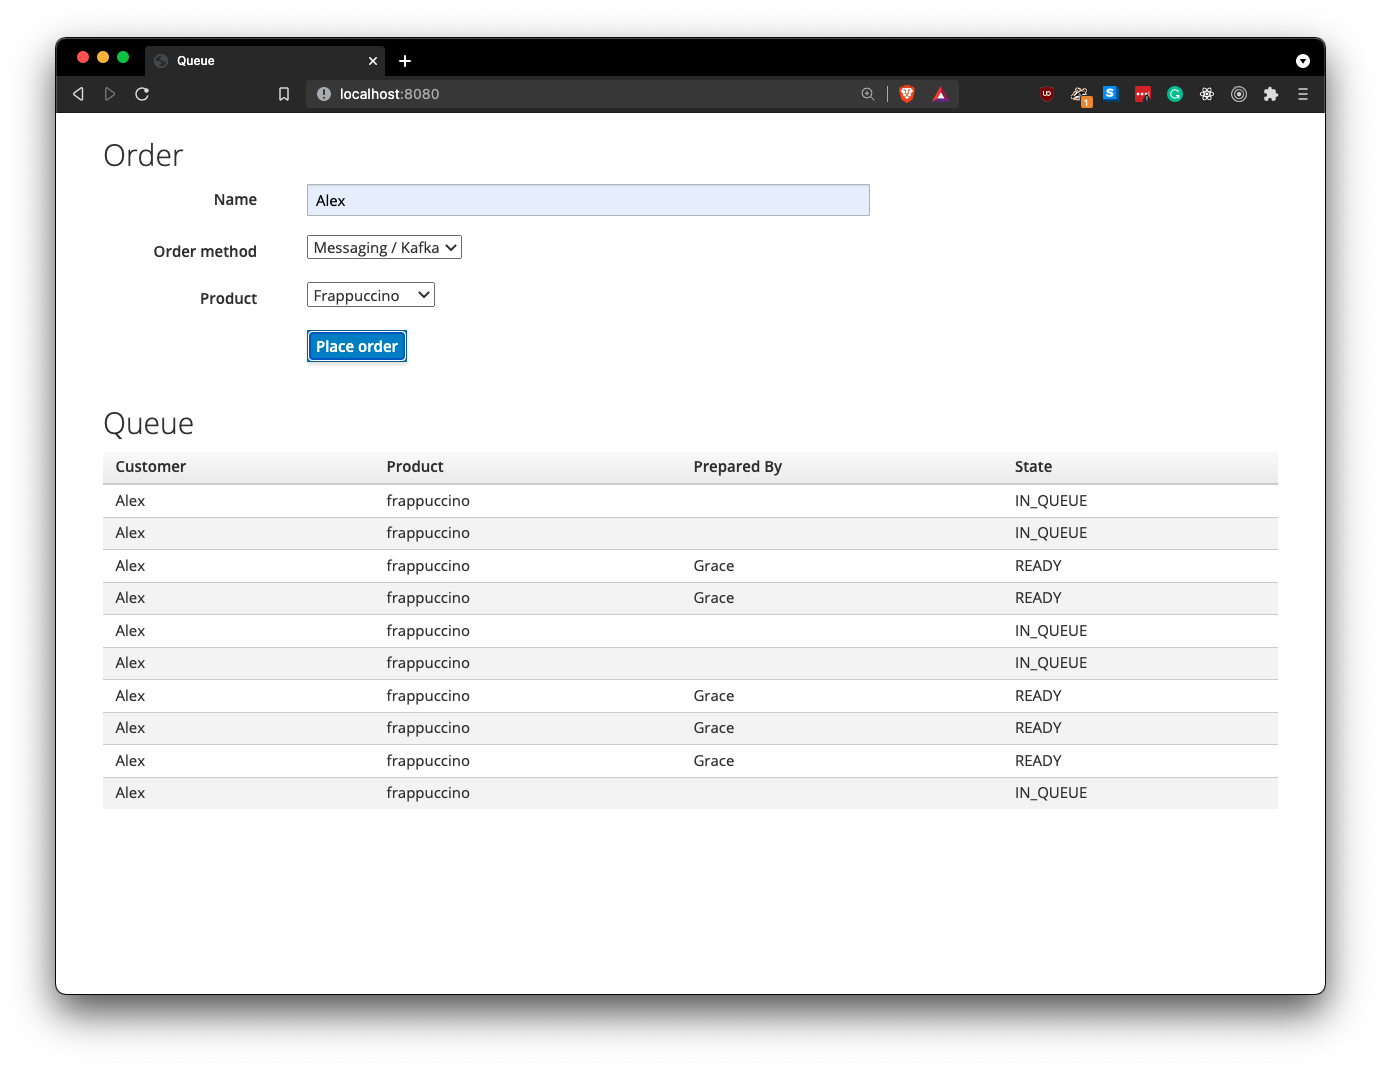
The differences between the two options are obvious now. Using the Messaging/Kafka option, we decoupled our system and made every service independent. So now we can place multiple orders and the barista-service will process them one by one whenever it can.
What will happen, though, if the barista-service ever goes down?
Because the orders are sent to Kafka and not to the barista service directly, there will be no problems. Kafka will keep the orders in a queue until the barista comes back to life and starts pulling orders again. This last point is a great example of the resilience of reactive systems.
In case the coffee shop gets so many people wanting coffee that just one barista isn't enough, we can simply spawn another barista service in a new terminal. Scaling the baristas so easily illustrates the principle of elasticity.
Conclusion
Reactive systems offer great advantages over traditional monolithic systems in an enterprise application. If you build high-integrity systems following reactive principles, you will gain much flexibility. Node.js is also a great framework for reactive systems because its architecture is closely aligned with the reactive principles documented in the Reactive Manifesto and The Reactive Principles. If you want to go deeper into reactive systems, please check out the video presentation Reactive with Node.js by Clement Escoffier and myself.
