Overview
This overview covers the key steps for installing Red Hat Enterprise Linux 8 so you can get started with software development.
This tutorial does not replace the Red Hat Enterprise Linux 8 Installation Guide. Instead, this tutorial provides an overview of the key steps for software developers. For detailed instructions, see the RHEL 8 documentation.
You’ll install a system with a full graphical desktop that you can use for exploring RHEL 8. Unlike prior versions of RHEL 8, there are no separate downloads for server, workstation, or desktop.
Before you begin
To follow this steps in this guide you will need:
A no-cost Red Hat Developer subscription and the RHEL 8 Binary DVD .iso file. When you register and download through developers.redhat.com, a subscription will be automatically added to your account.
Your Red Hat username and password. Your account was created during step one. You will need this to register the system and attach it to your subscription. Completing these steps are required for your system to download software from Red Hat.
A Windows system that:
can run Hyper-V, a 64-bit x86 machine with with hardware virtualization assistance (Intel VT-X or AMD-V) and Second Level Address Translation (SLAT).
has Hyper-V installed and the Hyper-V platform is enabled. For more information see Install Hyper-V on Windows 10 or consult the documentation for your version of Microsoft Windows.
is equipped with has at least 8 GB of RAM and has at least 28 GB of available disk space for the VM and the .iso file.
Create the VM
Launch Hyper-V manager to create the RHEL 8 VM.
Before creating the VM, you may need to create a virtual switch. Recent versions of Windows have a default switch already created that will give the VM access to the network via NAT. If you don't have the default switch, or prefer a different network configuration, create a new virtual switch and make sure it is attached to the external network.
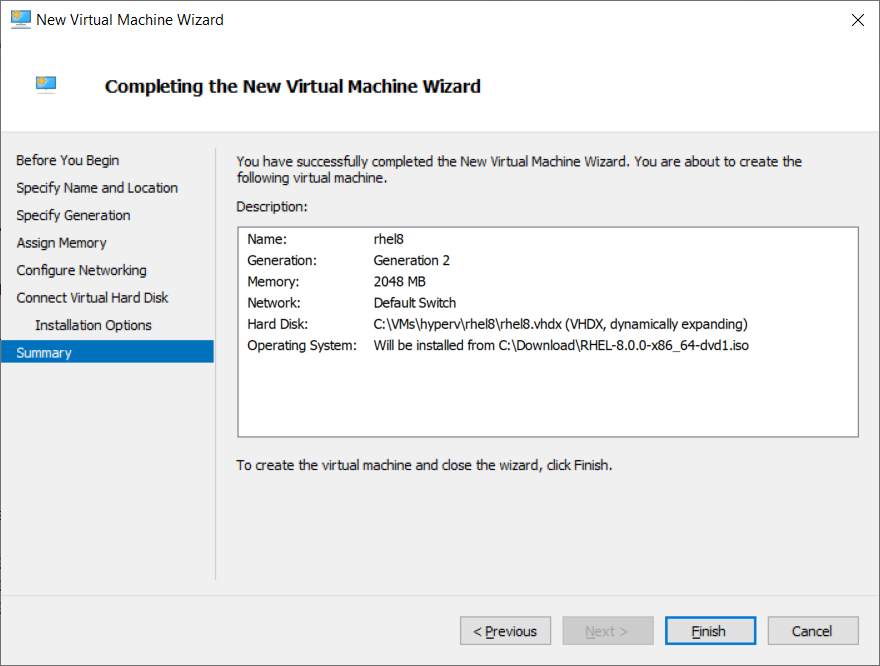
Create a new VM with the following criteria:
- Generation 2 to support newer virtualization features.
- 2 GB of RAM at a minimum. 4 GB or larger is recommended.
- Network is connected to the default virtual switch or another virtual switch that has external connectivity.
- A 20 GB or larger virtual disk.
- 2 or more virtual CPUs are recommended.
- Install an OS from a bootable image file is selected. The RHEL 8 Binary DVD
.isofile you downloaded earlier is selected as the image file.
Click Finish to create the VM.
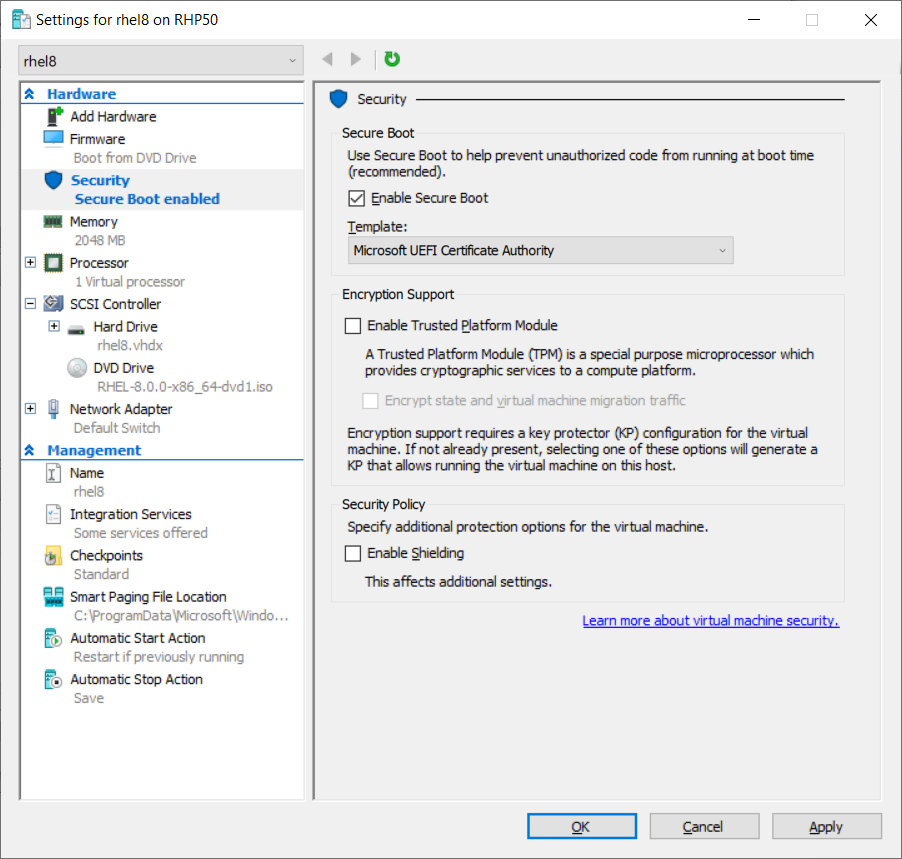
Next, you will need to change the secure boot settings. Select the RHEL 8 VM, and select Settings. Then, select Security. The option, Enable Secure Boot should be checked. Change Template to Microsoft UEFI Certificate Authority.
Notes:
- Legacy hardware, like the tulip NIC are no longer supported in RHEL 8. Creating a Generation 2 VM will avoid the use of legacy hardware emulation.
- If the VM fails to boot the RHEL 8 DVD image, make sure you've changed the secure boot template to Microsoft UEFI Certificate Authority as described above.
Finally to start the VM's console, select the VM and select Connect.
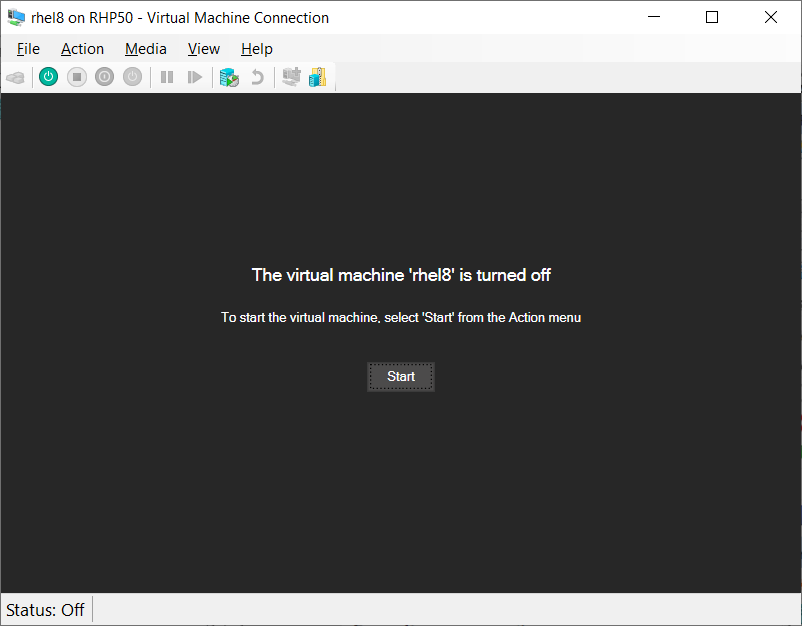
Start the VM to begin the installation of RHEL 8.
Note: When the VM starts, if you can't see the whole screen, you might need to change the Zoom Level to something other than Auto.
During the boot process, do not be alarmed by log messages that briefly flash reporting errors. They will clear within a second or two.
Installation
Now you are ready to run the RHEL 8 installer.
TL;DR The installation steps are:
- Select software to be installed. Choose the Workstation base environment, add Development Tools, Graphical Administration Tools, and Container tools. Note: Do not select Server with a GUI.
- Choose the disks/partitions to use for installation.
- Disable kdump to save memory.
- Configure and enable the network connection so that networking starts at boot. Optionally set the host name.
- Set the root password
- Create your regular user ID and make your ID an administrator so you can use
sudo.
1. Boot the RHEL 8 installer
Boot your system using the bootable installation media containing the RHEL 8 Binary DVD .iso:

Note: During boot, you can skip the media checking step by hitting the Esc key
On the following screens, select your preferred language and keyboard layout to use during installation.
You should now see the main screen for configuring your installation:

2. Select software to be installed
Click Software Selection under SOFTWARE. We recommend that you:
- Choose Workstation on the left under Base Environment
- Then, choose Container Management, Development Tools, and Graphical Admin Tools.

3. Choose disks/partitions for installation
Click Installation Destination under SYSTEM. Choose the disks/partitions to use for installing RHEL. See the Red Hat Enterprise Linux 8 Installation Guide for more information.
Note: if your system only has one disk and you are using the whole disk for the installation, just click Done

4. Disable kdump to save memory
Next, To save memory turn off kdump by clicking Kdump under SYSTEM. Then, uncheck Enable Kdump.

5. Configure and enable the network connection
Next, configure the Network and optionally set the host name. Click Network & Host Name under SYSTEM. Then:
- Select your network adapter from the list. if you need to change any network settings click Configure… .
- Turn the adapter on by clicking the toggle to the right of the OFF button in the upper right corner.
- Optionally, you can set the system's host name on the lower left.
Note: If you do not enable the network adapter here, you will not have network connectivity when you boot the system.

6. Begin the installation
When you are satisfied with your configuration, click Begin Installation.

7. Create your user ID and set the root password,
While the installation is proceeding, click Root Password to set the root (Administrator) password.
Next, create the regular user ID that you will use to log into the system by clicking User Creation.
Important note: Select Make this user administrator. This will enable sudo for your user ID.

8. Reboot and eject installation media
When installation is complete, click Reboot in the lower right corner.
Important note: While your system is rebooting, don’t forget to eject the installation media so that you don’t inadvertently reboot into the RHEL 8 installer again
If you have a machine (or VM) that reboots too quickly to eject the installation media, you can try:
- Change the boot order in the BIOS
- Shutdown the system and then restart the system to. Eject the media during POST, or use the appropriate key for your BIOS (such F12, F10, Enter) to select a boot device.
- On VirtualBox, select Devices from the VM's window menu, then select Optical Drives -> Remove disc from virtual drive to eject the installation ISO. If the system has already booted into the installer, you will need to click Force Unmount. Then reset the VM, either through the Machine menu, or using the keyboard shortcut Right CTRL + R (Windows/Linux) or Left Command + R (Mac). The VM should then boot from the virtual hard disk.
- On Hyper-V, select Media from the VM's menu. Then select Eject for the RHEL 8 DVD.
System registration
First Boot
When the system reboots, click License Information to accept the license agreement. On the License Information screen, Click I accept the license agreement under the text of the license.

System Registration During First Boot
Your system needs to be registered to download software and updates from Red Hat. When you joined Red Hat Developers, a no-cost developer subscription was added to your account. Registering your system attaches it to your subscription.
If you configured and started the network connection during installation, you can register the system now using the graphical interface. If you didn’t activate your network connection, follow the instructions below to register with the subscription-manager CLI.
To register your system, click Subscription Manager. On the next screen, if you need to configure a proxy click Configure Proxy, otherwise click Next.
On the following screen, enter your Red Hat username and password. When you joined Red Hat Developers, a Red Hat account was created for you. This the login that you use for Red Hat sites such as the Red Hat Customer Portal, access.redhat.com. Then, click Register.

On the Confirm subscription screen, if more than one subscription is listed, select Red Hat Developer Subscription. Then, click Attach. When registration completes, click Done.
Next, click Finish Configuration.
Log into the system with the user ID and password you created during installation.
During your first login, set your language, keyboard layout, and enable or disable location services. Then, connect your online accounts or click Skip. Next Click Start Using Red Hat Enterprise Linux. After you’ve reviewed the GNOME Getting Started info, close the window.
System Registration from the command line
If you didn't register your system during the first boot, you can register at any time using the command line. Start a Terminal window by clicking Activities in the upper left corner. Then select the Terminal icon on the lower left. Alternatively, start typing terminal in the search box and then hit enter to accept the Terminal auto-completion.

In the terminal window, start a root shell:
$ sudo bash
Next, register your system with Red Hat Subscription Management:
# subscription-manager register --auto-attach
Enter your Red Hat username and password. When registration has completed, you’ll see:
Installed Product Current Status:
Product Name: Red Hat Enterprise Linux for x86_64
Status:       Subscribed
Check that you now have the BaseOS and AppStream repos enabled with yum repolist:
# yum repolist
Updating Subscription Management repositories.
Red Hat Enterprise Linux 8 for x86_64 - AppStream (RPMs)
Red Hat Enterprise Linux 8 for x86_64 - BaseOS (RPMs)
Install updates
Once your system has been registered, you can use the command line or web console to install the latest updates.
Updating from the command line
use yum update form within a Terminal session to install the latest updates.
$ sudo yum update
If an updated kernel package is installed during updates, you should reboot your system:
$ reboot
Cockpit Web console
Red Hat Enterprise Linux 8 includes a web-based console called Cockpit that simplifies administration tasks especially for users who are new to Linux.
Enabling the Cockpit Web Console
Out of the box, Cockpit isn't enabled. We recommend that you enable Cockpit. To enable it, run the command below one time. You don’t have to worry about Cockpit consuming resources if you don’t use it. The following command tells systemd to only start Cockpit when it is accessed.
$ sudo systemctl enable --now cockpit.socket
By default, the system firewall will prevent access to Cockpit from the network. To allow access from the network:
$ sudo firewall-cmd --add-port=9090/tcp
$ sudo firewall-cmd --permanent --add-port=9090/tcp
Using the Cockpit web console
To access the Cockpit web console, start Firefox from the Activities menu, Then enter the URL: http://localhost:9090/
Log into Cockpit either your regular user ID or the root user ID.
To use Cockpit from the network use: https://<hostname>:9090/
Note: a self-signed SSL/TLS certificate is installed by default, which will generate a security exception because it isn't signed by a trusted CA. You will have to agree to proceed.
For more information see Managing Systems Using the Web Console
Coding time
Use these documents for creating your first applications on Red Hat Enterprise Linux 8.
Appstreams
The first step is to see what modules are available the Applications Streams (appstream) repo:
$ sudo yum module list # list all available modules in appstream
Or, find just the modules named `nodejs`
$ sudo yum module list nodejs
From the output you can see that Node.js 10 is the default module to install, note the `[d]`. You could have simply typed the following to install the default nodejs module.
$ sudo yum module install nodejs
Or even, shorter using ‘@’:
$ sudo yum install @nodejs
The above commands would have installed the nodejs with the default profile. A profile is group, usually a subset, of the packages in a module. For this module the default profile is named `default. In the steps above, the `development` profile was chosen to get the packages in the development profile installed.
To find out more about a module, use one of the following commands:
$ sudo yum module info nodejs # get info about the default nodejs module
$ sudo yum module info nodejs:10 # get info about a specific module streamLast updated: August 12, 2025
