Page
Install the Kasten operator
This lesson will walk you through the process of installing Kasten, creating a sample VM workload, configuring the necessary storage annotations, and finally, performing snapshot and restore operations. For simplicity and to allow experimentation without requiring an S3 bucket for external storage, this initial guide focuses on local snapshots rather than full backups.
Prerequisites:
- Red Hat OpenShift Container Platform (OCP) cluster
- OpenShift Virtualization
- Resources for Kasten (3 CPU core, 1.4 GB free memory)
- Git CLI (Optional, as the entire procedure can be performed via the UI)
- OC CLI (Optional, as the entire procedure can be performed via the UI)
In this lesson, you will:
- Install the Kasten operator from the Red Hat OpenShift dashboard
- Create a sample virtual machine workload
- Configure the necessary storage annotations
- Perform local snapshot and restore operations
Install Kasten
Via graphical interface (UI)
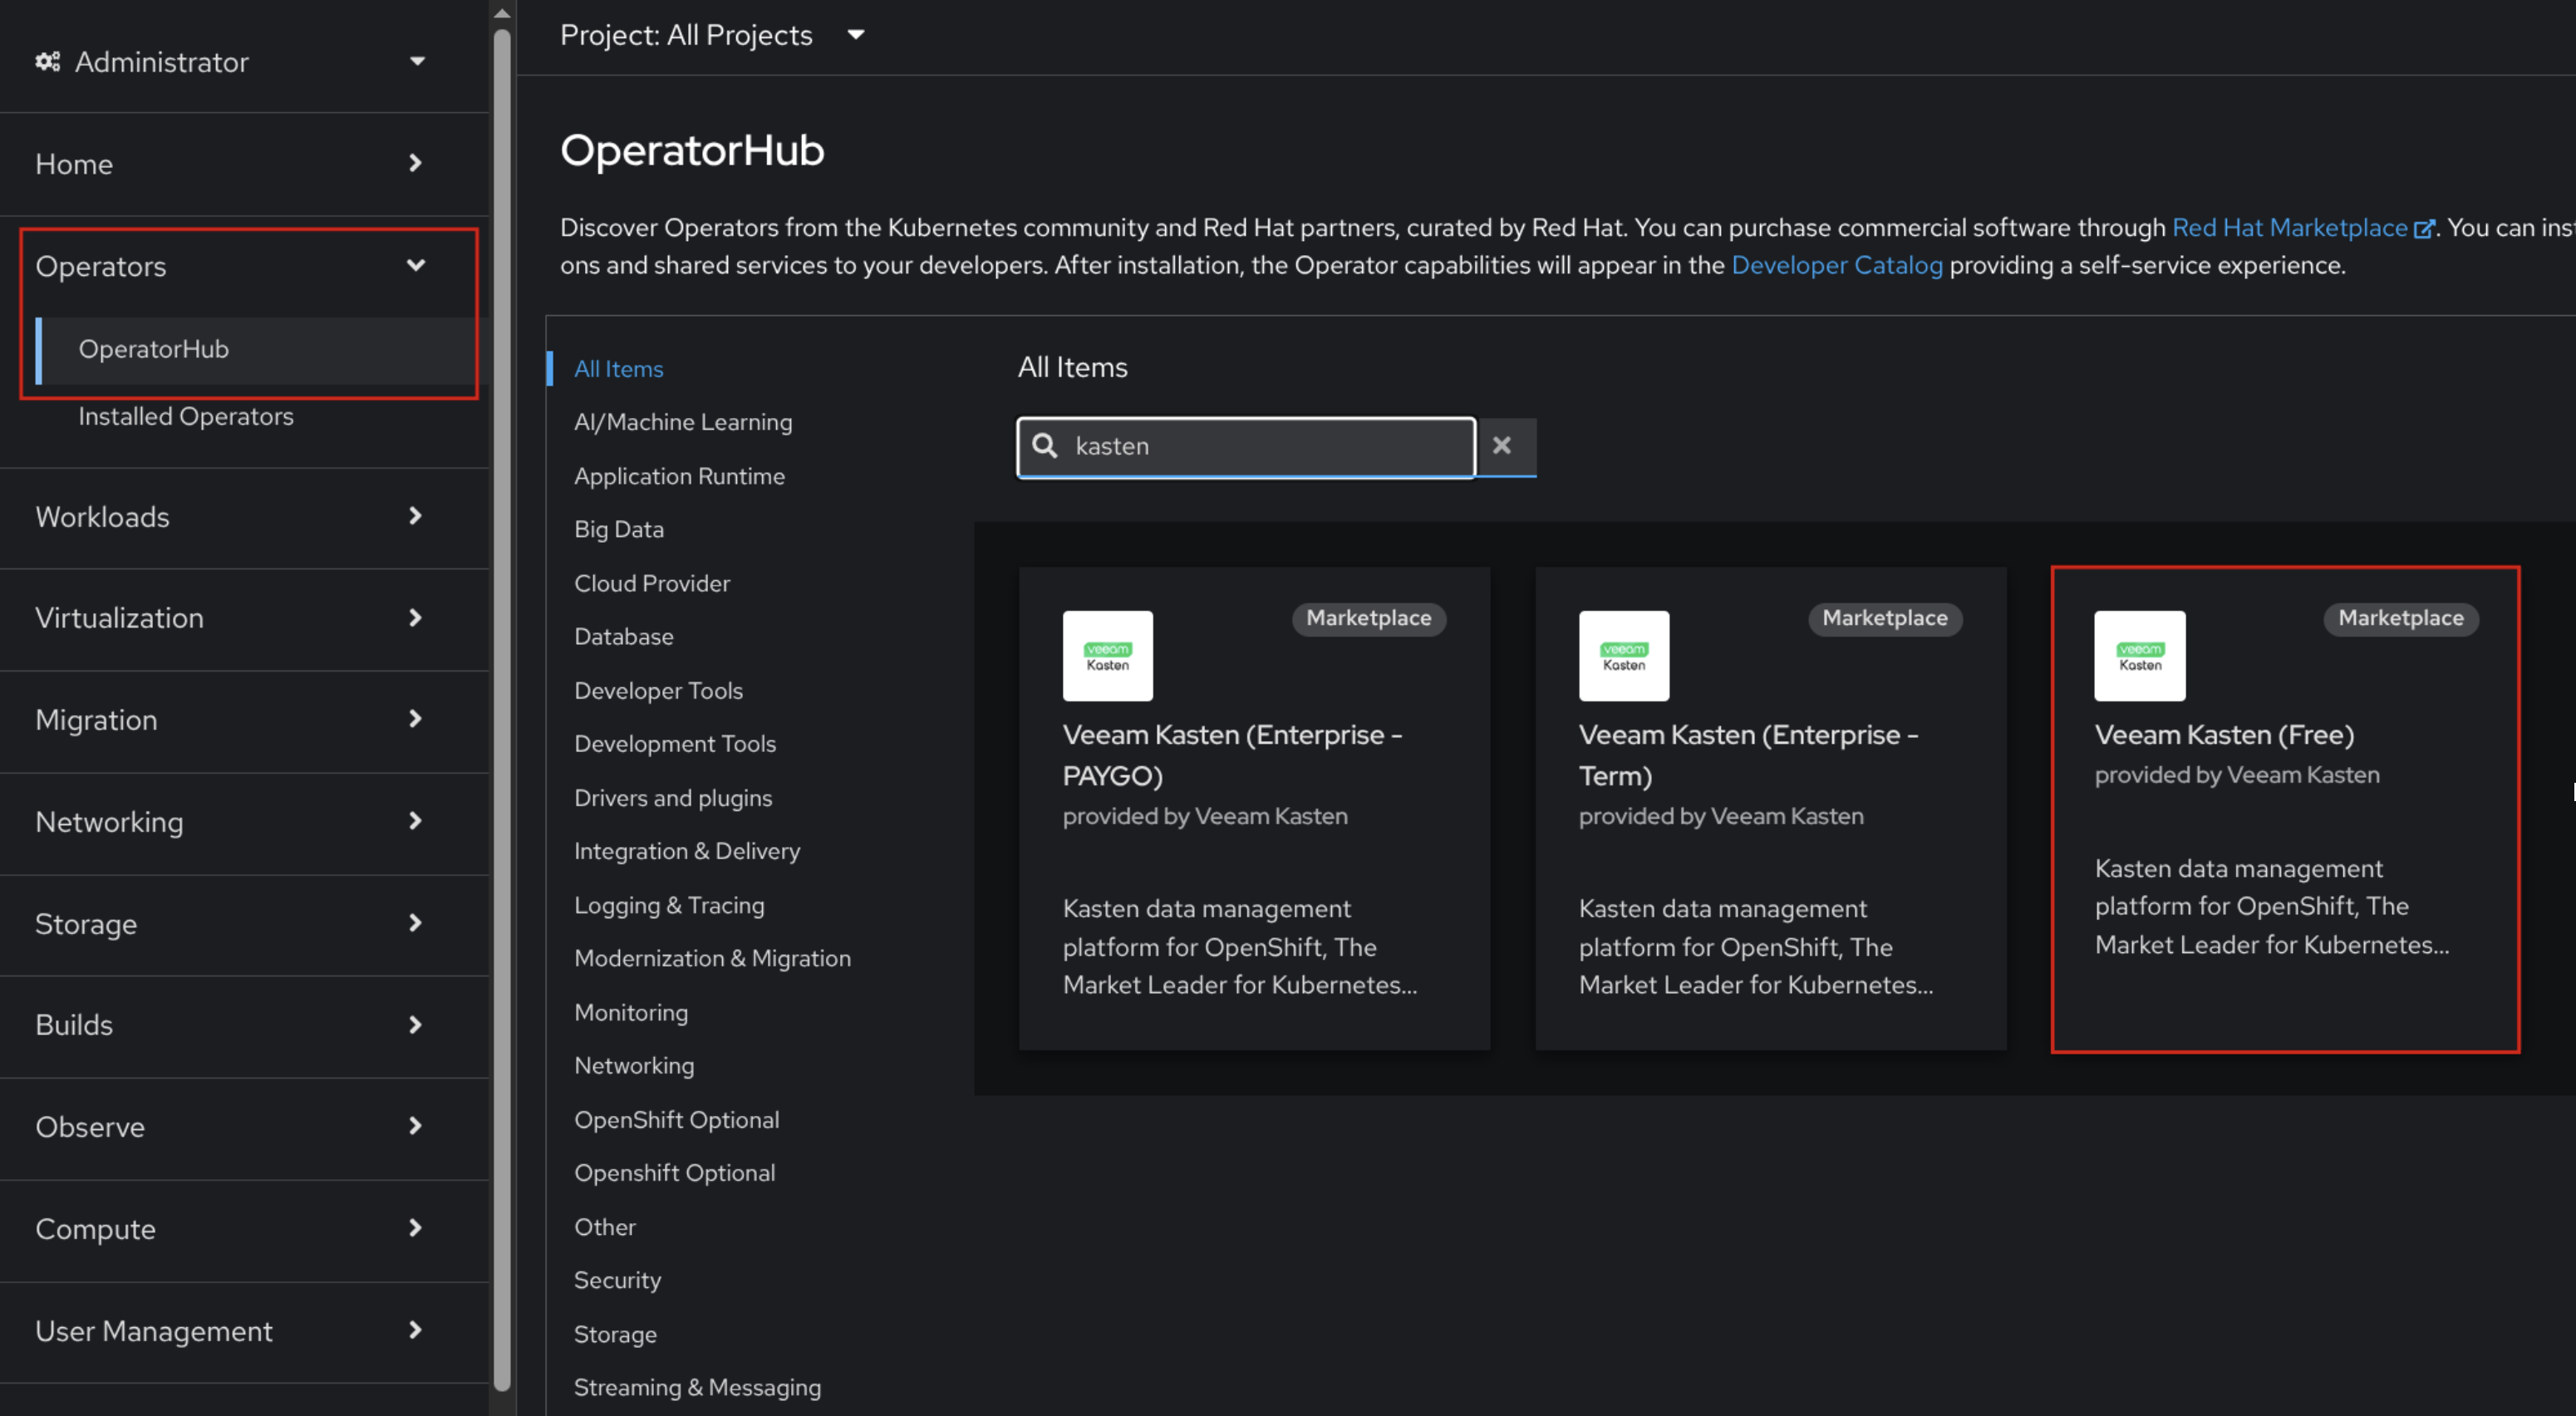
From the OpenShift dashboard, navigate to Operators → OperatorHub and search for Kasten operators. For this lesson, install the free version of the operator. This procedure is shown in Figure 1.
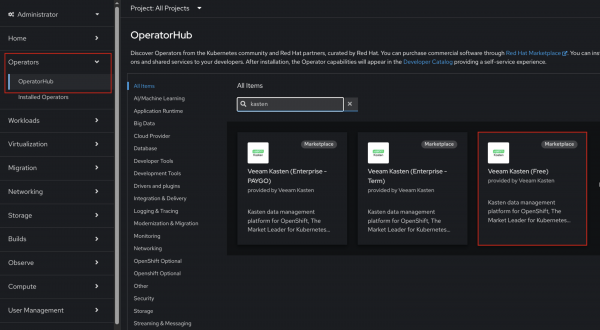
Figure 1: Red Hat Operator Hub console for installing Kasten operator via a GUI. - Click Veeam Kasten (Free), Install (not purchase). Leave all the default information and click Install.
- Once installed, click View Operator. You can also navigate to the Installed Operator menu and click the Veeam Kasten (Free) card.
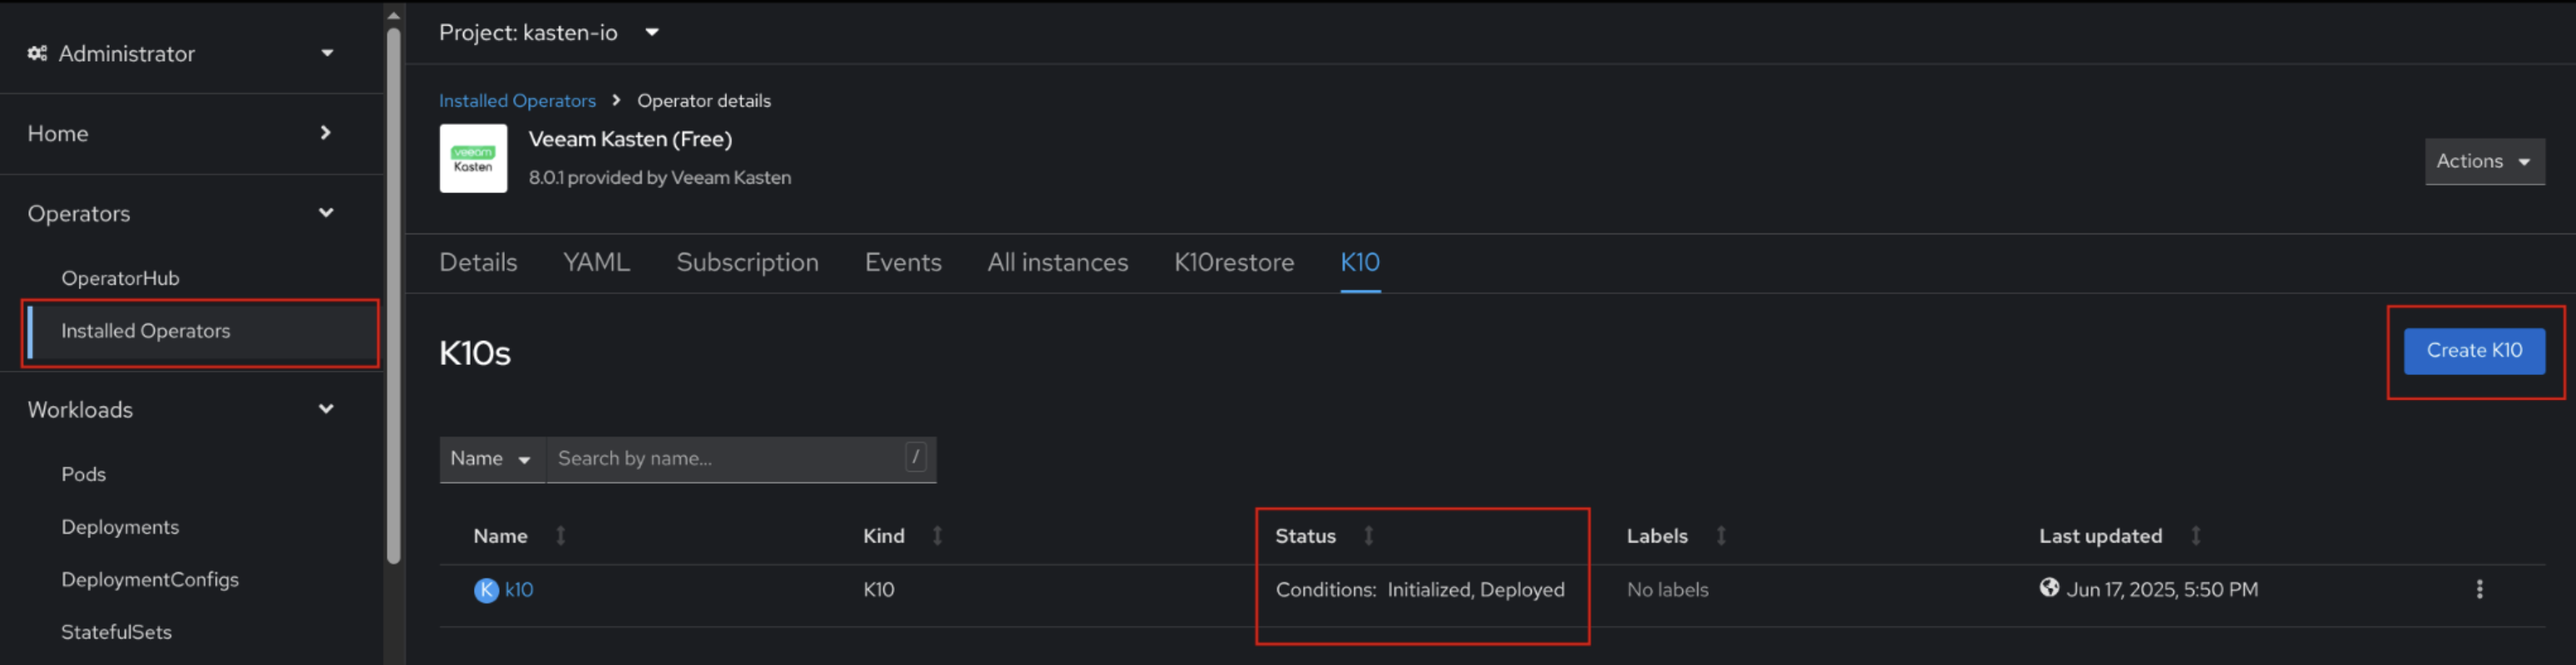
- Navigate to the K10 tab and click the Create button to deploy the K10 operand, which enables backup, restore, and disaster recovery functionalities for your applications.
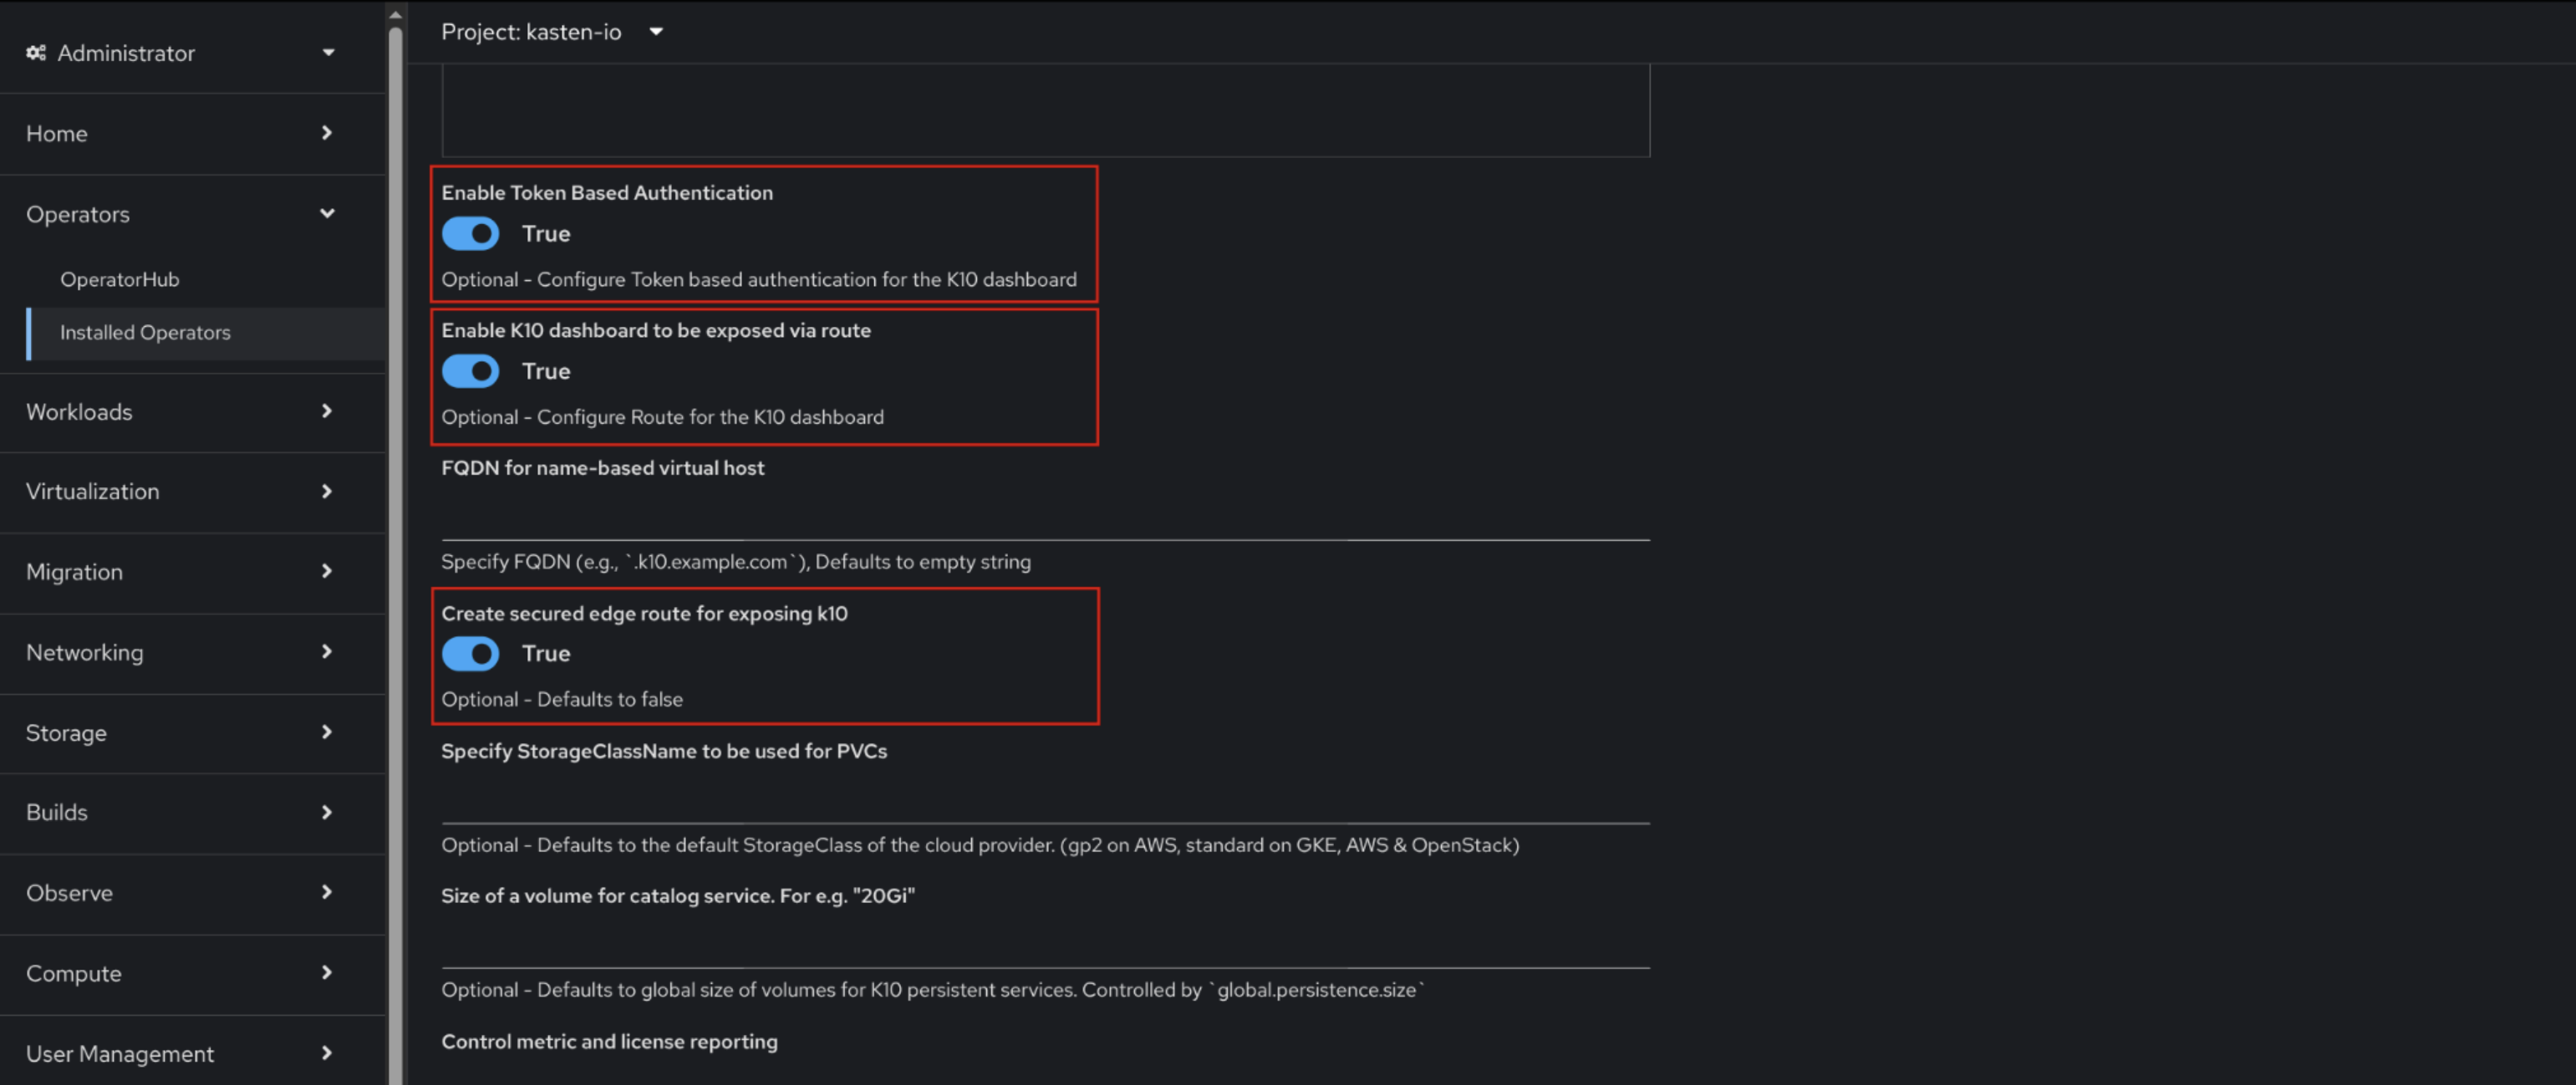
Upon clicking Create, the user is presented with the operator configuration interface (Figure 2).
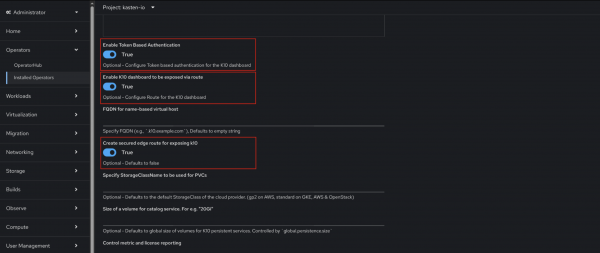
Figure 2: Kasten k10 configuration options.
As shown in the image, two key functionalities have been specifically enabled:- Enable token-based authentication (True): This setting configures token-based authentication for the K10 dashboard. This option typically allows K10 to integrate with the authentication system of OCP, enhancing security by leveraging existing user management.
- Enable K10 dashboard to be exposed via route (True) and Create secured edge route for exposing K10 (True): These options work in tandem to expose the K10 dashboard through a secure edge route. This means the K10 UI will be accessible externally, and critically, that access will be secured, likely using TLS/SSL to encrypt communication.
While other options are visible, such as specifying an FQDN,
StorageClassName, volume sizes, and control over metric and license reporting, the primary configurations highlighted are the secure access mechanisms for the K10 dashboard.Once the operator has been installed and the K10 instance created, the status column should display the message, Conditions: Initialized, Deployed (Figure 3).

Figure 3: A k10 resource correctly created.
Via command-line interface (CLI)
Clone the repository from GitHub:
git clone https://github.com/too-common-name/veeam-setup
cd veeam-setup
Log in to OCP using the CLI:
oc login --username=<username> --password=<password> --server=<api-server-url>Install the Kasten Operator:
oc create -f installation/Create a K10 resource:
oc create -f k10/
Via Helm
Note that you can see and configure additional Helm parameters by visiting install.kasten.io
Log in to OCP using CLI:
oc login --username=<username> --password=<password> --server=<api-server-url>Add the Kasten Helm repository to your local Helm client:
helm repo add kasten https://charts.kasten.ioInstall Kasten via Helm:
helm install k10 kasten/k10 \
--namespace 'kasten-io' \
--create-namespace \
--set "scc.create=true" \
--set "route.enabled=true" \
--set "route.tls.enabled=true" \
--set "auth.tokenAuth.enabled=true" \
--set "datastore.cacheSizeLimitMB=0"
Create a workload
Via graphical interface (UI)
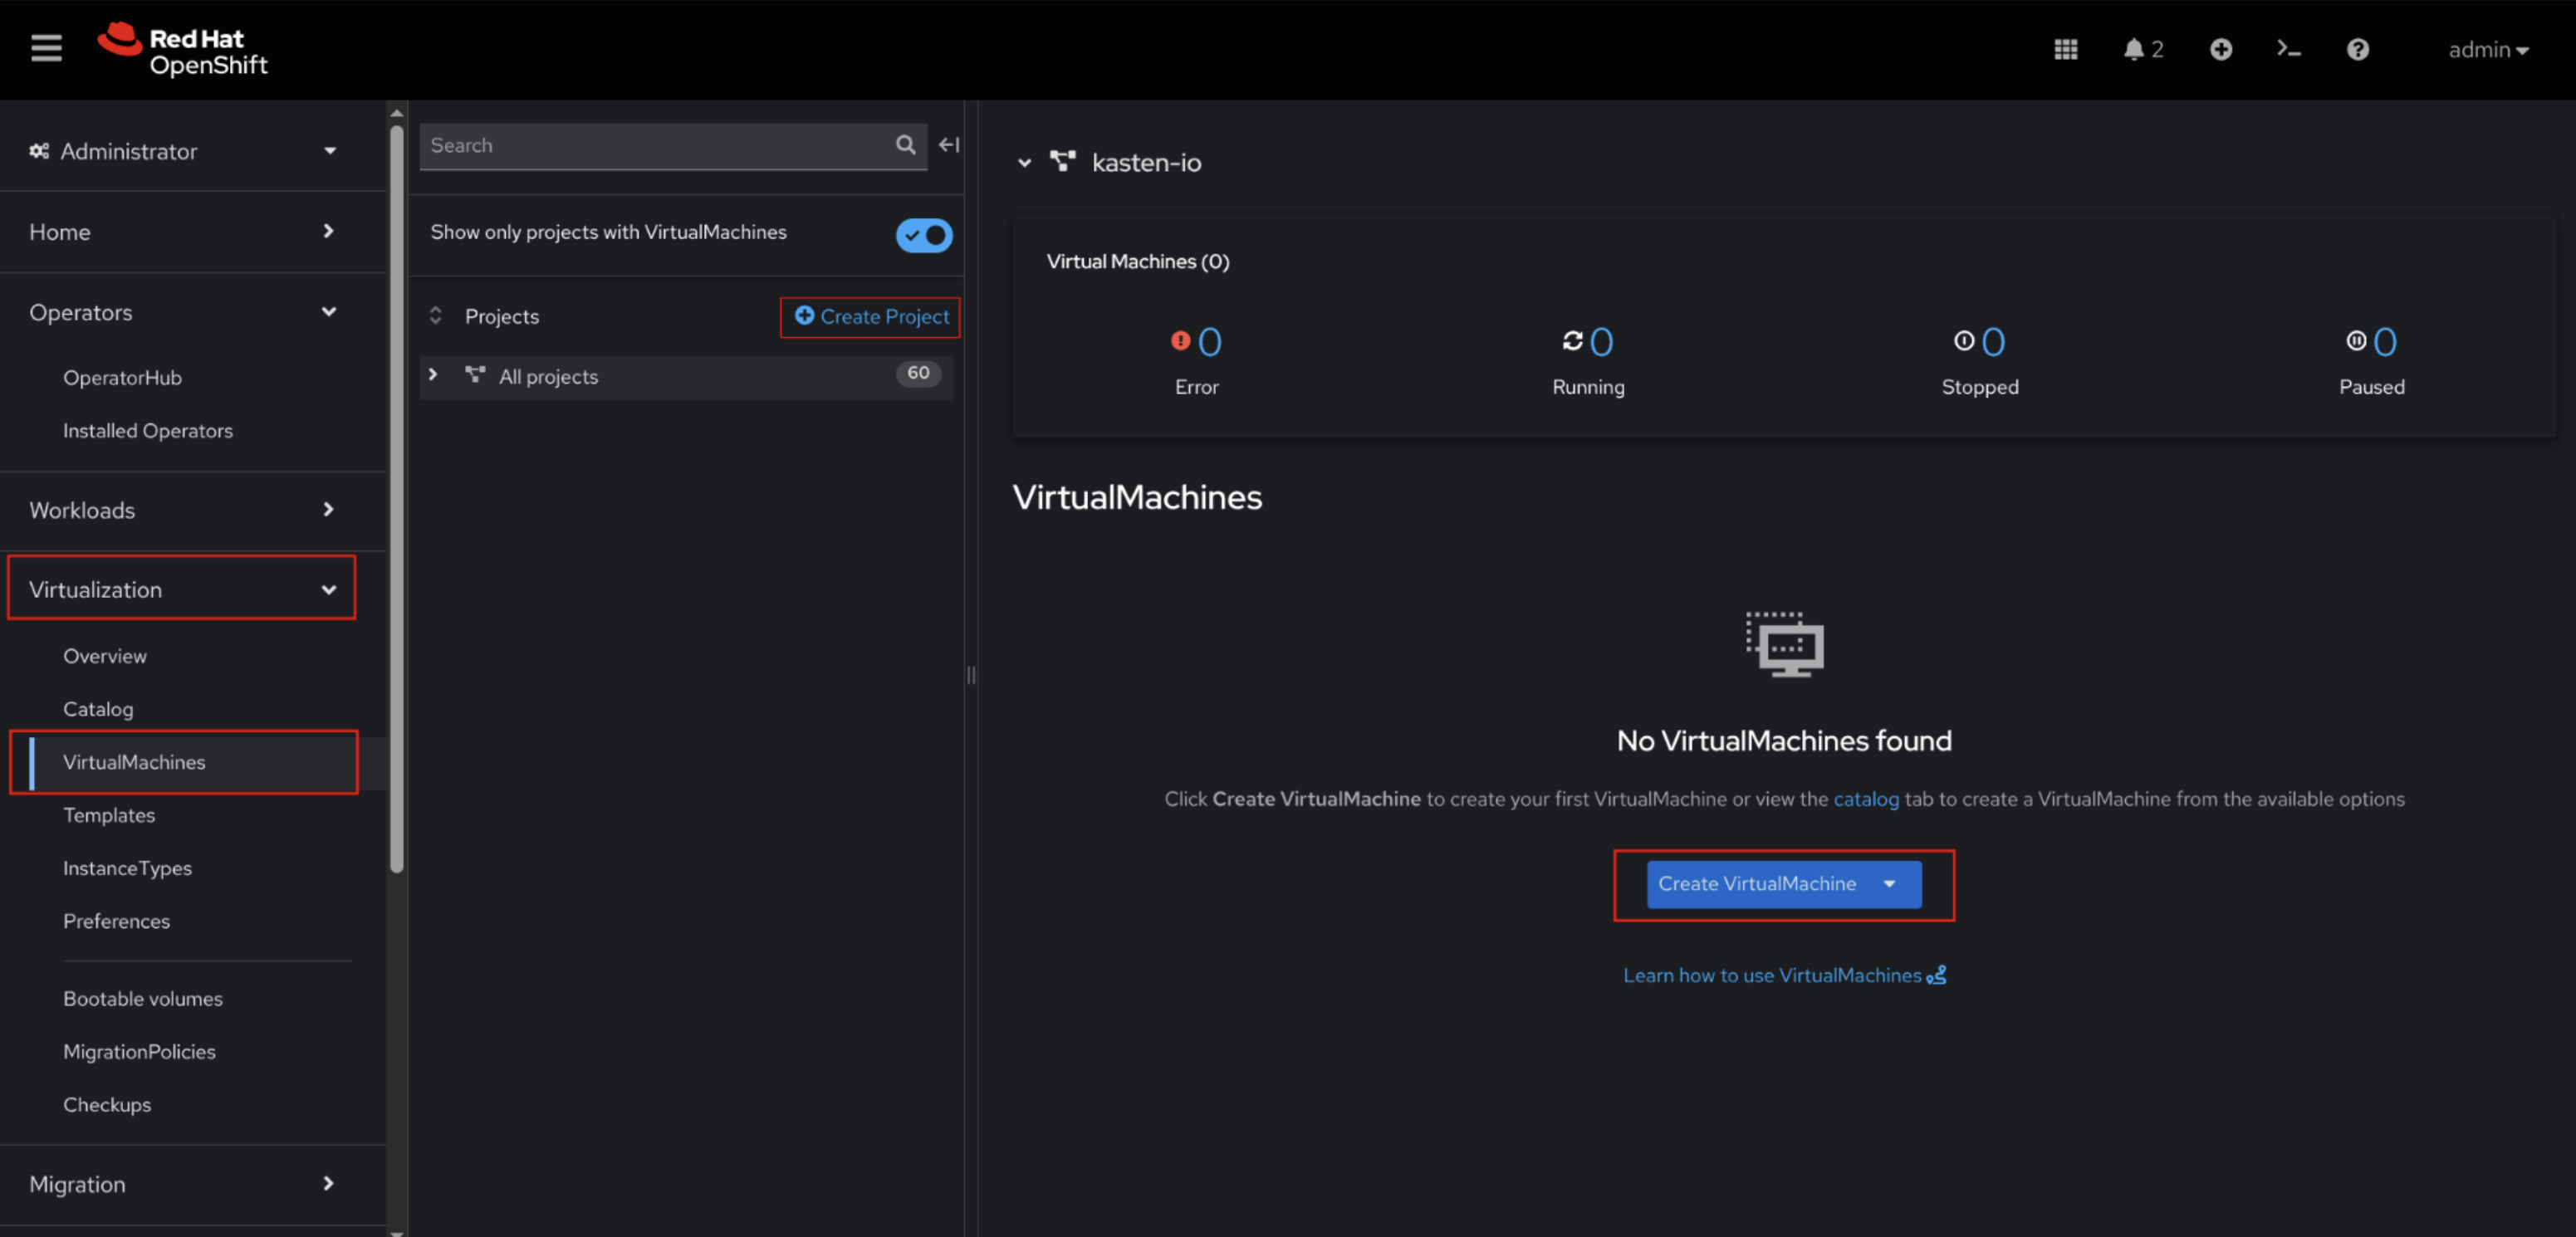
- Navigate to Virtualization → VirtualMachines (Figure 4).
- Create a new project named backup-test (Figure 4).
Create a new VM from InstanceType, choose Fedora instance and name it fedora-backup (Figure 4).
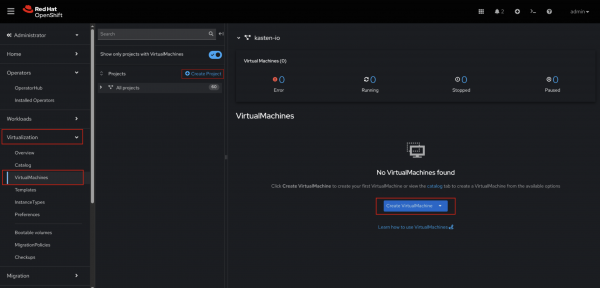
Figure 4: VM creation sections.
Via command-line interface (CLI)
Execute the following command:
oc create -f workload/
Configure storage for Kasten
Effective data protection with Kasten on OpenShift Virtualization relies heavily on a correctly configured storage back end. Kasten leverages Kubernetes' Container Storage Interface (CSI) and VolumeSnapshots to perform efficient backups. This step outlines the necessary configurations and validations.
- Perform pre-flight checks (optional but recommended). Before proceeding, you can run Kasten's pre-flight checks to validate your environment's readiness for data protection.
Run the following command to derive the list of provisioners along with their
StorageClassesandVolumeSnapshotClasses:curl -s https://docs.kasten.io/downloads/latest/tools/k10_primer.sh | bashIf you haven’t already configured the storage, you should see some errors like, “At least 1 VolumeSnapshotClass needs the k10.kasten.io/is-snapshot-class annotation set to true – Error.”
Here are the prerequisites for running Kasten pre-checks:
- Kubectl
- Helm version v3.11.0 or higher
- Kasten Helm Repository added to Helm configuration.
- To add the Helm Kasten repo, go to https://charts.kasten.io/.
Then, you can run the
k10_primeragainst a specific storage class using:curl -s https://docs.kasten.io/downloads/latest/tools/k10_primer.sh | bash /dev/stdin csi -s <storage_class_name>- For Kasten to recognize and use your
VolumeSnapshotClassfor snapshot operations, it must be annotated withk10.kasten.io/is-snapshot-class: "true". Specifically, you should annotate theVolumeSnapshotClassthat has the same provisioner as theStorageClassused to create the VM's disks. In the context of this lesson, this refers to theVolumeSnapshotClasswhose driver matches the provisioner of the defaultStorageClass.Via graphical interface (UI)
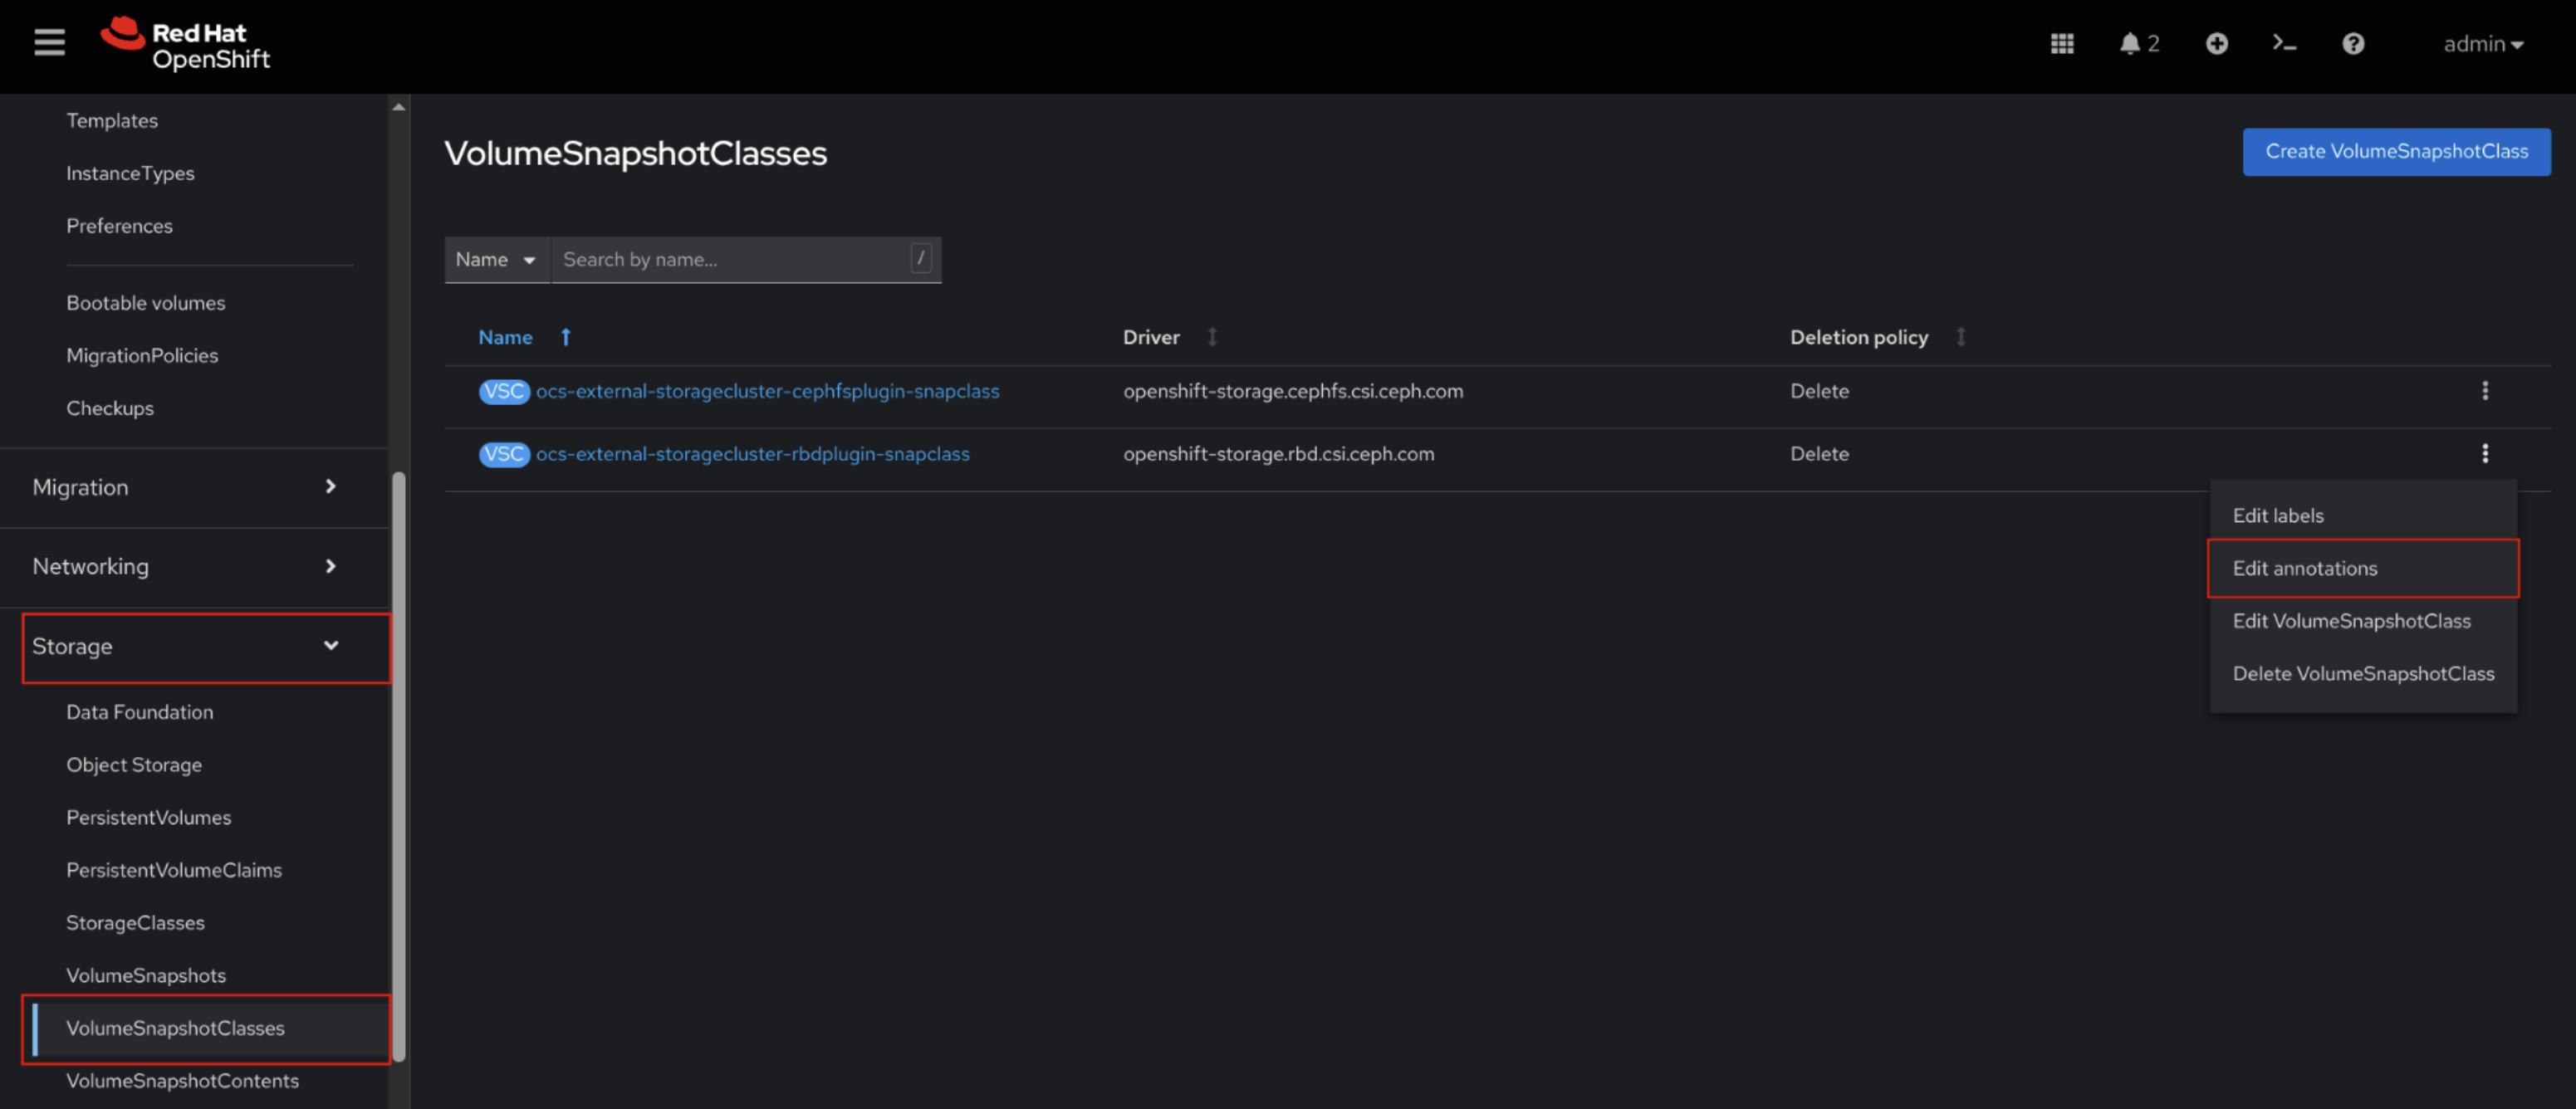
- Navigate to Storage → VolumeSnapshotClasses in the OpenShift console.
Click on the vertical ellipsis of the
VolumeSnapshotClassyou wish to annotate (ocs-storagecluster-rbd-snap if using OpenShift Container Storage) and select Edit annotations (Figure 5).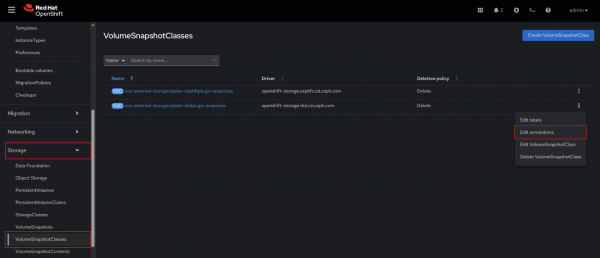
Figure 5: Edit VolumeSnapshotClass annotations. - Add the above annotations and click Save.
Via command-line interface(CLI)
Run the following command:
oc annotate volumesnapshotclass <your-volumesnapshotclass-name> k10.kasten.io/is-snapshot-class=true --overwrite
- For Ceph or OpenShift Data Foundation (ODF) storage, and any other storage that supports block-mode volumes, you must annotate the corresponding StorageClass with
k10.kasten.io/sc-supports-block-mode-exports: "true"if you intend to enable the export of snapshots in block mode for backup operations. The procedure for applying this annotation, both via graphical interface (UI) and command-line interface (CLI), is similar to that described for the VolumeSnapshotClass.Via graphical interface (UI)
- Navigate to Storage → StorageClasses in the OpenShift console.
- Click on the vertical ellipsis of the Storage Class you wish to annotate (the one used to provision VM storage) and select Edit annotations.
- Add the above annotations and click Save.
Via command-line interface (CLI)
Run the following command:
oc annotate storageclasses <your-storageclass-name> k10.kasten.io/sc-supports-block-mode-exports=true --overwrite
Snapshot the created workload
Now that you've created a workload and configured storage, it's time to learn how to back up our VM named fedora-backup using Kasten.
Via graphical interface (UI)
You can find the Kasten (K10) WebUI URL by navigating to the
kasten-ioproject in the OpenShift dashboard, then selecting Networking → Routes, and locating the Kasten route in the Location column (Figure 6).
Figure 6: K10 WebUI route and copy login command option. - To log in to the Kasten WebUI, you will need an OpenShift authentication token. You can obtain this token from the OpenShift UI.
- In the top right corner, click your username and select Copy login command from the dropdown menu in Figure 6. You may then be prompted to insert your OpenShift credentials to display the token.
- Once displayed, copy the token and paste it into the Kasten Web UI to complete your log in.
- Accept the Kasten End User Licensing Agreement (EULA) by filling in the required information.
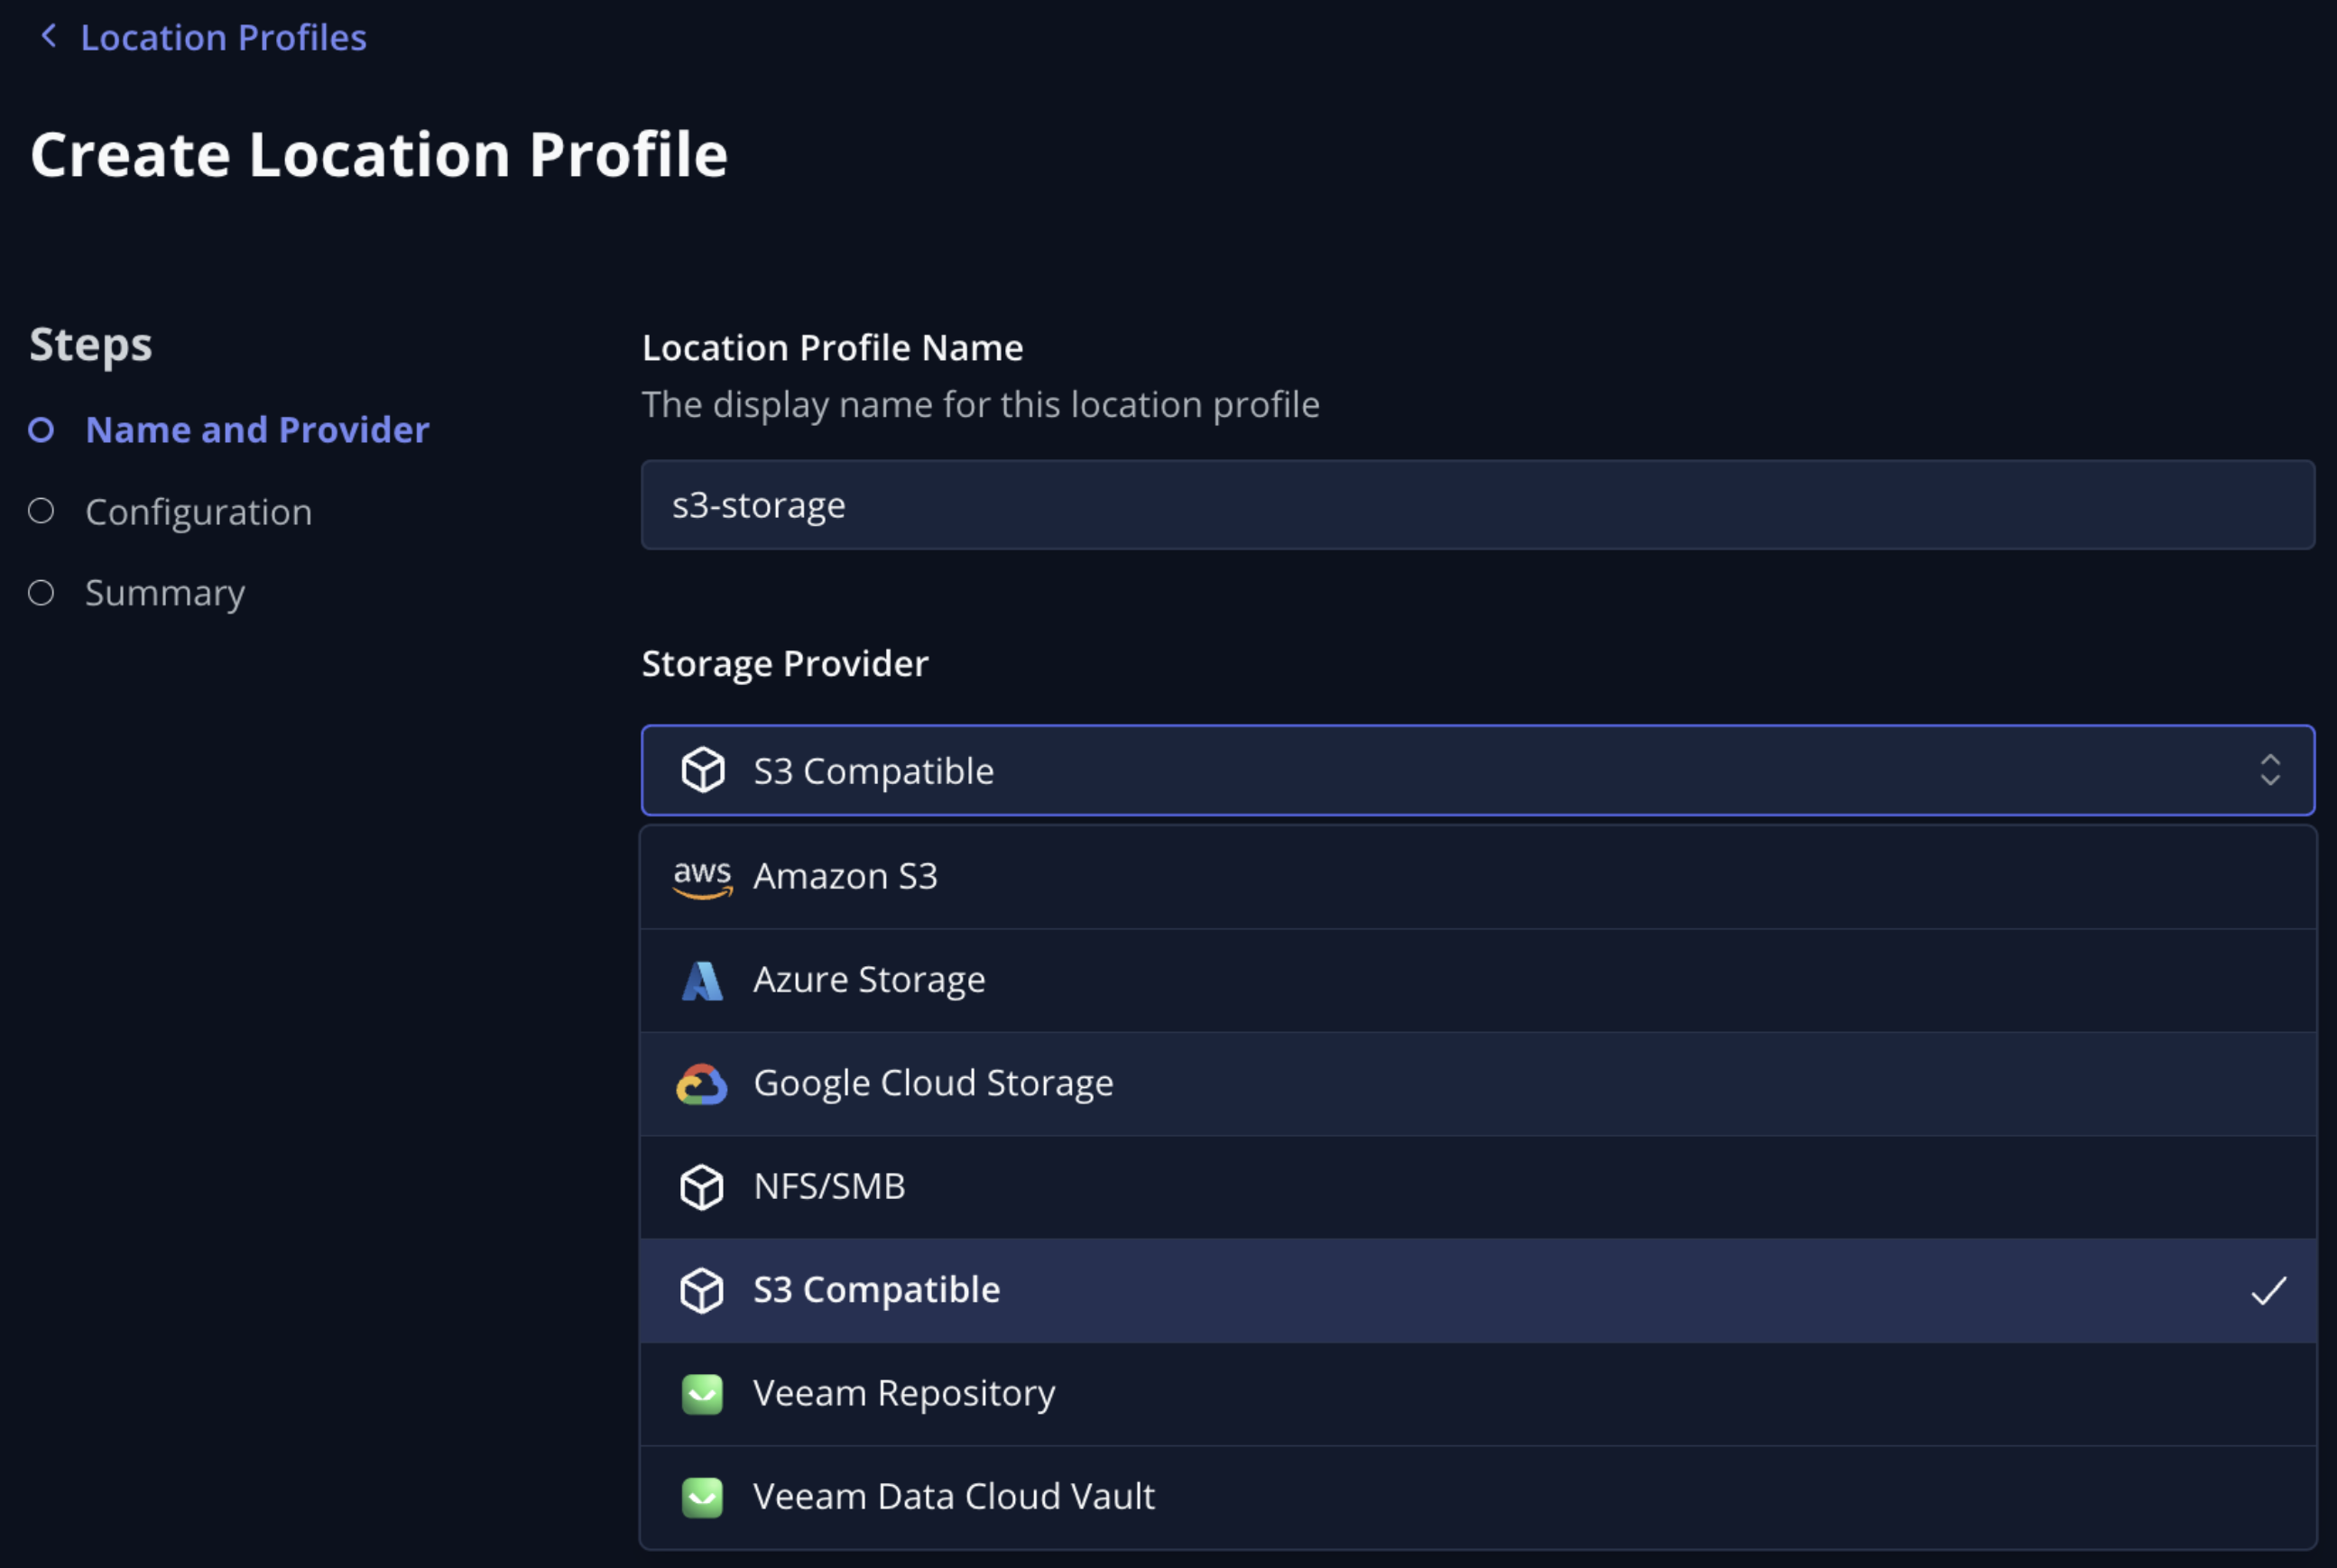
Configure a Location Profile within Kasten to export our snapshots to (Figure 7).

Figure 7: Location profile configuration from Kasten UI. To create a new policy for backup, navigate to Policies → Policies, click Create New Policy (Figure 8).
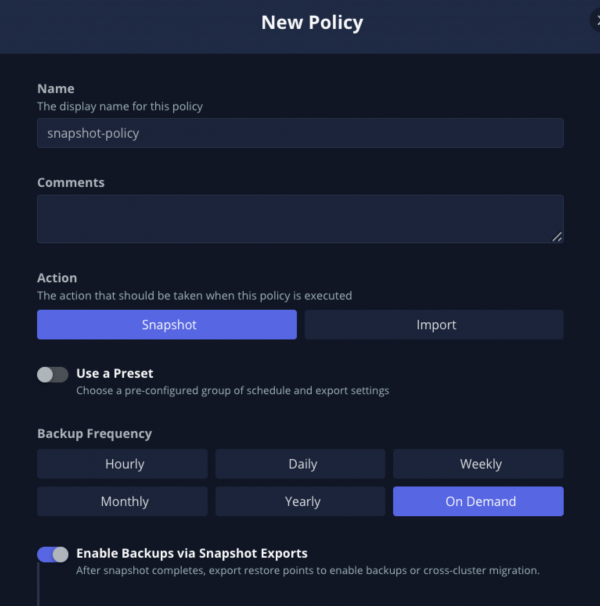
Figure 8: Snapshot policy creation from Kasten UI. - Set the following fields:
- Name: snapshot-policy
- Action: Snapshot
- Backup Frequency: On Demand
- Enable Backups via Snapshot Exports enabled and set to the location profile configured in step 4 above
- Select Applications by Name, click on the select box, and select
backup-test namespace.
- Click the vertical ellipsis then Run Once to execute the snapshot.
- If the policy runs successfully, you should see Completed as a last run status.
- You should also see a Restore Point on the Kasten UI by navigating to the Restore Points entry in the left-hand menu. This Restore Point corresponds to a
VolumeSnapshotthat can be viewed from the OCP UI by going to Storage → VolumeSnapshots and selecting thebackup-testproject.


Via command-line interface (CLI)
To accept the EULA and create the location profile, complete the following steps.
Ensure you've filled out
configuration/2-bucket-secret.yaml and configuration/3-bucket-profile.yamlwith your bucket information.Then run:
oc create -f configuration/To create the snapshot policy, run:
oc create -f backup/
You can then run the policy using the Kasten UI, as described in point 5 of the previous subsection.
Additionally, in my repository, you'll find an Ansible playbook designed to provision an AWS S3 bucket, create a dedicated IAM user with exclusive access to that bucket, and output the user's credentials.
Restore the workload
For this lesson, we will focus on the Graphical Interface (UI) for the restore operation, as it offers a highly intuitive and practical approach.
- To eliminate the VM:
- Navigate to Virtualization → Virtual Machines in the OpenShift console.
- Ensure you have selected the
backup-testproject. - Locate the
fedora-backupVM. - Click the vertical ellipsis next to the VM name.
- Select Stop to halt the virtual machine.
- Once the VM's status changes to Stopped, click the vertical ellipsis again.
- Select Delete and confirm the deletion. This will remove the VM and its associated PVC.
- Restore the Virtual Machine using Kasten:
- Go to the Kasten WebUI.
- From the left-hand menu, select Restore Points.
- Locate the Restore Point corresponding to your
fedora-backupVM. - Click the vertical ellipsis next to the Restore Point.
- Select Restore.
- Leave all the default settings in the restore wizard and click Restore to confirm.
- You can monitor the progress of the restore procedure by clicking Dashboard in the Kasten Web UI.
- Once the procedure is completed (it typically takes just over a minute), the VM should be back up and running in your OpenShift environment. You can verify this by navigating back to Virtualization → Virtual Machines in the OpenShift console.
Common issues and troubleshooting
This section addresses common storage configuration issues encountered during Kasten K10 setup.
Resource Mapping Not Found for K10 CRD
Problem: Creation of K10 operand using CLI fails with - error: resource mapping not found for name: "k10" namespace: "kasten-io" from "k10/1-k10.yaml": no matches for kind "K10" in version "apik10.kasten.io/v1alpha1
Cause: You attempted to create the K10 operand (Custom Resource) before the Kasten K10 Operator had fully installed its Custom Resource Definitions (CRDs). The cluster does not yet recognize the K10 kind.
Solution: Wait for the Kasten K10 Operator installation to complete and its CRDs to be registered with the Kubernetes API server before attempting to create the K10 operand.
VolumeSnapshotClass Annotation Missing
Problem: Snapshot procedure fails with - Failed to find VolumeSnapshotClass with annotation in the cluster.
Cause: The required k10.kasten.io/is-snapshot-class: "true" annotation is missing on the VolumeSnapshotClass corresponding to the StorageClass used by your VM disks. Kasten requires this to identify a valid snapshot class.
Solution: Ensure the relevant VolumeSnapshotClass is correctly annotated as detailed in the Configure storage for Kasten step above.
SnapshotClass Annotation Missing
Problem: Export procedure fails with volume's storage class does not support block mode export.
Cause: The required k10.kasten.io/sc-supports-block-mode-exports: 'true' annotation is missing on the SnapshotClass corresponding to the StorageClass used by your VM disks. Kasten requires this to identify a valid snapshot class.
Solution: Ensure the relevant SnapshotClass is correctly annotated as detailed in the Configure storage for Kasten step above.
Summary
In this learning path, we have walked through a straightforward procedure for performing Snapshot and Restore operations for a virtual machine workload on Red Hat OpenShift using Veeam Kasten K10.
While this guide focused on a simple VM backup, Kasten K10 offers a much broader range of capabilities:
- Full Backups: With an S3-compatible object storage bucket configured, you can extend Kasten's functionality to perform full backups, enabling long-term retention and disaster recovery to different clusters or regions.
- Transforms: Kasten's powerful integrated transform engine allows you to modify application configurations (e.g., change StorageClass, add/remove annotations, adjust replica counts) during a restore operation, facilitating agile application mobility, disaster recovery, and re-platforming.
- Blueprints: Veeam Kasten uses Kanister, an open-source framework, to perform application-level data management on Kubernetes. Kanister Blueprints define application-specific operations (like quiescing a database before a snapshot) to ensure application-consistent data protection.
The entire procedure demonstrated, from Kasten installation to snapshot policy creation and restore, involves Kubernetes Custom Resources (CRs). This inherent characteristic of OpenShift and Kasten means that the entire data protection lifecycle can be fully automated and managed via GitOps principles, ensuring consistency, version control, and auditability.
For a deeper dive into the architectural considerations and best practices for deploying Veeam Kasten with Red Hat OpenShift Virtualization, you can refer to the Veeam Kasten and Red Hat OpenShift Virtualization Reference Architecture.
Ready to learn more?
If you're ready to learn more about Red Hat OpenShift Virtualization, check out these resources: