Page
High-level architecture and Podman AI Lab
Podman AI Lab is a great way to get started with running and testing LLMs locally. This section will show you how you can use Services, Playgrounds, and Recipe catalogs in Podman AI Lab.
In order to get full benefit from taking this lesson, you need to:
- Install Podman Desktop and Podman AI Lab extension: follow the installation instructions for Podman Desktop and the Podman AI Lab extension in the article Podman AI Lab - Getting Started. This article also gives a great overview of the features in Podman AI Lab.
In this lesson, you will:
- Download, run, and test LLMs in Podman AI Lab.
- Find out how easy it is to start a chatbot recipe in Podman AI Lab with the downloaded model.
High-level architecture
Figure 1 depicts the transition from Podman AI Lab to OpenShift AI.

The workflow from local LLM to OpenShift AI is as follows:
- An LLM is downloaded through Podman AI Lab.
- A chatbot recipe is started in Podman AI Lab with the downloaded model.
- The chatbot recipe code from Podman AI Lab is updated in VS Code with LangChain to connect to the Elasticsearch vector database and OpenShift AI model serving inference endpoint.
- An ingestion notebook is run in OpenShift AI to add data to the Elasticsearch vector database.
- The LLM downloaded from Podman AI Lab is deployed to OpenShift AI on a custom serving runtime.
- The updated chatbot with LangChain is built as a container and deployed to OpenShift.
Download the model
We will be downloading and using TheBloke/Mistral-7B-Instruct-v0.2-GGUF. This model is a quantized (smaller) version of the full Mistral-7B-Instruct-v0.2. The smaller model will allow us to run inferencing on CPUs if GPUs are not an option.
Go to the AI Lab extension and select Catalog under Models (Figure 2).
Figure 2: Select Catalog. If you haven't already, download the TheBloke/Mistral-7B-Instruct-v0.2-GGUF model (Figure 3). The model is around 4GB so it might take some time.
Figure 3: Download Model. Podman AI Lab allows you to get started quickly with downloaded models through Services, Playgrounds, and the Recipes Catalog.
The Services section allows you to create a model service endpoint for models you've downloaded. Client code is provided (cURL by default) in multiple formats to get you started quickly with sending in requests to the model service endpoint. See Figure 4.
Figure 4: Podman AI Lab Services. The Playgrounds area allows you to define system prompts and experiment with different settings like temperature, max tokens, and top-p, as shown in Figure 5.
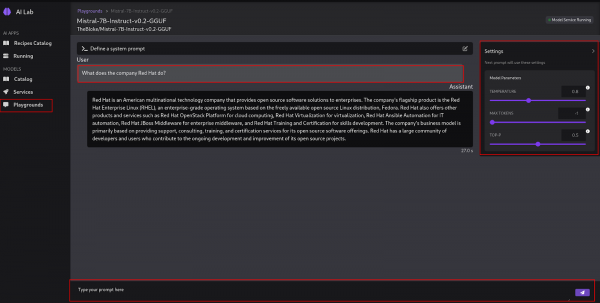
Figure 5: Podman AI Lab Playgrounds. The Recipes Catalog contains demo applications for natural language processing (NLP), computer vision, and audio. We'll be using the ChatBot recipe demo code in this example.
Create the Chatbot: make sure to select TheBloke/Mistral-7B-Instruct-v0.2-GGUF as your model and then click the Start AI App button (Figure 6).

Figure 6: Start chatbot After the chatbot has started, open it up to test it out (Figure 7).
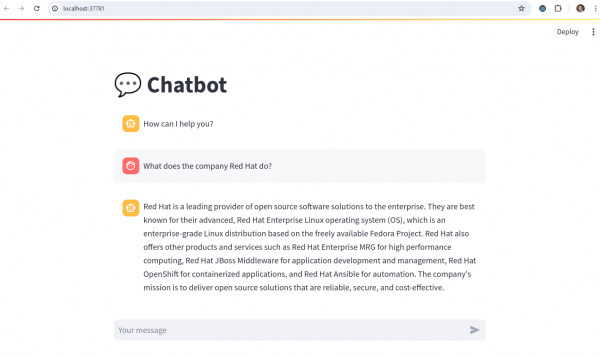
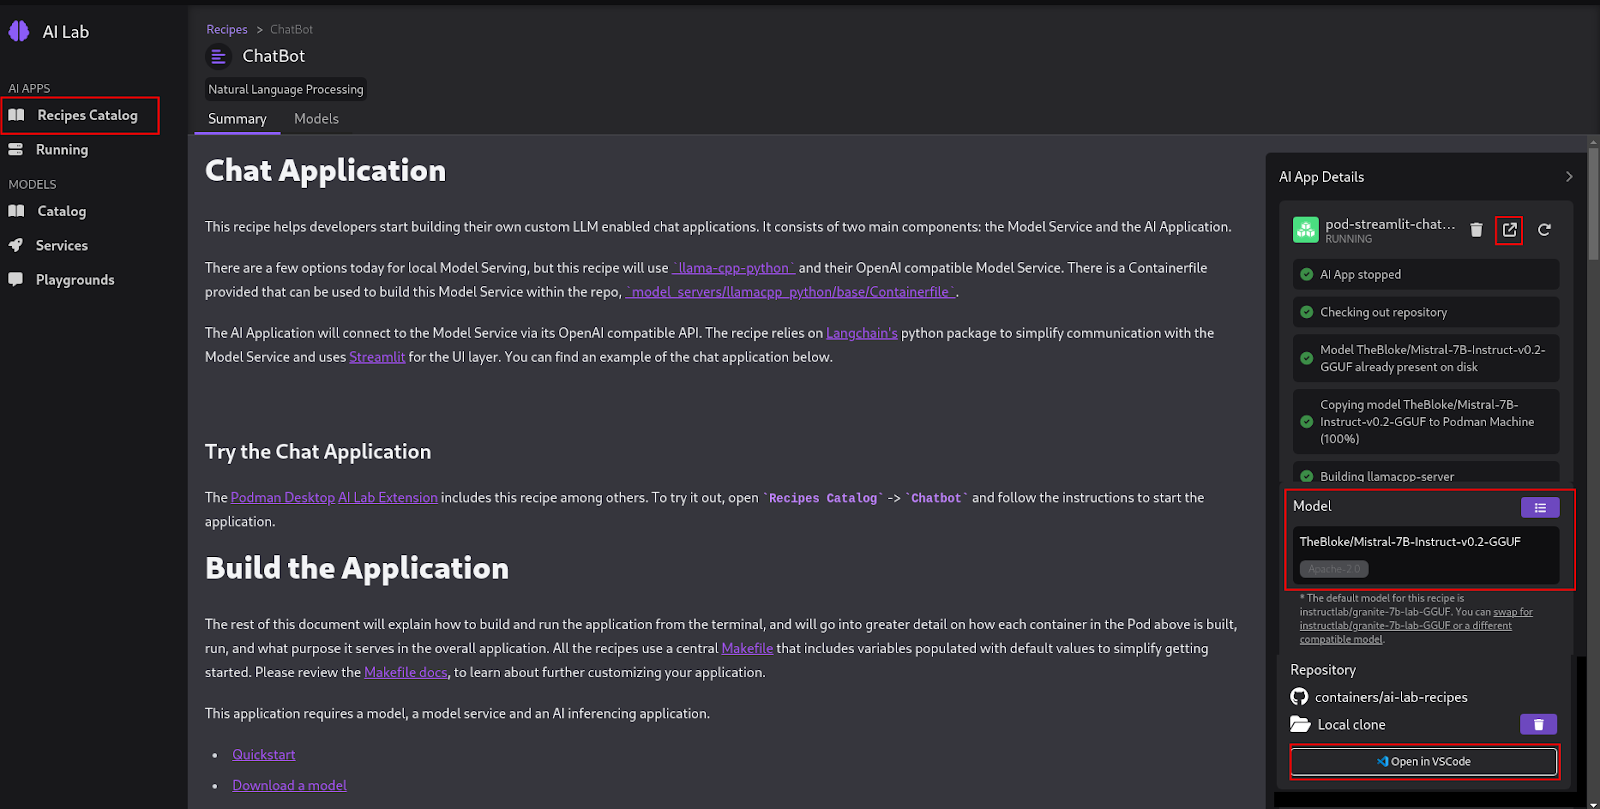
Figure 7: Chatbot UI. At the bottom of the AI App Details section, you'll see an Open in VSCode button (Figure 8). Clicking that will open all of the code that is running your chatbot. Later, we'll modify that code to connect Langchain, TheBloke/Mistral-7B-Instruct-v0.2-GGUF model, and the Elasticsearch vector database.
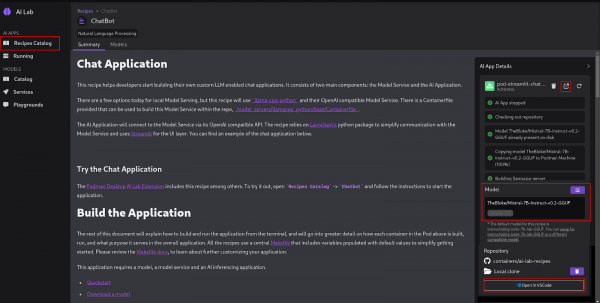
Figure 8: Podman AI Chatbot Recipe.


You’ve now installed Podman Desktop, Podman AI Lab, and installed and run an LLM locally. In the next section, you’ll install OpenShift AI and Elasticsearch vector database. You’ll then ingest some data into the vector database.