Installing Node.js on Red Hat Enterprise Linux 8/9
This post is going to show how to install the latest Long Term Support(LTS) version of Node.js on Red Hat Enterprise Linux(RHEL). The Node.js team at Red Hat recommends using the most recent LTS version of Node.js when possible. At the time of this writing Node.js 20 is the latest LTS, but these instructions will apply to any supported version on both RHEL 8 and RHEL 9.
It should also be noted that you must be a privileged user on the machine you are installing on.
Enable the Node.js module
The first thing that we need to do is enable the module stream for the latest Node.js LTS version, in our case Node.js 20. This is done with the following command
dnf module enable nodejs:20
It is also possible to get a list of the available module streams for Node.js using the following command
dnf module list nodejsYou will see something similar to the below output:
nodejs               18         common [d], development, minimal, s2i Javascript runtime

nodejs               20         common [d], development, minimal, s2i Javascript runtime
Install Node.js
Now that we’ve enabled the module stream we want, it is time to actually install Node.js. This is simply done with the following command:
dnf install nodejsThe screenshot below shows what packages will be installed. You should see something similar
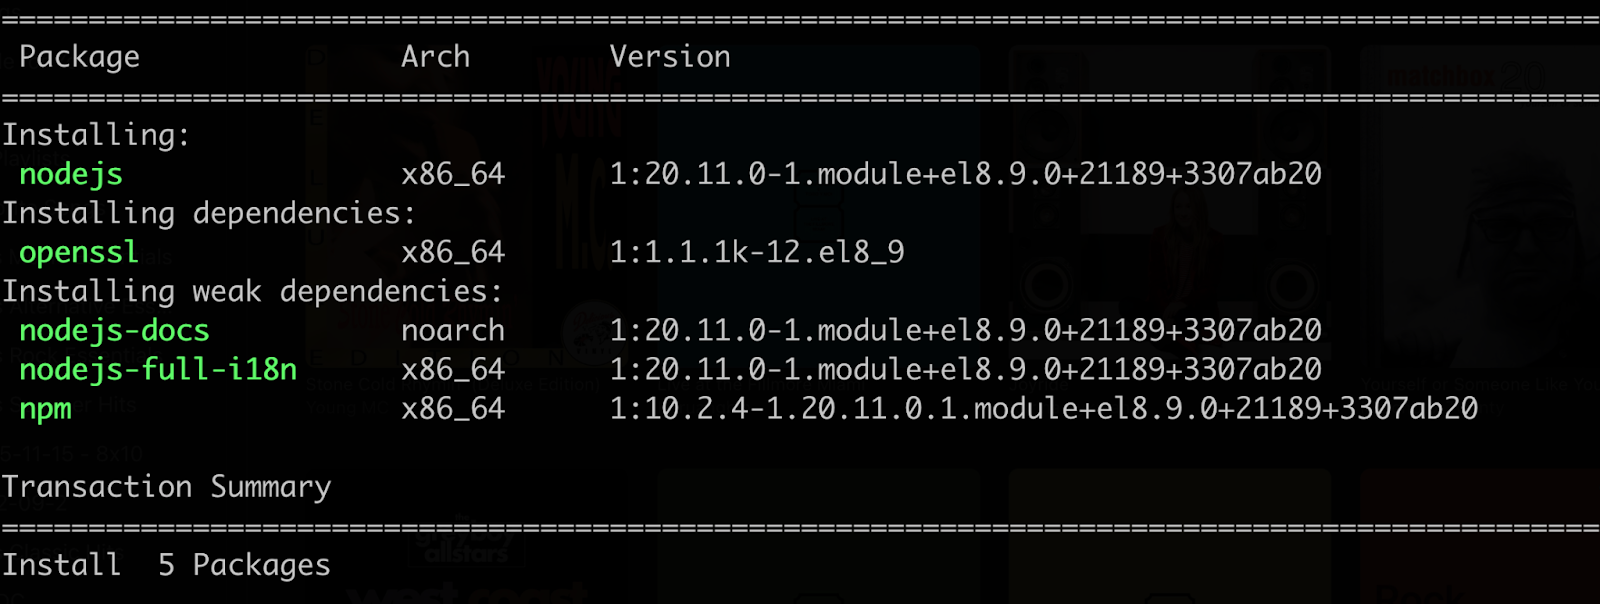
After the installation completes, you can check that Node.js is installed by using the node version command. It should return something similar:
node --version


v20.11.0
It should also be noted that the Node.js installation comes with some weak dependencies, such as docs. To skip installing these optional packages, you can use this command:
dnf install nodejs --setopt=install_weak_deps=FalseInstall a Different Node.js Module Profile
If we take a look at the output from the module list command from above, we notice that there is some extra output alongside the Node.js version:
nodejs 20 common [d], development, minimal, s2i Javascript runtimeThese values are different module profiles that can be installed. By default the common profile is installed, but if you needed to also install all the development tools for building and compiling native add-ons, you might choose the development profile. This other profile can be installed with the following command:
dnf module install nodejs/development For completeness, the default install command that we used earlier in the post, could also be written this way:
dnf module install nodejs/commonExamples
Now that the Node.js runtime is installed, let's create a couple of examples to test that things are working.
This first is a very simple application that outputs the Node.js version using console.log .
Using a text editor such as vi, nano, or gedit create a file named hello.js with the following content:
console.log('Hello, From Node ' + process.version);Save the file and then run it with the node command:
node ./hello.js

Hello, From Node v20.11.0
The next step is to try a slightly larger Node.js example that implements a tiny web server. Using your preferred text editor, create a file named hello-http.js with the following content:
const http = require('node:http');
const hostname = '127.0.0.1';
const port = 3000;

const server = http.createServer((req, res) => {
  res.statusCode = 200;
  res.setHeader('Content-Type', 'text/plain');
  res.end('Hello World\n');
});

server.listen(port, hostname, () => {
  console.log(`Server running at http://${hostname}:${port}/`);
});
Again, save the file, exit the editor and run the file with the node command.
node ./hello-http.js


Server running at http://127.0.0.1:3000/
You can either use curl or a browser to access the server at http://127.0.0.1:3000
Learn More
If you want to learn more about what Red Hat is up to on the Node.js front, check out our Node.js page here.
Last updated: April 13, 2026