In my previous article, Run Red Hat Enterprise Linux 8 in a container on RHEL 7, I showed how to start developing with the latest versions of languages, databases, and web servers available with Red Hat Enterprise Linux 8 even if you are still running RHEL 7. In this article, I’ll build on that base to show how to get started with Django 2 using the current RHEL 8 application stream versions of Python 3 and PostgreSQL 10.
From my perspective, using Red Hat Enterprise Linux 8 application streams in containers is preferable to using software collections on RHEL 7. While you need to get comfortable with containers, all of the software installs in the locations you’d expect. There is no need to use scl commands to manage the selected software version. Instead, each container gets an isolated user space. You don’t have to worry about conflicting versions.
In this article, I show you how to create a Red Hat Enterprise Linux 8 Django container with Buildah, and run it with Podman. The code is stored on your local machine and mapped into the container when it runs. You can edit the code on your local machine as you would any other application. Because it is mapped via a volume mount, the changes you make to the code are immediately visible from the container, which is convenient for dynamic languages that don’t need to be compiled.
While this method isn’t the way you’d want to do things for production, you get essentially the same development inner loop you’d have developing locally without containers. The article also shows how you can use Buildah to build an image with your completed application that you could use for production. Additionally, you’ll set up the RHEL 8 PostgreSQL application stream in a container that is managed by systemd. You’ll be able to use systemctl to start and stop the container just as you would for a non-container installation.
Prepping Red Hat Enterprise Linux 7
Before we create our Red Hat Enterprise Linux 8 container on our RHEL 7 system, we need to ensure that we have the necessary software installed, and then either select an example Django app or create our own. Let's walk through this preparation phase.
Installing Podman and Buildah on RHEL 7
First, we need to install Podman, which is in the Red Hat Enterprise Linux 7 extras repo. The extras repo isn’t enabled by default. It is recommended that developers also enable the rhscl (Red Hat Software Collections), devtools, and optional repos. To enable all of these at once:
$ sudo subscription-manager repos --enable rhel-7-server-extras-rpms \
    --enable rhel-7-server-optional-rpms \
    --enable rhel-server-rhscl-7-rpms \
    --enable rhel-7-server-devtools-rpms
Now install Podman and Buildah:
$ sudo yum install podman buildah
Tip: If sudo isn’t set up on your system, see How to enable sudo on Red Hat Enterprise Linux.
Later, we’ll run containers with systemd. If SELinux is enabled on your system (it is by default), you must turn on the container_manage_cgroup boolean to run containers with systemd:
$ sudo setsebool -P container_manage_cgroup on
For more information, see the container running systemd solution.
Note: The Red Hat ID that was created when you joined Red Hat Developer gives you access to content on the Red Hat Customer Portal.
Setting up a Django example app
We need some Django code to run. We’ll use the Polls app from the Writing your first Django app tutorial. Rather than recreating all of the files manually, we’ll pull the code from GitHub. The Django project doesn’t make the example app available for an easy download, but a few users have created repos containing it. I picked monim67/django-polls because the code for each chapter of the tutorial is tagged in the repo.
Run these commands to create a source directory:
$ sudo mkdir /opt/src
$ sudo chown $USER:$USER /opt/src
$ cd /opt/src
$ git clone https://github.com/monim67/django-polls.git
$ cd polls-app
$ git tag  # see what tags are available
$ git checkout d2.1t7 # optionally checkout the code for the last chapter
We now have an example Django app at /opt/src/django-polls.
Creating your Red Hat Enterprise Linux 8 container image
Now that our Red Hat Enterprise Linux 7 prep is complete, we can create our custom RHEL 8 container image. Using an existing Red Hat Universal Base Image (UBI) speeds up this process.
Understanding Red Hat Universal Base Images
Universal Base Images are universal base images from Red Hat that you can use as a base for your container images. From Mike Guerette’s article, "Red Hat Universal Base Image: How it works in 3 minutes or less:"
“Red Hat Universal Base Images (UBI) are OCI-compliant container base operating system images with complementary runtime languages and packages that are freely redistributable. Like previous RHEL base images, they are built from portions of Red Hat Enterprise Linux. UBI images can be obtained from the Red Hat Container Catalog and be built and deployed anywhere.
"And, you don’t need to be a Red Hat customer to use or redistribute them. Really.”
With the release of Red Hat Enterprise Linux 8 in May, Red Hat announced that all RHEL 8 base images would be available under the new Universal Base Image End User License Agreement (EULA). This fact means that you can build and redistribute container images that use Red Hat’s UBI images as your base, instead of having to switch to images based on other distributions, like Alpine. In other words, you won’t have to switch from using yum to using apt-get when building containers.
There are three base images for RHEL 8. The standard one is called ubi, or more precisely, ubi8/ubi. This is the image used above and is the one you might use most often. The other two are minimal containers. They have very little supporting software in them for when image size is a high priority and a multi-service image that allows you to run multiple processes inside the container managed by systemd.
Note: There are also UBI images for RHEL 7 under ubi7 if you want to build and distribute containers running on an RHEL 7 image. For this article, we only use the ubi8 images.
If you are just starting out with containers, you might not need to delve into UBI details right now. Just use the ubi8 images to build containers based off of RHEL 8. However, you need to understand UBI details when you start distributing container images or have questions about support. For more information, see the references at the end of this article.
Adding Python 3.6 and Django to a RHEL 8 container (manually)
Now we need Python 3.6 and Django. We’ll set up a container with the dependencies manually installed and then run the app to see how it’s done.
Let's use the Red Hat Enterprise Linux 8 Universal Base Image (UBI). But first, log into the new Red Hat Container Registry, which supports authentication, registry.redhat.io. If you don’t log in when you try to pull an image, you’ll get a verbose error message containing the message:
...unable to retrieve auth token: invalid username/password
Use your Red Hat Developer username and password to log into the registry:
$ sudo podman login registry.redhat.io
Note: Podman was designed so that it can run without root. However, the support for that feature isn’t there with RHEL 7.6. For more information, see Scott McCarty’s A preview of running containers without root in RHEL 7.6.
Now, run the container and make the source directory (/opt/src) available inside the container, then expose port 8000 so you can connect to the Django app with a browser on the host system:
$ sudo podman run -it -v /opt/src:/opt/src:Z -p 8000:8000 registry.redhat.io/ubi8/ubi /bin/bash
Inside the container, see what application streams are available with Red Hat Enterprise Linux 8:
# yum module list
Note: You might notice an extra group of application streams labeled "Universal Base Image."
Next, install Python 3.6:
# yum -y module install python36
Python 3.6 is now installed in our container and is in our path as python3, not python. If you want to know why, see Petr Viktorin’s article, Python in RHEL 8.
Next use pip to install Django:
# pip3 install django
You’ll get a warning about running pip as root. Running pip as root on a real system is generally a bad idea. However, we’re running in a dedicated container that is isolated and disposable, so we can do whatever we want with files in/usr.
Let’s check where the django-admin command-line interface (CLI) got installed:
# which django-admin
The pip command installed the CLI into /usr/local/bin. Now, let’s run the example app inside the container:
# cd /opt/src/django-polls
# python3 manage.py runserver 0:8000
Note: When you run the app, you might see an error message about unapplied migrations. You can ignore this message if you used the above repo, which included a pre-populated SQLite database. If you used a different source or need to create the database, see "Running DB migrations and Django admin inside the container" below.
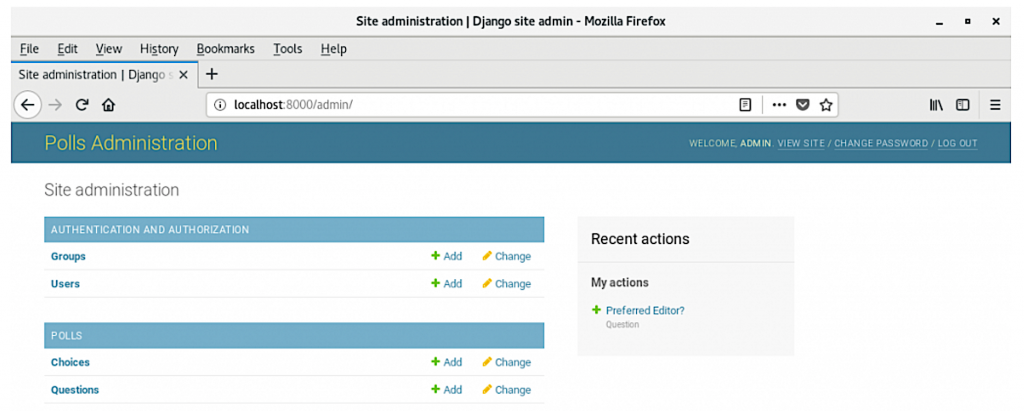
Using a browser on the host system, go to http://localhost:8000/admin/. The username and password for the SQLite database that came from the GitHub repo is admin and admin. After logging in, you should get a screen like this:
 Now, you’ve got a container, configured by hand, that will run Django using Red Hat Enterprise Linux 8’s Python 3.6 application stream on your RHEL 7 system. You could treat this container like a pet, and use
 podman restart -l and podman attach -l when you want to run it again, as long as you don’t delete it. We didn’t name the container, but the -l conveniently selects the last running container. Although this information is handy to know for testing, it’s rarely reproducible.
An additional problem with this container is that it runs as root in order to be able to install software. Any files created by the container in /opt/src will be owned by root.
Creating a Django container image with Buildah
To make things easier, we’ll create a container image that has Django installed, and will start the Django app any time the container is created. The container won’t have a copy of the app, we’ll still map it into the container from the host system. The code will be stored on your local machine where you can edit it as you would any other application source. Since it is mapped via a volume mount, the changes you make to the code will be immediately visible inside the container.
When creating images with Buildah, you can use Dockerfiles or Buildah command lines. For this article, we’ll use the Dockerfile approach since other tutorials often use this method.
Since we're working with files that are shared between your host system and the container, we’ll run the container using the same numeric user ID (UID) as your regular account. When inside the container, any files created in the source directory will be owned by your host system user ID. Find out your UID with the id command:
$ id
Make a note of the number after UID= and GID= at the very start of the line. On my system, my UID and GID are both 1000. In the Dockerfile and other examples below, change the USER line to match your UID:GID.
In /opt/src/django-polls, create Dockerfile with the following content:
FROM registry.redhat.io/ubi8/python-36

RUN pip3 install django gunicorn psycopg2

# This is primarily a reminder that we need access to port 8000
EXPOSE 8000

# Change this to UID that matches your username on the host
# Note: RUN commands before this line will execute as root in the container
# RUN commands after will execute under this non-privileged UID
USER 1000:1000

# Default cmd when container is started
# Default directory was already set by Python container to /opt/app-root/src
# Get Django to listen on all interfaces so we can connect from outside the container
CMD python3 manage.py runserver 0:8000
A few notes on the Dockerfile. Instead of installing Python 3.6, I used a UBI image from Red Hat that already had Python 3.6 on top of the UBI 8 image. During the build, pip will run inside the container as root because it is above the USER line that changes to a non-privileged user.
Next, build the Django container:
$ sudo buildah bud -t myorg/mydjangoapp .
(Don’t forget the trailing . )
Now, run the Django container, which should start the Polls app:
$ sudo podman run --rm -it -p 8000:8000 -v /opt/src/django-polls:/opt/app-root/src:Z myorg/mydjangoapp
The Django polls app should now be running, which you can verify by using a browser on the host system and going to http://localhost:8000/admin.
You can now edit the code in /opt/src/django-polls like you would any regular source code. When you need to restart, CTRL+C the container. Note the --rm in the run command, which will automatically remove the container when it exits. To start the container again, use the above podman run command again, which will create a fresh container.
Setting up your database
Now to set up a persistent, full-featured database that won't vanish when you shut off the container, and then connect it to Django.
Running DB migrations and Django admin inside the container
Since the environment to run Django exists in the container, you’ll need to run any Django admin commands inside it. You can either run a single command or launch a shell inside the container. To apply any DB migrations:
$ sudo podman run --rm -it -p 8000:8000 -v /opt/src/django-polls:/opt/app-root/src:Z myorg/mydjangoapp python3 manage.py migrate
Or, to work interactively inside the container, start a shell:
$ sudo podman run --rm -it -p 8000:8000 -v /opt/src/django-polls:/opt/app-root/src:Z myorg/mydjangoapp /bin/bash
Note: The shell prompt is set to (app-root) by the Python base image.
If you wanted to initialize a fresh database:
(app-root) python3 rm db.sqlite3
(app-root) python3 manage.py migrate
(app-root) python3 manage.py createsuperuser
You can stay in the shell and run the app with:
(app-root) python3 manage.py runserver 0:8000
Ensuring database persistence
By default, the Django polls app uses an SQLite database in the file db.sqlite3, which is in the django-polls directory along with the source code. Because we’ve set up the container to map in a directory from the host, the database will persist between container runs along with our source code.
Because containers are ephemeral, if the database was stored outside of the /opt/app-root/src directory, it wouldn’t persist between runs of the container. You could fix this issue by applying another volume mount -v to the podman run command.
Instead of using SQLite, you might want to use a full database server that runs separately from the Django app container.
Running PostgreSQL 10 in a container
In this section, we’ll get the Red Hat Enterprise Linux 8 PostgreSQL 10 application stream running in a container managed by systemd on the host system. Searching the Red Hat Container Catalog, we can look for PostgreSQL images. At the time this article was written, there wasn’t a PostgreSQL image based on UBI 8 in the catalog, but there was one based on RHEL 8. We’ll pull the image before running to make it easier to inspect:
$ sudo podman pull registry.redhat.io/rhel8/postgresql-10
Since containers are designed to be ephemeral, we need to set up permanent storage for the database. We’ll set up a directory on the host’s system and map it into the container. First, inspect the image to find out the user ID we’ll need for the directories. Alternatively, we could also get information about this image from its Red Hat Container Catalog page:
$ sudo podman inspect postgresql-10 | grep -A 1 User
Now that we’ve got the User ID the container will run under, create a directory on the host, give that User ID ownership, and set the context for SELinux:
$ sudo mkdir -p /opt/dbdata/django-polls-db
$ sudo chown 26:26 /opt/dbdata/django-polls-db
$ sudo setfacl -m u:26:-wx /opt/dbdata/django-polls-db
$ sudo semanage fcontext -a -t container_file_t /opt/dbdata/django-polls-db
$ sudo restorecon -v /opt/dbdata/django-polls-db
Let’s test PostgreSQL by hand:
$ sudo podman run -it --name django-polls-pgsql -e POSTGRESQL_USER=polls -e POSTGRESQL_PASSWORD=mysecret -e POSTGRESQL_DATABASE=django-polls -p 5432:5432 -v /opt/dbdata/django-polls-db:/var/lib/pgsql/data:Z registry.redhat.io/rhel8/postgresql-10
You should see output that looks like this:
Success. You can now start the database server using:

pg_ctl -D /var/lib/pgsql/data/userdata -l logfile start

waiting for server to start....
2019-08-18 21:10:08.545 UTC [31] LOG: listening on Unix socket "/tmp/.s.PGSQL.5432"
2019-08-18 21:10:08.554 UTC [31] LOG: redirecting log output to logging collector process
2019-08-18 21:10:08.554 UTC [31] HINT: Future log output will appear in directory "log".
done
server started
/var/run/postgresql:5432 - accepting connections
=> sourcing /usr/share/container-scripts/postgresql/start/set_passwords.sh ...
ALTER ROLE
waiting for server to shut down....
server stopped
Starting server...
2019-08-18 21:10:09.136 UTC [1] LOG: listening on IPv4 address "0.0.0.0", port 5432
2019-08-18 21:10:09.136 UTC [1] LOG: listening on IPv6 address "::", port 5432
2019-08-18 21:10:09.139 UTC [1] LOG: listening on Unix socket "/var/run/postgresql/.s.PGSQL.5432"
2019-08-18 21:10:09.142 UTC [1] LOG: listening on Unix socket "/tmp/.s.PGSQL.5432"
2019-08-18 21:10:09.160 UTC [1] LOG: redirecting log output to logging collector process
2019-08-18 21:10:09.160 UTC [1] HINT: Future log output will appear in directory "log".
PostgreSQL started correctly, so you can CTRL+C. Then clean up by removing the container:
$ sudo podman rm django-polls-pgsql
Next, create a systemd unit file to manage PostgreSQL. As root, use an editor or cat > to create /etc/systemd/system/django-polls-pgsql.service with the following contents:
[Unit]
Description=Django Polls PostgreSQL Database
After=network.target

[Service]
Type=simple
TimeoutStartSec=5m
ExecStartPre=-/usr/bin/podman rm "django-polls-pgsql"

ExecStart=/usr/bin/podman run --name django-polls-pgsql -e POSTGRESQL_USER=polls -e POSTGRESQL_PASSWORD=mysecret -e POSTGRESQL_DATABASE=django-polls -p 5432:5432 -v /opt/dbdata/django-polls-db:/var/lib/pgsql/data registry.redhat.io/rhel8/postgresql-10

ExecReload=-/usr/bin/podman stop "django-polls-pgsql"
ExecReload=-/usr/bin/podman rm "django-polls-pgsql"
ExecStop=-/usr/bin/podman stop "django-polls-pgsql"
Restart=always
RestartSec=30

[Install]
WantedBy=multi-user.target
Next, tell systemd to reload, start the PostgreSQL service, and then check the output:
$ sudo systemctl daemon-reload
$ sudo systemctl start django-polls-pgsql
$ sudo systemctl status django-polls-pgsql
You can check the container logs with:
$ sudo podman logs django-polls-pgsql
The PostgreSQL port, 5432, is exposed to the host system. So if you have the client installed, you should be able to connect to the database.
There are a couple of things to note about the podman run command inside the systemd unit file. Don’t use a -d option to detach from the running container like you would from the command line. Since systemd is managing the process, podman run should not exit until the container dies. If you have a -d, systemd will think the container has failed and will restart it.
The --rm option to podman run that automatically removed the containers when it exits isn’t used. Instead, systemd is configured to run a podman rm command just before starting the container. This gives you the opportunity to check the state of files inside the stopped container after it exits.
Configuring Django to use PostgreSQL
You need to change the settings for the Django site that contains the Polls app to use the PostgreSQL database instead of SQLite. Edit /opt/src/django-polls/mysite/settings.py and change the DATABASES section to:
DATABASES = {
  'default': {
    # 'ENGINE': 'django.db.backends.sqlite3',
    # 'NAME': os.path.join(BASE_DIR, 'db.sqlite3'),
    'ENGINE': 'django.db.backends.postgresql_psycopg2',
    'NAME': 'django-polls',
    'USER': 'polls',
    'PASSWORD': 'mysecret',
    'HOST': 'localhost',
  }
}
Using Buildah to create an image with your Django app
After you’ve developed your app, you can use Buildah to create a distributable container image with your Django app. We’ll use Buildah command lines instead of a Dockerfile. This method is much more flexible for complex builds and automation. You can use shell scripts or whatever tools you use for your build environment:
#!/bin/sh
# Build our Django app and all the dependencies into a container image
# Note: OOTB on RHEL 7.6 this needs to be run as root.
MYIMAGE=myorg/mydjangoapp
USERID=1000

IMAGEID=$(buildah from ubi8/python-36)
buildah run $IMAGEID pip3 install django gunicorn psycopg2

# any build steps above this line run as root
# after this build steps run as $USERID
buildah config --user $USERID:$USERID $IMAGEID

buildah copy $IMAGEID . /opt/app-root/src

# Any other prep steps go here. you could apply migrations, etc.
buildah config --cmd 'python3 manage.py runserver 0:8000' $IMAGEID

buildah commit $IMAGEID $MYIMAGE
Now, make app-image-buils.sh executable, then build the image:
$ chmod +x app-image-build.sh
$ sudo ./app-image-build.sh
Now you can run and test the new image:
$ sudo podman run --rm -it --net host myorg/mydjangoapp
The run command no longer needs the volume mount, because the code is now inside the container, and the data is managed by the PostgreSQL container’s volume.
When you are ready, you can distribute your application to others by pushing it to a container registry like Red Hat’s Quay.io.
Managing your Django app with systemd
You can manage your new Django app with systemd so it will start on system boot. As root, create the systemd unit file /etc/systemd/system/django-polls-app.service with the following contents:
[Unit]
Description=Django Polls App

After=django-polls-pgsql.service

[Service]
Type=simple
TimeoutStartSec=30s
ExecStartPre=-/usr/bin/podman rm "mydjangoapp"

ExecStart=/usr/bin/podman run --name mydjangoapp --net host myorg/mydjangoapp

ExecReload=-/usr/bin/podman stop "myorg/mydjangoapp"
ExecReload=-/usr/bin/podman rm "myorg/mydjangoapp"
ExecStop=-/usr/bin/podman stop "myorg/mydjangoapp"
Restart=always
RestartSec=30

[Install]
WantedBy=multi-user.target
Tell systemd to reload, then start the app.
$ sudo systemctl daemon-reload
$ sudo systemctl start django-polls-app
Next steps
By now, you should see that it is pretty easy to get the software components you need running in containers so you can focus on development. It shouldn’t feel too different from developing without containers. Hopefully, you can see how to build on these instructions for your own apps.
You should check out what other UBI 8 images are available for you to use in the Red Hat Container Catalog. If the language, runtime, or server isn't available as a UBI image, you can build your own using the UBI 8 base image. Then, you can add the application streams and other RPMs you need with yum commands in a Dockerfile, or with buildah run.
The setup in this article has a number of drawbacks as it was intended to be a quick and easy to digest demo. There are many ways one could improve the setup. For example, the Django container with the packaged app is configured to share the host’s network with --net host, which made it simple for the Django process to connect to the database via localhost. While this setup is quick and easy for development, you don’t get the network isolation that containers offer.
One of the ways the network configuration could be improved is to use Podman’s pod capabilities to put the web and database containers in the same pod where they share namespaces. See Brent Baude’s article Podman: Managing pods and containers in a local container runtime.
More information
Related articles:
- Run Red Hat Enterprise Linux 8 in a container on RHEL 7 (Covers PHP 7.2, MariaDB, and WordPress running in containers.)
- Setting up a Django application on RHEL 8 Beta
Cheat sheets:
Podman and Buildah:
- Podman and Buildah for Docker Users
- Managing containerized system services with podman
- Podman: Managing pods and containers in a local container runtime
- Getting Started with Buildah
- Building, Running, and Managing Containers - RHEL 8 Documentation
- Getting Started with Containers - RHEL 7 Documentation
UBI:
Last updated: April 3, 2023