In this blog post, we'll set up Microsoft SQL Server on Red Hat OpenShift. We'll use SQL Server to store data for a simple ASP.NET Core application running in a container deployed on OpenShift that manages a list of contacts. When we have that set up, we'll use SQL Operation Studio to connect to the server running on OpenShift from our developer machine.
Installing and configuring CDK
To set this up, we'll use Red Hat Container Development Kit (CDK). CDK provides you with all the tools to develop container-based applications. Using CDK, you’ll have OpenShift (and Kubernetes) running in a VM that includes a single-node OpenShift cluster on your Windows, macOS, or Linux machine.
To use CDK, you need a no-cost subscription. When you download CDK from developers.redhat.com, a no-cost developer subscription will be automatically added to your account. Follow these instructions to install CDK.
Next, we'll update the .NET Core versions available on our minishift instance. (If you haven't done so already, start minishift.) We'll do this in the openshift project, which will make .NET Core available in all our OpenShift projects. To do this, log in as the administrator and then switch to the openshift project. If the oc binary is not on your path, perform the steps described by minishift oc-env.
oc login -u system:admin
oc project openshift
Now that we've switched to the openshift project, update your .NET Core versions by following the steps in Install Image Streams.
As the last step, we'll add SQL Server 2017 support (mssql:2017 image) and two templates to facilitate setting up SQL Server and our .NET Core application.
oc create -f https://raw.githubusercontent.com/tmds/dotnet-mssql-ex/master/openshift/imagestreams.json
oc create -f https://raw.githubusercontent.com/tmds/dotnet-mssql-ex/master/openshift/template.json
oc create -f https://raw.githubusercontent.com/tmds/dotnet-mssql-ex/master/app/RazorPagesContacts/dotnet-template.json
Now we'll switch back to the developer user account:
oc login -u developer
Deploying SQL Server
Open up the OpenShift web UI by running minishift console. If you haven't opened it before, you'll need to accept using the self-signed certificate.
Now log in using developer/developer.
Create a project using the Create Project button at the top right and name the project to mssqldemo.
The UI will switch to the new project and we'll add our SQL Server by clicking Browse Catalog and selecting Microsoft SQL Server. The default values will create a SQL server instance named mssql. You need to accept the EULA by typing Y in the corresponding textbox. Then click Create to deploy SQL Server.
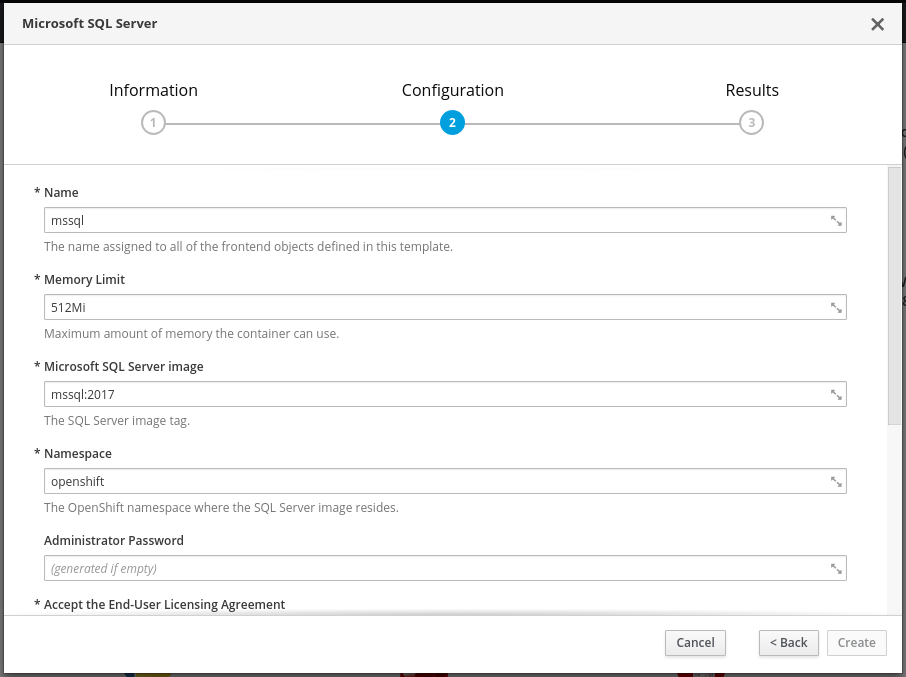
If you move to the project overview using the Overview button on the top left, you'll see the pod that runs our SQL Server. You can click on the 1 pod on the right side, which gives you more info about the pod. Clicking Logs at the top will show you SQL server logging. If you scroll through the log, you'll see we're running SQL Server on Red Hat Enterprise Linux and it is listening for us on port 1433.
As part of our deployment, two interesting resources were created: a secret named mssql-secret, which stores our SQL Server password and a persistent volume claim (PVC) named mssql-pcc, which represents the persistent storage from our database server. You can see these resources under Resources > Secrets and Storage, respectively. Take a look at the secret and the password stored inside.
Using SQL Server from .NET Core
Go back to the Overview. Now on the top right select Add to Project > Browse Catalog. We'll use the .NET Using Microsoft SQL Server template this time. You can use the default parameters. Note that we pass the name of the SQL Server (mssql) and the name of the secret that contains the password (mssql-secret).
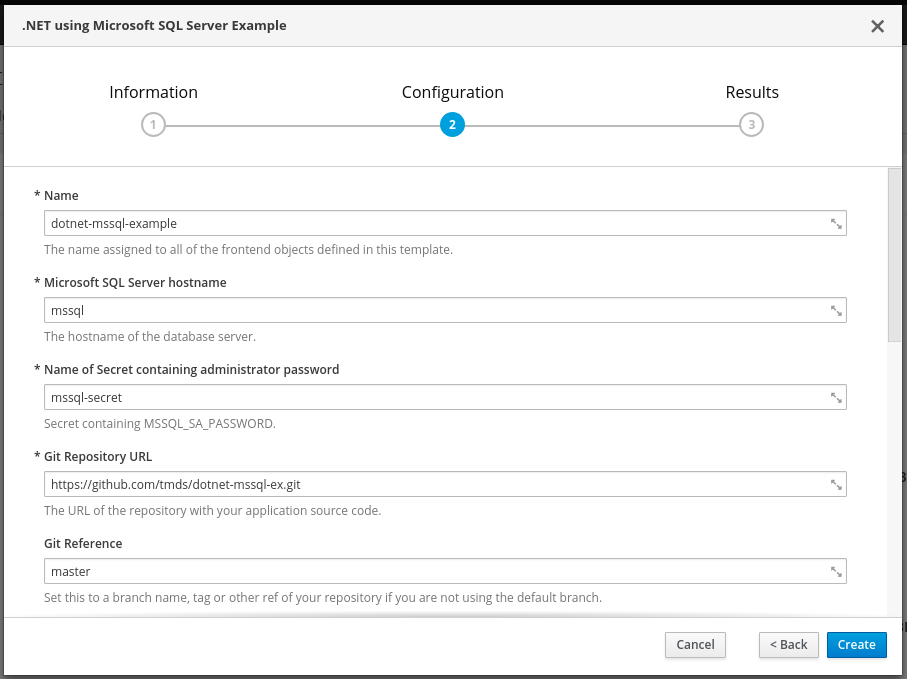
The SQL Server name and secret are passed as environment variables (MSSQL_SERVER and MSSQL_SA_PASSWORD) to the .NET Core application as part of the template. Additionally the template sets DB_PROVIDER to mssql to configure the application to use SQL Server as the back end. You can see this if you take a look at the template.json file.
The code in our application that uses these variables looks like this:
enum DbProvider
{
  Mssql,
  Memory
}

public void ConfigureServices(IServiceCollection services)
{
  DbProvider? dbProvider = Configuration.GetValue<DbProvider?>("DB_PROVIDER");
  if (dbProvider == null && !IsOpenShift)
  {
    dbProvider = DbProvider.Memory;
  }
  switch (dbProvider)
  {
    case DbProvider.Mssql:
      string server = Configuration["MSSQL_SERVER"] ?? "localhost";
      string password = Configuration["MSSQL_SA_PASSWORD"];
      string user = "sa";
      string dbName = "myContacts";
      string connectionString = $@"Server={server};Database={dbName};User Id={user};Password={password};";
      Logger.LogInformation($"Using SQL Server: {server}");
      services.AddDbContext(options => options.UseSqlServer(connectionString));
      break;
    case DbProvider.Memory:
      Logger.LogInformation("Using InMemory database");
      services.AddDbContext(options => options.UseInMemoryDatabase("name"));
      _migrateDatabase = false;
      break;
    default:
      throw new Exception($"Unknown db provider: {dbProvider}");
  }
  services.AddMvc();
}
private static bool IsOpenShift => !string.IsNullOrEmpty(Environment.GetEnvironmentVariable("OPENSHIFT_BUILD_NAME"));
When our application first starts, it will create the database to store our contacts.
This is done using Entity Framework Migrations. The code to create the database is part of our project and was generated using dotnet ef migrations add Initial.
To apply the migrations at startup, our project has the following code:
public void Configure(IApplicationBuilder app)
{
  if (_migrateDatabase)
  {
    MigrateDatabase(app);
  }
  app.UseMvc();
}
private static void MigrateDatabase(IApplicationBuilder app)
{
  using (var serviceScope = app.ApplicationServices
                               .GetRequiredService()
                               .CreateScope())
  {
    using (var context = serviceScope.ServiceProvider.GetService())
    {
      context.Database.Migrate();
    }
  }
}
In the Overview, we can see our application being built and deployed. Once the application pod is up and running, click the URL to open up the website. Use the Create link to add a few names to the database.

Managing SQL Server using SQL Operations Studio
SQL Operations Studio is a cross-platform tool for managing SQL Server. You can find the installation instructions in here.
The SQL Server is accessible only within the OpenShift cluster. To be able to connect to it from our machine, we’ll port-forward to the SQL Server pod.
First, we find out the name of the pod running SQL Server:
$ oc get pod | grep mssql | grep Running
dotnet-mssql-example-1-gmdvf   1/1       Running     0          43m
mssql-1-l7wn8                  1/1       Running     0          1h
The output from the command shows our SQL Server pod is named mssql-1-l7wn8 and our .NET Core application is named dotnet-mssql-example-1-gmdvf.
Now we can set up the port forwarding:
oc port-forward mssql-1-l7wn8 1433:1433
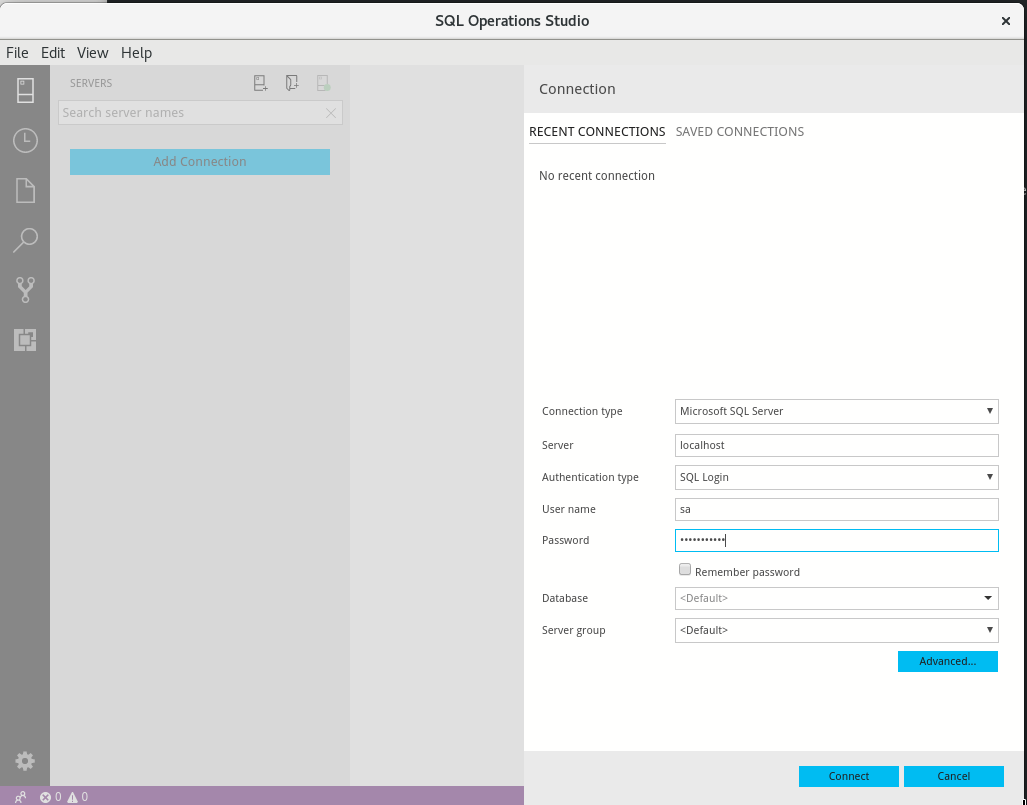
Now open up SQL Operations Studio and add a connection to localhost for user sa with the password from the mssql-secret.
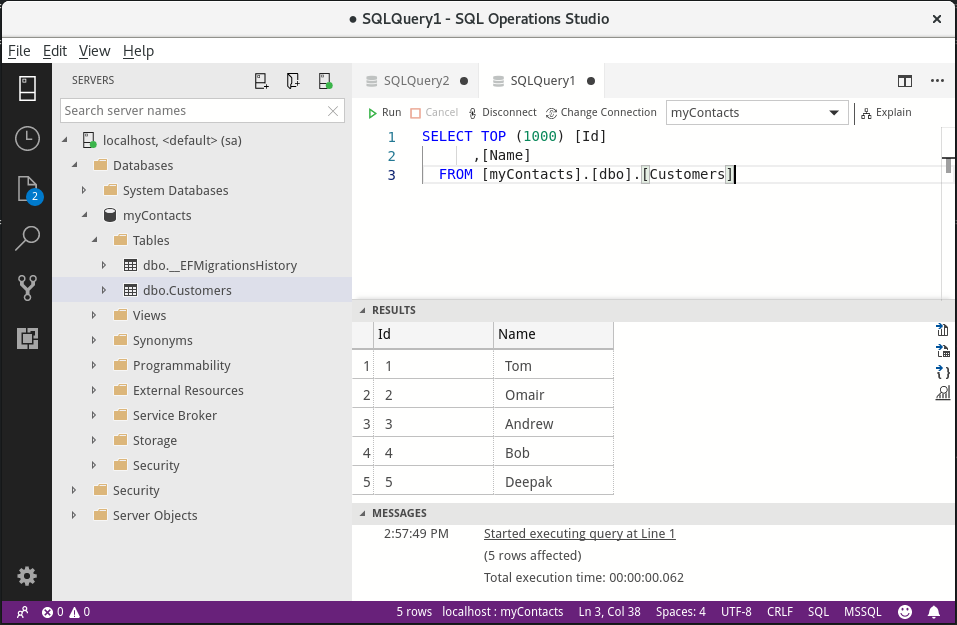
Once we have successfully connected, we can see the databases on the server and their tables. Navigate to the Customers table in the myContacts database.
To see the data in the database, right-click it and click Select top 1000. The query runs, and the data we entered using the ASP.NET Core application shows up in the query results.
Conclusion
In this blog post, you've learned how to deploy Microsoft SQL Server on OpenShift and use it from an ASP.NET Core application running on OpenShift. You've also seen how you can connect to the database server using SQL Operations Studio.
Last updated: November 2, 2023