In this blog, I demonstrate how to containerize and operate Request Tracker (RT), a classic LAMP application.
This article builds on Scott McCarty's post How to move Request Tracker into a Linux container. After the application container is built, I'll provide an example of how to use quadlets to run the container.
Background
I first used Request Tracker at my second university job in 2002. This web application ticked all the necessary boxes for our organization. It ran on Unix and Linux, used a Perl run time, supported customization and, importantly, had an open source support option. I used the application for years at that job and even brought it in house at subsequent jobs when an in-house solution wasn't available.
However, one of the largest problems has always been configuring and maintaining the Perl runtime environment, because RT uses many Perl modules. Some (but not all) modules might be available as Perl packages, which means for the others building and maintaining packages became routine. Installing a large amount of packages from the Comprehensive Perl Archive Network (CPAN) can cause havoc for any other Perl applications co-located on the same server, and cause problems with maintaining system security patches. Containerizing RT is a solution to this issue.
Design
Two runtime containers are used for this implementation. The standard, official MariaDB container provides the database. The RT application itself is based on an official httpd container. Podman quadlets are used to manage the execution of the container images. Persistent database data is stored in /store/db. For RT's persistent storage needs, ticket attachments are stored in /store/attachments, and application configuration files are stored in /store/config and individually attached to the container.
Out of scope elements
The following items are out of scope and should already functional:
- DNS
- Email routing
- Registry access
The following items are not included in this post, but should be considered for a production environment:
- SSL/TLS Configuration
- Integration with external authentication
MariaDB database
RT supports multiple database back ends. MariaDB is used in this example implementation. The MariaDB container is first run by hand to initialize the database, set the root DBA password and verify database access.
| Option | Parameter | Value |
|---|---|---|
| Persistent storage | -v | /store/db/:/var/lib/mysql:Z |
| Port | -p | 3306:3306 |
| MariaDB root dba password | -e | MARIADB_ROOT_PASSWORD=redhat |
| Network | --network | podman |
Here is the command to initialize the database and verify access:
$ podman run -d --rm -p 3306:3306 --name mariadb \
-v /store/db:/var/lib/mysql:Z \
-e MARIADB_ROOT_PASSWORD=redhat \
--network podman docker.io/mariadb:lts-ubi
$ podman ps
CONTAINER ID  IMAGE                              COMMAND     CREATED        STATUS        PORTS                   NAMES
686fb71f3d07  docker.io/library/mariadb:lts-ubi  mariadbd    2 seconds ago  Up 3 seconds  0.0.0.0:3306->3306/tcp  mariadb
$ podman exec -it mariadb mysql -u root -p -h localhost
mysql: Deprecated program name. It will be removed in a future release, use '/usr/bin/mariadb' instead
Enter password:
Welcome to the MariaDB monitor.  Commands end with ; or \g.
Your MariaDB connection id is 3
Server version: 11.8.3-MariaDB MariaDB Server
Copyright (c) 2000, 2018, Oracle, MariaDB Corporation Ab and others.
Type 'help;' or '\h' for help. Type '\c' to clear the current input statement.
MariaDB [(none)]> show databases ;
+--------------------+
| Database           |
+--------------------+
| information_schema |
| mysql              |
| performance_schema |
| sys                |
+--------------------+
4 rows in set (0.000 sec)
MariaDB [(none)]> exit
Bye
Running the database container by hand after initialization:
$ podman run -d --rm -p 3306:3306 --name mariadb -v /store/db:/var/lib/mysql:Z --network podman docker.io/mariadb:lts-ubi
RT application
The RT application image is built from the official Apache httpd 2.4 image by adding the necessary packages for RT, downloading, configuring, and installing the RT source code, and adding the necessary Perl packages.
The RT makefile provides a target to install all necessary Perl modules to support the configured options. Some Perl libraries are installed from the system package repository due to compile issues with the CPAN provided modules.
RT application Containerfile
The RT application image is further extended to support local environment needs and configuration files. This example container file needs to be modified to satisfy any local needs.
FROM quay.io/fedora/httpd-24
# Add application sources to a directory where the assemble script expects them
# and set permissions so that the container runs without the root access
USER 0
RUN dnf install -y mariadb links mod_fcgid expat-devel gcc gd gd-devel graphviz perl-CPAN perl-DBD-mysql perl-Starlet perl-GnuPG-Interface msmtp && \
  dnf clean all && \
  mkdir /rt && \
  cd /rt && \
  curl -o rt-5.0.8.tar.gz  https://download.bestpractical.com/pub/rt/release/rt-5.0.8.tar.gz && \
  tar -zxf rt-5.0.8.tar.gz && \
  cd rt-5.0.8 && \
  ./configure --enable-externalauth --with-attachment-store=disk --with-web-user=default --with-web-group=root && \
  yes | cpan -i CPAN && \
  yes | make fixdeps && \
  make install && \
  mv /opt/rt5/etc/RT_SiteConfig.pm /opt/rt5/etc/RT_SiteConfig.pm.ORIG && \
  chown -R default:root /run/mod_fcgid && \
  rm -rf /root/.cpan && \
  rm /rt/rt-5.0.8.tar.gz
#UID for the default user
USER 1001
Configuring Apache HTTPD
The necessary web configuration settings are included in the RT file docs/web_deployment.pod file. This file is saved to the /config/rt5.conf location outside of the container and attached to /etc/httpd/conf.d/rt5.conf within the container. An example is provided below, but can be customized to suit local needs.
$ cat /config/rt5.conf
<VirtualHost rt.example.com>
    ### Optional apache logs for RT
    # Ensure that your log rotation scripts know about these files
    # ErrorLog /opt/rt5/var/log/apache2.error
    # TransferLog /opt/rt5/var/log/apache2.access
    # LogLevel debug
    AddDefaultCharset UTF-8
    ScriptAlias / /opt/rt5/sbin/rt-server.fcgi/
    DocumentRoot "/opt/rt5/share/html"
    <Location />
        Require all granted
        Options +ExecCGI
        AddHandler fcgid-script fcgi
    </Location>
Configuring MSMTP
To route mail through the datacenter smart host, msmtp is used as a sendmail SMTP application. No authentication or TLS is used in the configuration used in this blog post. The settings file is saved as /config/msmtprc outside of the container and attached to /etc/msmtprc within the container. An example is provided below but can be customized to satisfy local needs.
$ cat /config/msmtprc
account default
host smtp.example.com
port 25
protocol smtp
auth off
tls off
tls_starttls off
from rt@example.com
logfile -
Configuring RT application
RT has many configuration settings. All settings and their default values are stored in the RT_Config.pm file and are not intended to be updated. The RT_SiteCcnfig.pm is used to provide site-specific configuration settings. These include database, email, and web integration settings, and application specific settings. Additional settings could be used to integrate with external authentication services or enable additional application features. The settings are saved in /config/RT_SiteConfig.pm outside of the container and attached to /opt/rt5/etc/RT_SiteConfig.pm within the container. An example is provided below but can be customized to satisfy local needs.
use utf8;
#Database connection settings
Set( $DatabaseRTHost, "%" ) ;
Set( $DatabaseHost, 'db.example.com' );
Set( $DatabaseType, 'mysql' );
Set( $DatabasePort, '' );
Set( $DatabaseName, 'rt5' );
Set( $DatabasePassword, 'rt_pass' );
Set( $DatabaseUser, 'rt_user' );
#Logging settings
Set( $LogToSyslog, "debug");
Set( $LogToSTDERR, "debug");
#Email settings
Set( $MailCommand, "sendmail");
Set( $SendmailPath, "/usr/bin/msmtp") ;
Set( $SendmailArguments, "-t" ) ;
Set( $CorrespondAddress, 'rt@example.com' );
Set( $CommentAddress, 'rt-comment@example.com' );
#Web settings
Set( $WebSecureCookies, 0);
Set( $WebDomain, 'rt.example.com' );
Set( $WebPort, '8080' );
#Application behavior settings
Set( $rtname, 'Example Corp.' );
Set( $NotifyActor, 1);
Set( %ExternalStorage,
        Type => 'Disk',
        Path => '/attachments',
);
1;
Using the RT application image
Running the RT app container by hand:
$ podman run -d --network podman \
--rm --name rt5 -p 8080:8080 \
  -v /store/config/msmtprc:/etc/msmtprc:Z \
  -v /store/config/rt5.conf:/etc/httpd/conf.d/rt5.conf:Z \
  -v \ /store/config/RT_SiteConfig.pm:/opt/rt5/etc/RT_SiteConfig.pm:Z \
  -v /store/attachments/:/attachments:Z colonwq/rt-508:latest
New instance
Before a new RT instance can be used, the RT specific database needs to be created and loaded with an initial set of data. To do this, the container must be started, attached to as the default user, and then the initialize-database Makefile target must be run. This prompts for the root password used when the MariaDB container first started, and creates the rt5 database and tables and populates it with the initial set of data.
$ podman exec -it -u 0:0 rt5 /bin/bash
bash-5.2# cd /rt/rt-5.0.8
bash-5.2# make initialize-database
/usr/bin/perl -I/opt/rt5/local/lib -I/opt/rt5/lib sbin/rt-setup-database --action init --prompt-for-dba-password
In order to create or update your RT database, this script needs to connect to your  mysql instance on db.example.com (port '') as root
Please specify that user's database password below. If the user has no database
password, just press return.
Password:
Working with:
Type:    mysql
Host:    db.example.com
Port:
Name:    rt5
User:    rt_user
DBA:    root
Now creating a mysql database rt5 for RT.
.
.
.
[306] [Fri Oct  3 19:09:42 2025] [debug]: Done setting up database content. (/rt/rt-5.0.8/sbin/../lib/RT/Handle.pm:1968)
Done inserting data.
Done.
bash-5.2#
Data upgrade and migration
Carefully review the product documentation prior to performing a database schema upgrade. A special Makefile target, upgrade-database, is provided to upgrade the database scheme. This target prompts for some initial information, and runs the necessary commands to upgrade to the current version.
$ podman exec -it rt5 /bin/bash
bash-5.2 $ cd /rt/rt-5.0.8
bash-5.2 $ make upgrade-database
Testing
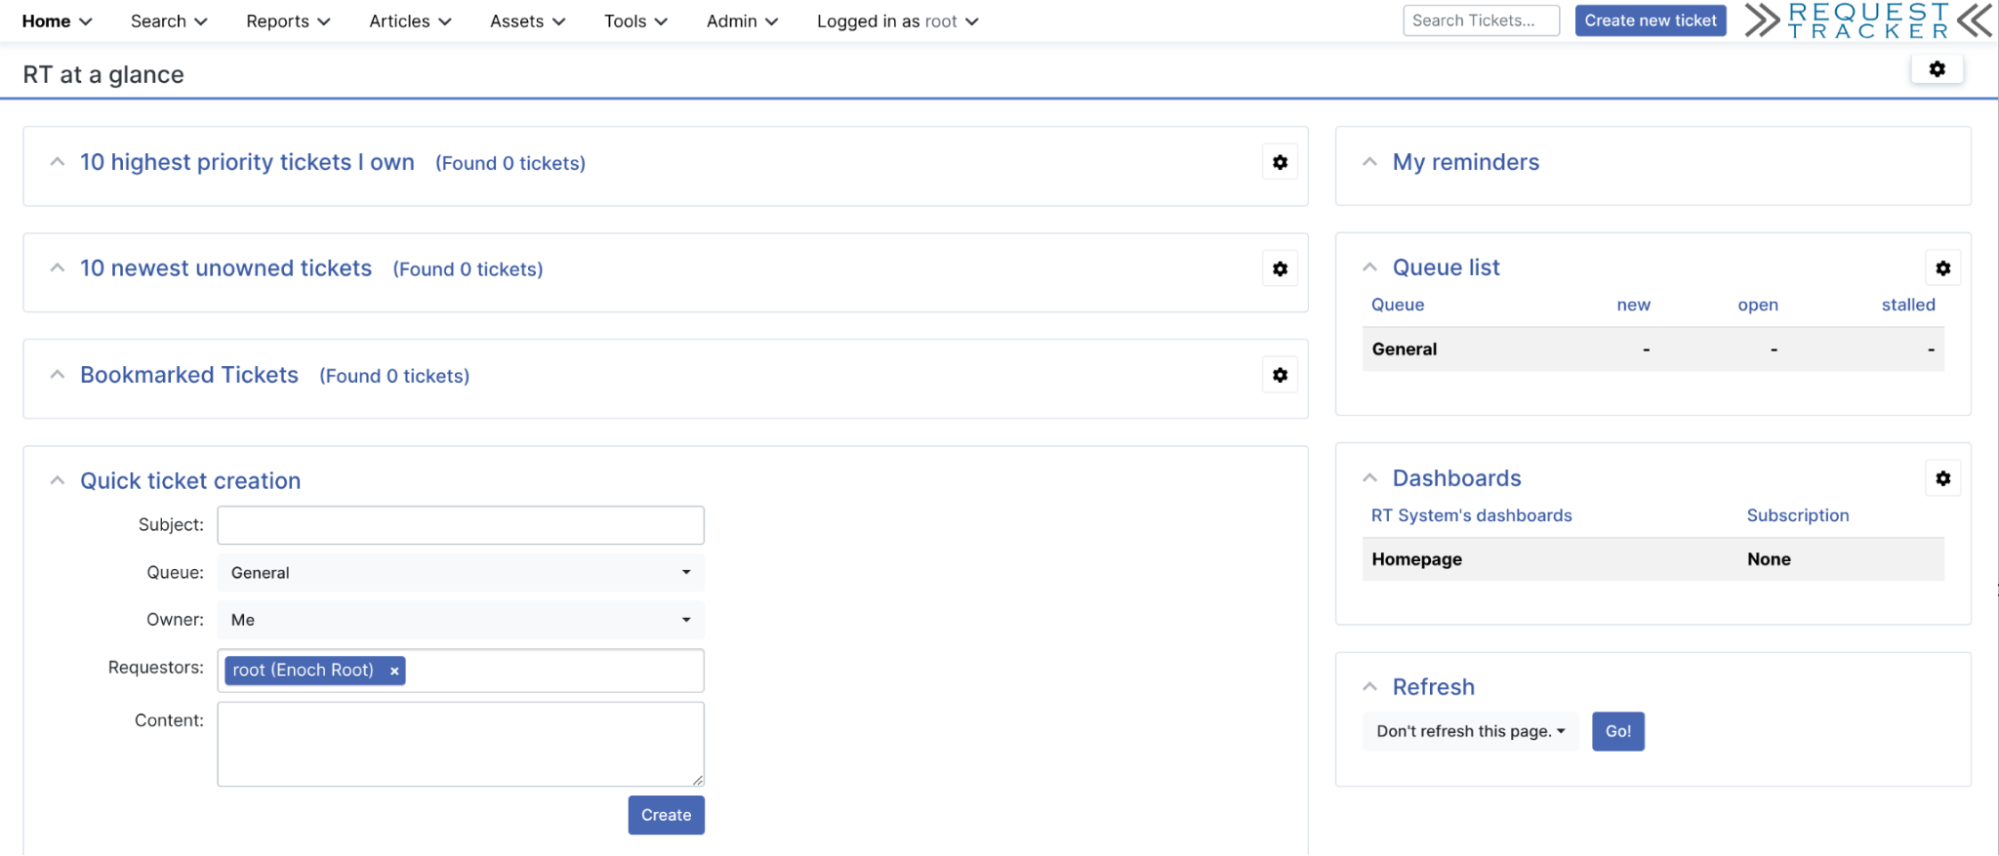
Assuming the configuration settings are correct, you're able to access the RT login screen at http://rt.example.com:8080 (Figure 1). The default admin name and password are provided in the product documentation.
Initial application configuration
To create tickets in the General queue using the rt-mailgate process, the Everyone user type needs permission to create and update tickets in the General queue.
Routing RT-related emails to the RT application
The RT application container does not run a mail server. Incoming emails are routed from the data center mail hub to the mail process running on the host computer. In this example, the host computer runs Postfix to process incoming emails. Incoming RT emails are processed by a mail pipe. The configured mail pipe runs as the same user running the container, and sends the mail data into the rt-mailgate process inside the container.
This is the exact email workflow path, illustrated in Figure 2:
- The mail client sends an email for rt@example.com to the mail hub.
- The mail hub finds the address in the aliases table, and forwards the email to rt@rt.example.com on the hosting server.
- On the hosting server, Postfix receives the email and processes it with the mail pipe.
- The configured mail pipe script, uses
podman execto pass the data to thert-mailgateprogram within the RT container. - The RT application processes the email and any outgoing emails are sent directly to the mail hub by the
msmtpprogram.

Data center mail up aliases:
$ grep rt.example /etc/aliases
rt: rt@rt.example.com
rt-comment: rt-comment@rt.example.com
Host server postfix configurations
Postfix transport:
# grep rt.example /etc/postfix/transport
rt@rt.example.com rt-pipe
Postfix master.cf:
# grep -A3 rt-pipe master.cf
rt-pipe unix - n n - - pipe
  flags=B user=colonwq argv=/usr/local/bin/process-rt.sh general correspond
rt-comment unix - n n - - pipe
  flags=B user=colonwq argv=/usr/local/bin/process-rt.sh general comment
The rt-mailgate wrapper script:
# cat /usr/local/bin/process-rt.sh
#!/bin/bash
QUEUE=$1
ACTION=$2
logger "Processing RT message Queue: ${QUEUE} Action: ${ACTION}"
cat |podman exec -i rt5 bash -c "cat - | /opt/rt5/bin/rt-mailgate --no-verify-ssl --queue ${QUEUE} --action ${ACTION} --url http://localhost:8080/"
exit 0
Don't try to capture or log the contents of the email. The line endings of the email headers use a carriage return and a new line. I did an extensive amount of troubleshooting because I saved the contents to $INPUT as a debugging effort!
Running as quadlets
The basic quadlet unit files were created by using Google Gemini to convert the podman command. Two quadlet unit files were created, and are used to automatically restart the containers. Read this article to understand the basics of Podman, systemd and quadlets.
MariaDB quadlet
$ cat .config/containers/systemd/mariadb.container
[Container]
# The image to run, using a fully qualified name
Image=docker.io/mariadb:lts-ubi
# Name for the container instance
ContainerName=mariadb
# Replace 'podman' with your desired network name
Network=podman
# Run the container in detached mode and remove it when it stops
AutoUpdate=registry
# Add --rm functionality by setting the container to be removed on exit
PodmanArgs=--rm
# Volume mount from host path to container path
Volume=/store/db:/var/lib/mysql:Z
# Port mapping from host port 3306 to container port 3306
PublishPort=3306:3306
# Note: The 'podman run -d' is implicit in a systemd service file.
[Install]
# This section defines how the service should be enabled and started.
# Use 'WantedBy=default.target' to start it with your user session.
WantedBy=default.target
RT application quadlet
$ cat .config/containers/systemd/rt5.container
[Container]
# The image to run, using a fully qualified name
Image=docker.io/colonwq/rt-508:latest
# Name for the container instance
ContainerName=rt5
# Connect the container to the 'podman' network
Network=podman
# Run the container in detached mode and remove it when it stops
AutoUpdate=registry
# Add --rm functionality by setting the container to be removed on exit
PodmanArgs=--rm
# Volume mounts from host paths to container paths
# main.cf  msmtprc  msmtp_wrapper.sh  rt5.conf  RT_Config.pm  RT_SiteConfig.pm
Volume=/store/config/msmtprc:/etc/msmtprc:Z
Volume=/store/config/rt5.conf:/etc/httpd/conf.d/rt5.conf:Z
Volume=/store/config/RT_SiteConfig.pm:/opt/rt5/etc/RT_SiteConfig.pm:Z
Volume=/store/attachments/:/attachments:Z
# Port mapping from host port 8080 to container port 8080
PublishPort=8080:8080
[Install]
# This service will start when the user session is active
WantedBy=default.target
Starting the quadlets
Once the quadlet unit files are saved, systemd needs to be notified of the files, and then you can start the services.
$ systemctl --user daemon-reload
$ systemctl --user status mariadb
$ systemctl --user status rt5
Quadlet persistence
As mentioned in this blog post and this product page, with a few commands these quadlets can persist across system reboots.
$ loginctl enable-linger colonwq
$ systemctl --user enable mariadb
$ systemctl --user enable rt5
Firewall rules
These are the firewall rules you need to implement.
- Web application access: TCP/8080
- Inbound email: SMTP
SELinux
SELinux is in enforcing mode on the hosting server. I used Setroubleshootd and Gemini to generate the SELinux rules. The combined file is over 300 lines, so I've placed the files you need in a Git repository. No warranty is given for these rules, but it did work for me.
Routine maintenance
Once you have it all set up, of course there's routine maintenance to perform.
Extracting ticket attachments
You must routinely extract ticket attachments from the RT database and save them to the configured external storage. RT includes a script to extract attachments from the database. You can schedule this as a routine job:
$ /usr/bin/podman exec rt5 \
/opt/rt5/sbin/rt-externalize-attachments
Backups
The RT database and attachments need to be routinely backed up. The below commands are based on the product documentation, and can either be executed as the user, or added to a job scheduler.
$ /usr/bin/podman exec -i rt5 bash \
-c "(cd /attachments/; tar -czf - *)" \
> /store/backups/attachments-`date +%s`.tgz
$ /usr/bin/podman exec -i rt5 bash \
-c "( mysqldump -u rt_user -pXXXXX \
-h db.example.com --default-character-set=utf8mb4 \
rt5 --tables sessions --no-data --single-transaction; \
mysqldump -u rt_user -pXXXXX -h db.example.com \
--default-character-set=utf8mb4 rt5 \
--ignore-table rt5.sessions \
--single-transaction )" | \
gzip > /store/backups/rt-`date +%s`.sql.gz
Next steps
Once RT is up and running, application configuration and customization are the next steps to perform. The RT web GUI supports the creation of multiple queues, ticket custom fields, action customization through custom "scrips" and many other features. The RT production documentation, forum, and wiki have resources to operate and customize the application.
Conclusion
You've now seen the key tasks involved in this process, including:
- Using a standard container image to provide a system service
- Customizing a standard container image to configure and install a local application
- Configuring an application stack
- Integrating an application stack into the data center infrastructure
- Running an integrated application stack as rootless containers
- Basic maintenance and upkeep of a deployed application stack
