Page
Launch JupyterLab and prepare your dataset
This first lesson will walk you through the first two steps of launching your workbench.
Prerequisites:
- Introduction to OpenShift AI
- Red Hat Developer Sandbox
- GitHub
- Prior knowledge of Python.
In this lesson, you will:
- Launch a workbench in OpenShift AI.
- Prepare a dataset.
- Automate the fetching of datasets using Kaggle's API.
- Enable direct access to large datasets for machine learning.
Launch a workbench in OpenShift AI
To launch and OpenShift AI workbench, follow these steps:
Navigate to the OpenShift AI dashboard, as shown in Figure 1.
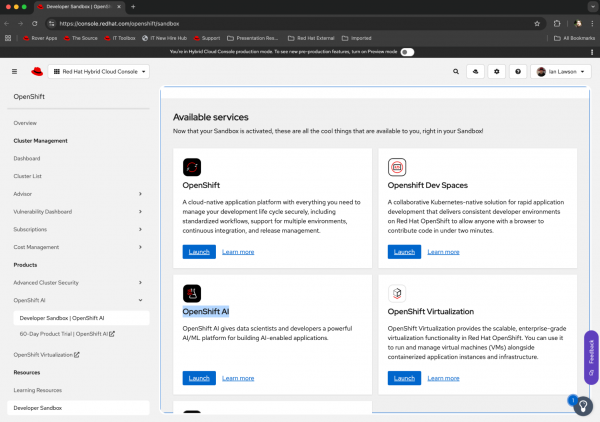
Figure 1: Selecting a component of the Developer Sandbox. - Click Launch for the OpenShift AI component of the sandbox.
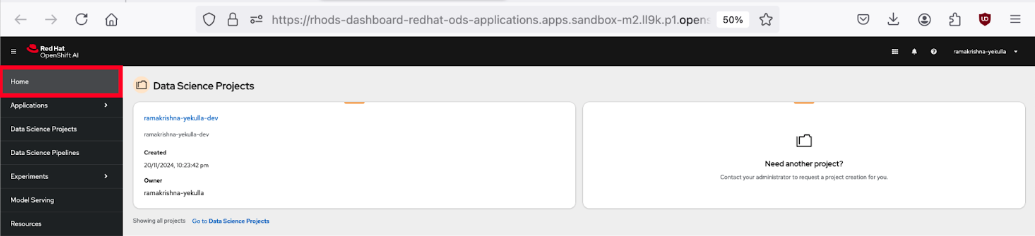
Once you select the OpenShift AI sandbox instance, it will take you to the OpenShift AI console dashboard. The interface includes a navigation menu on the left with options like Home, Applications, Data Science Projects, Data Science Pipelines, Experiments, Model Serving, and Resources. Navigate to Home (Figure 2).
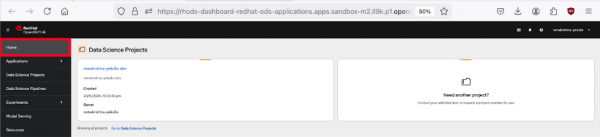
Figure 2: OpenShift AI dashboard. Click Data Science Projects. Here, you can choose or create a project where you'll conduct your experiments (Figure 3).
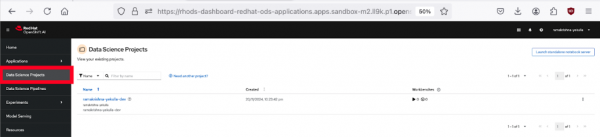
Figure 3: Dashboard of data science projects in OpenShift AI.


Create a new workbench
- Click on your project name from the list of project names, then navigate to the workbenches section in the main content area (Figure 4).
Click Create a workbench to initiate a new workbench, as shown in Figure 4.
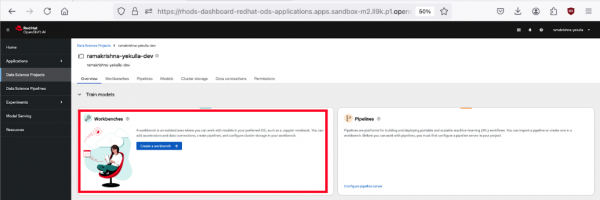
Figure 4: Create a workbench interface. - Configure your project, as shown in Figure 5
- Name: Give it a descriptive name (e.g.,
interactive_classification). - Notebook image: Select TensorFlow, as our model will use this framework.
- Deployment size: Choose Medium for a balanced performance.
Cluster storage: When you add a name, the system will automatically create storage for your notebook. If you chose
interactiveclassification, it will provision a storage component calledinteractiveclassification-storagewith “Max 20GB”).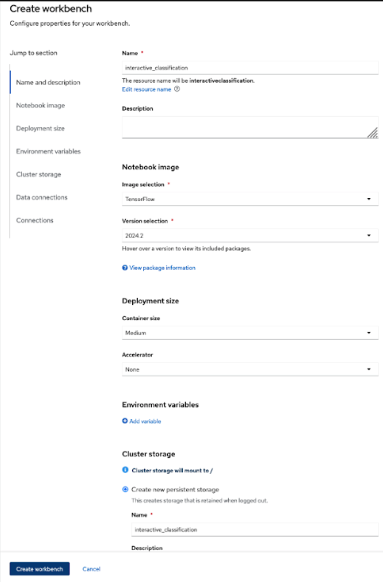
Figure 5: Configure your workbench.
- Name: Give it a descriptive name (e.g.,
Launch the workbench by selecting Create workbench. Wait for the status to indicate the workbench is running (Figure 6).
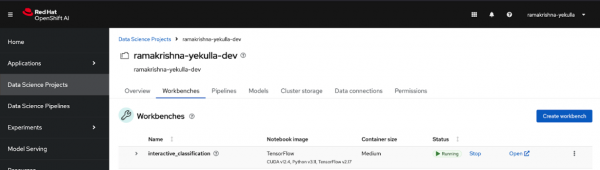
Figure 6: The workbench is running.


Obtain and prepare the dataset
This step involves two phases: Downloading the API key and setting it up on your workbench.
Download your Kaggle API key
Navigate to the Kaggle website and log in with your account credentials to access your account (Figure 7).
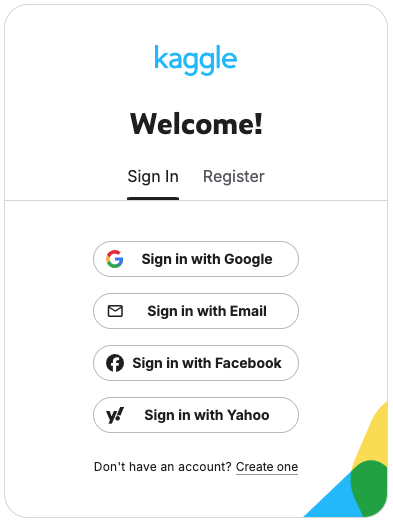
Figure 7: The Kaggle sign-in page lists multiple sign-in options. Go to your account settings. Click your profile icon at the top right corner of the page, then select Account from the dropdown menu (Figure 8).

Figure 8: The Kaggle API download page.

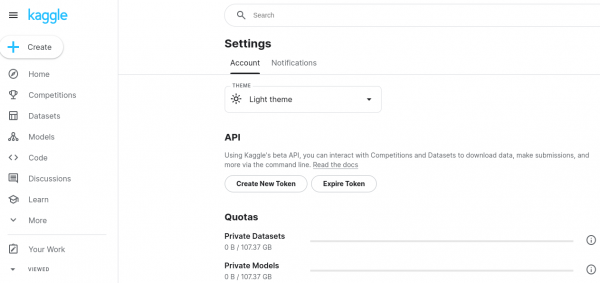
Download the API key
- Scroll down to the section labeled API.
- Select Create New Token.
A file named
kaggle.jsonwill automatically download to your local machine. This file contains your API credentials. Check your downloads directory forkaggle.json(Figure 9).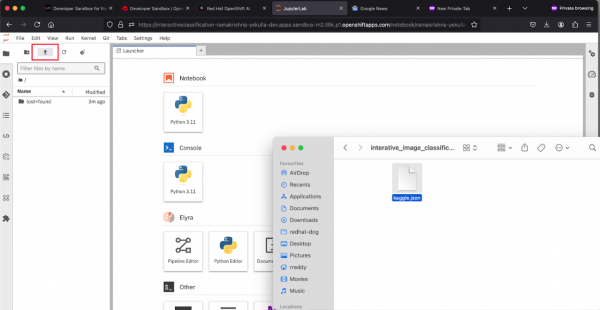
Figure 9: Kaggle API setup in JupyterLab.
Set up the API key on your workbench
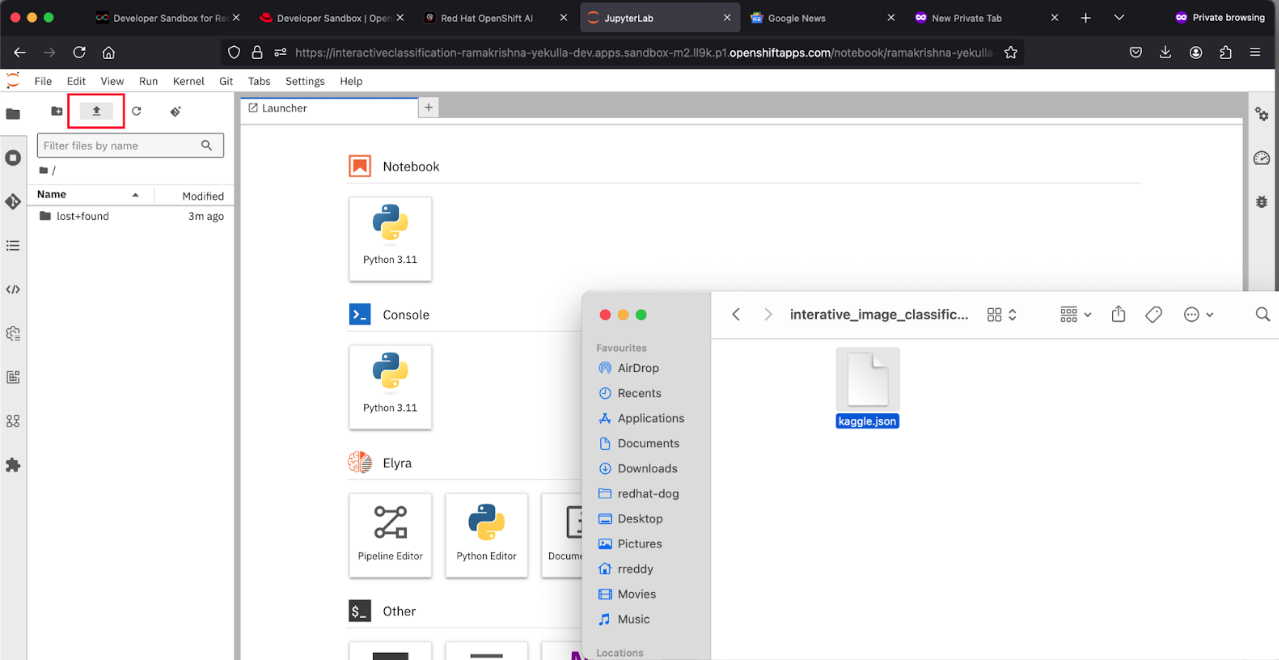
- Access your workbench environment by clicking on the name of the workbench in your Developer Sandbox OpenShift AI dashboard. When the workbench appears (i.e., a Jupyter Notebook), you will have an interface comprising a control panel on the left with a file browser, and a content panel on the right, which will initially contain the Launcher set of tiles. Above the file browser, are a set of file action icons.
- Select the Upload horizontal line with a vertical arrow.
- Navigate to where you downloaded the kaggle.json file, and click on it. The file will upload and appear on the left-hand file browser list.
- Click the Git pulldown at the top of the workbench. Select Clone a repository.
- Set the URI for the Git repo to https://github.com/redhat-developer-demos/openshift-ai and click Clone.
- At this point, you will have a new directory in the file browser,
openshift-ai. Click the openshift-ai directory in the file browser. - Now click the 2_interactive_classification directory in the file browser.
- Now click the Interactive_Image_Classification_Notebook.ipynb file. This will load a pre-defined notebook into the content panel with extensive self-documentation.
- Scroll down to the first executable cell of the notebook. Executable cells are prefixed with
[ ]. In this case the cell starts with!pip install kaggle. Make sure this cell is highlighted and click the run icon at the top of the workbench (the solid sideways triangle) to execute this cell. This will download the test dataset which will appear in the file browser.
Good job. Now the documentation in the cell matches the lessons to the steps. You've also launched JuptyterLab. Now we're ready to move on to real-time data streaming.