The Picketlink project is now a deprecated module in Red Hat JBoss Enterprise Application Platform (EAP), so there's a chance that Picketlink will no longer ship with the next release of EAP/Wildfly and that there will not be any fixes in the near future for the picketlink module.
Picketlink, however, is now merged with Keycloak, an open source identity and access management solution developed by Red Hat's JBoss Community. In this article, we'll present an alternative solution to the picketlink module. Some organizations use picketlink as the service provider to enable SAML-based authentication with a third-party identity provider (i.e., Active Directory Federated Services (AD FS), OKTA, PingFederate, etc.). In this, article, we'll see how the keycloak-saml adapter can be configured in the place of Picketlink to enable SAML-based authentication with a third-party identity provider.
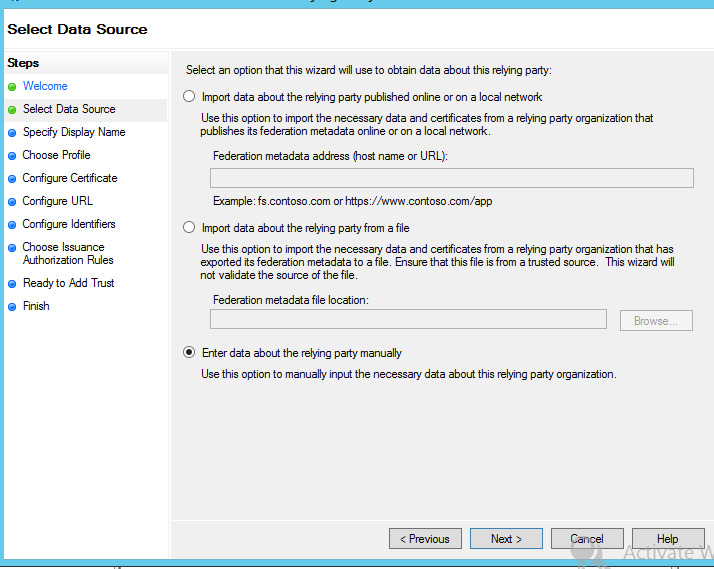
Set up the Relying Party

AD FS allows you to import metadata, which completes the configuration without any manual intervention. However, here we are required to go with manual configuration.
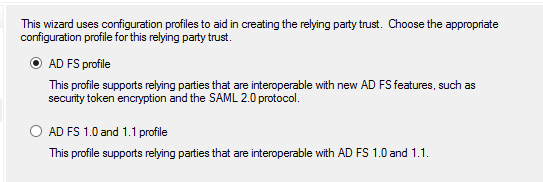
Select AD FS profile for SAML2.0 based federation:
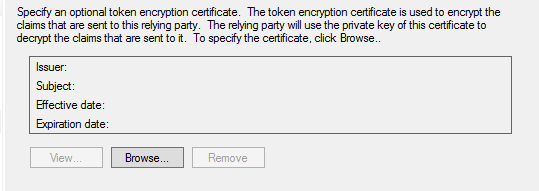
If you are required to enable encrypted assertion, import the certificate that will be used for encryption, but make sure that the associated private key is present with the service provider.
Check the SAML2.0 WebSSO protocol support to enable SAML federation with a web application:
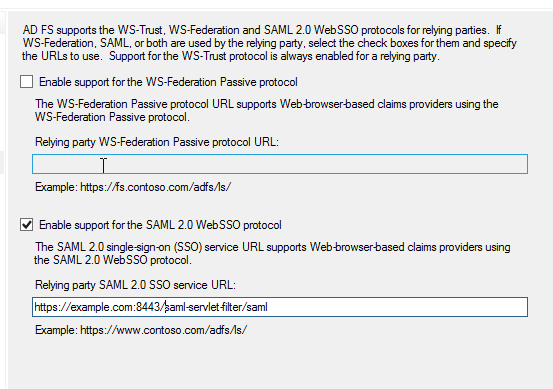
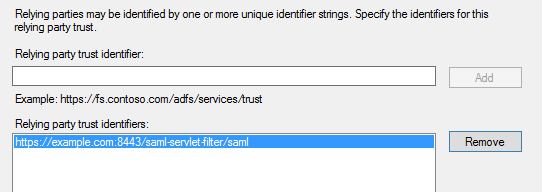
Add the URL of the relying party trust; multiple URLs can be added here:
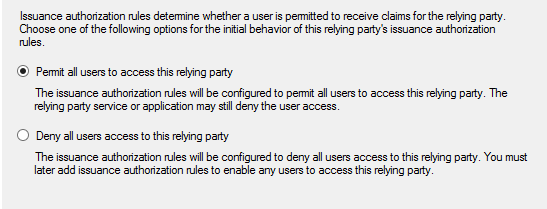
Permit all users to enable access for all the user to the relying-party:
Once the relying party trust is added, AD FS will be able to correctly authenticate the users according to requests from the service provider, but the requested name ID format will not yet be recognized and the SAML response will not contain any additional information like email. Thus, it's necessary to map claims from AD user details into a SAML document.
Three rules
We will set up three rules: one for mapping user ID, one for mapping standard user attributes, and another for a user group. All of these start by clicking the Add Rule button in the Edit Claim Rules.

The first rule will map the user ID in Windows Qualified Domain name to the SAML response. In the Add Transform Claim Rule window, select Transform an incoming claim rule type:

The second rule will map the user email to the SAML response. In the Add Transform Claim Rule window, select Send LDAP attributes as Claims rule type. You can add other attributes as needed:

The third rule would send a group name if the user is a member of a named group. Again, start in the Add Transform Claim Rule window and select Send Group Membership as a Claim rule type. Then enter the requested values in the field:

- Download the Wildfly client adapter from https://www.keycloak.org/downloads.html.
- Unzip the saml-adapter at
$Wildfly_Home. In Linux, unzip can be done by executing the commandunzip keycloak-wildfly-adapter-dist.zip. - Post successful extraction a CLI script.
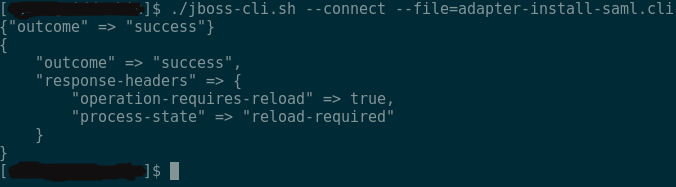
adapter-install-saml.cliwill be present at$Wildfly_Home/bin, which is required to be executed through the jboss-cli command, i.e.,$Wildfly_Home/bin/jboss-cli.sh --connect --file=adapter-install-saml.cli.
Wildfly is now ready with keycloak-saml adapter. To enable authentication with AD FS through SAML protocol, the keycloak-saml.xml file must be configured similarly to the picketlink.xml, as shown below, and placed at application's WEB-INF.
<keycloak-saml-adapter xmlns="urn:keycloak:saml:adapter"
               xmlns:xsi="http://www.w3.org/2001/XMLSchema-instance"
               xsi:schemaLocation="urn:keycloak:saml:adapter
               http://www.keycloak.org/schema/keycloak_saml_adapter_1_7.xsd">
      <SP entityID="https://example.com:8443/saml-servlet-filter/" sslPolicy="EXTERNAL"
           nameIDPolicyFormat="urn:oasis:names:tc:SAML:1.1:nameid-format:WindowsDomainQualifiedName"
           logoutPage="/logout.jsp">
           <IDP entityID="idp" signatureAlgorithm="RSA_SHA256">
                <SingleSignOnService signRequest="false"
                        validateResponseSignature="false"
                        requestBinding="POST"
                        bindingUrl="https://example.adfs.com/adfs/ls/"/>
                <SingleLogoutService signRequest="false"
                        signResponse="false"
                        validateRequestSignature="false"
                        validateResponseSignature="false"
                        requestBinding="POST"
                        responseBinding="POST"
                        postBindingUrl="https://example.adfs.com/adfs/ls/"
                        redirectBindingUrl="https://example.adfs.com/adfs/ls/"/>
          </IDP>
      </SP>
</keycloak-saml-adapter>
That's it. Now the keycloak-saml adapter is set up and ready to go.