Page
Create and configure your Kickstart file
Prerequisites:
- A basic understanding of Kickstart.
- Download the 9.4 Boot ISO compatible with your system architecture from Red Hat Developer.
In this learning path, you will:
- Configure a Kickstart file and host it on a server.
- Bootstrap systems with the specified configurations.
- Outline procedures for managing and applying system updates, either automatically or on-demand.
How to configure your Kickstart file
In the following Kickstart file, update the boot container image URL per your requirement. Additionally, for the root user, replace <your-key-here> with your actual key.
# enable text mode
text
# network configuration
network --bootproto=dhcp --device=link --activate
# Partioning Setup
clearpart --all --initlabel --disklabel=gpt
reqpart --add-boot
part / --grow --fstype xfs
# --- Container Image Installation --
ostreecontainer --url quay.io/[your_account]/[your_image]:[your_tag]
# --- Basic Security ---
firewall --disabled # Disable the firewall (consider hardening this later)
services --enabled=sshd # Enable SSH service for remote access
# --- Root User SSH Key (If Desired)---
rootpw --iscrypted locked #Disable direct root password login
# Add SSH key for root (replace with your key)
sshkey --username root "<your-key-here>"
# --- System Reboot ---
reboot
Host the Kickstart file
Upload the Kickstart configuration file to a web server that is accessible from the virtual machine.
Alternate host options
- Local HTTP server: If a web server is unavailable, execute the following command in the directory with your Kickstart file to host it using Python's HTTP server module:
python -m http.server - Embedded Kickstart file: Alternatively, embed the Kickstart file directly into an installer ISO using the mkksiso utility from the Lorax package. This method is ideal for USB installations:
mkksiso --ks /PATH/TO/KICKSTART /PATH/TO/ISO /PATH/TO/NEW-ISO
Deployment
To deploy the image you created, follow these steps:
- Boot the target system using the installation media.
- During the boot, append the following to the kernel arguments. Consult the system documentation for specific instructions to direct the installer to your Kickstart file:
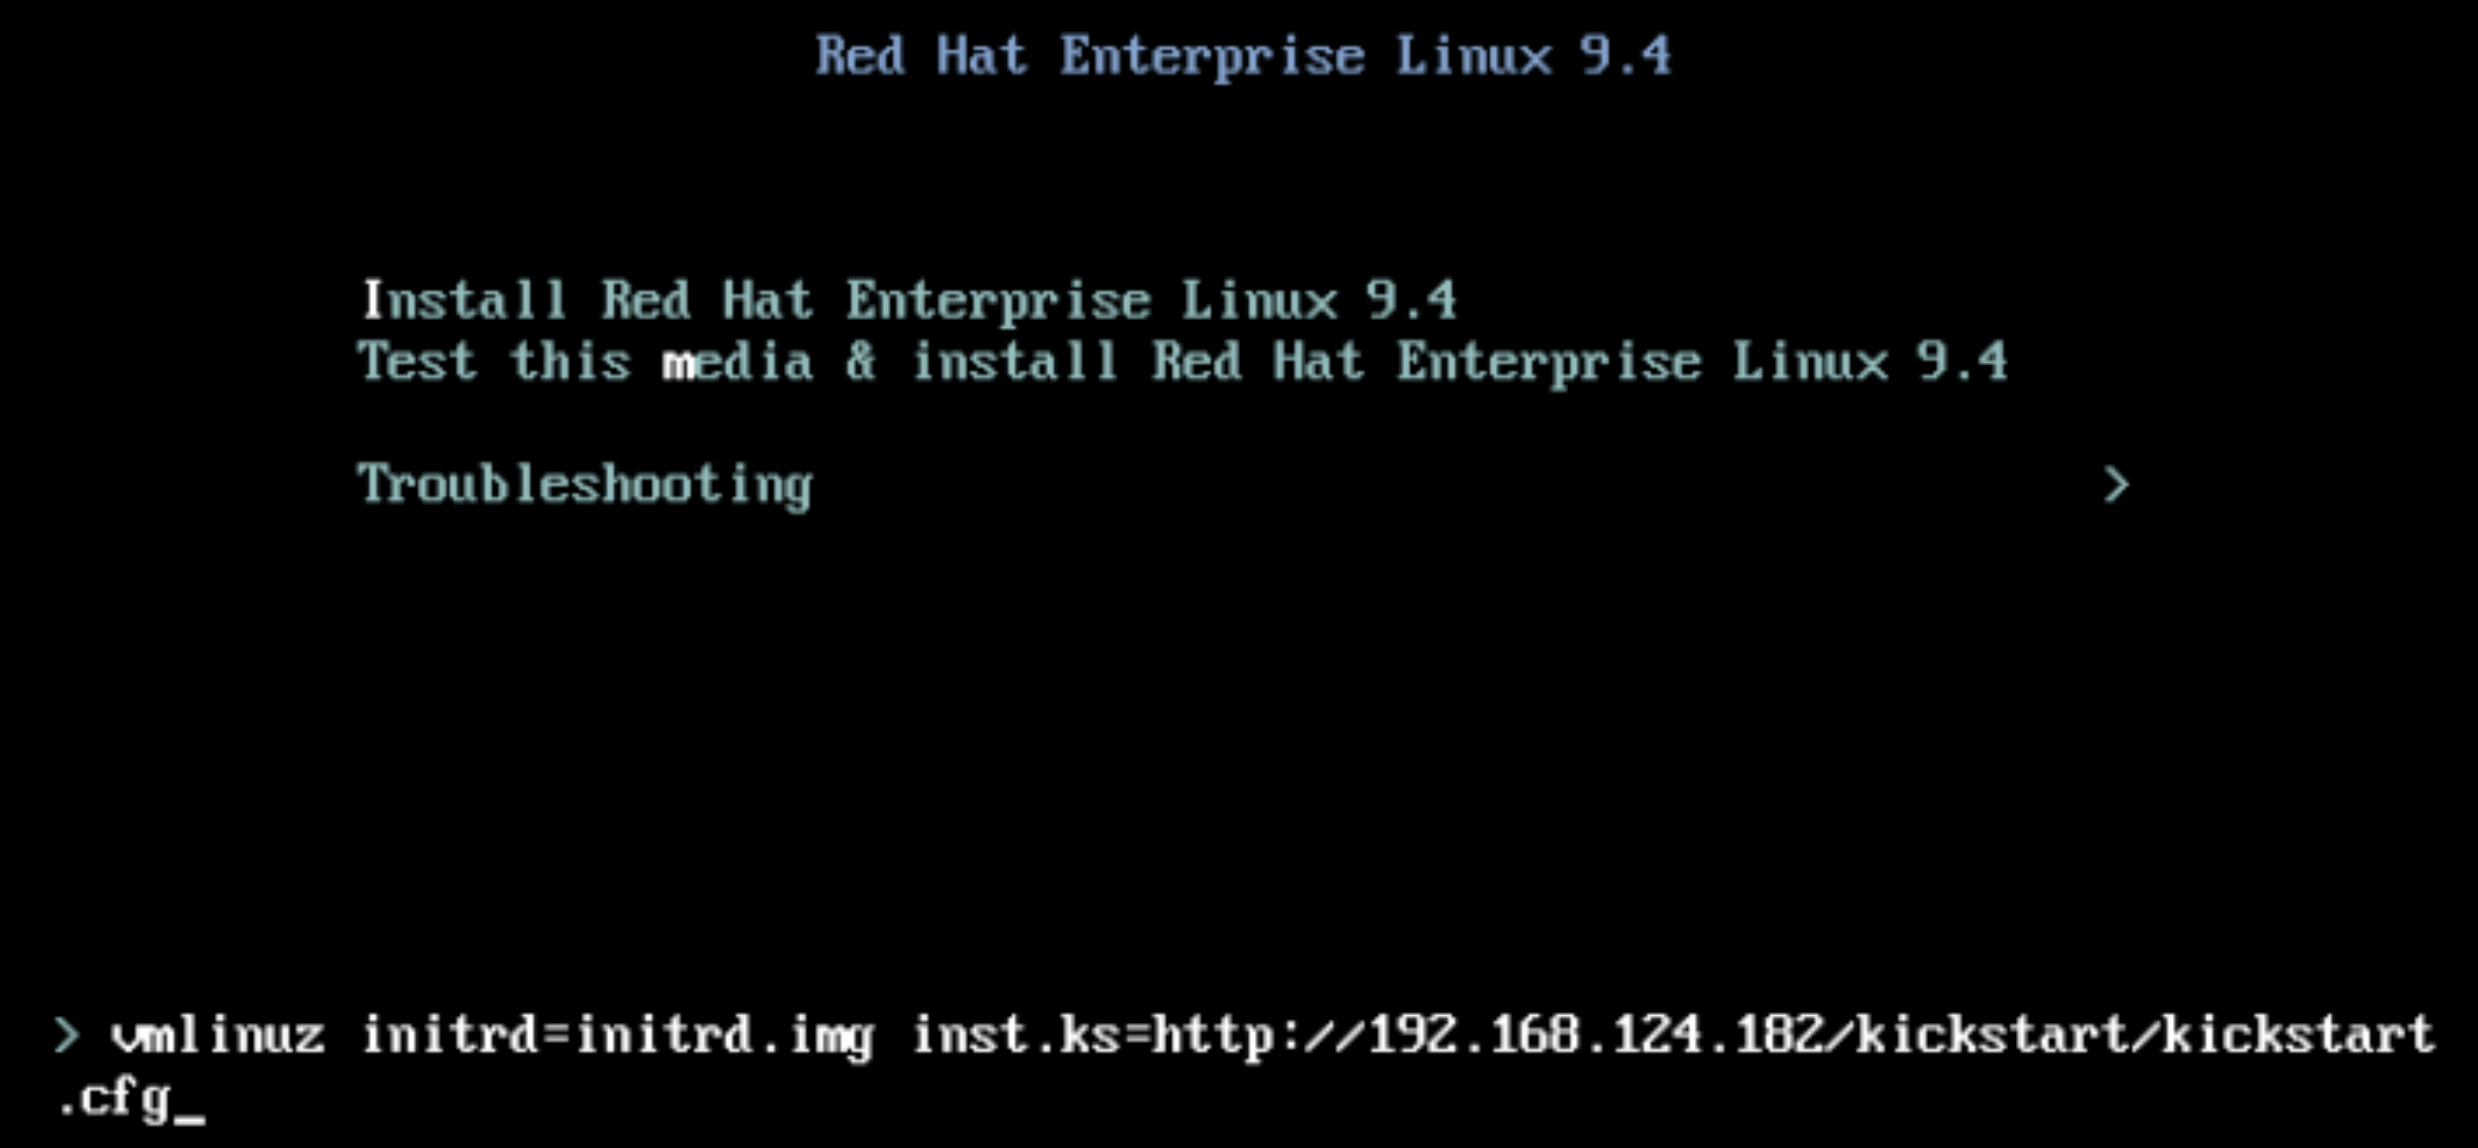
inst.ks=http://path_to_my_kickstart - If you are using RHEL or Fedora with GNOME Boxes to run your virtual machines, execute the following command to initiate deployment:
vmlinuz initrd=initrd.img inst.ks=http://<your-ip>/kickstart.kickstart.cfg For more information, please refer to Figure 1.
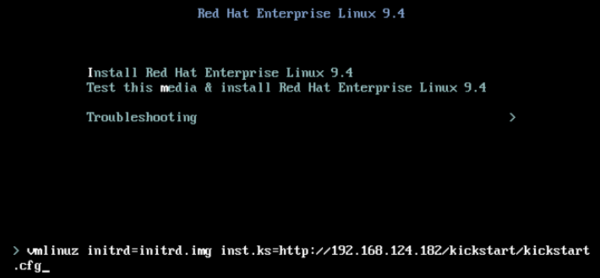
Figure 1: Defining the kickstart.cfg file URL in GRUB. - Select Ctrl+X or follow the on-screen prompt to initiate the boot process.
Post-installation updates
- Following installation, you can monitor and manage updates by observing the system service:
systemctl status bootc-fetch-apply-updates.timer - Alternatively, you can apply updates immediately with the following command:
bootc upgrade - Refer to the provided URL for details on enabling automatic updates and further configuration options.
Summary
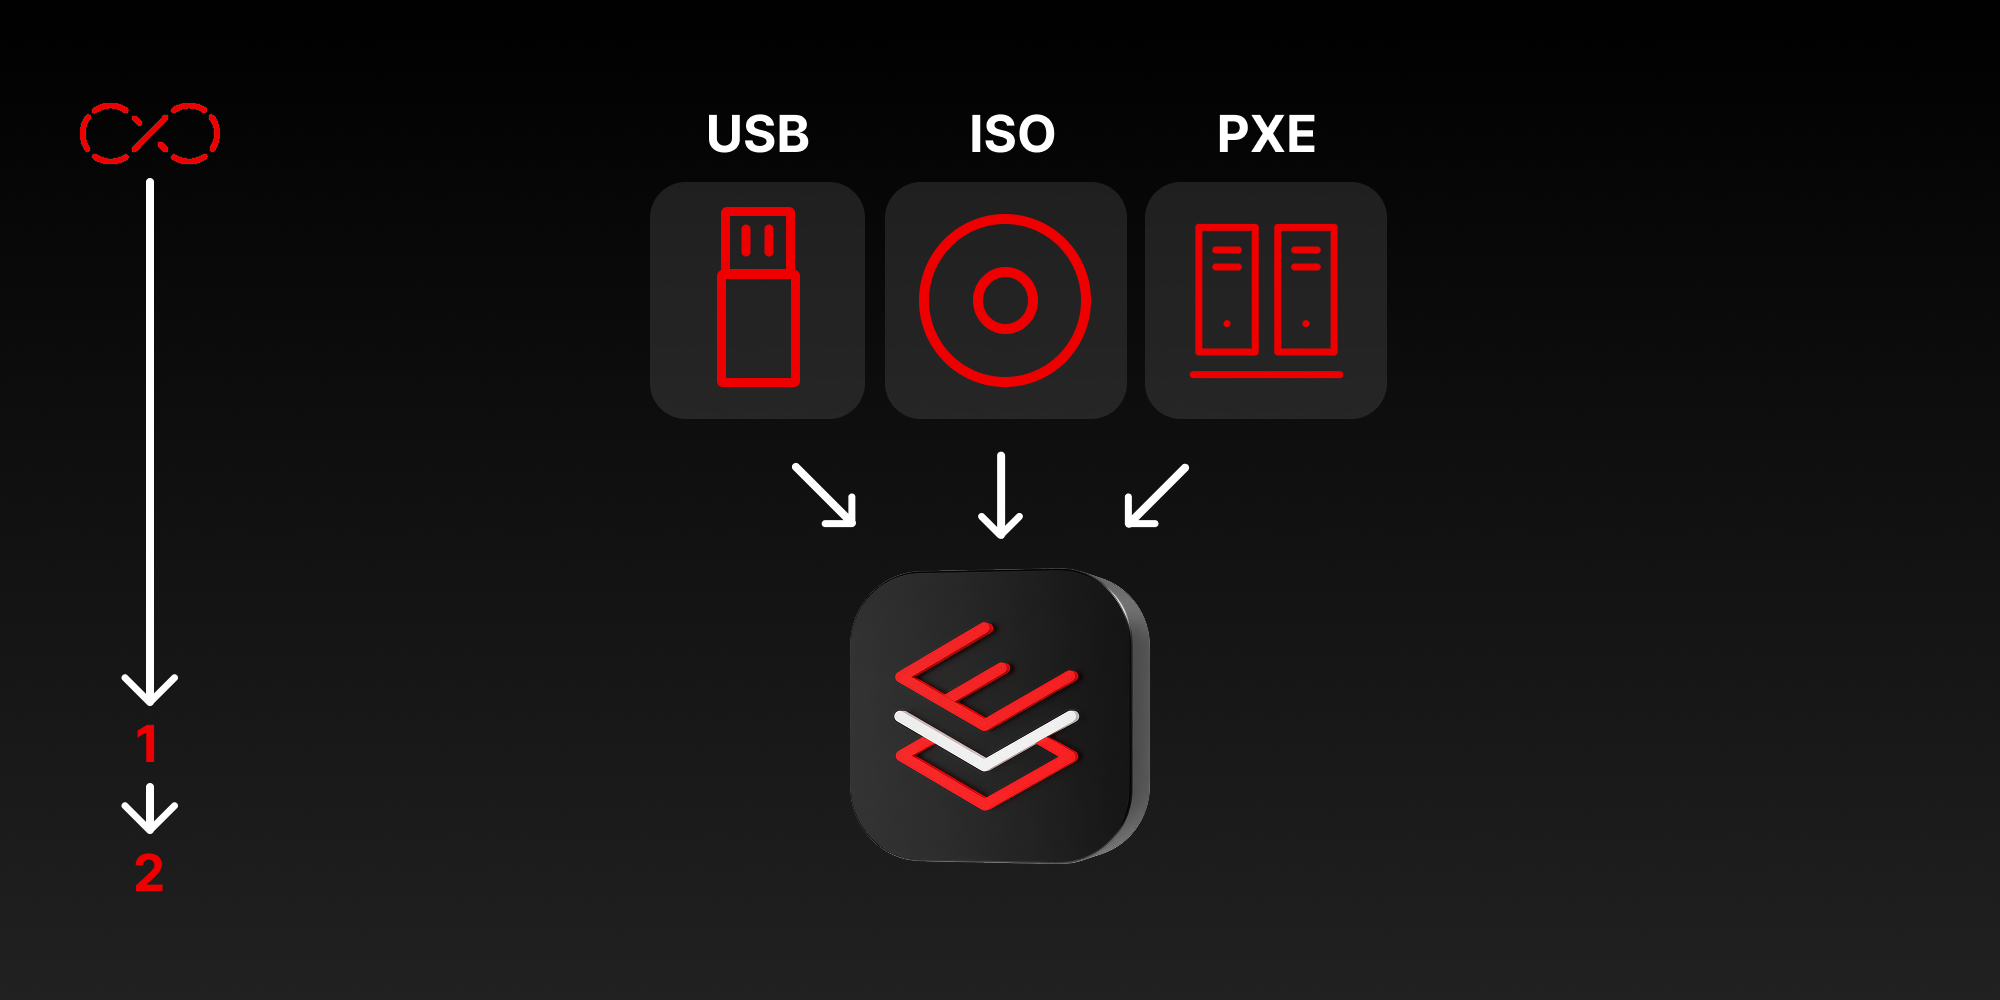
This hands-on learning path provided a step-by-step process for deploying image mode for Red Hat Enterprise Linux via Kickstart, which is ideal for bare-metal installations using ISO, PXE, or USB drives.
The learning path also covered the crafting of a Kickstart config file, hosting it on a server, and bootstrapping systems with the specified configurations. Additionally, it outlined the procedures for managing and applying system updates, either automatically or on demand.