Page
Build a customized and hardened RHEL image
The first phase of this process involves using customized security policies to build a customized hardened image. The following steps show you how.
To get full benefit from this lesson, you will need:
- A Red Hat Enterprise Linux subscription.
- Access to console.redhat.com.
- An environment to deploy your host (e.g., bare metal, VMware, AWS, Azure, etc.).
- Knowledge of the security compliance baseline to align with your system (e.g., CIS or PCI-DSS) and any customizations needed for the baseline to suit your requirements.
In this lesson, you will:
- Define and customize your security compliance policy.
- Generate a customized hardened image with Red Hat Lightspeed image builder.
Define and customize your security compliance policy
All Red Hat Enterprise Linux security compliance scanning and remediation is underpinned by content from the OpenSCAP project. OpenSCAP provides a mature and well-supported method for assessing, reporting, and enforcing security compliance at scale. For this guide, I will use the CIS Red Hat Enterprise Linux 9 Benchmark for Level 1 - Server policy and customize it according to my requirements.
Follow these steps to define and customize your security compliance policy:
- Log in to console.redhat.com.
- Navigate to RHEL -> Security -> Compliance -> SCAP Policies (or take a shortcut via https://console.redhat.com/insights/compliance/scappolicies).
- Create a new policy.
- Select RHEL 9 as the OS.
- Select CIS Red Hat Enterprise Linux 9 Benchmark for Level 1 - Server.
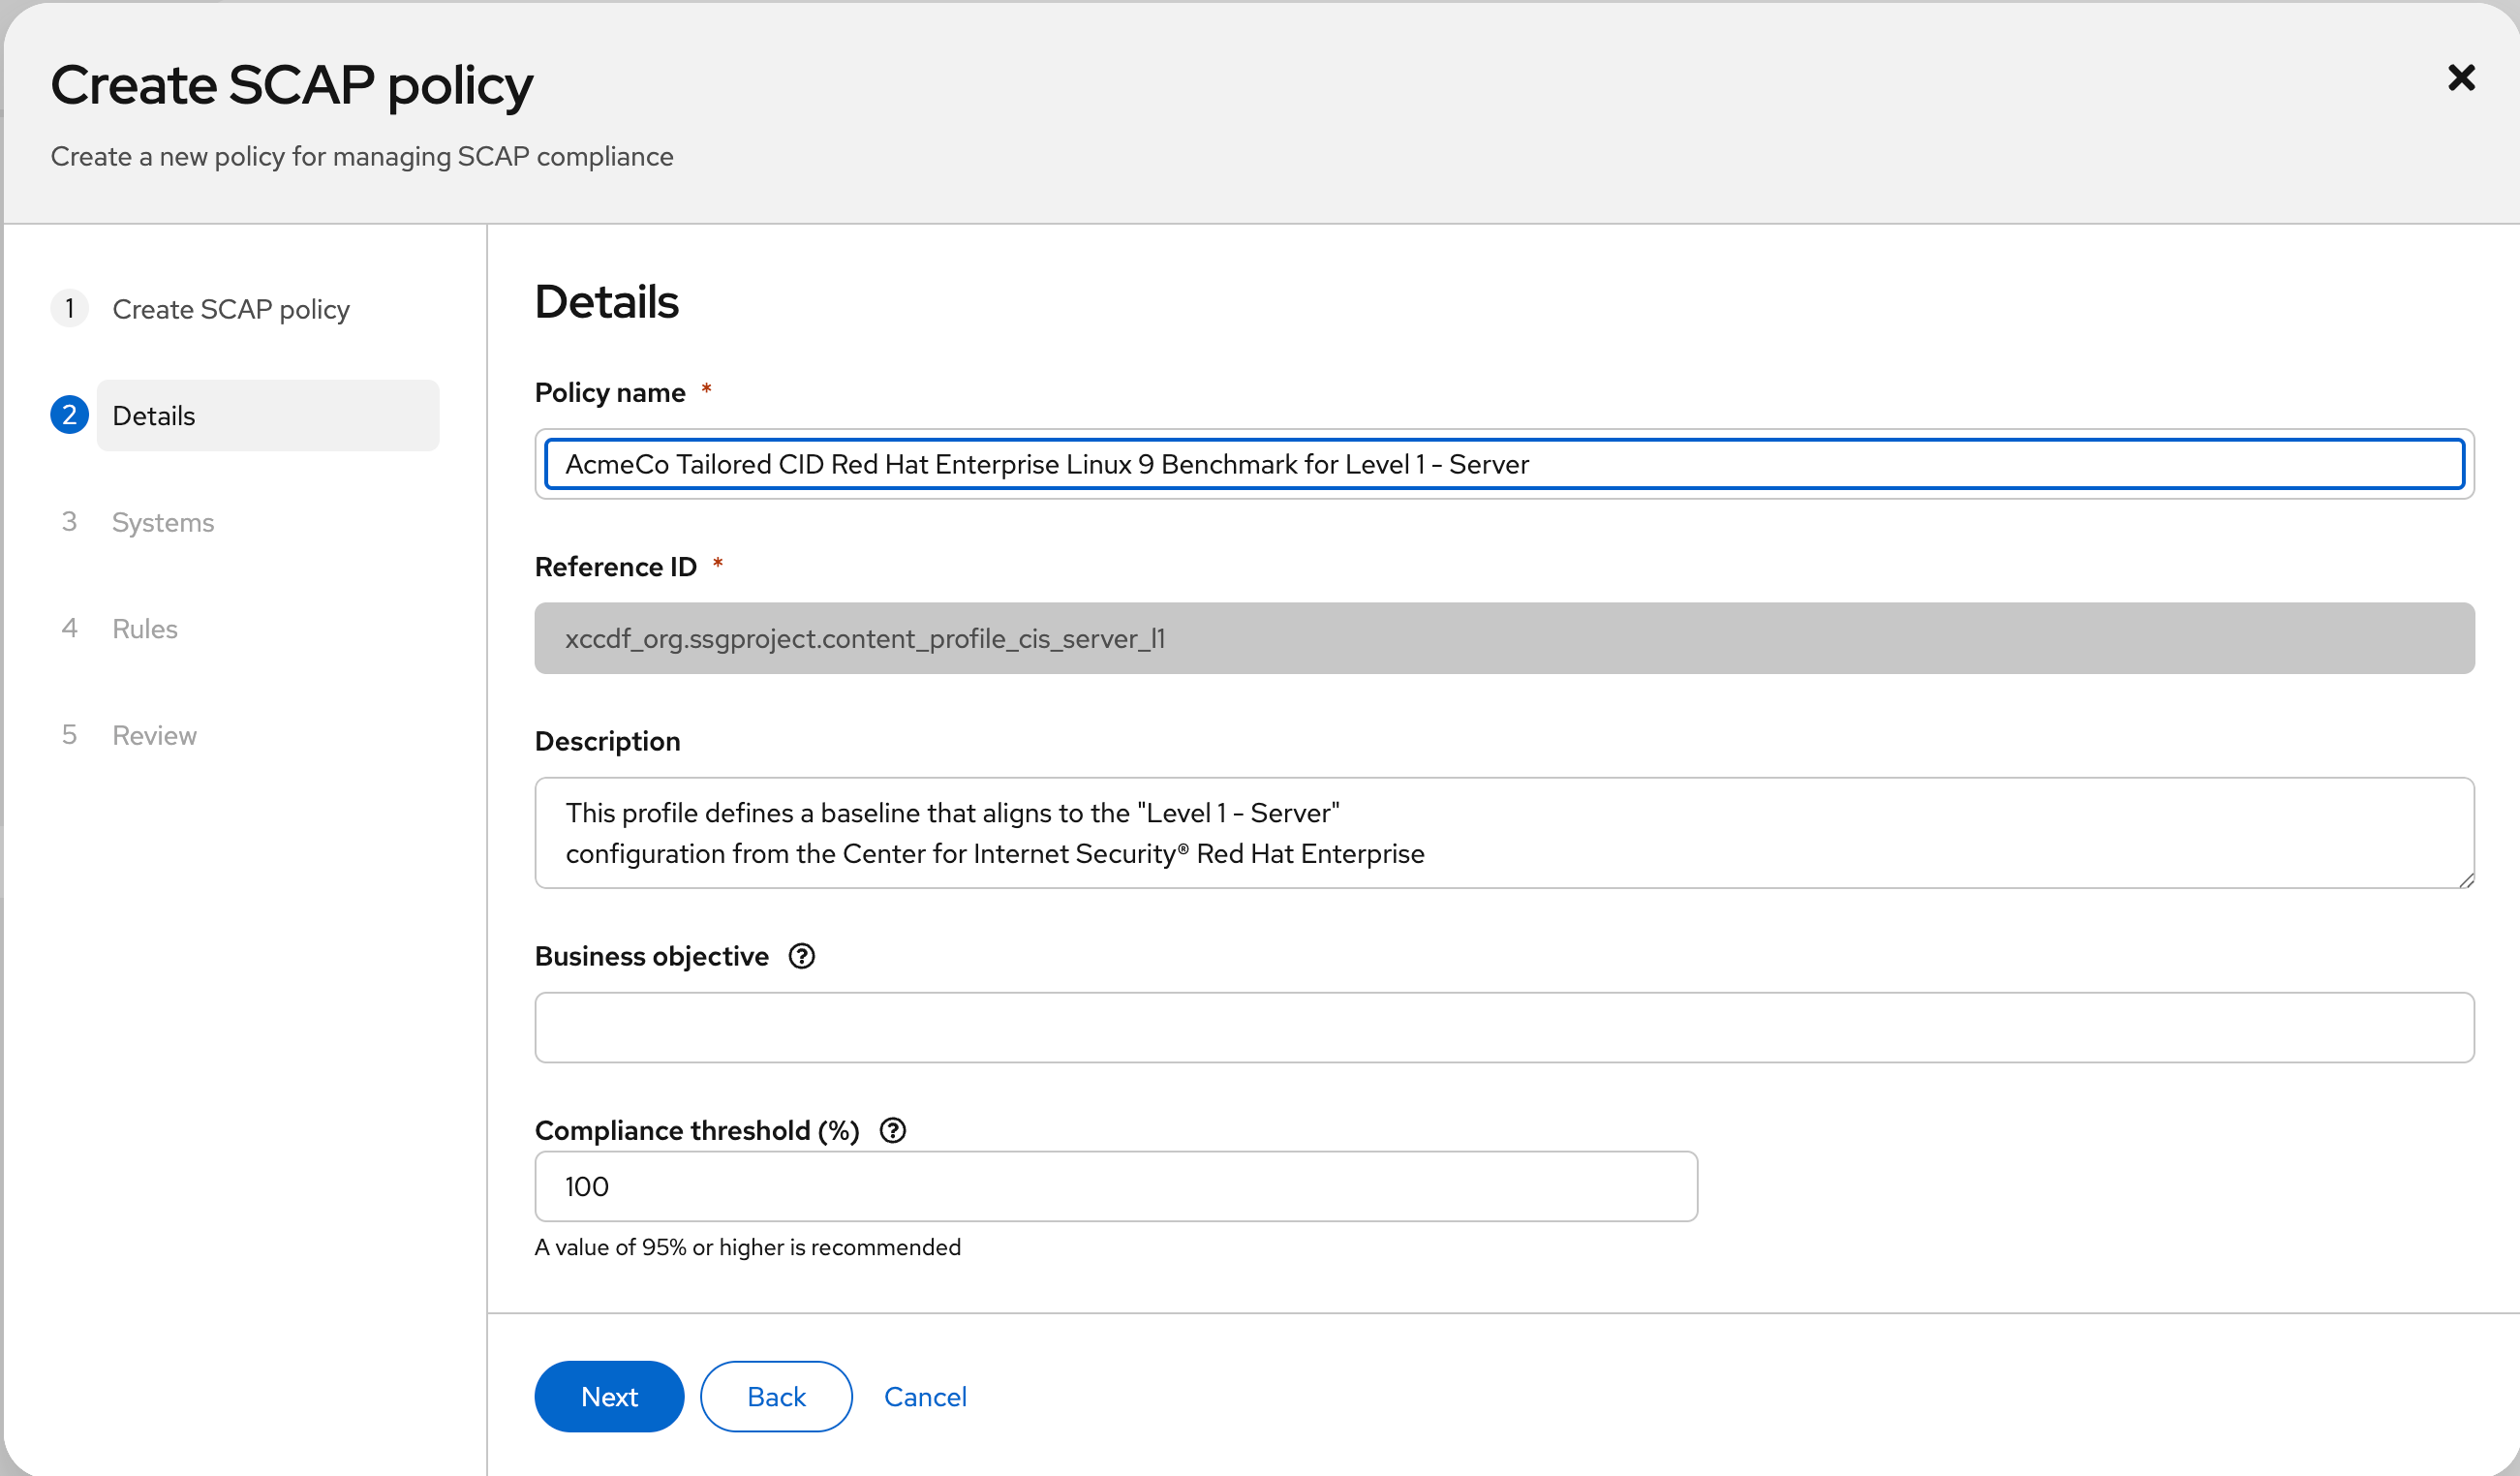
Give the policy a more meaningful and unique name if required. I suggest leaving the compliance threshold at 100% since you will want your system to be 100% compliant with your new customized policy (Figure 1).

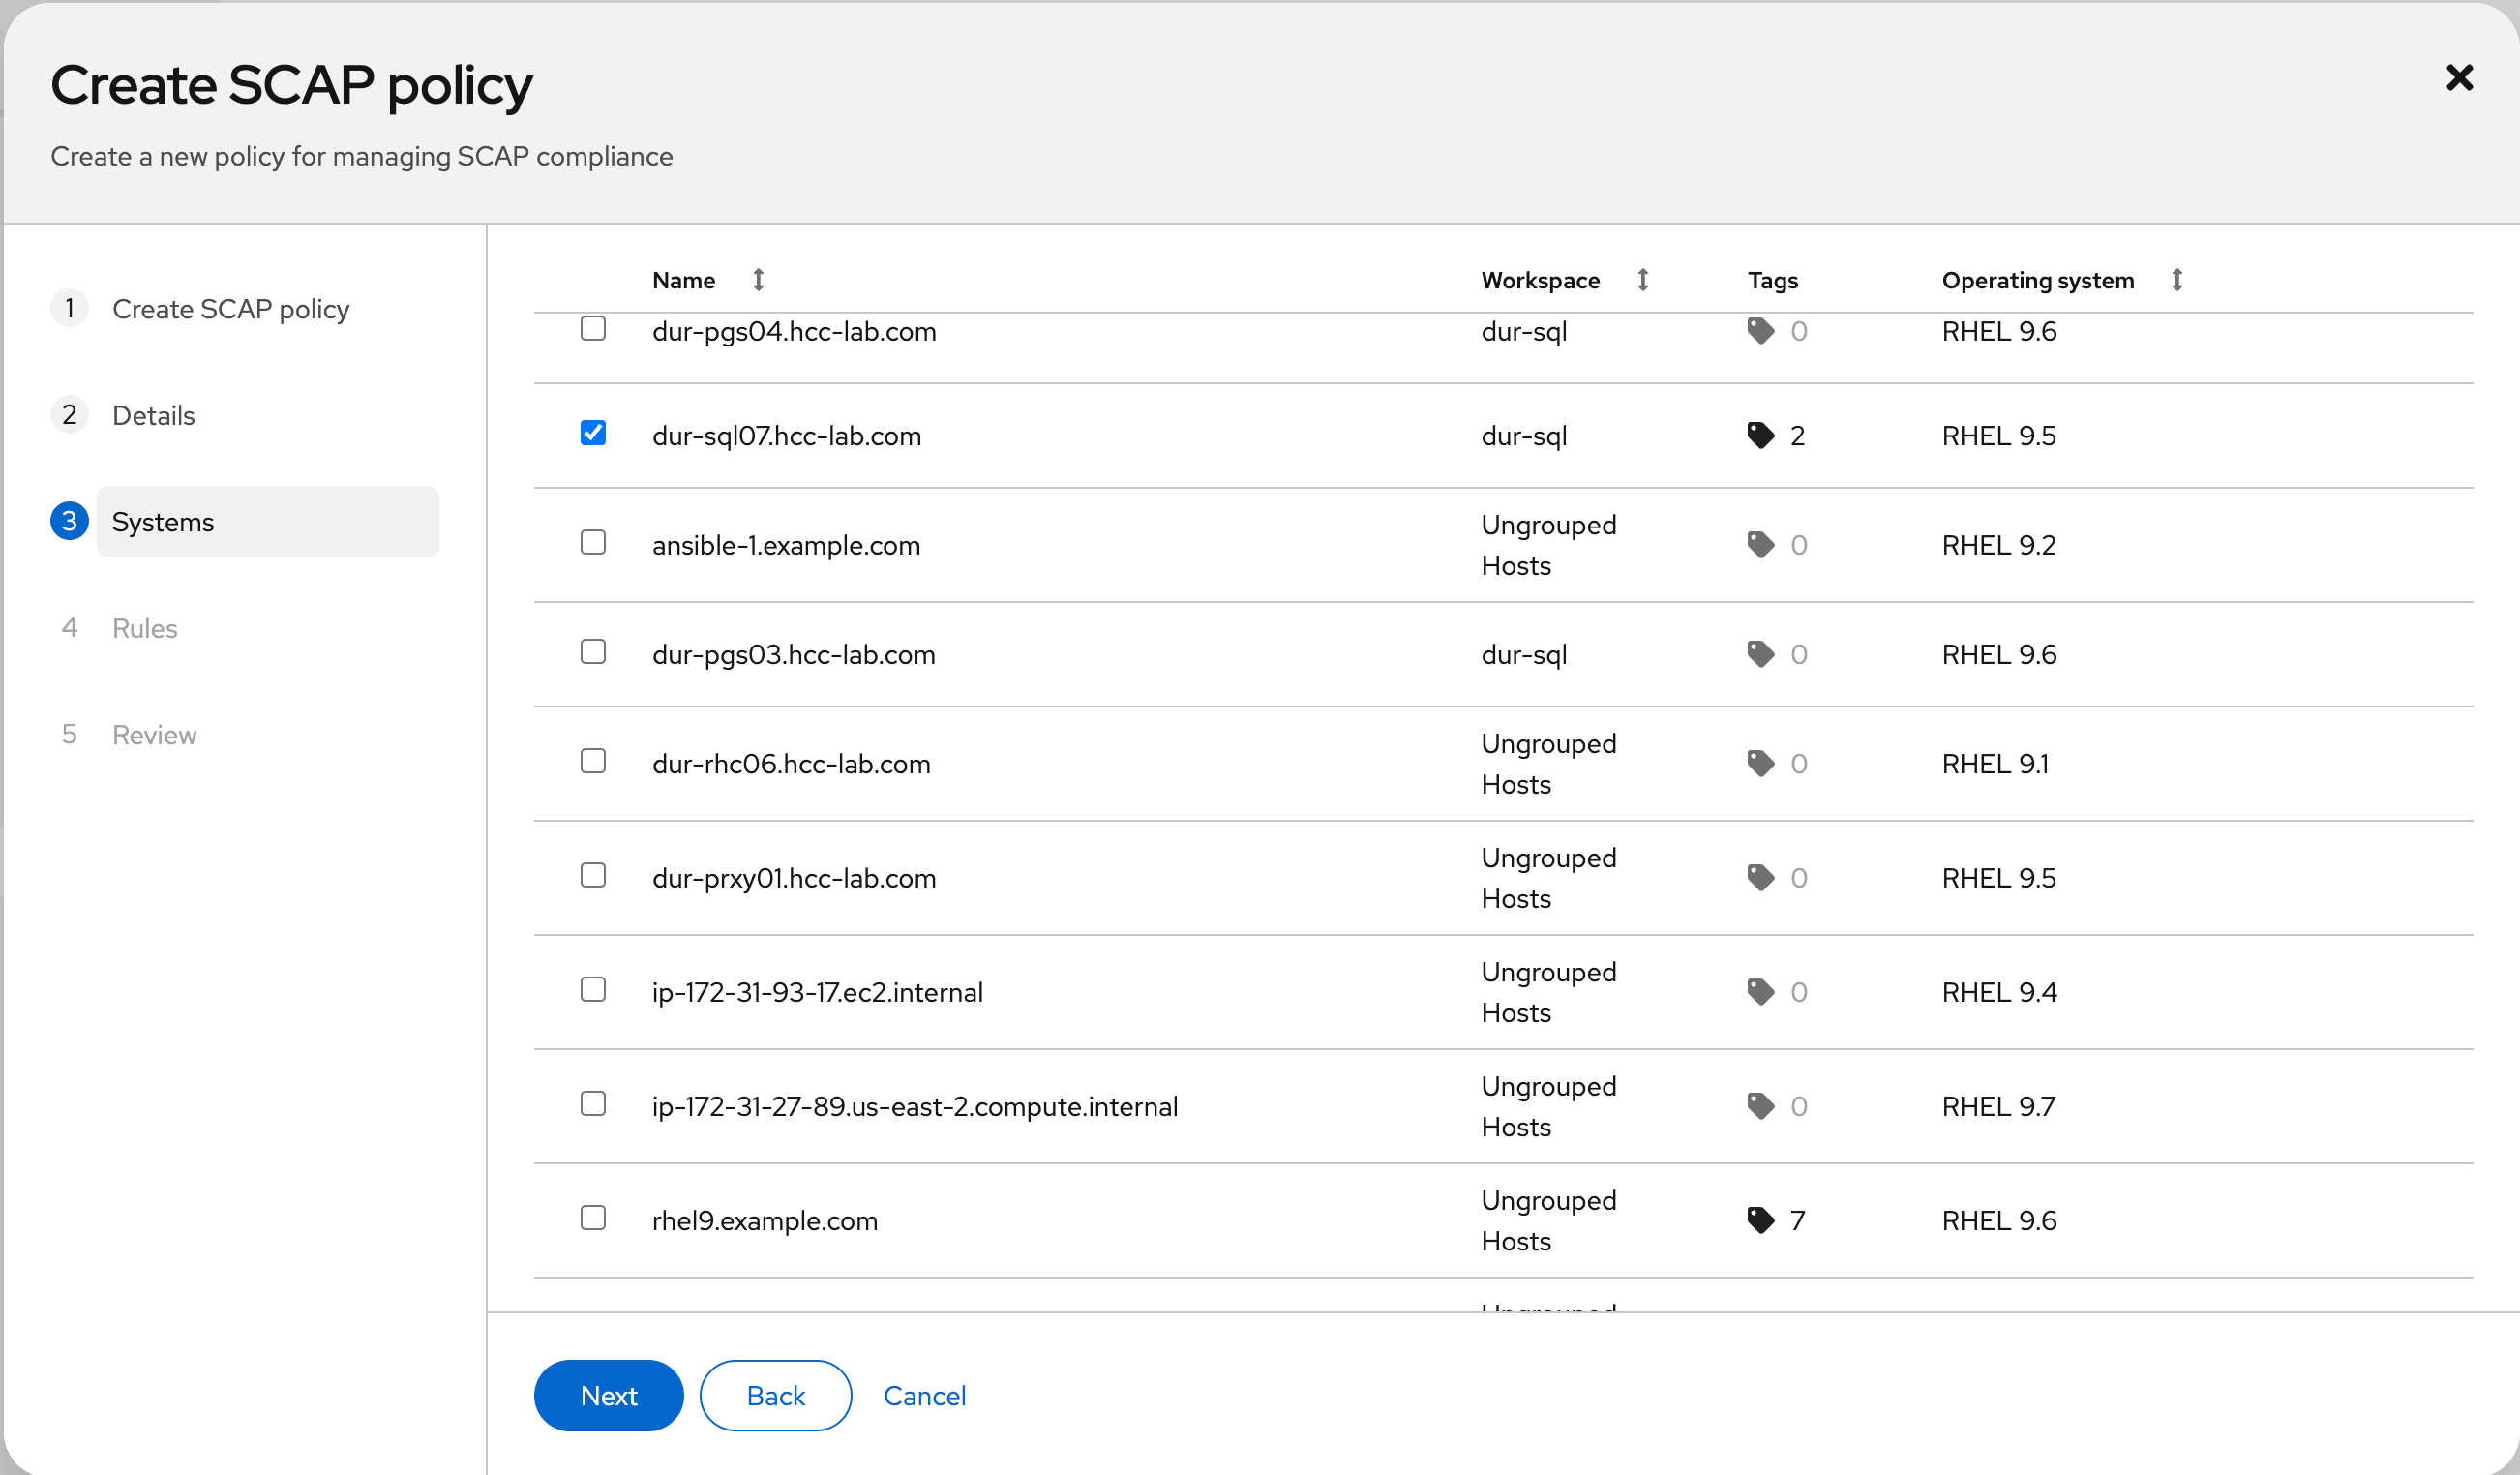
Figure 1: Create and name your policy. Select an existing system running the same RHEL minor release as the one you will build your image to include in the policy. This is a limitation of the policy creation workflow at the time of writing, and you can remove the selected system from the policy immediately after creation. I want to build a RHEL 9.5 image, so I need an existing RHEL 9.5 system registered with Red Hat Lightspeed for this task, as shown in Figure 2.

Figure 2: Associate your policy with an existing system. Here's where it gets interesting. Select which individual rules to exclude from the policy and customize parameters for rules that will remain included. OpenSCAP refers to this as tailoring. In this example, I will change the value for "Lock Accounts After Failed Password Attempts" (CCE-83587-6) from 3 failed log on attempts to 5 because I am a sloppy typist and want to cut myself some slack. (You probably don't want to do this in a real environment.) I will also exclude the rule "Disable Network File System (nfs)" (CCE-90850-9) to be able to use this system as an nfs server to share storage. Figures 3 and 4 depict this.
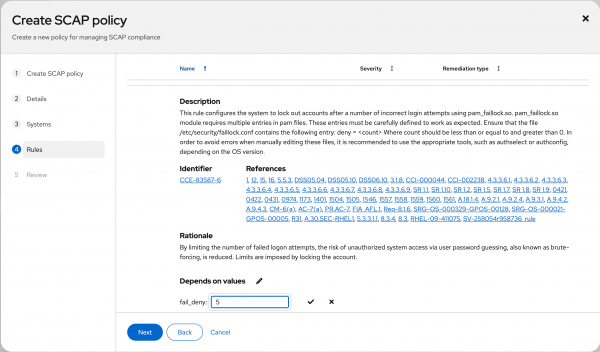
Figure 3: Tailor the values for a check within the policy. 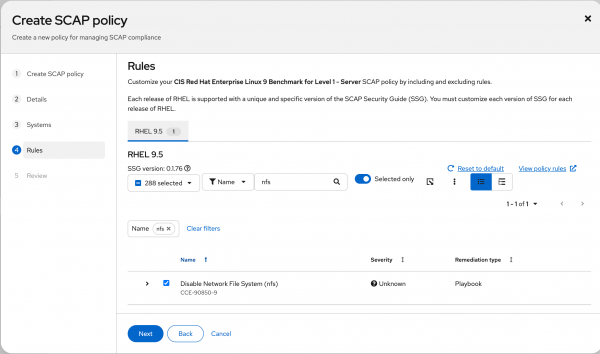
Figure 4: Use the check boxes to include and exclude rules from the policy. - Review and finish creating the policy.


Now that we have a policy, we can use it as part of the new build process.
Generate a customized, hardened image with Red Hat Lightspeed image builder
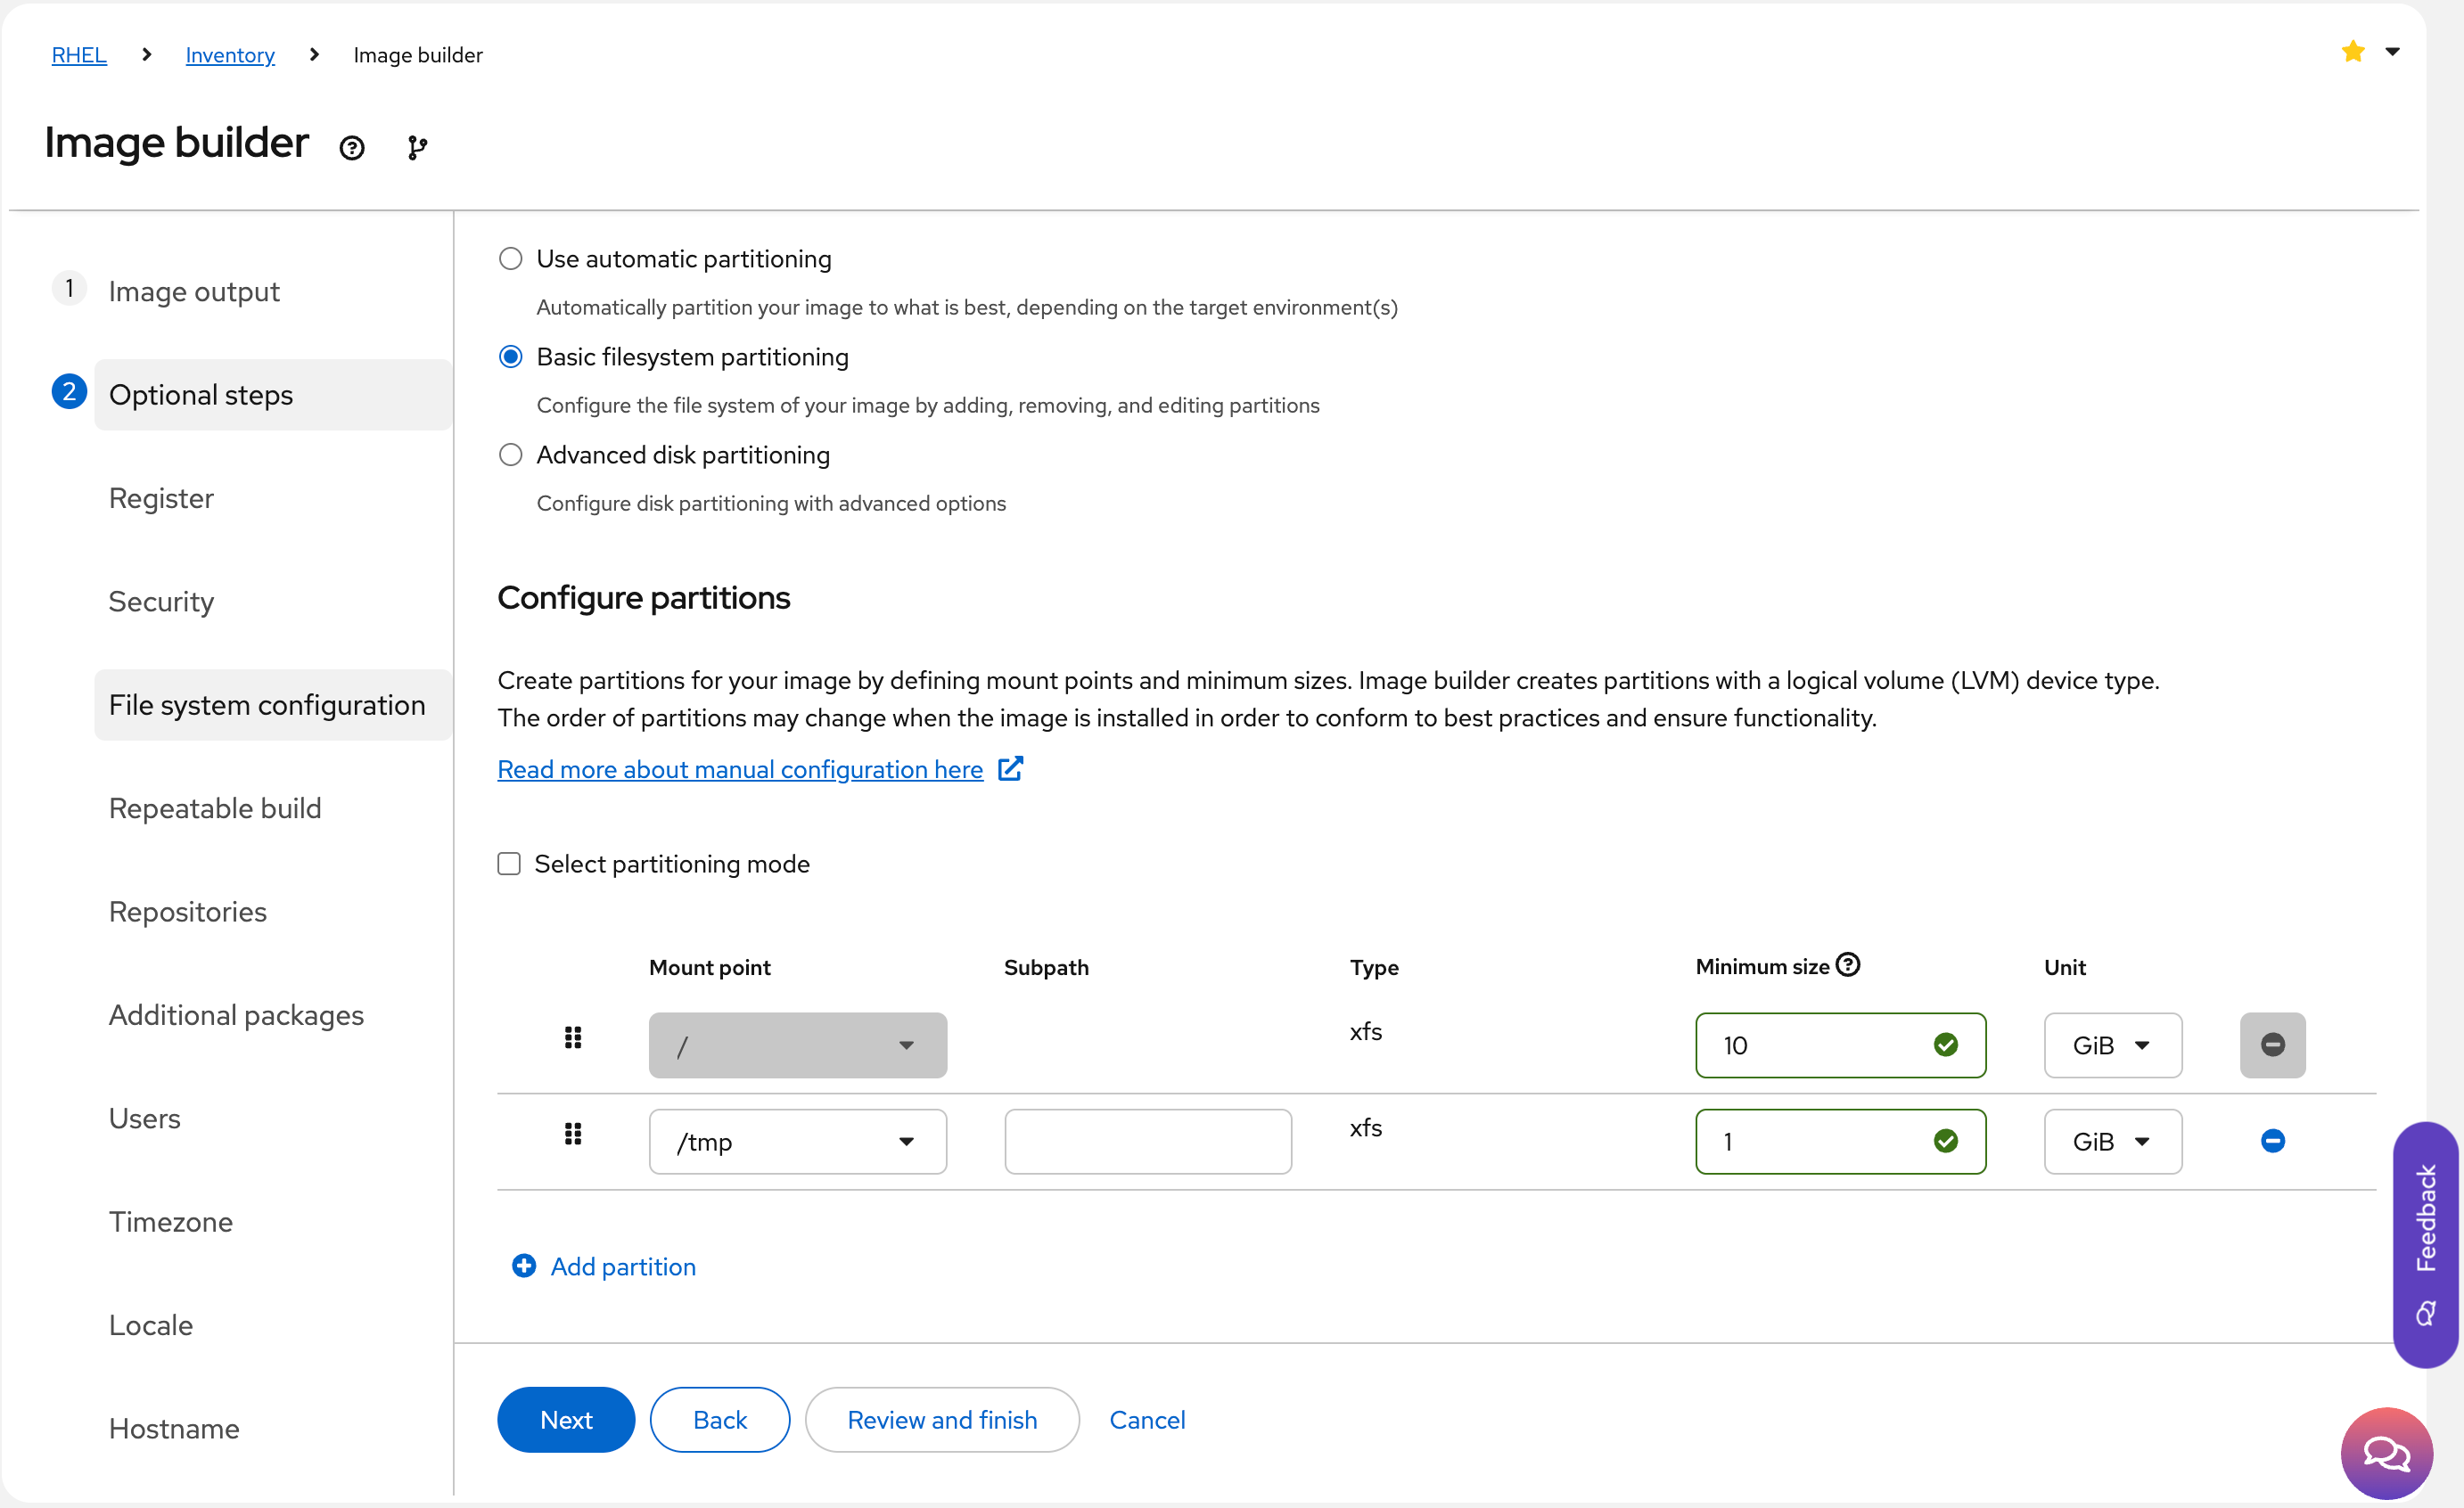
The RHEL compliance policies include Red Hat Ansible Automation Platform code snippets and shell scripts to help remediate most compliance check failures, but not all. This means that applying my customized CIS policy at build time is unlikely to make a system 100% compliant. One example of this is the rule "Ensure /tmp Located On Separate Partition" (CCE-90845-9). Remediating this requires that I create a separate partition somewhere in my storage, create a filesystem, and ensure it's mounted at boot time. Automation can't magically find this storage, but I can factor this into my new image's partitioning scheme to ensure that a new system is compliant to this control.
Here's what to do:
- Navigate to RHEL -> Inventory -> Image Builder (or go straight here: https://console.redhat.com/insights/image-builder).
Create a new image blueprint, then fill out the following menu items.
Image Output: Select RHEL 9 for the x86_64, and select the target environment. I will be building a qcow2 virtualization guest image in this example, but you can choose whichever environment(s) suits your needs (Figure 5).
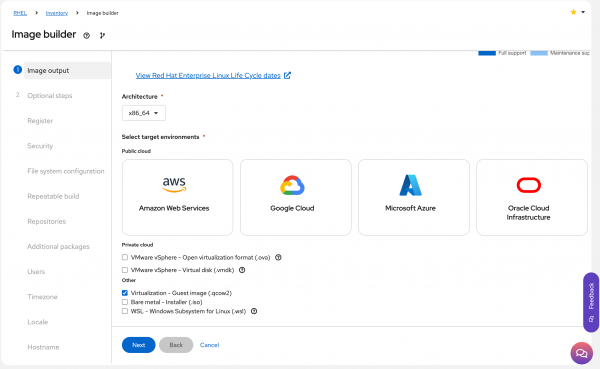
Figure 5: Select a target RHEL version, architecture, and environment for the image. Register: Select the registration method and Activation Key (if applicable).
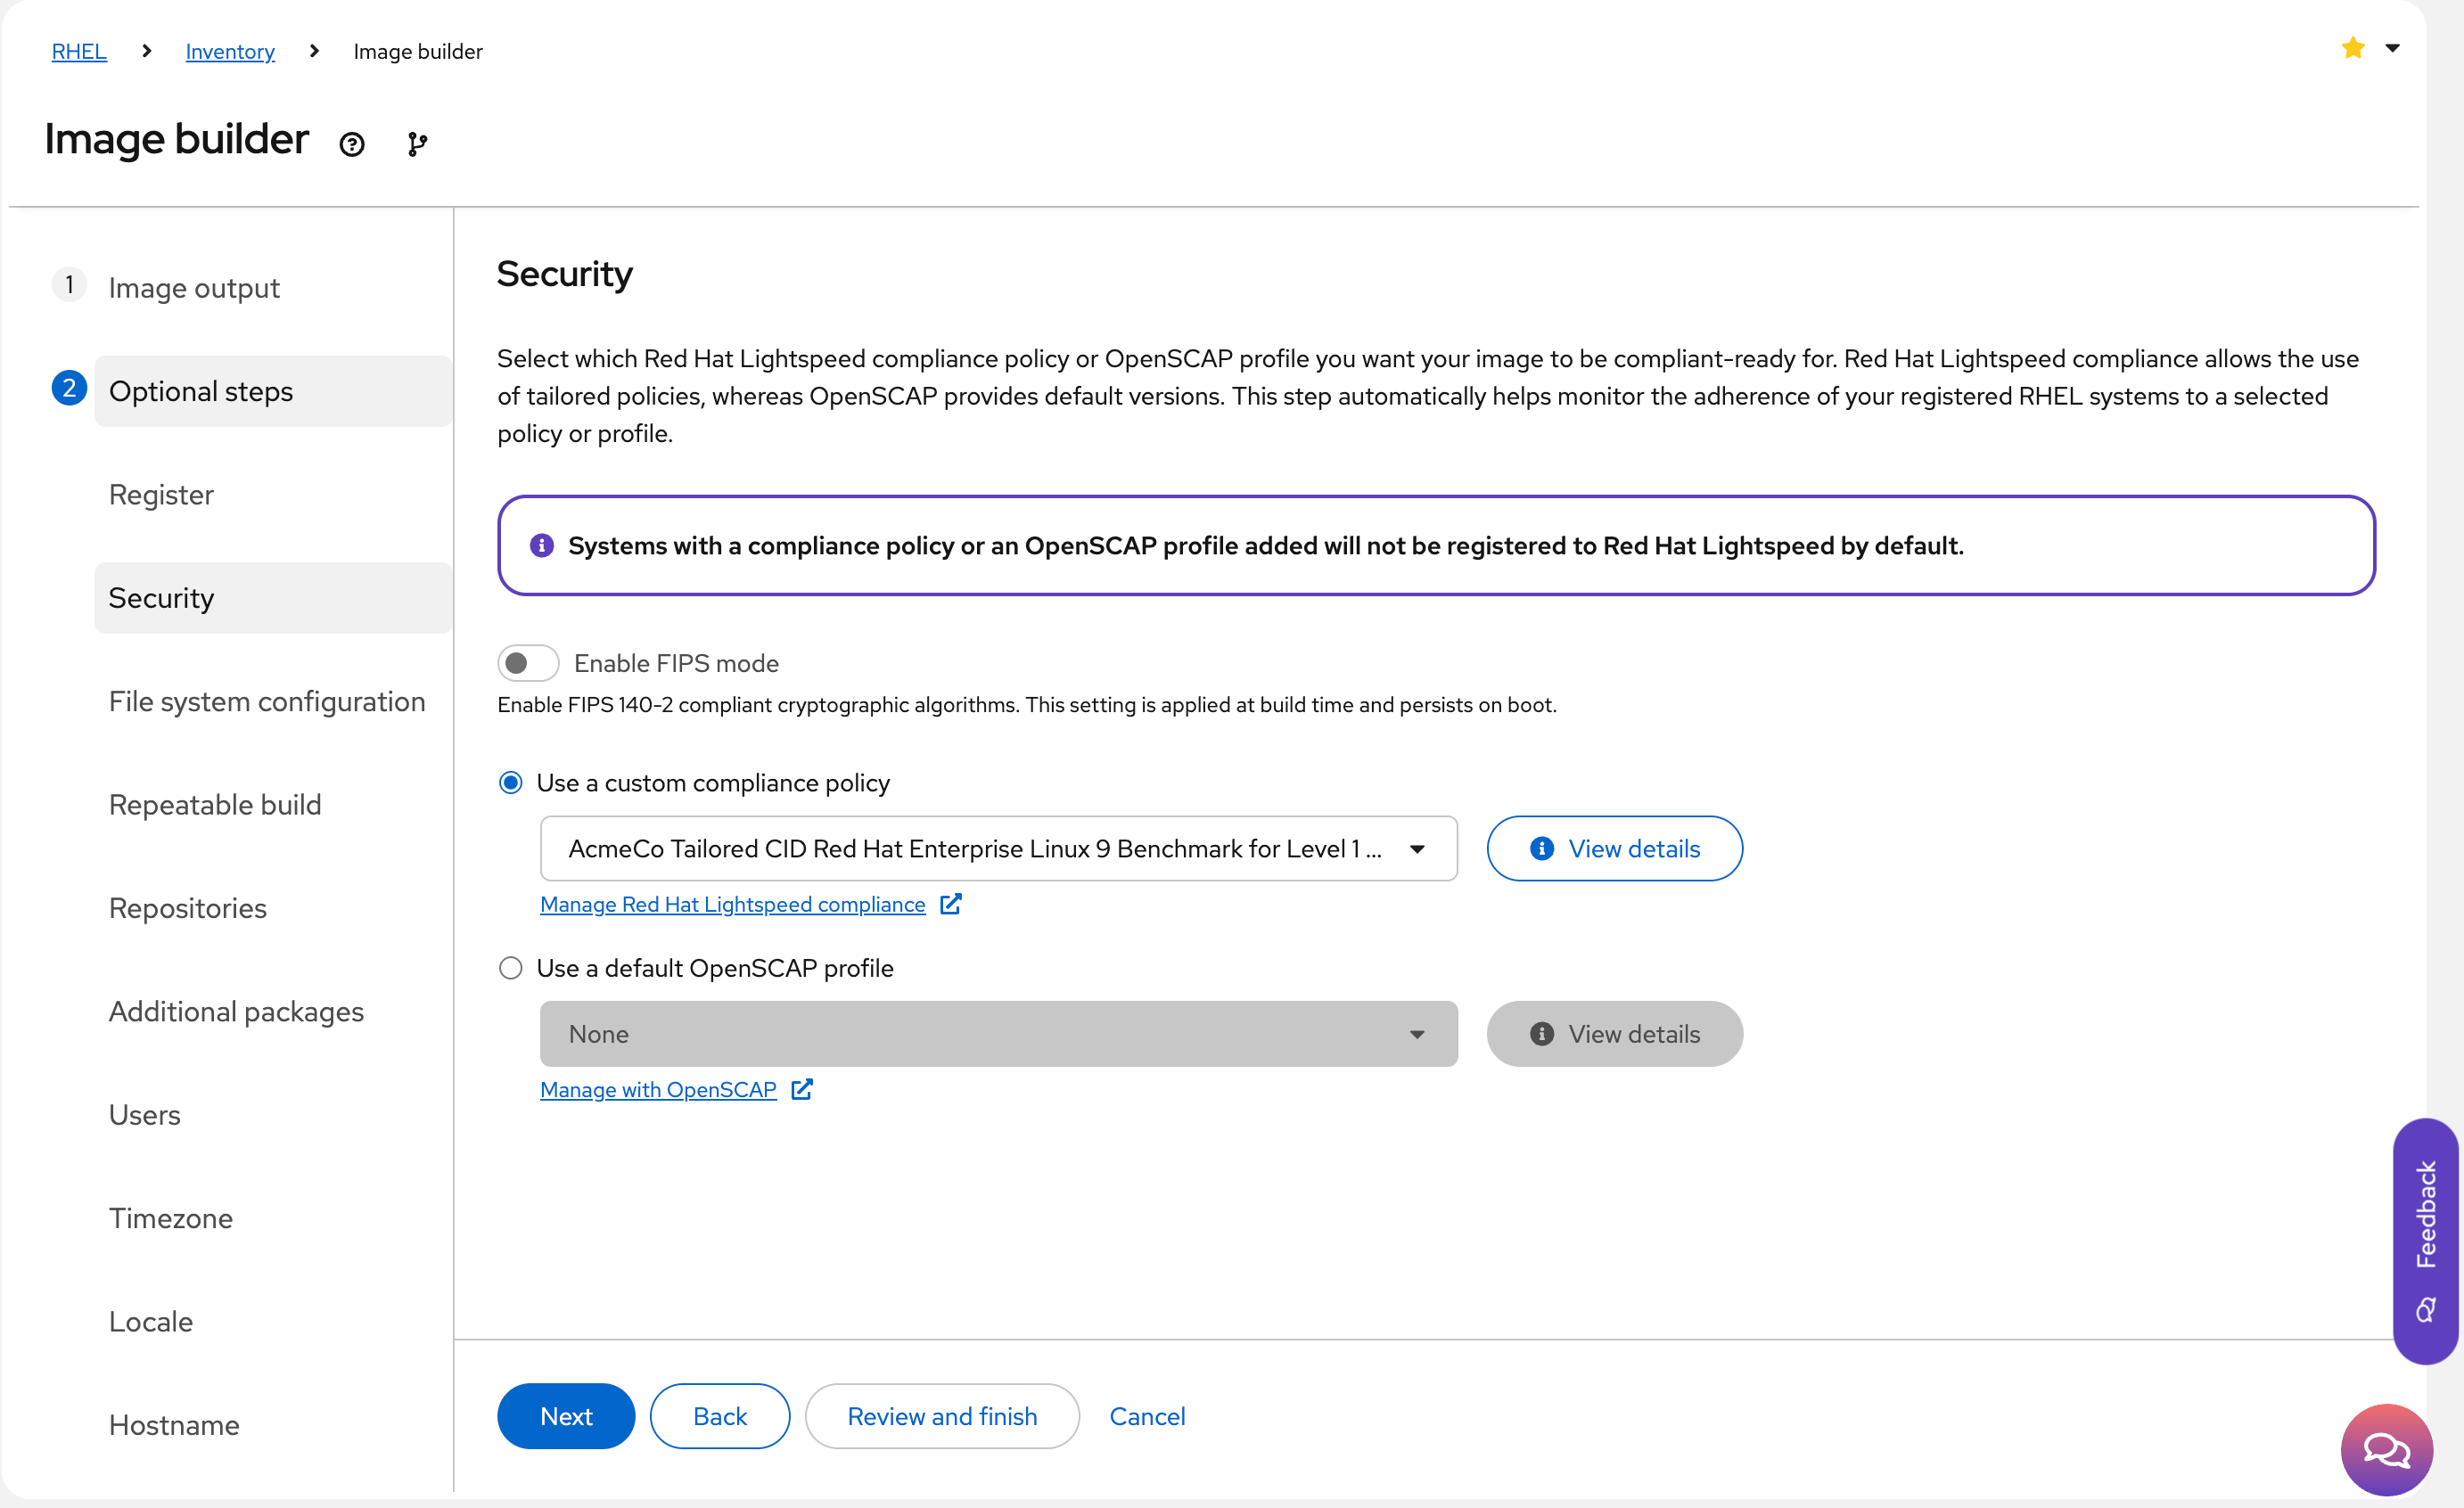
Security: Select the Use a custom compliance policy radio button. (Figure 6).
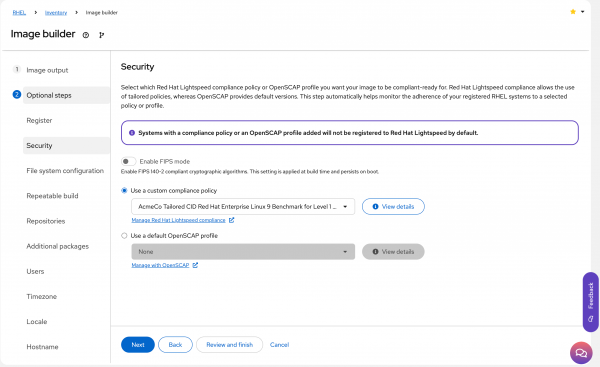
Figure 6: Select the appropriate Red Hat Lightspeed, formerly Red Hat Insights, compliance policy. Figure 6: Select the Use a custom compliance policy radio button. File system configuration: Since you selected the CIS Level 1 compliance policy that you created earlier, image builder has already included a separate
/tmppartition, as shown in Figure 7.
Figure 7: Customize partitioning if required for the workload or for a compliance check. Repeatable Build: Select the Disable repeatable build radio button to build a system that has the latest packages available, or select Enable repeatable build and choose a date to create an image that only contains packages that are available up to that date. You can also use Lightspeed for RHEL's content templates feature to shape the package content that is available to this system, but that topic is not covered in this learning path.
Repositories: Add any custom repositories the host needs to have available.
Additional packages: Add any additional packages to include in systems built from the image (Figure 8). I personally find
tmuxandvimparticularly useful.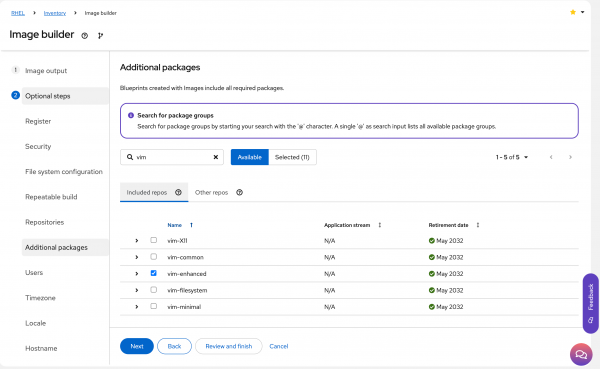
Figure 8: Select additional packages for the build. First boot configuration: Add any shell scripts to execute at first boot. You can find more reading on first boot scripts here.
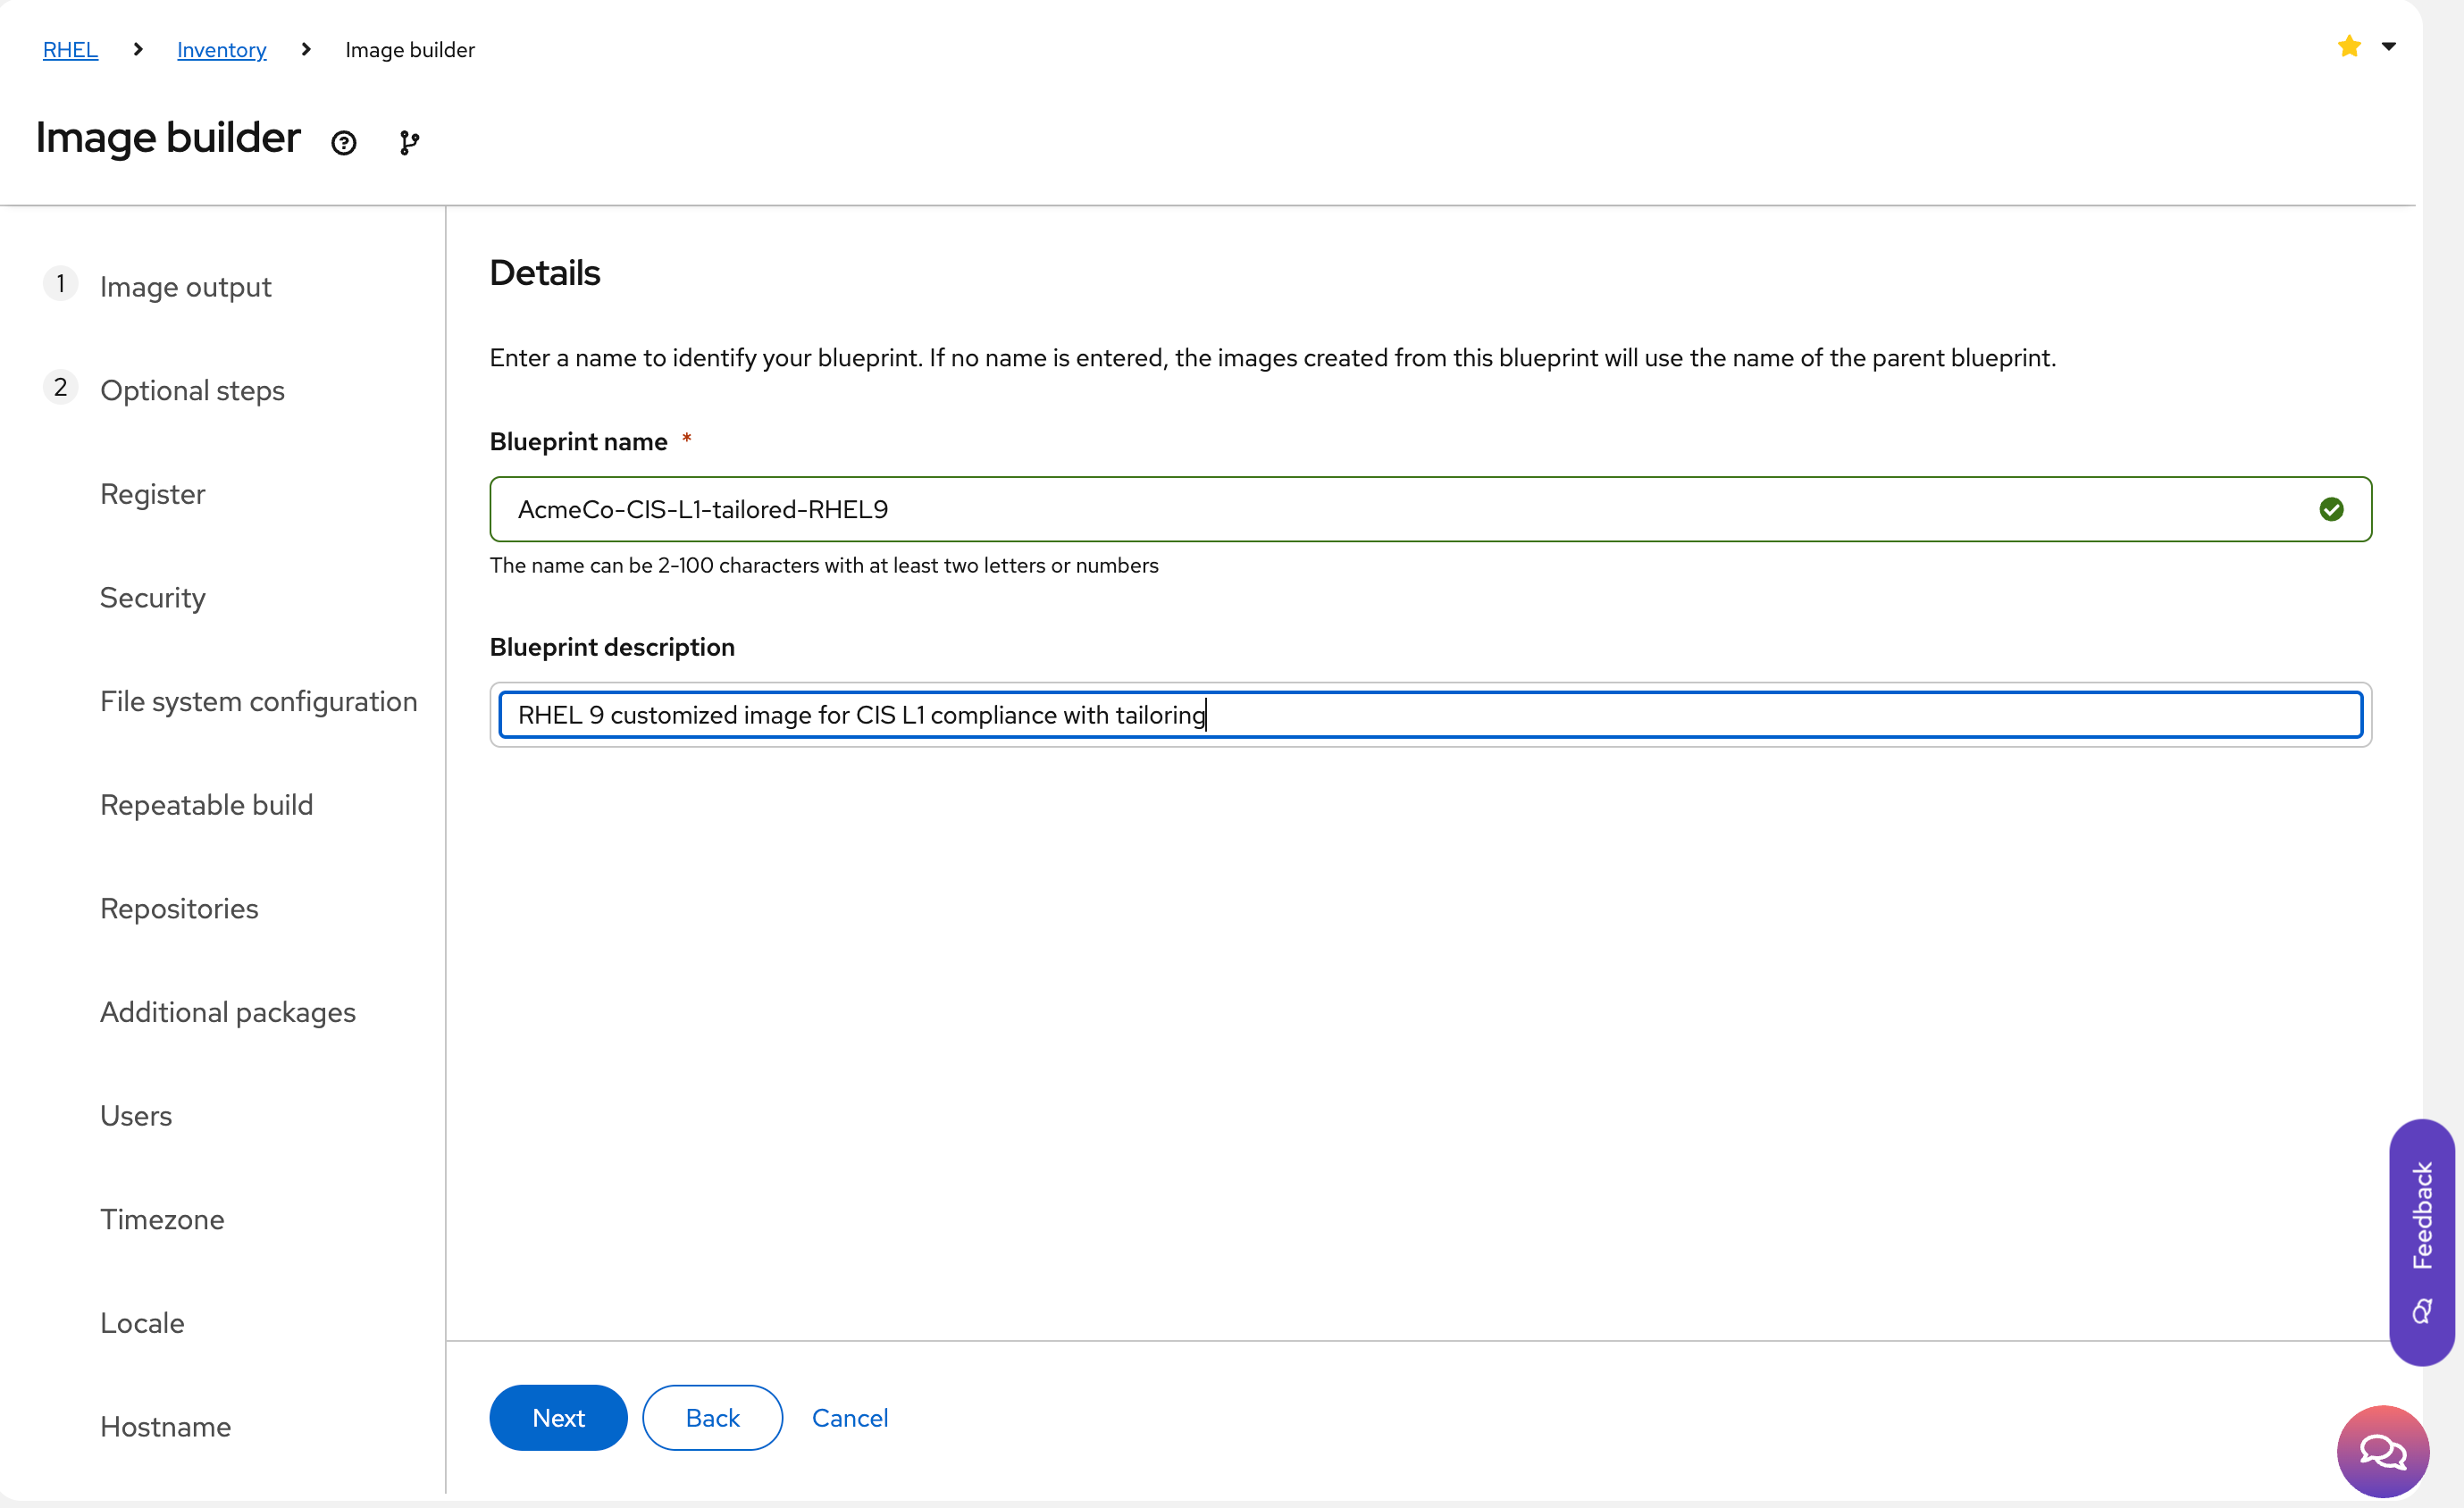
Details: Give the blueprint a meaningful name and description as shown in Figure 9.
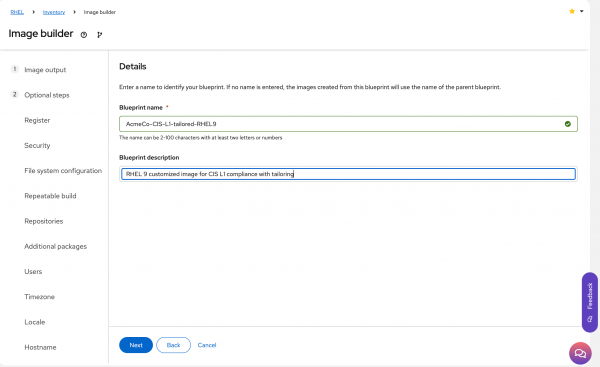
Figure 9: Name the blueprint. Review: Double-check the configuration and revise any items that need changing or correcting.
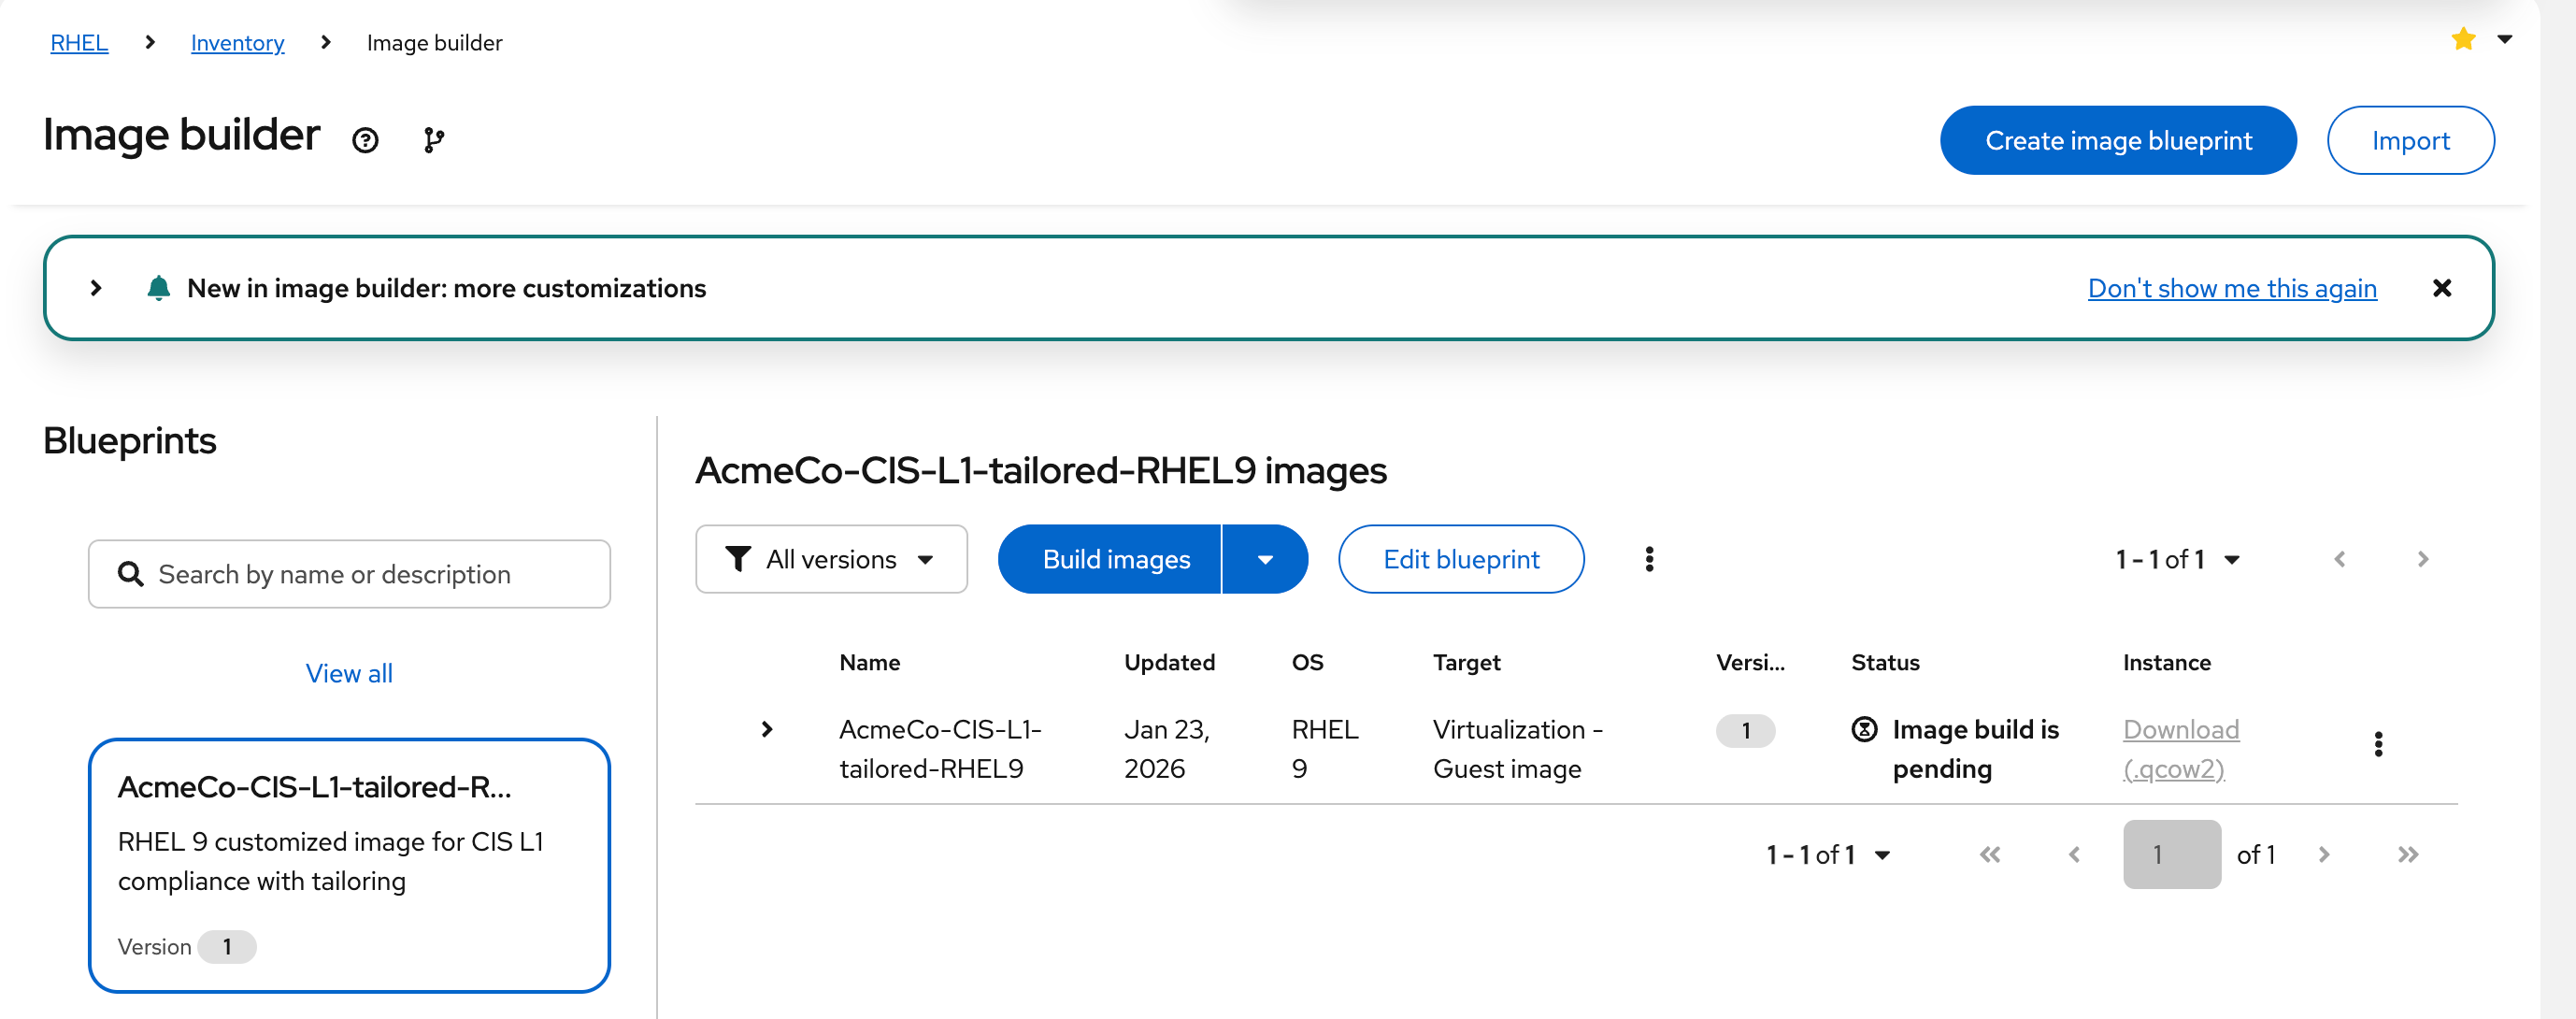
Create the blueprint, and optionally, build the image at the same time (Figure 10).

Figure 10: Generate the blueprint and build the image. - Download the qcow2 image. If building the image in a different format, ensure that the image is downloaded locally before it expires (usually 6 hours) or pushed to the cloud provider as required.


Now that we have built and downloaded the image, it’s time to deploy the first custom-hardened system.
Common issues and troubleshooting
The most challenging part of the process has nothing to do with the tools or procedures. Instead, it is coming to an agreement on what the security baseline should be and getting sign-off on any customizations (i.e., tailoring) required for the application workload or general operations. Success requires collaboration between application teams, Linux teams, and security teams to come up with workable agreements that allow applications to run correctly and minimize the risk to the business.
The final call-out to make is the previously mentioned limitation where a compliance policy must be assigned to a system at creation time. This presents two challenges:
- You may need to create a (temporary) RHEL instance (host) to work around this step.
- Any host you assign to the profile (and then immediately un-assign if required) must be running the same minor RHEL release as what you want Red Hat Lightspeed image builder to build on. This is because tailoring is done on a per-minor release basis (e.g., RHEL 9.4 and RHEL 9.5), and the tailoring you do for RHEL 9.4 compliance won't be applied to RHEL 9.5.
Try it yourself
Now you know how to create a tailored compliance policy using the Red Hat Lightspeed compliance service and how to bake that policy into images built using Red Hat Lightspeed image builder.
Feel free to experiment with the services at console.redhat.com and build images that meet your needs. Remember that these services are included in your Red Hat Enterprise Linux subscription. So make the most of the value of your subscription to help reduce security risk and drive consistency in your environment.
The next steps are to build a system using the newly created image, assign it to the chosen compliance profile, perform a compliance scan against that system, and consider how to remediate any issues identified.
In the next lesson, you will learn how to scan your system and assess any compliance issues you identify with the Red Hat Lightspeed compliance service.
