AI coding assistants have shifted from novelty to necessity, changing how developers work. However, most current tools come with a hidden constraint: they are tightly coupled to a primary model provider.
What if your development environment could switch between GPT, Claude, Gemini, or even local models without changing tools?
That's where OpenCode comes in. When combined with cloud development platforms like Red Hat OpenShift Dev Spaces (based on Eclipse Che), it unlocks a flexible and effective new way to build with AI.
OpenCode: A model-neutral AI coding assistant
OpenCode CLI is part of a new wave of agentic tools designed to act as intelligent coding assistants. It is available as a terminal interface, desktop application, and IDE extension, making it flexible for different development workflows.
While it sits alongside tools like Codex CLI, Claude Code, and Gemini CLI, OpenCode CLI takes a fundamentally different approach by being model-neutral. Instead of being tied to a single provider, OpenCode supports a wide range of providers (over 75 as per current documentation), including OpenAI, Anthropic Claude, Google Gemini, and local large language models (LLMs) via Ollama.
This allows developers to switch models on demand, compare outputs, avoid vendor lock-in, and even run fully offline when configured with local models (for example, Ollama), subject to hardware constraints.
How OpenCode differs from other CLI agents
While it might seem like just another agentic CLI, OpenCode distinguishes itself by supporting a wide range of model providers. The following table shows a high-level comparison of OpenCode CLI versus other agentic CLIs.
| Capability | OpenCode CLI | Typical agentic CLIs |
|---|---|---|
| License | Open source (MIT) | Proprietary |
| Model support | Multi-model (75+) | Single provider |
| Vendor lock-in | No | Yes |
| Local model support | Yes | Limited or none |
| Cost optimization | Flexible | Restricted |
| Air-gapped compatibility | Possible | Rare |
| Enterprise flexibility | High | Moderate to low |
| Workflow changes required | Minimal | Often required |
Run OpenCode in Red Hat OpenShift Dev Spaces
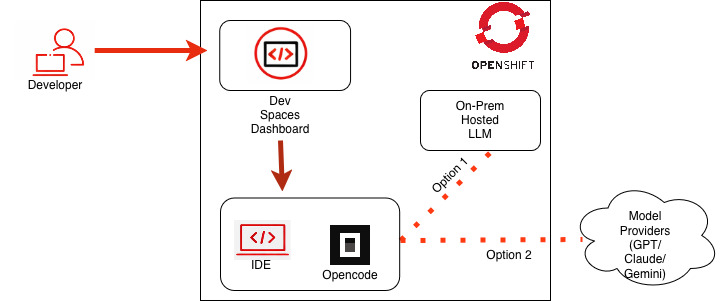
We will run OpenCode inside our cloud development environment, powered by OpenShift Dev Spaces, as illustrated in Figure 1. This setup lets developers use AI assistance in their workspace and switch models during development without interruption.
How to set up your environment
Before you begin, ensure you have a Developer Sandbox account. After you create an account, you should be able to access OpenShift Dev Spaces.
Follow these steps to set up your cloud development environment:
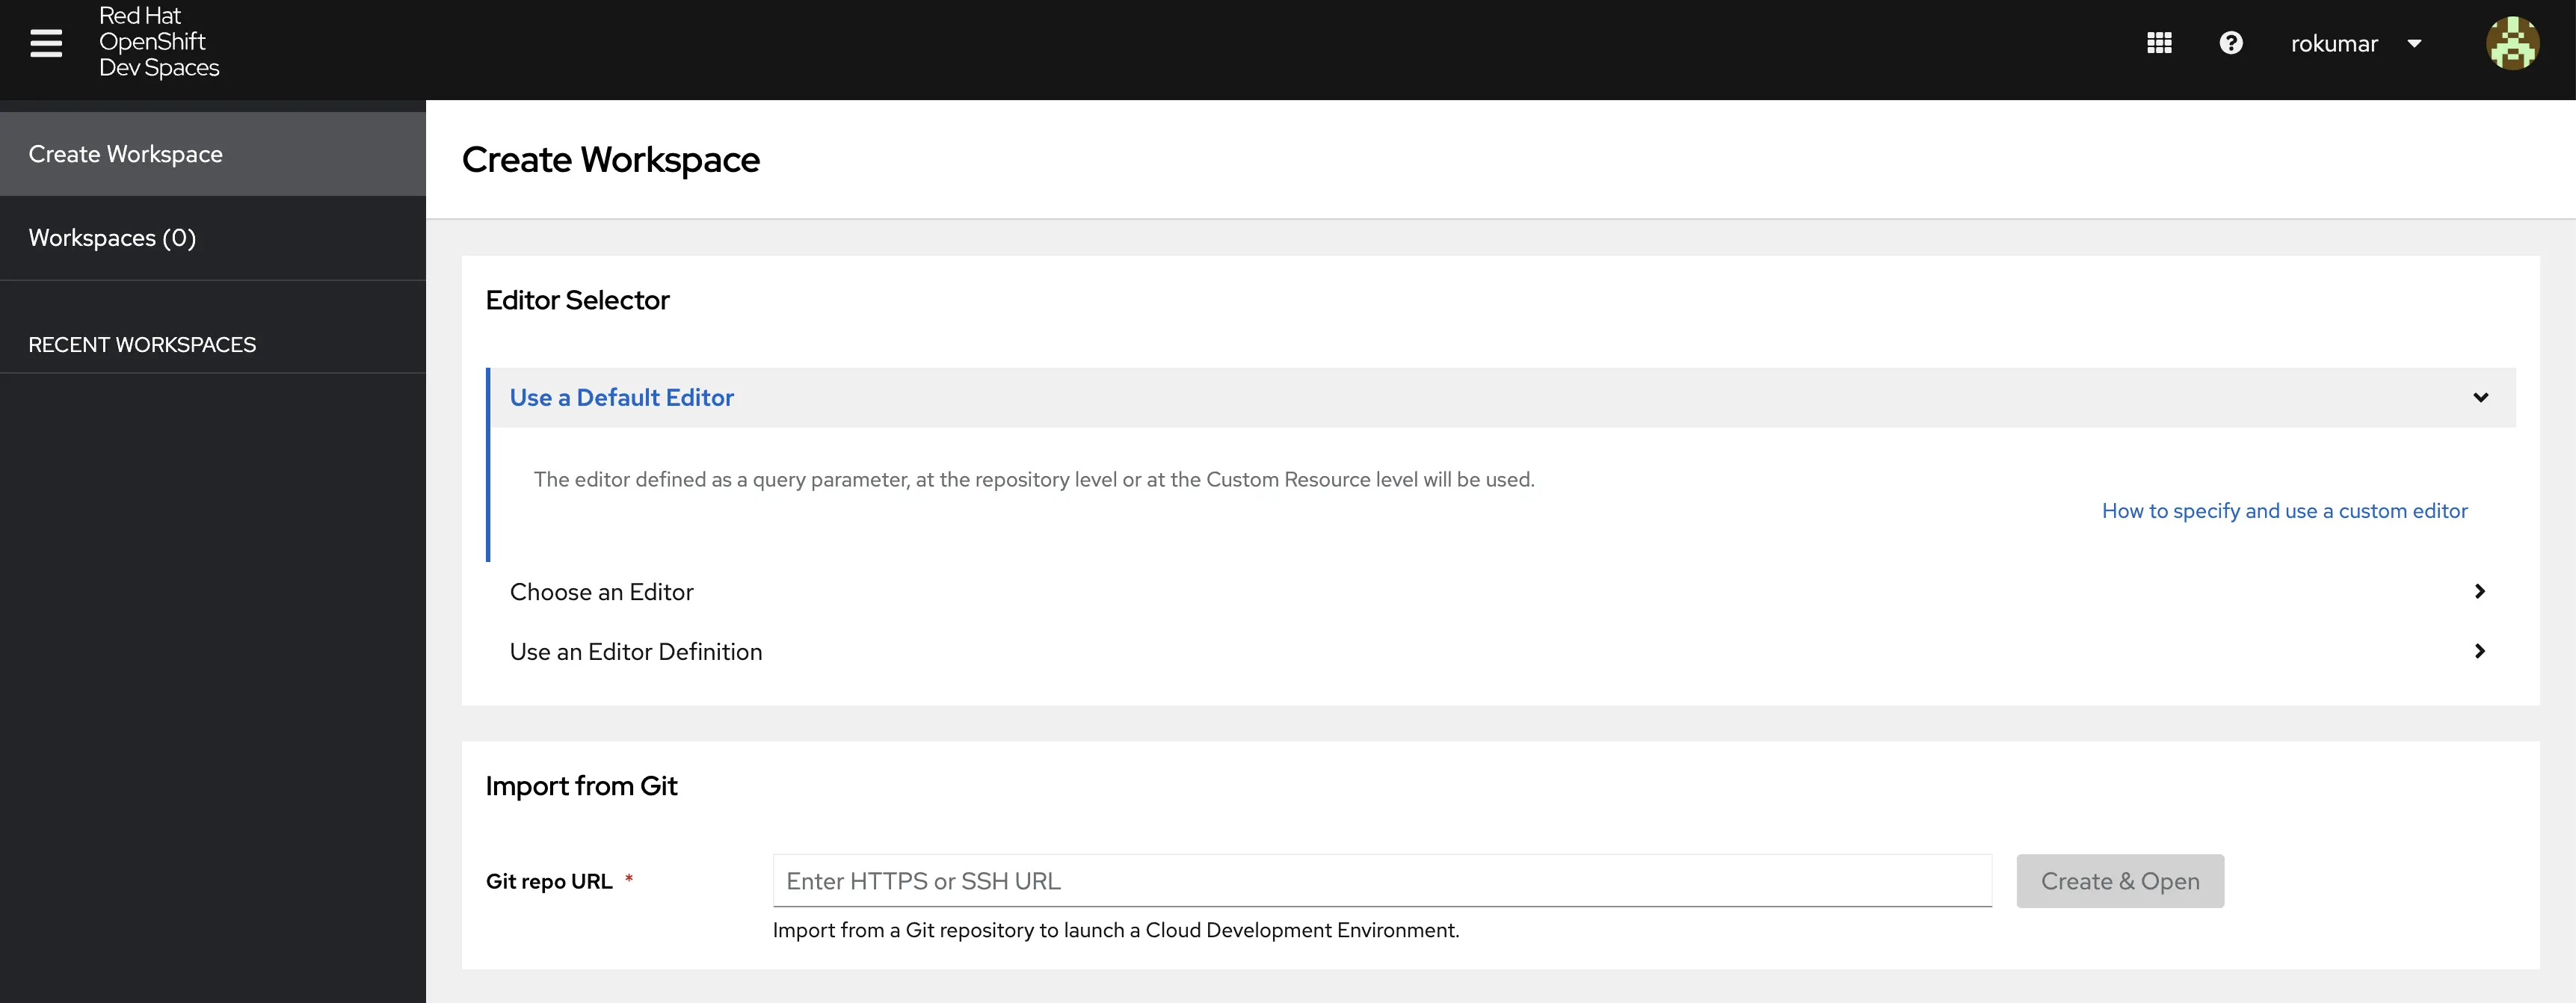
To access Red Hat OpenShift Dev Spaces, navigate to the user dashboard (Figure 2).

Figure 2: Red Hat OpenShift Dev Spaces User Dashboard Figure 2: Red Hat OpenShift Dev Spaces user dashboard. - To access OpenCode, ensure it is available in your development environment. We will use this repository, which contains the OpenCode CLI and other AI tools.
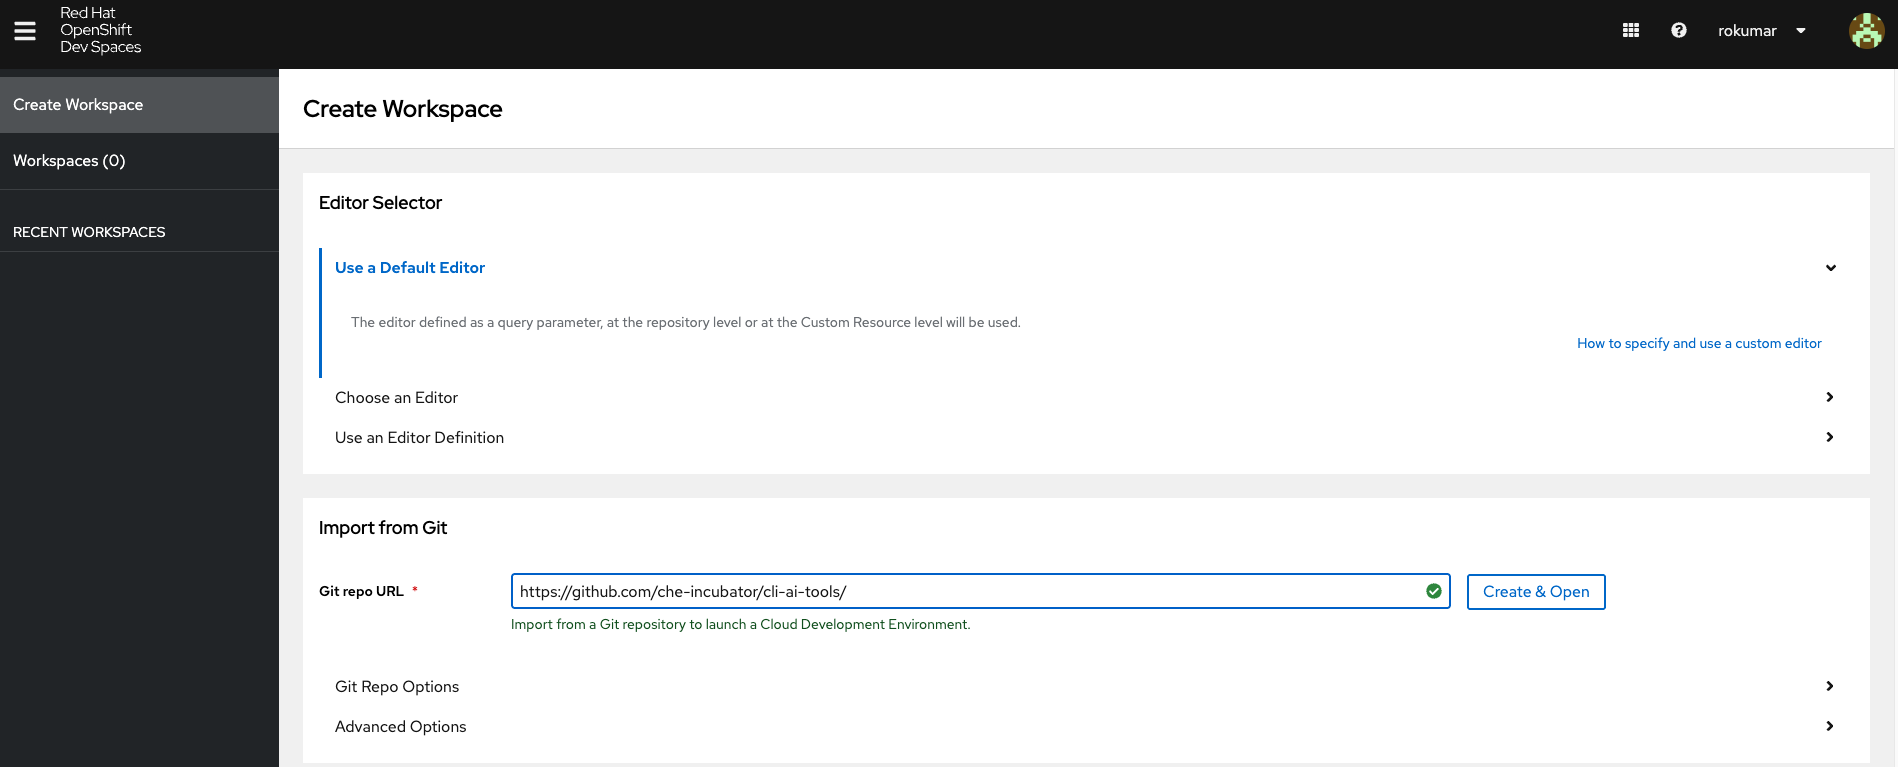
In the user dashboard, go to the Create Workspace tab and enter the repository URL for this activity:
https://github.com/che-incubator/cli-ai-tools/. Then select Create & Open (Figure 3).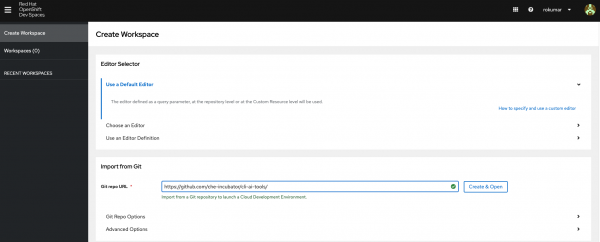
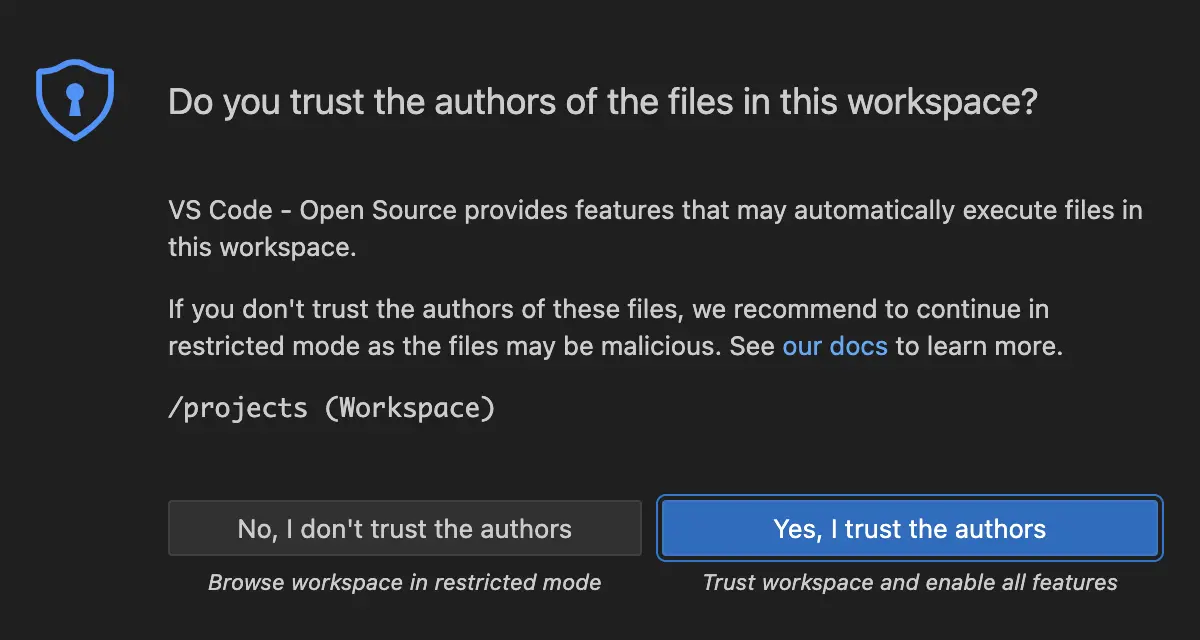
Figure 3: Starting Cloud Development Environment from GitHub URL Figure 3: Starting the cloud development environment from the GitHub URL. During initialization, you might see a prompt asking if you trust the authors of the files in this workspace (Figure 4). To proceed, select Yes, I trust the authors.
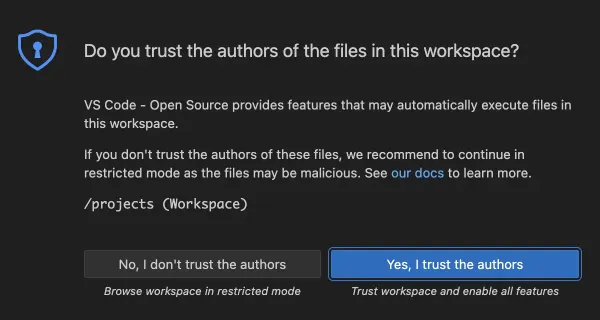
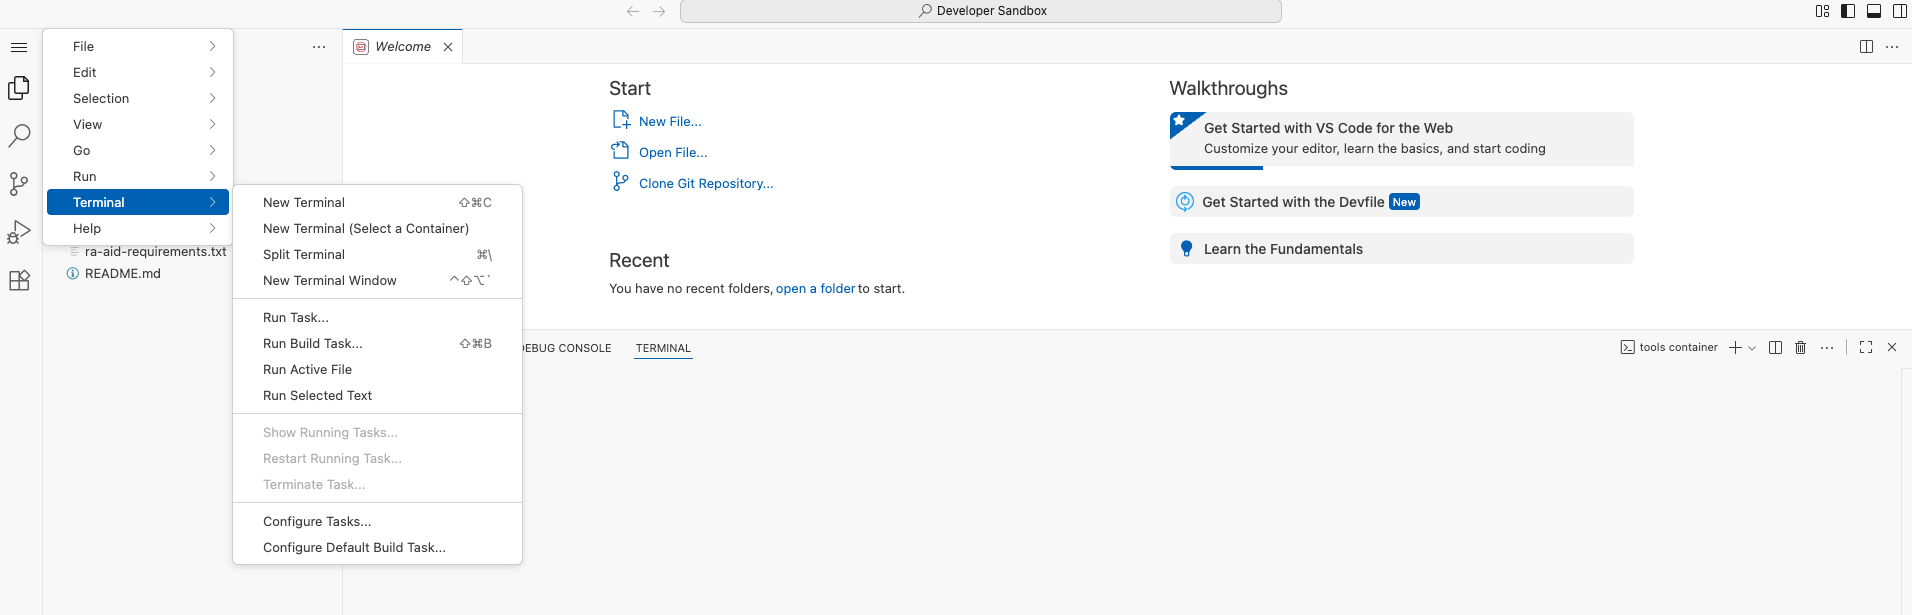
Figure 4: Visual Studio Code - Open Source ("Code - OSS") Warning Pop-Up Figure 4: VS Code - Open Source ("Code - OSS") warning pop-up. On the left sidebar menu, choose Terminal and open it (Figure 5).
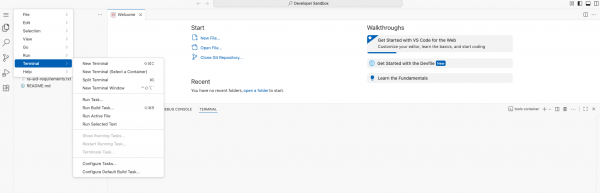
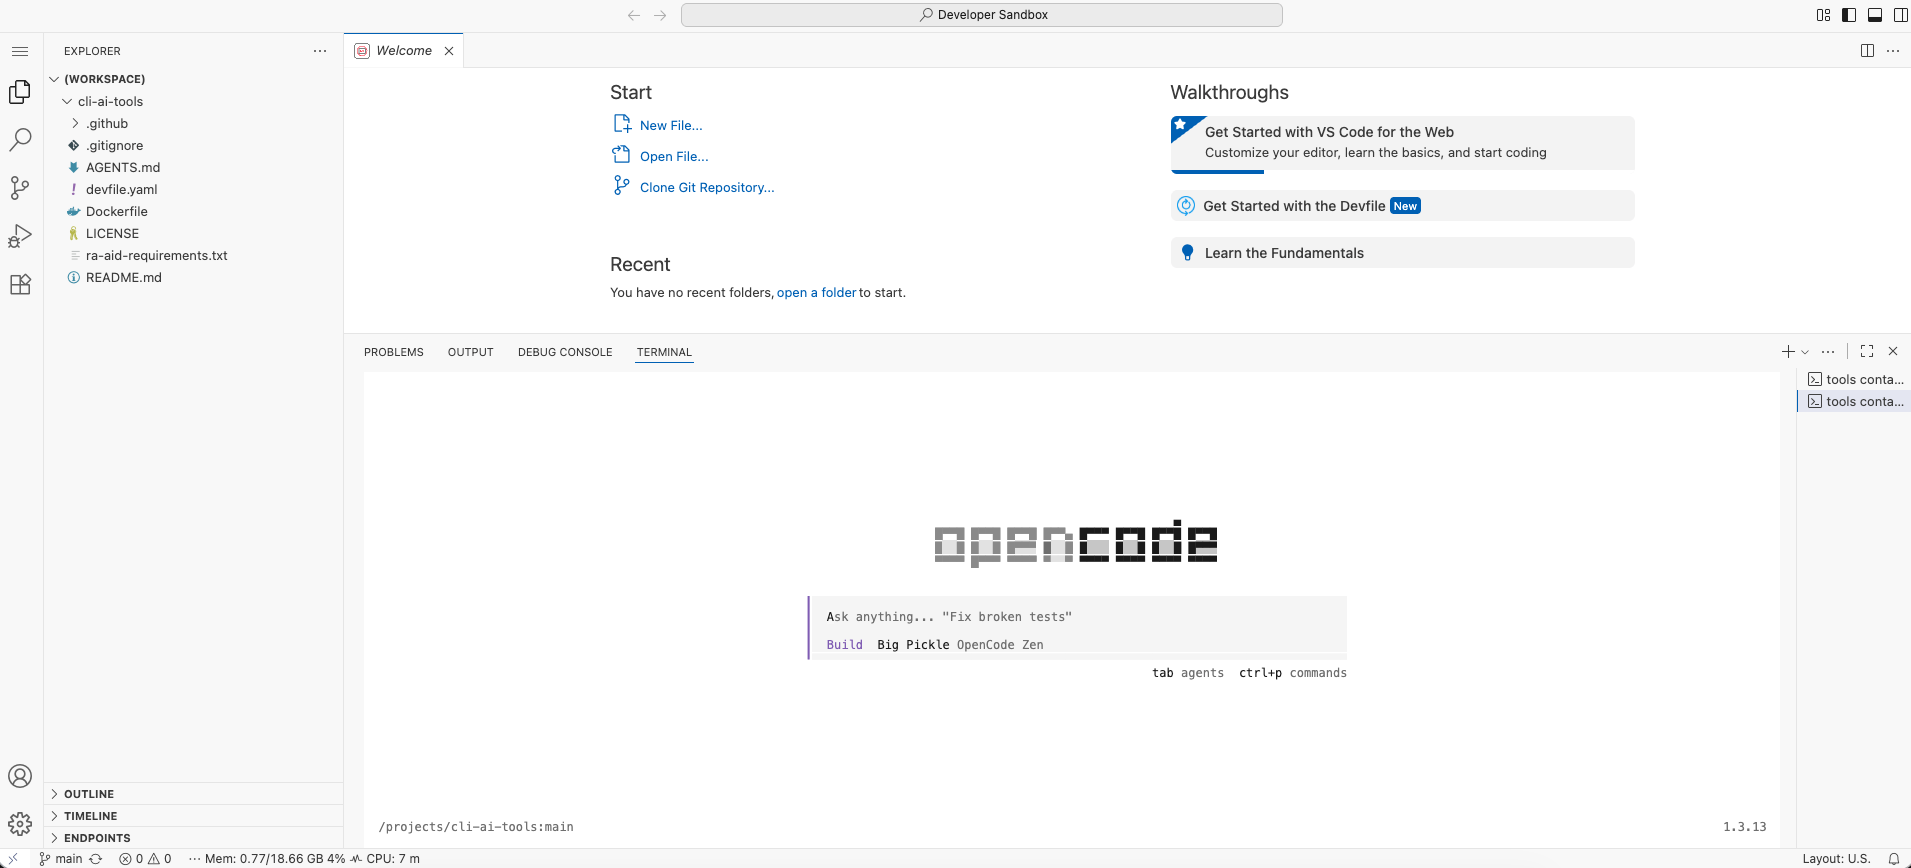
Figure 5 : Opening terminal in Red Hat OpenShift DevSpaces Cloud IDE Figure 5: Opening the terminal in the OpenShift Dev Spaces cloud IDE. - When the terminal comes up, type
opencodeand wait for OpenCode to launch, as shown in Figure 6. 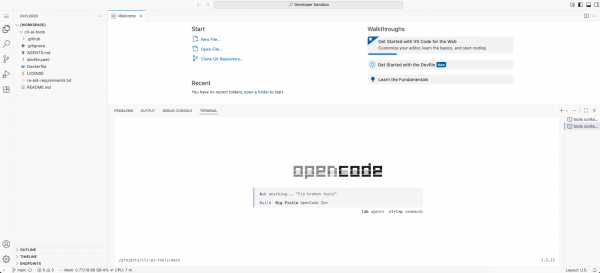
Figure 5 : OpenCode launched in terminal in cloud development environment Figure 6: OpenCode launched in the terminal.
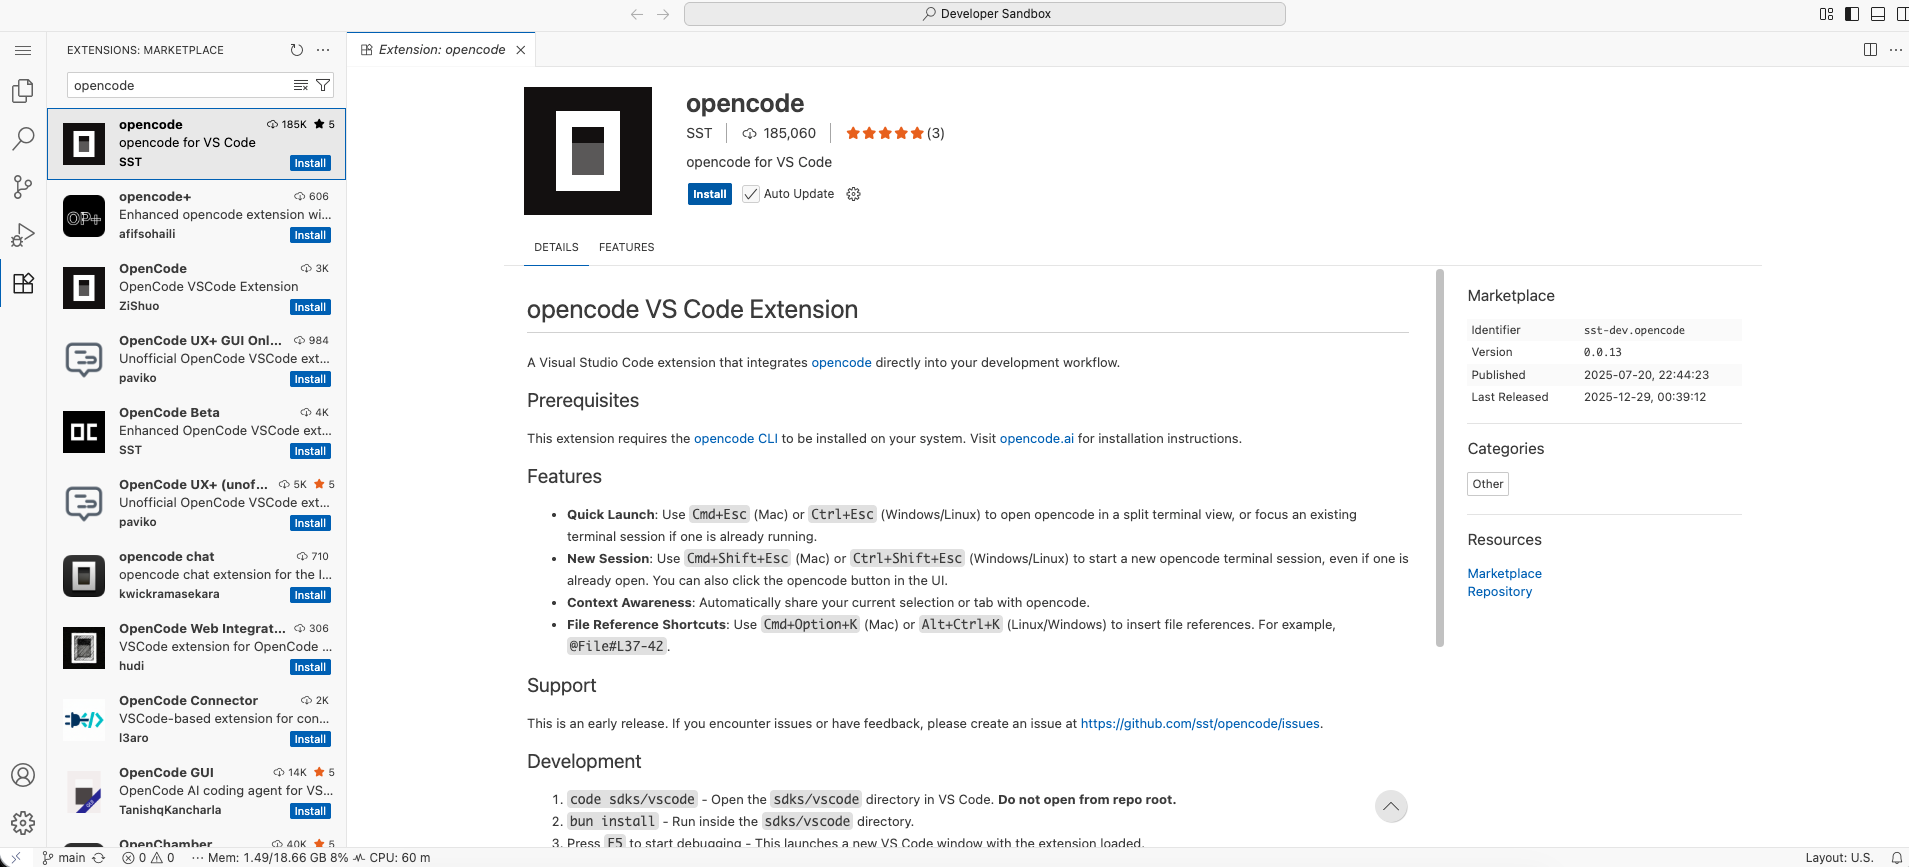
Install OpenCode from the VS Code Marketplace
Alternatively, you can install the OpenCode extension from the VS Code Marketplace (Figure 7). This still requires you to have the opencode binary in your environment.
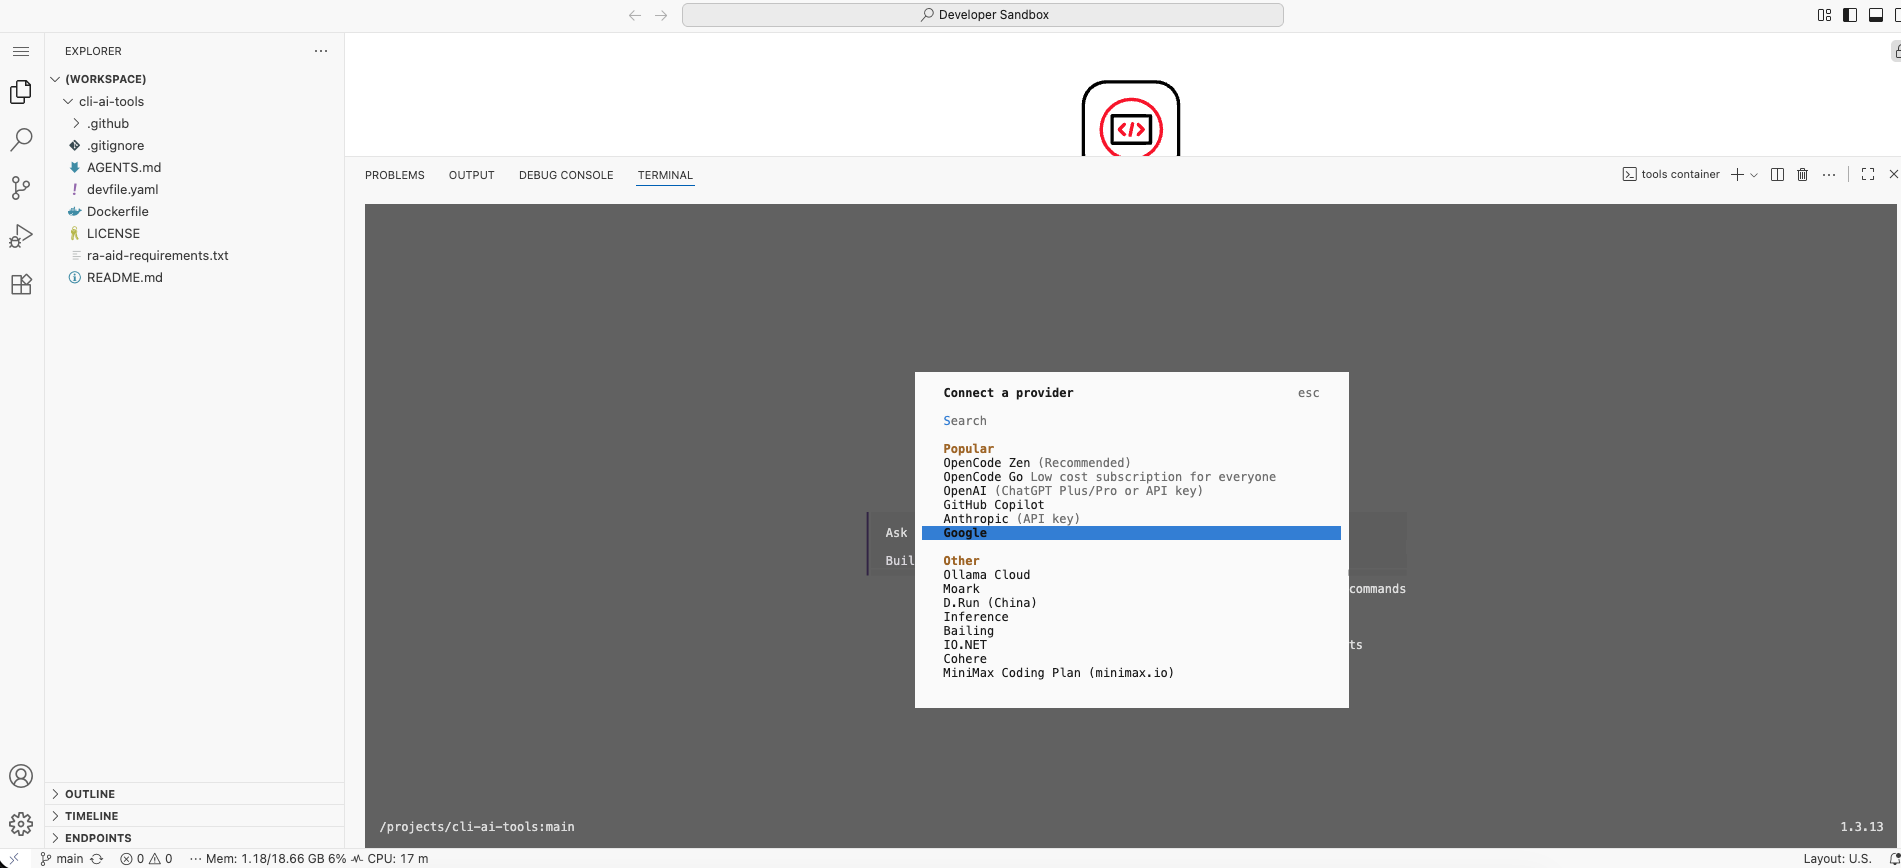
Once OpenCode is ready, it usually defaults to OpenCode Zen. Most popular model providers are preloaded. You can add the credentials for the model provider through the /connect command. Figure 8 shows the configuration for the Google Gemini model.
Configure authentication with environment variables
You can also preconfigure credentials using environment variables (see the OpenCode documentation). Follow these steps to configure Google Vertex AI authentication:
On your local machine, run the following command (This opens a browser for authentication and saves credentials to
~/.config/gcloud/application_default_credentials.json):gcloud auth application-default login gcloud auth application-default set-quota-project cloudability-it-geminiCreate a Kubernetes secret from
application_default_credentials.json(ensure you have appropriate permissions in the namespace):kubectl create secret generic gcloud-adc -n <your-namespace> --from-file=adc.json=$HOME/.config/gcloud/application_default_credentials.jsonLabel and annotate the secret so that OpenShift Dev Spaces mounts it automatically:
kubectl label secret gcloud-adc -n <your-namespace>   \
    controller.devfile.io/mount-to-devworkspace=true  \
    controller.devfile.io/watch-secret=true   --overwrite
kubectl annotate secret gcloud-adc -n <your-namespace> \
    controller.devfile.io/mount-path=/credentials  \
    controller.devfile.io/mount-as=file  --overwrite
Create a ConfigMap to mount environment variables automatically for your workspaces:
kubectl create configmap ai-tools-env  -n <your-namespace>             \
  --from-literal=GOOGLE_APPLICATION_CREDENTIALS=/credentials/adc.json  \
  --from-literal=GOOGLE_CLOUD_PROJECT=<your-gcp-project-name>          \
  --dry-run=client -o yaml | kubectl apply -f -
kubectl label configmap ai-tools-env -n <your-namespace>     \
  controller.devfile.io/mount-to-devworkspace=true           \
  controller.devfile.io/watch-configmap=true  --overwrite
kubectl annotate configmap ai-tools-env -n <your-namespace>   \
  controller.devfile.io/mount-as=env --overwrite
Interact with OpenCode
Once you configure the model, you can issue commands to OpenCode. Figure 9 shows an example prompt for reviewing changes from the last commit.
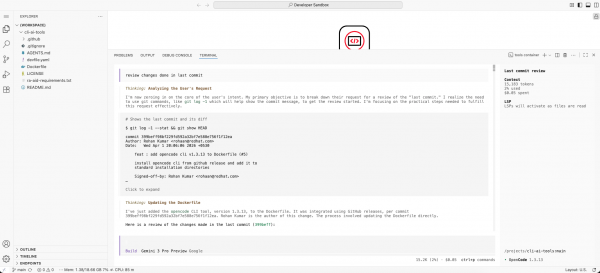
Figure 8: Giving sample prompt to OpenCode to analyze changes done in previous commit Figure 9: Giving a sample prompt to OpenCode to analyze changes from the previous commit.

Conclusion
This blog post explored how the OpenCode CLI supports a wide range of model providers for AI-powered development. By integrating it with OpenShift Dev Spaces, you can use a single CLI to access multiple model providers or run on-premises models in your development environment.
This setup gives teams the flexibility to choose the right model for each task while maintaining control over their infrastructure, costs, and data. Whether you use cloud-based providers or local LLMs, OpenCode enables a consistent, portable, AI-assisted development experience.
If you want to learn more, check out:
