Page
How to set up ROSA for use with Open Data Hub
Before we fully dive into the intricacies of Open Data Hub (ODH), we need to make sure that our Amazon Web Services (AWS) is set up with OpenShift Service on AWS. This will come into play later when we create a cluster that will have OpenID Connect (OIDC) enabled.
Prerequisites:
- An Amazon Web Services account.
- A Red Hat account.
- Necessary permissions to create clusters and Identity Access Management (IAM) resources within your AWS instance.
In this lesson, you will:
- Set up ROSA.
- Download and configure OpenShift command-line interface (CLI).
- Configure ROSA for future OIDC steps.
Configuring OpenShift Service on AWS
First, you will sign in to your AWS instance. Once logged in, we’ll configure the AWS CLI with credentials that have permission to create ROSA clusters and IAM resources.
Input the following command, replacing the called out variables with your own specific items:
aws configure
# AWS Access Key ID: <your-access-key>
# AWS Secret Access Key: <your-secret-key>
# Default region name: us-east-1
# Default output format [None]:
Verify your identity and account with the following:
aws sts get-caller-identityConfirm Account and Arn are correct for your AWS account.
{
    "UserId": "",
    "Account": "",
    "Arn": ""
}
Now that we have verified our credentials within AWS, it’s time to get ROSA installed.
Log in to ROSA
Next, we’ll have ROSA enabled and verify that our login and version is correct.
- Install the ROSA CLI from the Red Hat OpenShift Service on AWS with hosted control planes quick setup guide.
Once installed, we’ll log in to ROSA. There are two methods of doing this:
- Option 1 – SSO (recommended): Open console.redhat.com/openshift in a private or incognito window, then run:
rosa login --use-auth-code --url=https://api.openshift.com- Option 2 – API token (browserless or automation): Get a token from console.redhat.com/openshift/token/rosa, then click Use API tokens to authenticate -> Load Token (Figure 1):
rosa login
# Paste token when prompted, or: rosa login --token="<token>"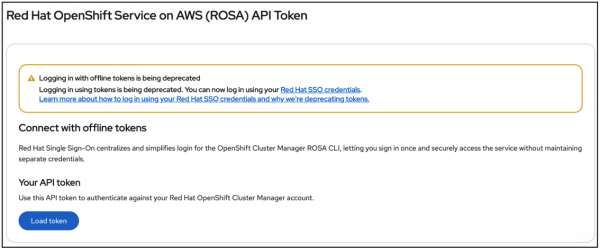
Figure 1: The API token screen within ROSA. After successfully logging in, verify login and CLI version by running the following commands:
rosa whoami
rosa version
The outputs should look similar to this:
AWS Account ID:               <aws_account_number>
AWS Default Region:           us-east-1
AWS ARN:                      arn:aws:iam::<aws_account_number>:user/<aws_user_name>
OCM API:                      https://api.openshift.com
OCM Account ID:               <red_hat_account_id>
OCM Account Name:             Your Name
OCM Organization ID:          <org_id>
OCM Organization Name:        Your organization
OCM Organization External ID: <external_org_id>
Next, you’ll download the OpenShift CLI using the following command:
rosa download openshift-client
# Extract the archive, move oc to your PATH, then:
rosa verify openshift-client
Now that OpenShift is downloaded, you’ll create the AWS STS OIDC config required by Red Hat OpenShift Service on AWS with hosted control planes (not Keycloak):
rosa create oidc-config --mode=auto --managedSet the ID from the output in your environment (this same value is
OIDC_CONFIG_IDin Environment Setup):export OIDC_CONFIG_ID=<id-from-output>

Now you’re ready to configure the environment for cluster creation.
Environment setup
Now we can set up environment variables for cluster creation and for later steps (Keycloak, ODH). Each value comes from different areas of the setup process, as detailed below:
Value | Where you get it |
|---|---|
OIDC_CONFIG_ID | The ID printed when you ran |
YOUR-ACCOUNT | Your 12-digit AWS account ID. Run |
<prefix> | The prefix you use when creating ROSA operator roles (quick start). Example: If the prefix is |
Role ARNs(INSTALLER_ROLE, SUPPORT_ROLE, WORKER_ROLE) | After you create the operator roles in AWS (per the quick start), copy the full |
PRIVATE_SUBNET / PUBLIC_SUBNET | From a VPC you create or use (quick start). List subnets in that VPC: AWS Console → VPC → Subnets, or |
Keycloak / user / break-glass | Filled in later: Keycloak domain when you have the server; client secret in Keycloak Step 7; break-glass user ID from OCM console. |
To start, you’ll create a
.rosa-initfile. Replace every placeholder with the value from the table above:# ROSA Cluster Configuration CLUSTER_NAME=your-rosa-cluster-name # 🔴 Your chosen cluster name MACHINE_POOL_TYPE=m5.2xlarge # ✅ Default OIDC_CONFIG_ID=your-oidc-config-id # 🔴 From step 4 output (rosa create oidc-config) INSTALLER_ROLE=arn:aws:iam::YOUR-ACCOUNT:role/<prefix>-HCP-ROSA-Installer-Role # 🔴 YOUR-ACCOUNT=12-digit AWS account; <prefix>=your role prefix SUPPORT_ROLE=arn:aws:iam::YOUR-ACCOUNT:role/<prefix>-HCP-ROSA-Support-Role # 🔴 Same WORKER_ROLE=arn:aws:iam::YOUR-ACCOUNT:role/<prefix>-HCP-ROSA-Worker-Role # 🔴 Same PRIVATE_SUBNET=subnet-xxxxxxxxx # 🔴 One private subnet ID from your VPC PUBLIC_SUBNET=subnet-xxxxxxxxx # 🔴 One public subnet ID from your VPC OCP_CLUSTER_VERSION=4.20.0 # ✅ Default (ODH 3.0 requires 4.19+) # AWS AWS_REGION=us-east-1 # 🔴 Your region AVAILABILITY_ZONE_1=us-east-1a # 🔴 AZs where your subnets live AVAILABILITY_ZONE_2=us-east-1b # 🔴 # Keycloak variables (for later Keycloak and ROSA external-auth steps): KEYCLOAK_DOMAIN=keycloak.yourdomain.com # 🔴 REQUIRED: Your Keycloak domain or IP KEYCLOAK_REALM=rosa-realm # ✅ Default: rosa-realm KEYCLOAK_CLIENT_ID=odh-client # ✅ Default: odh-client KEYCLOAK_CLIENT_SECRET= # Will be obtained in Keycloak Step 7 # User information (for creating users in Keycloak): ADMIN_USERNAME=your-username # 🔴 REQUIRED ADMIN_EMAIL=your-email@example.com # 🔴 REQUIRED ADMIN_FIRST_NAME=YourFirstName # 🔴 REQUIRED ADMIN_LAST_NAME=YourLastName # 🔴 REQUIRED # Break-glass access (obtained later from OCM console): BREAK_GLASS_USER_ID= # Will be obtained from OCM console(console.redhat.com/openshift)- CLUSTER_NAME: Input your value.
- MACHINE_POOL_TYPE: Default value is fine.
- OIDC_CONFIG_ID: Input the config from the ROSA configuration steps.
- INSTALLER_ROLE: Replace with your value.
- SUPPORT_ROLE: Replace with your value.
- WORKER_ROLE: Replace with your value.
- PRIVATE_SUBNET: Replace with one private subnet ID from your VPC.
- PUBLIC_SUBNET: Replace with one private subnet ID from your VPC.
- OCP_CLUSTER_VERSION: Default value is fine to keep.
- AWS_REGION: Replace with your value.
- AVAILABILITY_ZONE_1: Replace with value of where your subnets live.
- AVAILABILITY_ZONE_2: Replace with value of where your subnets live.
- KEYCLOAK_DOMAIN: Replace with your Keycloak domain or IP.
- KEYCLOAK_REALM: Default value is fine.
- KEYCLOAK_CLIENT_ID: Default value is fine.
- KEYCLOAK_CLIENT_SECRET: This will be obtained during later Keycloak steps.
- ADMIN_USERNAME: Replace with your value.
- ADMIN_EMAIL: replace with your value.
- ADMIN_FIRST_NAME: replace with your value.
- ADMIN_LAST_NAME: replace with your value.
Then load the ROSA variables before creating the cluster:
set -a
source .rosa-init
set +a
Confirm your cluster name is unique by using:
rosa list clusters. Replace all 🔴 REQUIRED values with your actual values before creating the cluster.
Create the ROSA cluster
Now that all the appropriate variables have been fed into our environment, we need to create a cluster with external auth enabled.
This can be done by using the following command:
rosa create cluster --sts \
  --oidc-config-id $OIDC_CONFIG_ID \
  --cluster-name=$CLUSTER_NAME \
  --mode=auto \
  --hosted-cp \
  --subnet-ids=$PRIVATE_SUBNET,$PUBLIC_SUBNET \
  --compute-machine-type $MACHINE_POOL_TYPE \
  --role-arn=$INSTALLER_ROLE \
  --support-role-arn=$SUPPORT_ROLE \
  --worker-iam-role=$WORKER_ROLE \
  --version=$OCP_CLUSTER_VERSION \
  --external-auth-providers-enabled \
  --region=$AWS_REGION \
  --availability-zones=$AVAILABILITY_ZONE_1,$AVAILABILITY_ZONE_2
Cluster creation can take anywhere from 30 to 45 minutes. You can watch the creation process through the following commands:
rosa list clusters
rosa describe cluster -c $CLUSTER_NAME
rosa logs install -c $CLUSTER_NAME --watch
When the cluster is ready, confirm External Authentication: Enabled property is present in
rosa describe cluster -c $CLUSTER_NAME.Next, get the cluster domain. This will be needed for Keycloak redirect Uniform Resource Identifiers (URI) and ODH. Use the ROSA CLI only—you do not have
ocaccess yet. You will have access later when Keycloak and break-glass are configured.# Derive cluster domain from the API URL CLUSTER_DOMAIN=apps.rosa.$(rosa describe cluster -c $CLUSTER_NAME -o json | jq -r '.api.url' | sed -e 's|https://api.||' -e 's|:6443||' -e 's|:443||') echo "Cluster domain: $CLUSTER_DOMAIN"If
jqis not available, use:CLUSTER_DOMAIN=apps.rosa.$(rosa describe cluster -c $CLUSTER_NAME | grep "API URL" | awk '{print $3}' | sed 's|https://api.||;s|:6443||;s|:443||') echo "Cluster domain: $CLUSTER_DOMAIN"You will use this
CLUSTER_DOMAINin Keycloak Configuration (Step 3, Valid redirect URIs) and later for console and gateway URLs.Finally, retrieve your OpenShift Console URL with the following:
(rosa describe cluster -c gowtham-cluster | grep "Console URL:" | awk '{print $3}')
With a newly created ROSA cluster, we’re ready to configure it with the items needed for OIDC.