Page
Create a Keycloak instance on AWS

After you configure your OpenShift Service on AWS cluster, it’s time to create a Keycloak instance within your environment.
Note
If you already have a Keycloak instance configured with an OIDC client, group mapper, and users, you may skip this lesson.
Prerequisites:
- Amazon Web Services account.
- Red Hat account.
- Configured AWS cluster.
- AWS CLI configured.
In this lesson, you will:
- Create a Keycloak instance.
Create a Keycloak instance on AWS
Using a community script, you can create an instance on AWS EC2.
- Navigate to keycloak-aws.sh to download the script.
Run the script using the following command:
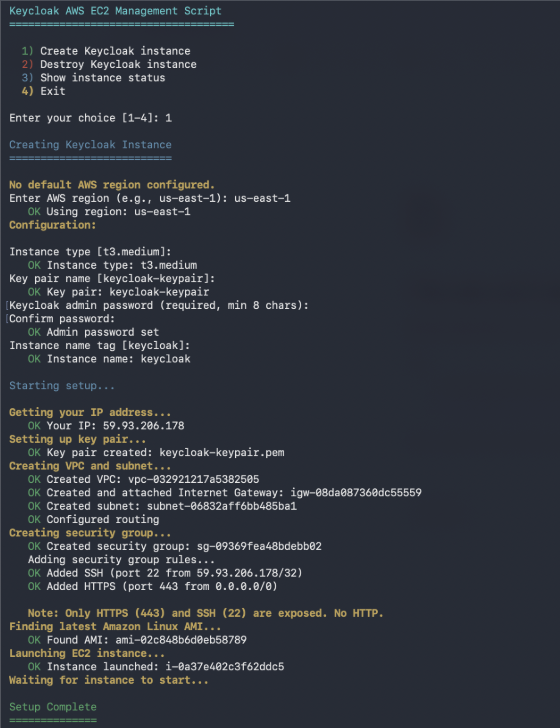
curl -sLO https://raw.githubusercontent.com/GowthamShanmugam/gowtham-hack/main/keycloak/aws-keycloak/keycloak-aws.sh
chmod +x keycloak-aws.sh
Enter 1 to create a Keycloak instance, and the script will run. This process may take a few minutes (Figure 1).

Figure 1: Screenshot of Keycloak instance running setup processes. After the script creates your Keycloak instance, set the following environment variables using the values from the script output:
export KEYCLOAK_DOMAIN=<PUBLIC_IP>
Replace <PUBLIC_IP> with the IP address shown in the script output.
Note
The script uses a self-signed certificate. When you configure the ROSA external auth provider, use Option A (with CA certificate) and provide the Keycloak CA (e.g., download from the instance or use openssl s_client to fetch the cert).
Now your Keycloak is created and ready to be configured.
